

OWNER’S MANUAL
ENG
A458RM250_638A508-01 2006.07.10, 21:19Page 3 Adobe PageMaker 6.5J/PPC
Keep these instructions for future reference as
they contain important information.
638A508-01
A
BE
q
ii
i
ii
uu
u
uu
yy
y
yy
C
tt
t
tt
rr
r
rr
D
ee
e
ee
qq
q
qq
ENG
ww
w
ww
OWNER’S MANUAL
Keep these instructions for future reference as
they contain important information.
x-c-v-b,n-m-,
638A508-01
w
qq
q
qq
qq
q
qq
yy
y
yy
ww
w
tt
t
tt
rr
r
rr
A458RM250638A508-012-8 2006.07.11, 13:32Page 2 AdobePageMaker6.5J/PPC
ee
e
ee
ww
2
q
ww
w
ww
w
qq
q
qq
q
qq
q
qq
qq
q
qq
qq
q-1
qq
qq
q-1
qq
ww
w
ww
ee
e-1
ee
ww
w
ww
ee
e
ee
ww
w-1
ww
ee
e
ee
ww
w
ww
rr
r
rr
rr
r-1
rr
1
2
3
A458RM250638A508-012-8 2006.07.11, 13:32Page 3 AdobePageMaker6.5J/PPC

w
qq
q-1
qq
qq
q-2
qq
ww
w-1
ww
ee
e
ee
e
qq
q
qq
qq
q-1
qq
ww
w-2
ww
qq
q-2
qq
4
A458RM250638A508-012-8 2006.07.11, 13:32Page 4 AdobePageMaker6.5J/PPC

ee
e
ee
r
qq
q-3
qq
ww
w
ww
65´/20m
5
A458RM250638A508-012-8 2006.07.11, 13:32Page 5 AdobePageMaker6.5J/PPC

Precaution
Safety first
CAUTION: TO AVOID BATTERY LEAKAGE. (OF BUILT-IN LiPoly
RECHARGEABLE BATTERIES)
• Charge batteries following the battery and charger manufacturer's instructions.
• Charge batteries with the included charger at the first use.
• Do not charge batteries with a charger other than the included one.
• Do not charge batteries other than the built-in LiPoly battery with the included charger
or use the charger as the power source for other equipment.
• Do not charge batteries in a place within the reach of small children.
• Do not give an impact to batteries and the charger during charging
• Do not re-peak a LiPoly battery that has peaked, otherwise the battery may be
degraded. LiPoly batteries have a low natural discharge rate, it does not require
recharging in the first one or 2 hours after a charge.
• When charge is complete, unplug the charger from the wall outlet.
• After use, be sure to turn the switch off. Failure to do so may adversely affect batteries, resulting in disabled charge.
• Do not short circuit battery terminals, otherwise the battery may swell and get hot,
leading to a danger.
• Do not wet batteries, heat, disassemble or modify them. Do not dispose of batteries
in fire.
• Do not use, store or charge batteries in a place near a heater, or in high temperature
or humidity condition.
• When the use out of batteries becomes shorter and shorter, it is most likely time to
replace the battery. Contact our service representative in such a case.
CAUTION: TO AVOID BATTERY LEAKAGE. (OF 9-VOLT (006P)
RECHARGEABLE BATTERIES FOR TRANSMITTER)
• Use 006P-9V dry batteries for transmitter.
• Make sure the batteries are inserted with correct polarity and follow the toy and
battery manufacturer's instructions.
• After use, remove the batteries from the transmitter to store.
• Battery replacement should be done in presence of adult.
• Do not attempt to short-circuit, disassemble or heat batteries. Do not dispose of
batteries in fire or wet them.
• If battery fluid contacts your eyes, skin or cloths, immediately wash them with water
and consult a doctor.
ENG
Precautions before Flight
Depending on flight condition or due to improper control, flying a helicopter can be
hazardous resulting in unforeseen accidents such as bodily injury and property damage, and the helicopter operator shall be held responsible for such accident. To be a
responsible operator, you are recommended to obtain adequate insurance before
playing with the helicopter.
CAUTIONS DURING PLAYING
• For avoiding hazards from improper use, this helicopter is not intended for children
under 15 years old. Also, children are recommended to use this helicopter under
adult's supervision.
• Do not touch charging terminals (i.e., the metal part) on the helicopter body and the
charger.
• Make sure you have plenty of open space in all directions (at least 3m-radius from
your location). Fly the helicopter in a safe area away from people, pets, etc.
• Check if a near transmitter produces interference or signals with the same frequency. In such a case, move to another place or try after a while.
• Do not point the transmitter antenna toward a person's or animal's head, otherwise
an unforeseen accident may occur. Also, do not bend the antenna.
• Do not throw the helicopter toward a person or animal, otherwise an injury may
occur.
• Do not bend or pull the components with a strong force.
• Do not keep looking at the blinking LEDs on the transmitter and the helicopter body.
Doing so may cause you to feel uncomfortable.
• Never attempt to disassemble or modify the helicopter.
• Do not bring your face or hands near the rotating rotor. For safety's sake, you are
recommended to wear goggles.
• Keep supervision to the helicopter in flight.
• Do not operate the rotor while it is locked.
• Do not drop or impact.
• Do not use an helicopter if it is unrecoverably damaged or distorted.
• After use, store the helicopter in a place out of the reach of children 3 years old or
younger.
• Do not store the helicopter in a place near a heater or like where temperature rises
(e.g., a shut up car in summer).
Battery Disposal Instructions
THIS PRODUCT USES A LITHIUM POLYMER BATTERY. MUST BE RECYCLED
OR DISPOSED PROPERLY.
Contact your local area office of solid waste management or other appropriate local
agency for information. Do not attempt to disassemble the battery before disposal.
6
A458RM250638A508-012-8 2006.07.11, 13:33Page 6 AdobePageMaker6.5J/PPC

ENG
Please check the headings I - VI with the
diagrams in pages 2, 3, 4, 5.
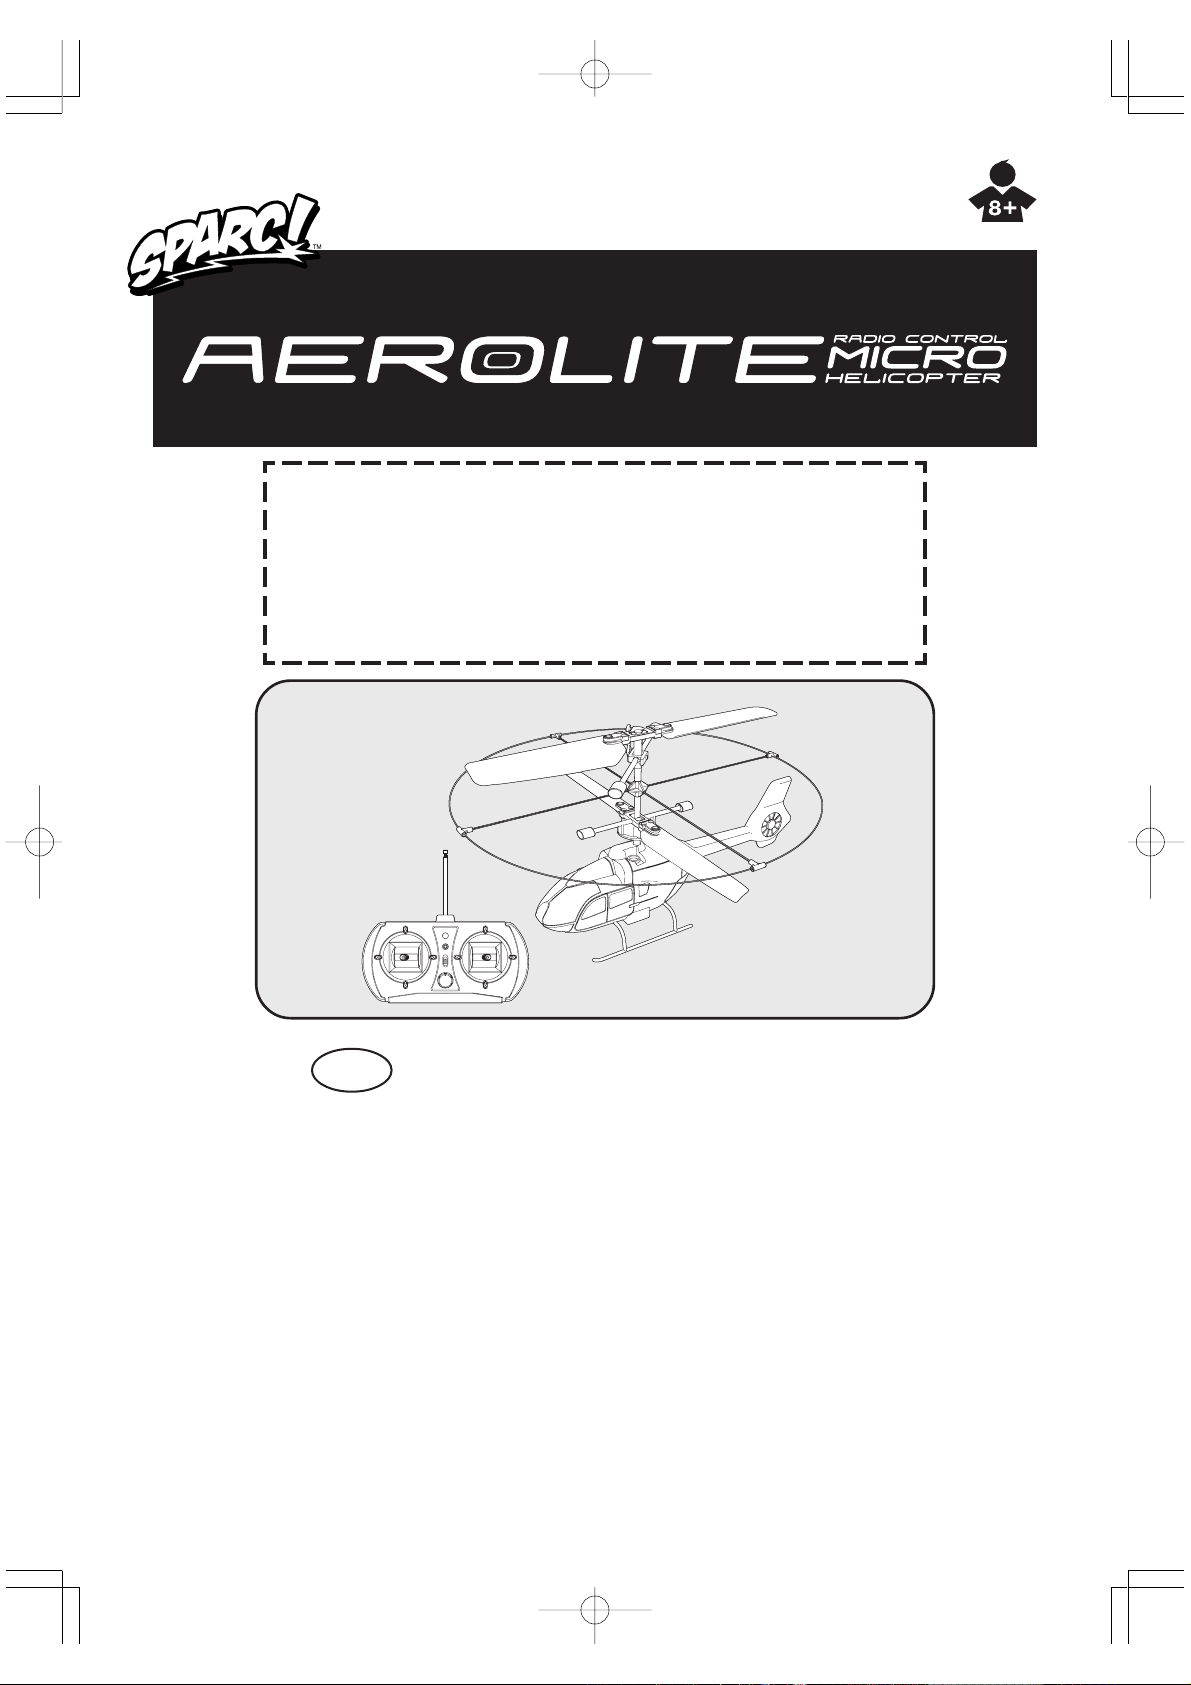
I. CONTENTS & FEATURES
This kit includes:
A. Micro Master x 1
B. Transmitter x 1
C. Charger x 1
D. Transmitter antenna x 1
E. Manual x 1
The product shown in the figure may slightly
differ from the real ones.
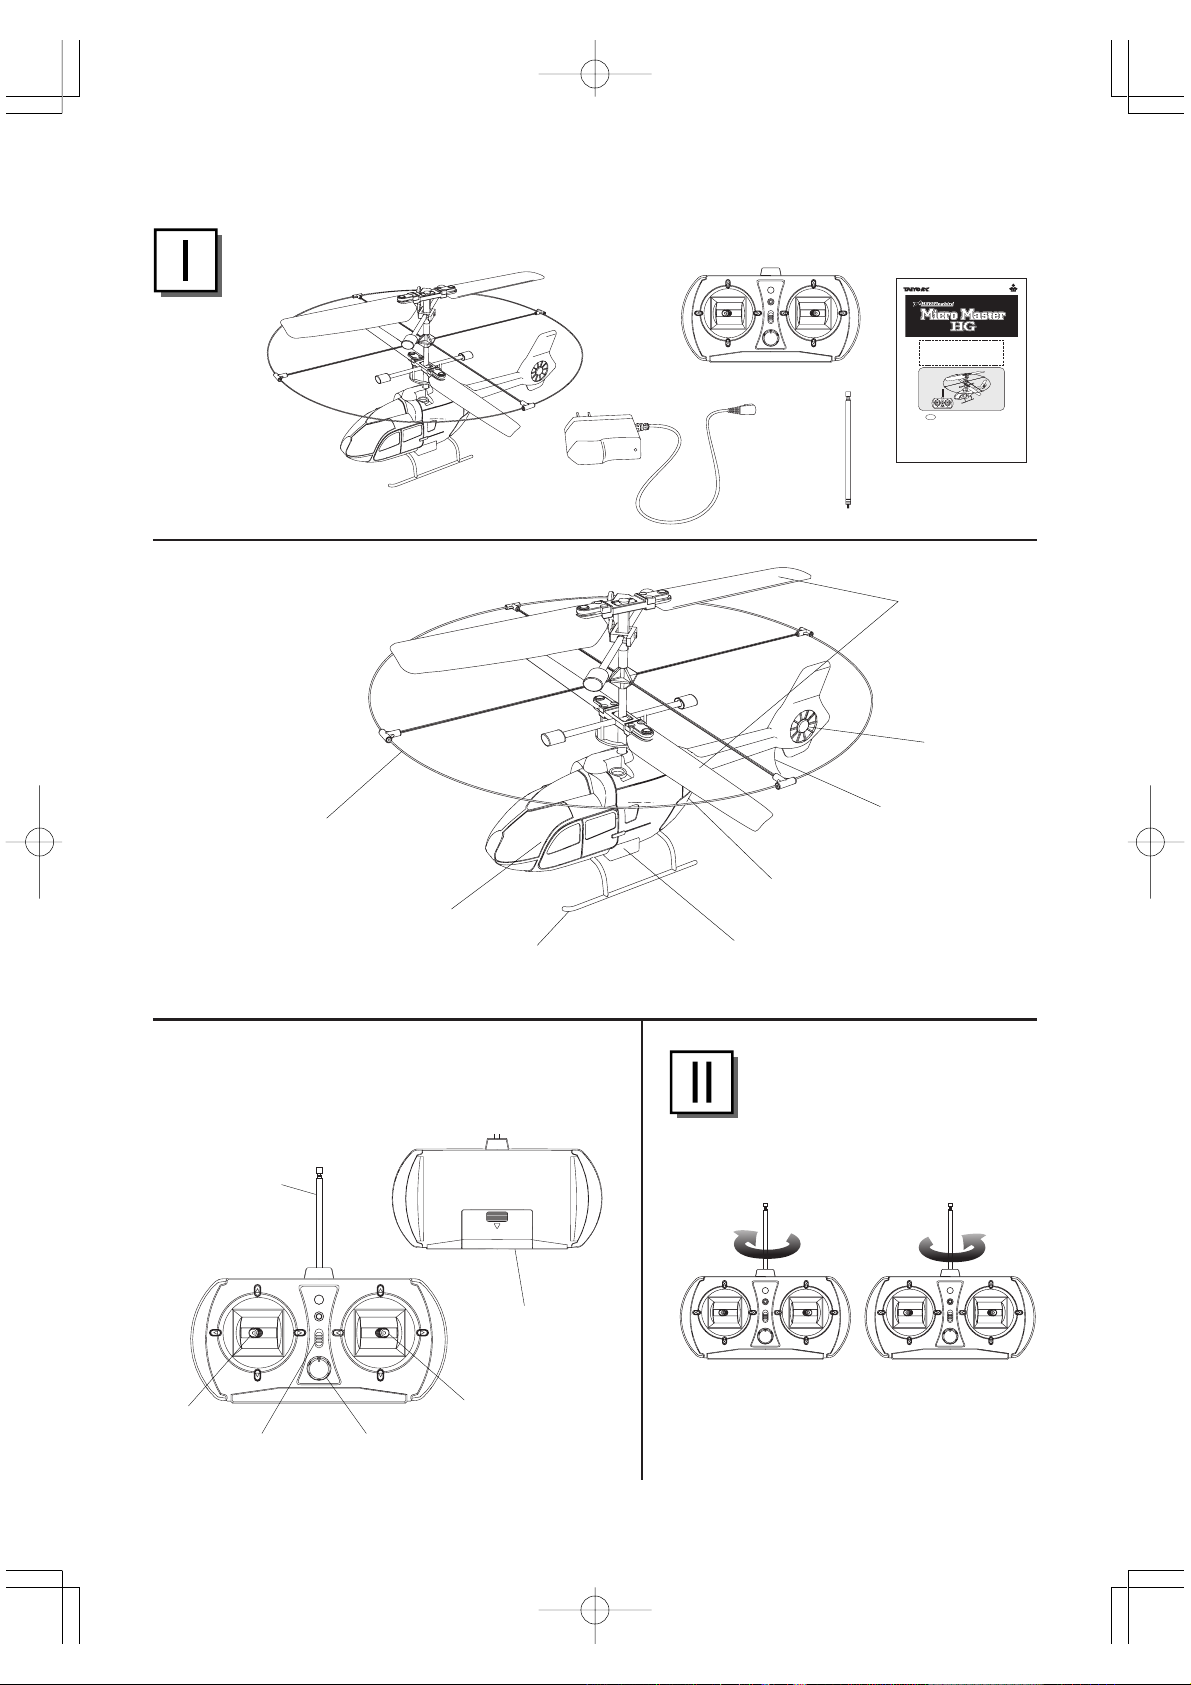
q Micro Master
q Rotor
* The rotor has a play structure for safety,
but not completely fixed. When the rotor
starts rotating, the centrifugal force acts
on the rotor allowing it to operate normally.
w Tail fin
e Antenna
* Do not cut the antenna rods.
r Charging port / Power switch (at the
bottom)
t 3.7V LiPoly battery embedded
y Skid
u Body
i Safety ring
w Transmitter
Front
q Antenna
w Throttle Stick
e Adjustment Knob
r Switch
t Rudder stick (left/right) / Forward stick (for-
ward)
Rear
y Battery Cover
II. Installation
q Transmitter Antenna Installation /
Uninstallation
q Antenna Installation
Turn the antenna clockwise to screw it in
the transmitter body.
The antenna is screw-in type. Securely
screw it in place, otherwise a malfunction
may result from loose antenna
connection.
w Antenna Uninstallation
Turn the antenna counterclockwise to
remove it. When housing the antenna,
retract it from the root rib for avoiding
bending of the antenna rod.
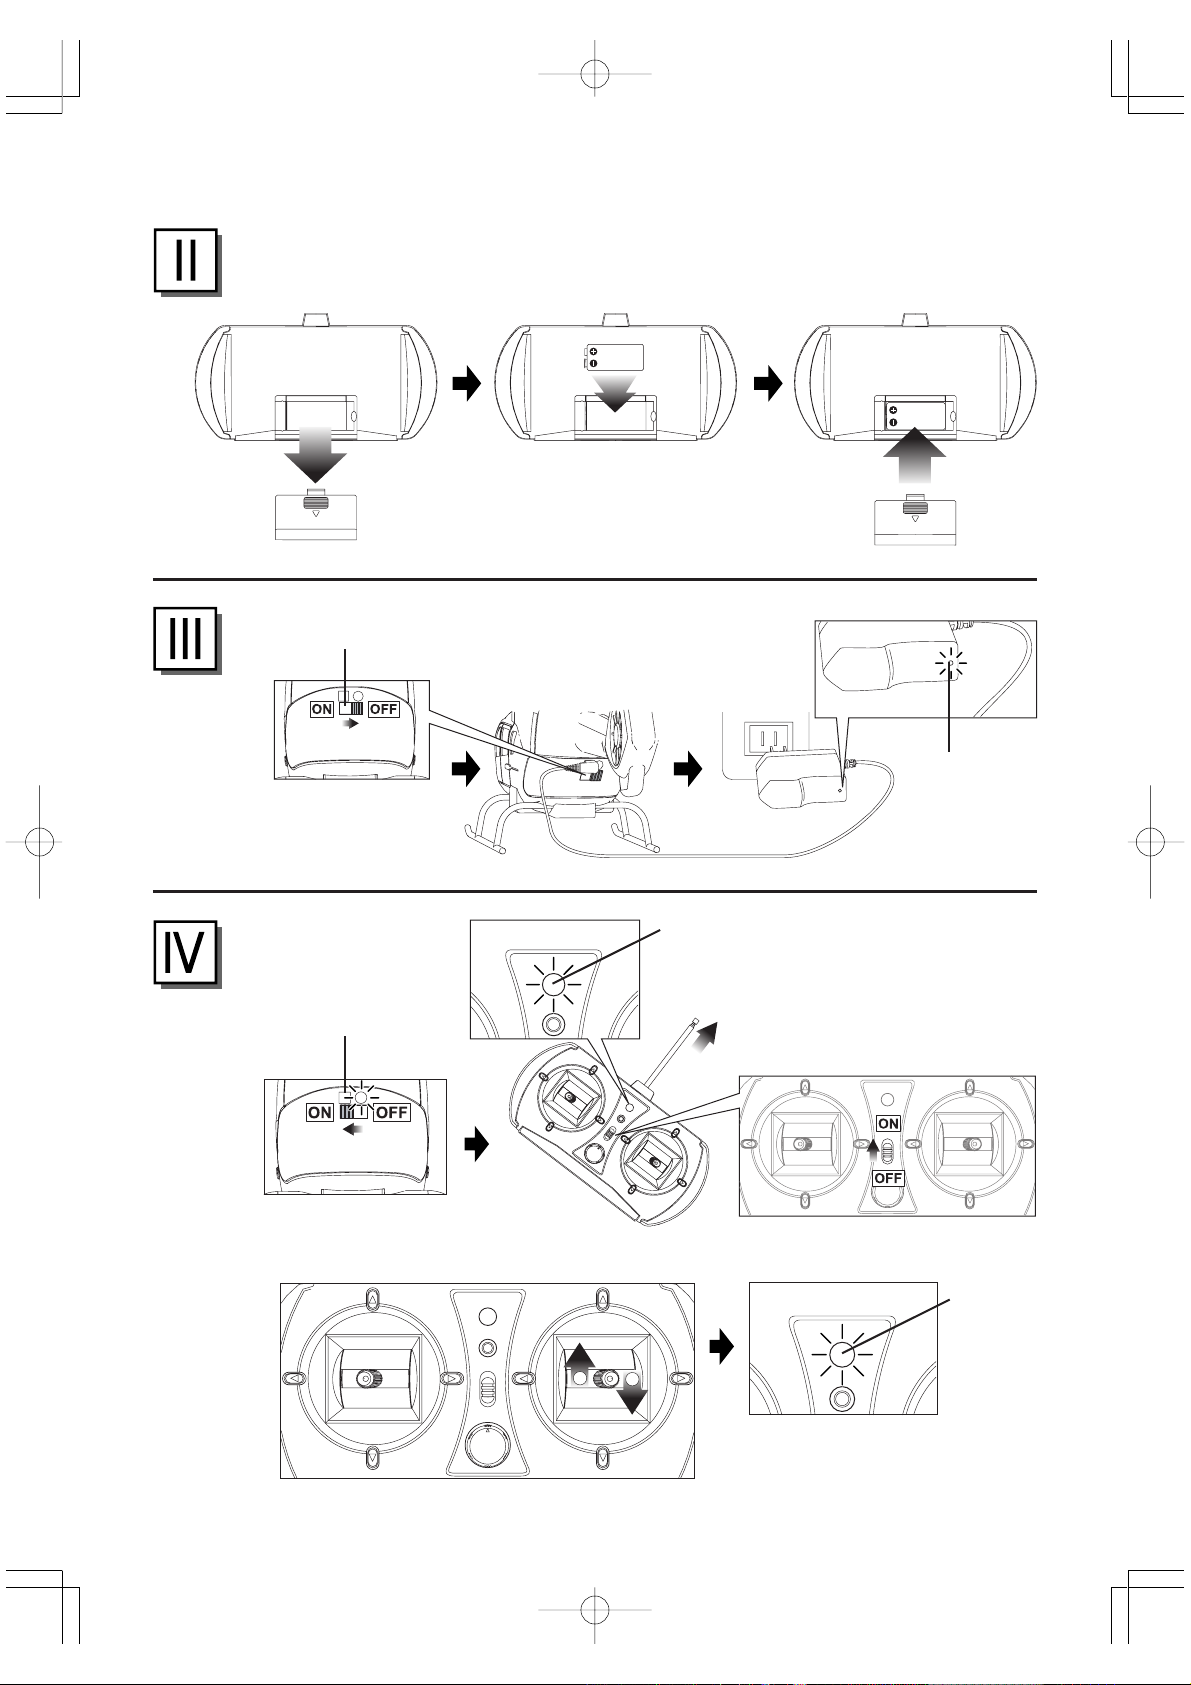
w Transmitter Battery Installation
Use one 9-Volt (006P) battery for the transmitter (not included).
q Slide open the BATTERY DOOR in the
direction shown in the figure.
w Insert the BATTERY with correct polarity
(+/-).
Insert a 9V (006P) BATTERY with the
polarity (+/-) as shown above.
e Replace battery door, following the
removal procedure in reverse.
* When the capacity of the 9V battery
becomes low, Power LED lamp changes
from steady to blinking. You need to
replace the 9V battery, otherwise a
malfunction may occur due to shortened
operating distance.
III.
Built-in Battery Charging Instructions
A rechargeable battery is built into the
helicopter body. Be sure to charge the battery
before you use it. The built-in LiPoly battery,
if not handled properly, may explode, cause
burns or catch fire resulting in a serious
accident.
Read "Handling of Lithium Polymer Battery"
and handle the battery properly.
q Set the power switch of the helicopter to
"OFF", insert the charger connector to
the charging port on the helicopter then
plug the charger to a standard wall
outlet.
The LED lamp will light in red.
* The LED lamp lights in green if the
charger is plugged to a wall outlet while
the charger connector is not inserted to
the helicopter.
q-1 Charging port.
w Red lamp on charger will light to show
charger is operating.
w-1 Charging port.
e When charge is complete, the LED lamp
changes to green. Remove the charger
connector from the charging port on the
helicopter then unplug the charger from
the wall outlet.
* Battery charging time varies with battery
level. As a guide, it takes approx. 1
hour when the battery is near empty, or
30 minutes if half-empty.
Important:
• To prevent overcharge of batteries,
observe the following instructions:
Do not re-peak a LiPoly battery that has
peaked. The battery, if not used to fly the
helicopter, does not require recharging in
the first one or 2 hours after a charge.
IV. How to Fly
q Preparation for flight
q Turn on the switch on the helicopter body,
then the LED lamp starts blinking.
When the LED lamp changes to steady,
the helicopter becomes ready for flight.
q-1 LED lamp.
w Completely extend the transmitter antenna.
e Turn on the switch on the transmitter. Then,
the LED lamp starts blinking.
e-1 LED lamp (blinking)
r Move the throttle stick to the top position
then to the bottom. The transmitter
gets ready when the LED lamp changes
from blinking to steady.
r-1 LED lamp (steadily lighting)
t Stay at least 2m away from the helicopter
before flying it up.
y Check safety of environment around you.
Now you are ready if no obstacles exist.
w Transmitter Functions
q Throttle stick (right)(UP/DOWN)
Moving the throttle stick up allows the
helicopter to ascend, and moving the stick
back makes the helicopter descend.
q-1 Up
q-2 Down
w Rudder stick (left)(Left / Right)
Moving the rudder stick left allows the
helicopter to turn left, and moving the stick
right makes the helicopter turn right.
w-1 Left turn
w-2 Right turn
e Forward stick (left)(Forward)
Moving the forward stick up allows the
helicopter to fly forward.
e Get skilled with the helicopter
q Slowly move the throttle stick up, then the
rotor starts rotating and the helicopter as-
cends. Since the ascending power varies
in synchronization with the stick operation,
adjust the throttle stick (right) to make the
helicopter hover when it reaches a height
of approx. 2m.
q-1 Up
q-2 Down
• If the helicopter tends to turn to one side,
turn the adjustment knob on the transmitter to correct it.
q-3 Adjustment knob
w To move the helicopter down, move the
throttle stick (right) back more slowly =than
when moving the helicopter up. When the
helicopter starts descending, hold the stick
in its position. The helicopter will land
gently by itself.
e While the helicopter is hovering, moving
the forward stick (left) up allows the
7
A458RM250638A508-012-8 2006.07.11, 13:33Page 7 AdobePageMaker6.5J/PPC

helicopter to fly forward. The helicopter
may experience a small descent as it flies
forward, slightly move the throttle stick up
to correct it.
r After use
Turn off the switch on the helicopter then
turn off the transmitter. Be sure to retract
the transmitter antenna.
Important:
• This helicopter is equipped with a feature
for monitoring the battery level of the builtin battery. The LED lamp blinks if the
battery level becomes low.
Turn off the switch when the LED lamp
starts blinking. Failure to do so may
adversely affect batteries, resulting in
disabled charge.
V. Flight Location and Condition
Flight Condition
ENG
Fly the helicopter in a place where the floor is
flat and no obstacle exists. Avoid locations
exposed to discharge air (e.g., a location near
air conditioning vent), otherwise the helicopter may become uncontrollable. Be sure to
fly the helicopter in calm condition.
Important:
• Keep supervision to the helicopter in flight.
• Children are recommended to play under
adult supervision.
VI. Maintenance
Care and Service
• The life of the helicopter can be extended
by daily care. Wipe the helicopter clean if
dust or the like builds up and check if any
loose part.
• The helicopter body is made of
polystyrene foam. If damaged, use scotch
tape or suitable adhesives to repair.
* Never use instant glue which will make
the polystyrene foam dissolve.
• The helicopter may lose balance if broken
and cannot fly normally, ask our service
representative for repair. (Refer to "After
Service" for details".)
FCC STATEMENT
This device complies with part 15 of the FCC Rules. Operation is subject to the following two conditions:
(1) This device may not cause harmful interference, and
(2) this device must accept any interference received, including interference that may cause undesired operation.
Changes or modifications to this unit not expressly approved by the party responsible for compliance could void the
user's authority to operate the equipment.
8
A458RM250638A508-012-8 2006.07.11, 13:33Page 8 AdobePageMaker6.5J/PPC

638A508-01
A458RM250638A508-01 2006.07.10, 16:11Page 2 AdobePageMaker6.5J/PPC
 Loading...