

Page 1
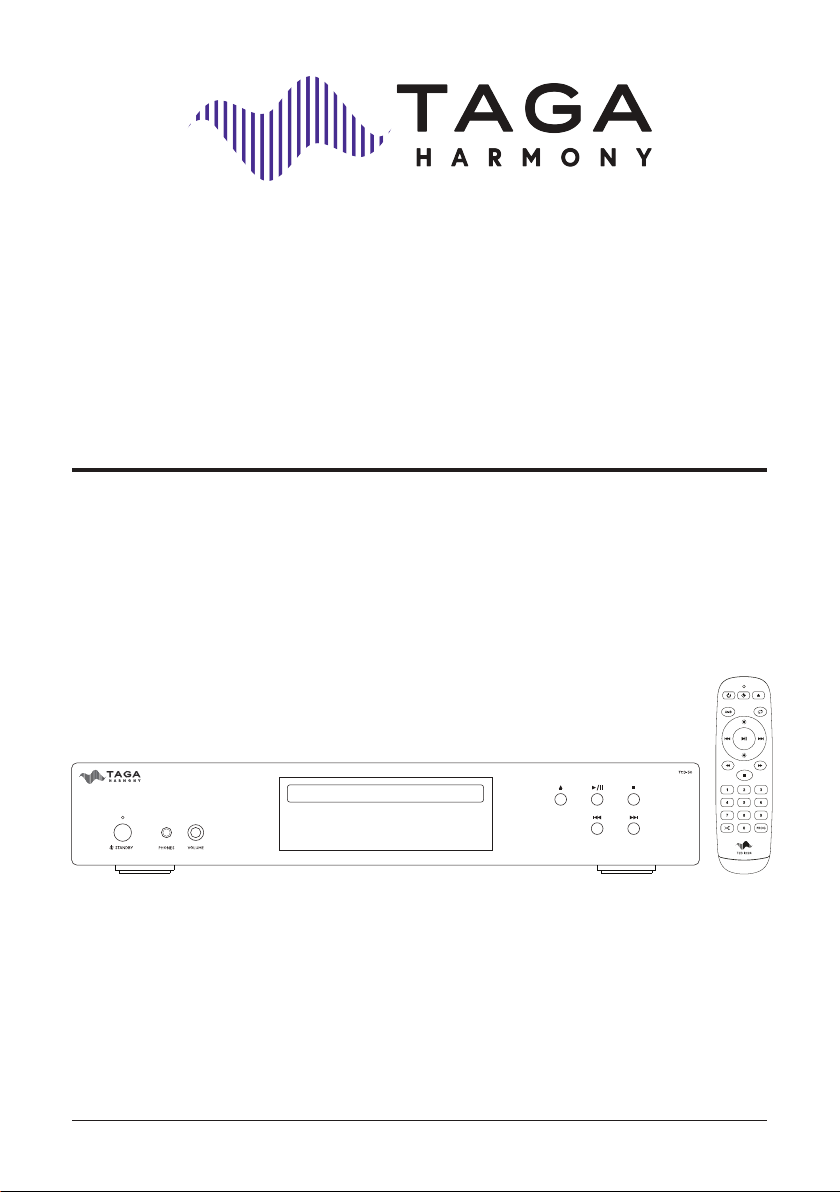
TCD-50, TCD-30
HI-FI CD PLAYER
Edition 09-2024
Instruction Manual
Page 2

Page 3
Introduction
Thank you for purchasing this TAGA Harmony CD player.
This device is a Hi-Fi CD player featuring a high quality digital to analogue converter and
made for those who wish to get the very best from their CD collection.
KEY FEATURES:
• Elegant design utilizing an aluminum front panel to match with most devices.
• High quality digital to analogue converter utilizing the critically acclaimed ESS
SABRE ES9018 Reference 32-bit DAC with Hyperstream™ II architecture and Time
Domain Jitter Eliminator.
• Oversized 35W toroidal power transformer.
• Outputs:
TCD-50: 2 analog (RCA unbalanced and XLR balanced) and 2 digital (Optical, Coaxial).
TCD-30: 1 analog (RCA unbalanced) and 2 digital (Optical, Coaxial).
• Gold-plated solid RCA sockets (high-end machined brass in the TCD-50) and
gold-plated XLR (TCD-50) socket pins ensure the best signal transmission.
• Oxygen Free Copper wiring for all RCA and XLR (TCD-50) outputs
(incl. the Coaxial output) to enhance the sound quality.
• Headphone output with volume regulation for those who prefer discrete listening.
• Clear VFD display.
• Full functional remote controller.
Cleaning
Do not use strong or abrasive cleaners. Use a damp, soft cloth for cleaning.
Specications and the latest instruction manual edition
Full technical specications and the latest edition of the instruction manual are available
on www.TagaHarmony.com
Contents
Safety Instructions 3
Remote controller 7
Front and Rear Panel 9
Hooking Up the CD Player 10
Operation 12
Additional Information 16
Kit Content 18
Specications 18
2
Page 4
Safety Instructions
IMPORTANT
READ THIS SECTION CAREFULLY BEFORE PROCEEDING!
DO NOT EXPOSE THIS PRODUCT TO RAIN OR MOISTURE. DO NOT REMOVE COVER (OR BACK).
NO USER-SERVICEABLE PARTS INSIDE. REFER SERVICING TO QUALIFIED SERVICE PERSONNEL.
WARNING: TO REDUCE THE RISK OF FIRE OR ELECTRIC SHOCK,
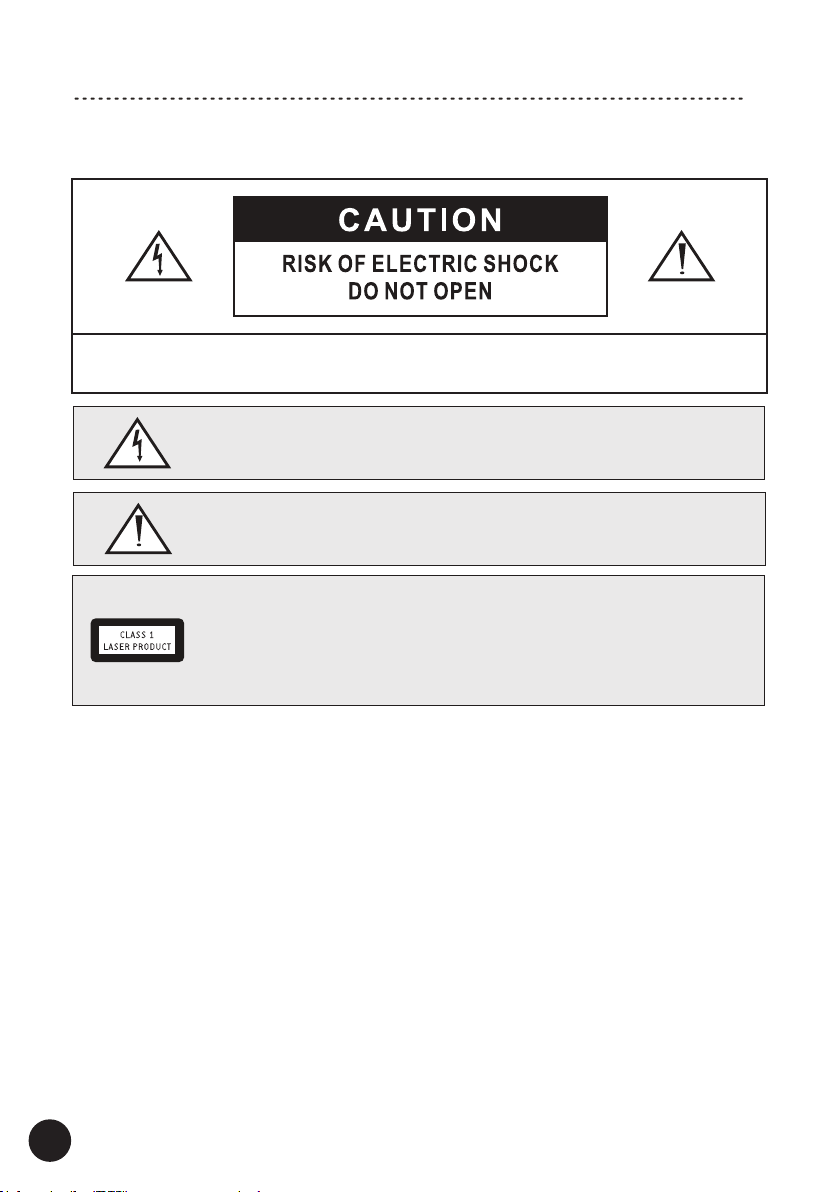
The triangle containing a lightning symbol is intended to alert the user to the presence
of uninsulated dangerous voltages within the product’s enclosure that may be of
sufcient magnitude to constitute a risk of electric shock to persons.
An exclamation mark in a triangle is intended to alert the user to the presence
of important operating and maintenance (servicing) instructions in the literature
accompanying the appliance.
Class 1 Laser Product
• This unit utilises a laser. Use of controls, adjustments or performance of procedures
other than those specied herein may result in hazardous radiation exposure.
• Before moving the unit, ensure the disc tray is empty.
• Always remove the disc when the unit is not in use.
• Failure to do so will risk severely damaging the disc and the unit.
• Do not stack devices, heat from other devices may affect the performance of the
unit.
WARNING: TO REDUCE THE RISK OF FIRE OR ELECTRIC SHOCK, DO NOT
EXPOSE THIS APPARATUS TO RAIN OR MOISTURE, AND OBJECTS FILLED WITH
LIQUIDS, SUCH AS VASES, SHOULD NOT BE PLACED ON THIS APPARATUS.
CAUTION: TO PREVENT ELECTRIC SHOCK, FULLY AND SECURELY INSERT
THE POWER CABLE PLUG INTO THE POWER OUTLET, AND POWER CABLE
CONNECTOR INTO THE UNIT SOCKET (IF THIS UNIT IS NOT EQUIPPED WITH AN
INTEGRATED [ATTACHED] POWER CORD).
CAUTION: FOR CONTINUED PROTECTION AGAINST RISK OF FIRE, REPLACE
THE FUSE (IF THE UNIT IS EQUIPPED WITH A USER REPLACEABLE FUSE) ONLY
WITH THE SAME AMPERAGE AND VOLTAGE TYPE. IN CASE WHEN THE UNIT IS
NOT EQUIPPED WITH A USER REPLACEABLE FUSE - REFER REPLACEMENT TO
QUALIFIED SERVICE PERSONNEL.
WARNING: THE UNIT MAY BECOME HOT. ALWAYS PROVIDE ADEQUATE
VENTILATION TO ALLOW FOR COOLING. DO NOT PLACE THE UNIT NEAR
A HEAT SOURCE, OR IN SPACES THAT CAN RESTRICT VENTILATION.
EN_safety_02-20_1
3
HTR-1000CD v.1
Page 5

Safety Instructions
1. Read Instructions - All the safet y and operating instructions
should be read before the product is operated.
2. Retain Instructions - The safety and operating instruc tions should
be retained for future reference.
3. Heed Warnings - All warnings on the product and in the operating
instructions should be adhered to.
4. Follow Instructions - All operating and use instructions should
be followed.
5. Cleaning - Unplug this product from the power outlet before
cleaning. Do not use liquid cleaners or aerosol cleaners.
6. Water and Moisture - Do not use this product near water - for
example, near a bath tub, wash bowl, kitchen sink or laundry tub;
in a wet basement; or near a swimming pool; and the like. These
precautions also apply to the power cord.
7. Ac cessories - Do not place this product on an unstable cart,
stand, tripod, bracket or table. The product may fall, causing serious injury to a child or adult and serious damage to the product.
Use only with a cart, stand, tripod , bracket or table recommended
by the manufacturer or sold with the product. Any mounting of
the product should follow manufacturer’s instructions and should
use a mounting accessory recommended by the manufacturer.
8. Ventilation - This unit may be equipped with slots and openings
in the cabinet (housing) which are provided for ventilation and
to ensure reliable operation of the product and to protect it from
overheating and these openings must not be blocked or covered.
The openings should never be blocked by placing the product
on a bed, sofa, rug or other similar surface. This product should
be not placed in a built-in installation such as a bookcase or
rack unless proper ventilation is provided or the manufacturer’s
instructions have been adhered to. For products equipped with a
separate power supply unit, leave at least 5cm (2in.) of free space
on all sides and the top of the power supply.
9. Power Sources - This product should be operated only from the
type of power source indicated on the marking label (placed on
the product and/or, if applicable, on a separate power supply
unit). If you are not sure of the type of power supply in your home,
consult your product dealer or local power company. For products
intended to operate from battery power or other sources, refer to
the operating instructions.
10. Grounding and Polarity - some units for proper operation or
to take full advantage of their capabilities may require to be
connected to a grounded power outlet – refer to the user manual
for more information.
Some units may have markings for the live (L) and neutral (N)
conductors for power - in order to take full advantage of capabilities of such products, it is recommended to properly connec t
the polarity according to the markings on the unit - refer to the
user manual for more information. Connecting the polarity not in
accordance with the markings will not aect the durability and
reliability of the device.
11. Power-cord Protection - Power supply cords should be routed
so that they are not likely to be walked on or pinched by items
placed upon or against them, paying particular attention to cords
at plugs, convenience receptacles and the point where they exit
from the product.
12. Lighting - For added protec tion for this product during a lighting
storm or when it is left unattended and unused for long periods
of time, unplug it from the wall outlet and disconnect the antenna
or system cables. This will prevent damage to the product due to
lighting and power-line surges.
EN_safety_09-22
13. Overloading - Do not overload wall outlets, ex tension cords or
integral convenience receptacles as this can result in a risk of fire
or electric shock.
14. Object and Liquid Entry - Ne ver push object s of any kind into this
product through openings as they may touch dangerous voltage
points or short-out par ts that could result in a fire or electric
shock. Do not expose this apparatus to dripping or splashing and
ensure that no objects filled with water, such as vases are placed
on the apparatus.
15. Servicing - Do not attempt to servic e this product yourself as
opening or removing covers may expose you to dangerous
voltage or other hazards. Refer all servicing to qualified ser vice
personnel.
16. Damage Requiring Service - Unplug this product from wall outlet
and refer servicing to qualified personnel under the following
conditions:
• when power supply cord or plug is damaged;
• if liquid has been spilled or objects have fallen into the product;
• if the product does not operate normally by following the operating instructions. Adjust only those controls that are covered by
the operating instructions as an improper adjustment of other
controls may result in damage and will require extensive work
by a qualified technician to restore the product to its normal
operation;
• if the product has been dropped or damaged in any way;
• if the product exhibits a distinc t change in performance - this
indicates a need for a service.
1 7. Replacement Parts - when replacement par ts are required, be
sure the technician has used replacement parts specified by the
manufacturer or with the same characteristics as the original
part. Unauthorized substitutions may result in fire, elec tric shock
or other hazards.
18. Safety Check - Upon completion of any ser vice or repairs to this
product, ask the service technician to per form safety check to
determine that the products is in proper operating condition.
19. Wall of ceiling mounting - The product should be mounted to a
wall or ceiling only as recommended by the manufacturer.
20. Heat - The product should be situated away from heat sources
such as radiators, heat registers, stoves or other products (including amplifiers) that produce heat.
21. [Refers to products e quipped with vacuum tubes] Tube Cage
or cover - For your safety and to protect the vacuum tubes this
product may be equipped with the factory installe d vacuum tube
cage or cover.
It is not recommended to remove the cage or cover unless it is
required to change the vacuum tubes.
When the cage or cover is removed - do not touch the vacuum
tubes - they may be hot and burn the skin!
22. Operating Environment - Operating environment temperature and
humidity of the unit: +5°C to +35°C (+41°F to +95°F); less than
85% RH (cooling slots not blocked).
PACKAGING WARNING
The packaging may contain elements
such as plastic, that should be kept
away from small children.
The thin foil or small elements can
stick to the nose and mouth, or may
be swallowed and prevent breathing.
4
Page 6
Batteries- Safety Instructions
IMPORTANT
READ THIS SECTION CAREFULLY BEFORE PROCEEDING!
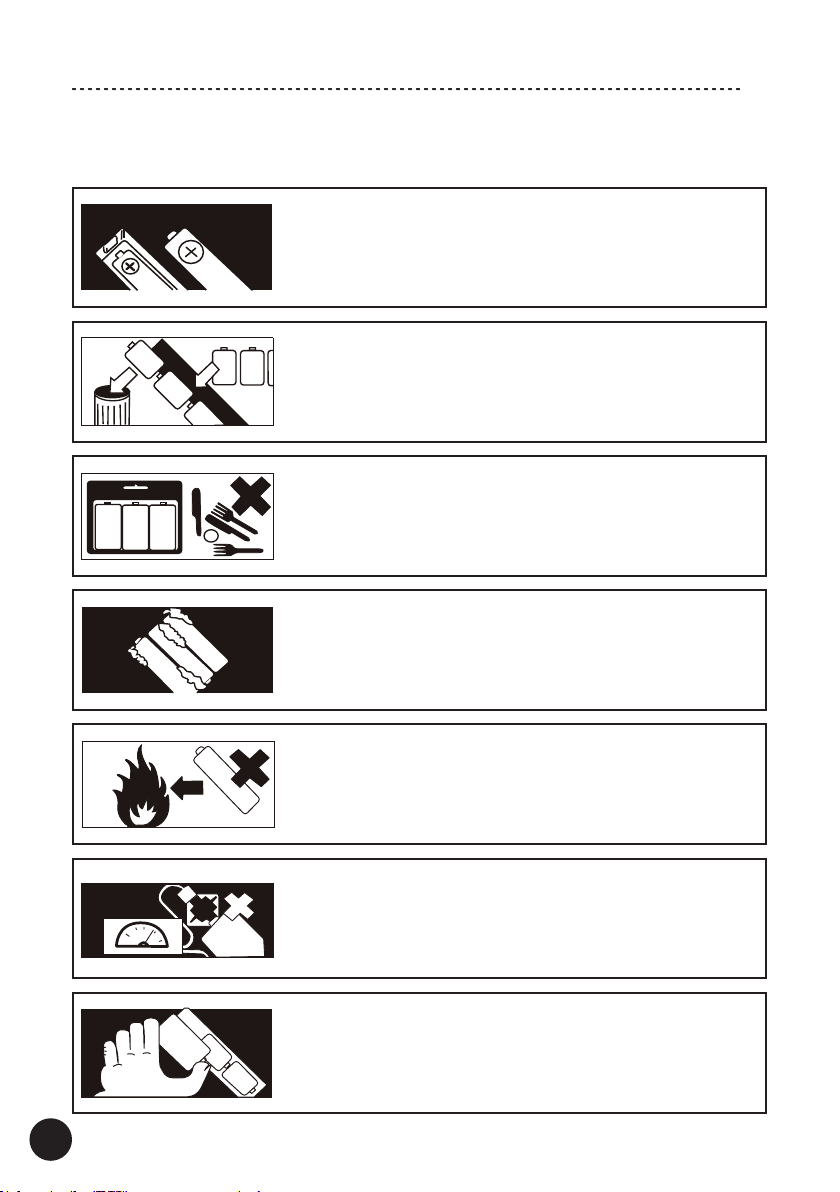
Make sure to insert the battery aligning the correct polarity - the
positive and negative ends should be facing in the correct direction
as marked on equipment.
Incorrect tting may cause leakage or, in extreme cases, re or
even an explosion.
Always replace the whole set of batteries at one time, taking care
not to mix old and new batteries or batteries of different types, since
this may result in leakage or, in extreme cases, re or even an
explosion.
Store unused batteries in their packaging and away from metal
objects which may cause a short-circuit resulting in leakage or, in
extreme cases, re or even an explosion.
Remove dead batteries from equipment and all batteries from
equipment when you know you are not going to use for a long time.
Otherwise the batteries may leak and cause damage.
EN_batteries_safety_08-22
5
Never dispose of batteries in re as this can cause them to
explode. Please recycle dead batteries; do not put with the normal
household waste.
Never attempt to recharge ordinary batteries, either in a charger
or by applying heat to them. They may leak, cause re or even
explode. There are special rechargeable batteries which are clearly
marked as such.
Supervise children if they are replacing batteries by themselves in
order to ensure these safety instructions are followed.
Page 7
Batteries- Safety Instructions
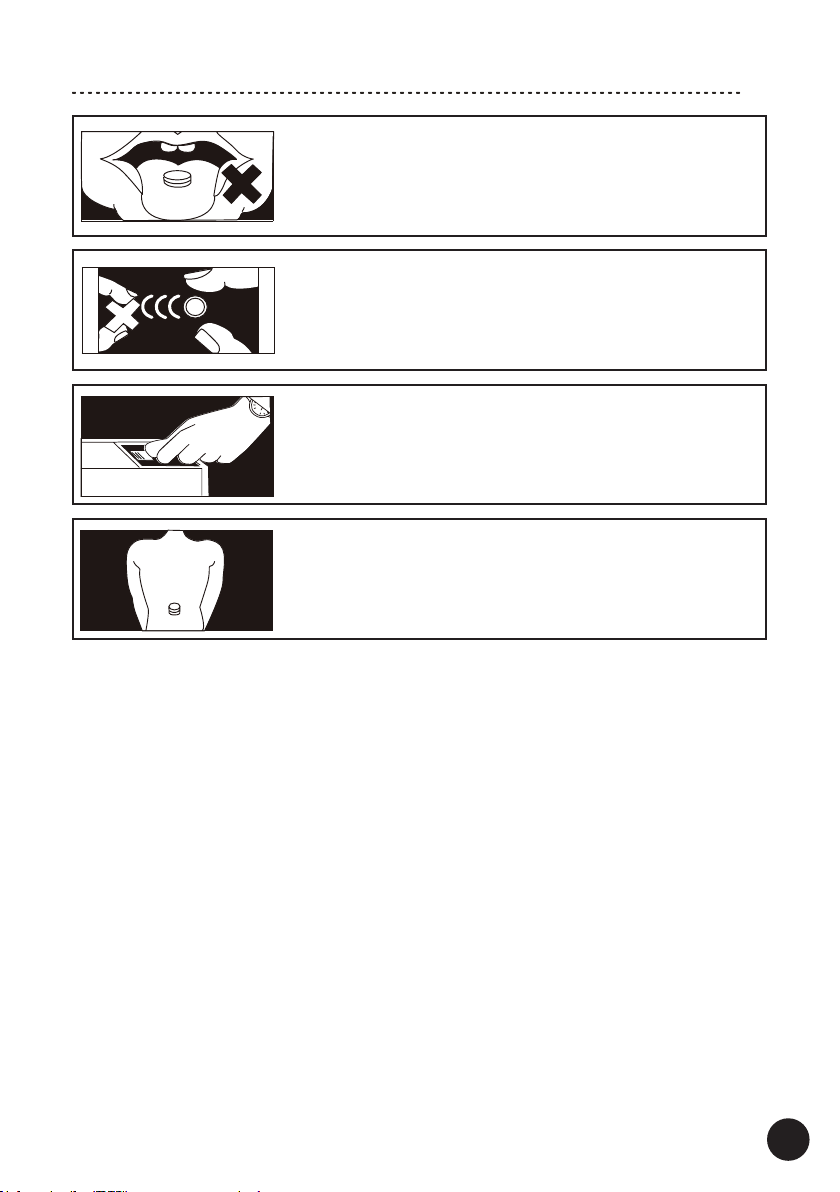
Remember that small button cell batteries such as used in some
hearing aids, toys, games and other appliances, may be easily
swallowed by young children and this is dangerous.
Keep loose button cells away from young children.
Make sure appliance battery compartments are securely closed.
Seek medical assistance if you believe a battery has been
swallowed.
EN_batteries_safety_08-22
6
Page 8
Remote Controller
• Always use AAA bateries and do not use the rechargeable batteries.
• If the batteries run out, remove the old batteries and replace them with new
ones within several minutes.
• If the batteries are placed incorrectly, thay can cause explosion.
• Remove the batteries if the remote controller is not used for a long period of
time.
• Do not handle and store the batteries together with metallic tools.
• KEEP AWAY FROM CHILDREN!
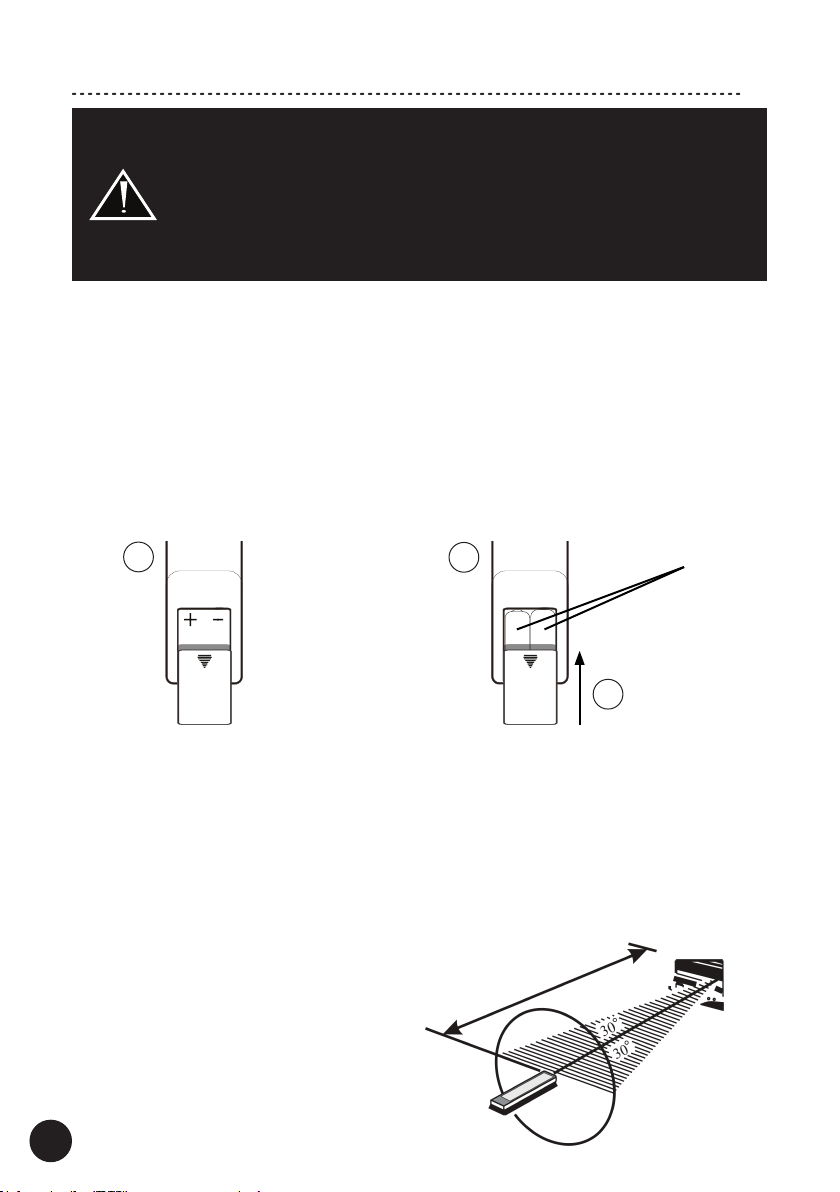
Battery Installation
1. Prepare two AAA batteries (not provided with this product).
2. Remove the rear battery cover by sliding it downwards.
3. Insert the batteries into the battery compartment. Carefully follow the polarity diagram inside
the battery compartment (positive + and negative - symbols).
4. Reinstall the rear cover.
2
3
Operating range
Use the remote controller by aiming it at the remote controller sensor.
The remote controller can operate in the maximum range
of 5 meters away from the CD Player and within 30 degrees
from the axis of the controller sensor.
Note! Exposing the remote controller sensor
to direct sunlight or strong light may cause faulty operation.
Remote Controller
7
Batteries
4
Remote Controller Sensor
5m
Page 9
Remote Controller
1
2
3
4
5
6
7
9
10
11
12
13
14
15
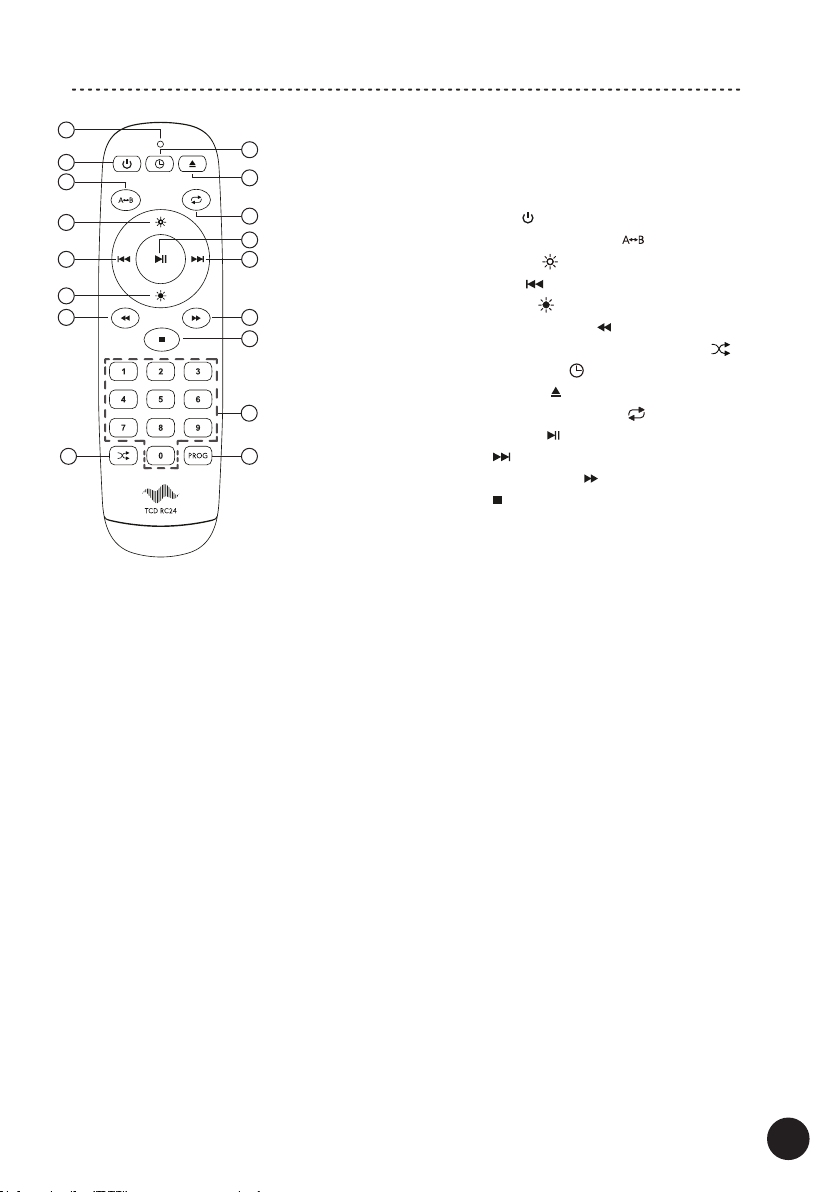
1. Signal LED Indicator
The Indicator ashes after each button is
pressed indicating that the remote controller is
transmitting the signal.
2. Standby Button ( )
3. Repeat A-B Function Button ( )
4. Brightness Higher ( )
5. Previous Button ( )
6. Brightness Lower ( )
7. Search Backward Button ( )
8. Random (Shufe) Play Function Button ( )
9. Time Function Button ( )
10. Open/Close Button ( )
16
11. Repeat Play Function Button ( )
12. Play/Pause Button ( )
8
17
13. Next Button ( )
14. Search Forward Button ( )
15. Stop Button ( )
16. Number Buttons (0-9)
17. Program Function Button (PROG)
8
Page 10
Front and Rear Panel
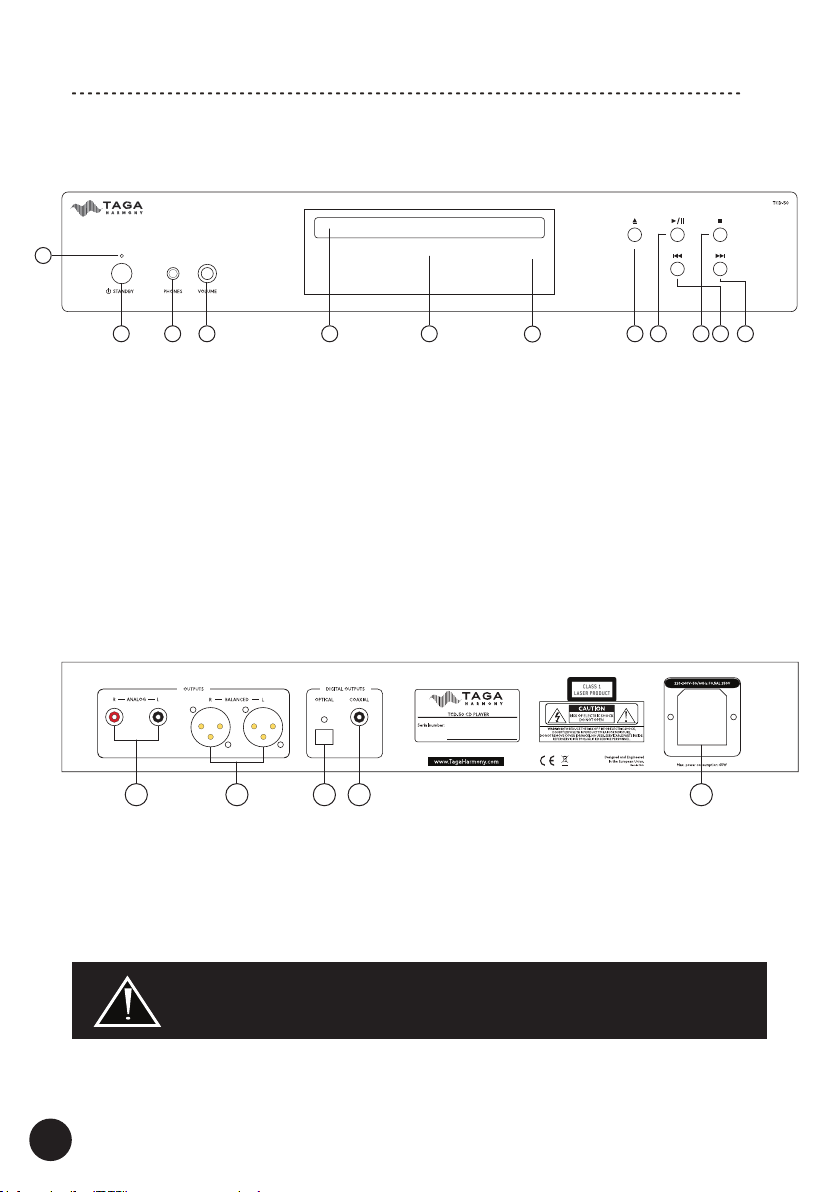
Note! TCD-50 model shown - outputs, placement of Controls and Displays may vary
on the model.
1
2 3 4 6 9
5 8
7
Front Panel:
1. Standby LED Indicator
2. Standby Button
3. Headphone 3.5 mm (1/8”) Output
4. Headphone Output Volume Regulator Knob
5. Disc Tray
6. Display
7. Remote Controller Sensor
8. Open/Close Button
9. Play/Pause Button
10. Stop Button
11. Previous Button
12. Next Button
13 14 15 16 17
Rear Panel:
13. Analog Stereo RCA output
14. Analog Balanced Stereo XLR output (TCD-50 only)
15. Digital Optical Output
16. Digital Coaxial Output
17. Power Cable Input and Fuse Box
1110 12
A blown fuse should be only exchanged for exactly the same type as indicated on
the rear panel.
The Power Cable should be disconnected!
9
Page 11
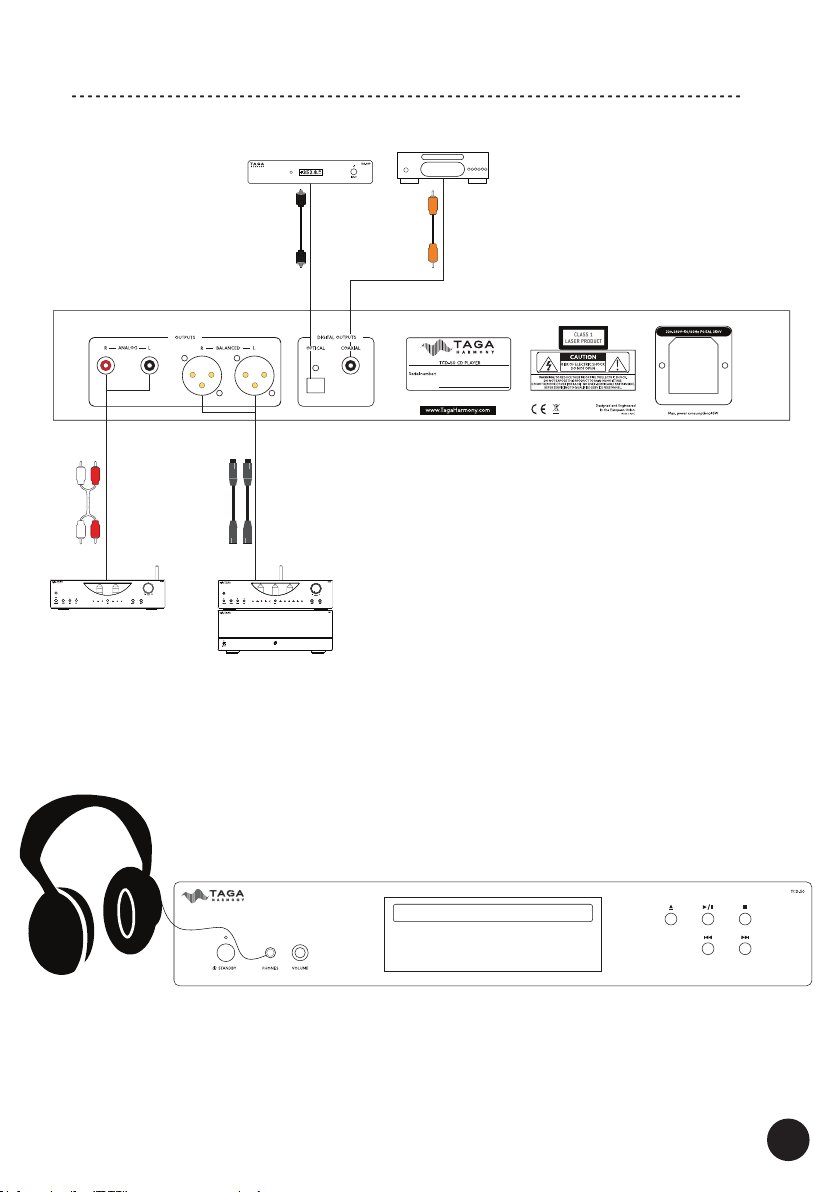
Hooking Up the CD Player
RCA-RCA
interconnect
Amplier, receiver,
powered speakers etc.
Digital-to-Analog
Converter etc.
Digital
optical
cable
XLR female
– XLR male
interconnect
Preamplier, Amplier, receiver,
powered speakers etc.
Stereo Receiver etc.
Digital
coaxial
cable
Headphones
10
Page 12
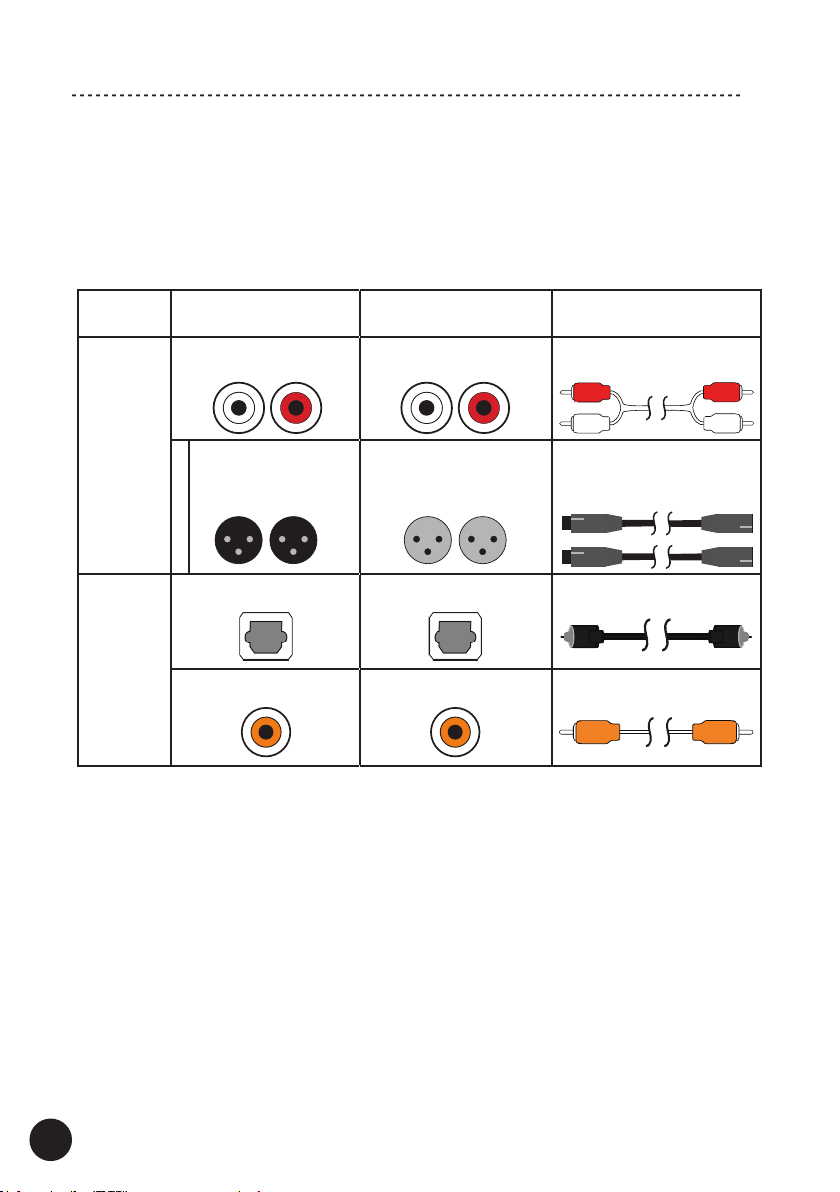
Hooking Up the CD Player
1. Make sure the CD Player is turned off (the Power Cable is disconnected from the
electrical outlet).
2. Make sure that external equipment which will be connected to the CD Player is
turned off.
3. If you want to listen to music via headphones: connect the headphones to the
Phones output.
Check „Headphones connection (PHONES)” for more details.
4. External audio equipment connection options:
Signal CD PLAYER
Analog
Output
R-Analog-L RCA sockets RCA-RCA interconnect
Audio equipment
Input
Connection Cable
(not supplied)
R-Balanced-L
(male sockets)
TCD-50
Digital
The sockets and ports shown for external equipment and connection options may differ depending
on the device.
OPTICAL Optical socket Optical cable
COAXIAL Coaxial socket Coaxial cable
XLR female sockets XLR female - XLR male
interconnect
(not supplied)
(not supplied)
(not supplied)
5. Your CD Player is ready for operation.
Note! Check “Additional Information” for other useful operating instructions.
11
Page 13
Operation
Plug the Power Cable to the CD Player and into the electrical outlet.
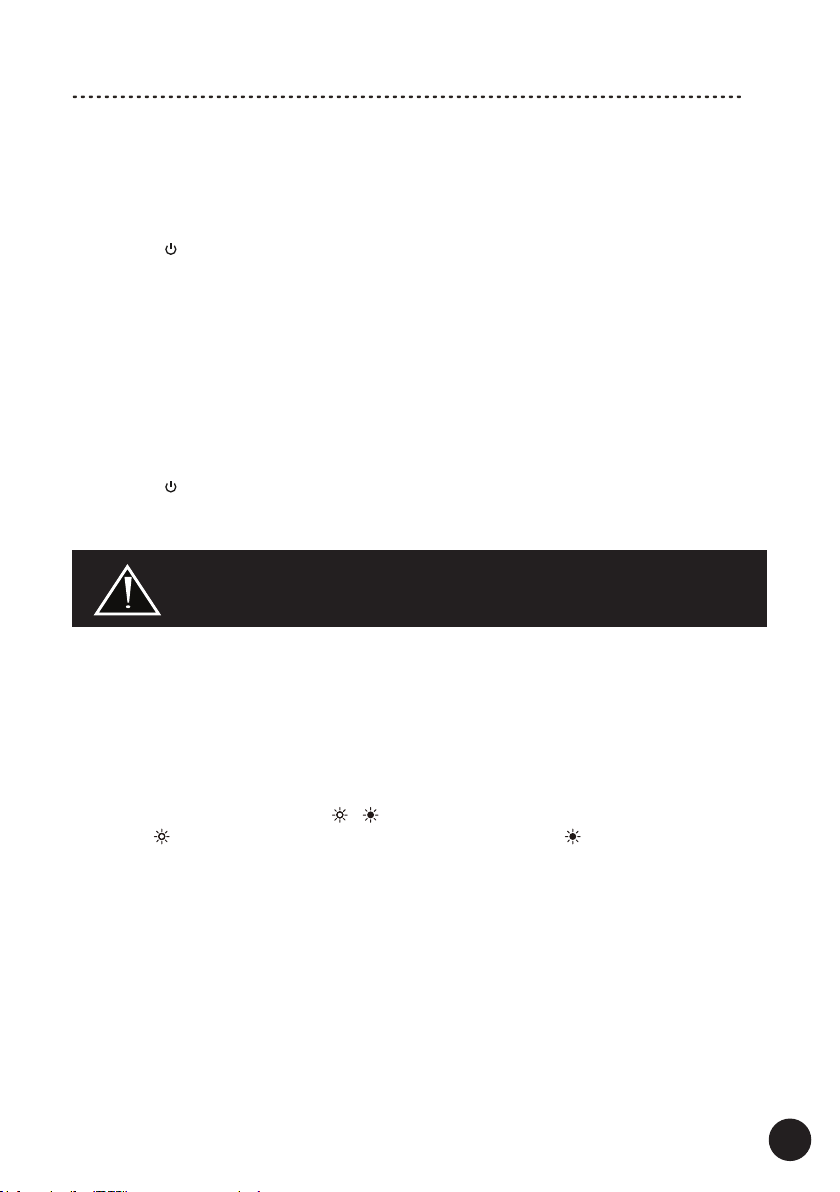
Switching ON / OFF
When you connect the CD Player to the electrical outlet for the rst time, it will be in the
Standby mode. The Standby LED Indicator will be illuminated.
ON
• Press the
The Standby LED Indicator will switch off.
• If there is no CD disc inserted, the info [NO DISC] will be shown on the display after a
while.
• If there is a CD disc inserted, the info about the CD disc [Number of tracks – Total
time] will be shown on the display after a while.
Note! This CD Player reads only CD-Audio discs. Other formats are not supported.
Playable media: CD, CD-R, CD-RW. Non-nalized discs cannot be played.
CD-Audio discs exceeding capacity of 74 minutes may not be played correctly
(especially last tracks).
OFF
• Press the
The Standby LED Indicator will be illuminated.
• The Display will be switched off.
Standby button to switch the CD Player on.
Standby button to switch the CD Player off.
Some internal circuits of the device are powered even in the standby mode.
When you plan leaving home or going away for longer disconnect the power
cable from the device.
Automatic Standby Mode
To save energy, the CD Player will automatically switch to the Standby mode if no CD
is played for approximately 20 minutes.
BRIGHTNESS regulation
The BRIGHTNESS function is used to change the brightness of the Display, and to turn
off the Display.
The function is controlled by the / buttons.
Press the button repeatedly to increase the brightness, the button to lower the
brightness.
12
Page 14
Operation
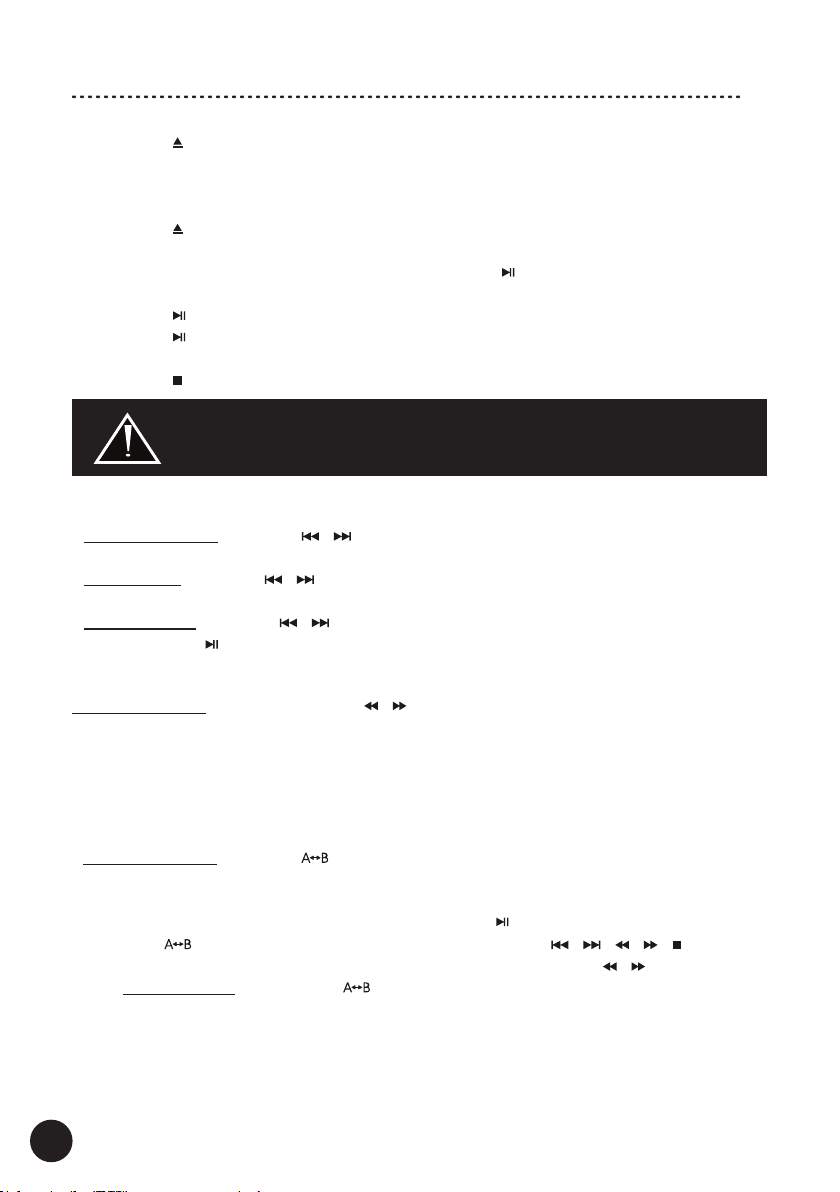
CD Discs Playing
1. Press the button to open the disc tray and place the CD disc on it (with the printed
side up).
Note! If the disc tray is not closed manually within approximately 60 seconds, it will
close automatically.
2. Press the button to close the disc tray, after the CD disc is read correctly, info
about the disc [Number of tracks – Total time] will be shown on the Display.
Note! When the disc tray is open, please press the button to close it and start
playing the disc automatically.
3. Press the to start playing.
4. Press the to temporarily stop the playing - [PAUSE] will be displayed.
Press the button again, it will continue to play.
5. Press the button to stop the disc playing.
Do not place any foreign objects on the disc tray.
Do not push the disc tray in by hand when the CD Player is switched off.
This may damage this device.
Skip to Track
• During playback: press the / buttons once or more to skip to the previous / next
track on the disc.
• During stop: press the / buttons to choose the track you want to start playing
with. The playback will start automatically after a while.
• During pause: press the / buttons to choose the track you want to start playing
with. Press the to start playing.
Search
During playback: press and hold the / buttons to search for the position that you
intend to continue playing.
Release to resume normal play.
Repeat A-B
This function allows to constantly play the content between two selected points: A [start]
to B [end].
• During playback: press the button to select the start point and press it again to
select the end point.
[REP A - B] will be displayed.
Note! You can pause and resume playing using the button.
• Press the button again or one of the following buttons ( / , / , ) to
disactivate this function - [REP OFF] will be displayed (except for / ).
Note! During pause: pressing the button will resume playing and set the start point
(A) from the point where the playback was previously paused.
13
Page 15
Operation
Repeat Play
Switching between ALL-track repeat and ONE-track repeat.
The function may be only activated during the playback or pause by using the button.
• First press: to repeat the current track.
[REP ONE] will be displayed.
• Second press: to repeat all tracks.
[REP ALL] will be displayed.
• Third press or the button: disactivates this function.
[REP OFF] will be displayed.
Note! When a single track is repeated, press the / buttons, to skip to the previous
/ next track on the disc – the selected track will be repeated.
Random (Shufe) Play
You can play tracks on a CD disc in a random sequence.
The CD player must be in the Play mode with a CD disc inserted.
1. Press the button to start the Random Play.
[RAND ON] will be displayed.
Note! Press the / buttons to randomly select the next track.
2. Press the button again or the button to clear this function.
[RANDOFF] will be displayed.
Program Play
You can program up to 24 tracks to play in any desired order.
The CD player must be in the Stop mode with a CD disc inserted.
In the Program Mode the Display will show [PRG01:##]:
01 - program memory number.
## - programing start: a total number of tracks on the disc.
programing in progress: selected track to store in the program memory.
1. Programing start: press the PROG button. [PRG01:##] will be displayed. ## will be
ashing.
2. Press the / buttons to select a track to be stored in the program memory 01.
3. Press the PROG button to store the selected track in the program memory.
4. The program memory number will change to the next one.
5. Repeat steps 2-3 to select and store all desired tracks.
6. To start the program play, press the button - [PROG ON] will be displayed.
7. To clear the program play, press the button - [PROGOFF] will be displayed.
Note! Skip to Track operation, using the / buttons, will work within the programmed memory, until it is cleared.
Note! All functions will be deactivated when you turn off the CD Player or open the disc
tray.
14
Page 16
Operation
Direct Track Selection
The 0-9 buttons allow to select a specic track on the CD disc.
For instance: to select track number 12, press 1 and then 2 buttons etc.
• During playback: press the 0-9 buttons to start playing from the selected track.
• During stop and pause: press the 0-9 buttons to start playing from the selected track.
The playback will start automatically after a while.
Note! This function may not be active when other CD Player functions are running.
Time Display
Time display switching function.
NO PLAYING (STOPPED): [Total number of tracks on the CD disc - Total CD disc time]
PLAYING or PAUSED
The track number is displayed in the rst position.
Each button press is switching between [Elapsed track time] → [Remaining track
time] → [Remaining total CD disc time]
Note! The time displayed on this unit may differ from the actual time, as it is calculated
by rounding.
Note! This function may not be active when other CD Player functions are running.
Headphones connection (PHONES)
When headphones are plugged into the headphone output (Phones) the transmission
of sound to all outputs is still active.
The volume of the headphones is regulated by the Headphone Output Volume Regulator Knob [from zero: the knob in the max counterclockwise position].
Listening at high volume may cause hearing damage.
15
Page 17
Additional Information
Break-In
Your TAGA Harmony CD Player sounds great immediately after it is taken out of the carton but
internal components require a “break-in” period to reach its full sonic capabilities.
During the “break-in” period it is recommended to operate the CD Player at moderate volume
levels.
The rst level of the “break-in” is reached after approximately 10 hours of play.
The optimal level of the “break-in” is reached after approximately 40 to 60 hours of play.
It is recommended to avoid one-time short periods of operation unless the CD Player reaches the
rst “break-in” level.
When the CD Player is turned on, it should operate for around 2 hours.
Turn off procedure
If the CD Player was turned off even for a short period of time, you should wait
at least 2 minutes before turning it back on.
Do not turn it ON then OFF and then ON again in quick succession.
Follow this procedure each time you turn your CD Player OFF / ON.
This precaution will minimize the stress (high voltages) on internal components.
Power transformer – Power lters and conditioners
It is a normal phenomenon that the device’s power transformer may generate a certain amount of
audible noise.
Very loud operation of the power transformer may be caused by low quality of power supply
(voltage surges etc.).
In such a case, we suggest using a power lter or conditioner - you can also try to power this product from a different power line than other devices (e.g. from a power outlet in another room).
16
Page 18
Additional Information
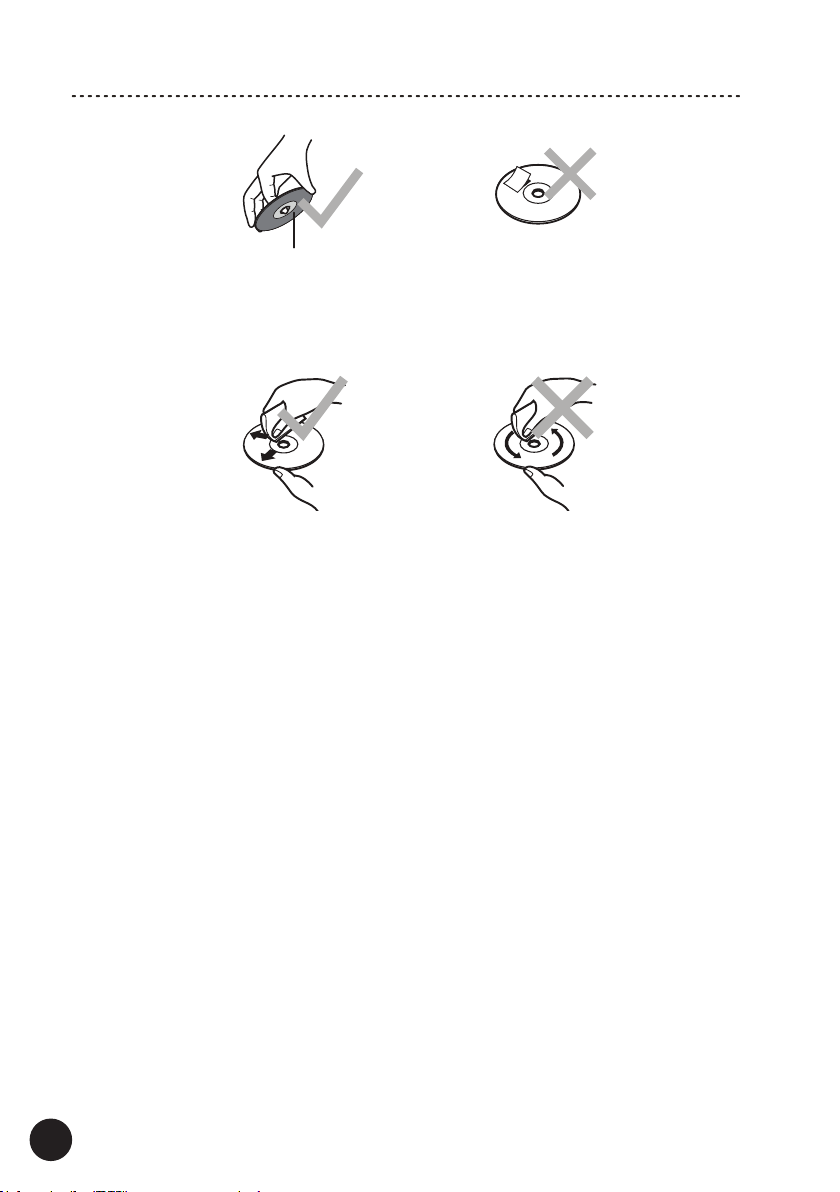
Playback side
Handling of CD discs
• Do not touch the playback side of the disc.
• Do not attach paper or tape to the disc.
Cleaning Discs
• Fingerprints and dust on the disc cause picture and sound deterioration.
Wipe the disc from the centre outwards with a soft cloth. Always keep the disc clean.
• If you cannot wipe off the dust with a soft cloth, wipe the disc lightly with a slightly moistened
cloth and nish with a dry cloth.
• Do not use any type of solvent such as thinner, benzine, commercially available cleaners or
antistatic spray. They may damage the disc.
Storing Discs
• Do not store discs in places subjected to direct sunlight or near heat sources.
• Do not store discs in places subjected to moisture and dust such as a bathroom or near a
humidier.
• Storing discs vertically in a case, stacking discs or placing objects on discs outside of their
cases may cause warping.
17
Page 19
Kit Content
We strongly advise to contact a professional installer or dealer in order to install
TAGA Harmony products.
We recommend using high quality TAGA Harmony cables and other installation
accessories.
Kit Content:
CD Player 1EA
Power Cable 1EA
Instruction Manual 1EA
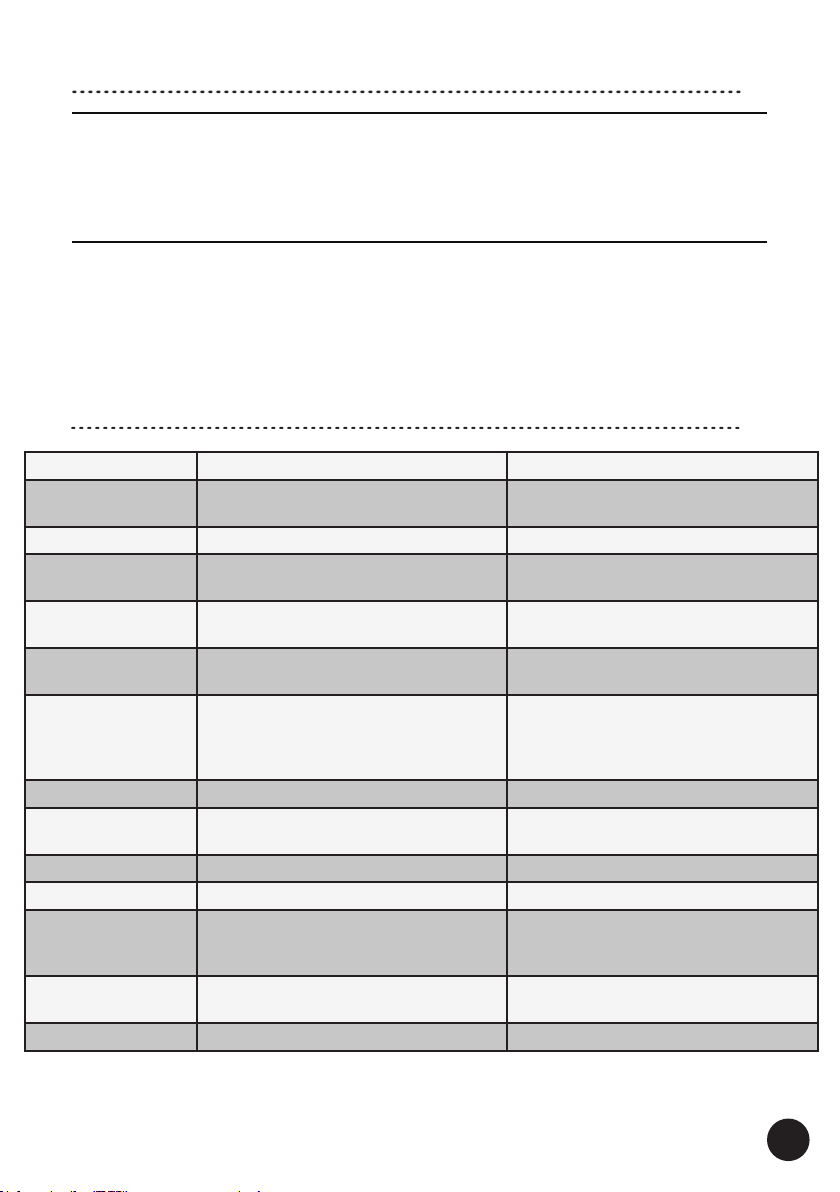
Specications
TCD-50 TCD-30
Compatible CD
formats
DA converter ESS SABRE ES9018 ESS SABRE ES9018
Analog lter
Digital outputs
Analog outputs
Headphone output
Frequency response 20Hz - 20kHz (±1dB) 20Hz - 20kHz (±1dB)
Total Harmonic
Distortions
Signal / Noise ratio >110dB (A-Weighted) >110dB (A-Weighted)
Crosstalk <-100dB @1kHz <-100dB @1kHz
AC power /
power consumption
Dimensions
(H x W x D)
Weight 5.5 kg / pc. 4.4 kg / pc.
We reserve the right to change the technical data and the design of the product without notice as a result of further development.
CD-Audio
(playable media: CD, CD-R, CD-RW)
2 Pole Fully Differential
Linear Phase Bessel lter
Optical, Coaxial
[up to 44.1kHz/16bit]
STEREO: UNBALANCED (RCA),
STEREO: BALANCED (XLR)
Impedance: 32ohm
Output power: ≤30mW, 32ohm
Variable
[0-30mW @32ohm | 0-50mW @600ohm]
<0.005% (A-Weighted) @1kHz 0DBFS
< 0.005% (2.0V 1kHz)
220-240V 50/60Hz, 45W
Standby <0.5W
Operation max 35W
8.2 x 43 x 32 cm
(incl. feet, excl. knobs/sockets)
CD-Audio
(playable media: CD, CD-R, CD-RW)
2 Pole Fully Differential
Linear Phase Bessel lter
Optical, Coaxial
[up to 44.1kHz/16bit]
STEREO: UNBALANCED (RCA)
Impedance: 32ohm
Output power: ≤30mW, 32ohm
Variable
[0-30mW @32ohm | 0-50mW @600ohm]
<0.005% (A-Weighted) @1kHz 0DBFS
< 0.005% (2.0V 1kHz)
220-240V 50/60Hz, 45W
Standby <0.5W
Operation max 35W
8.2 x 43 x 32 cm
(incl. feet, excl. knobs/sockets)
18
Page 20
EU declaration of conformity
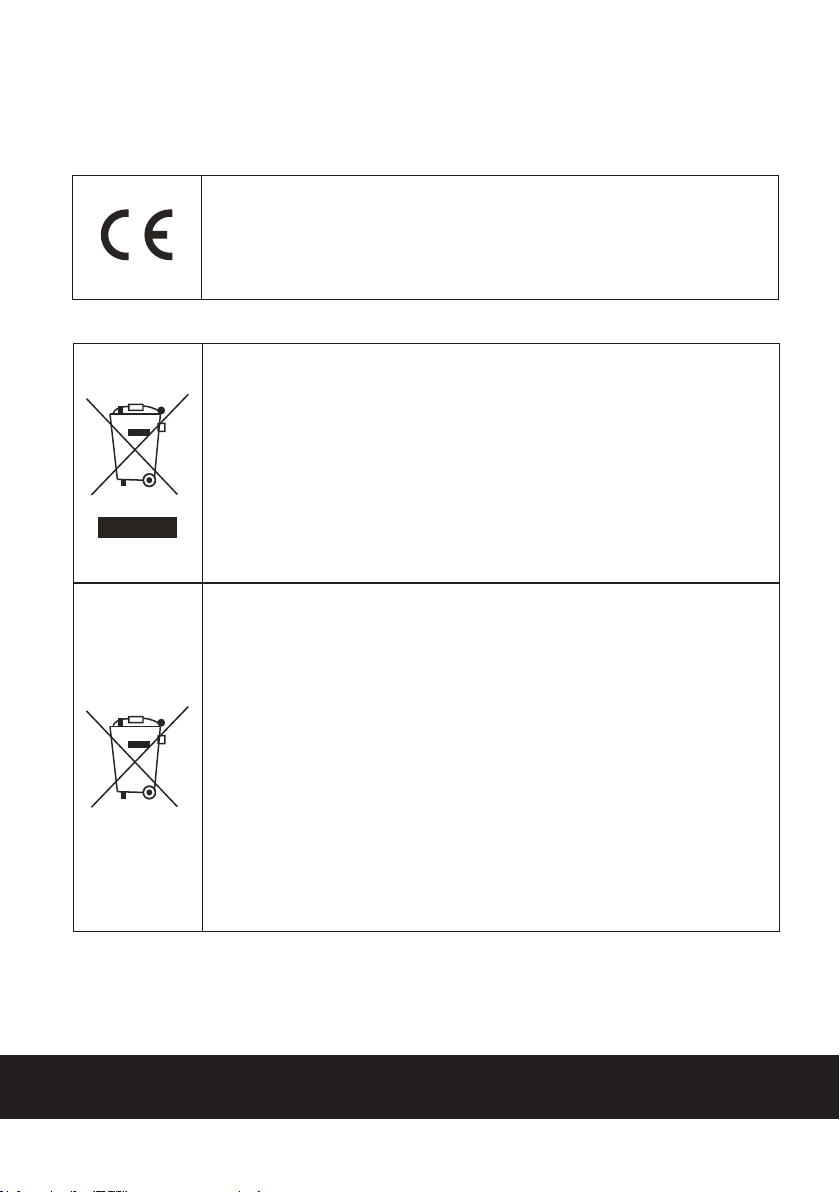
As its manufacturer, hereby we declare that the product is in compliance with the
Disposal of the product
(applicable in the European Union and other countries with separate
This symbol on the product or on its literature and packaging indicates that this
product shall not be treated as household waste. Instead it shall be handed over
to the appropriate collection point for the recycling of electrical and electronic
equipment. By ensuring that this product is disposed of correctly, you will help
to prevent potential negative consequences for the environment and human
health, which could be caused by inappropriate waste handling of this product.
The recycling of materials will help to conserve natural resources. For more
detailed information about recycling of this product, please contact your local
government ofce, your household waste disposal service or the shop where
Your product is marked with the symbol shown on the left.
Your product is marked with the symbol as showed on the left.
2014/30/EU (EMC) & 2014/35/EU (LVD) & 1275/2008/EC (ErP)
The full text of the EU declaration of conformity is available from the
following EU directives and regulations:
For EU (European Union) member users:
This product has been tested and found in compliance with
2014/30/EU (EMC) & 2014/35/EU (LVD) directives.
Disposal of old electrical & electronic equipment
& 2015/863/EU (RoHS)
requirements of the European Community
manufacturer.
collection systems)
you purchased the product.
(applicable in the European Union and other countries with separate
This symbol on the battery or on the packaging indicates that the battery
provided with this product shall not be treated as household waste. On certain
batteries this symbol might be used in combination with a chemical symbol. The
chemical symbol for lead (Pb) is added if the battery contains more than 0.004
% lead. By ensuring that these batteries are disposed of correctly, you will help
to prevent potentially negative consequences for the environment and human
health which could be caused by inappropriate waste handling of the battery.
The recycling of the materials will help to conserve natural resources. In case
of products that for safety, performance or data integrity reasons require a per-
manent connection with an incorporated battery, this battery should be replaced
by qualied service staff only. To ensure that the battery will be treated properly,
hand over the product at end-of-life to the appropriate collection point for the
recycling of electrical and electronic equipment. For all other batteries, please
view the section on how to remove the battery from the product safely. Hand the
battery over to the appropriate collection point for the recycling of waste batte-
ries. For more detailed information about recycling of this battery, please contact
your local government ofce, your household waste disposal service or the shop
POLPAK POLAND Sp. z o.o.
AL.JEROZOLIMSKIE 331A
05-816 REGUŁY k/WARSZAWY, POLAND
Email: [email protected]
Disposal of waste batteries
collection systems)
where you purchased the product or battery.
TAGA EUROPE
www.TagaHarmony.com
 Loading...