

SZ DJI TECHNOLOGY WM3221510 Users manual
Phantom 3 Advanced User Manual
There are two options for Dynamic Home Point.
1. Set the aircraft current coordinate as the new Home Point.
2. Set the mobile device's coordinate as the new Home Point.
Setting Up Dynamic Home Point
Follow the steps below to setup Dynamic Home Point:
1. Connect to the mobile device and launch the DJI Pilot app and go to the “Camera” page.
”and select“ ”, to set the mobile device’s coordinates as the new Home Point.
2. Tap“
”and select“ ”, to set the aircraft’s coordinates as the new Home Point.
3. Tap“
4. The aircraft status indicator blinks green to show Home Point is set successfully.
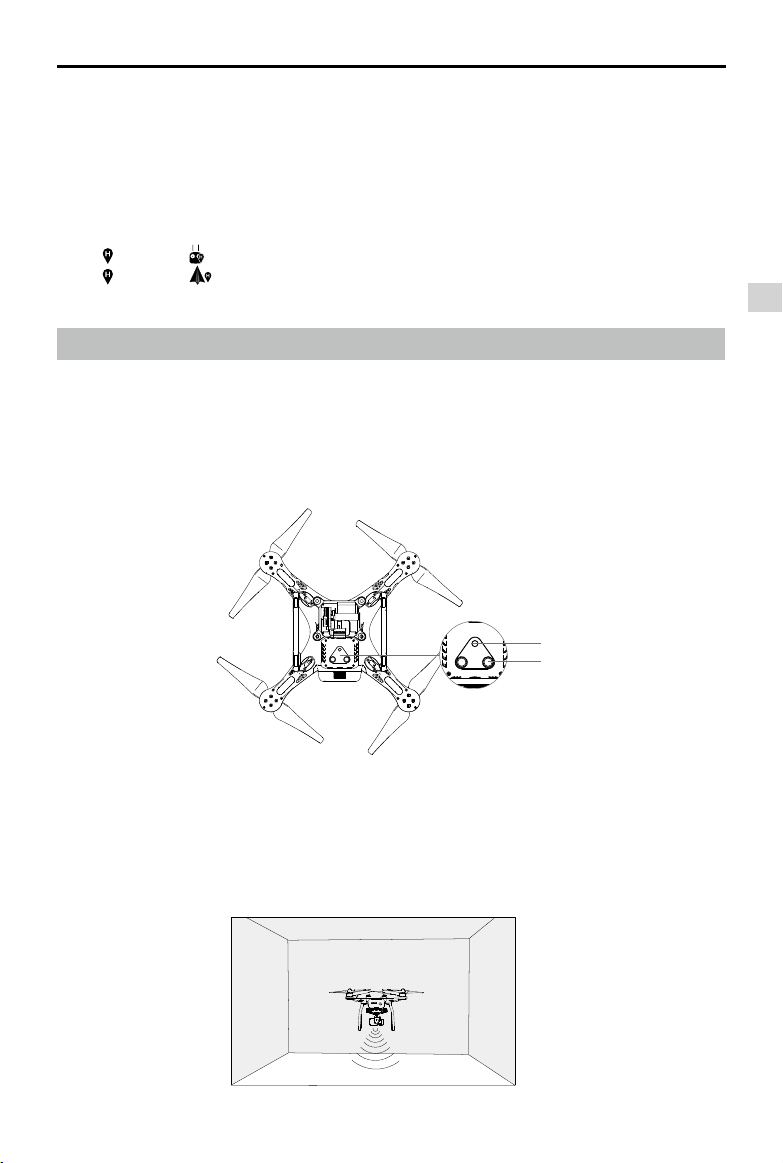
Vision Positioning System
DJI Vision Positioning is a positioning system that uses ultrasonic and image data to help the aircraft
identify its current position. With the help of Vision Positioning, your Phantom 3 Advanced can hover in
place more precisely and y indoors or in other environments where there is no GPS signal available.
The main components of DJI Vision Positioning are located on the bottom of your Phantom 3 Advanced,
including [1] one monocular camera and [2]two sonar sensors.
Aircraft
[1]
[2]
Using Vision Positioning
Vision Positioning is activated automatically when the Phantom 3 Advanced is powered on. No manual
action is required. Vision Positioning is typically used in the indoor environment where no GPS is available.
By using the sensors on the Vision Positioning system, Phantom 3 Advanced can perform precision
hovering even when no GPS is available.
2015 DJI. All Rights Reserved.
©
15
Phantom 3 Advanced User Manual
Follow the steps below to use Vision Positioning:
1. Toggle the switch to “P” mode.
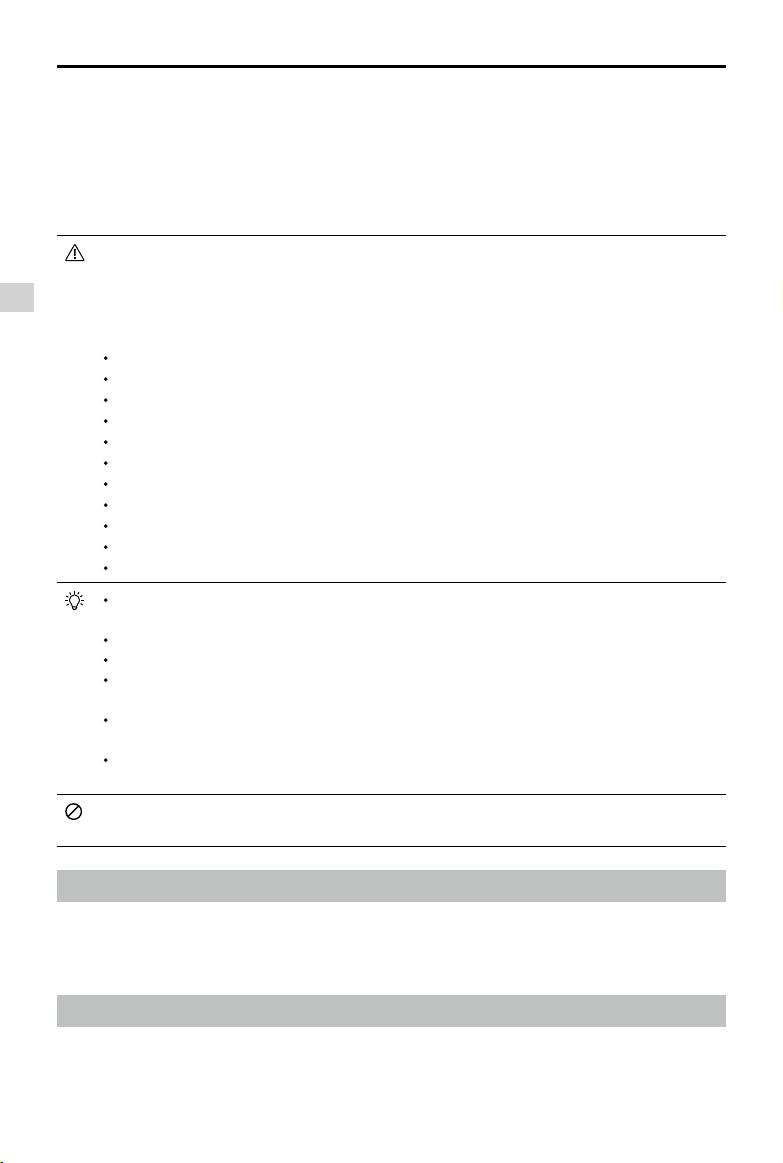
2. Place the aircraft on a at surface. Notice that the Vision Positioning system cannot work properly on
surfaces without pattern variations.
3. Power on the aircraft. The aircraft status indicator will ash twice in green light, which indicates the Vision
Positioning system is ready. Gently push the throttle up to lift off, and the aircraft will hover in place.
The performance of your Vision Positioning System is subject to the surface you are ying over.
The ultrasonic waves may not be able to accurately measure the distance over sound absorbing
Aircraft
materials, and the camera may not function correctly in suboptimal environments. The aircraft will
switch from “P” mode to “A” mode automatically if both GPS and Vision Positioning System are
not available. So operate the aircraft cautiously when in any of the following situations:
Flying over monochrome surfaces (e.g. pure black, pure white, pure red, pure green).
Flying over a highly reective surfaces.
Flying at high speeds(over 8 m/s at 2 meters or over 4 m/s at 1 meter).
Flying over water or transparent surfaces.
Flying over moving surfaces or objects.
Flying in an area where the lighting changes frequently or drastically.
Flying over extremely dark (lux < 10) or bright (lux > 100,000) surfaces.
Flying over surfaces that can absorb sound waves (e.g. thick carpet).
Flying over surfaces without clear patterns or texture.
Flying over surfaces with identical repeating patterns or textures (e.g. tiles with same design).
Flying over inclined surfaces that will deect sound waves away from the aircraft.
Keep the sensors clean at all times. Dirt or other debris may adversely affect the effectiveness
of the sensors.
The effective hovering altitudes of the aircraft is from 0 to 3 meters.
Vision Positioning system may not function properly when the aircraft is ying over water.
Vision Positioning system may not be able to recognize pattern on the ground in low light
conditions (less than 100 lux).
Do not use other ultrasonic devices with frequency of 40 KHz when Vision Positioning system is
in operation.
Vision Positioning system may not be able to stabilize the aircraft when flying close to the
ground (below 0.5 meters) in fast speed.
Keep the animals away from the aircraft when Vision Positioning system is activated. The sonar
sensor emits high frequency sound that is only audible to some animals.
Flight Recorder
Flight data is automatically recorded to the SD card. This includes ight telemetry, aircraft status
information, and other parameters. Access these data from the DJI Pilot app through the Aircraft
Micro-USB Port.
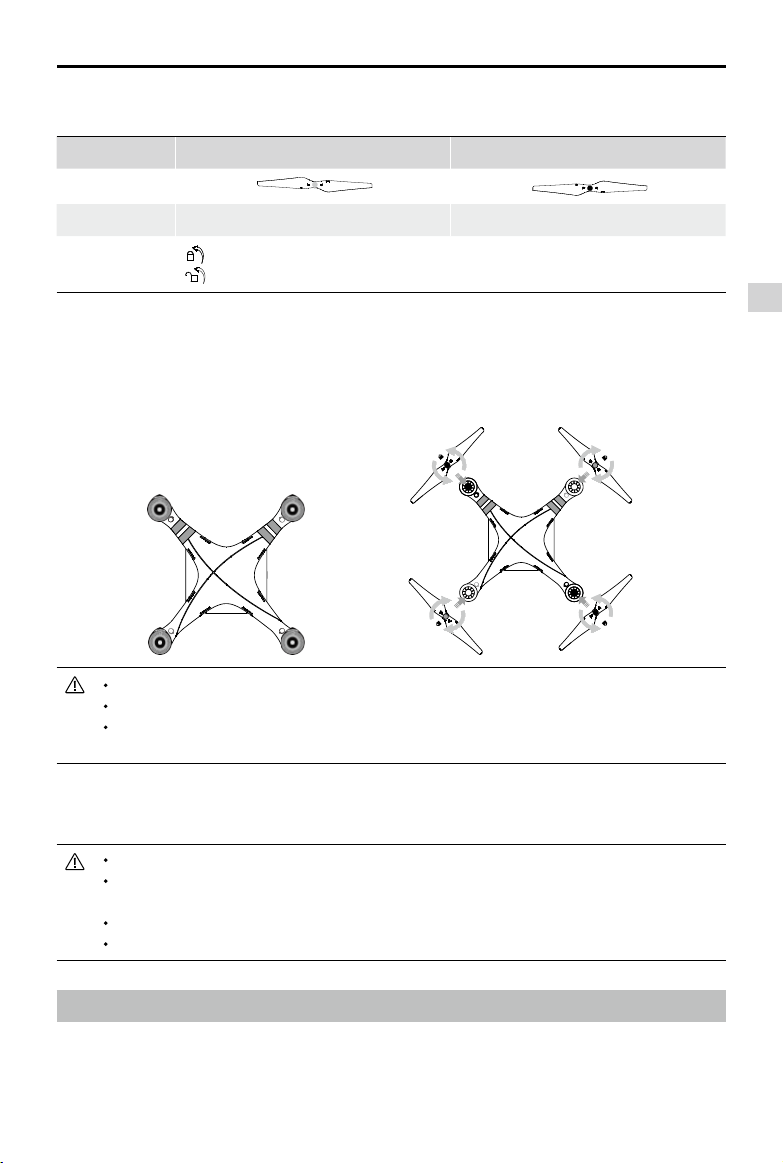
Attaching and Detaching the Propellers
Use only DJI approved propellers with your Phantom 3 Advanced. The grey or black nut on the
propeller indicates the rotation direction of the propeller and where it should be attached. To attach
2015 DJI. All Rights Reserved.
16
©
Phantom 3 Advanced User Manual
the propellers properly, match the nut with the axis on the motors of your Phantom 3 Advanced
Propellers Grey cap Black cap
Figure
Attach On Motors with a grey axis Motors with a black axis
Legends
Lock : Turn the propellers in the indicated direction to mount and tighten
Unlock : Turn the propellers in the indicated direction to loosen and remove
.
Attaching the Propellers
1. Attach the propellers with a grey nut onto a motor with the grey axis and spin the propellers clockwise
to secure them in place. Attach the propellers with a black nut onto a motor with the black axis and
spin the propellers counter clockwise to secure its position. Be sure to completely tighten each
propeller by hand before ight.
Aircraft
Ensure propellers are attached to its corresponding motors, otherwise the aircraft cannot take off.
Wear gloves when handling propellers.
Manually tighten each of the propellers on the corresponding motors to ensure it is attached
rmly.
Detaching the Propellers
Hold the motor still. Then spin the propeller in the unlock direction indicated on the propeller itself.
Check that the propellers and motors are installed correctly and rmly before every ight.
Ensure that all propellers are in good condition before each ight. DO NOT use aged, chipped,
or broken propellers.
To avoid injury, STAND CLEAR of and DO NOT touch propellers or motors when they are spinning.
ONLY use original DJI propellers for a better and safer ight experience.
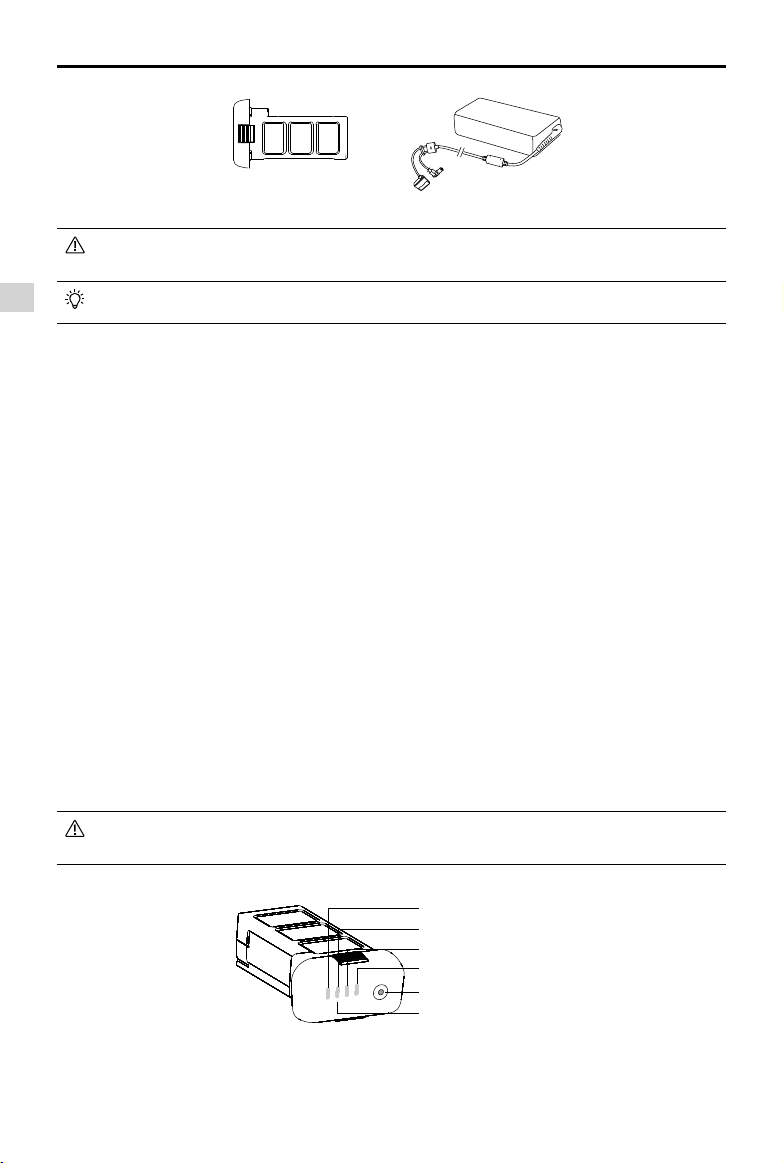
DJI Intelligent Flight Battery
The DJI Intelligent Flight Battery has a capacity of 4480 mAh, voltage of 15.2 V, and smart charge-
discharge functionality. It can only be charged with an appropriate DJI approved charger.
2015 DJI. All Rights Reserved.
©
17
Phantom 3 Advanced User Manual
Flight Intelligent Flight Battery
Charger
Battery must be fully charged before using it for the rst time. Refer to "Charging the Intelligent
Flight Battery" for more information .
Aircraft
Be aware that the output power of the supplied Phantom 3 Advanced charger is 57W.
DJI Intelligent Flight Battery Functions
1. Battery Level Display: LEDs display the current battery level.
2. Battery Life Display: LEDs display the current battery power cycle.
3. Auto-discharging Function: The battery automatically discharges to below 65% of total power when
it is idle for more than 10 days to prevent swelling. It takes around 2 days to discharge the battery to
65%. It is normal to feel moderate heat emitting from the battery during the discharge process. Discharge thresholds can be set in the DJI Pilot app.
4. Balanced Charging: Automatically balances the voltage of each battery cell when charging.
5. Over charge Protection: Charging automatically stops when the battery is fully charged.
6. Temperature Detection: The battery will only charge when the temperature is between 0°C(32°F) and
40°C (104°F).
7. Over Current Protection: Battery stops charging when high amperage (more than 8 A) is detected.
8. Over Discharge Protection: Discharging automatically stops when the battery voltage reaches 12 V to
prevent over-discharge damage
9. Short Circuit Protection: Automatically cuts the power supply when a short circuit is detected.
10. Battery Cell Damages Protection: DJI Pilot app shows warning message when damaged battery cell
is detected.
11. Battery Error History Browse the battery error history from the DJI Pilot app.
12. Sleep Mode: Sleep mode is entered after 20 minutes of inactivity to save power.
13. Communication: Battery voltage, capacity, current, and other relevant information is provided to the
aircraft’s to the main controller.
Refer to
Disclaimer
and
Intelligent Flight Battery Safety Guidelines
before use. Users take full
responsibility for all operations and usage.
Using the Battery
LED1
LED2
LED3
LED4
Power Button (Bulit-in LED)
Battery Level Indicators
Powering ON/OFF
Powering On: Press the Power Button once, then press again and hold for 2 seconds to power on. The
Power LED will turn red and the Battery Level Indicators will display the current battery level.
Powering Off: Press the Power Button once, then press again and hold for 2 seconds to power off.
2015 DJI. All Rights Reserved.
18
©

Phantom 3 Advanced User Manual
Low Temperature Notice:
1. Battery capacity is signicantly reduced when ying in low temperature environment (< 0°C ).
2. It is not recommended to use the battery in extremely low temperature (< -10°C) environment. Battery
voltage should reach to the appropriate level when using in the environment where temperature range
between minus 10°C to 5°C.
3. Stop ying when DJI Pilot app displays “Low Battery Level Warning” in low temperature environment.
4. Place the battery indoors to warm up the battery before using it in the low temperature environment.
5. To ensure the performance of the battery, keep the battery body temperature above 20°C.
In cold environments, insert the battery into the battery compartment and allow the aircraft to
warm up for approximately 1-2 minutes before taking off.
Checking the battery level
The Battery Level Indicators display how much remaining power the battery has. When the battery is
powered off, press the Power Button once. The Battery Level Indicators will light up to display the current
battery level. See below for details.
The Battery Level Indicators will also show the current battery level during charging and
discharging. The indicators are dened below.
: LED is on. : LED is ashing.
: LED is off.
Battery Level
LED1 LED2 LED3 LED4 Battery Level
87.5%~100%
75%~87.5%
62.5%~75%
50%~62.5%
37.5%~50%
25%~37.5%
12.5%~25%
0%~12.5%
=0%
Aircraft
Battery life
The battery life indicates how many more times the battery can be discharged and recharged before
it must be replaced. When the battery is powered off, press and hold the Power Button for 5 seconds
to check the battery life. The Battery Level Indicators will light up and/or blink as described below for 2
seconds:
2015 DJI. All Rights Reserved.
©
19
 Loading...