

Page 1

Remote Control Features
MODE: The MODE switch is used for toggling SmoothTrack.
1. In Position 1, Smooth Track is off. Remote control is freely position pan
axis stops and holds the last input position of the pan axis control stick.
2. In Position 2, Smooth Track is on. Remote control is freely position pan
axis stops and holds the last input position of the pan axis control stick.
3. In Position 3, Smooth Track is on. The gimbal will always point and reset
pan to the forward facing direction once the pan axis control stick is let go.
Position 1
Position 2
Position3
FUNCTION: 1. The FUNCTION switch is used to select the SmoothTrack speed.
User Manual
Ronin-M
-Free, SmoothTrack Off
-Free, SmoothTrack On
-Reset to Center, SmoothTrack On
There are 3 possible selections: Fast, Normal and Slow. The value
of each speed can be preset in the App or PC Assistant.
Position 1
2. Activating Motor Kill Switch
Quickly ip the FUNCTION Switch between Position 1 and Position
3 consecutively for 3 times and you will activate the motor kill
switch. Do the same again to turn off the motor kill switch. Prior to reactivating the gimbal motors, be sure to position the camera in the
standard operating position. The motor kill switch is useful in case
the gimbal operator runs into an issue or you need to make a quick
mechanical adjustment to the gimbal or camera setup.
Left Stick: Horizontal movements on the left stick control the Roll axis. Vertical
movements have no denition.
Right Stick: Horizontal
movements on the right stick
control the Pan axis.
These stick settings can be customized in the DJI Ronin-M Assistant App or PC Assistant.
-Fast Position 2 -Normal Position3 -Slow
Right Stick:Vertical movements
on the right stick control the Tilt
axis.
Adding3rdpartytransmitter/receiver
Ronin-M supports 3rd party transmitters/receivers, such as D-Bus or PPM. Connect the transmitter
through the port (refer to Page 8 for the location of D-Bus/PPM port).
2015 DJI. All Rights Reserved.
©
31
Page 2
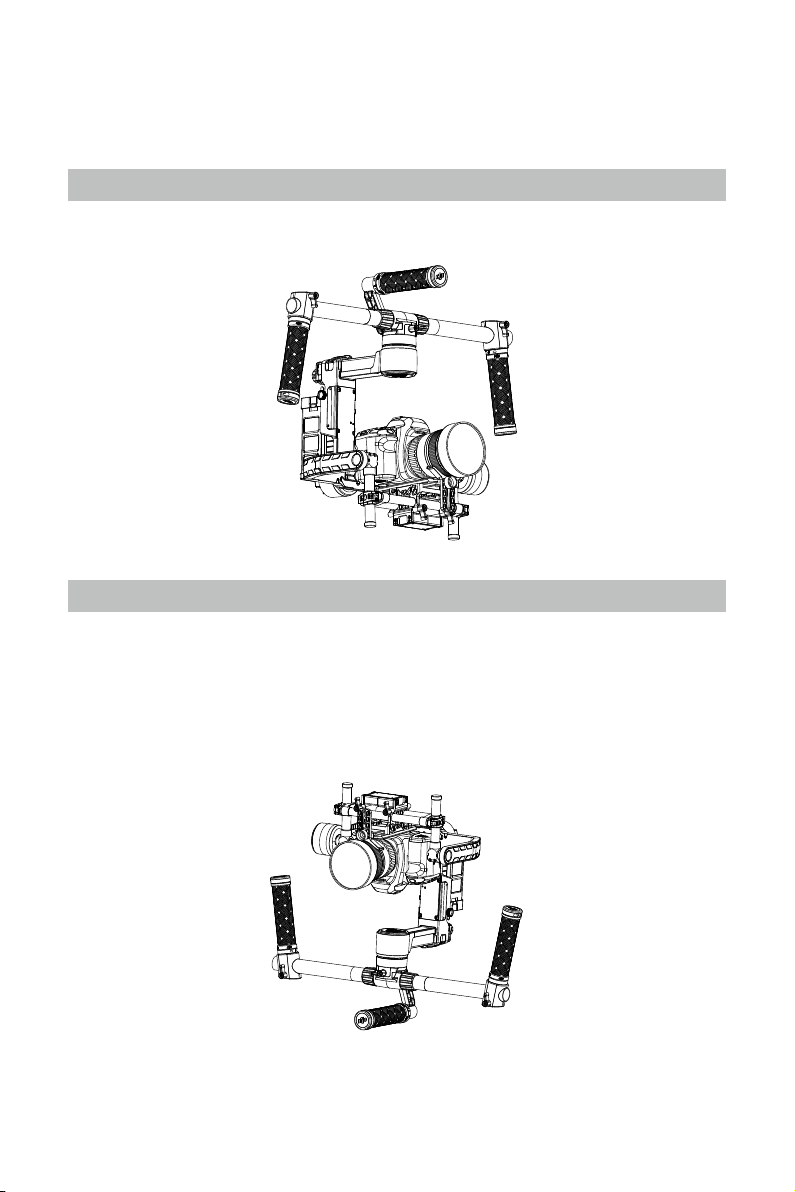
Operation Modes
There are three operation modes in the Ronin-M: underslung mode, upright mode and briefcase
mode.
Underslung Mode
Underslung mode is the standard, default mode. It can be used without any user input.
Upright Mode
Flip the gimbal forward 180 degrees and it will automatically change to upright mode. Alternatively,
you can set the gimbal into upright mode before turning it on. Upright mode is ideal for car mounts
or other high camera positions, as it allows you to shoot higher and/or at eye level. Upright mode can
be used without any user input. Do not ip the gimbal over sideways going left or right to convert to
upright mode.
2015 DJI. All Rights Reserved.
32
©
Page 3
User Manual
Ronin-M
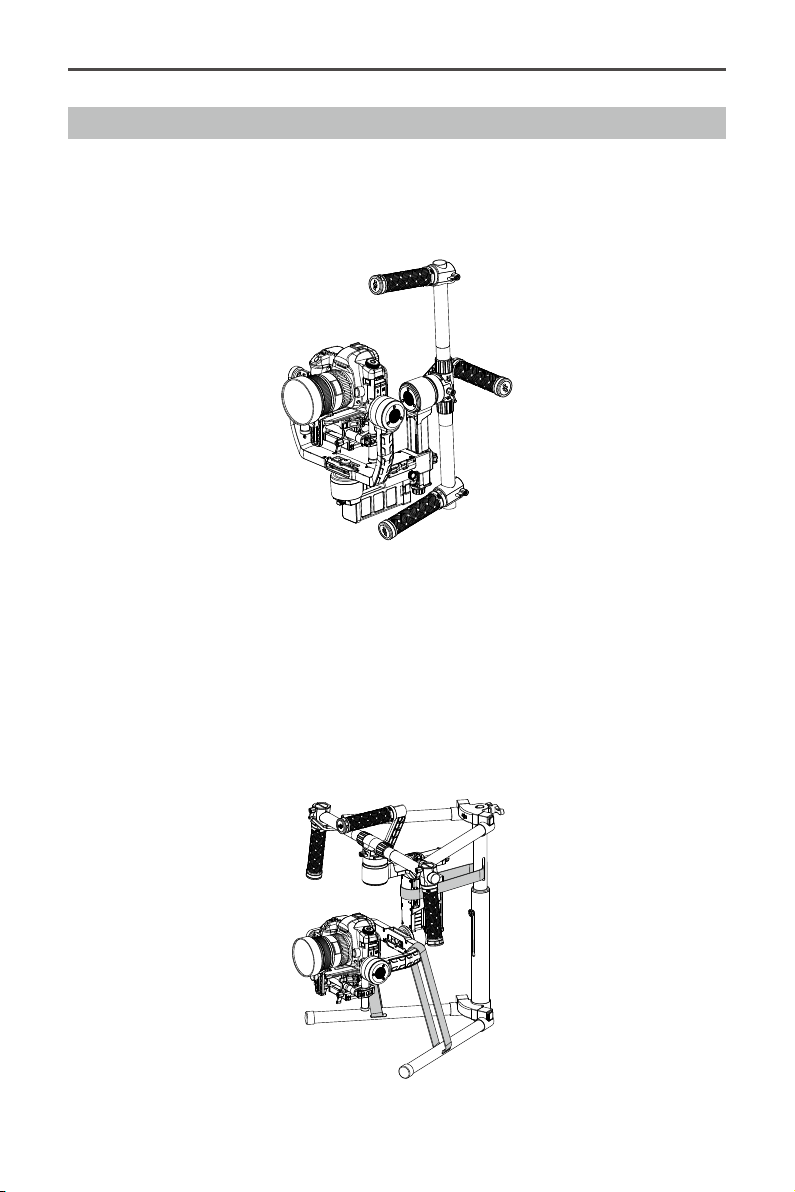
Briefcase Mode
Briefcase mode allows you to hold the Ronin-M in a slim prole close to your body. To enter briefcase
mode, tilt the gimbal on the roll axis 90 degrees to the left or right. You may turn briefcase mode off in
the gimbal app, in which case the Ronin-M will never automatically transform into briefcase mode. In
briefcase mode, the remote control does not have pan, tilt, or roll control of the Ronin-M.
Maintenance
The gure to the right shows the proper way to transport the Ronin-M with the stand. Using the hook-
and-loop straps, lock the Ronin-M gimbal in place as shown. Be sure to undo the straps prior to turning
the Ronin-M on!
Ronin-M is a precise machine, and it is not waterproof. Keep it away from sand and dust during usage.
After use, it is recommended to wipe the Ronin-M down with a soft dry cloth. Never spray any cleaning
liquids onto the Ronin-M.
2015 DJI. All Rights Reserved.
©
33
Page 4

Troubleshooting
NO. The Problem What to Do
1 Motors appear to be weak After camera balancing, launch the Assistant App or the PC/
MAC Assistant and start the Auto Tune Stability. Wait for
the process to complete and the stiffness settings will be
populated on the screen.
2 If after tapping the Auto
Tune Stability button and
the gimbal is still vibrating
3 Pan axis seems off center Go into the Assistant App or PC/MAC Assistant, tap/click the
4 Ronin seems to be drifting Place the Ronin-M on the tuning stand and in the Assistant App
5 SmoothTrack doesn’t work (1) Turn on the Remote control and be sure the MODE switch
6 Motors seem to shutoff
automatically
7 Gimbal shuts off and
doesn’t come back on
8 Forgot the Bluetooth
password
9 Footage appears to
wobble side to side or up
and down
(1) Check to make sure all knobs are very tight. Including the
pan motor knob.
(2) Check to make sure the camera securing screw is tight.
Push on the camera plate to make sure it is not loose and
sliding in the camera mount.
(3) Try decreasing the stiffness of the each axis. You should
be able to tell if there is one particular axis being affected
by looking at the "power" of the axes.
Calibrate Center and follow the on-screen instructions.
or the PC/MAC Assistant, tap/click the Calibrate System button.
Let the process complete before picking up the Ronin-M.
is not at Position 1 (the uppermost position).
(2) SmoothTrack is turned off in the Assistant App or the PC/
MAC Assistant software.
(3) The SmoothTrack Deadband is turned up too high.
Reduce the Deadband size in the SmoothTrack Menu.
Check your camera balance. If the power indicated in the
Gimbal Motors Menu indicates 10 or more on any of the 3
axes, please rebalance your camera.
Power cycle the gimbal. This is a motor protection algorithm
that’s built into the Ronin-M to save its own electronic
components. If any particular motor goes into a self-protection
mode (motor shuts off) 6 times within a 1 minute period, the
Ronin-M will shut off power to the motors and will not come
back to life unless power cycled.
Connect Ronin-M to the PC/MAC Assistant and click the
"Reset Password" button to reset your password.
SmoothTrack speed is too high or SmoothTrack deadband
is too low. Decrease the SmoothTrack speed or increase the
deadband.
2015 DJI. All Rights Reserved.
34
©
Page 5

Specication
General
Built-In Functions Three Operation Modes
Underslung Mode
Upright Mode
Briefcase Mode
Built-in independent IMU module
DJI Specialized Gimbal Drive
Motors with Encoders
Peripheral
Camera Tray Dimensions Maximum depth at center of mass on camera base plate: 120mm
Maximum height measured from top of camera base plate:
195mm Maximum width: 160mm
Accessory Power Connections 12V regulated P-Tap x 2, USB 500mW x 1, DJI Lightbridge x 1
GCU Input Power 4S Ronin-M Battery
Connections 2.4GHz Remote Control, Bluetooth 4.0, USB 2.0
PC/MAC Assistant Software
Requirements
Mobile Assistant Software
Requirements
Windows XP SP3; Windows 7; Windows 8 (32 or 64 bit); Mac OS X
10.9 or above
iOS version 6.1 or above Mobile Device; Android 4.3 or above
Mechanical & Electrical Characteristics
Working Current Static current: 300mA (@16V)
Dynamic current: 600mA (@16V)
Locked motor current: Max 10A (@16V)
Operating Temperature -15oC ~ 50oC (-5oF ~ 120oF)
Weight 2.3kg (5.07lbs) fully loaded with handlebar
Gimbal Dimensions 500mm(W) x 210mm (D) x 420mm(H)
Working Performance
Load Weight Capacity
(Reference Value)
Control Angle Accuracy 0.02°
Maximum Control Rotation
Speed
Mechanical Endpoint Range Pan axis control: 360°
Controlled Rotation Range Pan axis control: 360
2.5kg (5.5lbs)
Pan axis: 90°/sec
Tilt axis: 100°/sec
Roll axis: 30°/sec
Tilt axis control: Up 105o to Down 165°
Roll axis control: ± 110°
°
Tilt axis control: Up 105° to Down 165
Roll axis control: ± 25
°
Bluetooth Module
USB Connection
2.4GHz Receiver
Temperature Sensor
DJI Advanced 32-Bit DSP Processor
D-Bus/PPM Receiver Supported
°
2015 DJI. All Rights Reserved.
©
35
Page 6

User manual is subject to change without prior notice.
You may visit DJI ofcal website to obtain the latest version of user manual.
http://www.dji.com/product/ronin-m/download
2015 DJI. All Rights Reserved.
©
Page 7

FCC statements:
This device complies with part 15 of the FCC rules. Operation is subject to the
following two conditions: (1) this device may not cause harmful interference, and (2)
this device must accept any interference received, including interference that may
cause undesired operation.
NOTE: The manufacturer is not responsible for any radio or TV interference caused
by unauthorized modifications or changes to this equipment. Such modifications or
changes could void the user’s authority to operate the equipment.
NOTE: This equipment has been tested and found to comply with the limits for a
Class B digital device, pursuant to part 15 of the FCC Rules. These limits are designed
to provide reasonable protection against harmful interference in a residential
installation. This equipment generates uses and can radiate radio frequency energy
and, if not installed and used in accordance with the instructions, may cause harmful
interference to radio communications. However, there is no guarantee that
interference will not occur in a particular installation. If this equipment does cause
harmful interference to radio or television reception, which can be determined by
turning the equipment off and on, the user is encouraged to try to correct the
interference by one or more of the following measures:
‐ Reorient or relocate the receiving antenna.
‐ Increase the separation between the equipment and receiver.
‐Connect the equipment into an outlet on a circuit different from that to which the
receiver is connected.
‐Consult the dealer or an experienced radio/TV technician for help.
This device complies with Industry Canada license‐exempt RSS standard(s).
Operation is subject to the following two conditions:
(1) this device may not cause interference, and
(2) this device must accept any interference, including interference that may
cause undesired operation of the device.
Cet appareil est conforme avec Industrie Canada RSS exemptes de licence standard(s).
Son fonctionnement est soumis aux deux conditions suivantes:
(1) cet appareil ne peut pas provoquer d'interférences, et
(2) cet appareil doit accepter toute interférence, y compris celles pouvant causer un
mauvais fonctionnement de l'appareil.
The output power of this device is less than 20mW.The SAR test is not required.
 Loading...