

Page 1
Page 2

1
WELCOME
Welcome to Sytech! Thank you for purchasing the Tower Speaker with
Bluetooth and CD player SY-X255BTCD. Please read this manual
carefully before operating your product and pay close attention to the
precautions which are mentioned below Store this user manual in a
safe place for future reference.
CONTENTS
SAFETY INSTRUCTIONS........................................................................................ 2
DESCRIPTION OF PARTS....................................................................................... 4
REMOTE CONTROL & INSTALLATION.............................................................5
GENERAL OPERATION...........................................................................................6
BLUETOOTH/NFC /USB OPERATION.............................................................. 8
AUDIO/FM OPERATION....................................................................................... 9
TROUBLE SHOOTING...........................................................................................10
SPECIFICATIONS................................................................................................... 11
ACCESSORIES
* Tower Speaker Unit
* Tower Base Plate and Screw to Attach the Unit
* 3.5mm-RCA Audio Cable
* User Manual Remote Control Power Cable
* Screws & Reinforcing bars
Page 3
2
SAFETY INSTRUCTION
1.
Read these instructions - All the safety and operating instructions should
read before this product is operated.
2. Keep these instructions - The safety and operating instructions should be
retained for future reference.
3. Heed all warning - All warnings on the appliance and in the operating
instructions should be adhered to.
4. Follow all instruction - All operating and use instructions should be
followed.
5. Do not use this apparatus near water - The appliance should not be used
near water or moisture - for example, in a wet basement or near a
swimming pool, and the like.
6. Clean only with a damp cloth.
7. Do not block any of the ventilation openings, install in accordance with
the manufacturer’s instructions.
8. Do not install near any heat sources such as radiators, heat registers,
stoves, or other apparatus (including amplifiers) that produce heat.
9. Do not defeat the safety purpose of the polarized or grounding-type
plug has two blades with one wider than the other. A grounding prong.
The wide blade or the third prong are provided for your safety. When
the provided plug does not fit into your outlet, consult an electrician for
replacement of the obsolete outlet.
10. Protect the power cord from being walked on or pinched particularly at
plugs, convenience receptacles, and the point where they exit from the
apparatus.
11. Only use attachments/accessories specified by the manufacturer.
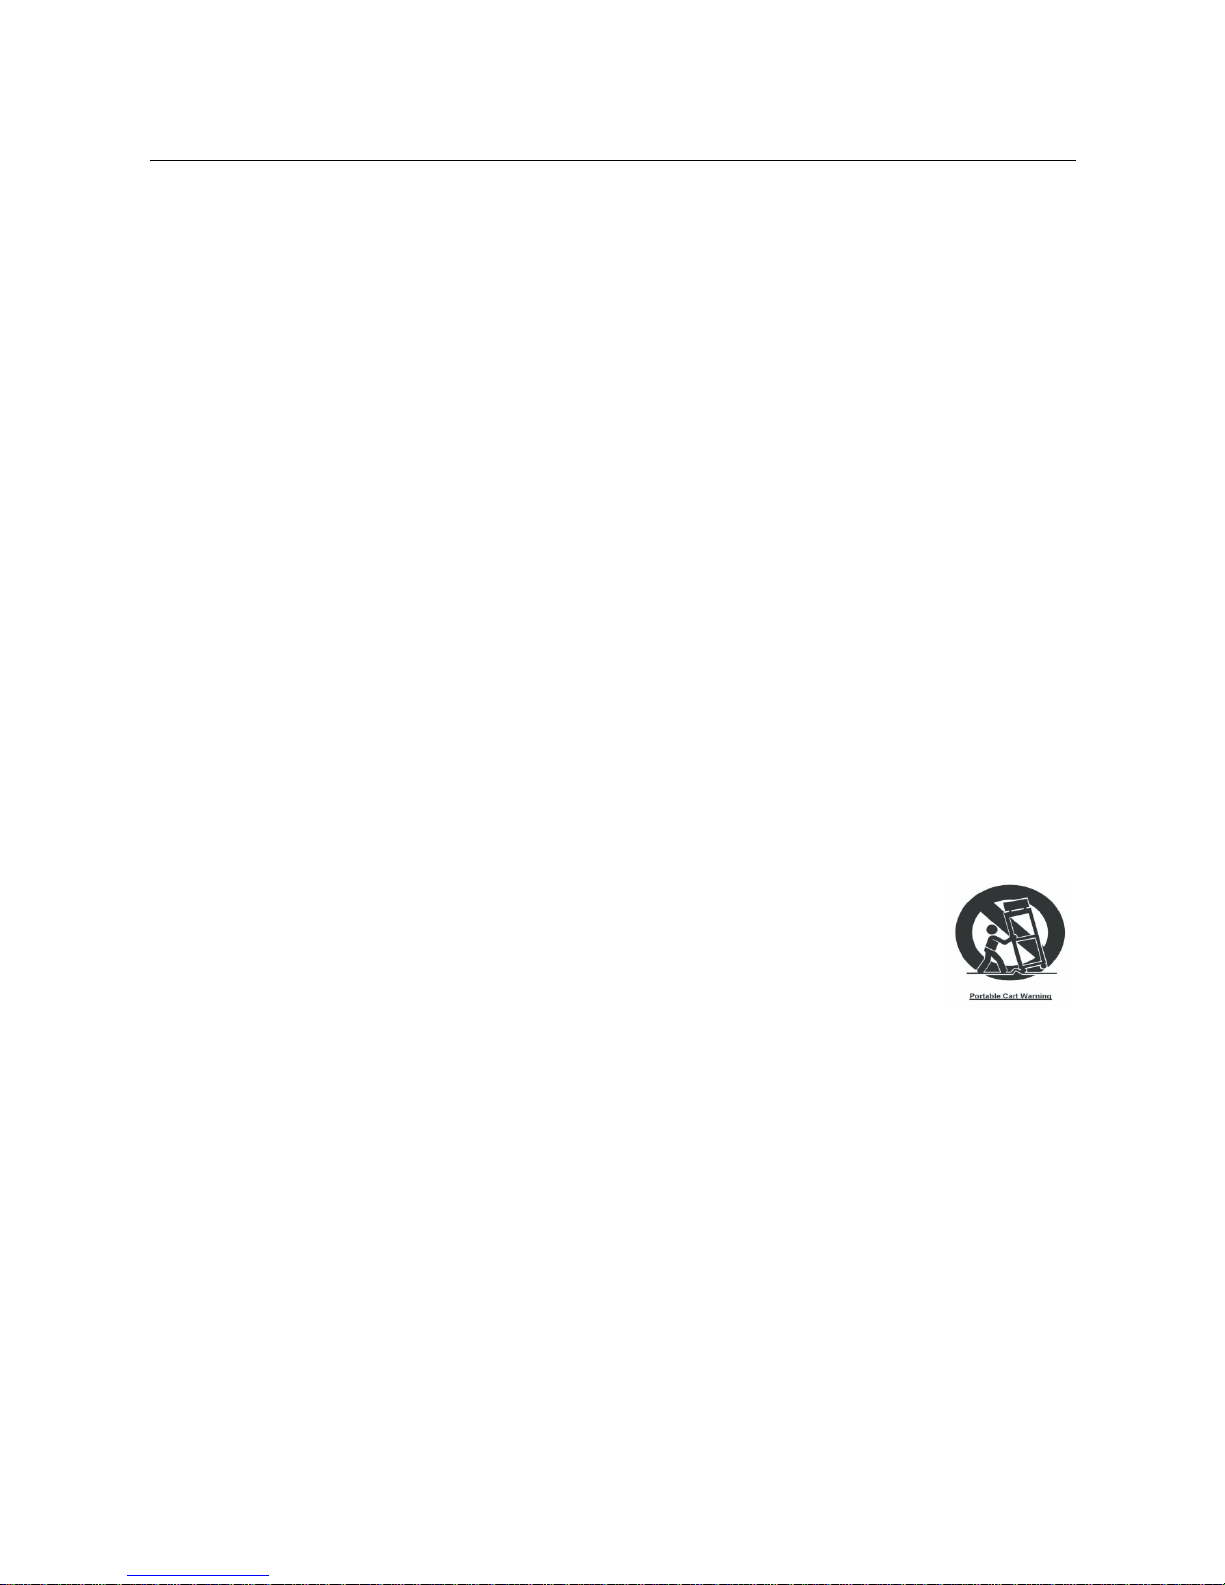
12. Use only with a cart, stand, tripod, bracket, or table specified
by the manufacturer, or sold with the apparatus. When a cart
is used, use caution when moving the cart/apparatus
combination to avoid injury from tip-over.
13. Unplug the apparatus during lightning storms or when unused for long
periods of time.
14. Refer all serving to qualified service personnel. Servicing is required
when the apparatus has been damaged in any way, such as powersupply cord or plug is damaged, liquid has been spilled or objects have
fallen into the apparatus, the apparatus has been exposed to rain or
moisture.
15. Please keep the unit in a good ventilation environment.
16. These servicing instructions are for use by qualified service personnel
only. To reduce the risk of electric shock, do not perform any servicing
other than that contained in the operating instructions unless you are
qualified to do so.
Page 4
3
17. The MAINS PLUG is used as disconnect device, the disconnect
device shall remain readily operable.
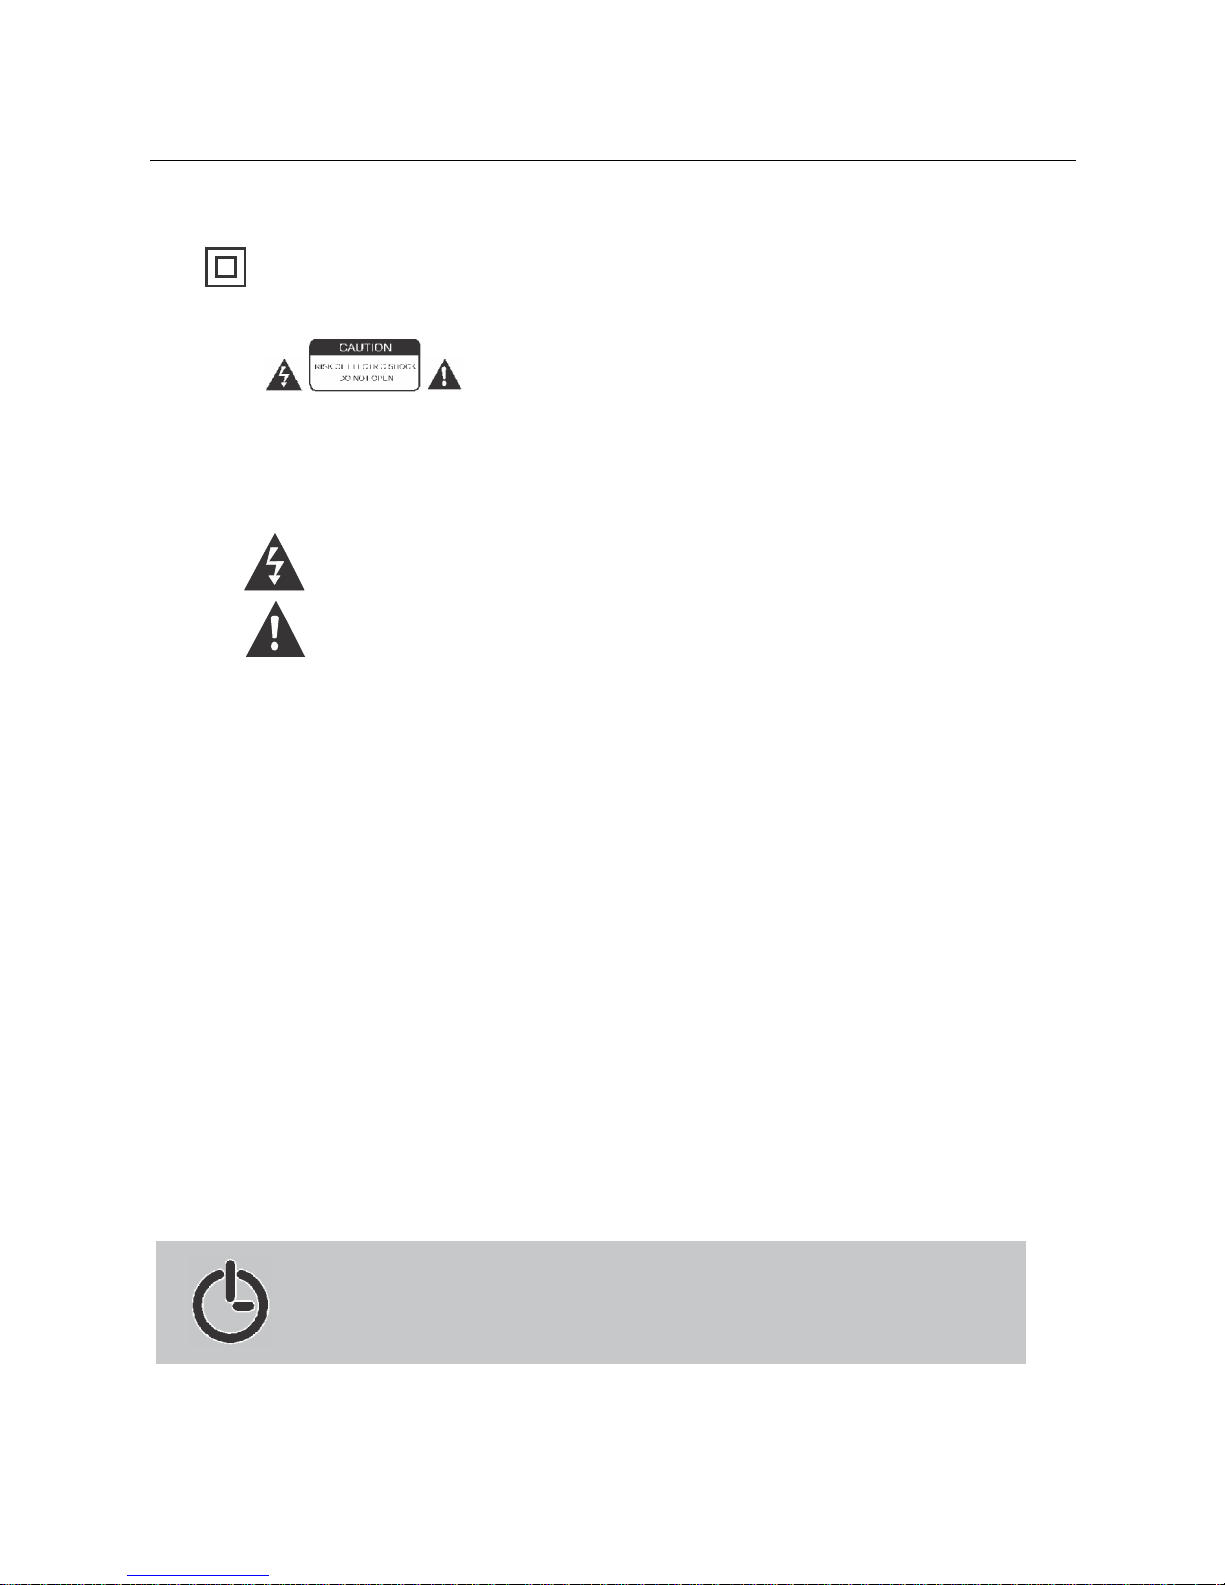
18. This equipment is a Class II or double insulated electrical
appliance. It has been designed in such a way that it does not
require a safety connection to electrical earth.
19. This lightning flash with arrowhead symbol within an equilateral
triangle is intended to alert the user to
the presences of non-insulated
dangerous voltage
within the product’s enclosure that may be of
sufficient magnitude to constitute a risk of electric shock.
- To reduce the risk of electric shock, do not remove cover(or
back) as there are no user serviceable parts inside. Refer
servicing to qualified personnel.
- To exclamation point within an equilateral triangle is
intended to alert the user to the presence of important operating and
maintenance in the literature accompanying the appliance.
20. The batteries in remote control shall not be exposed or excessive
heat such as sunshine, fire or the like.
21. The apparatus shall not be exposed to dripping or slashing and that
no subjects filled with liquids, such as vases, shall be placed on the
apparatus.
22. To reduce the risk of fire or electric shock, do not expose this
apparatus to rain or moisture.
This product complies with the European Commission on the Eco-dsign
Directive and its implementing Regulations-Energy related products. 15
minutes (approx.)later without any input (except in FM mode), the system
will automatically enter standby mode. Follow the instruction manual to
assume the operation.
NOTE: This unit is designed to enter STANDBY mode
automatically after 15 MINUTES(approximately)of inactivity.
Press the STANDBY button to wake the unit.
SAFETY INSTRUCTION
ERP II NOTE (ENERGY RELATED PRODUCTS)
Page 5
4
DESCRIPTION OF PARTS
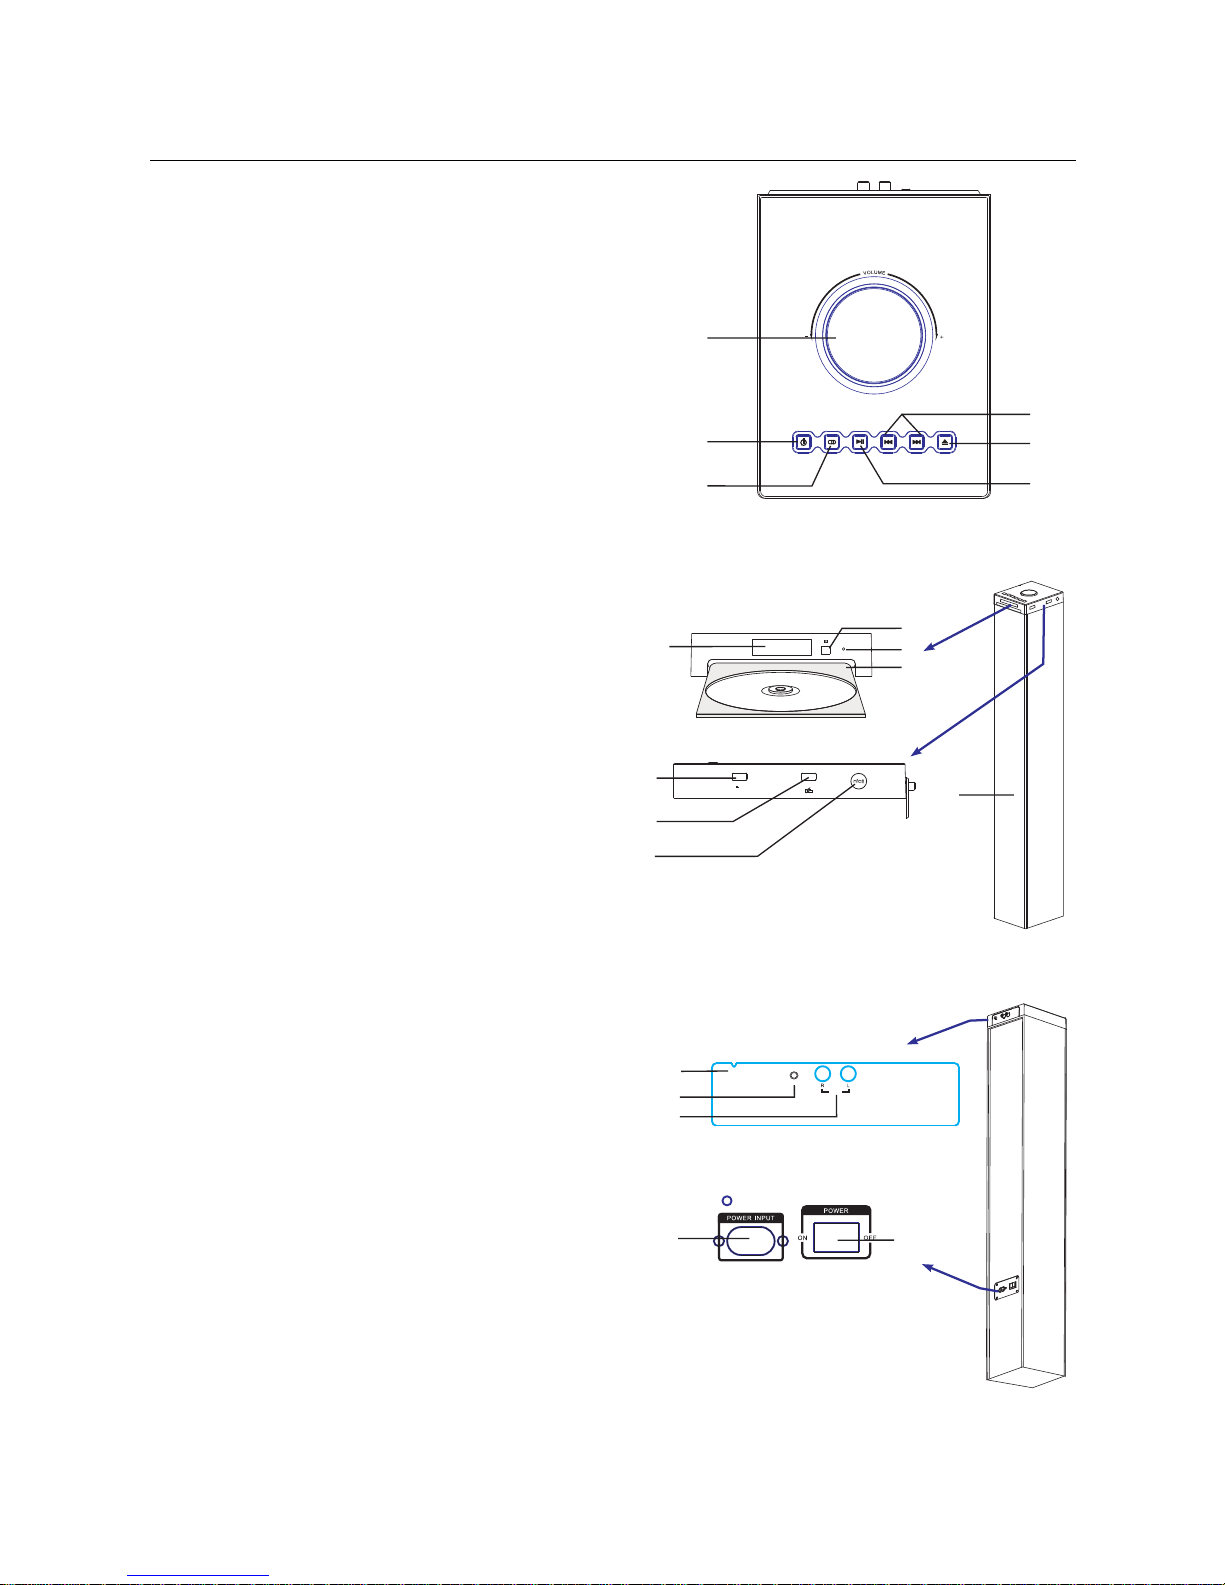
TOP PANEL
1. Volume+/-
2. Standby
3. Mode
4. Previous/Next
5. Eject (Open or close the disc tray)
6. Play/Pause
FRONT
1. Display screen
2. Remote sensor
3. Indicator
4. Disc tray
5. USB port for playing MP3
6. USB port for charging
7. NFC sensor
8. Speakers
BACK PANEL
1. FM antenna
2. 3.5mm Aux in Jack
3. R/L RCA Jack
4. Power input
5. Power switch
5V 500mA
USB
5V1A FOR
CHARGE
FM
AUX
4
5
2
3
1
3
2
8
1
4
2
5
1
6
4
LINE IN
5
6
7
3
Page 6
5
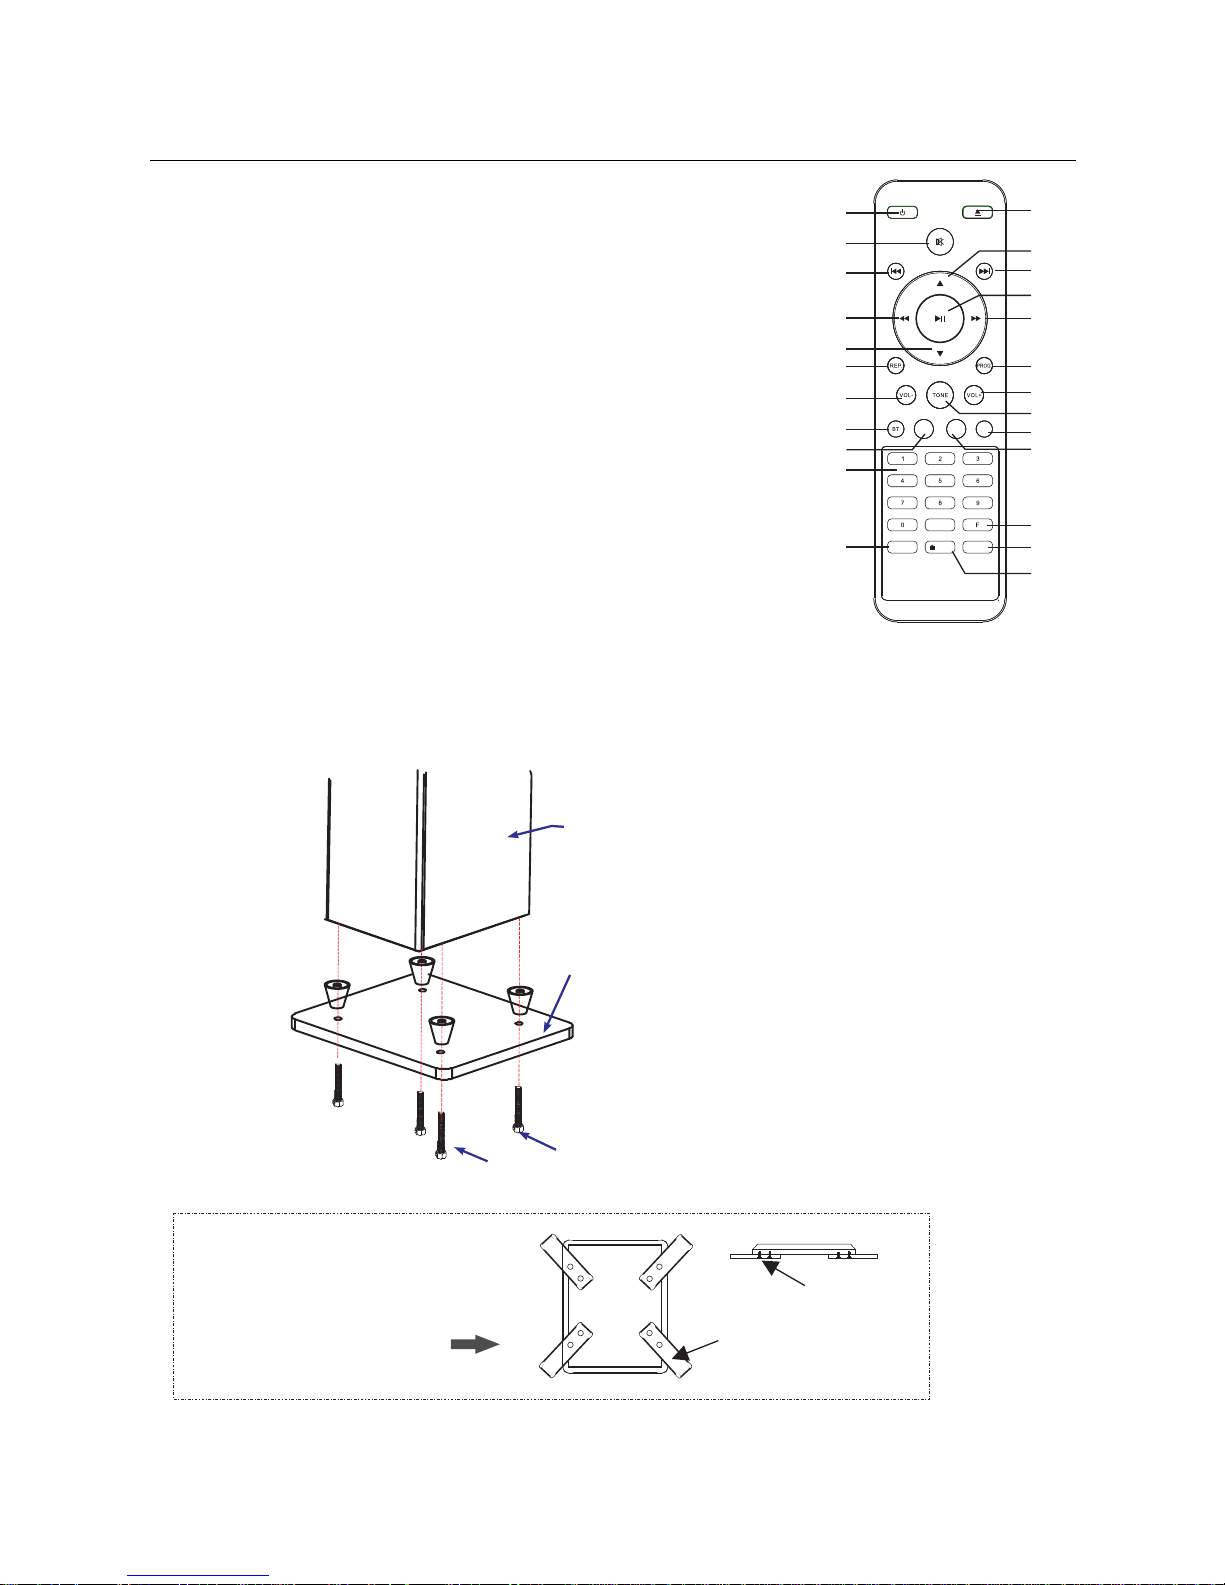
REMOTE CONTROL
1. Standby
2. Mute
3. Previous
4. Fast rewind
5. Down
6. Repeat
7. Volume-
8. Bluetooth
9. CD/USB
10. Numbers
11. Search
13. Up
14. Next
15. Play/Pause
16. Fast forward
17. Program
18. Volume+
19. Tone
20. FM
21. AUX 1/2
22. Frequency
23. Mono/Stereo
12. Eject
24. Save
INSTALLATION
SEARCH
MO/ST
10+
SAVE
22
23
24
11
CD/USB
3
4
5
6
1
2
14
17
18
19
12
13
16
15
20
21
9
7
8
10
AUX1/2
FM
Base plate
The tower
Fix the Screws
Please install the machine as below (do not connect to power):
Screws
Reinforcing bars
To stand the unit more stable,
use the provided Screws to
mount the Reinforcing bars on
the bottom of the Tower Base
Plate. Check the diagram
for installation method!
Page 7

6
GENERAL OPERATION
STANDBY MODE
Press the STANDBY button to wake up the unit or turn to standby mode.
SELECT MODE
Press the MODE button to select the mode: CD, USB, FM, Bluetooth,
or Aux1/2. Press the CD/USB button on remote to select CD or USB mode,
press the AUX1/2 button on the remote to select Aud-1 or Aud-2 mode.
VOLUME SETTING
Press the VOLUME+/- buttons or rotate the volume knob to adjust the
volume.
MUTE THE SOUND
Press the MUTE button on remote control to mute the sound. Press
again or press the VOLUME+/- buttons to resume the volume level.
SKIP TRACKS
Press the PREVIOUS /NEXT button on remote control or on front
panel to skip to the previous or next track.
PLAY/PAUSE
Press the PLAY/PAUSE button to pause the playback, press again
to resume.
ACCELERATE THE MUSIC
In USB or CD mode, press the / button on remote control to forward
or reward the music. Press repeatedly to resume the normal speed.
REPEAT MODE
Press the REP. button on remote control to repeat the song by once, press
again to repeat all songs, press the third time to resume normal.
PROGRAM
In CD mode, press the PROG. button on remote control to enter the program
setting, “P :0100", use the NUMBER buttons to select the song you want to
program, then press the button to confirm and start playing the music in
the programmed order.
Page 8

7
TONE ADJUSTMENT
Press TONE button on the remote control to select bass and treble.
When the display screen shows “TRB”, use VOL+/- buttons to adjust the
effect of treble.
When the display screen shows “BS”, use VOL+/- buttons to adjust the
effect of bass.
MO/ST BUTTON
In FM mode, press MO/ST button switch from stereo mode to mono mode.
Press again to switch back to stereo mode.
SAVE BUTTON
In FM mode, press SAVE button to save the current frequency to a preset
position.
GENERAL OPERATION
Page 9
8
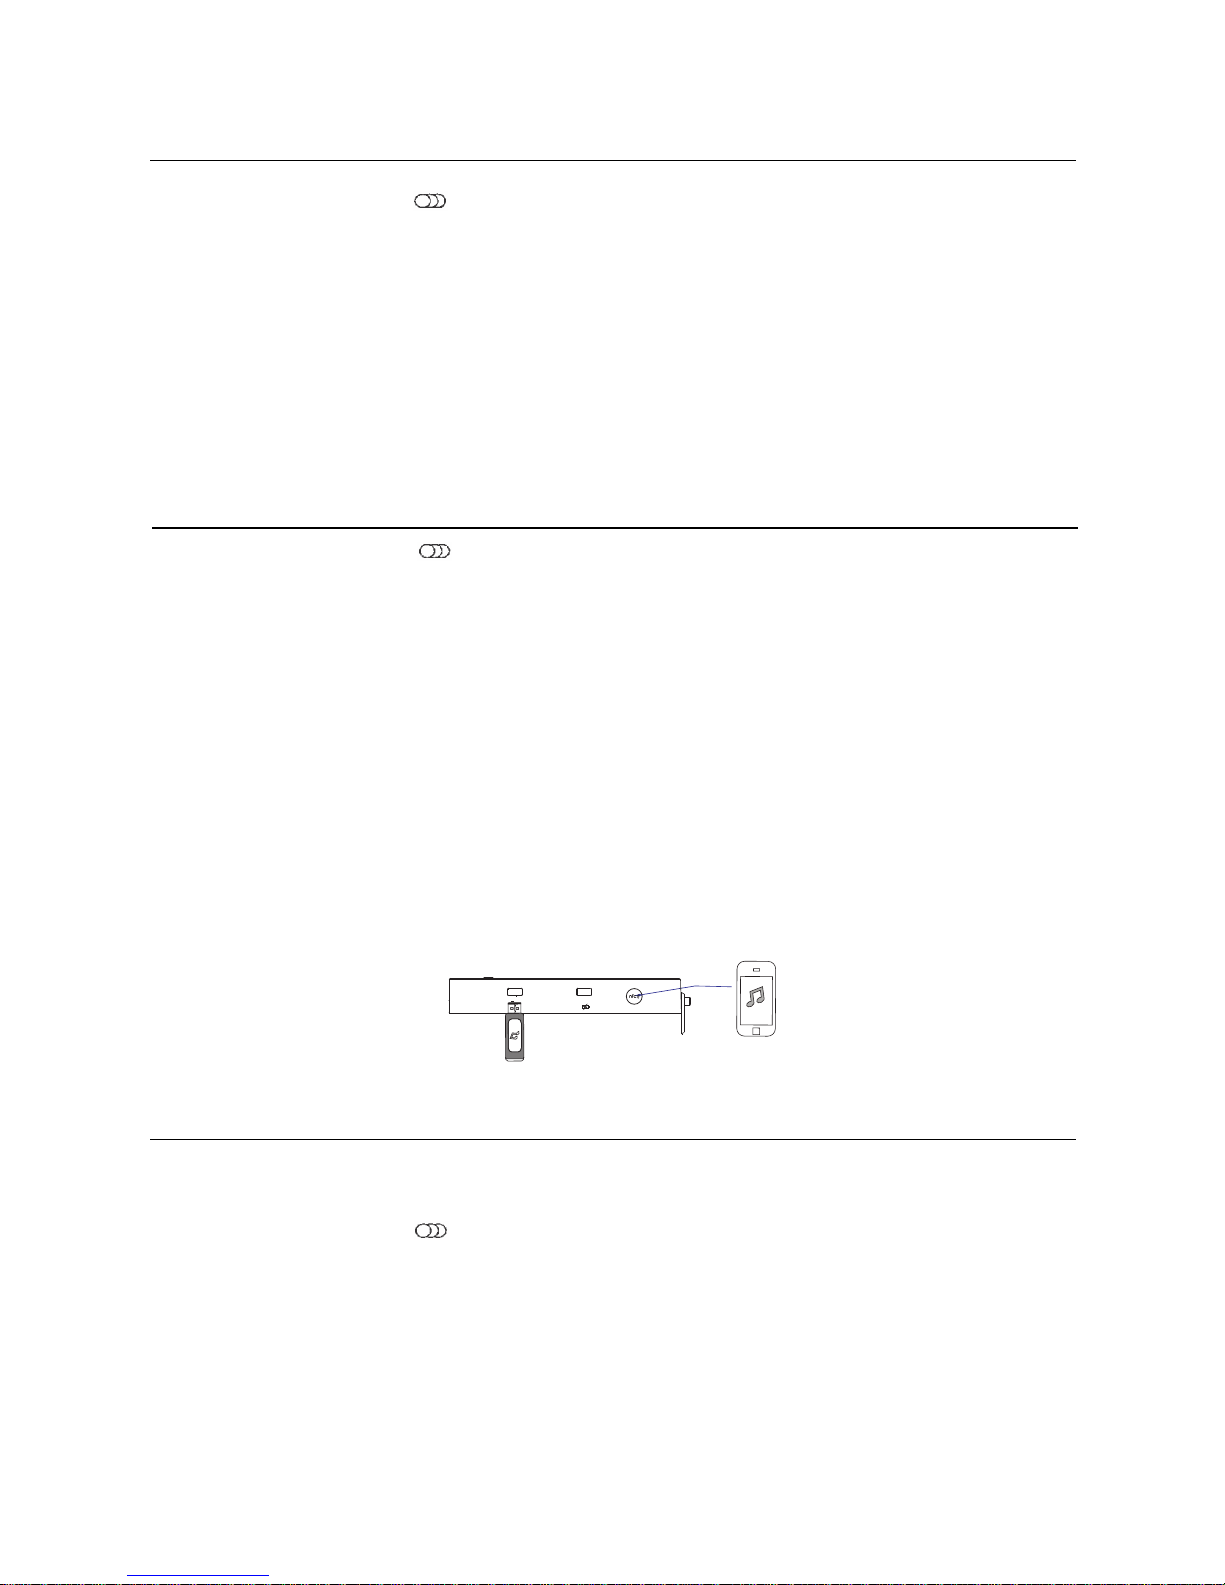
BLUETOOTH OPERATION
1. Press the MODE button to switch to the Bluetooth mode.
2. The previous paired device will connect to speaker tower
automatically when each time changing to Bluetooth mode.
3. Turn on the Bluetooth device (e.g. phone) and enter the Bluetooth
search interface.
4. Search “SY-X255BTCD” and pair it, input the password "0000" if
necessary. If paired, the display will blink steadily.
5. If it still doesn't work, reset the Bluetooth and follow above steps again.
NFC OPERATION
1. Press the MODE button to enter the Bluetooth mode.
2. Place the back of phone (with NFC function) on the position of word
“NFC” on the front panel of the unit for 3 seconds, the Bluetooth
function of the phone is activated automatically.
3. When the indicator lights steadily and you can hear an audible signal,
they are paired.
4. To disconnect NFC Bluetooth connection, place the back of the phone on
the position of the word “NFC” on the front panel of the unit. When
there comes an audible signal, they are disconnected.
5. Some devices of Android system 4.0 or below need to install the
NFC.apk to enable the NFC function. Some devices may be in a weak
compatibility for NFC function, which may relate to the NFC software.
USB OPERATION
1.
Power on the unit and insert a USB Flash Drive (not supplied) into the
USB Port, ensuring the plug is fully inserted at the correct way.
2. Press the MODE button to switch to the USB mode.
3. The tower will play music from the USB automatically.
4. The maximum size of Flash Drive that can be connected is 32GB max.
5. The supported format for USB play is MP3.
6. The 2nd USB port charges electronic devices through 5V, 1000mA. (1A
only)
5V 500mA
Phone with NFC
NFC sensor
USB
5V1A FOR
CHARGE
Page 10
9
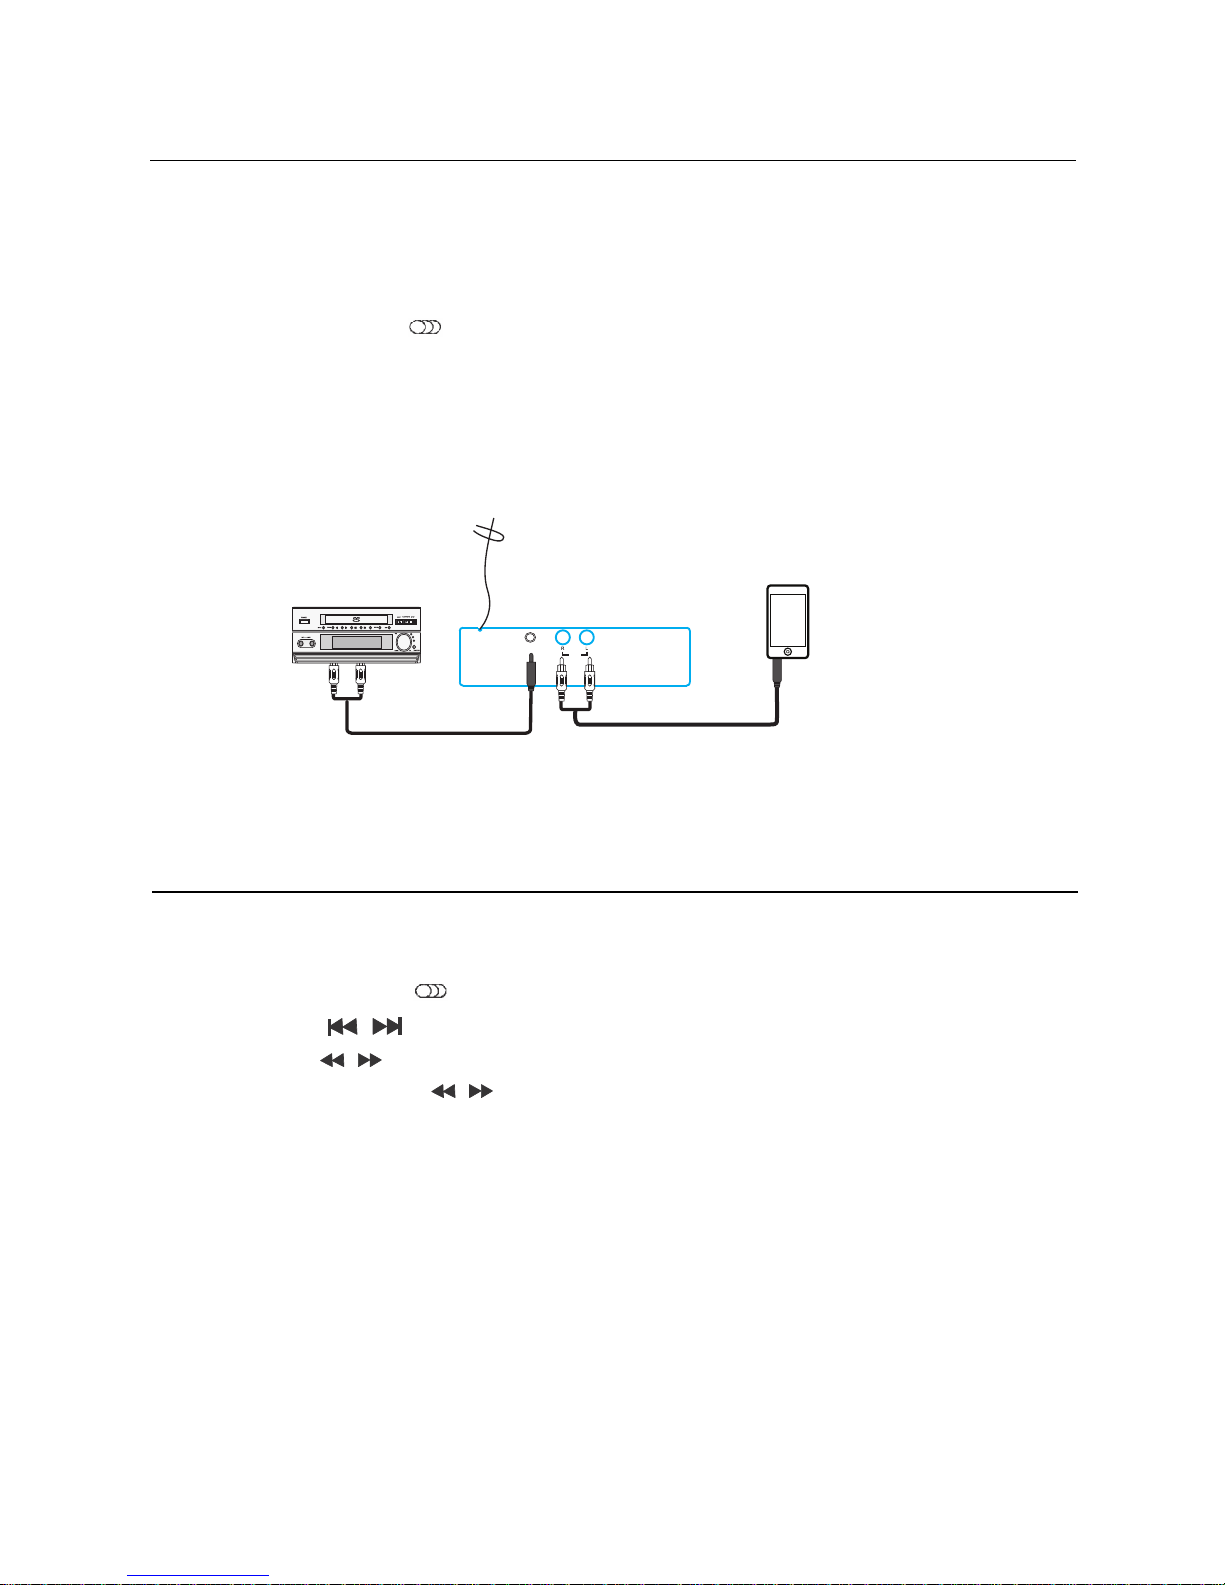
AUDIO OPERATION
Use the 3.5mm-RCA Audio cable (included) to connect the unit with Disc
player/MP3 player/phone/computer or other music device.
1. Connect one end of the Audio cable to the R/L Audio-in Jack on the
back panel of the unit, and connect the other end to the MP3 player.
2. Press the MODE button on the top panel or press the AUX1/2 button
on remote to switch to Aux in mode (Aud-1/ Aud-2).
3. Press the AUX1/2 button to enter the Aud-1 mode and start playback
by the device connected to the R/L RCA Jack.
4. Press the AUX1/2 button to enter the Aud-2 mode and start playback
by the device connected to the 3.5mm Aux in Jack.
FM OPERATION
1. Adjust the FM antenna to get the best reception.
2. Press the MO/ST button to turn stereo on.
3. Press the MODE button to switch to the FM mode.
4. Press the / button to skip to the previous or next station.
5. Press the / button on remote to tune the frequency by 0.05MHz.
6. Press and hold the / button on remote to skip to strongest station.
7. Press the SEARCH button on the remote control to search the stations,
press again to stop searching.
8. Save (60) stations:
Press the NUMBER buttons to select the preset number, then press the F
button and input the frequency, at last press the SAVE button to save
the station. E.g. to save the 107.5MHz into preset 36. Press the NUMBER
button 10+, 6, then press F and input 1, 7, 5, 0, at last press the SAVE
button.
FM
AUX
AUX IN
MP3 player
Disc player
FM antenna
Page 11
10
TROUBLE SHOOTING
Before taking the unit to be repaired, please check the following table when a
problem occurs. Consult your dealer or service center if the problem cannot
be solved with the following information.
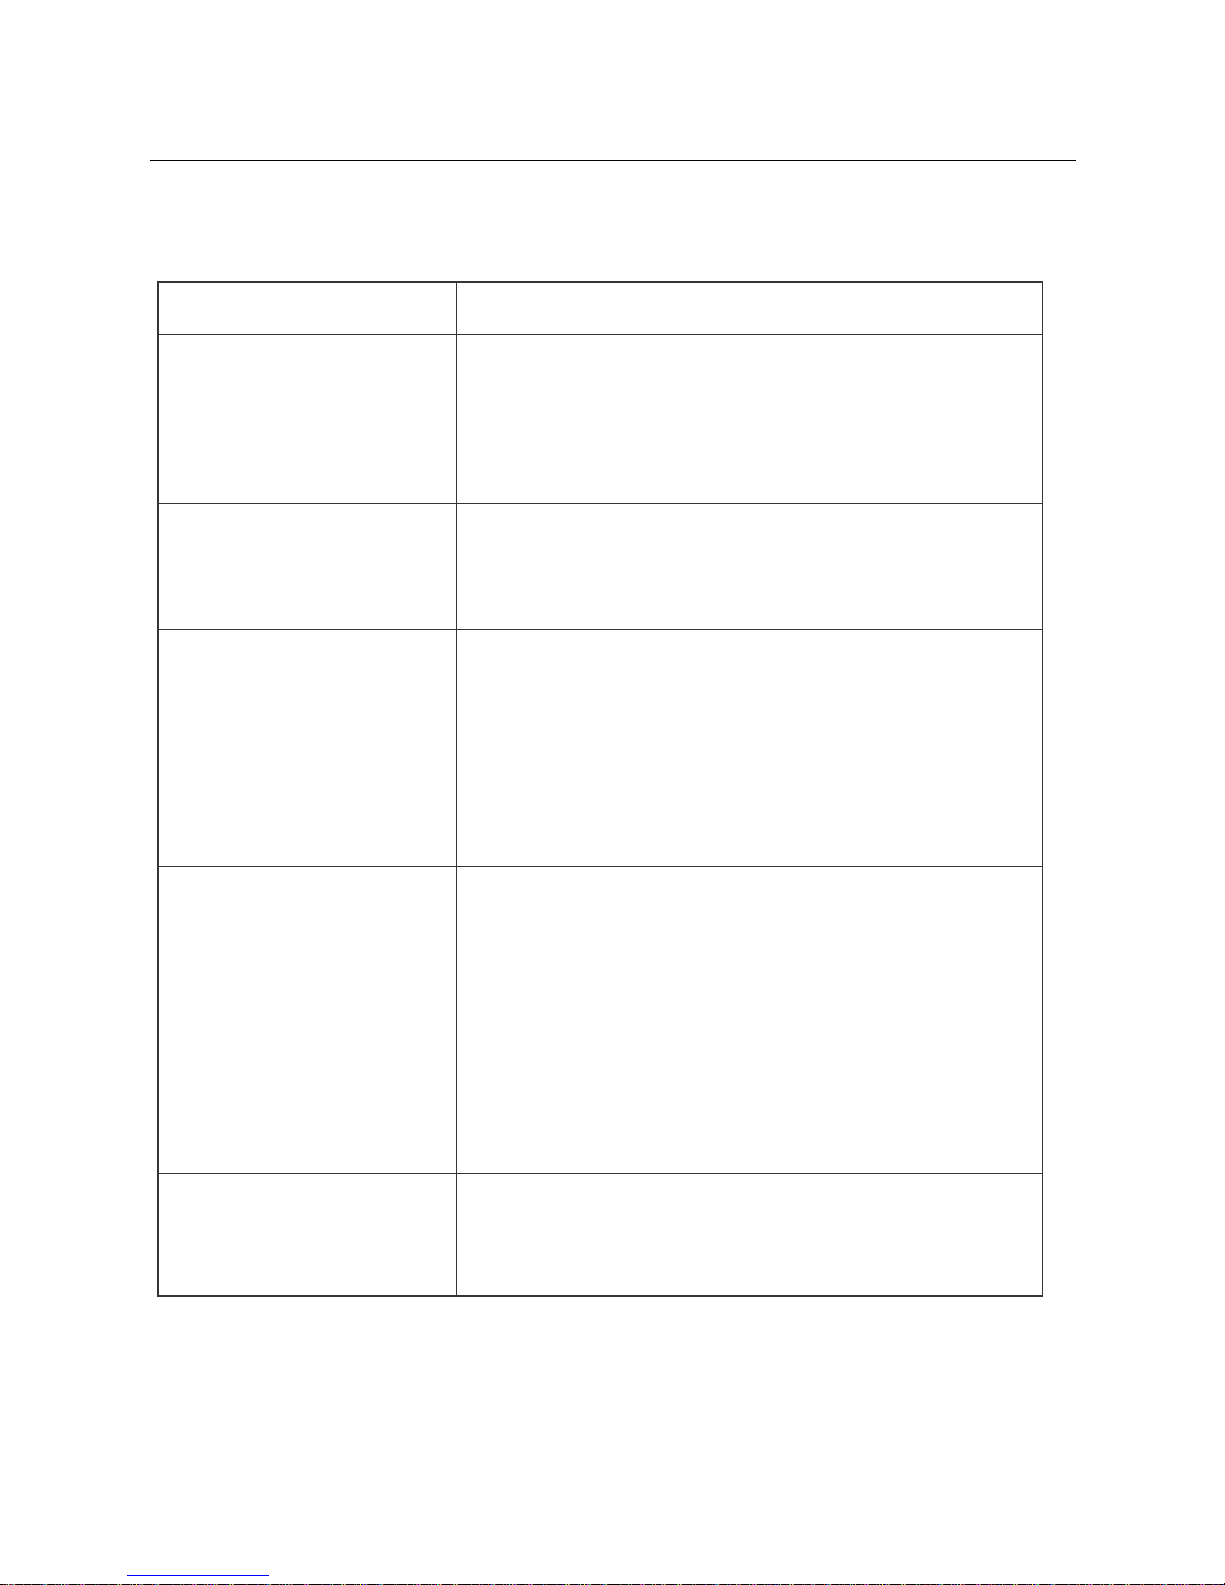
Problem Remedy
(Power)
System does not turn on
or does not respond to
the Remote control.
- Make sure AC power plug is connected to the
wall socket outlet properly and it has power.
- If this does not help, leave the unit unplugged
before seeking advice.
(Remote control)
No functions or short
range.
- Insert new batteries.
- Aim remote directly towards the remote
sensor located in center of speaker.
(Pairing the product)
Cannot pair successfully.
- Check whether the speaker is in Off or
searching mode.
- Check whether there are other Bluetooth
receivers around your Bluetooth device. Turn
them off to avoid any disturbance. Attempt to
pair again.
Cannot play properly,
the music plays
intermittently.
- Check whether the distance between the
speaker and your Bluetooth device is out of
its working distance (10m).
- Check whether there are some obstacles
blocking the communication between the
speaker and the Bluetooth device.
- Move the speaker or the Bluetooth device to
get the best reception.
The sound is distorted.
- Check the volume setting on both the
speaker and your Bluetooth device and
adjust the volume to a suitable level.
Page 12
11
SPECIFICATIONS
Power 220-240V~ 50/60Hz
Max power output
60W
FM frequency
87.5~108.0MHz
Remote control range
7 meters
Bluetooth range
10 meters
Bluetooth version
CSR4.0+EDR
Bluetooth profile A2DP, AVRCP
Transmission frequency
2.4GHz
USB charging power
5V---1A
USB capacity
32GB
Supported format
CD, CD-R, MP3
Input jack
3.5mm Aux in jack; R/L RCA jack; USB
Operation temperature
0°C to + 35°C
NOTE:
As a result of continual improvements, the design and specifications of the
product within differ slightly from the unit illustrated on the packaging.
Correct disposal of the old products
Please make yourself aware of the local collection system for electrical and
electronic products. Please act according to your local rules and do not
dispose of your old products with your normal household waste. Correct
disposal of your old product will help prevent potential negative
consequences for the environment and human health.
Page 13
12
DECLARATION OF CONFORMITY
Manufacturer Name: Satyatrade S. L.
Address: Pol.Ind.La Raya. C/ Guadalquivir, 2.
Camarma de Esteruelas, 28816 Madrid
Tel: 902 430 967
Fax: 91 8864285
NIF: B83254763
Manufacturing country: China
Description: Tower Speaker with Bluetooth and CD player
Sytech® SY-X255BTCD complies with the following directives:
CE Standard: Directive 2004/108/EC
R&TTE Standard: Directive 1999/5/EC
ROHS Standard: Directive 2011/65/EU Restriction of Hazardous Substances
Signed: Ajeet Nebhwani Utamchandani
Sole Administrator
 Loading...