

Syswan Duolinks SW24 Series Quick Start Manual
DU OL IN KS S W2 4 SE RI ES
Quick Start Guide
For advanced setup please refer to your User Guide on the CD-ROM for more detailed information.
Setup Procedure
Step 1:
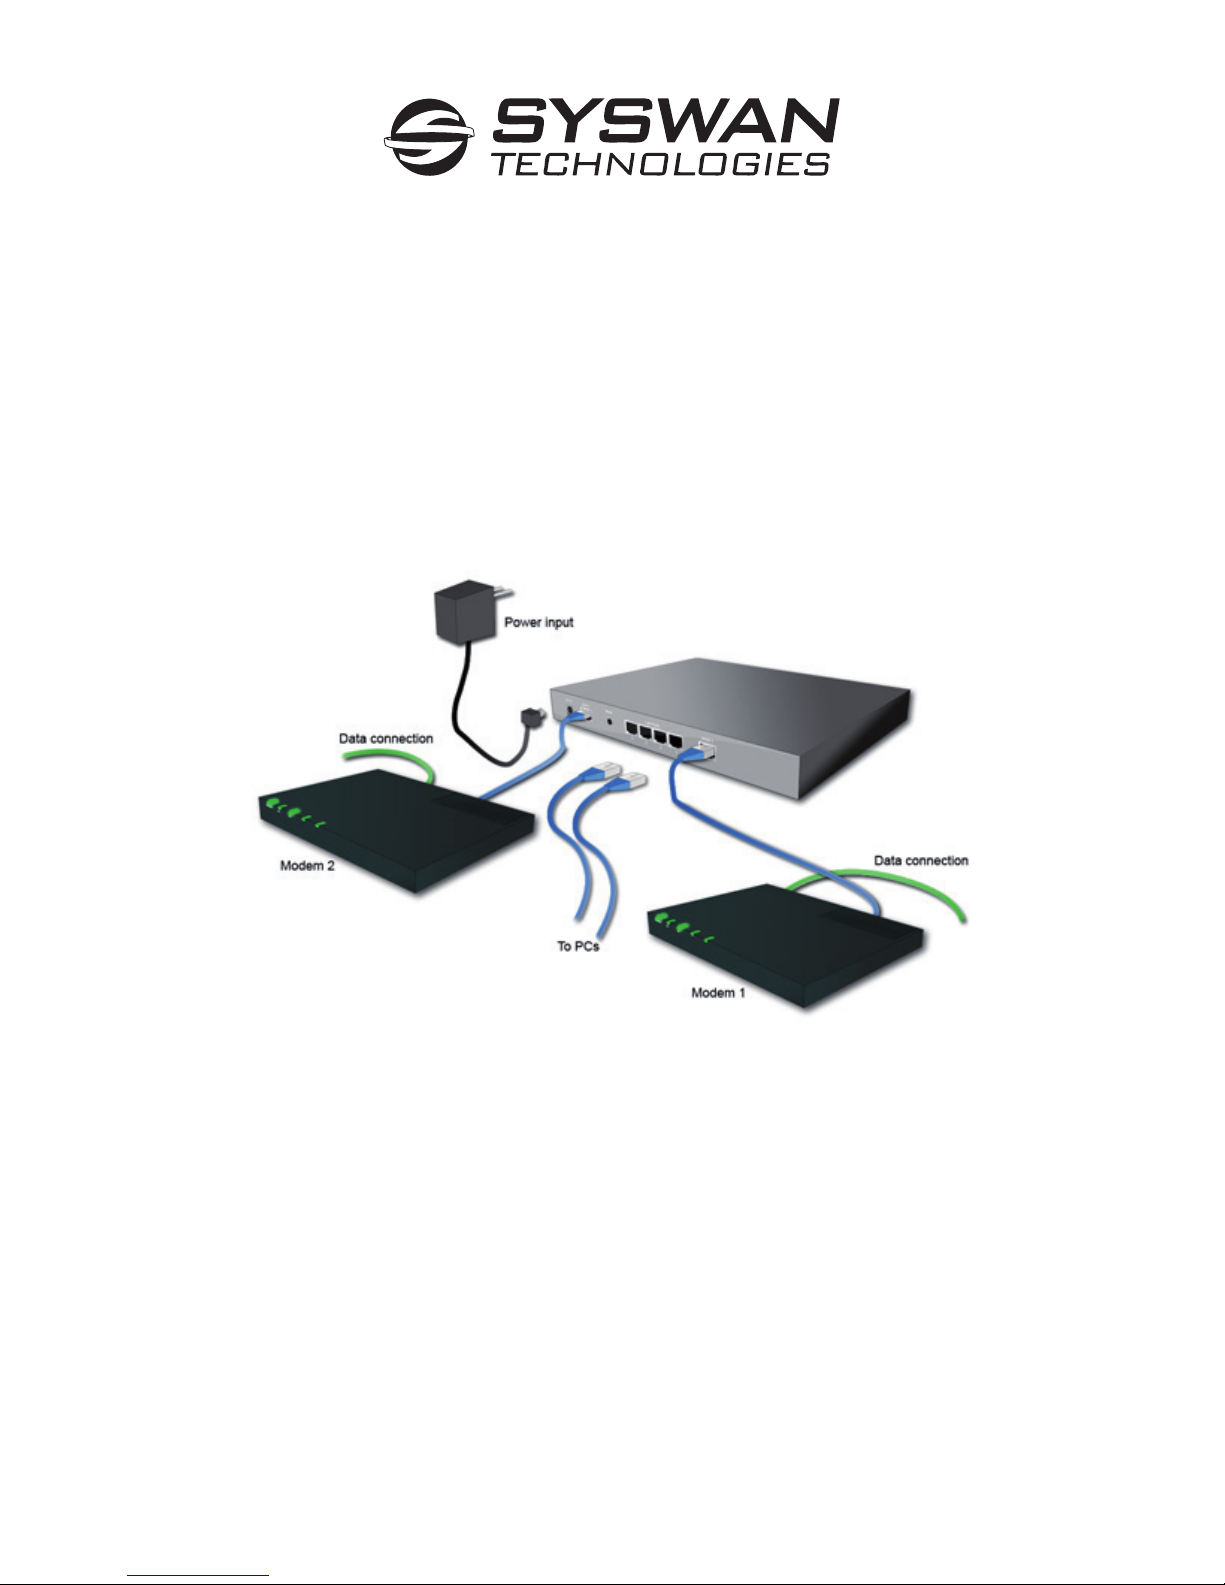
Connect your Duolinks SW24 Series router
1. First, verify that your Duolinks SW24 Series router and your cable or DSL modems are powered OFF.
2. Using Ethernet cables connect your Broadband modems to the Duolinks SW24 Series router’s WAN
ports on the back panel.
3. Connect the Ethernet cables from PCs to the LAN ports of your Duolinks SW24 Series router.
Any LAN port on the Duolinks SW24 Series router will automatically act as an «Uplink» port when
connected to another Ethernet Switch or Hub.
4. Power ON the modems and wait for synchronization (approx. 30 seconds).
5. Plug in the power adapter of the Duolinks SW24 Series router to an electrical outlet and insert the
power cord into the DC 5V input on the back panel. Immediately the Power LED of your router will light
up.
6. The corresponding WAN – Link/ACT LED will be ON if the WAN port is correctly connected to a
Broadband modem.
7. For each PC connected to the LAN ports, the corresponding LAN – Link/ACT LED will be ON.

Step 2:
Configure your Internet Access
Make sure you have all the setup instructions provided by your ISP. If not, contact your ISP to obtain
all the necessary instructions for accessing the Internet using your Broadband modems before
proceeding.
NOTE : Your PC’s Ethernet adapter should be set to obtain an IP address automatically. For more
information, refer to your OS help or the Appendix A of this document.
1. Start your PC. If your PC is already running, restart it. It will automatically obtain an IP address from
the Duolinks SW24 Series router using DHCP.
2. Open your web browser.
3. In the Address or Location box of your web browser enter:
https://19 2.168.1.1
4. If shown, accept the SSL security information alert.
5. You will be prompted for a User Name and password.
Enter admin for the «User Name»
Leave the «Password» field blank
The default user name is admin. On the admin setup page you will see next, you will be able to modify
the default user name and set a password. Once done, select Submit.
It is recommended that you set a password to prevent unauthorized access to your router.
Select “Go to primary setup” to go to the Primary Setup page.
If you have modified the user name or defined a password you will then be prompted to re-enter the
new login information.
6. You will be then directed to the Primary Setup page.
In this section you will need to enter the information provided by your ISP.
You can configure your WAN links using the following four possibilities with the information provided by
your ISP.
a) Static IP
Select Static IP from the Connection Type drop-down menu if your ISP states that you are connecting
through Static IP. Enter the IP Address, Subnet Mask, Gateway from the Address Information section.
You will need to enter at least one DNS Server information.
Submit to save your configuration.
b) Dynamic IP
Select Dynamic IP from the Connection Type drop-down menu if your ISP states that you are
connecting through Dynamic IP (DHCP).
You will need to enter at least one DNS Server information (Optional for Dynamic IP).
Submit to save your configuration.
c) PPPoE
Select PPPoE from the Connection Type drop-down menu if your ISP states that you are connecting
through PPPoE.
Enter the User Name, Password and other required information provided by your ISP in the PPPoE
Dialup section.
Submit to save your configuration.
d) PPTP
Choose the correct connection method indicated by your ISP, enable the PPTP Connection checkbox
and enter the relevant PPTP information provided by your ISP.
Submit to save your configuration.
7. Repeat this procedure for your 2nd WAN port. When both WAN links are correctly configured, select
Submit and Reboot to save and activate your configuration.
Congratulations ! Your router setup is now complete.
 Loading...