

Page 1
Page 2
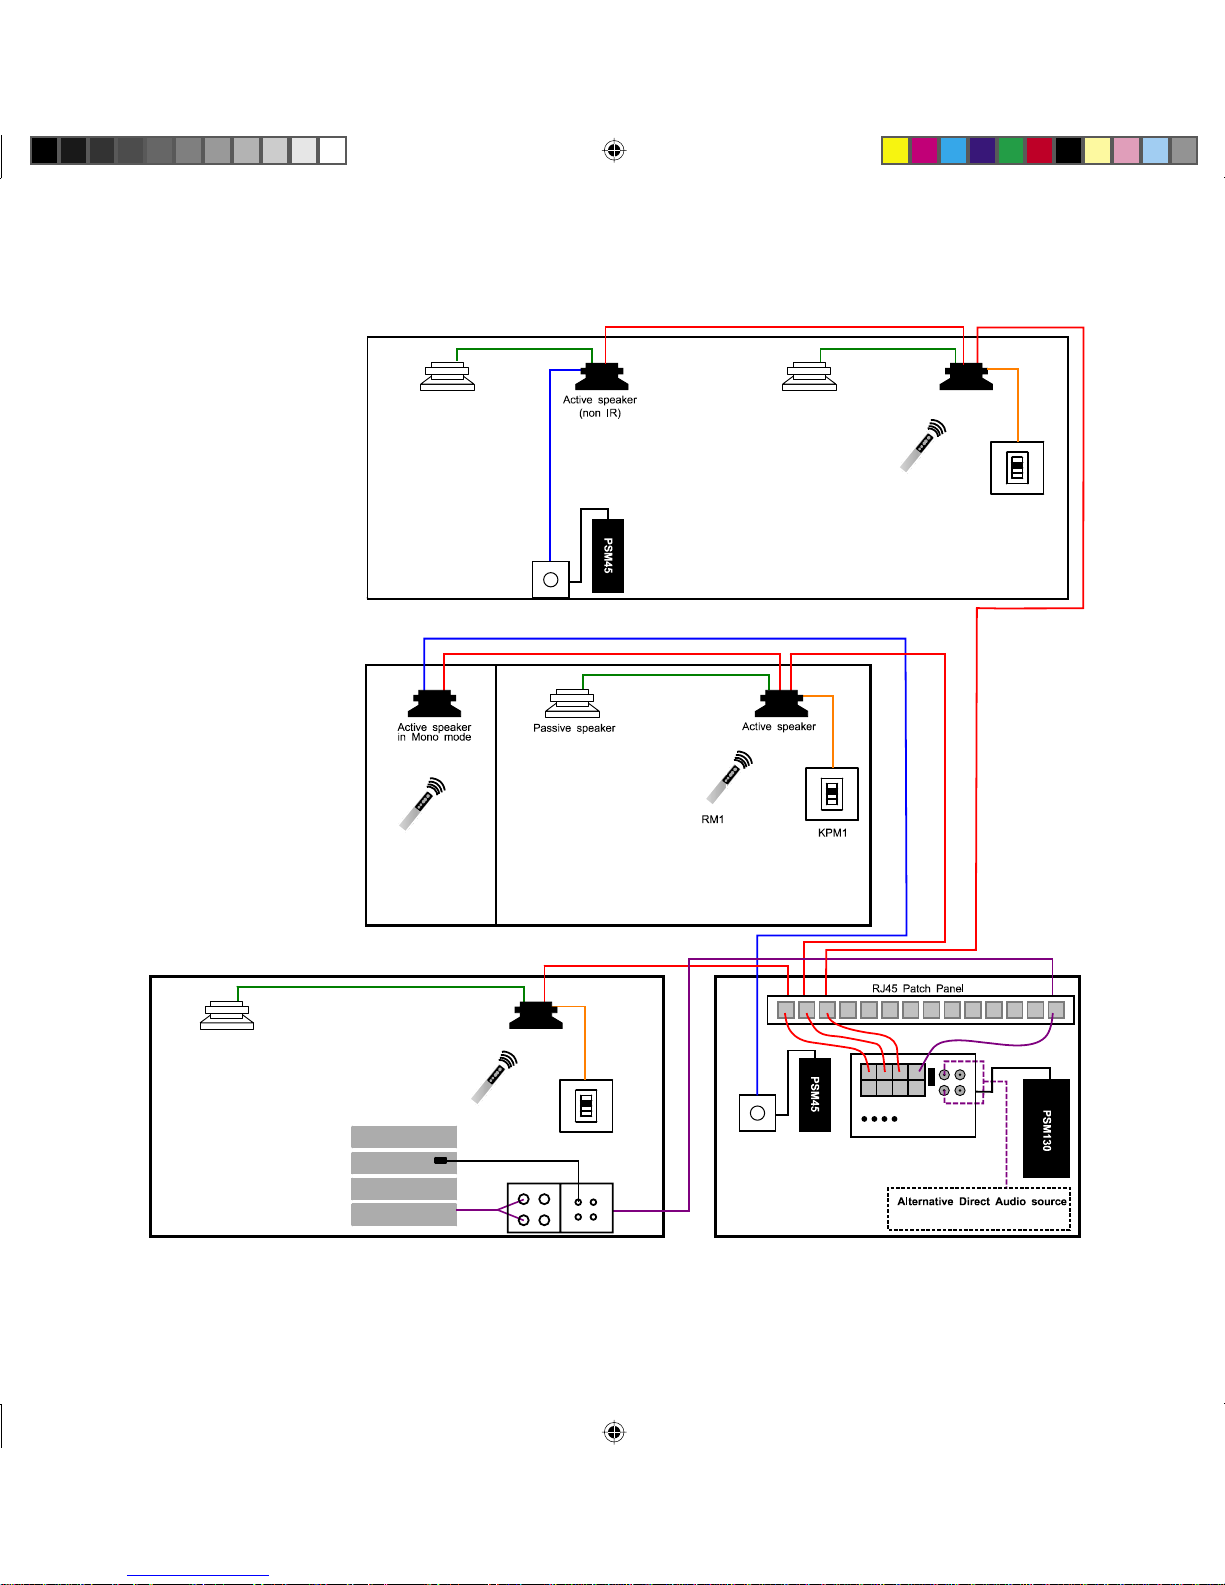
SIM IRM
CIM if both combined
in double module
PIM
HUB HM1
Schematic shows audio source located in Family Room. An alternative to this is shown with a direct audio source located
with the HUB. All cables are CAT5/6 UTP, maximum cable per zone 150m (excluding power only cables). No single cable
run to exceed 50m; maximum active speaker to passive speaker length 30m; maximum power cable using PSM45 40m.
En suite bathroom
demonstrates how a
single speaker in mono
mode can be used in
smaller rooms, in this
example as a sub-zone of
the bedroom. This allows
a local power supply
(PSM45) centrally fi tted.
When installed like this
the maximum cable length
for the PSM45 is 40m. If
cable length 40-50m then
use PSM130.
Kitchen/Dining room
demonstrates how large
areas can be covered
by up to three pairs of
speakers using sub-zone
connections. This shows
the use of a locally fi tted
power supply (PSM45).
Kitchen/Dining room
BedroomEn suite
bathroom
Family room Equipment area/understairs cupboard etc
Diagram showing a basic overall wiring scheme
Patch panel is convenient but not essential.
Quick Install Card 02 ii 5/6/03, 10:09:43 am
Page 3
Module connections
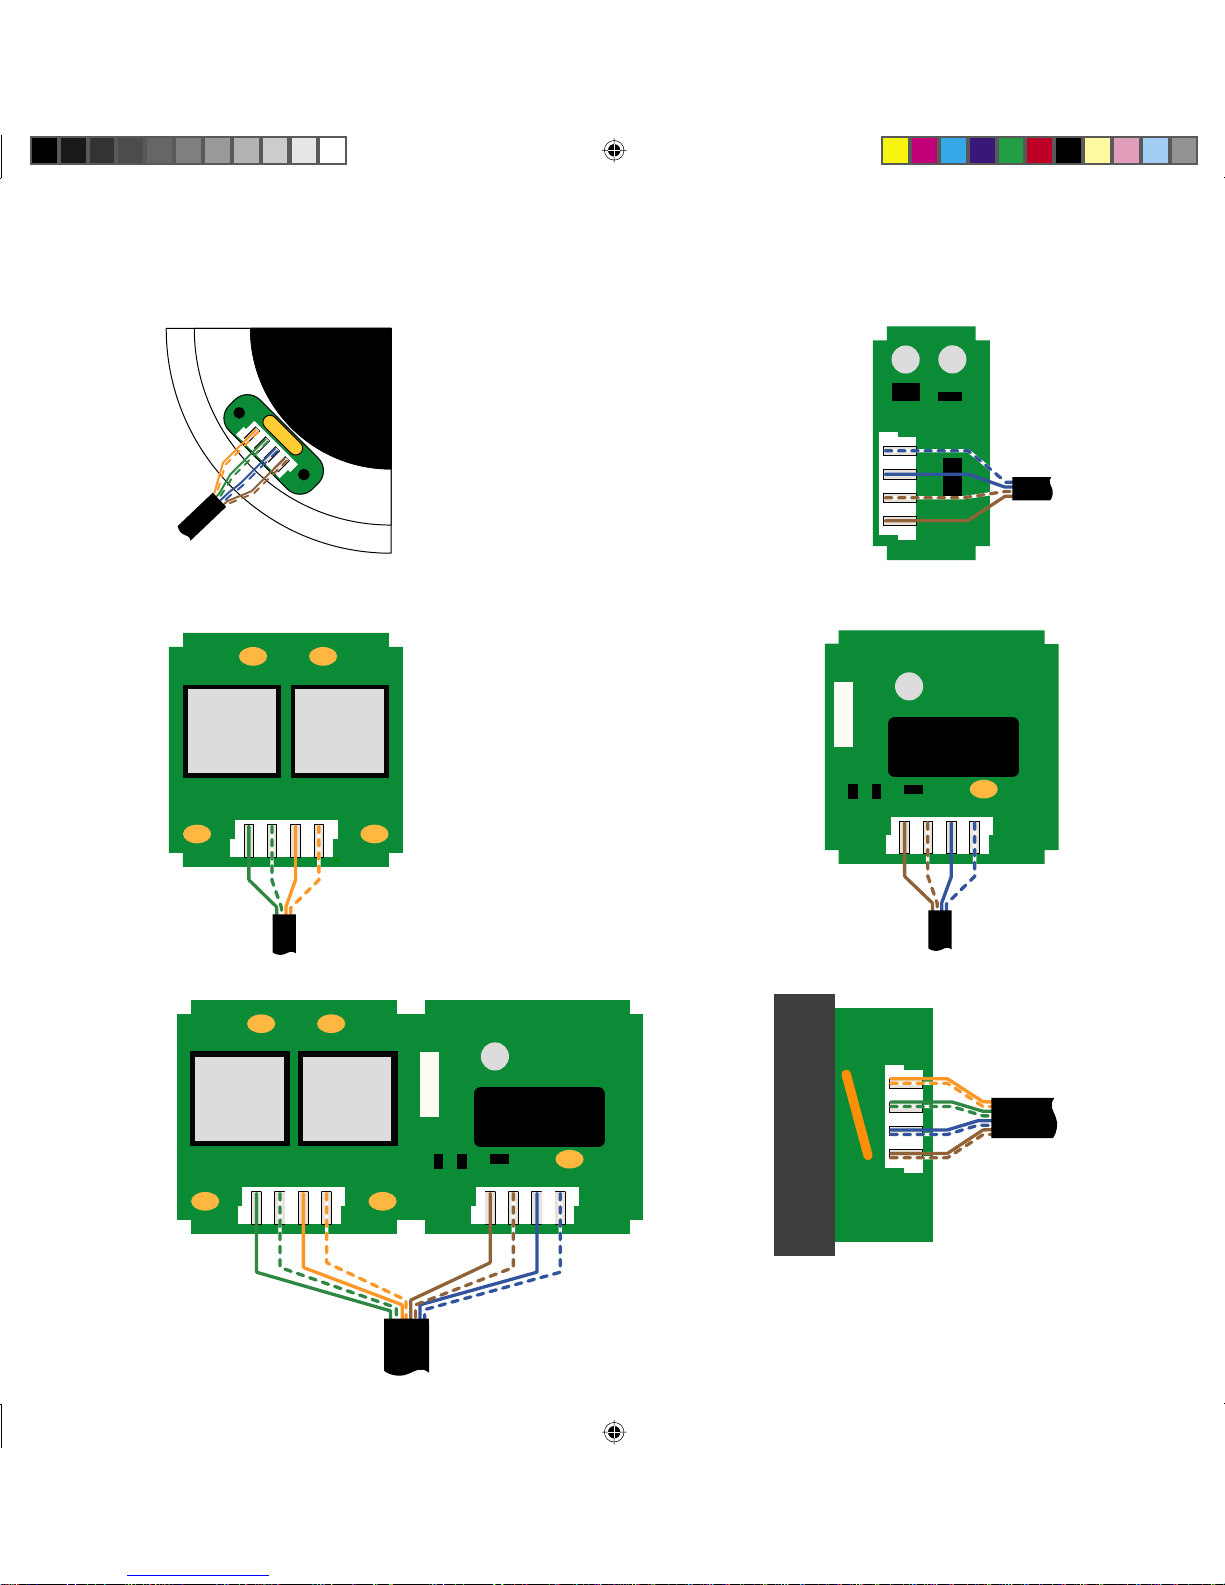
All terminations require a 110 punch-down
tool. No other tool should be used or the
crimp connections will be damaged.
SIM
(rear view)
IRM
(rear view)
CIM
(rear view)
KPM1
(rear view)
PIM
(side view)
PASSIVE SPEAKER
(left)
Quick Install Card 02 iii 5/6/03, 10:09:49 am
Page 4
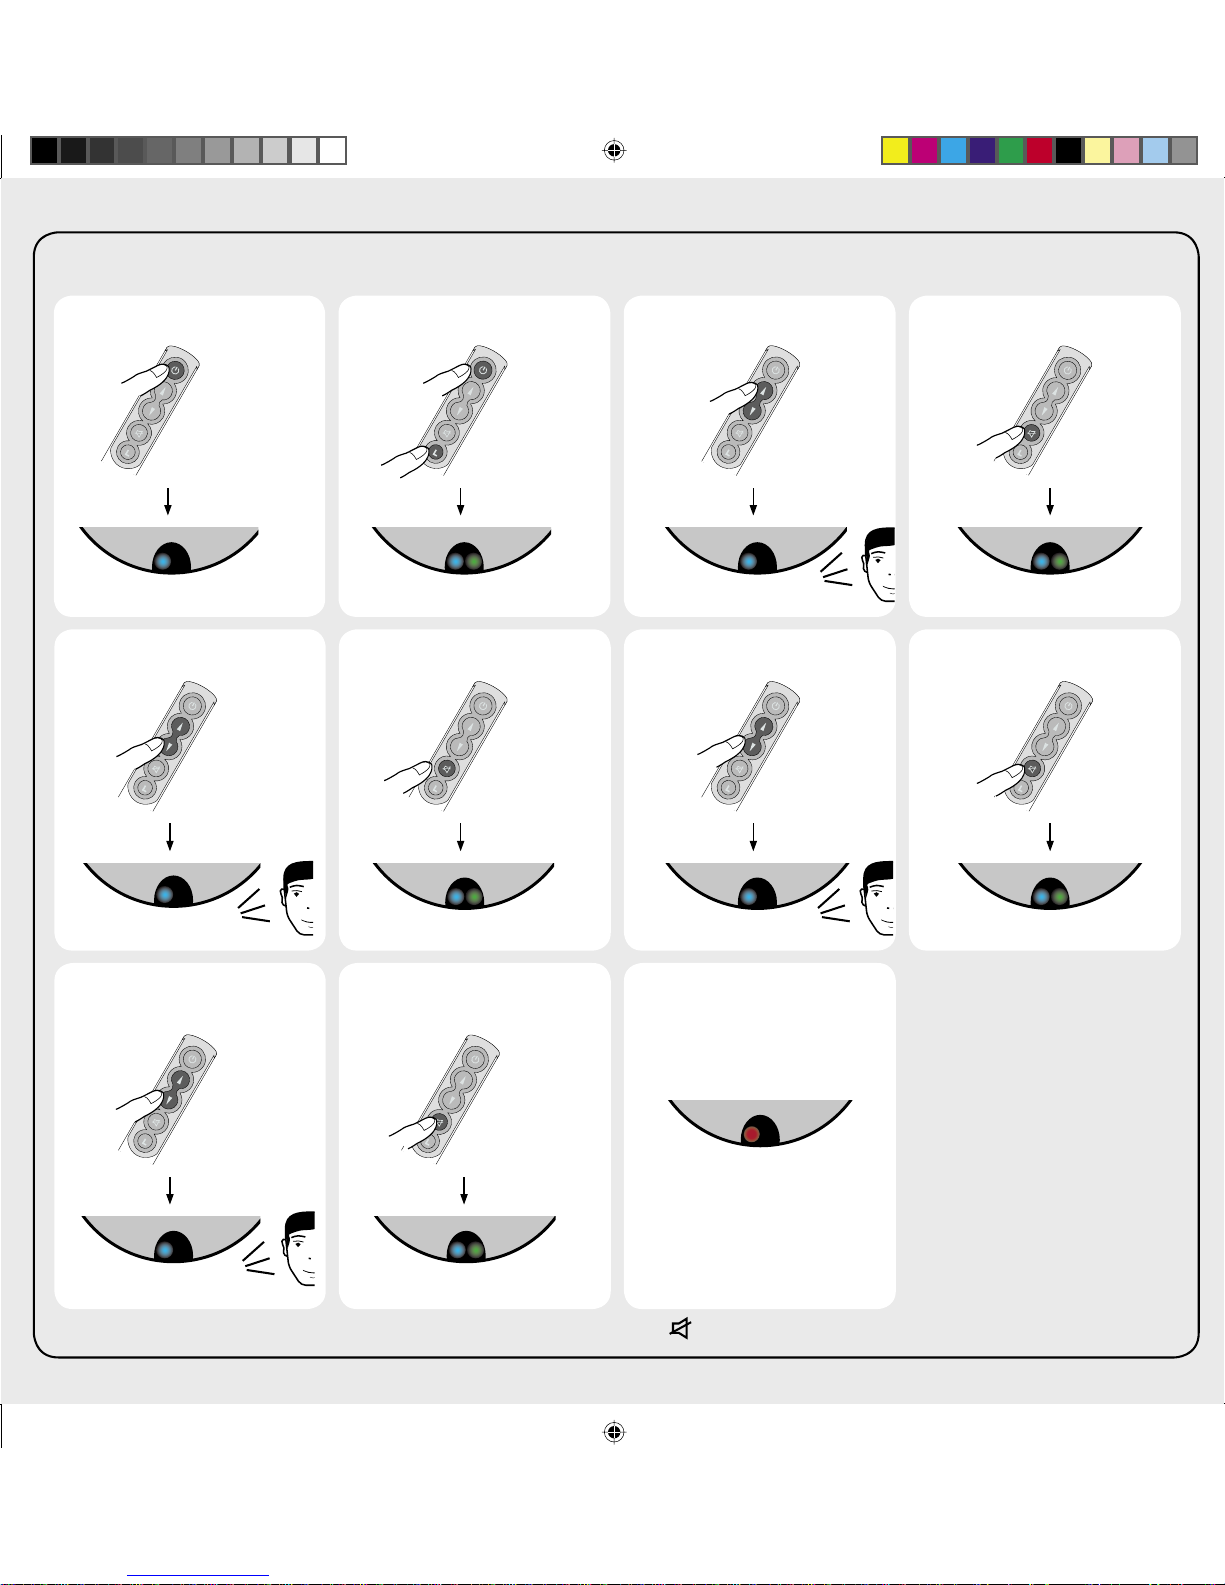
*If a parameter does not need to be changed, press to skip to next parameter.
10. Exit from set up9. Adjust maximum
volume*
11. Speaker ready for
use
8. Step to next parameter6. Step to next parameter5. Adjust bass* 7. Adjust treble*
2. Select set-up mode1. Tu rn zone on 3. Adjust turn-on volume* 4. Step to next parameter
To set bass, treble, and volume levels
VOL
Green fl ash three times
V
OL
VOL
Green fl ash twice
VOL
Green fl ash three times
VOL
VO
L
Red
Standby
Blue Green
VOL
Hold
down together
VOL
Green fl ash twice
VOL
VOL
Blue
Quick Install Card 02 iv 5/6/03, 10:09:54 am
Page 5
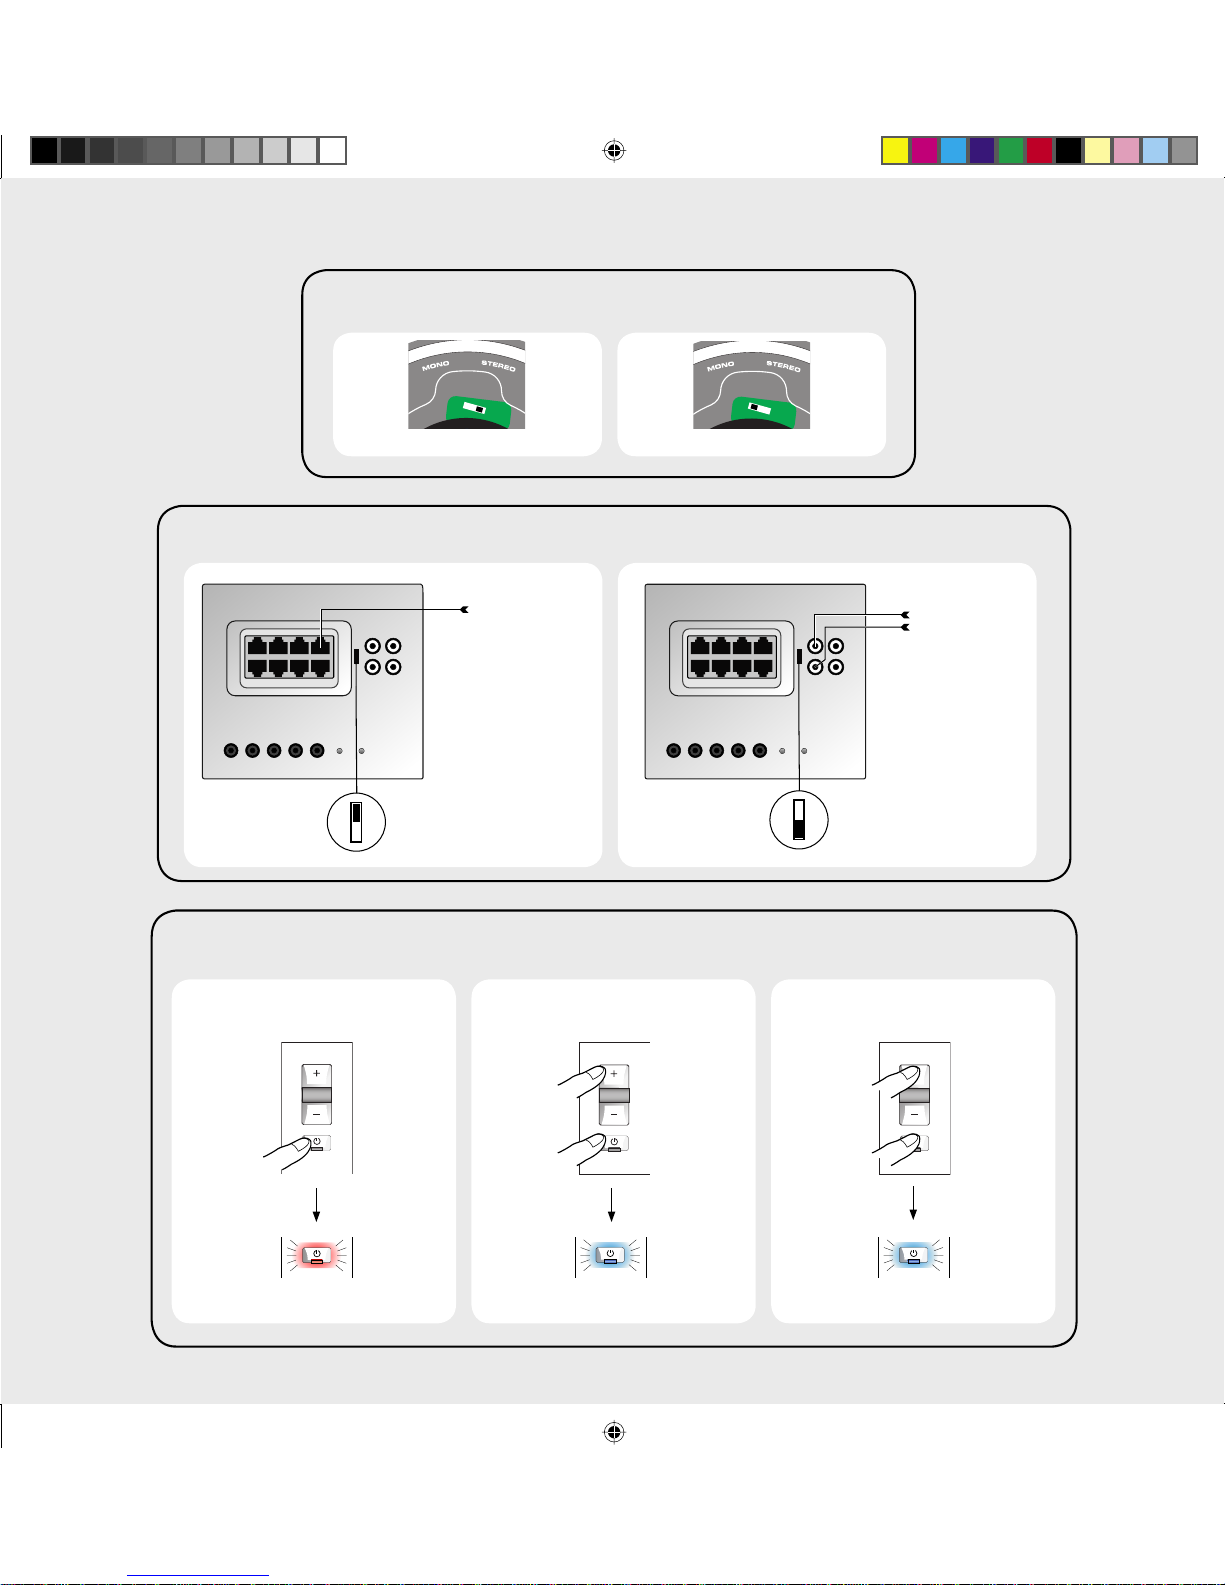
1. Put the zone into
standby
2. Enable the local input 3. Disable the local input
Remote
RJ45
Remote audi
o
Blue - Green - Blue - Green - Red
To enable/disable a local input
To set the mono/stereo switch
To set the hub direct/remote switch
MonoStereo
Red Blue - Red - Blue - Red
RCA Phono
Direct Audio
Direct
Press
simultaneously
Press
simultaneously
Quick Install Card 02 v 5/6/03, 10:16:34 am
Page 6
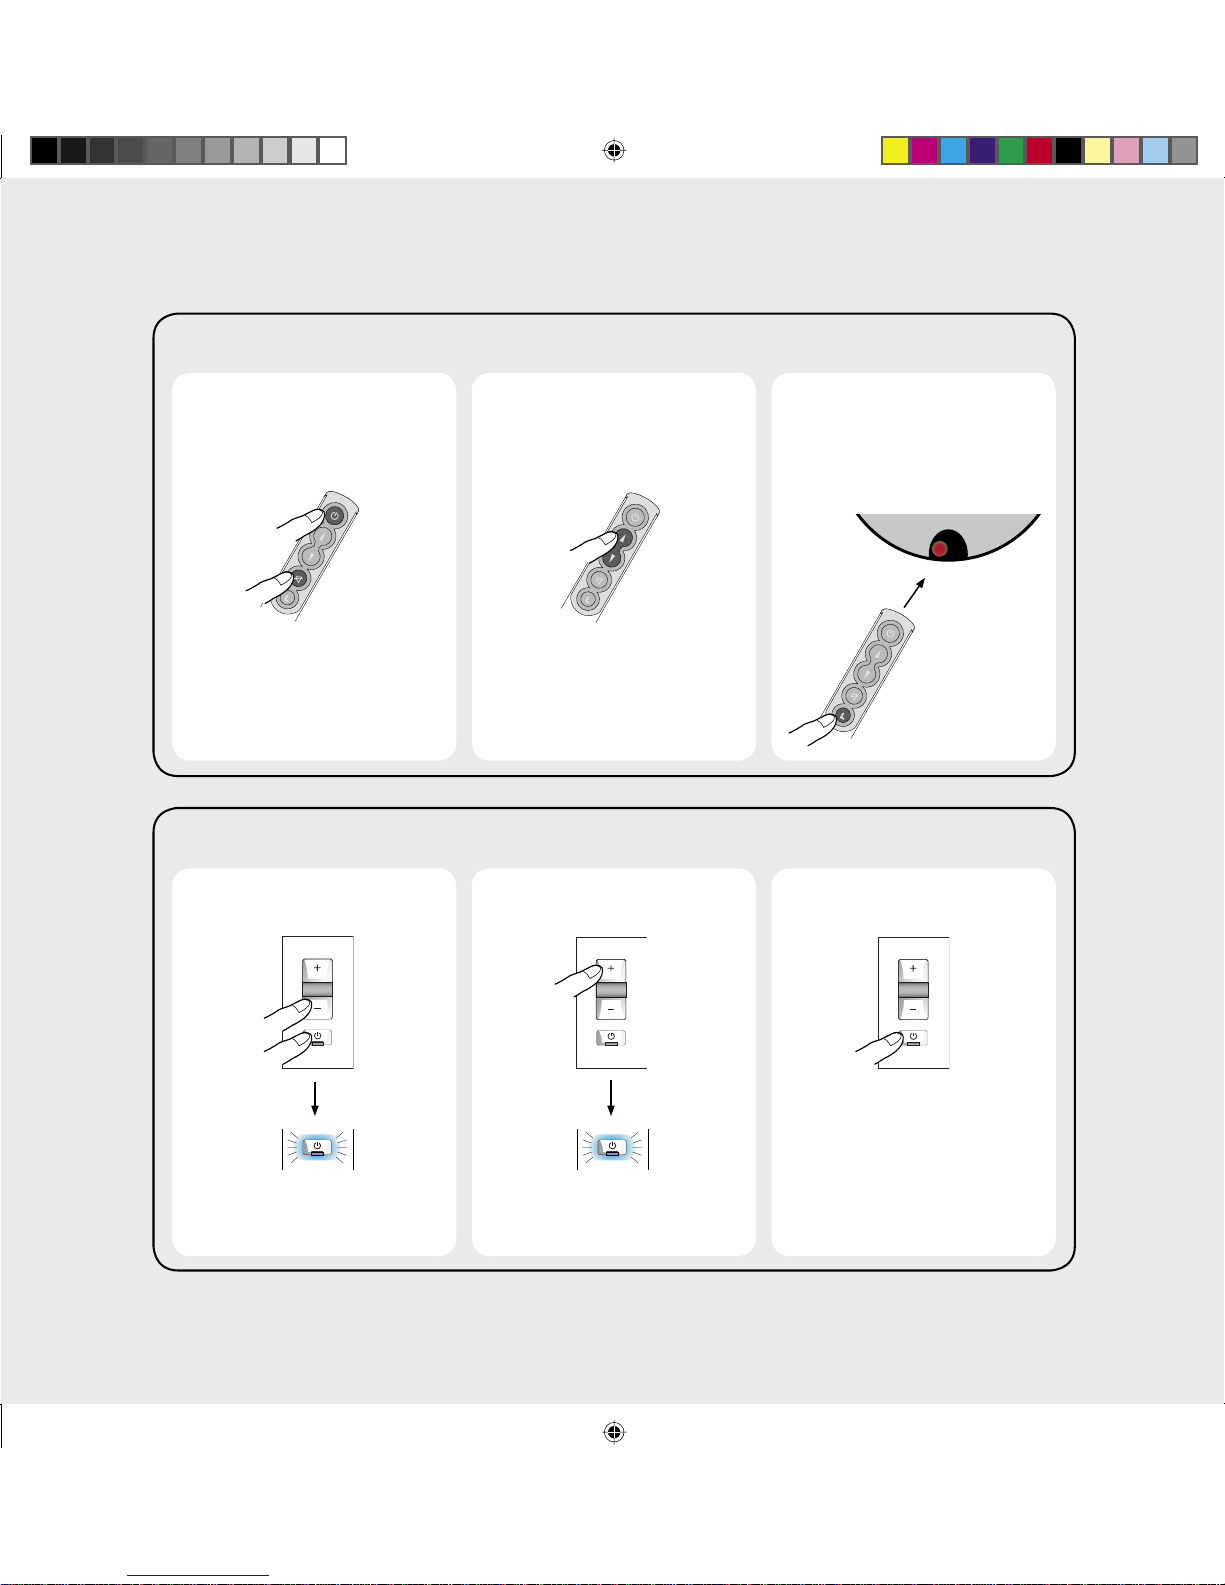
3. Put back to normal
operation
2. Change the remote
control address
1. Reset the remote
control address
3. Put back to normal
operation and set the
speaker to the same
address
2. Change the remote
control address
1. Reset the remote
control address
Flash Blue
Each press increments the
address 2, 3, etc.
To set the speaker and keypad address*
Blue fl ash twice
This resets the address to 1
Note: Set the remote control and
keypad to the same address
To set the speaker and remote control address*
VOL
VOL
*Address change is not normally required
Hold 1
second
Press to
increment
Hold 1
second
Press to
increment
Red
Each press increments the
address 2, 3, etc.
This resets the address to 1
Point at speaker
VOL
Quick Install Card 02 vi 5/6/03, 10:10:30 am
 Loading...