

Page 1
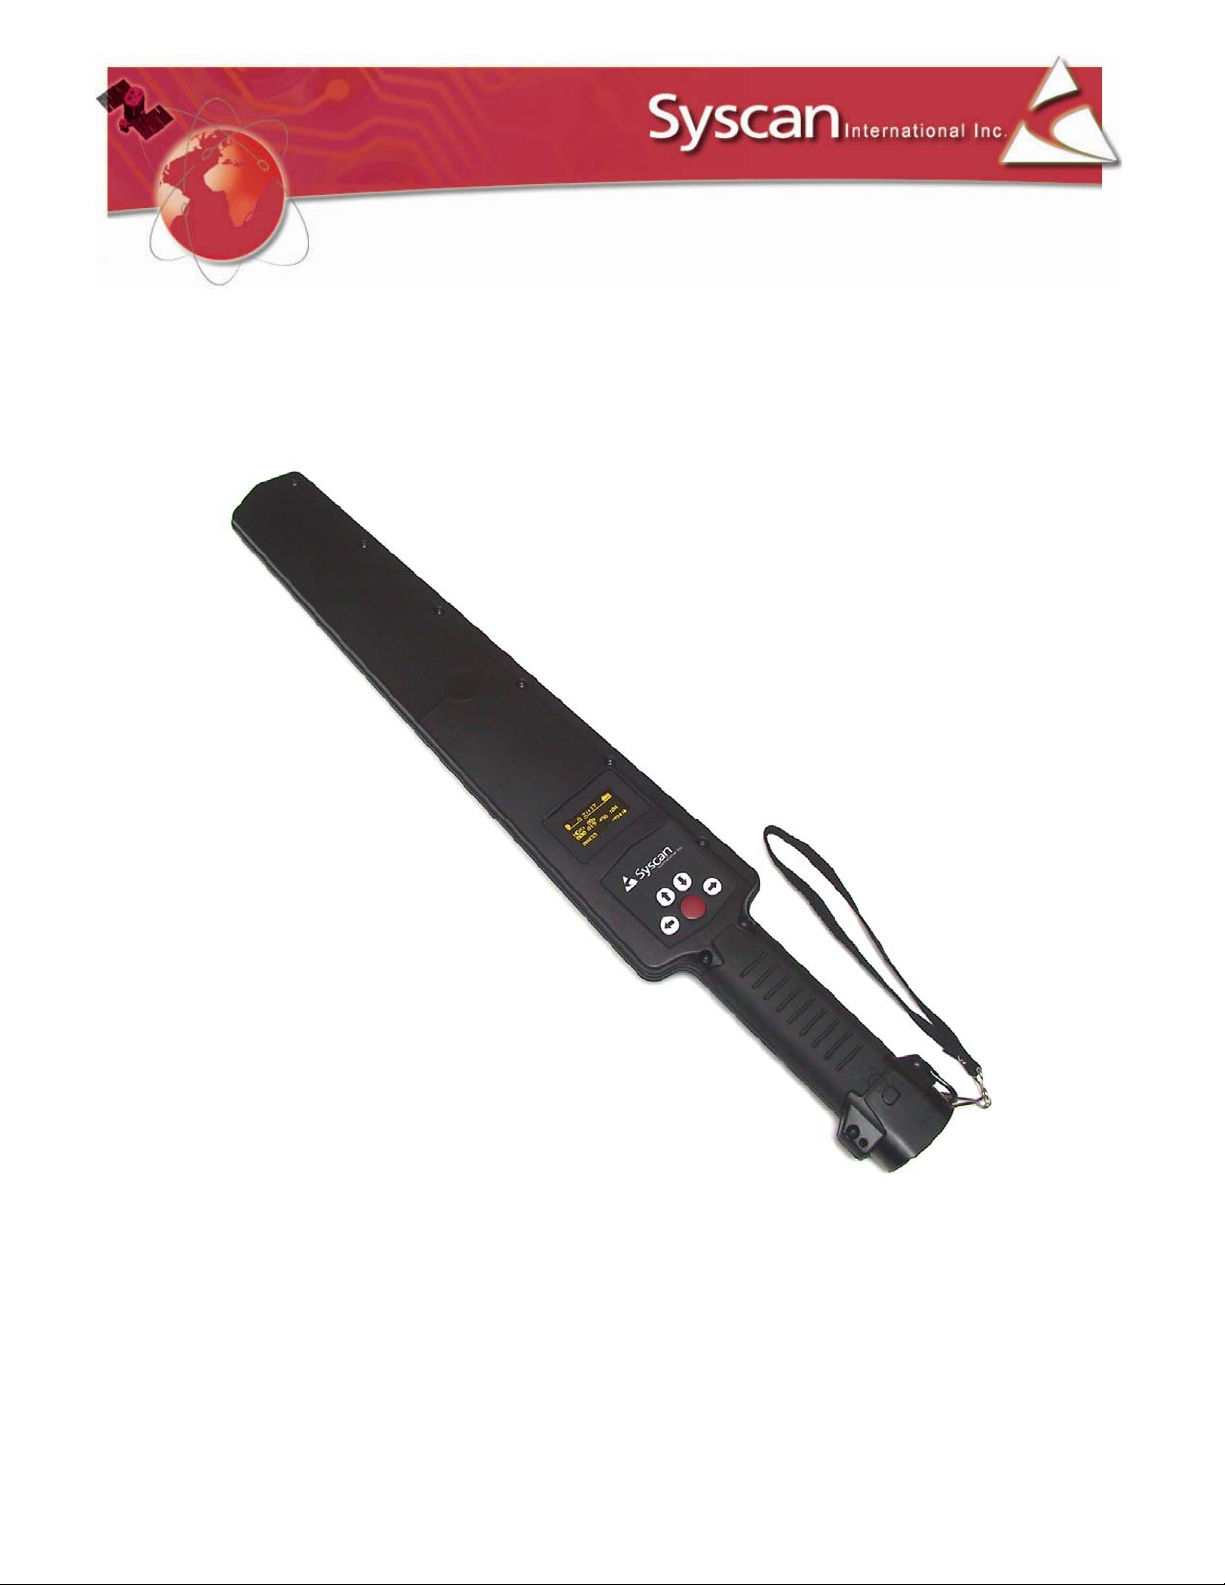
LiveTrack V3 Reader
User Manual
January, 2008
Syscan International Inc., Montreal
Page 2

NOTICE
THE POWER SUPPLY IS TO BE USED TO RECHARGE THE BATTERY AND NOT TO RUN THE READER.
This device complies with Part 15 of the FCC Rules. Operation is subject to the following two conditions: (1) This device may not cause
harmful interference, and (2) This device must accept any interference received, including interference that may cause undesired operation.
This equipment has been tested and found to comply with the limits for Class A Digital Device, pursuant to Part 15 of the FCC Rules. These
limits are designed to provide reasonable protection against harmful interference in a residential installation. This equipment generates and
can radiate radio frequency energy and, if not installed and used in accordance with the instructions, may cause harmful interference to radio
communications. However, there is no guarantee that interference will not occur in a particular installation. If this equipment does cause
harmful interference to radio or television reception, which can be determined by turning the equipment off and on, the user is encouraged to
try to correct the interference by one or more of the following measures.
• Reorient or relocate the receiving antenna
• Increase the separation between the equipment and receiver
• Connect the equipment into an outlet on a circuit different from that to which the receiver is connected
• Consult the dealer or an experienced radio/TV technician for help
Any changes or modifications not expressly approved by the party responsible for compliance could void the user’s authority to operate the
equipment.
INFORMATION TO USER
LiveTrack Reader – User Manual. Page: 2 / 22
Page 3

1. NOMENCLATURE ............................................................................................................................................................5
1.2 CHARGER/SERIAL CONNECTION ................................................................................................................ 6
1.3 INDICATOR ICONS ................................................................................................................................7
1.4 MAIN SCREEN...................................................................................................................................... 8
1.5 MENU SCREEN .....................................................................................................................................9
1.6 INFO MENU....................................................................................................................................... 11
1.7 ADVANCED MENU................................................................................................................................12
2. COMMUNICATIONS ......................................................................................................................................................18
2.1 BLUETOOTH COMMUNICATION ............................................................................................................... 18
2.2 SERIAL COMMUNICATION ...................................................................................................................... 18
2.3 PACKET DESCRIPTION .......................................................................................................................... 19
2.4 SCALE CONNECTION ............................................................................................................................ 20
3. TROUBLESHOOTING .................................................................................................................................................... 21
4. CONTACT .........................................................................................................................................................................22
LiveTrack Reader – User Manual. Page: 3 / 22
Page 4

SPECIFICATIONS
Case: Polycarbonate ABS
Operating Frequency: 125 kHz and 134.2 kHz
RFID Compatibility: HDX ISO, FDX-B ISO and EM4002
Reading Distance : 25-35 cm, 10-14 Inches (HDX)
Memory: 30, 000 tags
Communication Ports: Serial RS232 or optional Bluetooth (Class1, 100m)
Battery: 7.4V Li-ion rechargeable
Power Input : 12 VDC for charging battery
Protection Class : IP 66
Dimensions: 65 X 10 X 3cm (26 x 4 x 1.2")
Weight : 0.7 kg (1.5 lbs)
Display : Graphic OLED 128 x 64 pixels
Display Languages: English, French, Spanish and German
Included in the box: Quick Start Guide, Reader, LiveTrack
Manuals (on CD), Hand Strap, Serial Cable and 12v DC
international power supply.
®
Manager Software,
LiveTrack Reader – User Manual. Page: 4 / 22
Page 5

1. Nomenclature
1. RFID reading zone
2. Display screen
3. ON/OFF button
4. Control buttons
5. Handle/Battery compartment
6. Battery compartment door
7. Charge/Serial connector
LiveTrack Reader – User Manual. Page: 5 / 22
Page 6
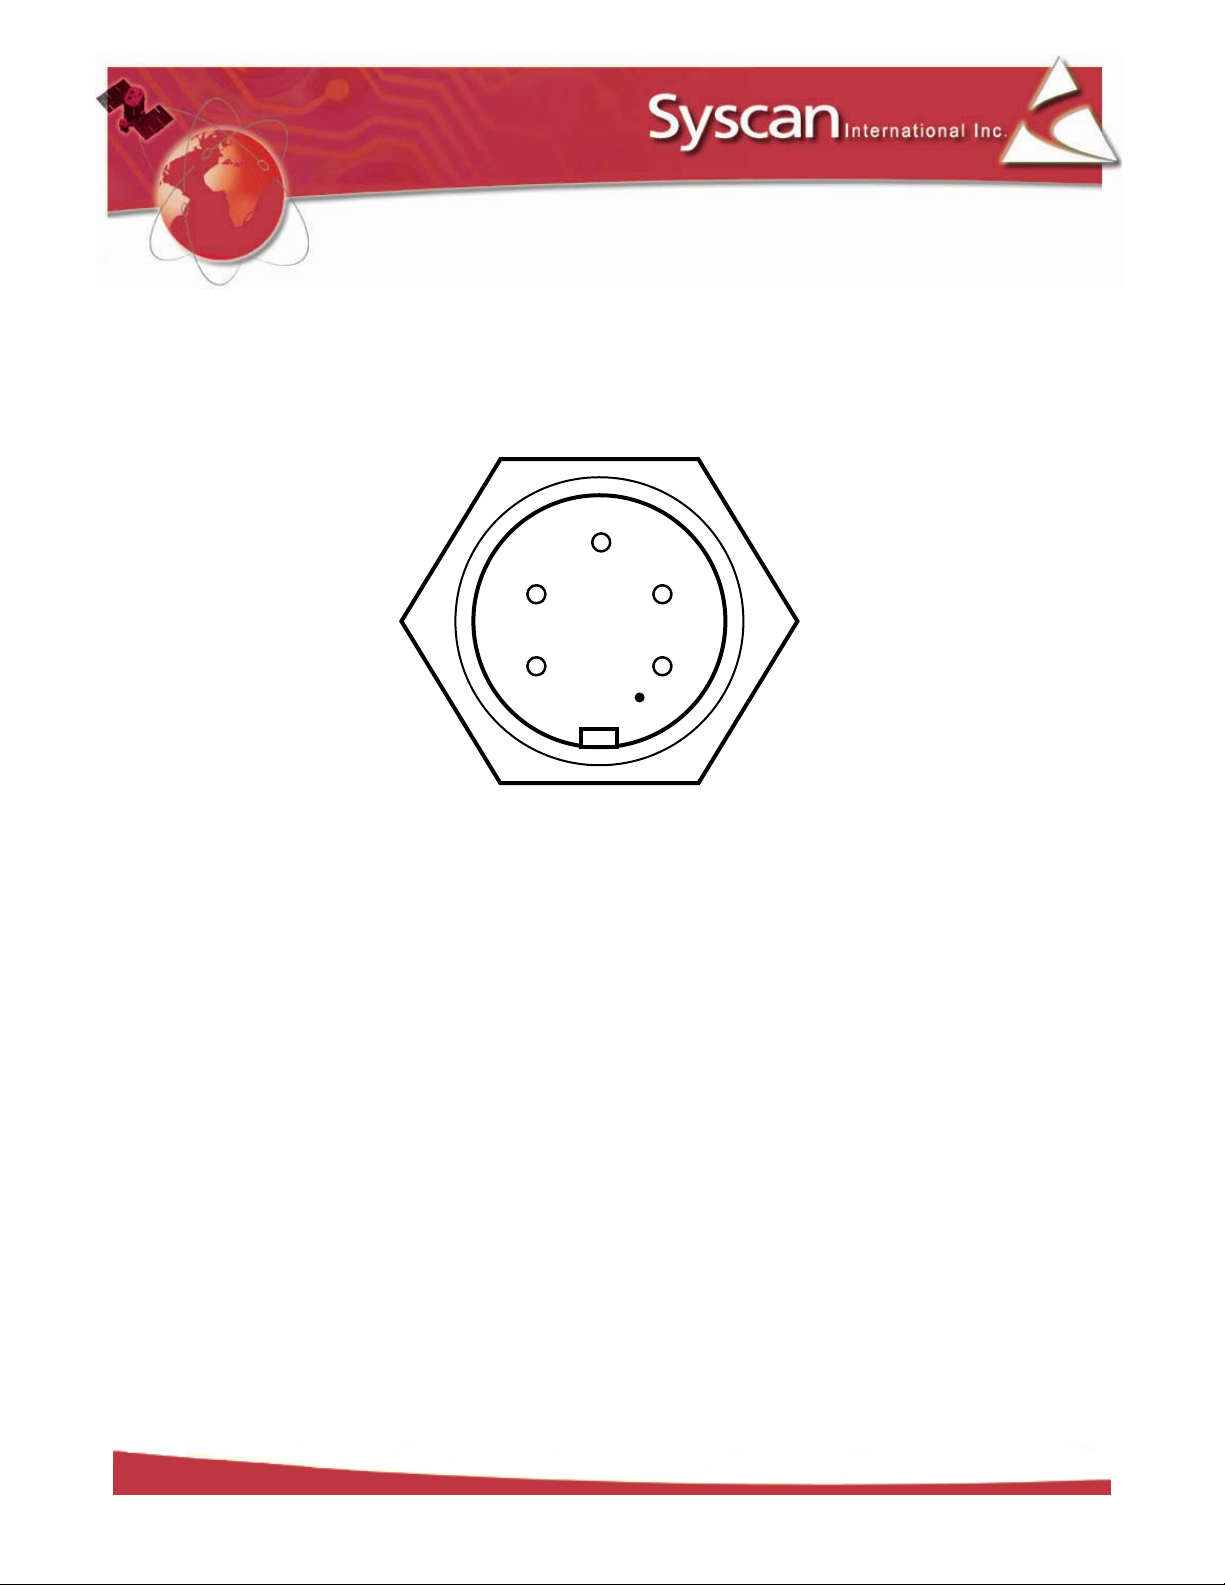
1.2 Charger/serial connection
Pin 1 : 12 VDC IN
Pin 2 : RS-232 TX data to PC
Pin 3 : RS-232 Rx data from PC
Pin 4 : N/C
Pin 5 : GND
4
5
3
2
1
LiveTrack Reader – User Manual. Page: 6 / 22
Page 7

1.3 Indicator icons
Bluetooth icon
Connection arrows
RFID icon
Counter
Bluetooth icon: ON: The Bluetooth circuit is present and on.
OFF: The Bluetooth circuit is off.
Connection arrows: The arrows indicate that the Bluetooth is connected.
RFID icon: ON: The RFID circuit is on and ready to read.
OFF: The RFID circuit is off.
Battery icon: Indicates the battery power left in the reader.
Battery icon
LiveTrack Reader – User Manual. Page: 7 / 22
Page 8
00025
MENU
Tag
00025
MENU
00025
MENU
1.4 Main screen
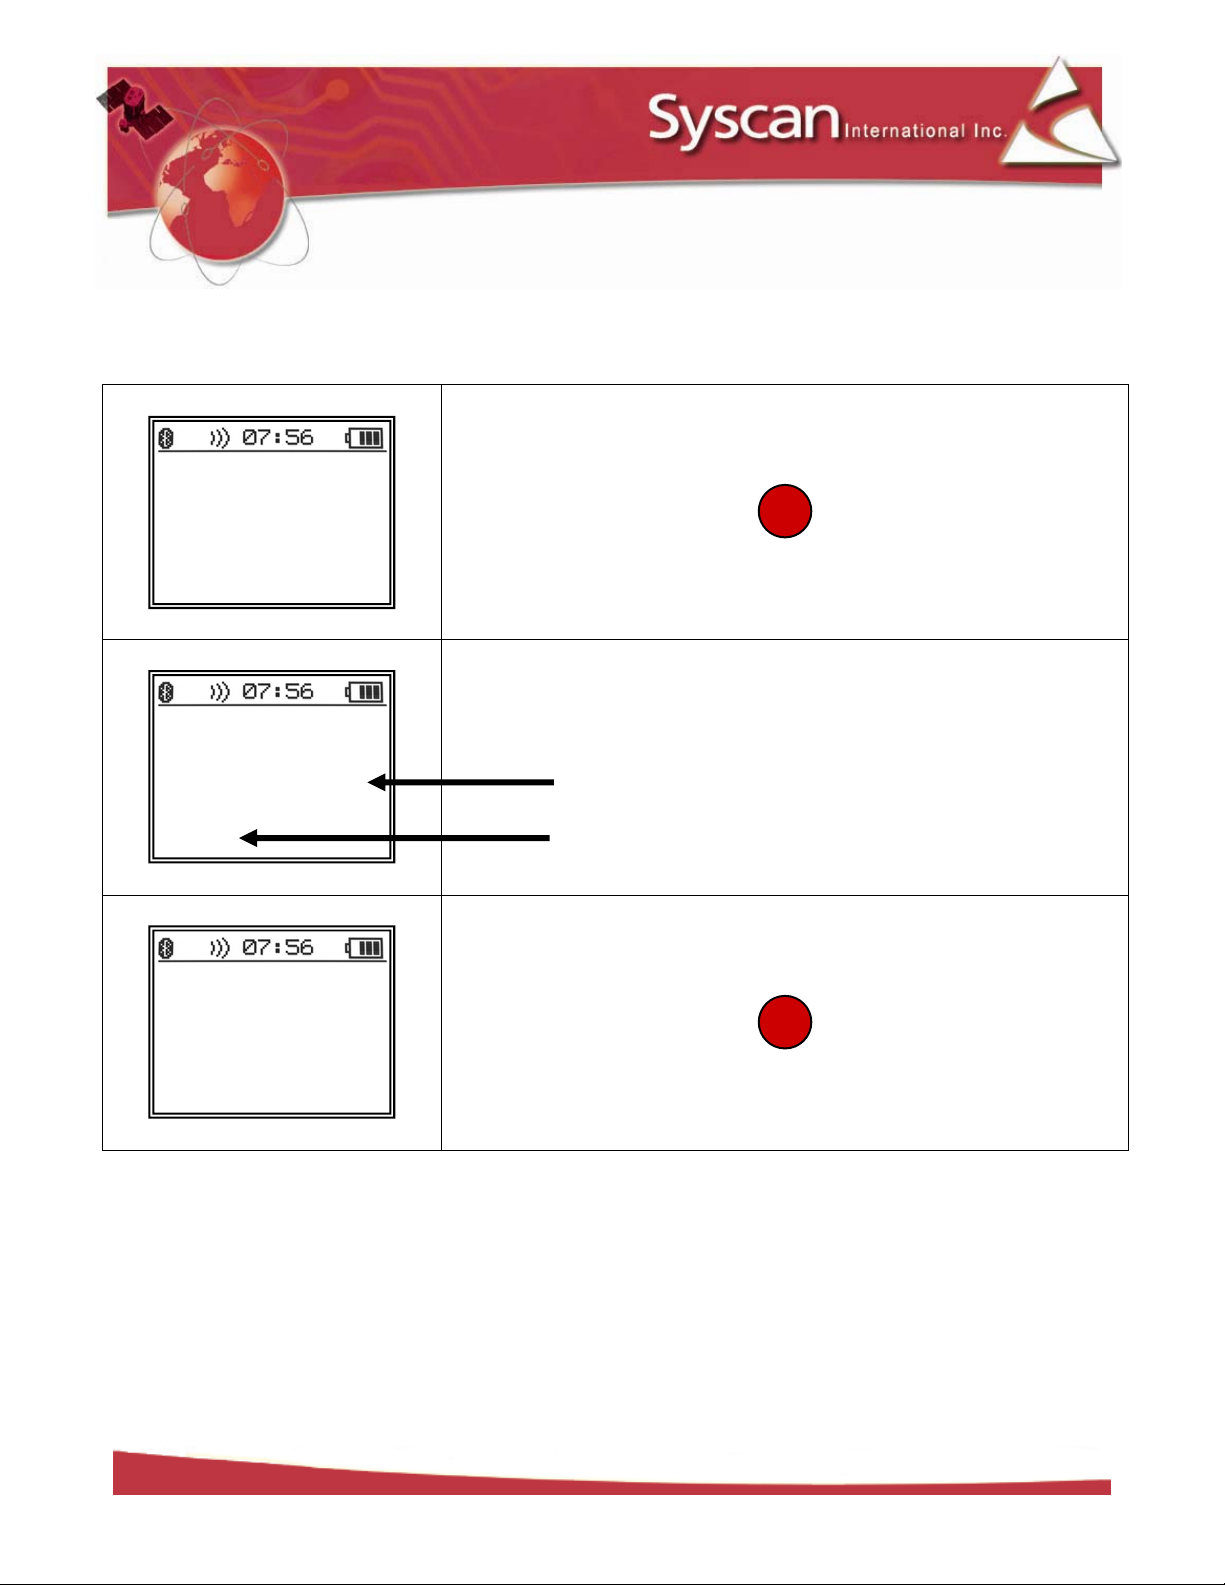
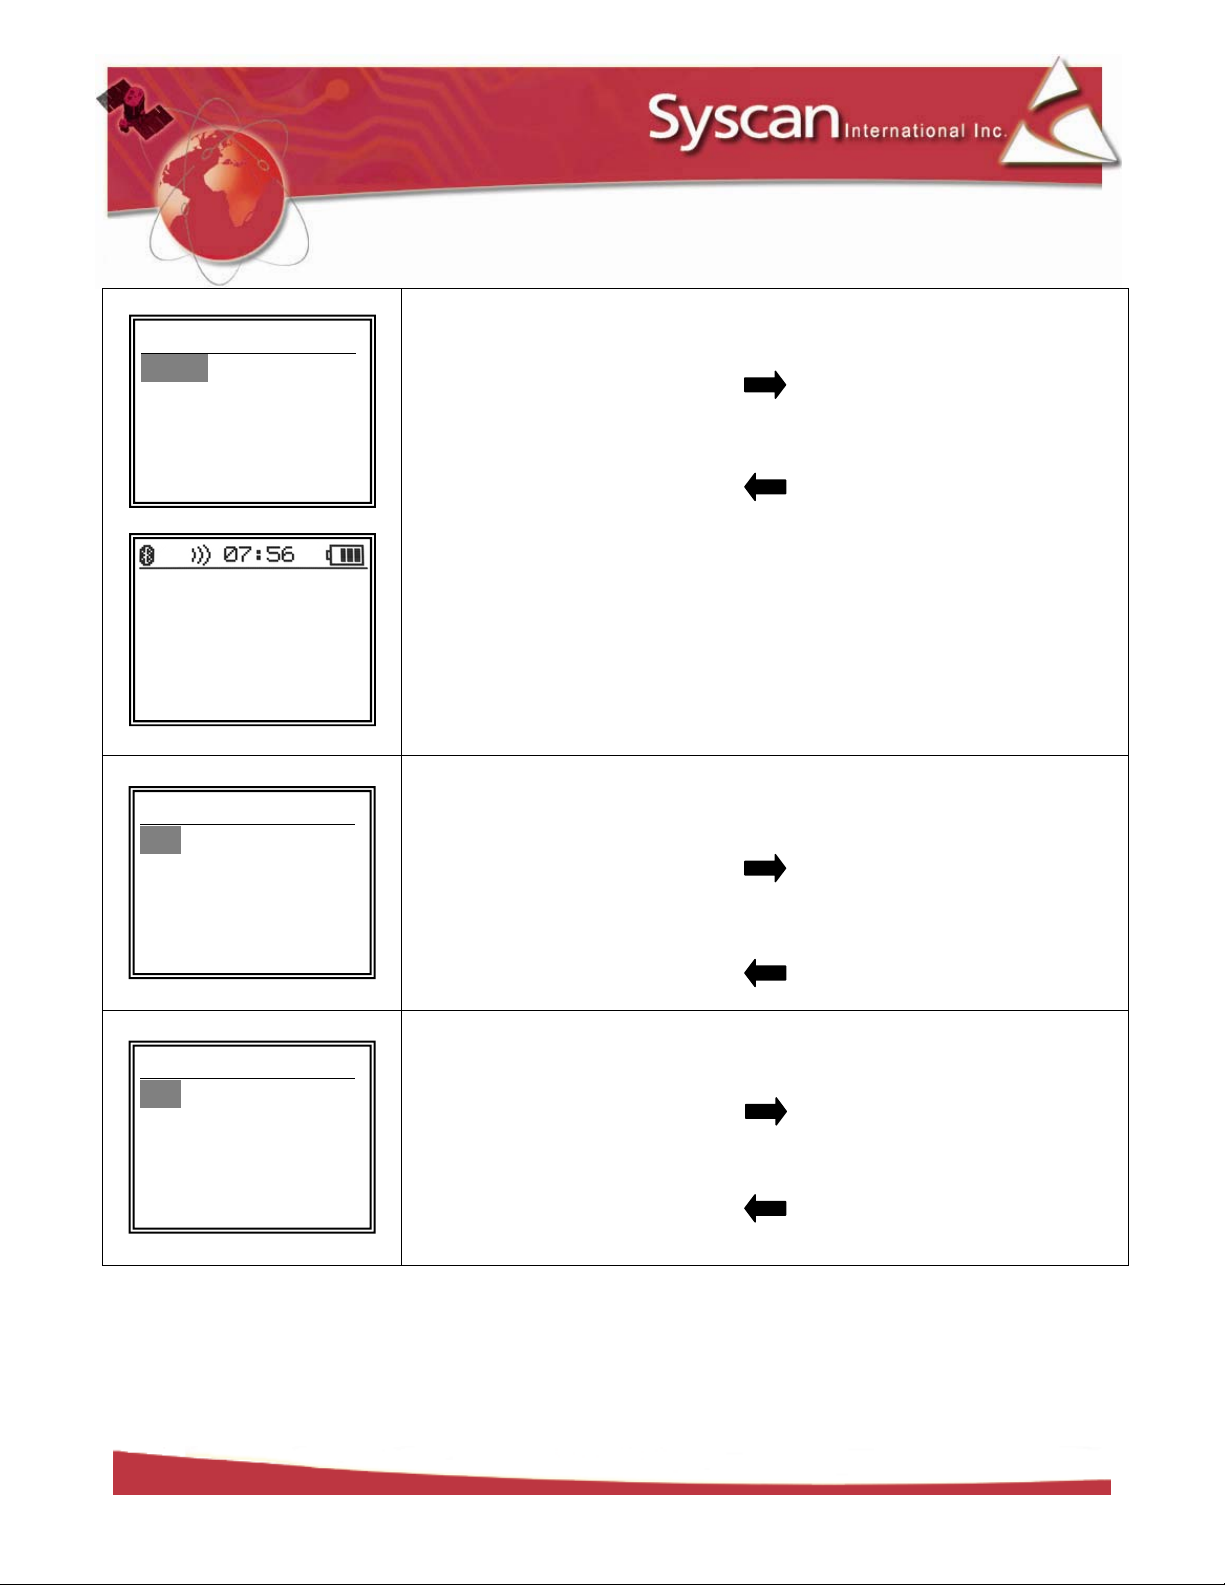
Turn on the reader by pressing the ON/OFF button.
>
HDX: 999
000 000 000 125
>
The main screen contains the tag number as well as the counter.
number
Counter
HDX: 999
000 000 000 125
Turn off the reader by pressing the ON/OFF button for 2 seconds.
>
LiveTrack Reader – User Manual. Page: 8 / 22
Page 9
00025
MENU
MENU
31/07/07
COUNTER
1.5 Menu screen
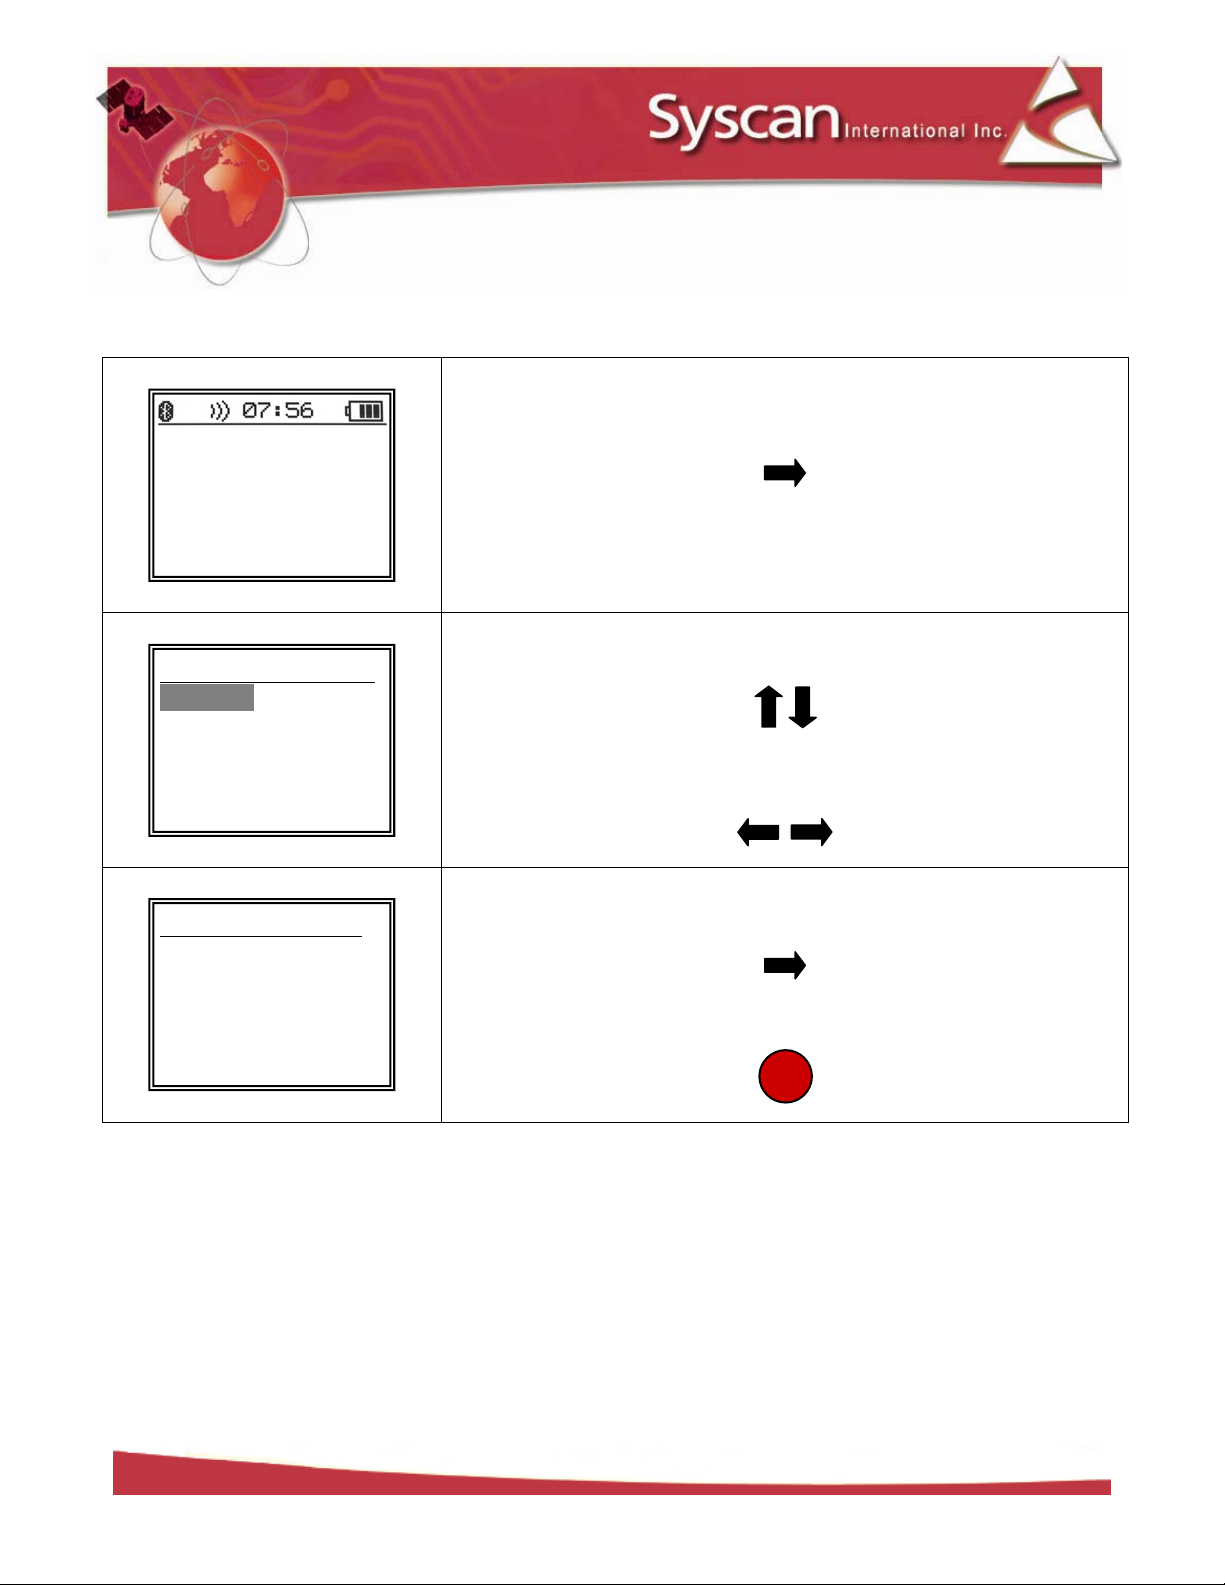
Select MENU by pressing the right arrow button.
HDX: 999
000 000 000 125
>
COUNTER
SEPARATOR
INFO MENU
ADVANCED MENU
<BACK ENTER>
_
00025
<BACK RESETn
Navigate in the MENU using the up and down arrow buttons.
Enter a menu item by pressing the right arrow button or go back by
pressing the left arrow button.
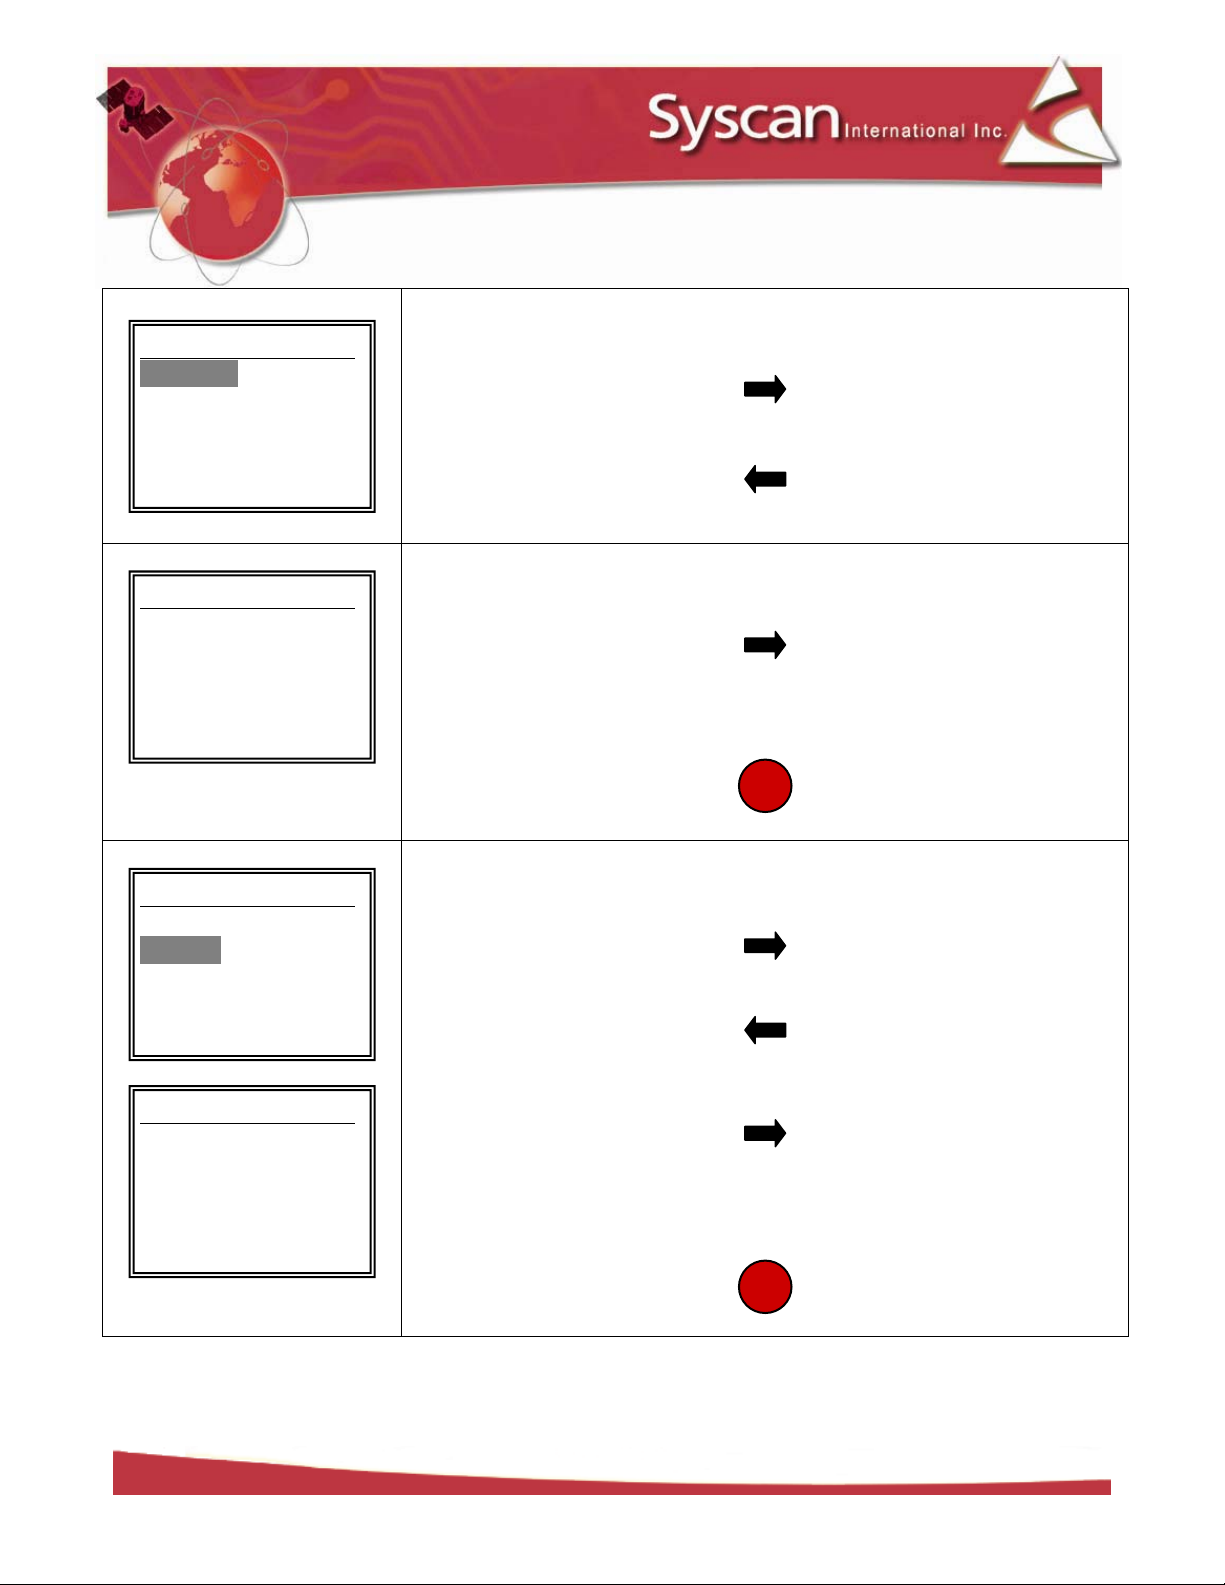
Select COUNTER by choosing it from the menu and pressing the
right arrow button.
Reset the counter by pressing the ON/OFF button.
LiveTrack Reader – User Manual. Page: 9 / 22
Page 10
SEPARATOR
INSERT
SEPARATOR?
<BACK YESn
_
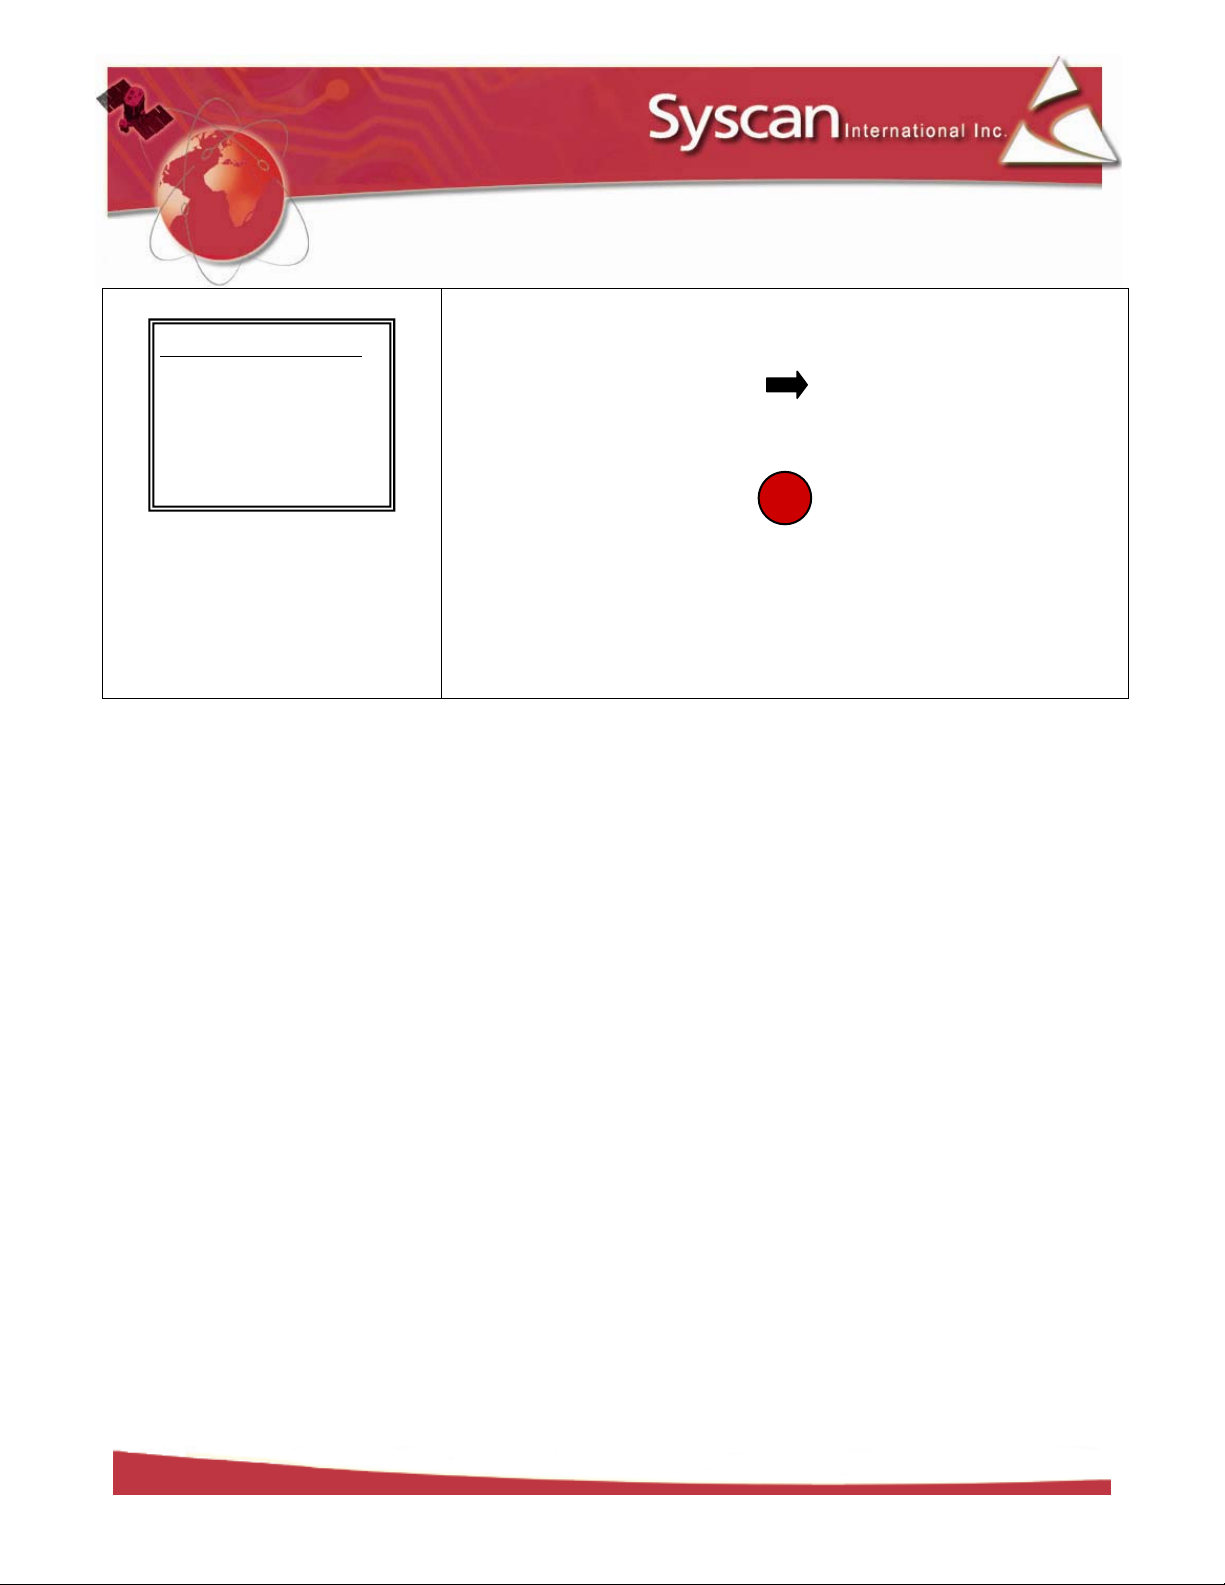
Select SEPARATOR by choosing it from the MENU and pressing the
right arrow button.
Insert a separator by pressing the ON/OFF button.
A separator is a fake tag with a 000 000 000 000 000 ID and can be
used to separate batches of reads.
The separator will not affect the tag counter but will affect the
memory count.
LiveTrack Reader – User Manual. Page: 10 / 22
Page 11
INFO MENU
850
MENU
31/07/07
31/07/07
1.6 Info menu
COUNTER
SEPARATOR
INFO MENU
ADVANCED MENU
<BACK ENTER>
_
BAT:7.85V
SER :F70-LTL03
VER:VF01.08R
MEM:00025 B9600
<BACK
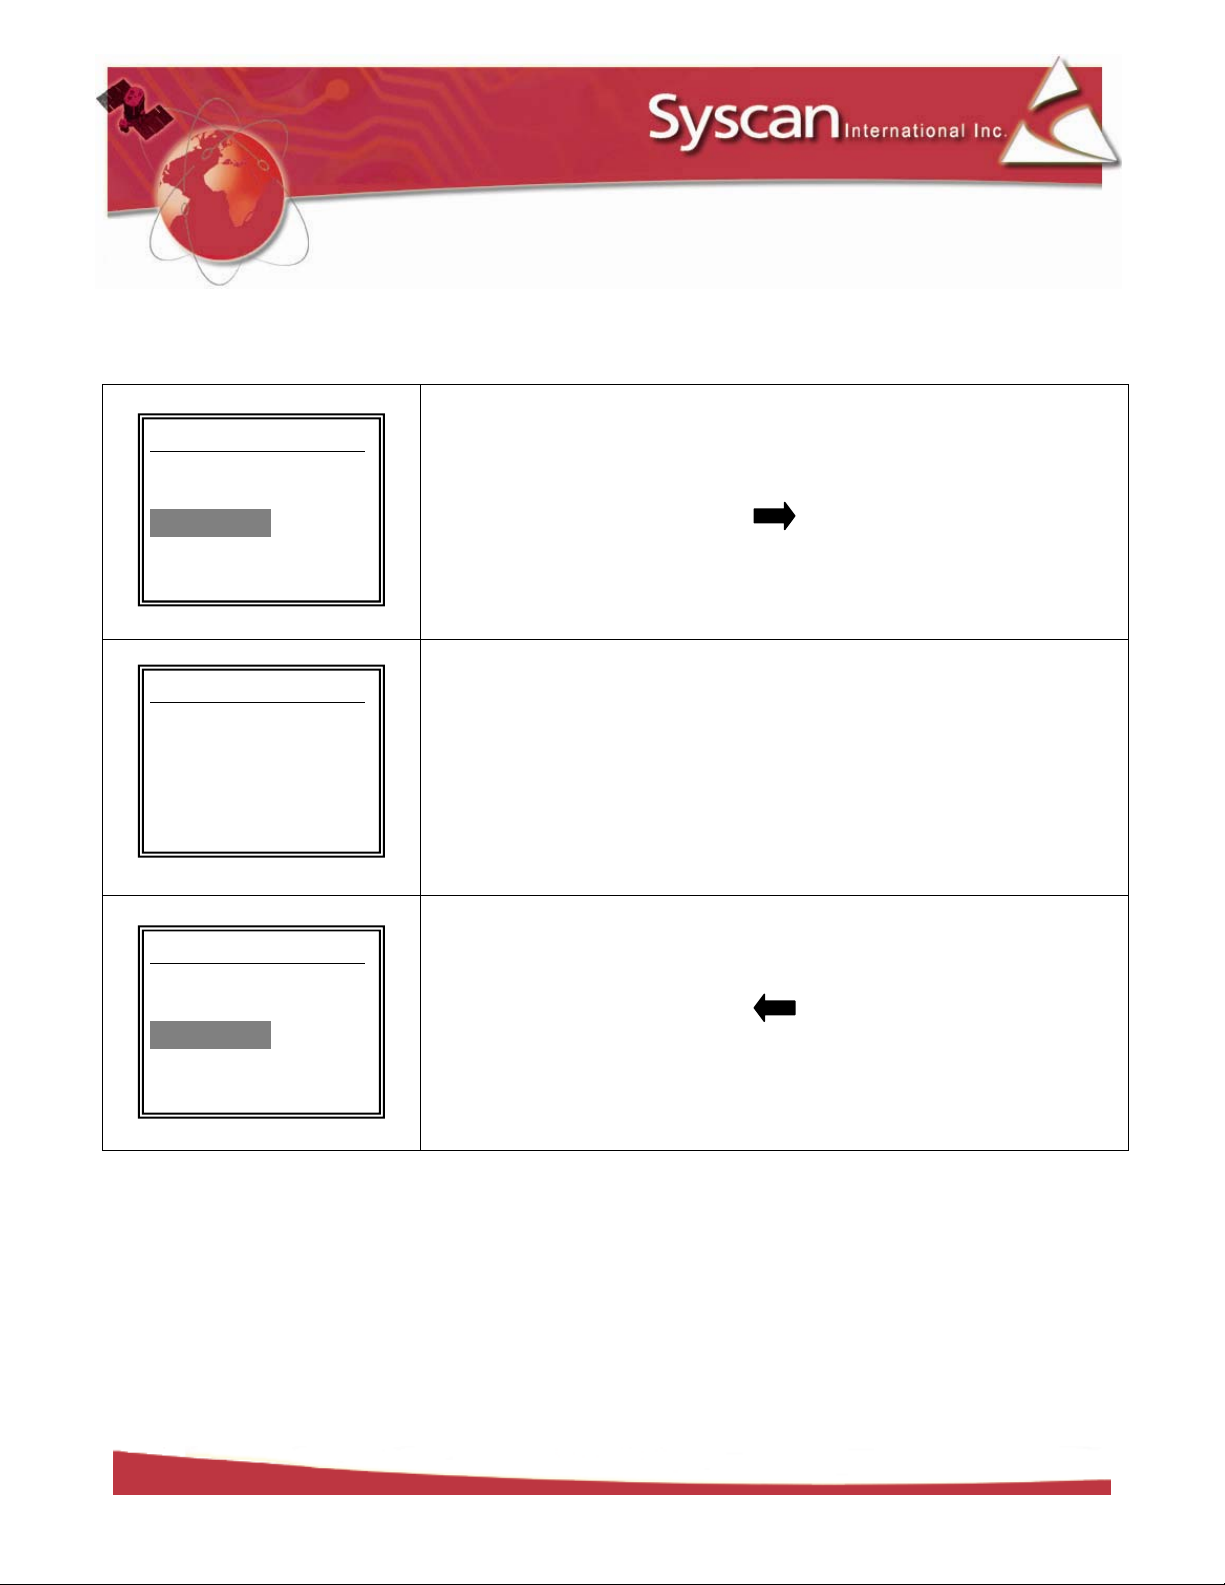
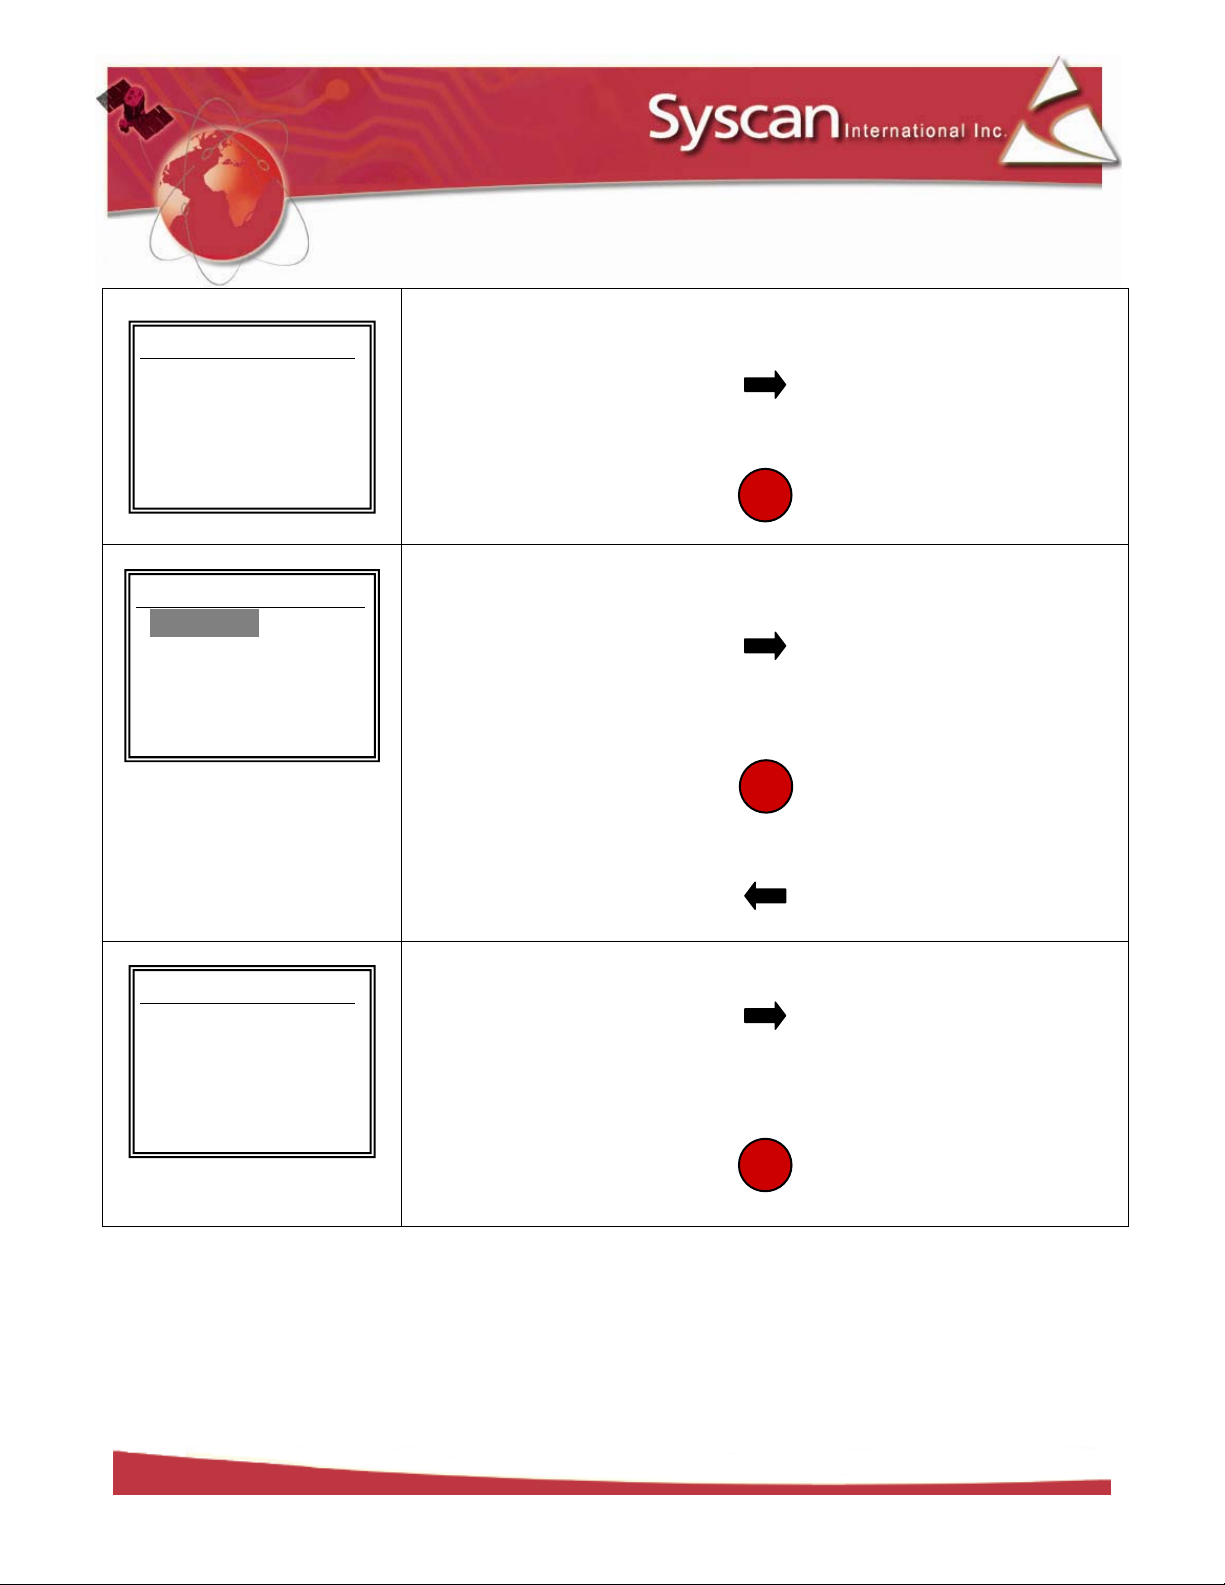
Select INFO MENU by choosing it from the MENU and pressing the
right arrow button.
The INFO MENU contains informations about the reader including:
BAT : Actual battery voltage.
SER : Serial number of the reader.
VER : Firmware version.
MEM: Number of tags in memory.
B9600: Signifies a Bluetooth module at baud rate 9600.
MENU
COUNTER
SEPARATOR
INFO MENU
ADVANCED
Get back to MENU by pressing the left arrow button.
<BACK ENTER>
LiveTrack Reader – User Manual. Page: 11 / 22
Page 12
MENU
31/07/07
ADVANCED MENU
1.7 Advanced menu
COUNTER
SEPARATOR
INFO MENU
ADVANCED MENU
<BACK ENTER>
_
ERASE MEMORY
DOWNLOAD MEMORY
READ MODE
DUPLICATES
VIBRATION
SOUND
LANGUAGE
SITE NUMBER
BLUETOOTH
LOAD DEFAULT
OUTPUT MENU
SET TIME & DATE
LINE FEED
TAG TYPE
RFID INFO.
<
>
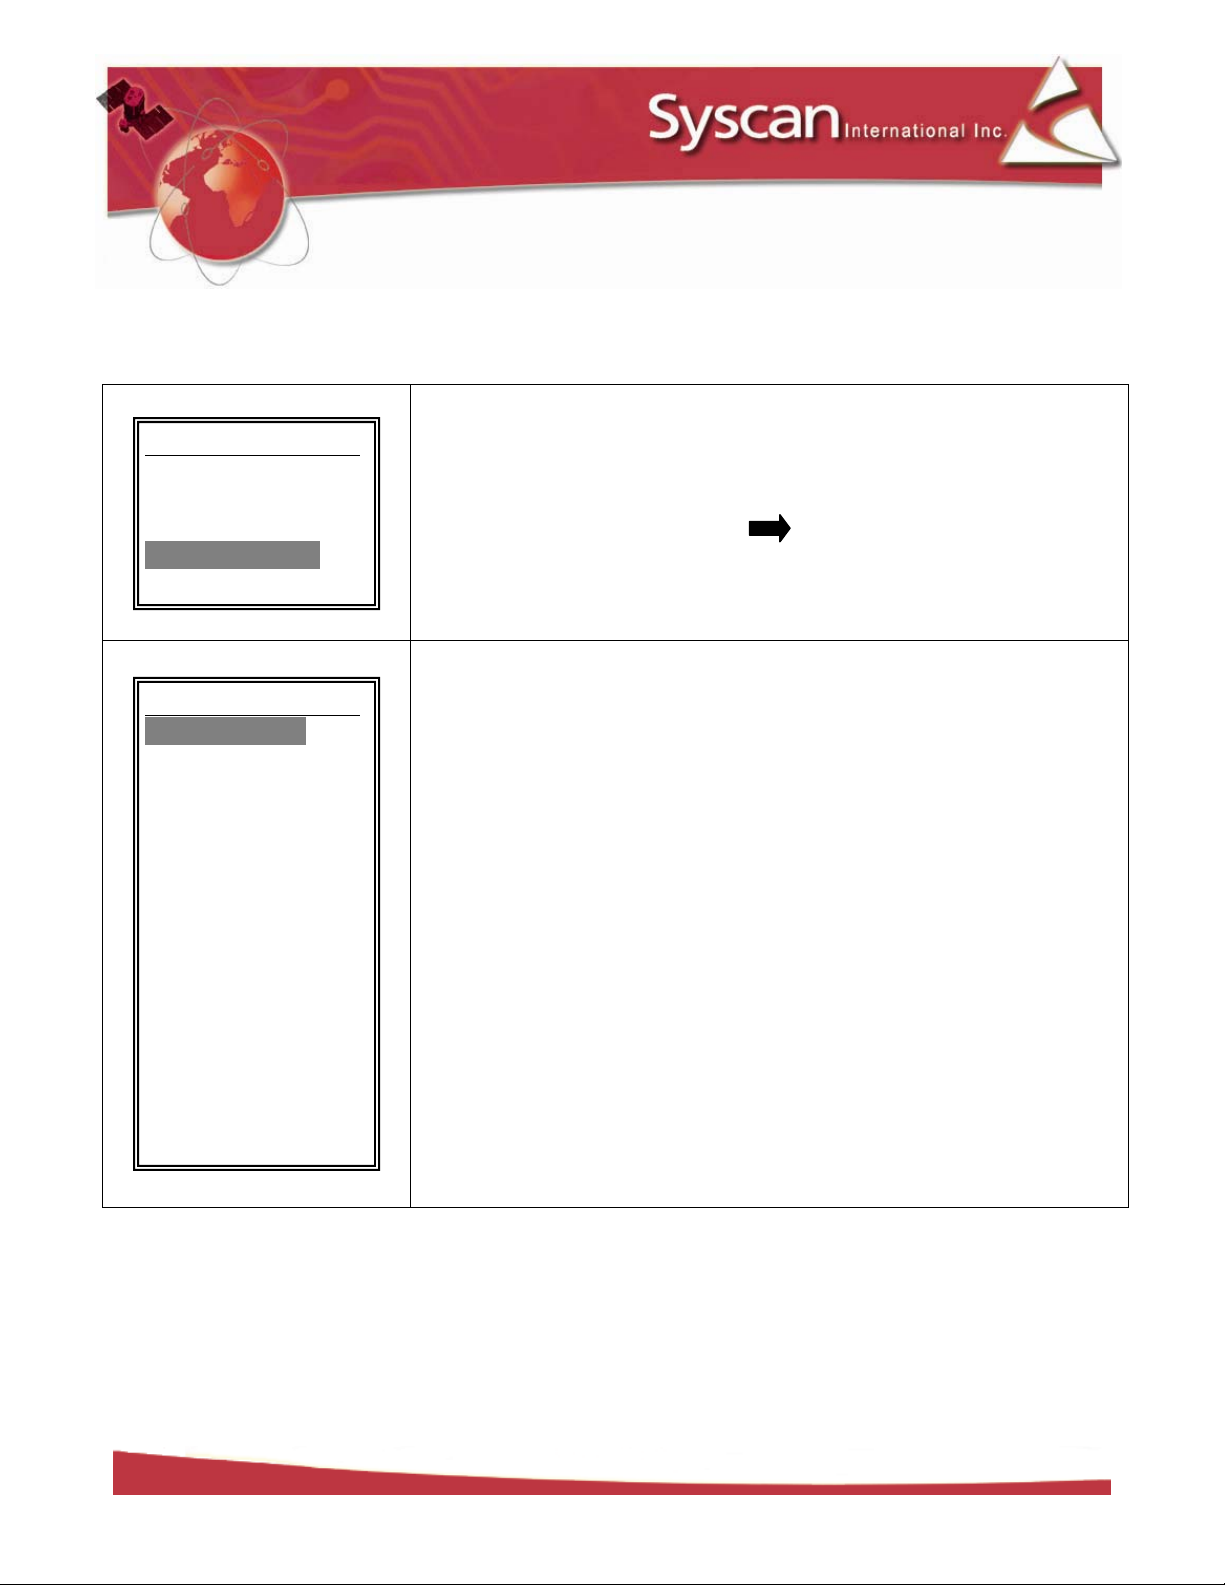
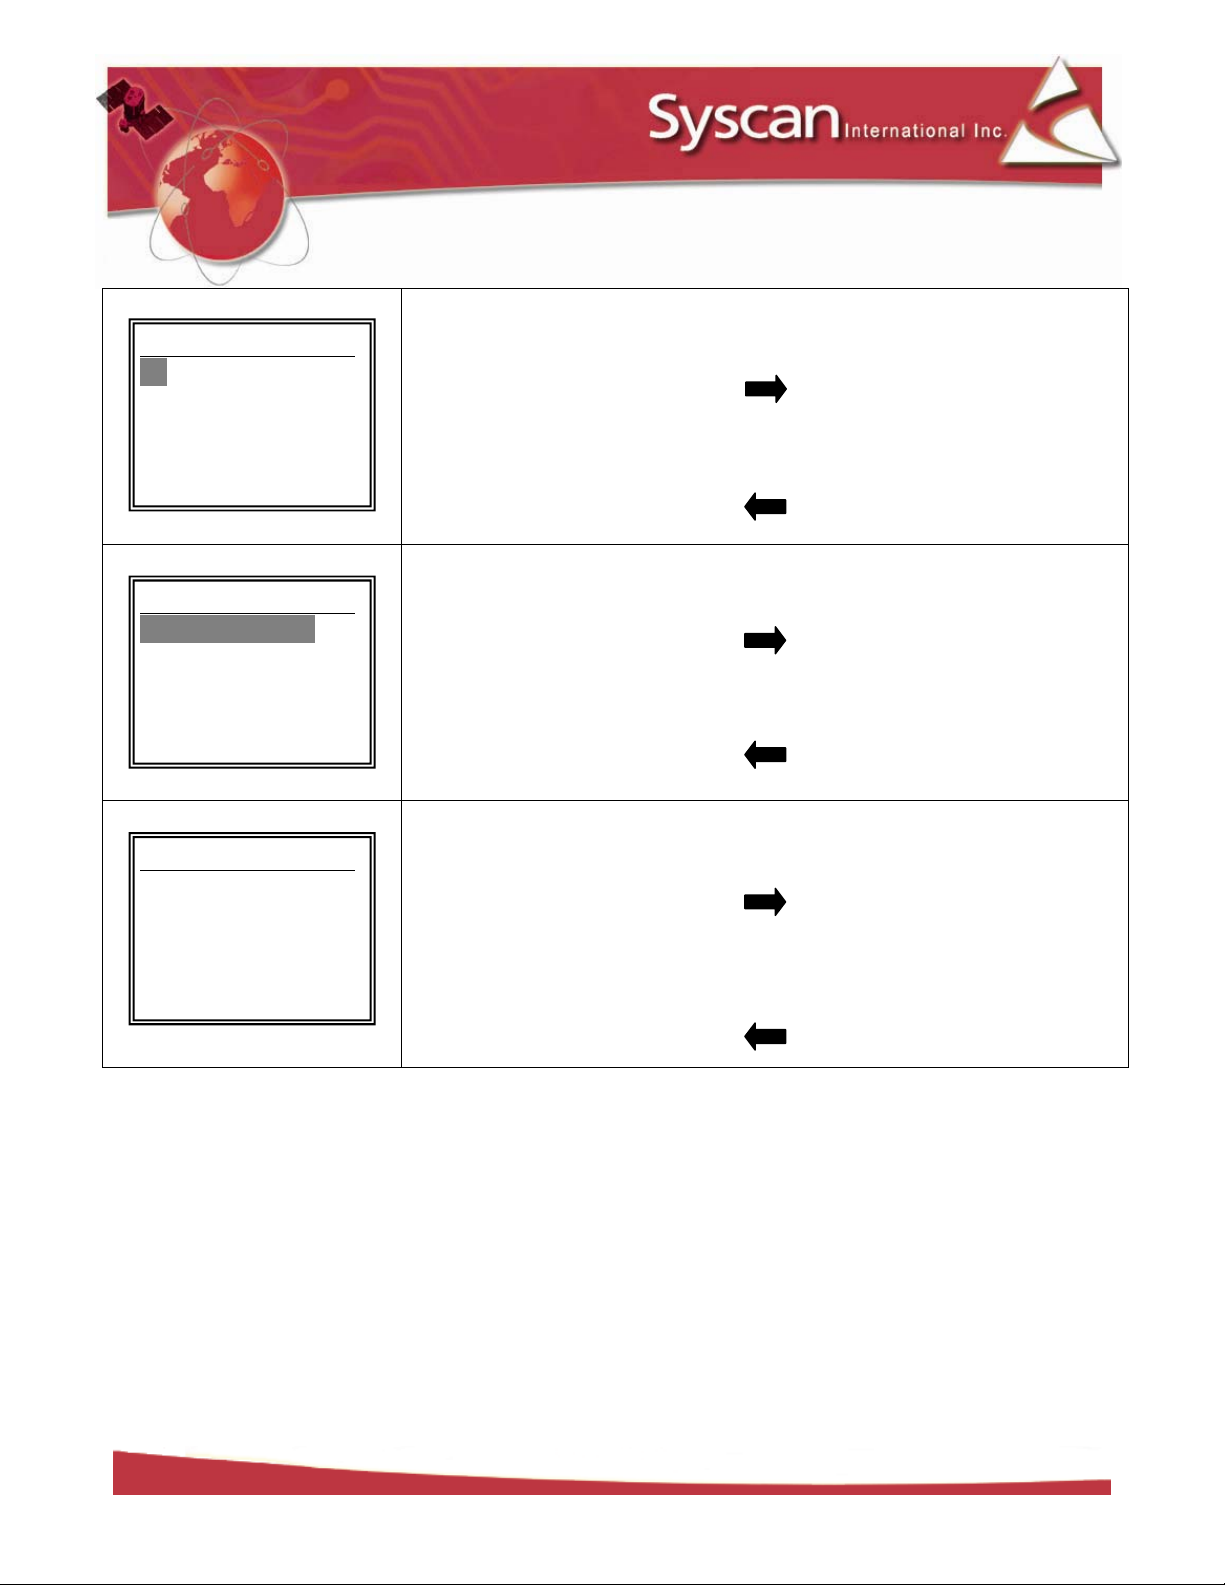
Select the ADVANCED MENU by choosing it from the MENU and
pressing the right arrow button.
The ADVANCED MENU contains all the advanced features and settings
available on the reader.
LiveTrack Reader – User Manual. Page: 12 / 22
Page 13
READ MODE
ERASE MEMORY _
00025 TAGS
05 %
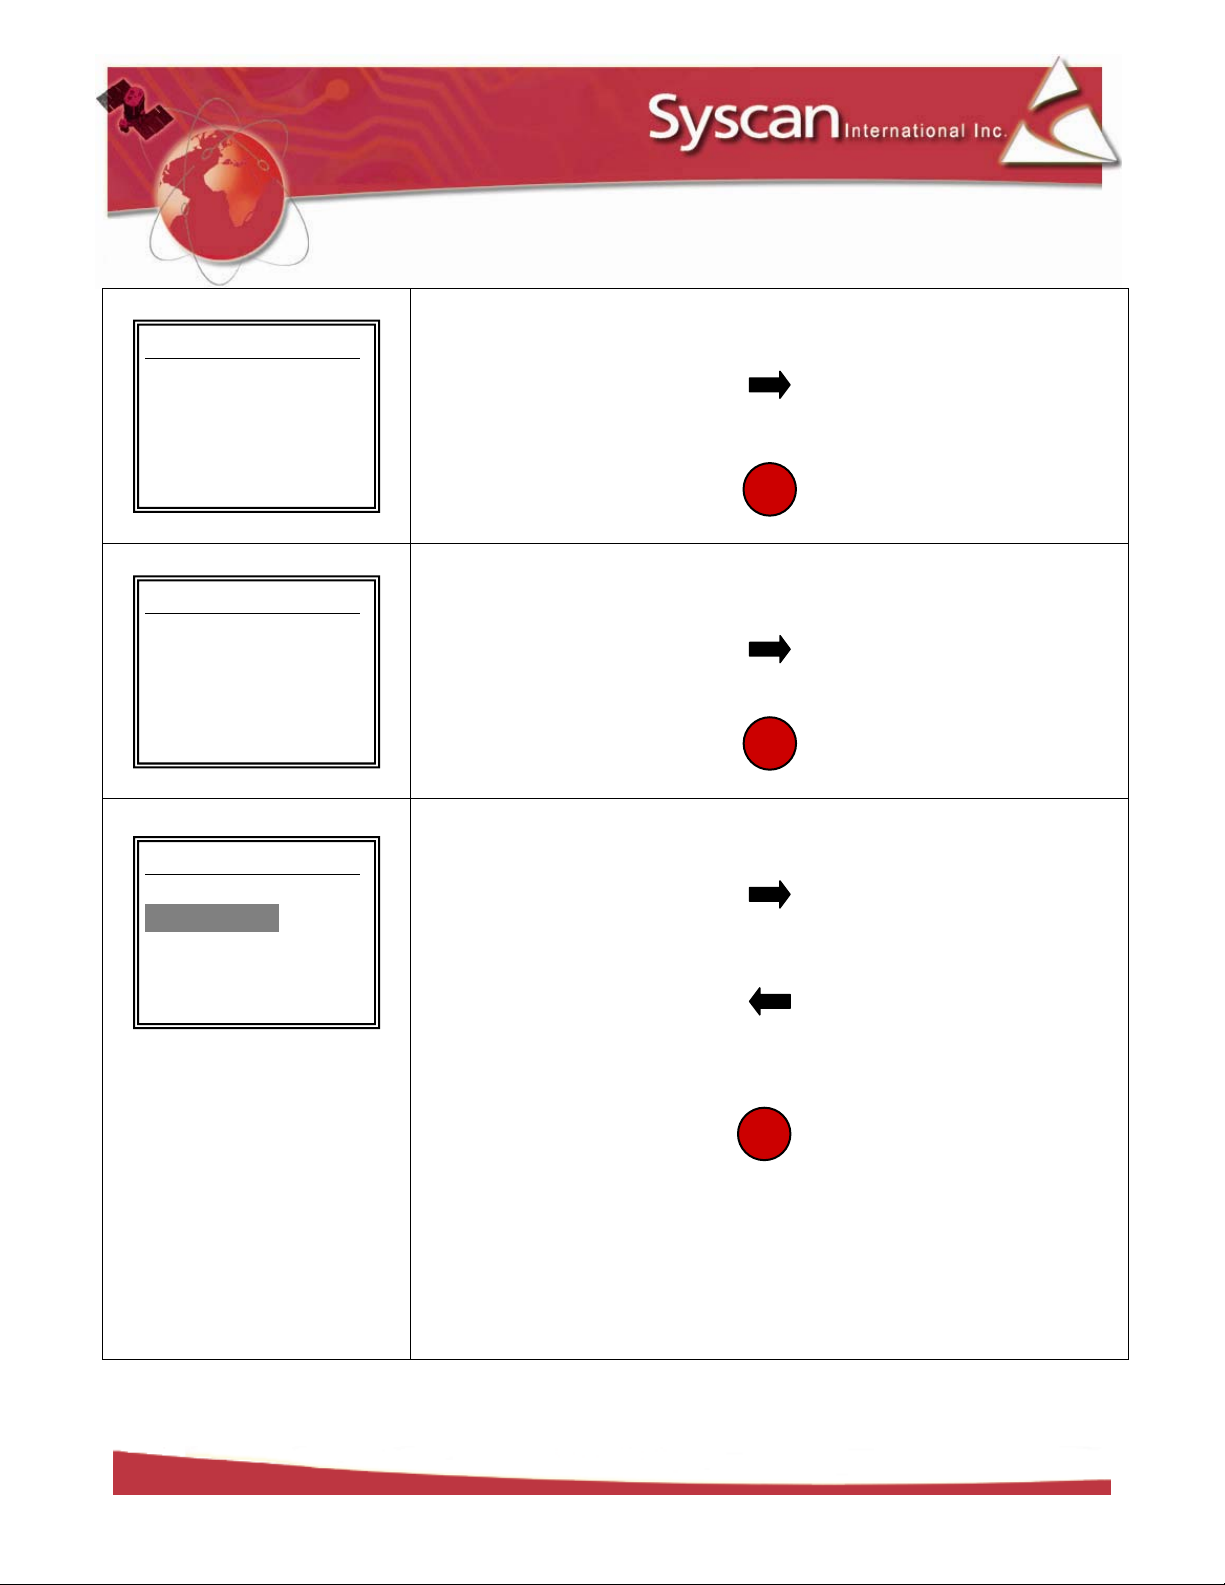
Select ERASE MEMORY by choosing it from the ADVANCED MENU and
pressing the right arrow button.
Erase the memory by pressing the ON/OFF button.
<BACK ERASEn
DOWNLOAD MEMORY_
00025 TAGS
05 %
Select DOWNLOAD MEMORY by choosing it from the ADVANCED MENU
and pressing the right arrow button.
Download the tags in the memory by pressing the ON/OFF button.
<BACK DOWNLOADn
Select READ MODE by choosing it from the ADVANCED MENU and
_
SINGLE
CONTINUOUS
<BACK
pressing the right arrow button.
Choose SINGLE mode or CONTINUOUS mode, and then press the left
arrow button.
Press the red button once to complete the change.
SINGLE mode: The ON/OFF button has to be press before each read.
CONTINUOUS mode: The RFID section is constantly in read mode.
LiveTrack Reader – User Manual. Page: 13 / 22
Page 14
DUPLICATES
00025
MENU
SOUND
ALLOW
DO NOT ALLOW
<BACK
HDX: 999
000 000 000 125
_
Select DUPLICATES by choosing it from the ADVANCED MENU and
pressing the right arrow button.
Choose ALLOW or DO NOT ALLOW the duplicates, and then press the
left arrow button.
ALLOW: The reader will allow duplicates starting from the next read.
DO NOT ALLOW: The reader will not allow duplicates starting from the
next read. The reader will beep twice and display *DUPLICATE* at the
bottom of the screen.
* DUPLICATE *
VIBRATION _
YES
NO
>
Select VIBRATION by choosing it from the ADVANCED MENU and
pressing the right arrow button.
Choose YES or NO, and then press the left arrow button.
<BACK
_
YES
NO
<BACK
Select SOUND by choosing it from the ADVANCED MENU and pressing
the right arrow button.
Choose YES or NO, and then press the left arrow button.
LiveTrack Reader – User Manual. Page: 14 / 22
Page 15
LANGUAGE
BACK
BLUETOOTH
Select LANGUAGE by choosing it from the ADVANCED MENU and
pressing the right arrow button.
Choose a language, and then press the left arrow button.
ENGLISH
FRENCH
SPANISH
GERMAN
<
_
SITE NUMBER _
1234000
nBACK
_
SLAVE
MASTER
000C7647064F
<BACK MODIFY>
BLUETOOTH ID _
001C00000000
nBACK
Select SITE NUMBER by choosing it from the ADVANCED MENU and
pressing the right arrow button.
Replace each number using the up or down arrow buttons. Move the
cursor using the left or right arrow buttons. Once finished, press the
ON/OFF button.
Select BLUETOOTH by choosing it from the ADVANCED MENU and
pressing the right arrow button.
Choose SLAVE or MASTER, and then press the left arrow button.
In MASTER mode, the Bluetooth ID of the pairing slave has to be
entered. Press the right arrow button to modify it.
Replace each digit using the up or down arrow buttons. The digits go
from 0-9 and A-F. Move the cursor using the left or right arrow buttons.
Once finished, press the ON/OFF button.
LiveTrack Reader – User Manual. Page: 15 / 22
Page 16
BACK
YES/NO
LOAD DEFAULT _
LOAD DEFAULT ?
Select LOAD DEFAULT by choosing it from the ADVANCED MENU and
pressing the right arrow button.
To reload the default settings of the reader, press the ON/OFF button.
<BACK YESn
OUTPUT MENU _
>TAG TYPE
>TAG ID
DATE / TIME
SITE NUMBER
<
Select TIME & DATE by choosing it from the ADVANCED MENU and
n
TIME & DATE _
14:09 31/07/07
HH:MM DD/MM/YY
nBACK
Select OUTPUT MENU by choosing it from the ADVANCED MENU and
pressing the right arrow button.
The format of the transmitted packet contains four sections. Select (>)
or unselect ( ) by using the up and down arrow buttons and pressing
the ON/OFF button.
Once finished, press the left arrow button.
pressing the right arrow button.
Replace each number using the up or down arrow buttons. Move the
cursor using the left or right arrow buttons. Once finished, press the
ON/OFF button.
LiveTrack Reader – User Manual. Page: 16 / 22
Page 17
LINE FEED
TAG TYPE
RFID INFO
_
CR
CR/LF
<BACK
_
FDX / HDX DEC
FDX / HDX HEX
INDUSTRIAL
<BACK
Select LINE FEED by choosing it from the ADVANCED MENU and
pressing the right arrow button.
Choose CR to add a carriage return or CR/LF to add a carriage return
and line feed when transmitting data. Once finished, press the left
arrow button.
Select TAG TYPE by choosing it from the ADVANCED MENU and
pressing the right arrow button.
Choose the tag type FDX/HDX DEC (Decimal, 134,2 kHz), FDX/HDX HEX
(Hexadecimal, 134,2 kHz) or Industrial (EM4002, 125 kHz) and then
press the left button.
. _
VER: 1.04
POWER 22%
TUNE: 12/43
PHASE: 0
<BACK
Select RFID INFO by choosing it from the ADVANCED MENU and
pressing the right arrow button.
The RFID INFO menu contains the RFID tuning information.
Once finished, press the left arrow button.
LiveTrack Reader – User Manual. Page: 17 / 22
Page 18

2. Communications
2.1 Bluetooth Communication
The Bluetooth reader operates as a slave device. Please refer to your master device manual to
establish the pairing. The reader does not need a PIN authentication. If your master device needs a
PIN authentication, use “default”. Your master device should provide a COM port after pairing with
the reader. Use that virtual COM port to communicate with the reader.
For more detail information, see the “LiveTrack Manager – Software Manual”.
2.2 Serial communication
Use the serial cable provided in the kit to connect the reader to a DB-9 serial port.
Configure the serial port at 9600, n, 8, 1 and no handshaking.
LiveTrack Reader – User Manual. Page: 18 / 22
Page 19

2.3 Packet description
When an RFID Tag is read, the tag, date, time and site # will be saved in the reader’s memory and
will be transmitted via Bluetooth or serial communication.
When a read occurs, the format of the packet being sent by the reader is as follows:
FCCCDDDDDDDDDDDDAASSMMHHWWDDMMYYTTTTTTT‘CR’
*The packet can be modify using the OUTPUT MENU. (See page 16)
Field Description
F Tag Type
‘F’ for ISO FDX-B tags
‘H’ for ISO HDX tags
‘I’ for EM4002 tags
CCC The tag’s country code
D…D The tag’s unique Identification number
AA…YY
TTTTTTT The site number
CR Carriage return - ASCII code 13 (0x0D)
The time and date of the reading
Field description
AA
SS
MM
HH
WW
DD
MM
YY
2 numbers for the milliseconds
2 numbers for the seconds
2 numbers for the minutes
2 numbers for the hours
2 numbers for the day of the week ex: Monday = 01 and Sunday = 07
2 numbers for the day
2 numbers for the month
2 numbers for the year
LiveTrack Reader – User Manual. Page: 19 / 22
Page 20
BACK
YES/NO
2.4 Scale connection
The LiveTrack reader is compatible with most scale heads on the market today. Including:
Gallagher
Reliable Scales
Avery Weigh-Tronix
Tru-Test
WW Paul Scales
Digi-Star
Tru-Test
Toledo
Vesta
1. Make sure you have an EID compatible scale (see Manufacturer)
2. Simply configure the scale to receive the EID from the reader (see your Manufacturer’s
documentation).
3. If you are using a Bluetooth connection, make sure you have a Bluetooth compatible scale and
LiveTrack reader.
Serial connection:
Select only the TAG ID from the OUTPUT MENU (see page 16). The menu should look like this when
done with the configuration.
OUPUT MENU _
TAG TYPE
>TAG ID
DATE / TIME
SITE NUMBER
<
Simply plug the communications cable that came with your LiveTrack reader into the input port on
your scale.
When reading a tag the EID tag number should appear on your scale, some scales only display a part
of the number.
n
LiveTrack Reader – User Manual. Page: 20 / 22
Page 21

3. Troubleshooting
LiveTrack Reader – User Manual. Page: 21 / 22
Page 22
4. Contact
Syscan International Inc.
For technical department, please contact
1-888-479-7226
For sales department, please contact
1-888-479-7226
LiveTrack Reader – User Manual. Page: 22 / 22
 Loading...