

Page 1

Micro
Setup Guide
Model: GU01
Page 2

Genie Micro
An easy-to-use device for controlling your camera
remotely for capturing photos, time-lapses and
video. Connect the Genie Micro to your camera and
wirelessly control it from any iOS or Android device
using the Syrp App.
This Setup Guide will take you through the basics to
get you started using your Genie Micro for the
first time.
A full user manual can be found on the support
section page at www.syrp.co
Page 3
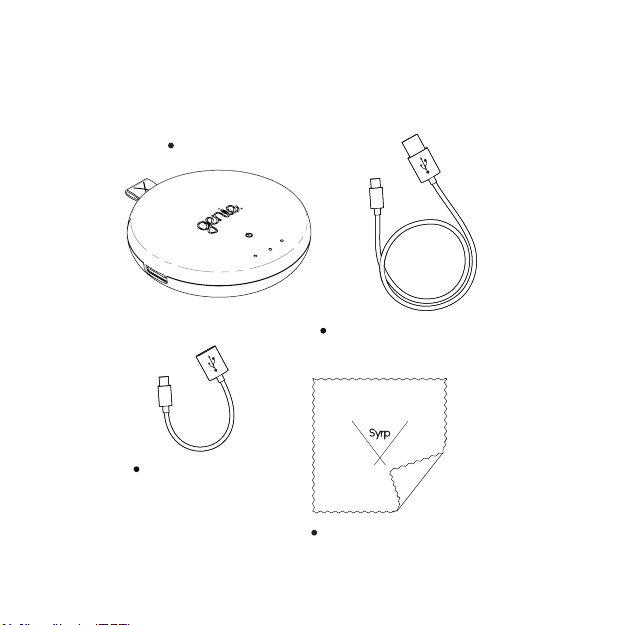
What’s in the Box
Genie Micro
USB-C to USB-A
Female Cable
USB-C to USB-A Male Cable
Micro Fiber Cloth
Page 4
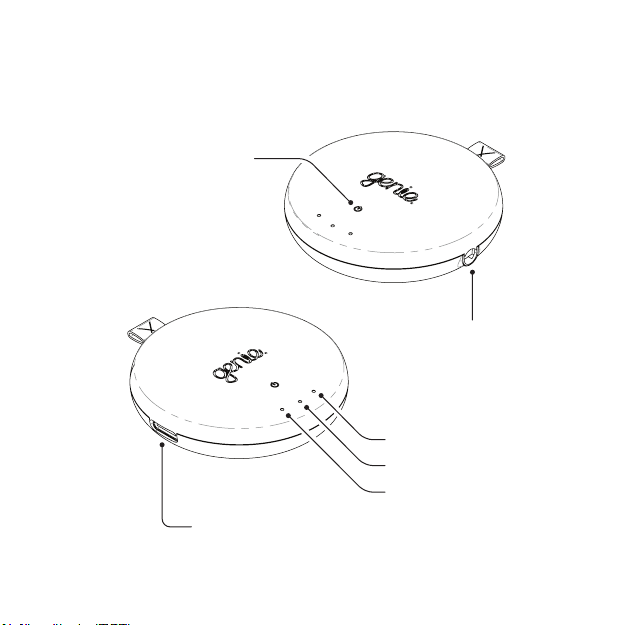
Genie Micro Interface
On/ Off Button
Charging Port/
USB Camera Control
Camera Port
Camera Light
Charging Light
Connection Light
Page 5
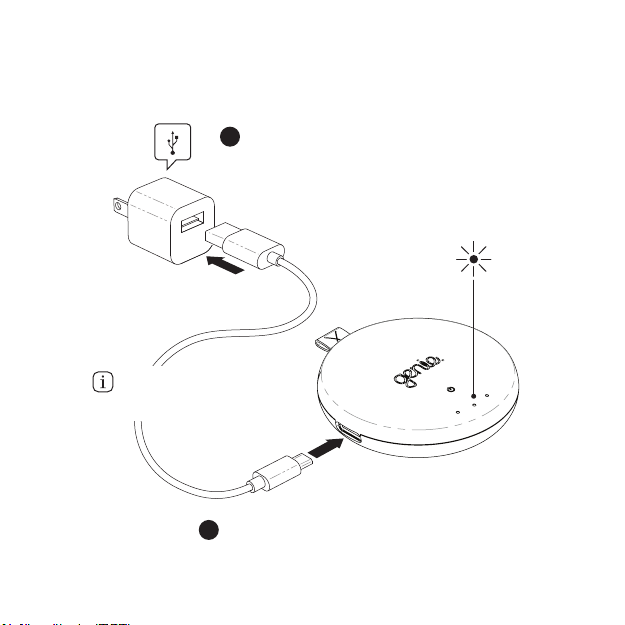
Plug the USB cable into a wall
1
charger, laptop or USB port.
The Genie Micro can not
be charged while in use.
2
Plug the USB-C plug into the
Genie Micro charging port.
Charging
Orange light indicates
charging, green indicates
fully charged.
Page 6

Mount the Genie Micro
Insert the Genie Micro on to the hotshoe of your
1
camera, with the power button facing the back of
the camera.
Page 7

Shutter Control
Plug the 2.5mm end of your Shutter Link Cable (*sold
1
separately) into the camera port on the Genie Micro.
2
Plug the other end into the remote port on your
camera. Consult your camera manual to find the
correct port.
*
Select a Shutter link cable for
your camera at www.syrp.co
Page 8

Turn bluetooth ON in the settings menu
1
on your device.
Download and open the Syrp App.
2
Press the power button on the Genie
3
Micro once to turn it on.
(Don’t hold the power button down)
Flashing LED indicates
ready to pair and solid
green indicates paired
Device Connection
Page 9

App Connection
CONNECTION
CREATE CONTENT
COMMUNITY TUTORIALS
GENIE MICRO
Panning
Tap the
1
icon
2
Select your
Genie Micro
CONNECTION
Page 10

XXXXX
XXX
Up to date
vX.X
Firmware Update
1
2
Tap the
icon to update
firmware
icon appears
when device has
updated
Page 11

Learn More
For tutorials on operating the Genie Micro and
navigating the App tap the question mark ? on the
home screen of the App or subscribe to our
YouTube Channel.
youtube.com/syrpey
instagram.com/syrp_
facebook.com/syrp.co
twitter.com/syrp_
support@syrp.co.nz
www.syrp.co
Page 12

Genie Micro Quick Tips
Always set your camera and lens to manual focus (MF), if
set to Auto Focus (AF) the camera can misfire, leading to
missed frames.
Turn image review OFF on your camera. On some cameras
image review can cause missed frames in your time-lapse.
Once you begin a time-lapse or video recording you can
leave the App and disconnect, your move will continue to
run as normal.
Press the power button once to turn the Genie Micro on.
To turn the Genie Micro off, hold the power button for 2
seconds.
Hold the power button down for more than 20 seconds to
force shutdown the device.
Page 13

Firmware Tips
The App will alert you if a new firmware update is
available. If you have trouble updating the Firmware
try these tips:
Close the App down and restart the App.
Force the device into “factory mode” by holding down the
power button for over 10 seconds untill all 3 LED’s start
flashing. After this, retry updating the device from the App.
Note that the device’s name will have changed to
something similar to “Syrp: XXXXXXXXXXXX”.
For iOS devices, go to Settings > Cellular/Mobile Data.
Then scroll down and turn Wi-Fi Assist Off.
Try updating from a different location or device.
Visit the support section page at www.syrp.co for more
detailed help.
Page 14

 Loading...