

Page 1

Page 2

Contents.
1. WHAT’S IN THE BOX
2. MOUNTING THE GENIE MINI
3. LINK CABLE
4. GENIE MINI CONNECT
5. APP CONNECT
6. HOME SCREEN
7. CHARGING
8. TECH SPECS
Please read the instructions carefully before using the Genie Mini. For more detailed setup
tutorials including ‘how to setup a Timelapse’ and ‘how to setup a Video’ tap the question
mark in the bottom right of the App or subscribe to our Youtube Channel
Go Filming!
Page 3
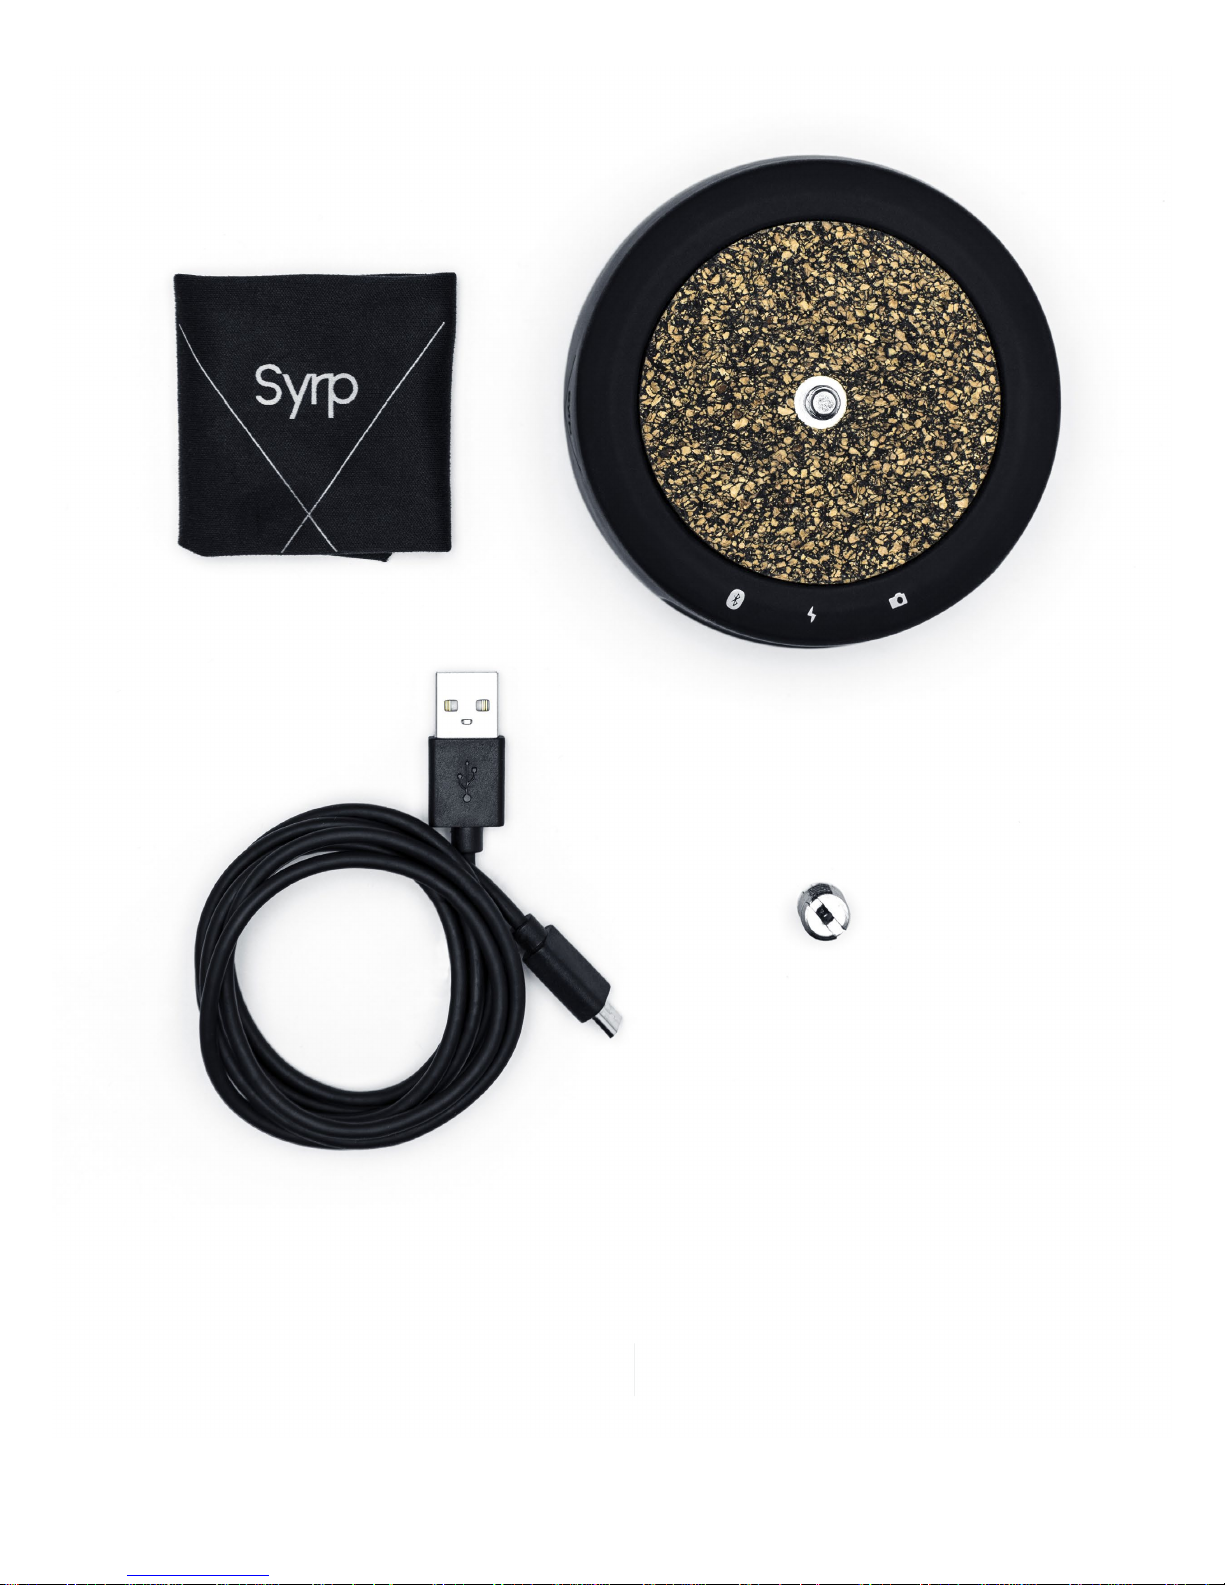
Items that are included in the box when
you purchase a Genie Mini
1 Genie Mini 2 Syrp Micro Fiber cloth 3 Micro USB charging cable 4 1/4” to 3/8” Thread adapter
What’s in the Box
Page 4
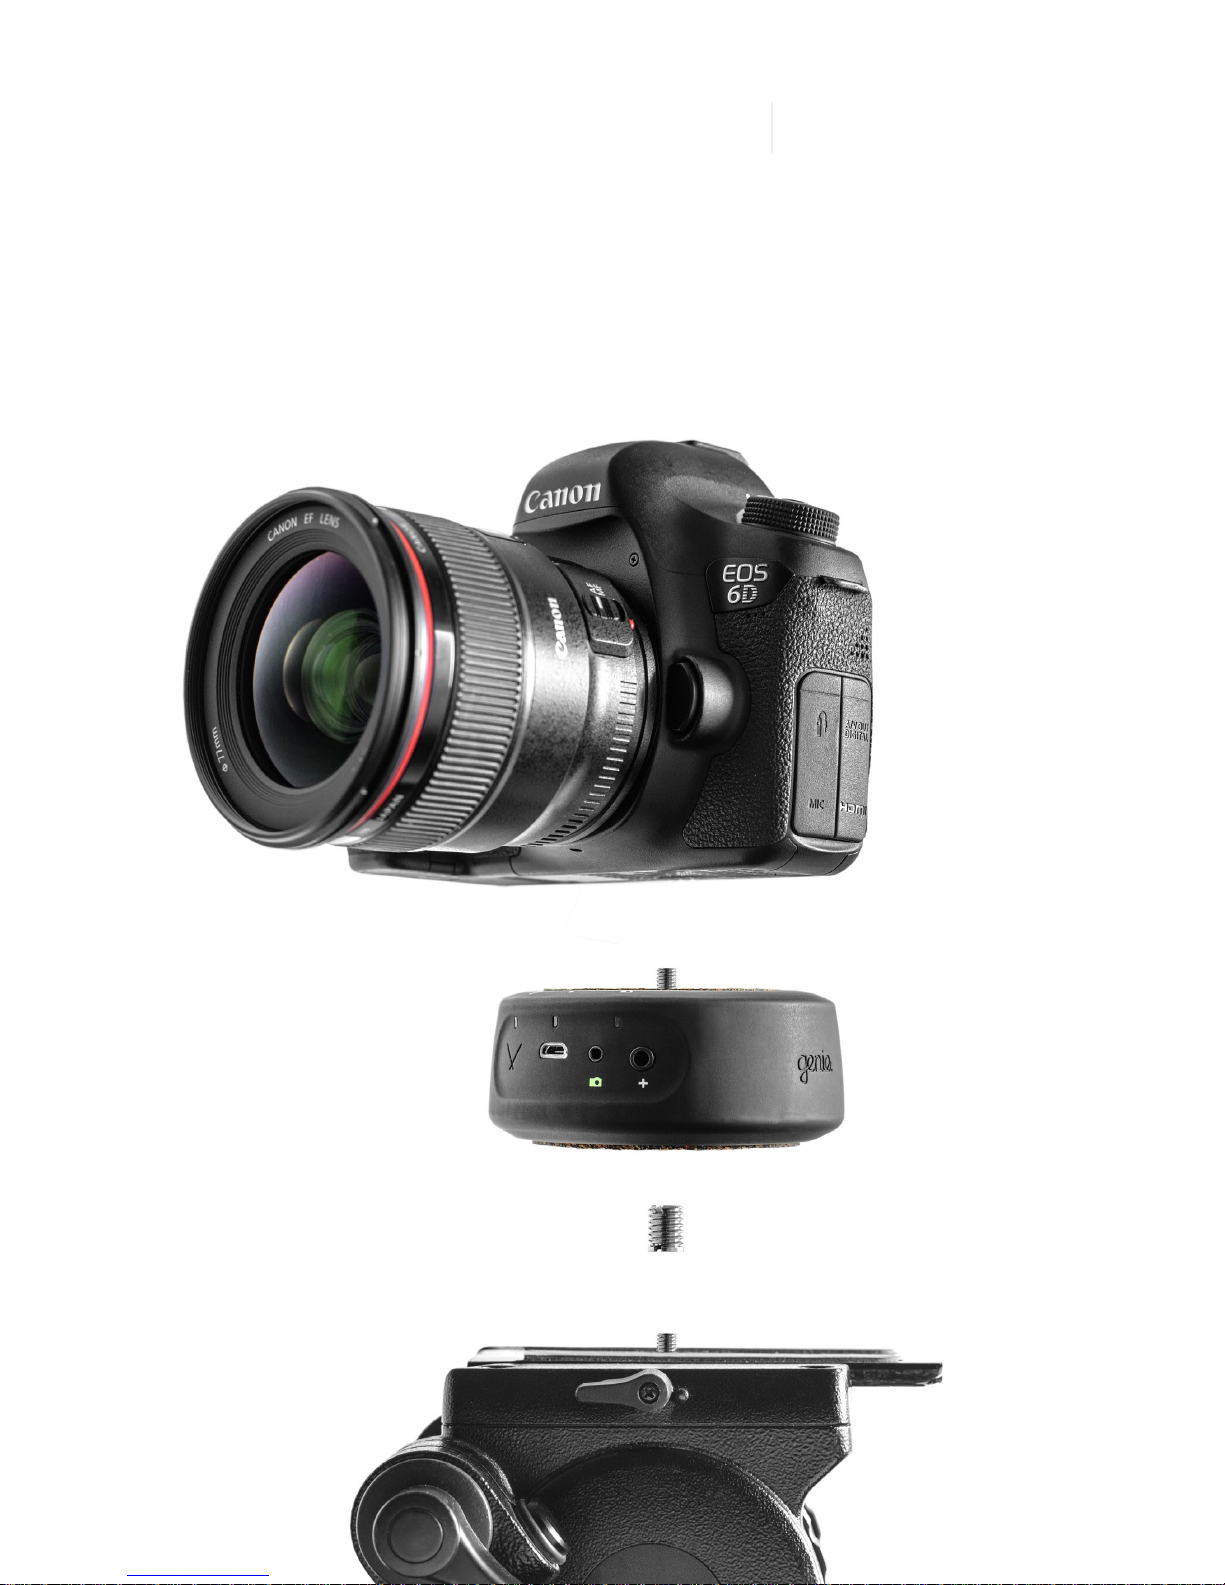
Attach the Genie Mini to a tripod
and your camera to the top.
Mounting the Genie Mini
1
2
Attach the Genie Mini to a tripod head or the tripod legs. If using
a tripod head then use the thread adapter included to tranform the
large thread on the Genie Mini into a small thread.
Screw your camera onto the top of the Genie Mini. We recommend
using a Ballhead between the Genie Mini and the camera in order to
have greater control of your cameras position.
Page 5

The Syrp link cable is used to trigger your camera for
shooting timelapse. We stock multiple different cables for
different cameras. Refer to our website to find the correct
cable for your camera.
1
2
3
Plug in the 2.5mm end into the camera port on the
Genie Mini marked with a Green camera icon.
Plug the other end into the remote port on your camera.
Consult your camera manual to find the correct port.
Once connected the Genie Mini is ready to trigger
your camera for timelapse.
Link Cable
Page 6

Set your Genie Mini up to pair
with the Syrp Genie App.
1
2
Press the Syrp cross on the front of the Genie
Mini.
The Bluetooth LED indicator will flash green
confirming that the Genie Mini can now be
paired with the Syrp Genie App.
Genie Mini Connect
Page 7

OK
CONNECT
Turn ON bluetooth on your phone and connect
the Syrp Genie App to the Genie Mini.
1
2
3
4
5
In the settings menu on your phone, Turn bluetooth
ON.
On the Syrp Genie App, navigate to the ‘Connection’
screen by tapping the Syrp Connect icon at the top
right of the screen.
Your Genie Mini will appear in the list. select the
Genie Mini you want to connect to by tapping on its
name or tapping the circle.
The App will now connect to your selected Genie Mini.
A green tick icon and battery indicator will appear.
The Syrp logo will also turn green confirming that a
connection has been made.
Press “OK” or the back arrow to go to the home
screen
App Connect
Page 8

Choose your recording type.
1
2
3
4
To start a recording select either Timelapse or
Video.
Tap the Community button to watch films shot
with the Genie Mini and other Syrp products.
The Question Mark in the bottom right will take
you to a selection of video tutorials about various
setups.
Tap the Settings Cog in the top left to adjust
settings on the Genie Mini
Home Screen
Page 9

Charge the Genie Mini using the USB cable included
1
2
3
4
Plug the Micro USB charger into the Genie Minis
USB port.
Plug the other end into a wall charger, laptop or
computer to charge the device.
The charge light above the USB port should
turn orange indicating the the Genie
Mini is charging.
Once fully charged the charging light will turn
green.
Charging
Page 10

Technical information.
1
2
3
4
5
6
7
Max Speed: 360 Degrees in 33 seconds
Minimum Resolution: 0.005 Degrees
Panning Load: 4kg (8.8 lb)
Tilting Load: 3kg centered (6.6 lb)
Weight: 230g (8.1 oz)
Timelapse: 48+ hours
Video: 5+ hours
Charge Time: 3 Hours
Included Li-Ion Rechargeable battery
Please check the compatiblity chart online here
for specified camera models
Bluetooth 4.0 Low Energy
USB Charging
Camera Port: 2.5mm
Accessory Port: 3.5mm (Dual Genie + IR Cable)
USB Charging 5V 0.5A DC
1/4-20 On top
3/8-20 On bottom
Included 1/4” to 3/8” adapter
Tech Specs
92mm
40mm
SPEED LIMITATIONS
PAYLOAD / WEIGHT
BATTERY
COMPATITBILITY
INTERFACE
POWER SUPPLY
MOUNT TYPE
Page 11

• Always set your camera and lens to manual focus (MF), if set to Auto Focus
(AF) the camera can misfire leading to missed frames.
• Turn image review OFF on your camera. On some cameras image review can
cause missed frames in your time-lapse.
• Once you begin a recording you can leave the App and disconnect, your move
will continue to run as normal.
• Press the Syrp button once to turn the Genie Mini on/off. Holding the Syrp button
down for longer forces a hardware / firmware reset on the Genie Mini.
• To turn the Genie Mini off you must first disconnect in the connection window on
the Syrp Genie App before pressing the Syrp button once.
• If you don’t have a Genie Mini or you would like to explore the setup process
for connecting to multiple Genie products you can use the Product Test Drive,
Virtual Setup mode. Enter the Connection screen of the app and select Product
test drive Virtual setup. Here you can connect to multiple products and explore
how the app works. You can turn OFF Test drive mode in the settings menu of
the app.
Helpful tips on using your Genie Mini
Quick Tips
Page 12

If you are having trouble updating the
firmware on your Genie Mini, try these tips:
Firmware Tips
• The App will automatically alert you if a new firmware update is available and
will be installed from within the App. Always make sure you have the latest App
installed. If the firmware update fails try some of these tips
• Try to update on a different device, if it works you can go back to using your
original device.
• Turn WIFI off on your device.
• Do not connect to other bluetooth devices while updating, it’s best to turn off
other nearby bluetooth devices completely, or the update may fail.
• Try the update from a different location, in some situations unknown interference
can cause a failed update.
Safe Mode
If your Genie Mini has a flashing red light then it means the device is in SAFE mode
and there is no firmware currently loaded onto the device. The battery indicator will
have a question mark and read as empty. This does not mean there is an issue with
the battery. Please follow the steps below to get back up and running.
Forced firmware update iOS
1 Plug The Genie Mini in to power.
2 Force close the App and reopen on your device.
3 Now navigate to the connection screen on the App.
4 Hold down the Genie Mini ON button for 10 – 15 seconds. (This resets the
hardware in the Genie Mini, a series of lights will flash)
5 You will see the Genie Mini appear in the Connection Screen. Tap to CONNECT
6 Navigate to the New time lapse screen and select new time lapse. This will
prompt a firmware update.
Forced firmware update Android
1 Plug The Genie Mini in to power.
2 Force close the App and reopen on your device.
3 Now navigate to the connection screen on the App.
4 Hold down the Genie Mini ON button for 10 – 15 seconds. (This resets the
hardware in the Genie Mini, a series of lights will flash)
5 You will see the Genie Mini appear in the Connection Screen. Tap to CONNECT.
6 Navigate to the SETTINGS menu and tap FIRMWARE RELOAD This will prompt
a firmware update.
Page 13

Contact.
Syrp Limited
43A Linwood Ave, Suite 7
Mt Albert 1025
Auckland
New Zealand
+64 9 845 6319
General enquiries:
syrp@syrp.co.nz
www.syrp.co.nz
twitter.com/syrp_ vimeo.com/syrp
gplus.is/syrp
facebook.com/syrp.co.nz youtube.com/c/syrp
instagram.com/syrp_
 Loading...