

SYP OR-HD62CD-4K22 Operation Manual
CDPS-UA6H2HFS
6 x 2 HDMI 4K UHD Matrix with HDCP 2.2
Operation Manual
Operation Manual
OR-HD62CD-4K22


SAFETY PRECAUTIONS
Please read all instructions before attempting to unpack or install or
operate this equipment, and before connecting the power supply.
Please keep the following in mind as you unpack and install this
equipment:
• Always follow basic safety precautions to reduce the risk of re,
electrical shock and injury to persons.
• To prevent re or shock hazard, do not expose the unit to rain,
moisture or install this product near water.
• Never spill liquid of any kind on or into this product.
• Never push an object of any kind into this product through any
openings or empty slots in the unit, as you may damage parts
inside the unit.
• Do not attach the power supply cabling to building surfaces.
• Use only the supplied power supply unit (PSU). Do not use the PSU
if it is damaged.
• Do not allow anything to rest on the power cabling or allow any
weight to be placed upon it or any person walk on it.
• To protect the unit from overheating, do not block any vents or
openings in the unit housing that provide ventilation and allow for
suf cient space for air to circulate around the unit.
REVISION HISTORY
VERSION NO. DATE DD/MM/YY SUMMARY OF CHANGE
RDV1 01/07/15 Preliminary Release
VERSION NO. DATE DD/MM/YY SUMMARY OF CHANGE
RDV1 01/07/15 Preliminary Release
RDV2 22/01/16 Add annotation of screw
replacement for rack ears

CONTENTS
1. Introduction ............................................ 1
2. Applications ........................................... 1
3. Package Contents ................................ 1
4. System Requirements ............................ 1
5. Features .................................................. 2
6. Operation Controls and Functions ....... 3
6.1 Front Panel ........................................3
6.2 Rear Panel .........................................4
6.3 Remote Control ................................ 5
6.4 IR Pin De nitions ................................6
6.5 OSD Menu ......................................... 6
6.6 RS-232 Protocols .............................12
6.7 Telnet and RS-232 Commands .....12
6.8 Telnet Control .................................17
6.9 Web GUI Control ............................19
7. Connection Diagram .......................... 22
8. Specifi cations ......................................23

1
1. INTRODUCTION
The 6 by 2 HDMI 4K UHD Matrix with HDCP 2.2 and Fast Switch which
allows HDMI signal from any of its 6 sources to be routed to and
displayed on any of its 2 connected HDMI displays simultaneously with
View All Mode and Picture-in-picture (PIP) supported. Fast switching
technology can greatly eliminate the time required by swapping or
turning ON/OFF the connected displays. It supports 4Kx2K, 3D, 30bit Deep Color, Hi-Def audio and other features de ned by HDMI
speci cations.
The management of source/sink scenarios can be operated easily
through on-panel buttons, IR remote control, RS-232 or Ethernet
protocol.
2. APPLICATIONS
• Entertainment Room / Home Theater
• Show Room / Demo Room
• Lecture Room/Hall Presentation
• Show Room/Demo Room
• Public Commercial Display
• Information Board
3. PACKAGE CONTENTS
• 6 by 2 HDMI 4K UHD Matrix with HDCP2.2 and Fast Switching
• Remote Control with Battery
• Left & Right Rack Ears
• 5V/2.6A DC Power Adaptor
• IR Receiver Cable
• Operation Manual
4. SYSTEM REQUIREMENTS
Input source equipment such as Blu-ray/DVD/PS3 player or Set-Top-Box
and output HDMI TV/Display and or audio ampli er with connection
cables.
3. PACKAGE CONTENTS
• 6 by 2 HDMI 4K UHD Matrix with HDCP2.2 and Fast Switching
• Remote Control with Battery
• Left & Right Rack Ears
(To t the rack ears, please remove existing screws on the side
panels and install the rack ears using the replacement screws
supplied in the package.)
• 5V/2.6A DC Power Adaptor
• IR Receiver Cable
• Operation Manual
4. SYSTEM REQUIREMENTS
Input source equipment such as Blu-ray/DVD/PS3 player or Set-Top-Box
and output HDMI TV/Display and or audio amplier with connection
cables.

2
5. FEATURES
• HDMI with 3D & 4Kx2K supported, HDCP 2.2 and DVI compliant
• Supports 6 HDMI inputs and 2 HDMI outputs
• Displays any of 6 High-De nition sources on 2 HDTV displays
simultaneously with fast switch
• When in Preview mode, the system will be treated as Switcher (2
HDMI output same images at the same time)
• In Preview mode, it support View All (1 Main video source and 5
Sub video sources) and PIP (1 Main video source and 1 Sub video
source). 3D and 4K2K sources inputs are not supported
• Note: View All is TDM (Time Division Multiplexing display)
• 3DTV Pass-Through
• Supports HDTV resolutions up to 4Kx2K (3840x2160@24/25/30 &
4096x2160 @30Hz)
• Supports Optical audio extraction
• Supports Optical audio sampling rate output up to 192kHz
• Supports data rate from 300Mbps to 3Gbps and Deep Color up to
1080p 30-bit
• Supports individual EDID or common EDID
• Supports LPCM 2/5.1/7.1CH, Dolby Digital 2~5.1CH, DTS 2~5.1CH
(Pass through), Dolby TrueHD and DTS-HD Master Audio
• Supports 6 sets of Matrix preset functions for input/output setting
• Input port HDCP support Standard and Apple mode. The Apple
mode selection to guarantees the use of Apple devices
• Compliant with DVI source (Not supporting Deep color and Color
space YCbCr 422/444)
• Supports OSD on output B under Preview Mode

3
6. OPERATION CONTROLS AND FUNCTIONS
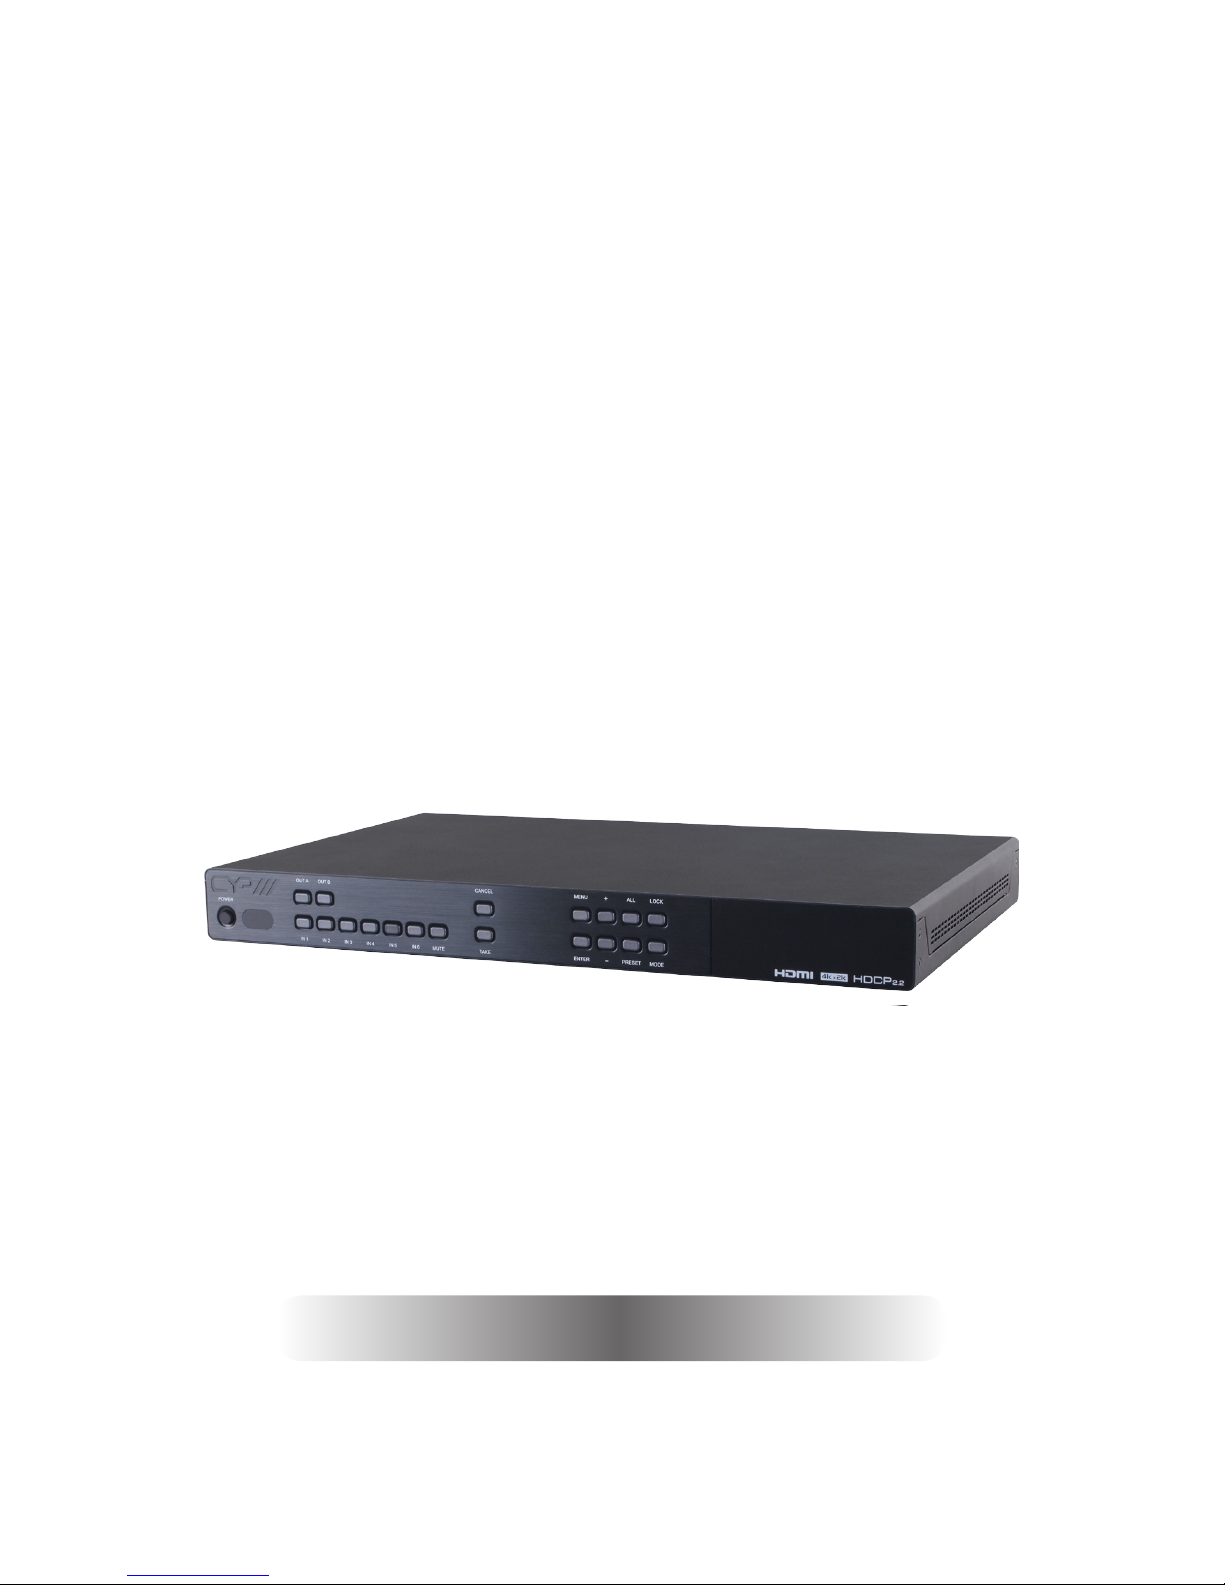
6.1 Front Panel
6X2 HDMI MATRIX FAST SWITCH
IN 1IN 2IN 3IN 4IN 5IN 6 MUTE
OUT A OUT B
POWER
TAKE
CANCEL
ENTER
MENU
PRESET
ALL
MODE
LOCK
+
-
1 2 4 5
3
6 7 8 10 14112 115
9 11 13
1
Power & LED: Press the Power key to turn on the device and the
LED will illuminated.
2
IR Window: IR Receiver receives remote control signal from the
remote control included in the package.
3
OUTPUT A ~ B: Press these OUT buttons once along with one IN
buttons to select input source for select output display.
4
IN 1~6: Press these IN buttons to select an input from 6 input
sources.
5
MUTE: Press to mute audio source.
6
TAKE: Press this button to con rm IN and OUT selection.
7
CANCEL: Press this button to cancel IN and OUT selection.
8
ENTER: Press this button to con rm selection.
9
MENU: Press to enter Menu options.
10
+/-: Press to move up / down under menu options.
11
ALL: Press to select all outputs to display with one input source.
12
PRESET: Press this button, the OLED menu will show preset, then
select IN 1~6, press “TAKE” to con rm the selection or press
“CANCEL” to deselect.
13
LOCK: Press to lock all button functions on the panel, press and
hold 5 seconds to rescission lock mode.
14
MODE: Take mode / Real Time mode switch.
15
LCM: Display input and output selection and menu options.
IN 1 IN 2IN 3IN 4IN 5IN 6 MUTE
OUT A OUT B
POWER
TAKE
CANCEL
ENTER
MENU
PRESET
ALL
MODE
LOCK
+
-
1 2 4 5
3
6 7 8 10 14112 115
9 11 13
4
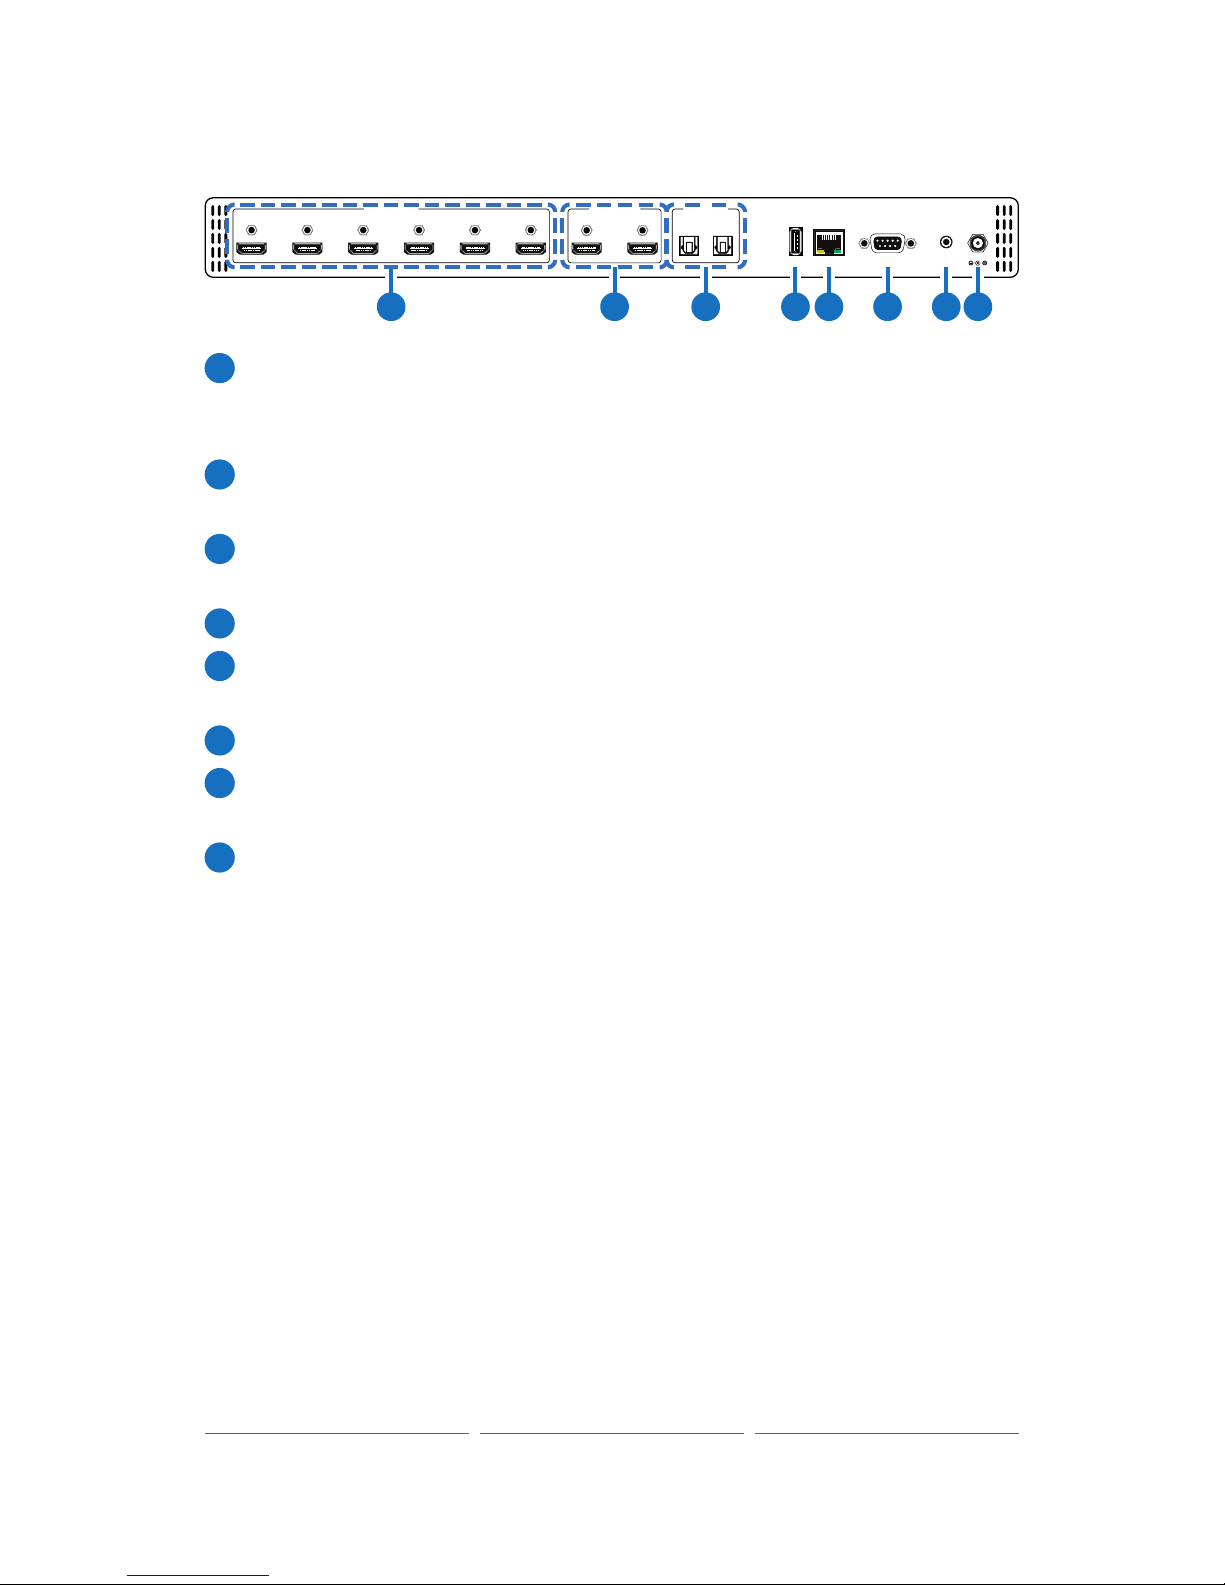
6.2 Rear Panel
CONTROLSERVICE
HDMI IN
HDMI OUT
S/PDIF OUT
AB
123456AB
RS232
IR IN
DC 5V
1 2 3 4 5 6 7 8
1
HDMI IN: Connect from source equipment such as Blu-ray / DVD /
PS3 player, Set-Top Box or any HDMI equipped source device for
input signal sending.
2
HDMI OUT: Connect to HDMI TV / display or HD ampli er for output
image and audio or audio display.
3
S/PDIF OUT: Connect to Audio sound system or Ampli er for digital
output sound.
4
SERVICE: This is reserved for rmware update use only.
5
CONTROL: Connect to PC / Laptop with active internet service for
Telnet / Web GUI control with RJ-45 terminated cable.
6
RS232: Connect to PC / Laptop to control the device.
7
IR IN: Connect the IR receiver which contented in the package for
receive IR signal from the remote control.
8
DC 5V: Connect the adapter with power cord which included in
the package and connect to AC wall outlet for power supply.

5
6.3 Remote Control
1
POWER: Press Power key to turn on
the device or set to standby mode.
2
OUT A~B: Press these OUT buttons
once then to select an input source
for an output display.
3
TAKE: Press this button to con rm IN
and OUT selection.
4
MODE: Press to switch to matrix or
preview mode.
Matrix mode: Press OUT A or OUT B
or both then select from INPUT 1~6
or MUTE to select input sources,
press TAKE after selection to con rm
or press CANCEL to undo.
Preview mode: Select VIEW ALL or
PIP mode by entering Menu page.
Select to VIEW ALL: Press from INPUT 1~6 or MUTE to select input
sources for main channel.
Select to PIP mode: Press from OUT A~B then Press from INPUT 1~6
or MUTE to select input as main or sub video sources, press ALL or
SWAP to switch from main or sub video sources.
5
PV DISP.: Press to switch Preview display on and off.
6
SWAP: While in PIP mode, press to swap main or sub video source.
7
MENU: Press to enter Menu options.
8
ENTER: Press this button to con rm selection.
9
+/-: Press to move up and down under menu options.
10
ALL: Press to select all outputs to display with one input source.
11
IN 1~6: Press these IN buttons to select an input from 6 input
sources.
12
CANCEL: Press this button to cancel IN and OUT selection.
13
PRESET: Press this button, the OLED menu will show preset, then
select IN 1~6, press “TAKE” to con rm the selection or press
“CANCEL” to deselect.
IN 3
IN 5
MUTEENTER
-
OUT A
OUT B
MODE
PV DISP.
PRESET IN 4
SWAP LOCK
ALLIN 1
TAKE
IN 2
CANCEL
+MENU IN 6
CR-136
1
15
12
2
3
4
5
6
7
8
9
13
10
14
11
6
14
LOCK: Press to lock all button functions, press and hold 5 seconds
to rescission lock mode.
15
MUTE: Press to mute audio source.
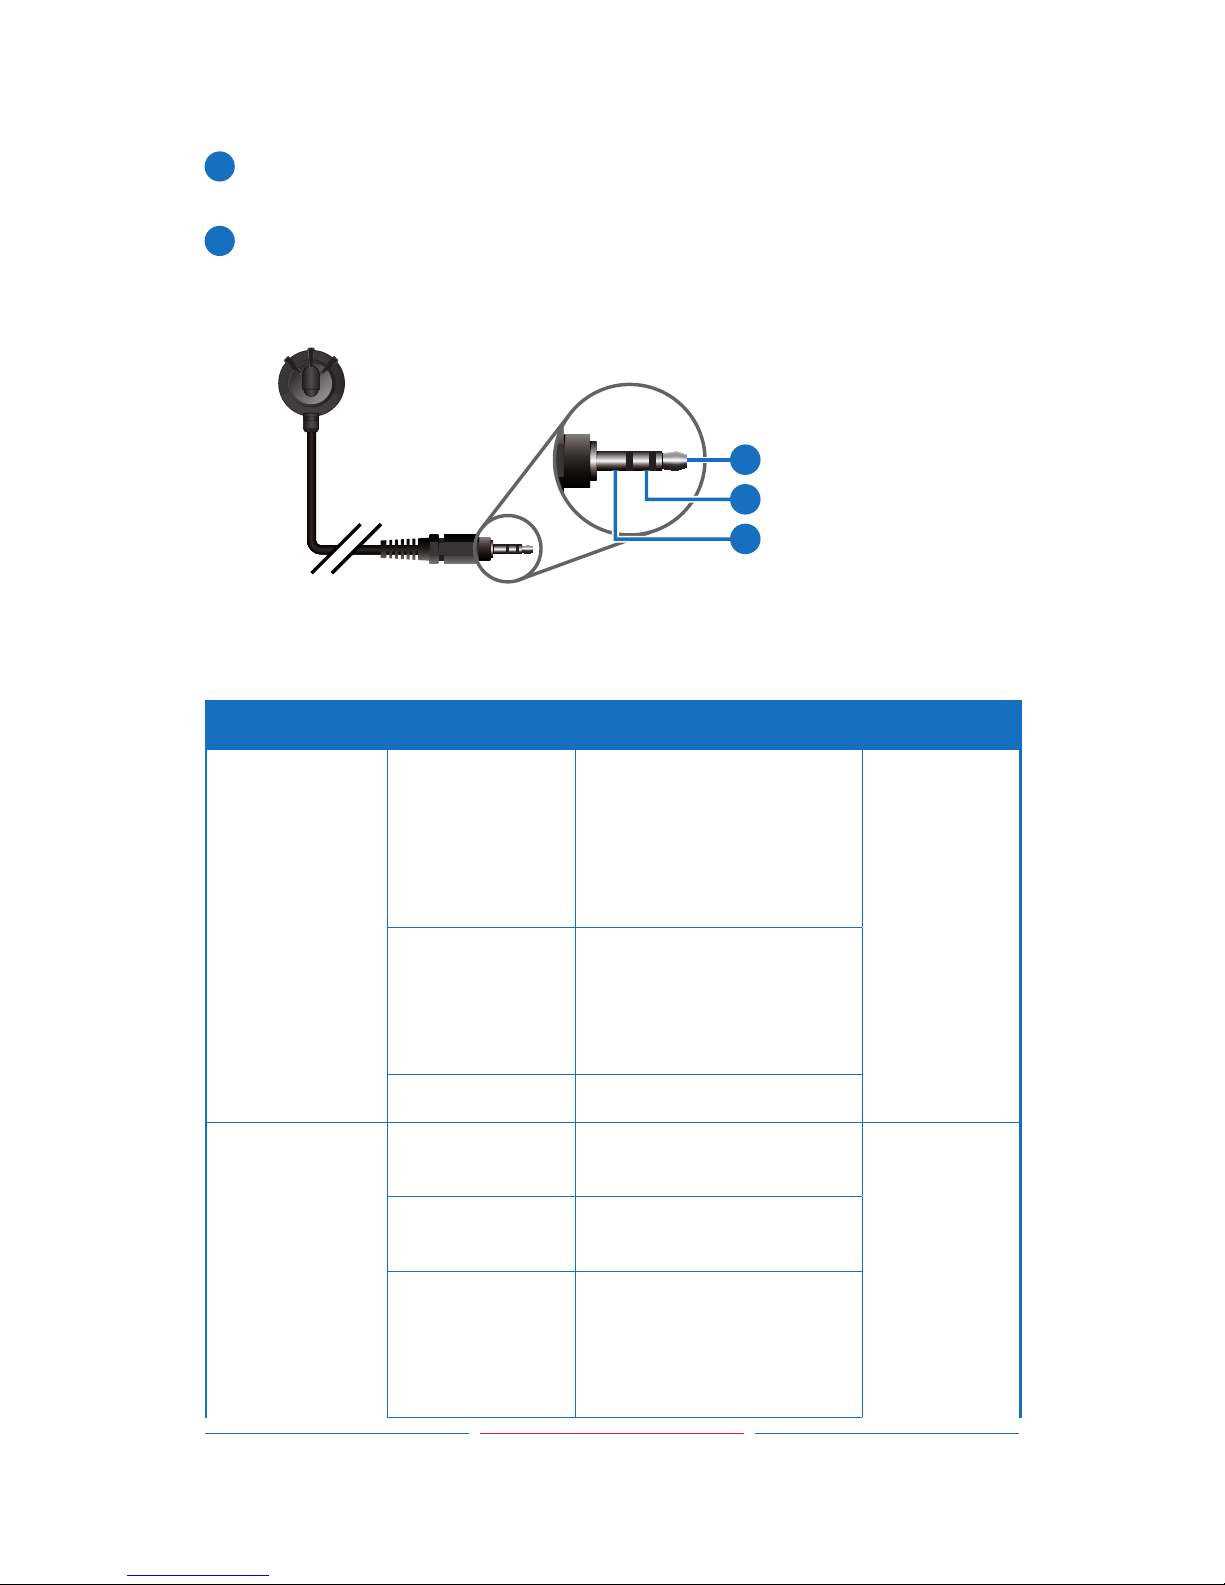
6.4 IR Pin Defi nitions
3
1
2
IR Signal
Power
Grounding
IR Receiver
6.5 OSD Menu
Main Menu Sub Menu Description Default
EDID Mode All All Input ports are using
same EDID.
In menu “EDID All”,
can select suitable
EDID.
All
Appoint Each Input port can
select individual EDID.
In menu “EDID IN1~6”
select suitable EDID.
Exit
EDID All Sink A Copy Output A display
EDID
8/2D/
PCM/1080P
Sink B Copy Output B display
EDID
8/2D/
PCM/720P
Standard EDID.
Content: deep
color/2D3D/audio/
native resolution.
 Loading...