


NuGenius/NuGenius+ User manual
USER MANUAL

NuGenius/NuGenius+ User manual
Contents Page
SAFETY PRACTICES ........................................................................................................................................................ 4
CHAPTER ONE - INTRODUCTION .................................................................................................................................. 12
1.1 APPLICATIONS SUPPORTED .......................................................................................................................................... 12
1.2 HARDWARE .............................................................................................................................................................. 12
1.2.1 Specification ................................................................................................................................................ 12
1.2.2 System Components ................................................................................................................................... 13
1.2.3 Accessories .................................................................................................................................................. 14
CHAPTER TWO - INSTALLATION ................................................................................................................................... 15
2.1 INSTALLATION ........................................................................................................................................................... 15
2.1.1 Transilluminator set-up ............................................................................................................................... 15
2.2.2 Power on/off ............................................................................................................................................... 15
2.2 USER INTERFACE ....................................................................................................................................................... 15
2.3 DYNAMIC FIELD CORRECTION ........................................................................................................................................ 16
2.4 EXTENDED DYNAMIC RANGE (EDR) .............................................................................................................................. 16
2.5 SELECT REGIONAL POWER FREQUENCY .......................................................................................................................... 16
2.6 INSTALLING GENETOOLS ON A SEPARATE PC ................................................................................................................... 16
CHAPTER THREE - IMAGE ACQUISITION ....................................................................................................................... 17
3.1 CAPTURING AN IMAGE OF AN AGAROSE ETBR OR SIMILAR GEL ............................................................................................ 17
Step 1 – Position sample and choose lighting ........................................................................................................... 17
Step 2 – Adjust lens ................................................................................................................................................... 17
Step 3 – Set exposure time........................................................................................................................................ 17
3.2 CAPTURING AN IMAGE OF A PROTEIN GEL (COOMASSIE, SILVER STAINED) OR OTHER WHITE LIGHT IMAGE (COLONY PLATE, AUTORAD,
MICROTITRE PLATE ETC) ........................................................................................................................................................ 18
Step 1 – Position sample and choose lighting ........................................................................................................... 18
Step 2 – Adjust lens ................................................................................................................................................... 18
Step 3 – Set exposure time........................................................................................................................................ 18
3.3 CAPTURING AN IMAGE OF AN AGAROSE "SAFE" DYE GEL .................................................................................................... 19
Step 1 – Position sample and choose lighting ........................................................................................................... 19
Step 2 – Adjust lens ................................................................................................................................................... 19
Step 3 – Set exposure time........................................................................................................................................ 19
3.4 CAPTURING AN IMAGE OF A STAIN-FREE GEL (NUGENIUS+) ............................................................................................... 20
Step 1 – Position sample and choose lighting ........................................................................................................... 20
Step 2 – Adjust lens ................................................................................................................................................... 20
Step 3 – Set exposure time........................................................................................................................................ 20
CHAPTER FOUR - SAVING / OPENING IMAGES AND PRINTING IMAGES ....................................................................... 21
4.1 SAVING IMAGES ........................................................................................................................................................ 21
4.2 OPENING IMAGES ...................................................................................................................................................... 21
4.3 PRINTING ................................................................................................................................................................. 22
CHAPTER FIVE - IMAGE ENHANCEMENT ...................................................................................................................... 23
5.1 IMAGE ENHANCEMENT ............................................................................................................................................... 23
5.2 ANNOTATION ........................................................................................................................................................... 24
5.3 DIGITAL ZOOM .......................................................................................................................................................... 24
CHAPTER SIX - USER PREFERENCES .............................................................................................................................. 26
6.1 SETTINGS ................................................................................................................................................................. 26
6.2 STROBE COMPENSATION ............................................................................................................................................. 26
6.3 UV SAFETY............................................................................................................................................................... 26

NuGenius/NuGenius+ User manual
6.4 PRINTER…………………………………………………………………………………………………………………………………………………………. 27
6.5 DATE & TIME …………………………………………………………………………………………………………………………………………………. 28
CHAPTER SEVEN - TROUBLESHOOTING AND CONTACT INFORMATION .……………………………………………………………………. 29
7.1 TROUBLESHOOTING ….………………………………………………………………………………………………………………………………………... 29
7.2 CONTACT SYNGENE ..……………………………………………..…………………………………………………………………………………………… 29
APPENDIX A - LOOKING AFTER YOUR NUGENIUS/NUGENIUS+ SYSTEM ....................................................................... 30
APPENDIX B – DISPOSING OF YOUR IMAGING SYSTEM
................................................................................................. 31

Safety Information
NuGenius/NuGenius+ User manual
4
Safety practices
This document describes the general safety practices and precautions that must be
observed when operating the NuGenius/NuGenius+.
This advice is intended to supplement, not supersede, the normal safety codes in the
user’s country. The information provided does not cover every safety procedure that
should be followed. Ultimately, maintenance of a safe laboratory environment is the
responsibility of the user and the user’s organization.
Please consult all documentation supplied with the NuGenius/NuGenius+ before you
start working with the instrument. Carefully read the safety information in this
document and in the other documentation supplied. When setting up the
instrument or performing analyses or maintenance procedures, strictly follow the
instructions provided.
Warning notices
We use ‘Warnings’ to highlight information or instructions that MUST be followed to
avoid personal injury to yourself or other people in the vicinity.
For example: Switch off the mains voltage and remove the mains cord before
cleaning.
Ensure that all instrument operators read and understand the precautions listed
below.
You are advised to post a copy of the precautions near or on the instrument shelf.
The following precautions must be observed when using the
NuGenius/NuGenius+.
Be sure that the voltage of the NuGenius/NuGenius+ instrument
corresponds to the voltage used in your laboratory.
Never remove the rear panel of the NuGenius/NuGenius+ instrument
without shutting down the instrument and disconnecting the instrument
power cord from line power.
The power cord must be an appropriately rated and approved cord-set in
accordance with the regulations of the country it is used in.
Do not replace the power cord with one of inadequate rating.

Safety Information
NuGenius/NuGenius+ User manual
5
Symbols
Symbol
Definition
Attention: See instructions for use.
Attention: Use of UV lights. Please Read UV Safety Warning.
Attention: Danger of electric shock.
Serial Number.
Symbol indicating "Not for general waste." For European
Union (EU) States, this symbol should be used to mark devices
that are reusable and not contaminated at the end of the
device life.
This symbol is a mandatory marking for devices entering the
European market to indicate conformity with the essential
health and safety requirements set out in European Directives.
Symbol for "Manufacturer." This symbol shall be adjacent to
the name and address of the manufacturer.
Symbol for "temperature limitation." The upper and lower
temperature limits will be indicated on either side of the
symbol.
Symbol used to indicate that the product should be kept dry.
Symbol indicating that the device is "fragile" and should be
handled with care.
Symbol indicating the correct upright position of the transport
package.

Safety Information
NuGenius/NuGenius+ User manual
6
Warning labels attached to the instrument draw your attention to specific
hazards. You must refer to this user guide and other documentation provided
with your system for more details concerning the potential hazard and any
precautions or other actions that must be taken.
Warning Labels
The following labels are displayed on the outer surfaces of the instrument:
UV Safety Warning
The NuGenius/NuGenius+ imaging system has a UV Transilluminator. If you open the
door the system will automatically switch the UV off. If you wish to override the UV,
please refer to section 6.3.
UV Warning
Electrical
Safety
Warning
Power
Rating and
Serial

Safety Information
NuGenius/NuGenius+ User manual
7
Before you override the UV safety interlock, read the following recommendations:
You should wear appropriate personal protection. As a minimum,
we recommend the use of full-face shields that meet the necessary
levels of UV protection. Those meeting the standard will be marked
with the ANSI Z87.1. notation [ANSI Z87.1-89, Practice for
Occupational and Educational Eye and Face Protection, IBR
approved for 29CFR1910.133(b)(1)].
We recommend that all users of UV be made familiar with the
guidelines published by the various national authorities. In the USA
these guidelines are published by OSHA (www.osha.gov) in their
standard 29CFR1910. This provides up to date safety information
and guidance. In the UK the NRPB (www.nrpb.org) issues similar
guidelines. Employers must familiarise themselves with these
guidelines and their obligations described in the standards.
In addition to face shields, we recommend that you should consider
wearing appropriate clothing to protect potential exposure to areas
of skin (face, arms, and hands for example).
N.B. The door safety interlock is reset when you close the door
General operating conditions
The NuGenius/NuGenius+ has been designed and tested in accordance with the
safety requirements of the International Electrotechnical Commission (IEC). The
NuGenius/NuGenius+ conforms to IEC61010-1 (Safety Requirements for electrical
equipment for measurement, control and laboratory use) as it applies to IEC Class 1
(earthed) appliances, and therefore meets the requirements of EC directive
2014/35/EU.
If possible, avoid any adjustment, maintenance or repair to the instrument while
it is open and operative. However, if any adjustment, maintenance or repair is
necessary while the instrument is open, this must be done by a skilled person
who is aware of the hazards involved.
Whenever circumstances arise that mean your NuGenius/NuGenius+ may be unsafe,
make it inoperative. In particular, a NuGenius/NuGenius+ may be unsafe if it:
Shows visible damage
Fails to perform the intended measurement
Has been subjected to severe transport stresses
Has been subjected to prolonged storage in unfavorable conditions

Safety Information
NuGenius/NuGenius+ User manual
8
Transportation and Storage Conditions
The system should only be transported and stored in its original packaging to ensure
maximum protection. It is recommended to keep the original packaging.
The unit should be transported and stored in an environment -10°C to +50°C, not
condensing.
If you must move the imaging system any great distance please contact your local
distributor to advise you about moving your system.
Environmental conditions
The instrument should only be used under the following conditions:
Indoors
Altitudes below 2000m
Ambient temperature between 5
o
C and 40oC
Relative humidity below 80% for temperatures up to 31
o
C, decreasing linearly
to 50% relative humidity at 40oC
Electrical supply fluctuations not exceeding +10% of the nominal voltage
The protection provided by the equipment may be impaired if the operating
conditions do not lie within these parameters.
The NuGenius/NuGenius+ instrument
requires two people to lift it safely.
The NuGenius/NuGenius+ weighs 20kg.

Safety Information
NuGenius/NuGenius+ User manual
9
Electrical safety
The instrument has been designed to protect the operator from potential electrical
hazards. This section describes some recommended electrical safety practices.
Lethal voltages are present at certain points within the instrument.
When the instrument is connected to line power, removing the instrument
covers is likely to expose live parts.
Even when the power switch is set to off, high voltages can still be present –
capacitors within the instrument may still be charged even if the instrument has
been disconnected from all voltage sources.
The instrument must be correctly connected to a suitable electrical supply. The
supply must have a correctly installed protective conductor (earth ground) and
must be installed or checked by a qualified electrician before connecting the
instrument.
Any interruption of the protective conductor (earth ground) inside or outside
the instrument, or disconnection of the protective conductor terminal is likely
to make the instrument dangerous.
Intentional interruption of the protective conductor is prohibited
Ensure that the electricity supply inlets on the instrument are not
obstructed, i.e. leave a gap to allow easy disconnection from the electricity
supply.
When working with the instrument:
Connect the instrument to a correctly installed line power outlet that has a
protective conductor connection (earth ground).
Do not operate the instrument with any covers or internal parts
removed.
Do not attempt to make internal adjustments or replacements except as
directed in the manuals.
Disconnect the instrument from all voltage sources before opening it for any
adjustment, replacement, maintenance or repair. If the opened instrument
must be operated for further adjustment, maintenance or repair, this must
only be done by your supplier’s Service Engineer.
Whenever it is possible that the instrument is no longer electrically safe
for use, make the instrument inoperative and secure it against any
unauthorised or unintentional operation. The electrical safety of the
instrument is likely to be impaired if, for example, the instrument:
- Shows visible damage
- Has been subjected to prolonged storage in unfavorable conditions

Safety Information
NuGenius/NuGenius+ User manual
10
- Has been subjected to severe stress during transportation
Electrical protection
Insulation: Class I rating for external circuits. Only connect equipment that
meets the requirements of IEC 61010-1, IEC 60950 or equivalent standards.
Installation Category: The instruments are able to withstand transient over
voltages typically present on the MAINS supply. The normal level of transient
over voltages is impulse withstand (overvoltage) category II of IEC 60364-4-
443.
Pollution Degree 2: Normally only non-conductive pollution occurs.
Occasionally, however, temporary conductivity caused by condensation
must be expected.
Electrical Specifications
The NuGenius/NuGenius+ power rating is as follows:
Voltage
100-240Vac
Frequency
50-60Hz
Current
2A
Fuse
2 of 20 mm x 5 mm IEC127 T 6.3 A H 250V
Changing fuses
There are two sets of fuses that you may need to replace: the first set is located
near the electrical power cord socket on the rear of the darkroom; the second
set is located on the rear of the UV Transilluminator inside the darkroom (if
supplied).
To change the fuses on the rear of the darkroom:
Switch off the darkroom and remove the line power cord from the electrical
supply.
Gently pull out the fuse holder on the rear of the darkroom:
Replace the fuse(s) with new ones of the same type and rating. The fuse
type is 20 mm x 5 mm IEC127 T 6.3 A H 250V for instruments in all
countries.
Replace the fuse holder.
Power socket
Fuse holder

Safety Information
NuGenius/NuGenius+ User manual
11
Note: It is recommended to always replace both fuses at the same time, even if
only one of them has blown, as the other may have been weakened.
If the instrument still does not work correctly after replacing the fuses with the
correct replacements, or if the fuses blow repeatedly, contact your supplier’s
office or representative.
EMC compliance
EC directive
The NuGenius/NuGenius+ instrument has been designed and tested to meet the
requirements of the EC directive 2014/30/EU. The NuGenius/NuGenius+ instrument
complies with the EMC standard EN61326 (EMC standard for electrical equipment
for measurement, control and laboratory use) and EN55011 (ISM) class B (RF
emissions).
FCC rules and regulations
This product is classified as a digital device used exclusively as industrial, commercial
or medical test equipment. It is exempt from the technical standards specified in Part
15 of the FCC Rules and Regulations based on Section 15.103 (c).

1. Introduction
NuGenius/NuGenius+ User manual
12
Chapter One - Introduction
The NuGenius/NuGenius+ system has been designed to make your gel imaging
simple, quick and easy. This system is the perfect choice for a low budget gel imaging
system and features a compact darkroom which has an internal LED white light and a
motorised lens.
The NuGenius/NuGenius+ system supports multiple applications including DNA/RNA
gel imaging such as EtBr, SYBR Green and visible stained gels i.e. Coomassie Blue and
silver stain.
1.1 Applications supported
Transilluminator UV
Visible Light
Converter
Blue Light
Converter
Ethidium Bromide
SYBR Green
SYBR Gold
SYBR Safe
Gel Green
Gel Red
SYPRO Ruby
Stain-Free (NuGenius+)
Coomassie blue stain
Copper stain
Zinc stain
Silver stain
SYBR Gold
SYBR Green
SYBR Safe
UltraSafe blue
1.2 Hardware
1.2.1 Specification
NuGenius
NuGenius+
Camera
12/16 bit
12/16 bit
CCD
1/2.5 inch
2/3 inch
Zoom
Motorised zoom 8-48, F1.2,
aperture and focus
Motorised zoom 11.5-69,
F1.4, aperture and focus
Display
7” widescreen colour touch
screen
7” widescreen colour touch
screen
Filter
UV032 filter as standard
UV06 filter as standard
Max gel size
20 x 24 cm
20 x 24 cm
Data types
TIFF and JPEG
TIFF and JPEG
CCD resolution
5M pixels
5M pixels
Image storage
USB
USB
Image
enhancements
Rotation and inversion,
sharpen, smooth and more
Rotation and inversion,
sharpen, smooth and more
Illumination
Slide in and out UV
Transilluminator, visible light
converter and blue light
converter, Epi white LED
Slide in and out UV
Transilluminator, visible light
converter and blue light
converter, Epi white LED

1. Introduction
NuGenius/NuGenius+ User manual
13
1.2.2 System Components
1.2.2.1 Darkroom
The darkroom has a hinged door. The darkroom features:
Slide out mid wave 302nm UV Transilluminator
Internal white light LED
Safety switches to protect from accidental UV exposure
1.2.2.2 UV Transilluminator
The UV Transilluminator will excite many fluorescent stains such as Ethidium
bromide, SYBR™ stains, Gel Red™. The standard wavelength is 302nm.
To protect users from accidental exposure, the UV light is automatically shut off if
the door is opened. The Transilluminator can be slid easily in and out of the cabinet.
1.2.2.3 LCD Touch Screen
A built-in 7 inch colour LCD touch-screen allows users to preview, capture, print and
save images, as well as to select various processing functions, without the
connection of an external keyboard or mouse.
TRANSILLUMINATOR
(OPTIONAL)
For UV, white or blue light
UV transilluminator
slides in and out of
darkroom
Blue light converter
Visible light converter
USB
For storing of images on USB
memory stick
TOUCH SCREEN
Colour LCD Screen
POWER INDICATOR
Green if power is on
SAFETY SWITCHES
To prevent accidental UV
exposure when door is open
INTERNAL WHITE
LIGHT
For sample
positioning and
focusing
HINGED DOOR
With magnetic catch
1. Introduction
NuGenius/NuGenius+ User manual
14
1.2.2.4 USB Flash Drive
The USB flash drive on the front of the NuGenius/NuGenius+ allows for the easy
storage of images.
1.2.3 Accessories
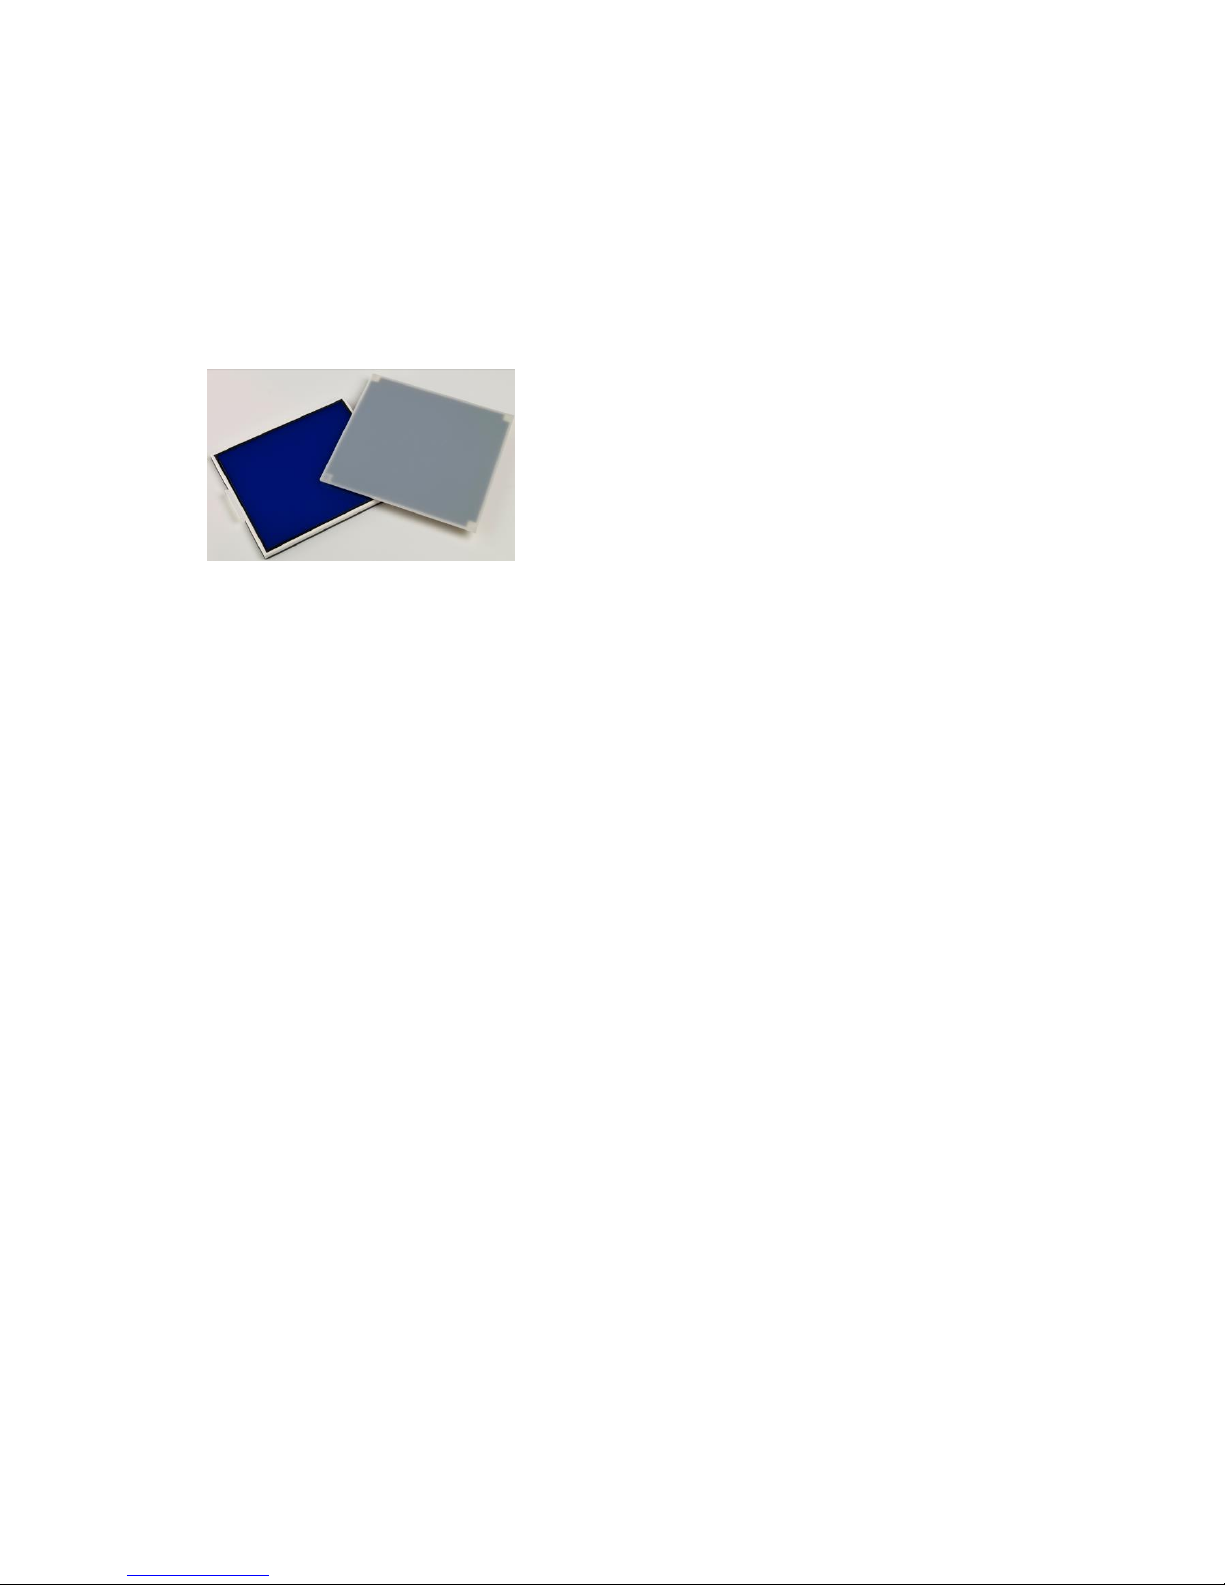
1.2.3.1 Visible or blue light converter screens
Syngene offers a visible light converter that can be
placed on top of the UV Transilluminator for
imaging Coomassie and silver stained gels.
Syngene also offers a blue light converter that can
be placed on top of the UV Transilluminator for
safely imaging gels stained with SYBR Safe, Gold
and Green, GelGreen and UltraSafe blue.
1.2.3.2 Printer
There are two models of printer available for the NuGenius/NuGenius+:
Mitsubishi P95DW
Canon Selphy CP1200
The drivers are preinstalled.
1.2.3.3 Analysis software
The NuGenius/NuGenius+ system is supplied with 4 copies of GeneTools analysis
software from Syngene. This may be loaded on a PC of your choice. Please see the
loading instructions in section 2.6.

2. Getting Started
NuGenius/NuGenius+ User manual
15
Chapter Two - Installation
2.1 Installation
CAUTION: Do not connect power supply to any of the components until you are
satisfied that everything is connected correctly.
For assistance please contact your supplier or Syngene directly.
2.1.1 Transilluminator set-up
Place the UV Transilluminator inside and connect it to the free flying mains lead
inside the NuGenius/NuGenius+ system.
2.2.2 Power on/off
Connect the mains lead from the NuGenius/NuGenius+ system to the mains power
supply and switch on the unit. There will be a few seconds delay as the system boots.
After a few seconds a display will appear.
To turn the internal computer off, press the ‘SHUT DOWN’ button on screen and
then select ‘SHUT DOWN NOW’. The System will now shut down. Once the screen
has gone black wait 20 seconds and then turn the unit off at the rear.
2.2 User Interface
The user interface is shown below.
Digital
zoom
Image
Capture
buttons
Lighting
options
Exposure
time
Lens
control
Additional
menus

2. Getting Started
NuGenius/NuGenius+ User manual
16
2.3 Dynamic field correction
The dynamic field function is based on powerful algorithms which corrects for
uneven illumination from the light source. This results in an image with a flat, even
background whilst maintaining GLP compliance.
Once switched on, please follow the on-screen instructions.
2.4 Extended Dynamic Range (EDR)
Some gels contain areas that are too bright or too dark to be successfully captured.
Closing the iris to cut down the light may prevent the viewing of dark or faint bands,
whilst opening it may lead to saturation. EDR solves this problem by automatically
capturing a series of images at different exposure times. The content of each image
is assessed and those areas that are within the dynamic range of the camera are
combined. The result is an image with a large dynamic range (up to 65536 grey
levels) that encompasses all the brightness ranges existing within the sample without
saturation.
2.5 Select Regional Power Frequency
Press the ‘SETTINGS’ button on screen, select either 50 or 60Hz depending on the
electricity supply of your region.
2.6 Installing GeneTools on a separate PC
Plug the Syngene branded flash drive into the PC you wish to install GeneTools on.
Navigate into the “GeneTools” folder on the flash drive and run the
“InstallGeneTools” program.
Follow the on-screen instructions to install and license the GeneTools software. You
should have been provided with media keys to license the software. These media
keys can be found in a file named “Media Keys.txt” on the Syngene branded flash
drive.

3. Image Acquisition
NuGenius/NuGenius+ User manual
17
Chapter Three - Image Acquisition
3.1 Capturing an image of an agarose EtBr or similar gel
Step 1 – Position sample and choose lighting
Press the 'Live' button and then position the sample on the centre of the
Transilluminator and close the door. Select ‘UV TRANSILLUMINATOR’ from the
lighting options.
Step 2 – Adjust lens
Adjust the aperture, zoom and focus settings until a suitable image is displayed,
preferably with the sample filling the screen for maximum resolution.
Please note that opening the aperture too far may result in areas of the sample
being saturated.
You can select to display any saturation on screen by pressing the ‘DISPLAY
SATURATION’ button. Saturated areas will appear orange.
Step 3 – Set exposure time
The exposure time can either be set manually or automatically. Adjusting the
exposure time will alter the brightness of the image. To manually increase or
decrease the exposure time, use the following icons.
Click on the or to increase or decrease the exposure time, or
alternatively, click on the time to set it manually.
Set an exposure time you are happy with and press ‘CAPTURE’.
Alternatively, the auto-exposure function sets the exposure time to a level that
ensures no saturation of the image occurs. To use the auto-exposure function press
‘AUTO’.
You can then save or print the image.

3. Image Acquisition
NuGenius/NuGenius+ User manual
18
3.2 Capturing an image of a protein gel (Coomassie, silver stained) or other
white light image (Colony plate, autorad, microtitre plate etc)
Step 1 – Position sample and choose lighting
Press the 'Live' button, then position the sample on the centre of the
Transilluminator and then close the door. Select ‘VISIBLE-LIGHT CONVERTER’ from
the lighting options.
Step 2 – Adjust lens
Adjust the aperture, zoom and focus settings until a suitable image is displayed,
preferably with the sample filling the screen for maximum resolution.
Please note that opening the aperture too far may result in areas of the sample
being saturated.
You can select to display any saturation on screen by pressing the ‘DISPLAY
SATURATION’ button.
Step 3 – Set exposure time
The exposure time can either be set manually or automatically. Adjusting the
exposure time will alter the brightness of the image. To manually increase or
decrease the exposure time, use the following icons.
Click on the or to increase or decrease the exposure time, or
alternatively, click on the time to set it manually.
Set an exposure time you are happy with and press ‘CAPTURE’.
Alternatively, the auto-exposure function sets the exposure time to a level that
ensures no saturation of the image occurs. To use the auto-exposure function press
‘AUTO’.
You can then save or print the image.

3. Image Acquisition
NuGenius/NuGenius+ User manual
19
3.3 Capturing an image of an agarose "safe" dye gel
Step 1 – Position sample and choose lighting
Press the 'Live' button, then position the sample on the centre of the
Transilluminator and then close the door. Select ‘BLUE-LIGHT CONVERTER’ from the
lighting options.
Step 2 – Adjust lens
Adjust the aperture, zoom and focus settings until a suitable image is displayed,
preferably with the sample filling the screen for maximum resolution.
Please note that opening the aperture too far may result in areas of the sample
being saturated.
You can select to display any saturation on screen by pressing the ‘DISPLAY
SATURATION’ button.
Step 3 – Set exposure time
The exposure time can either be set manually or automatically. Adjusting the
exposure time will alter the brightness of the image. To manually increase or
decrease the exposure time, use the following icons.
Click on the or to increase or decrease the exposure time, or
alternatively, click on the time to set it manually.
Set an exposure time you are happy with and press ‘CAPTURE’.
Alternatively, the auto-exposure function sets the exposure time to a level that
ensures no saturation of the image occurs. To use the auto-exposure function press
‘AUTO’.
You can then save or print the image.

3. Image Acquisition
NuGenius/NuGenius+ User manual
20
3.4 Capturing an image of a Stain-Free gel (NuGenius+)
Step 1 – Position sample and choose lighting
Press the 'Live' button, then position the sample on the centre of the
Transilluminator and then close the door. Select ‘STAIN-FREE QUICK’ (2.5 min) or
‘STAIN-FREE FULL’ (5 min) from the lighting options.
Step 2 – Adjust lens
Adjust the aperture, zoom and focus settings until a suitable image is displayed,
preferably with the sample filling the screen for maximum resolution.
Please note that opening the aperture too far may result in areas of the sample
being saturated.
You can select to display any saturation on screen by pressing the ‘DISPLAY
SATURATION’ button.
Step 3 – Set exposure time
The exposure time can either be set manually or automatically. Adjusting the
exposure time will alter the brightness of the image. To manually increase or
decrease the exposure time, use the following icons.
Click on the or to increase or decrease the exposure time, or
alternatively, click on the time to set it manually.
Set an exposure time you are happy with and press ‘CAPTURE’.
Alternatively, the auto-exposure function sets the exposure time to a level that
ensures no saturation of the image occurs. To use the auto-exposure function press
‘AUTO’.
You can then save or print the image.

4. Saving/Opening and Printing Images
NuGenius/NuGenius+ User manual
21
Chapter Four - Saving / Opening Images and Printing
Images
4.1 Saving images
Insert a USB flash drive into the USB port on the front of the instrument.
Press on the ‘SAVE TO USB’ button. The image will change to display that the image
has been saved.
Unsaved image
Saved Image
Images can be saved in the following formats:
JPEG
PNG
TIFF
NOTE: Before removing the USB drive, we recommend you press the ‘EJECT USB
DRIVE’ button to ensure no data is lost.
Eject USB Drive button
4.2 Opening images
Insert a USB flash drive into the USB port on the front of the instrument.
Press on the ‘OPEN SAVED IMAGE’ button.
Open Saved Image button
NOTE: Before removing the USB drive, we recommend you press the ‘EJECT USB
DRIVE’ button to ensure no data is lost.
Eject USB Drive button

4. Saving/Opening and Printing Images
NuGenius/NuGenius+ User manual
22
4.3 Printing
To print directly from the NuGenius/NuGenius+ system, press the ‘PRINT’ icon.
If the print button is not available, you have not selected your printer. See section
6.4 for more details on selecting your printer.

5. Image Enhancement
NuGenius/NuGenius+ User manual
23
Chapter Five - Image Enhancement
The NuGenius/NuGenius+ system offers a variety of functions ranging from image
enhancement to annotation.
5.1 Image enhancement
To access the enhance functions select the or button until you get to
the “Image Enhancement” screen. From here you can select to smooth, sharpen,
invert, lighten, darken or rotate your image.
The Invert button will reverse the
image to give black bands on a white
background or vice versa. This icon is
particularly useful when trying to see
faint bands.
The Rotate function will allow you to
rotate the image in both 5 degree
steps (by using the - and + buttons)
and also rotate to set positions (0,
90, 180, 270 degrees).
To apply a sharpening filter to your
image move the SMOOTHER/
SHARPER slider to the right. When
this filter has been applied band
edges should become more
pronounced but you may also
observe an increase in the graininess
of the image.
The DARKER/LIGHTER slider will
allow you to change how dark or
light the image is.
The RESET button will undo the
changes from the captured image.
5. Image Enhancement
NuGenius/NuGenius+ User manual
24
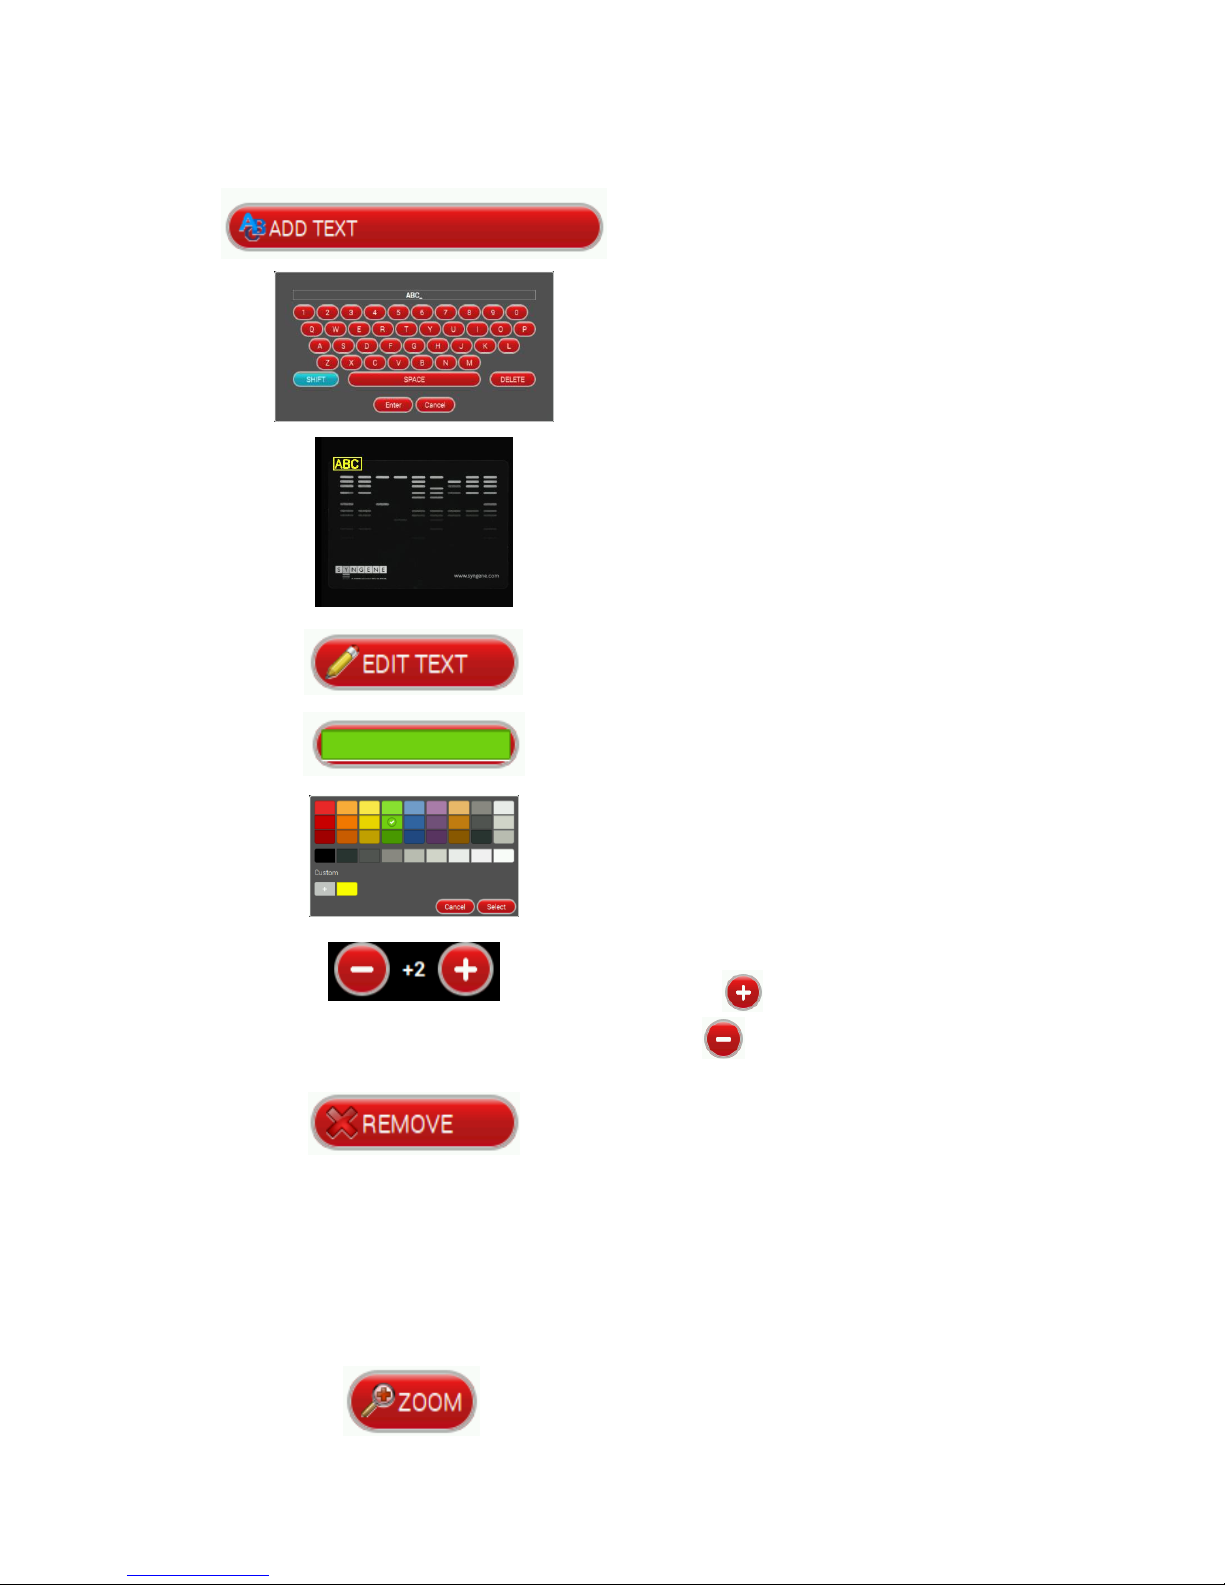
5.2 Annotation
To add text to the image, press the ‘ADD
TEXT’ button.
An on-screen keyboard will pop-up. Type
your text then press ‘ENTER’.
The text will now appear on the image.
To reposition the text, press on the text,
a box should appear around it, press and
hold on this then drag the text to the
position you want it in.
The ‘EDIT TEXT’ button allows the user
to edit the text.
The colour of the text can be changed.
Select from a selection of colours
available from the palette.
The size of the text can be adjusted.
Press the to increase the font size
and the to decrease the font size.
To remove any text annotations select
the text that you wish to remove and
then press the ‘REMOVE’ button.
5.3 Digital zoom
To zoom in or out of your image use the ‘ZOOM’ buttons on screen once you have
captured your image.
Digitally zoom in on your image.

5. Image Enhancement
NuGenius/NuGenius+ User manual
25
Zoom settings can be reset at any time.
Digitally zoom out of your image.

6. User Preferences
NuGenius/NuGenius+ User manual
26
Chapter Six - User Preferences
6.1 Settings
Select the ‘SETTINGS’ button.
The following screen, with the different setting options, will then appear.
6.2 Strobe compensation
Select your regional power frequency settings - choose between 50Hz or 60Hz.
6.3 UV safety
Select ‘PERMIT OVERRIDE’ if you wish the user to be able to override the UV Safety
protocols.
To turn the Transilluminator on while the door is open, this must be selected.

6. User Preferences
NuGenius/NuGenius+ User manual
27
To override the UV Safety interlock,
pull the right hand door switch and
then follow the on-screen
instructions.
WARNING: UV light can be hazardous to your health, please refer to the UV Safety
instructions.
6.4 Printer
Click ‘SELECT PRINTER’ and then select the printer you have attached to the
NuGenius/NuGenius+ system and then click ‘OK’.
If no printer is connected and/or not detected by the system an error message will
appear. Connect the printer to the system and then select ‘Ok’.
6. User Preferences
NuGenius/NuGenius+ User manual
28
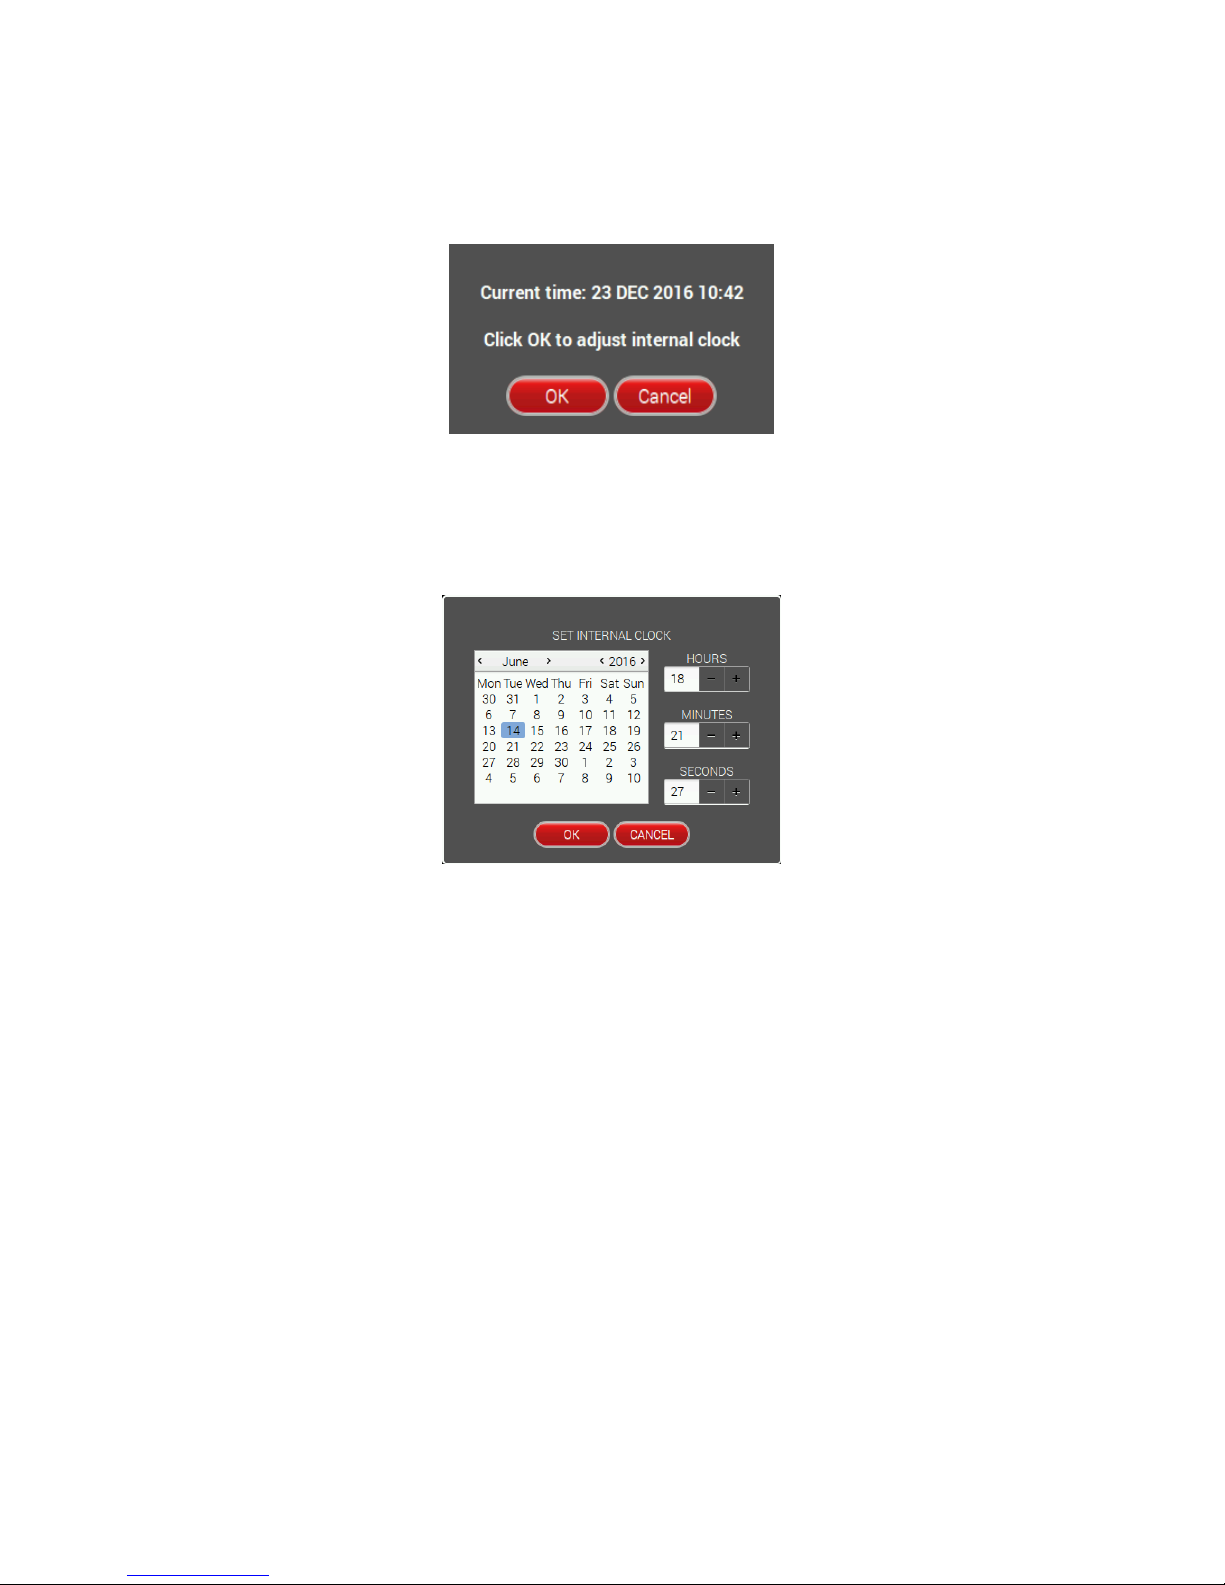
6.5 Date & Time
Select ‘SET INTERNAL CLOCK’ - the current time and date will appear.
To change the time or date, select ‘OK’ and adjust accordingly, then select ‘OK’ to
save.

7. Troubleshooting and Contact Information
NuGenius/NuGenius+ User manual
29
Chapter Seven - Troubleshooting and Contact
Information
7.1 Troubleshooting
No power to the darkroom
Check connection of main power cord to main power port on the rear of the
NuGenius/NuGenius+.
Try another power socket within lab.
Transilluminator will not turn on
Check power cord by sliding Transilluminator fully out from cabinet. If loose
push back in.
If still not on, remove power cord and attach another one plugged in
elsewhere. If Transilluminator comes on there is an electrical supply problem
within the NuGenius/NuGenius+. If it still does not come on it is likely the
Transilluminator has failed. Contact Syngene. NOTE: Please take UV
precautions.
Print button is enabled but nothing happens when you select it
Check the correct printer has been selected.
If more than one printer is present, the system may be unable to distinguish
between them. Disconnect one and then continue.
Unable to save images with USB present
Check that the options on the “Image storage” screen are not disabled. If
they are, to re-enable them eject the USB and reinsert it. This should reenable the options and you will be able to save your image.
7.2 Contact Syngene
EUROPE: USA:
BEACON HOUSE 5103 PEGASUS COURT, SUITE L
NUFFIELD ROAD FREDERICK
CAMBRIDGE MD 21704
CB4 1TF
Tel: +44 1223 727123 Tel: 800 686 4407/1 301 662 2863
Fax: +44 1223 727101 Fax: 301 631 3977
Email: sales@syngene.com Email: ussales@syngene.com
www.syngene.com

Appendix A- Looking after your NuGenius system
NuGenius/NuGenius+ User manual
30
Appendix A - Looking after your
NuGenius/NuGenius+ system
The system does not require regular maintenance or calibration other than
occasional checking and cleaning.
Cleaning the imaging system
Switch off the mains voltage and remove the mains cord before cleaning .
You can clean the outside of the NuGenius/NuGenius+ using a soft lint-free cloth,
moistened if required with a little water. Mild detergent may be used, if necessary. Do
not use abrasive or solvent based cleaning materials. Always perform a patch test on
an inconspicuous area before you clean the entire accessory.
Avoid spilling any liquid into the body of the NuGenius/NuGenius+ and clean any
external spills immediately. If any liquid enters the main body of the instrument, make
the system inoperative and contact your dealer.

Appendix B- Disposing of your imaging system
NuGenius/NuGenius+ User manual
31
Appendix B – Disposing of your Imaging
system
The Waste Electrical and Electronic Equipment (WEEE) Directive
A label with a crossed-out wheeled bin symbol and a rectangular bar indicates that
the product is covered by the Waste Electrical and Electronic Equipment (WEEE)
Directive and must not be disposed of as unsorted municipal waste. Any products
marked with this symbol must be collected separately, and in accordance with the
regulatory guidelines in your area.
The objectives of the WEEE Directive are to preserve, protect and improve the
quality of the environment, protect human health, and utilise natural resources
prudently and rationally. Specific treatment of WEEE is indispensable in order to
avoid the dispersion of pollutants into the recycled material or waste stream. Such
treatment is the most effective means of protecting the customer’s environment.
OR
 Loading...