

Page 1

SYNERGY MFG. 870 INDUSTRIAL WAY, SAN LUIS OBISPO, CA (805) 242-0397
8561-03 – 2003-13 Dodge AAM 9 ¼” Axle
Lower Control Arm Skid Plates
GENERAL NOTES:
These instructions are also available on our website; www.synergymfg.com. Check the website before
you begin for any updated instructions and additional photos for your reference.
Please read these instructions carefully before beginning, do not attempt to install if you do not have the
tools or skills required.
This is a weld on part and should be installed by an experienced welder.
We recommend installing one side at a time.
Be sure to disconnect the ground cable from the battery prior to welding as to prevent electrical damage
to the vehicle.
PARTS LIST:
(2) 8561-03 DODGE LOWER CONTROL ARM SKIP PLATE 2010- PRESENT (1R & 1L)
Parts / Tools Needed to complete installation:
Basic simple hand tools.
4-1/2” angle grinder with cut off wheel and abrasive attachments to remove paint and metal from inner
C’s.
Some form of welder. Mig is preferred, but Tig or stick welding is acceptable.
Spray paint of desired color.
APPROXIMATE INSTALL TIME: 2-4 HOURS
INSTALLATION:
1) NOTE: This install can be done with the vehicle on the ground under its own weight. However, the
vehicle can be raised off the ground for easier access. Be sure to use a quality jack and jackstands.
2) Begin by cutting off the factory gusset that spans the front of the lower control arm bracket circled
below.
Page 2
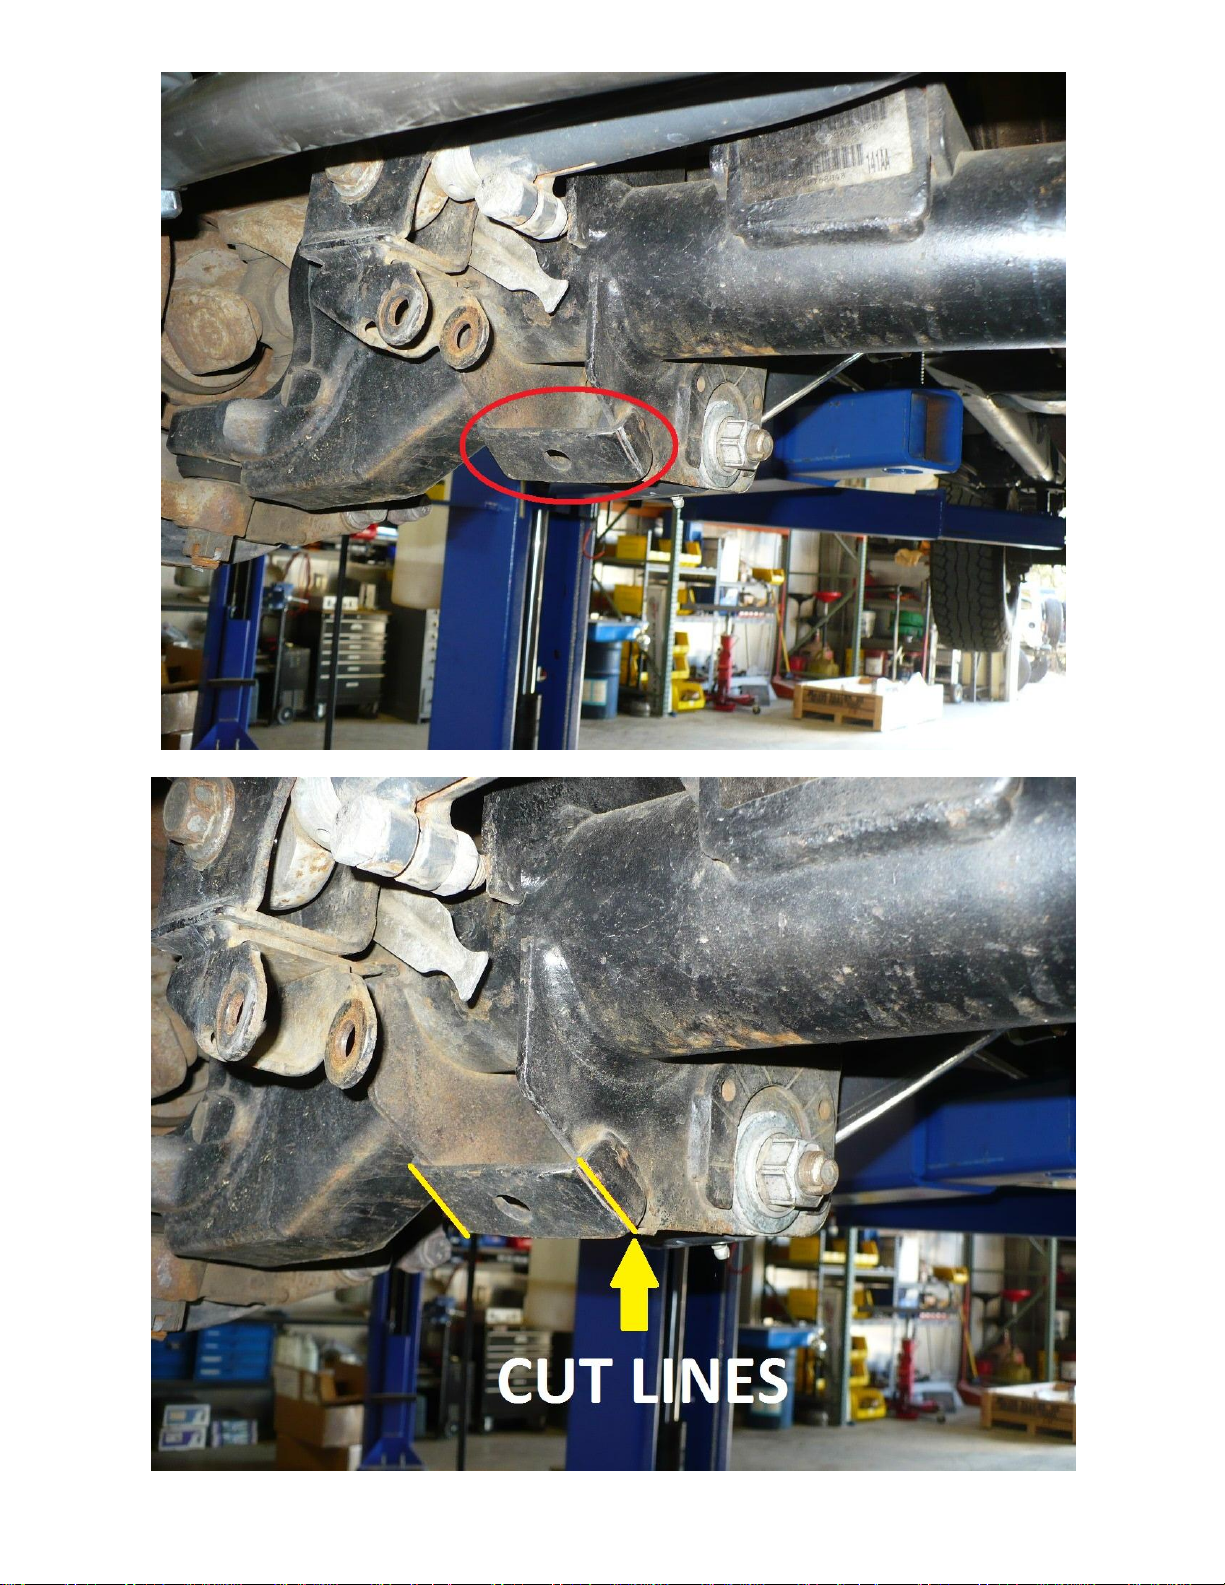
3) To ensure a straight cut, mark two lines on either side of the gusset.
Page 3
4) Next cut along the marked lines using a 4 ½” angle grinder and remove factory gusset.
5) Once removed, grind smooth for welding.
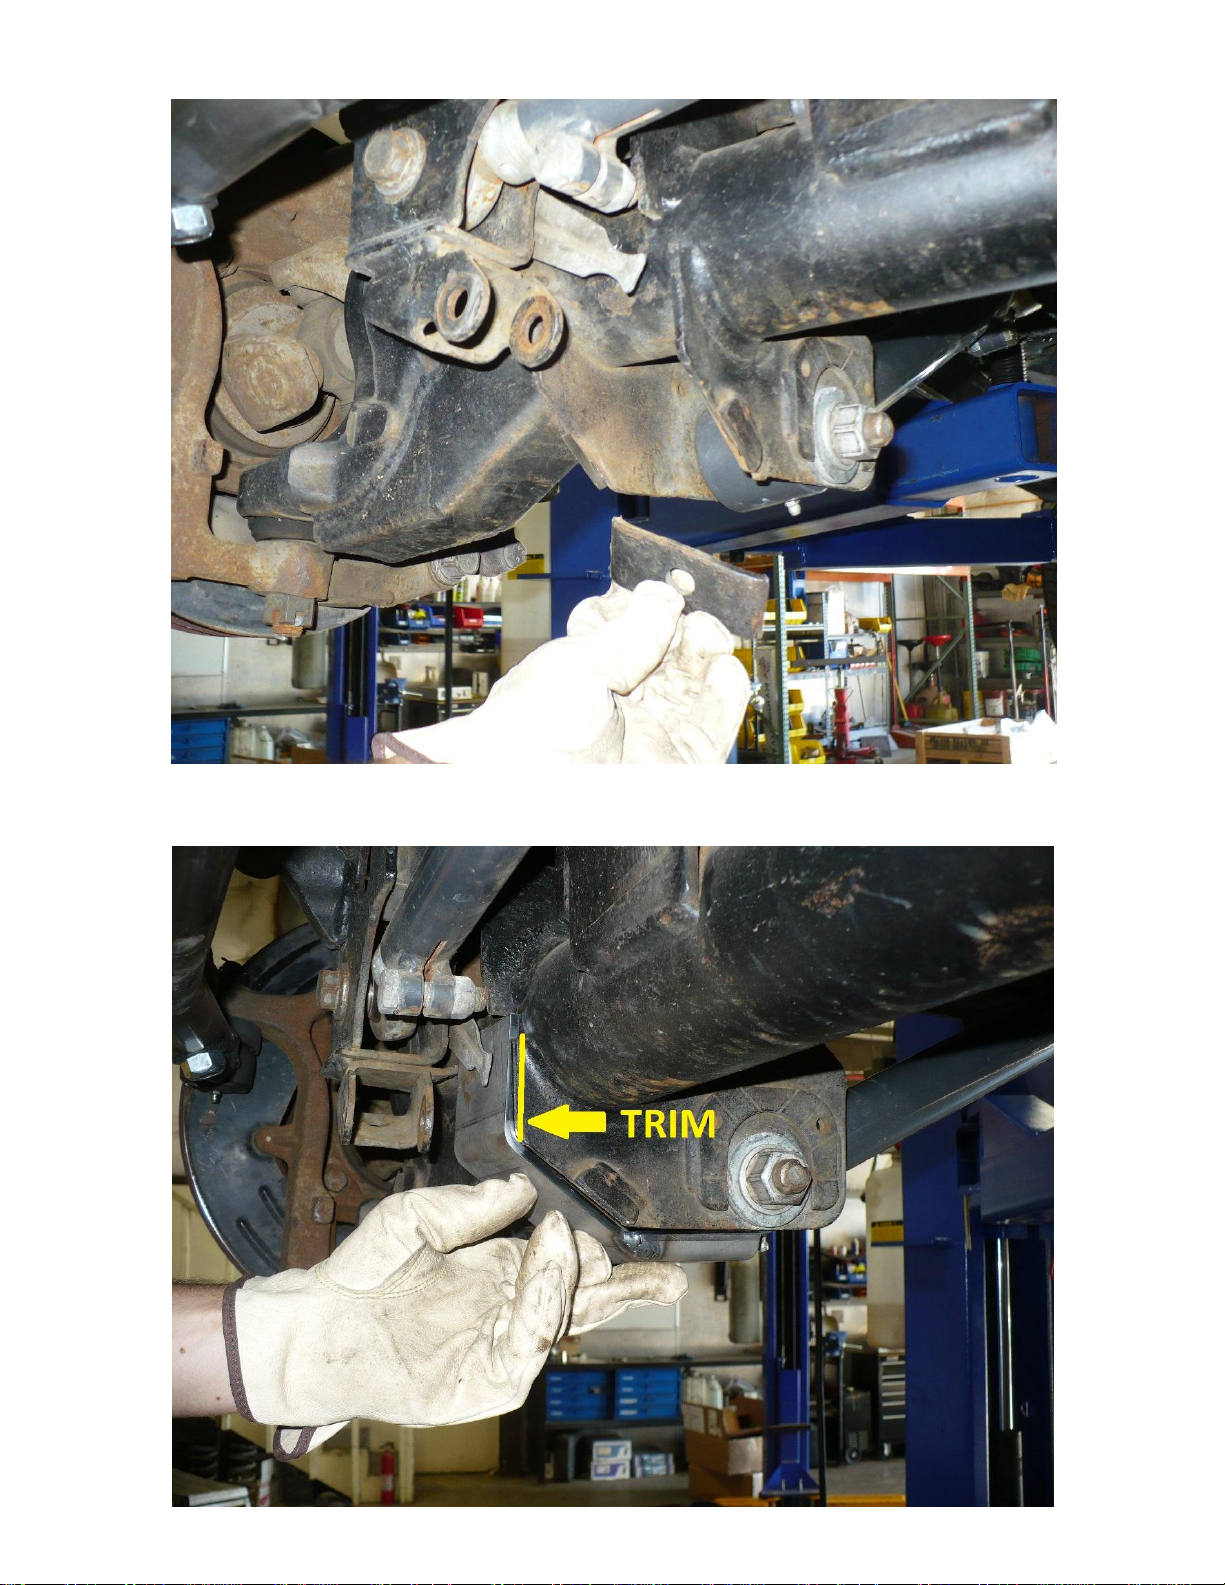
6) Next, test fit the lower control arm (LCA) skid plate.
7) In some cases the factory control arm bracket may need to be trimmed for an even weld seam.
Page 4

8) On 03-08 trucks, there may be some interference with the track bar / steering stabilizer bracketry on the
axle. If this is the case, a small notch may need to be made for proper fitment.
9) Once satisfied with fitment, remove paint and prepare surface for welding.
10) We suggest adding a bevel, indicated below, to the LCA skid for a better weld joint.
Page 5

11) Tack weld the LCA skid into position. Tack securely in several places.
12) To get a full weld on the bottom of the control arm bracket, remove the lower control arm bolt. As
indicated.
Note, the lower control arm does not need to be fully removed but take caution as to not
burn or melt the bushing in the control arm when welding.
Page 6

13) Fully weld in position. Weld as much as desired, we recommend welding as shown below.
Page 7

14) Allow welds to cool. Deburr welds and paint to prevent corrosion.
15) Reinstall the control arm bolt and torque to vehicle specifications:
14mm (9/16” bolts) – 125 ft-lbs
16mm (5/8” bolts) – 145 ft-lbs
18mm (3/4” bolts) – 200 ft-lbs
16) The images above show the install on the passenger side of the vehicle. Installation on the driver’s side
follows the same procedure as the passenger side.
Installation is Complete
 Loading...