

Page 1

SYNERGY MFG. 870 INDUSTRIAL WAY, SAN LUIS OBISPO, CA (805) 242-0397
INSTALLATION INSTRUCTIONS
PPM-8076 / PPM-8076-RHD JEEP JK 2.0”
BOLT ON REAR TRACK BAR BRACKET
GENERAL NOTES:
These instructions are also available on our website at www.synergymfg.com
Check the website for any updated instructions and additional photos for
reference.
Simple hand tools are required for installation.
Although it is possible to install these with vehicle sitting on ground, it will be
much easier to install with the suspension drooped out.
You must use a minimum of 2” bump stop extension, 8058-20 (2”) or 8058-30
(3”) or 8058-40 (4”) to prevent the track bar from contacting the exhaust at full
bump.
2.0” diameter shocks are the maximum size allowable with this track bar bracket,
any larger and rubbing will occur between the track bar bracket and the shocks
during articulation.
Note; these instructions cover installation on a LHD vehicle. Installation on a
RHD vehicle is the same with everything mirrored on the right side of the chassis.
1) Remove the factory rear track bar from the axle and loosen the track bar from the
frame bracket to allow the track bar to rotate out of the way. Secure the track bar up
and out of the way with a bungee cord or something similar.
a. All track bar bolt hardware is a 21mm or 13/16” wrench size.
b. Retain all factory track bar hardware as it will be re-used when reinstalling
the track bar.
Page 2
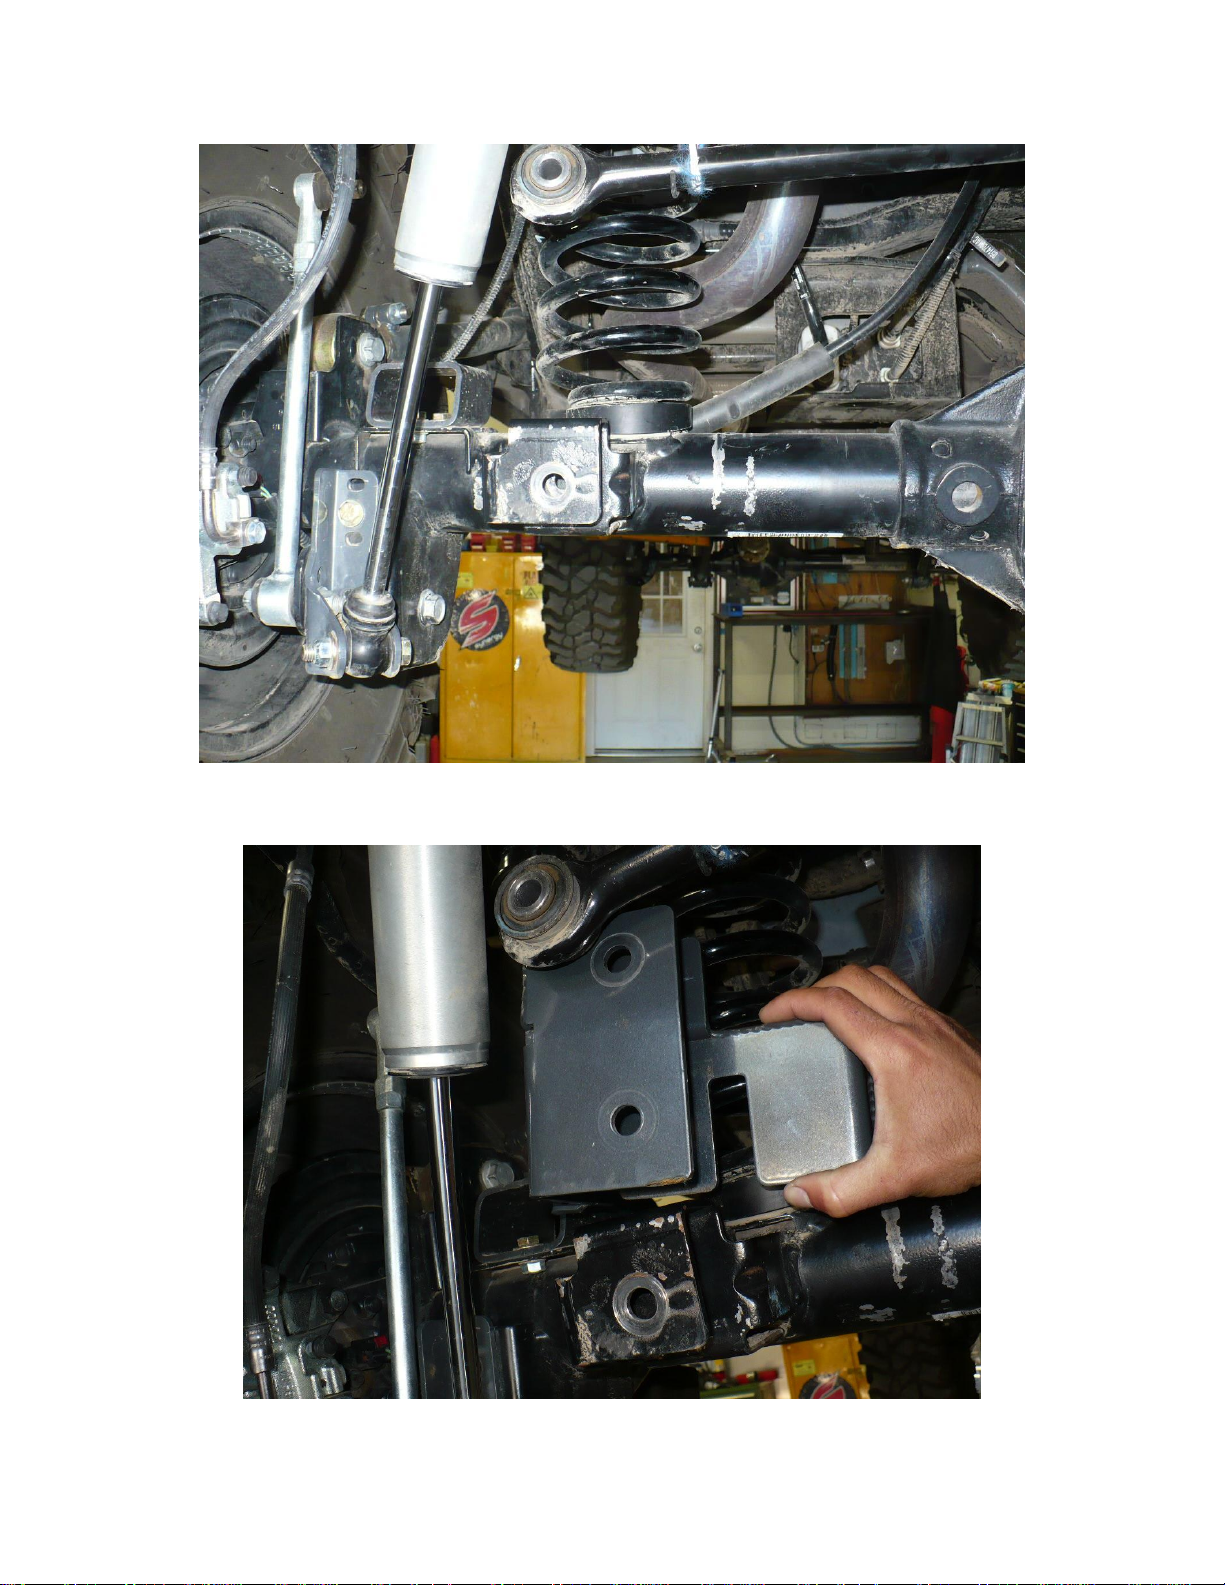
2) Next, slide the bracket over the factory track bar bracket. The new 8076 bracket
should sandwich the factory bracket as shown in the pictures below.
Page 3
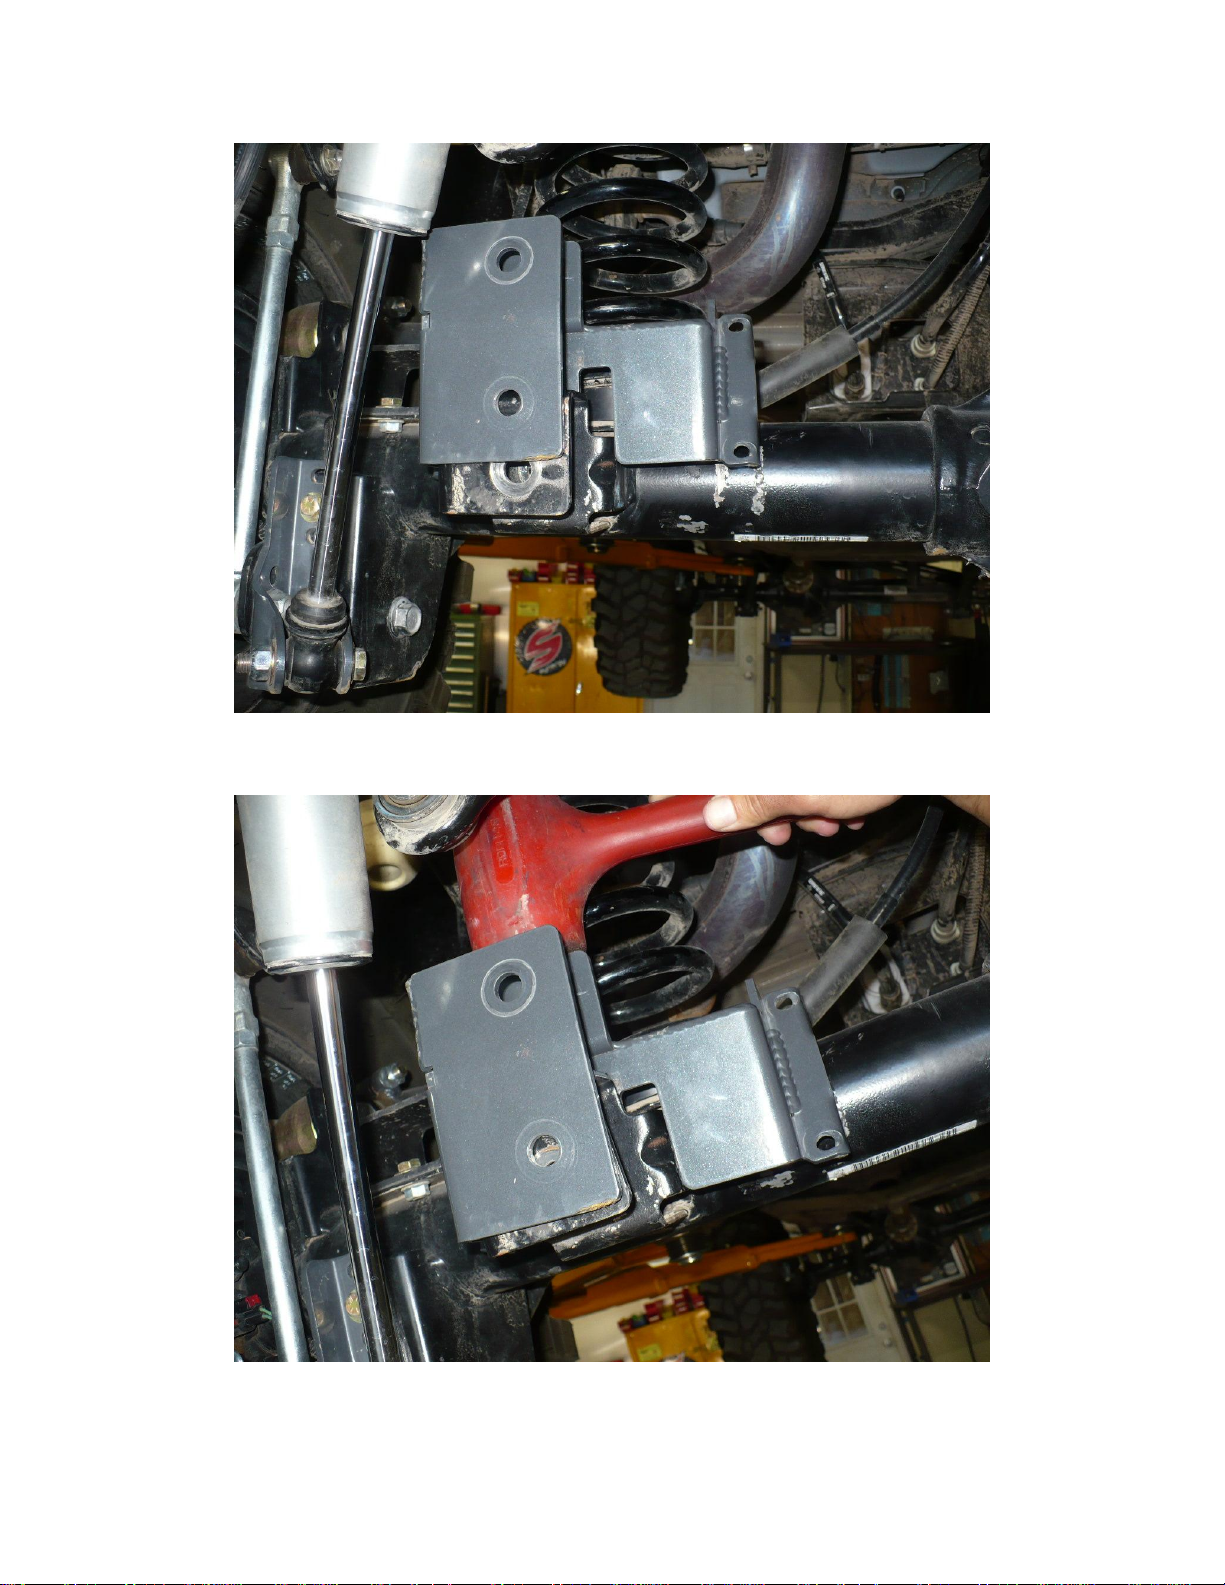
3) At this point, a gentle tap to the top of the bracket with a rubber mallet will seat it into
place.
Page 4

4) Once seated over the axle tube, use an alignment bar to properly line up the bottom
hole in the bracket with the factory track bar mounting location.
5) Next, install the 1.60” wide spacer provided in the kit in the factory location as
shown. Use the 9/16” bolt included in the kit with a washer under the bolt head to
align everything.
Page 5

6) Next, install the washer and nut on the back side of the bracket. Do not tighten at this
time though.
Page 6

7) Next, install the u-bolts over the axle tube through the track bar relocation bracket.
Use a flat washer and nylock nut to secure the u-bolts. On some rear axle housings
there is a weld along the front of the axle tube opposite of the track bar bracket.
Grind the weld down just where it goes under the u-bolt so that the u-bolt contacts the
entire tube.
Page 7

8) Torque the 3/8” U-bolts to 30 ft-lbs
9) Torque the 9/16” bolt to 150 ft-lbs.
10) Attach the track bar to the new track bar bracket with the vehicle sitting on the ground
under its own weight. It helps to have someone push the back of the vehicle from
side to side to align the track bar bushing in the new mount in the bracket. Tighten
the OEM track bar bolts to 125 ft-lbs .
11) The track bar bolt may rub the coil spring on some applications. This is often due to
the coil spring bowing because the pinion has increased. Solutions to this are as
follows:
a. Trim the end of the bolt sticking through the nut.
b. Flip the bolt around so the bolt head is adjacent to the spring.
c. Rotate the spring so the bolts are in between the coils.
d. Cut and rotate the lower spring mounts on the axle.
e. Install polyurethane lower coil wedges.
Installation is Complete
 Loading...