

Page 1

SYNERGY MFG. 870 INDUSTRIAL WAY, SAN LUIS OBISPO, CA (805) 242-0397
PPM-5609
YJ BAJA BASKET MOUNT
GENERAL NOTES:
• These instructions are also available on our website; www.synergymfg.com.
Check the website before you begin for any updated instructions and additional
photos for your reference.
• The installation of this rack requires the removal of hard top or rear portion of soft
top. The top can be reinstalled after installation is complete.
• Installation of rack requires trimming of factory roll bar padding if still equipped.
• These mounts are designed to mount the rack approximately 3/4” above the tub
rails. The use of some 3/4” thick runners to span the tub will aide in the
installation process and leveling of the rack. That or the use of some 2” x 6”
pieces of wood on end atop the wheel tubs.
PARTS LIST:
1. (1) Large Baja Basket
2. (2) Left / Right Side YJ Mounting Plates
3. (2) Left / Right Tube Clamp Mounting Brackets
4. (4) 7/16-20 UNF 1” long bolts
5. (4) 7/16” Split Lock Washers
6. (4) 3/8-16 UNC ¾” long bolts
7. (4) 3/8-16 Stover Nuts
8. (8) 3/8” flat washers.
INSTALLATION:
1) Remove the factory hard top or the rear portion of the soft top to gain access to
the rear portion of the cage.
2) Remove the factory rear seat
3) Remove the rear upper seat belt turning loop.
4) Unzip the factory C-pillar roll cage padding cover and padding.
5) Unpack the YJ Baja Basket and all the included components.
Page 2
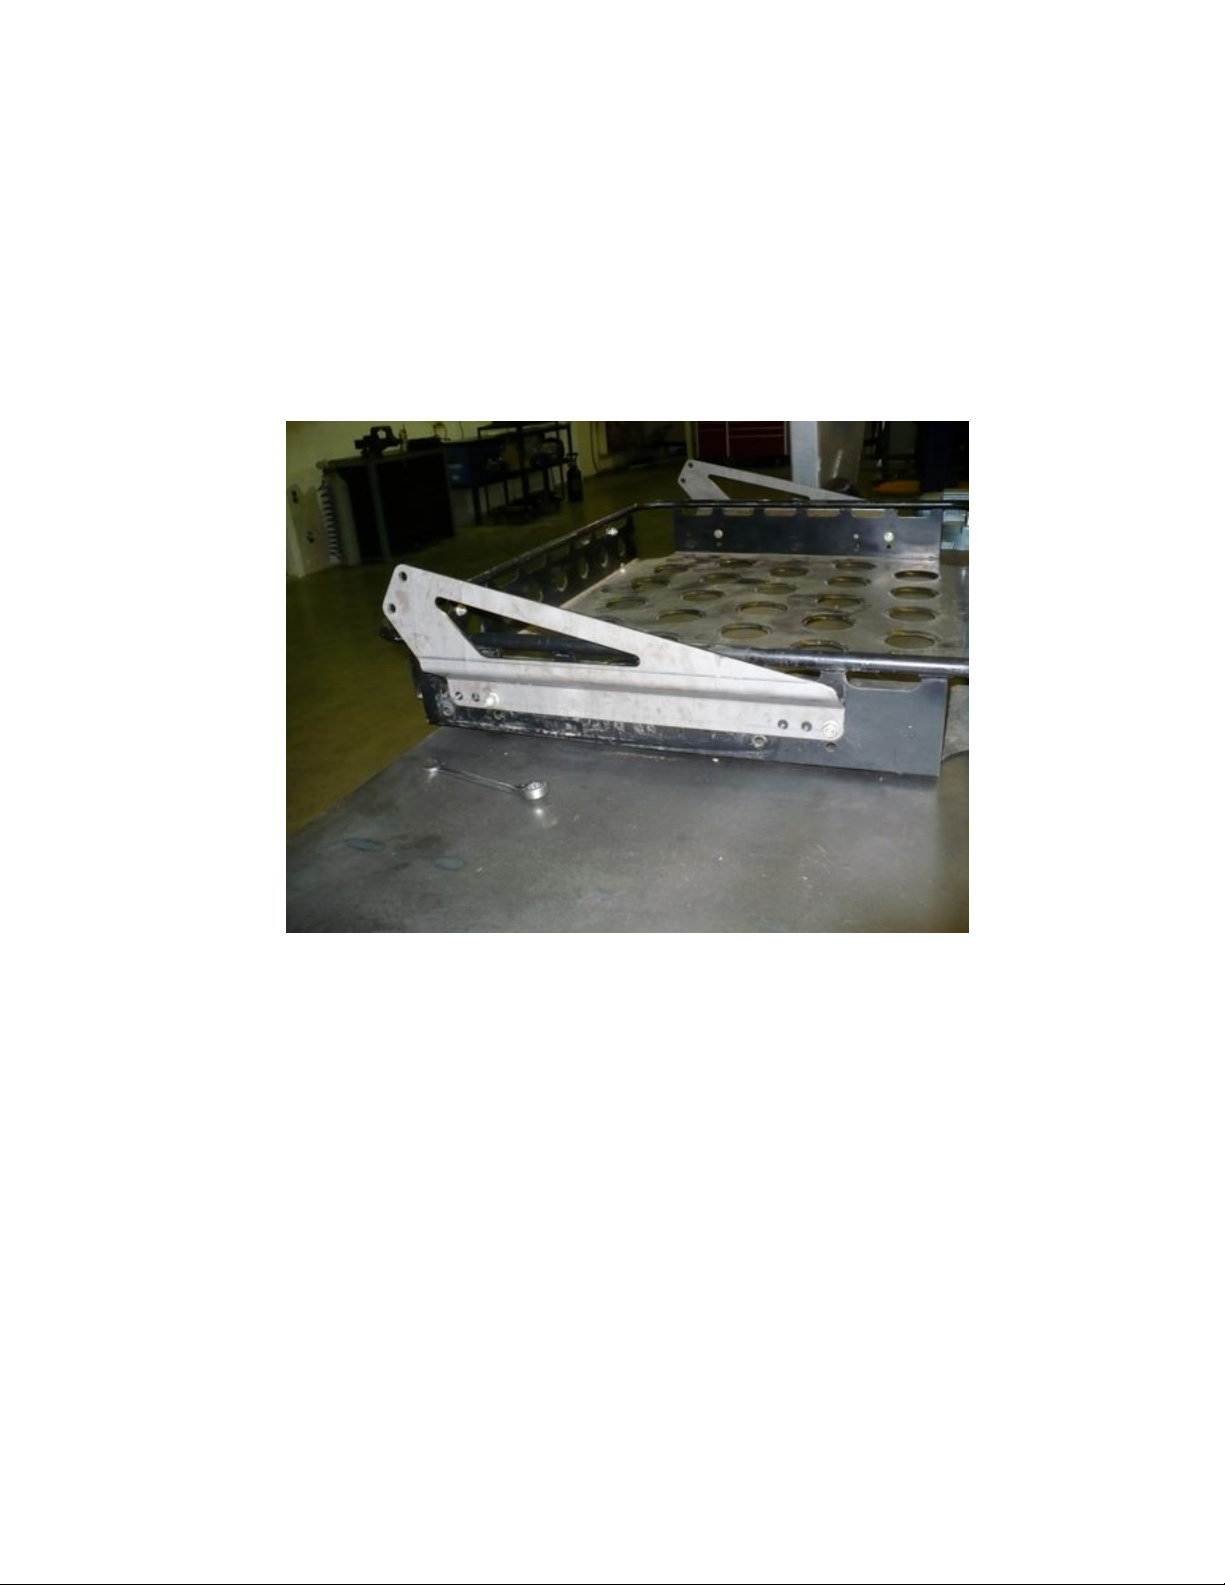
6) Install the two side mounting plates onto the upper holes of the rack with the bolts
from the inside out. Use the (4) 3/8” x ¾” bolts, (4) lock nuts, and (8) washers.
Install a washer under the head of each bolt and under each nut. Snug bolts down
but do not fully tighten at this point. See picture below for reference.
7) With the side mounting brackets installed, place some form of 3/4” runner across
the rear tub of the Jeep. A couple of 4 ft long pieces of 2”x6” stood vertically
across the top of the wheel tubs will also work well.
Page 3

8) Center the rack between the roll cage.
9) Disassemble the two tube clamp mounting brackets.
10) Slide the clamp down the top of the cage between the rack mounting plate and
align the holes. Once aligned, start the two 7/16 x 1” bolts and lock washer under
the head of each bolt on both sides. Tighten the bolts finger tight. (Note – clamps
are L&R side specific)
Page 4

11) Once both clamps have been bolted to the brackets, attach the outer part of the
clamp to both sides of the roll bar. Use the (6) 5/16 x 1” socket head cap screws
and a ¼” allen wrench. Torque the bolts to 20 ft-lbs in a cross directional pattern.
Page 5

12) If roll cage padding is still desired. Remove the (4) 7/16” bolts securing the rack
and trim reinstall padding and cover, trimming where needed.
13) Once satisfied with fit and trim, reinstall the (4) 7/16” bolts and torque to 40 ft-lbs
14) Remove runners used to locate and level the rack.
15) Double check that rack is level. If adjustment is needed, loosen the 7/16” bolts
slightly and adjust to desired position.
16) The rack height can also be adjusted slightly by moving the side mounting plate
position to the bottom hole or slide the clamps up or down slightly. (Note – there
is minimal adjustment by sliding the clamps as the YJ cage tapers in at the top
prohibiting much up and down adjustment of clamp height.)
17) Soft / hard top can now be reinstalled. Installation is complete.
 Loading...