

Page 1

SYNERGY MFG. 870 INDUSTRIAL WAY, SAN LUIS OBISPO, CA (805) 242-0397
5232 YJ REAR CAGE KIT
Version 1.1
GENERAL NOTES:
• These instructions are also available on our website; www.synergymfg.com.
Check the website before you begin for any updated instructions and additional
photos for your reference.
• This is a weld in roll cage kit, all welding should be performed by an experienced
welder with proper welding equipment
• Use in conjunction with PPM-5231; YJ front cage kit
• This kit works with either a soft top or hard top
• Use extreme care when welding and grinding in the interior of your Jeep, remove
or cover any components you do not want welding spatter or grinding sparks to
damage.
1) Remove the hard or soft top.
2) Remove the roll cage padding / covers and the rear upper seat belt mounting bolts. It
is also a good idea to remove the rear seat to prevent damage from welding and ease
installation.
3) Install the PPM-5231 YJ Front Cage kit per the instructions included with the front
cage kit.
4) Remove the paint on the factory cage around the areas to be welded. Position the Cpillar cross bar and B-C pillar spreaders as shown below in picture 4.1
Page 2
Picture 4.1 Complete rear kit including side kit tacked into place for reference.
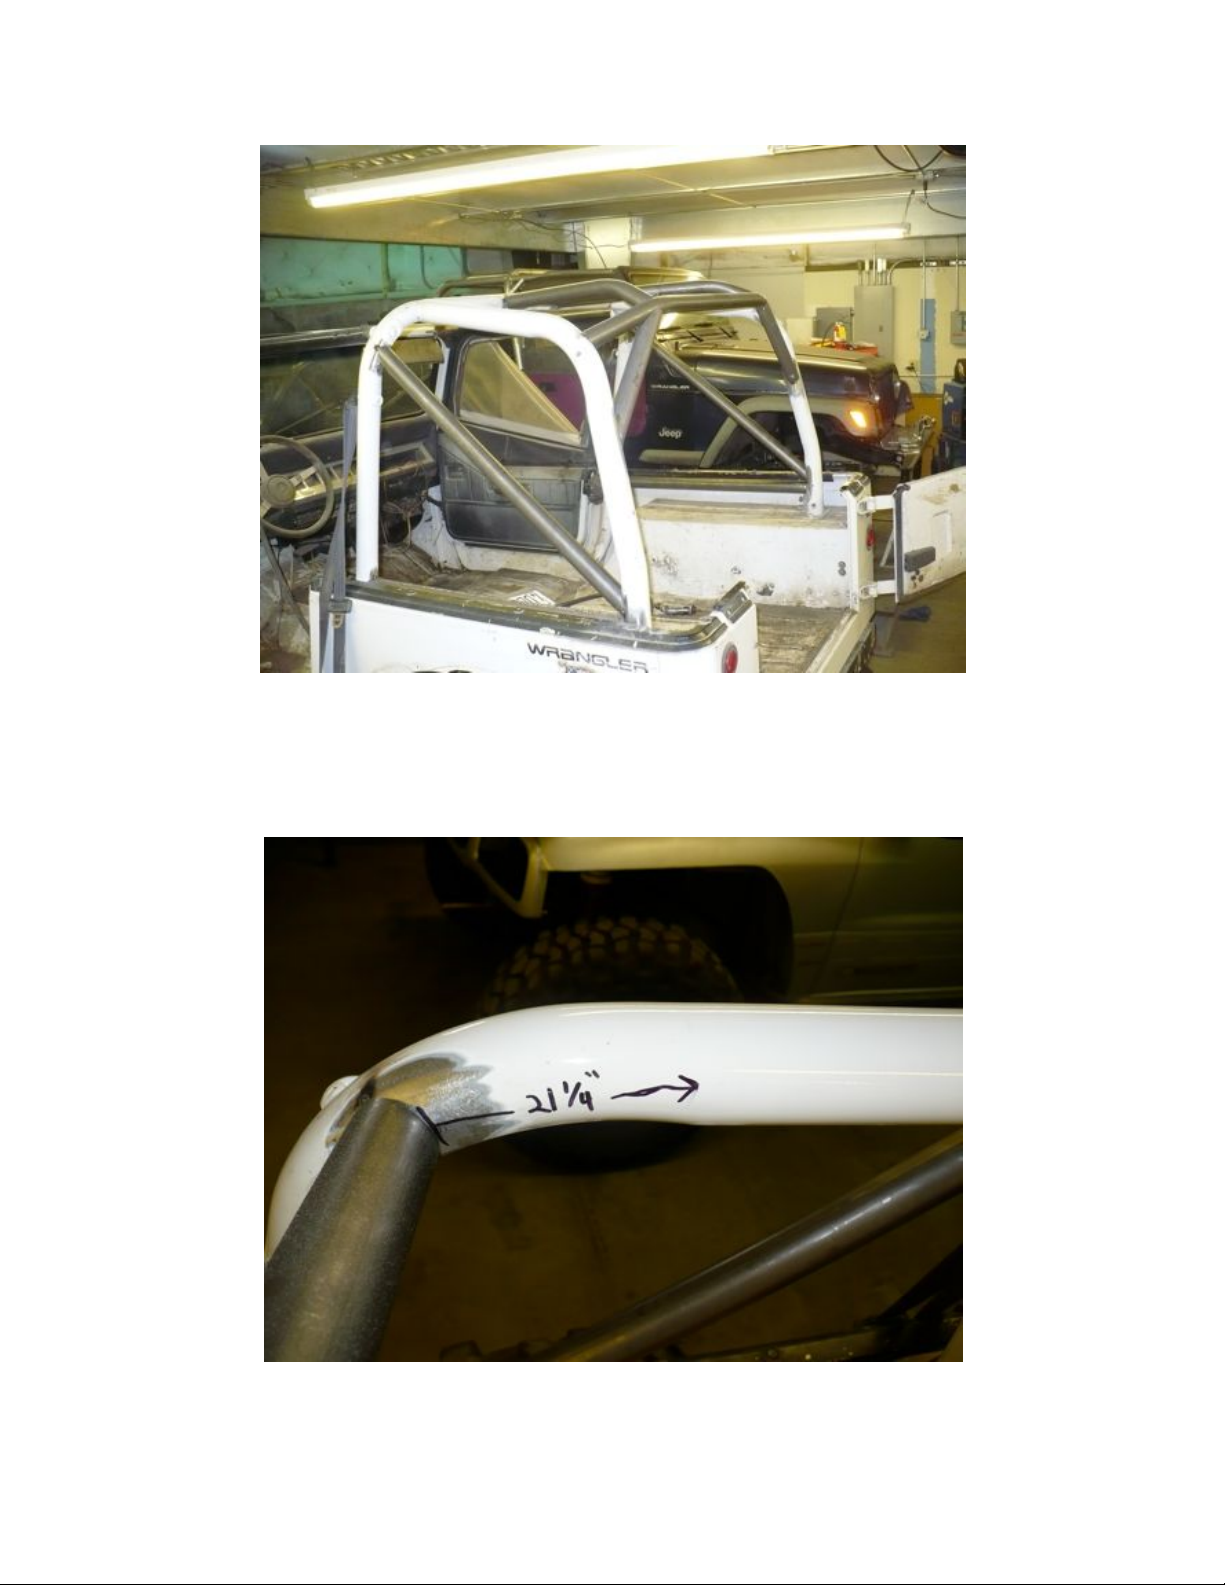
5) Level the C-pillar cross tube with tub before tacking into place.
6) Before tacking C-pillar cross tube into place, install B-C pillar spreaders in place to
insure proper placement of C-pillar cross tube. C-pillar cross tube should be
approximately 21.25” back from the B-pillar hoop as shown in picture 6.1 below.
Picture 6.1
Page 3
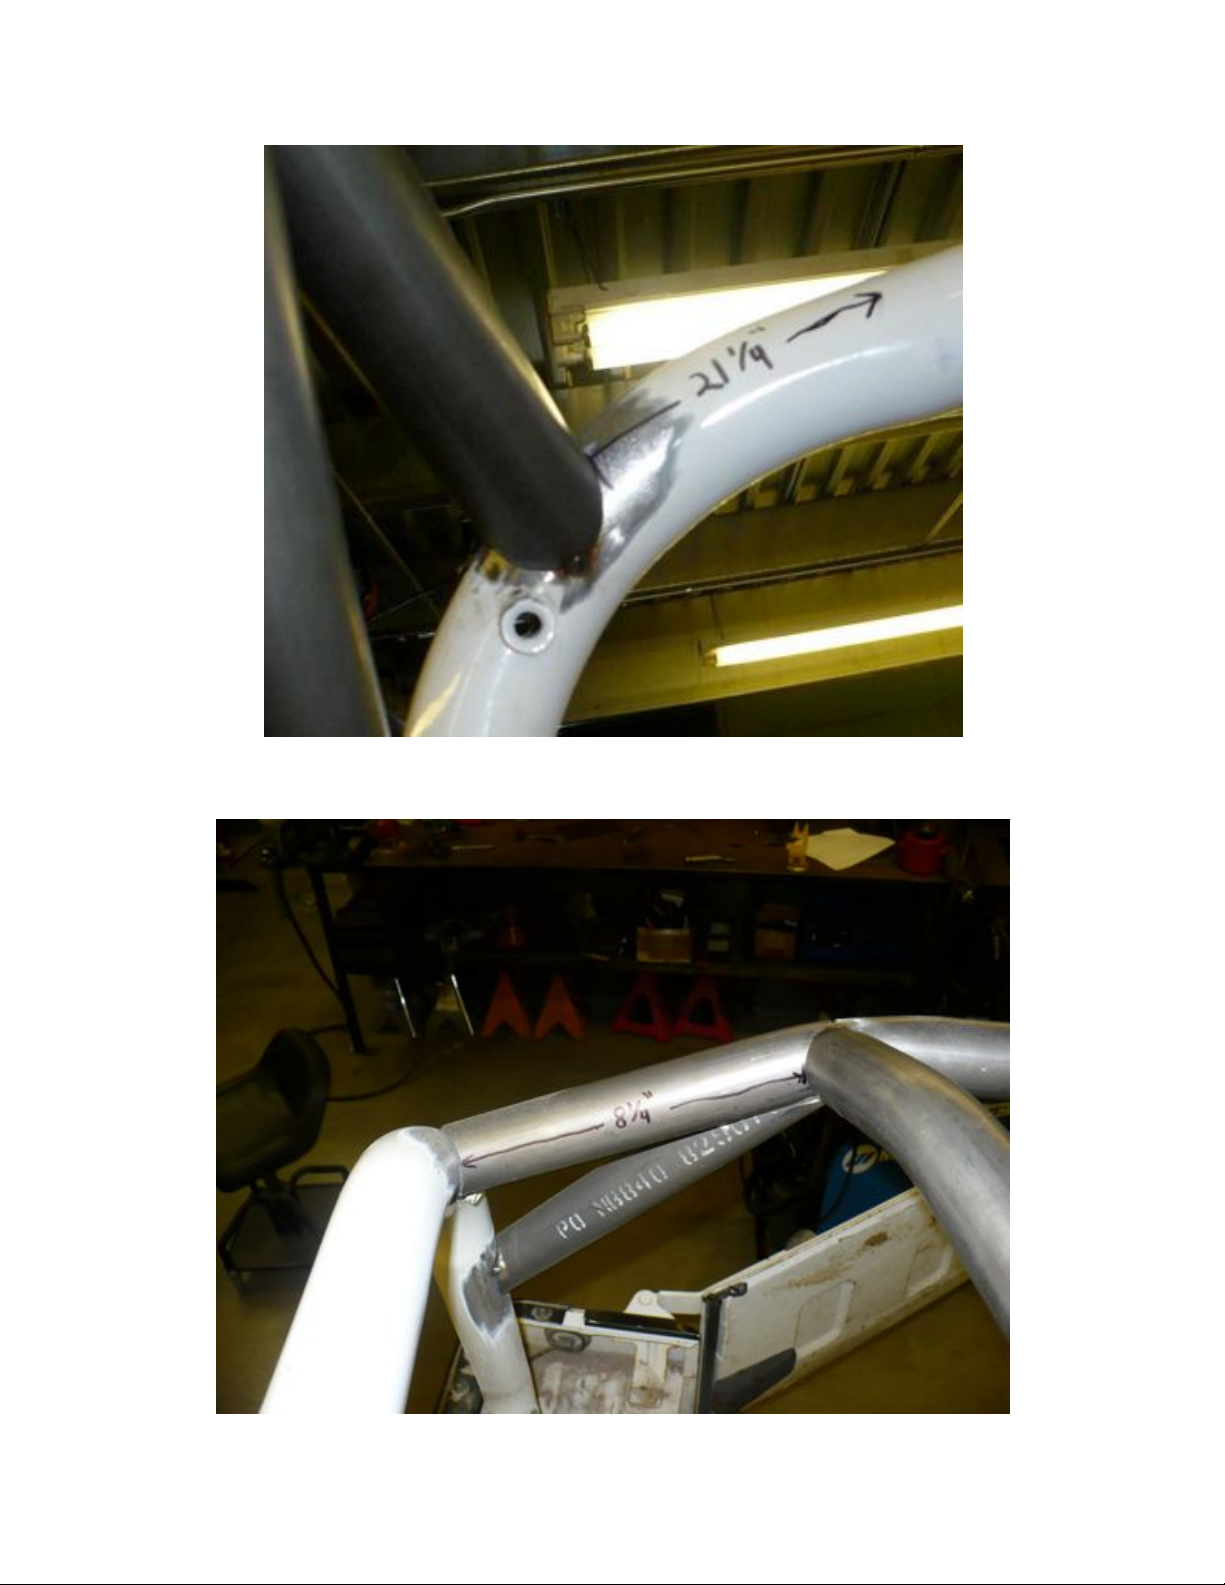
7) B-C pillar spreaders should be spaced approximately 8 ¼” from the factory C-pillar
down bars on the C-pillar cross tube.
Page 4

8) Space the B-C pillar spreaders approximately 8 ½” apart on the B-pillar main hoop.
9) Once satisfied with C-pillar cross tube and B-C pillar spreaders, go ahead and tack
into place. Once tacked, the C-pillar gussets can be fitted and tacked into place.
They are notched differently L&R and should be placed accordingly. The bottom of
the gusset should be about 18 ½” from the C-pillar base plate.
Page 5

10) With gussets tacked in place, dbl check measurements one last time and then fully
weld cage kit. Installation of rear cage kit is finished at this time. If installing PPM5233 Side Cage Kit, read on. If not, clean up weld areas, and paint desired color to
prevent rusting.
5233 YJ SIDE CAGE KIT
• The following covers the PPM-5233 YJ Side Cage Kit installation.
Page 6

1) Begin by fitting the B-C Pillar base tie in bars as shown below. Level the bars with
the sides of the tub. Push them up as high as they will go, but be sure to check them
L to R to ensure they are at the same height.
2) Once happy with base tie ins, tack into place. Next, fit the B-C pillar diagonals in
place. These are notched side specific and will only fit on one way. Drop them in
place so they fit just above the base tie in tubes and just below the weld for the
factory windshield supports on the B-pillar hoop. See picture 2.1 & 2.2 below.
Page 7

Picture 2.1
Page 8

Picture 2.2
3) Once satisfied with diagonals placement, tack into place. Dbl check measurements
before fully welding and then weld into place.
4) Clean weld areas and paint desired color to prevent rusting. Reinstall any interior
removed during the installation and enjoy.
 Loading...