

Page 1

SYNERGY MFG. 870 INDUSTRIAL WAY, SAN LUIS OBISPO, CA (805) 242-0397
PPM-5203 TJ/LJ FRONT CAGE KIT
Version 1.1
GENERAL NOTES:
• These instructions are also available on our website; www.synergymfg.com.
Check the website before you begin for any updated instructions and additional
photos for your reference.
• This is a weld in roll cage kit, all welding should be performed by an experienced
welder with proper welding equipment
• Use in conjunction with PPM-5204 or PPM-5210; TJ/LJ front rear cage kit
• This kit works with either a soft top or hard top
• Use extreme care when welding and grinding in the interior of your Jeep, remove
or cover any components you do not want welding spatter or grinding sparks to
damage.
• Note, if you want to retain the factory roll bar padding you will have to cut holes
where the tubes attach, position the tubes through the padding, slide the padding
over the tubes and weld. Thus, if roll bar padding is retained, plan ahead and
notch the padding as tubes are installed.
1. Remove the hard top or soft top, if using a soft top, remove the door surrounds.
2. Remove the sound bar, upper seat belt mounts, roll bar padding and B-pillar padding
and trim.
3. Remove the stock tubes over the side doors, unbolt them from the windshield and
from the B-pillar hoop.
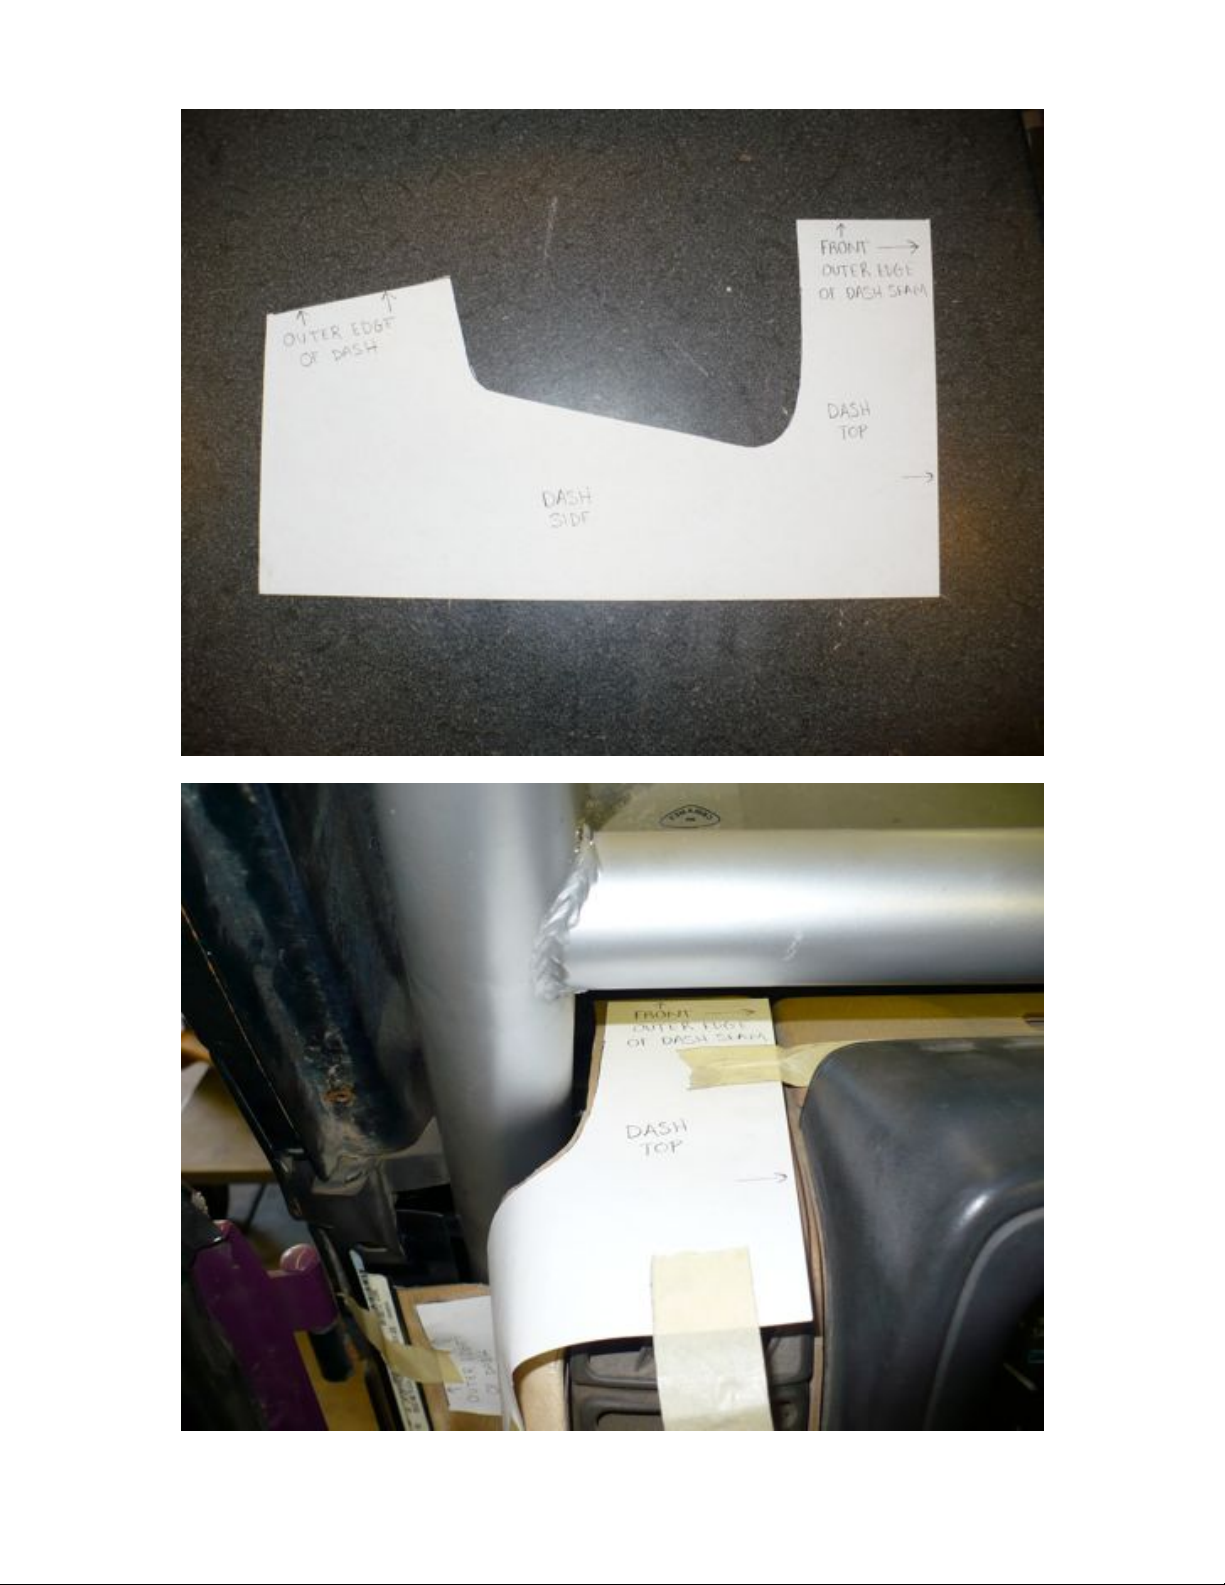
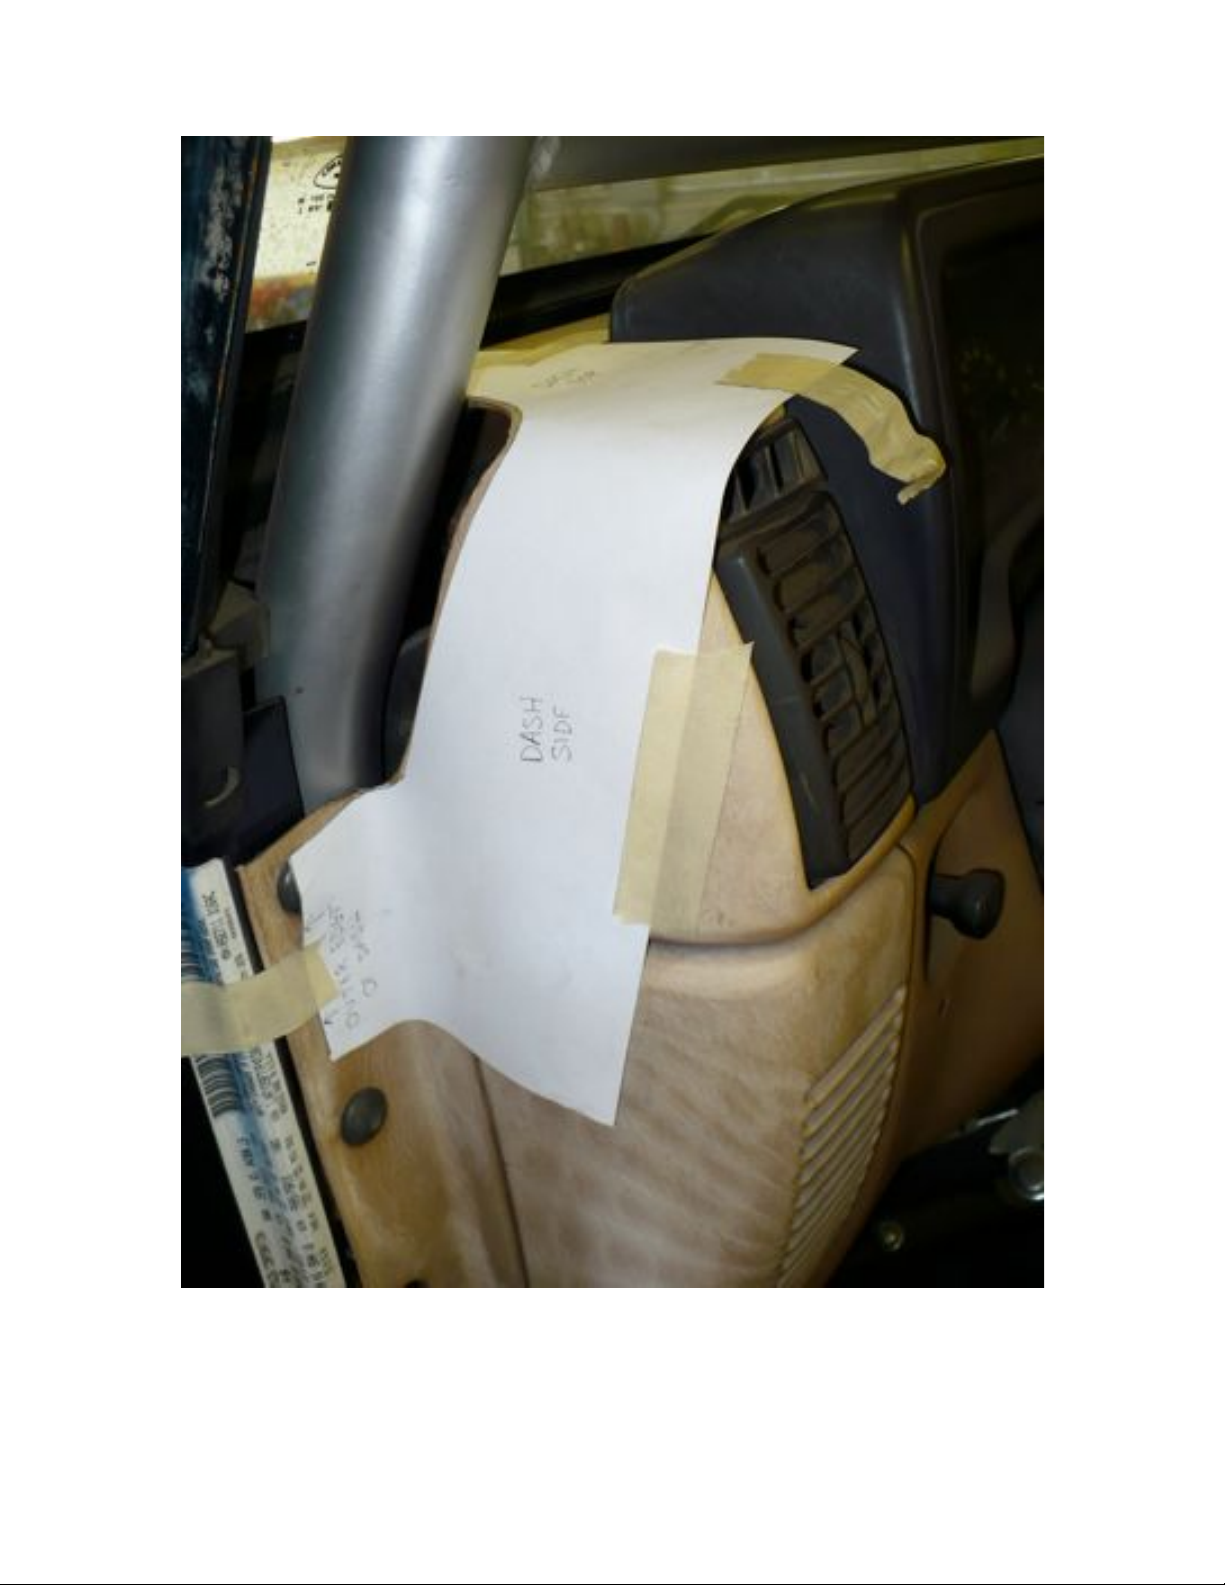
4. Notch the dash using the templates provided. The template is made for the drive side
with the words up, use the opposite side for the passenger side.
Page 2
Page 3
5. Pull up the front foot area carpet to mount the floor plates, position the foot plates as
shown, the outer edge goes up against the side of the kick panel, the back edge of the
floor plate is approximately 1.5” from the front edge of the drain hole. Wait to drill
Page 4

and bolt the floor plates until you position the A-pillar tubes and center the floor plate
on the A-pillar tubes.
6. Remove the paint on the factory cage around the areas to be welded. The will be
between the holes that mounted the side bars to the B-pillar and the middle of the Bpillar where the A-pillar spreader tubes go.
7. It is recommended to position all the tubes and square them before you do any welding
on the tubes.
8. Position the new A-pillar upright and over the door tubes, the tube is in two pieces, the
splice is above the dash. Use the provided 1 ½ diameter short tube slugs at the splice.
Drill a few ½” holes in the A-pillar tubes so you can rosette weld the tubes to the
inner slug. Leave a 1/8-1/4 gap between the tubes so the weld will weld the ends of
the two tubes to the inner tube slug. The upper end of the door tube should be located
in the middle of the two bolt holes that the original door bars attached to the B-pillar.
Tack weld the door tube to the B-pillar.
Page 5

9. Position the dash bar. This tube intersects at the splice in the A-pillar tube. It is
helpful to wrap a ratchet strap around the A-pillars to clamp this tube in place.
Page 6

10. Rotate the lower A-pillar tube to align to the center the floor plate, drill the floor and
attach the floor plate using the supplied 3/8 hardware. You will need to cut access
hole in the panel underneath the floor panel to install the nuts and washers
underneath. If you are using the frame tie-in kit, cut out the whole section of the
bottom panel to install the bushing plate.
11. Position the upper windshield cross tube and spreader tubes. The spreaders tube
center spacing is up to you but 8” center spacing will match the rear cage diagonal
tubes. The bend in the spreader tubes goes to the front. Use a ratchet strap front to
back to around the B-pillar and windshield tube to hold these tubes in place.
Page 7

12. Mount the A-pillar windshield brackets to the windshield using the stock bolts, if the
brackets do not touch the A-pillar; use the supplied shims between the bracket and
windshield.
Page 8

13. Make sure all the tubes are aligned and square or level. Tack weld all of the joints in
this order:
1. Lower A-pillar to floor plate
2. A-pillar splice over dash
3. Windshield cross tube to A-pillar
4. Spreader tubes to windshield and B-pillar tubes
5. Windshield brackets to A-pillar
6. DO NOT tack weld the dash bar until you completely weld the Apillar splice
14. Weld the A-pillar splice completely, then tack weld the dash bar into place, make sure
the tube is level
15. Weld the rest of the joints of the cage and weld the windshield bracket to the A-pillar.
16. Position the grab handles as shown below and weld into place
Page 9

17. If you are adding the optional PPM-5205 frame tie in kit, assemble and weld as
shown below:
Page 10

 Loading...