

Page 1

SYNERGY MFG. 870 INDUSTRIAL WAY, SAN LUIS OBISPO, CA (805) 242-0397
PPM-5014-A JK REAR AIR-BUMP KIT
Version 1.1
GENERAL NOTES:
These instructions are also available on our website; www.synergymfg.com. Check the website before
you begin for any updated instructions and additional photos for your reference.
The instruction pictures below were taken on a 4dr Jeep JK.
The installation of this kit requires cutting of the factory frame. A cut off wheel, plasma cutter or oxy-
acetylene torch will be needed to complete installation. The air-bump mount will need to be welded to
the factory frame rail. An experienced fabricator/welder is recommended to properly install this kit.
This kit is designed to set the rear suspension at a 3” bump stop spacing.
INSTALLATION:
1. Strip the rear suspension down to the point where it can be cycled fully from bump to droop and articulated
from side to side, removal of coils and shocks should suffice for proper cycling of rear suspension.
2. Cut the factory bump stop mount off the frame. A 4 ½” cut off wheel and grinder works well for this.
a) Cut along the weld and try not to cut into the frame.
Page 2
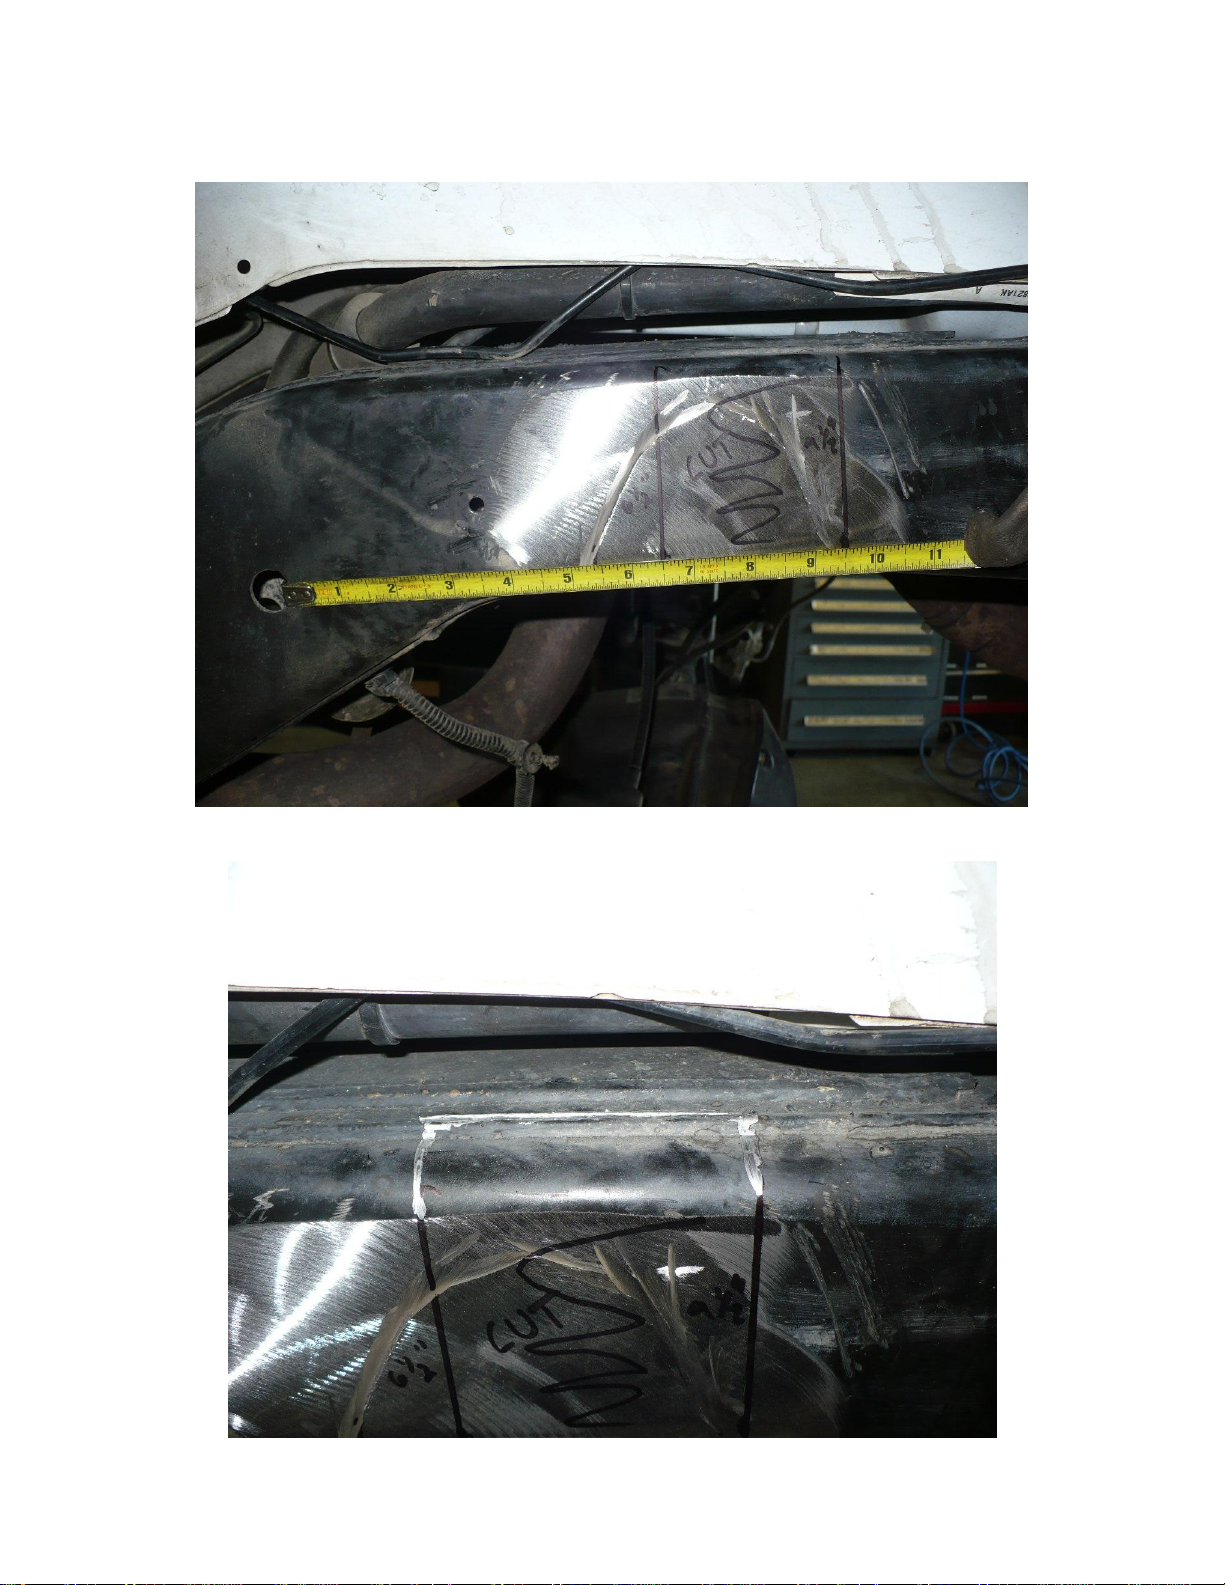
3. Clean up the remainder of the area with a grinder / sanding disc until the frame is smooth.
4. With the frame cleaned up, measure 6-1/2” and 9-1/2” back from the frame hole shown below.
5. Mark cut lines on both top and bottom of frame. Cut lines should go to the back of the first weld seam on
both top and bottom of frame. See images below.
Page 3
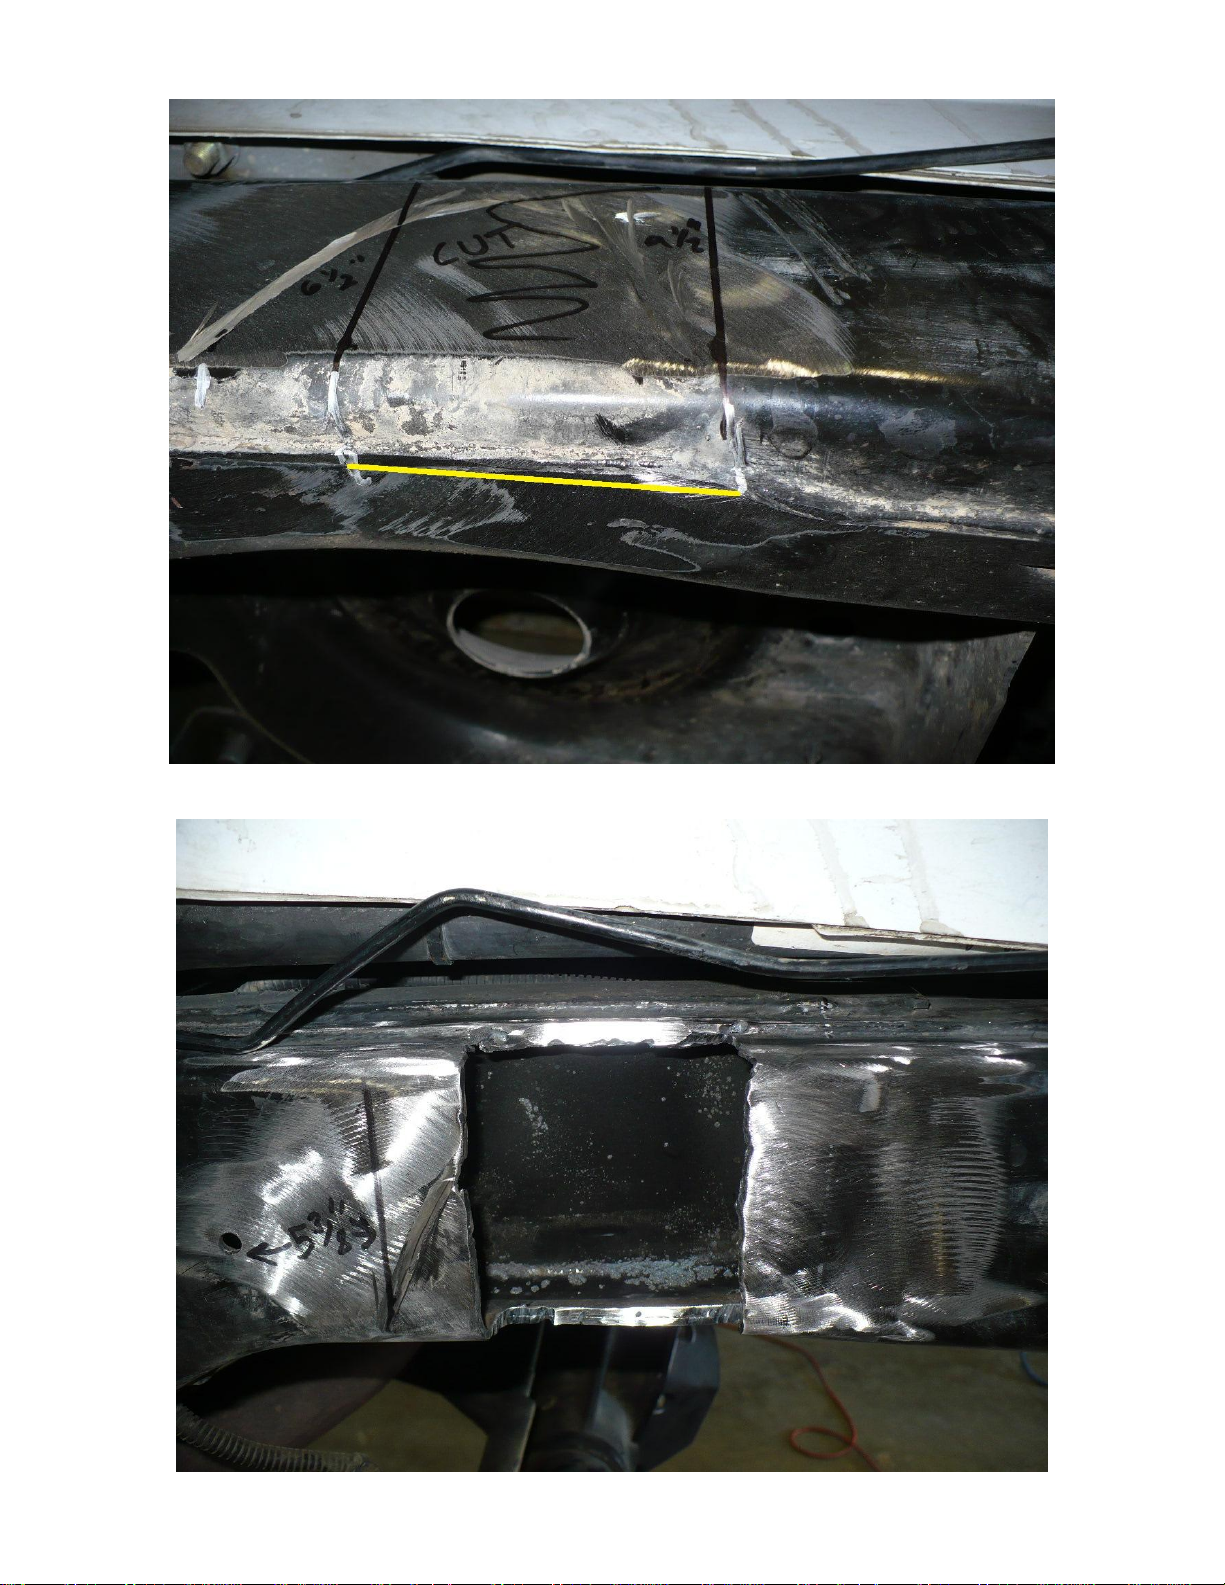
6. Next, cut out the outlined section of frame. Clean up any rough edges and remove paint from frame for
welding. Completed cut should appear as shown below.
Page 4

7. Test fit 501402 air bump mount. Be sure the top edge butts up to the weld on the top of the frame.
Page 5

8. Depending on axle location due to longer control arms, position of the air bump mount may vary. We have
found that 5-3/8” back from the same frame hole used earlier is the ideal location on Jeeps featuring 3-4.5”
lift and control arms set at about ½” longer than stock. See image 8.1 below.
9. Positioning of the air bump mount can be adjusted front to back as needed for proper alignment on the axle
pad. Be sure to check sway bar clearance and axle pad engagement at bump.
IMG. 8.1
Page 6

10. Next, bolt on the 501401-01 rear bump stop strike pads onto the axle and place the rear suspension at full
bump. Do this with whichever shocks are to be used bolted in place.
Page 7

11. After cycling the suspension, and satisfied with sway bar and shock clearances, fully weld upper mount in
place. Weld all areas as shown below.
Page 8

12. After welding, paint any exposed areas of metal to prevent rust and corrosion.
13. Note, brake line will need to be bent around bump can. Be sure it does not interfere with sway bar link at
bump. Or see steps 17-20 at the end of the instructions for a clean brake line mod.
14. Reassemble rear suspension and lower vehicle onto ground. We recommend running between 80-100 psi in
the bump stops.
OPTIONAL BRAKE LINE MOD
15. Locate the hole shown below in the rear upper shock mount. Use a step drill to open this hole up to a
diameter of 5/8”.
Page 9

16. Next, relocate the brake line by putting a 75-90 degree bend in the end as shown below.
17. Attach the soft line to the hardline as shown and clip into place using a brake line clip.
Page 10

18. Double check that brake line is still long enough at full droop and re-bleed the brakes.
INSTALLATION IS COMPLETE
 Loading...