

Page 1
SYNERGY MFG. 870 INDUSTRIAL WAY, SAN LUIS OBISPO, CA (805) 242-0397
PPM-5000 SYNERGY SUSPENSION JEEP TJ FRONT
COILOVER BRACKET KIT
Version 1
GENERAL NOTES:
Requirements:
Fabrication and welding skills, grinder with cut off wheel, and a welder. A plasma cutter
(or cutting torch) and other fabrication tools will make the install easier. This kit requires
cutting and welding of the frame.
This kit requires cutting off part of the factory shock mounting bracket and parts of the
inner fender. You will also have to weld the new bracket in place. Some under hood
components may need to be relocated or repositioned. This kit is designed to use a 2.0
Fox or Sway-A-Way 12" Travel shock with a 3" lower bumpstop spacer (not included in
the kit). A 14" travel shock can be used but up travel will be sacrificed.
1. Remove the front tires, wheels, shocks, springs, and any under hook components
that may interfere with installation.
Page 2
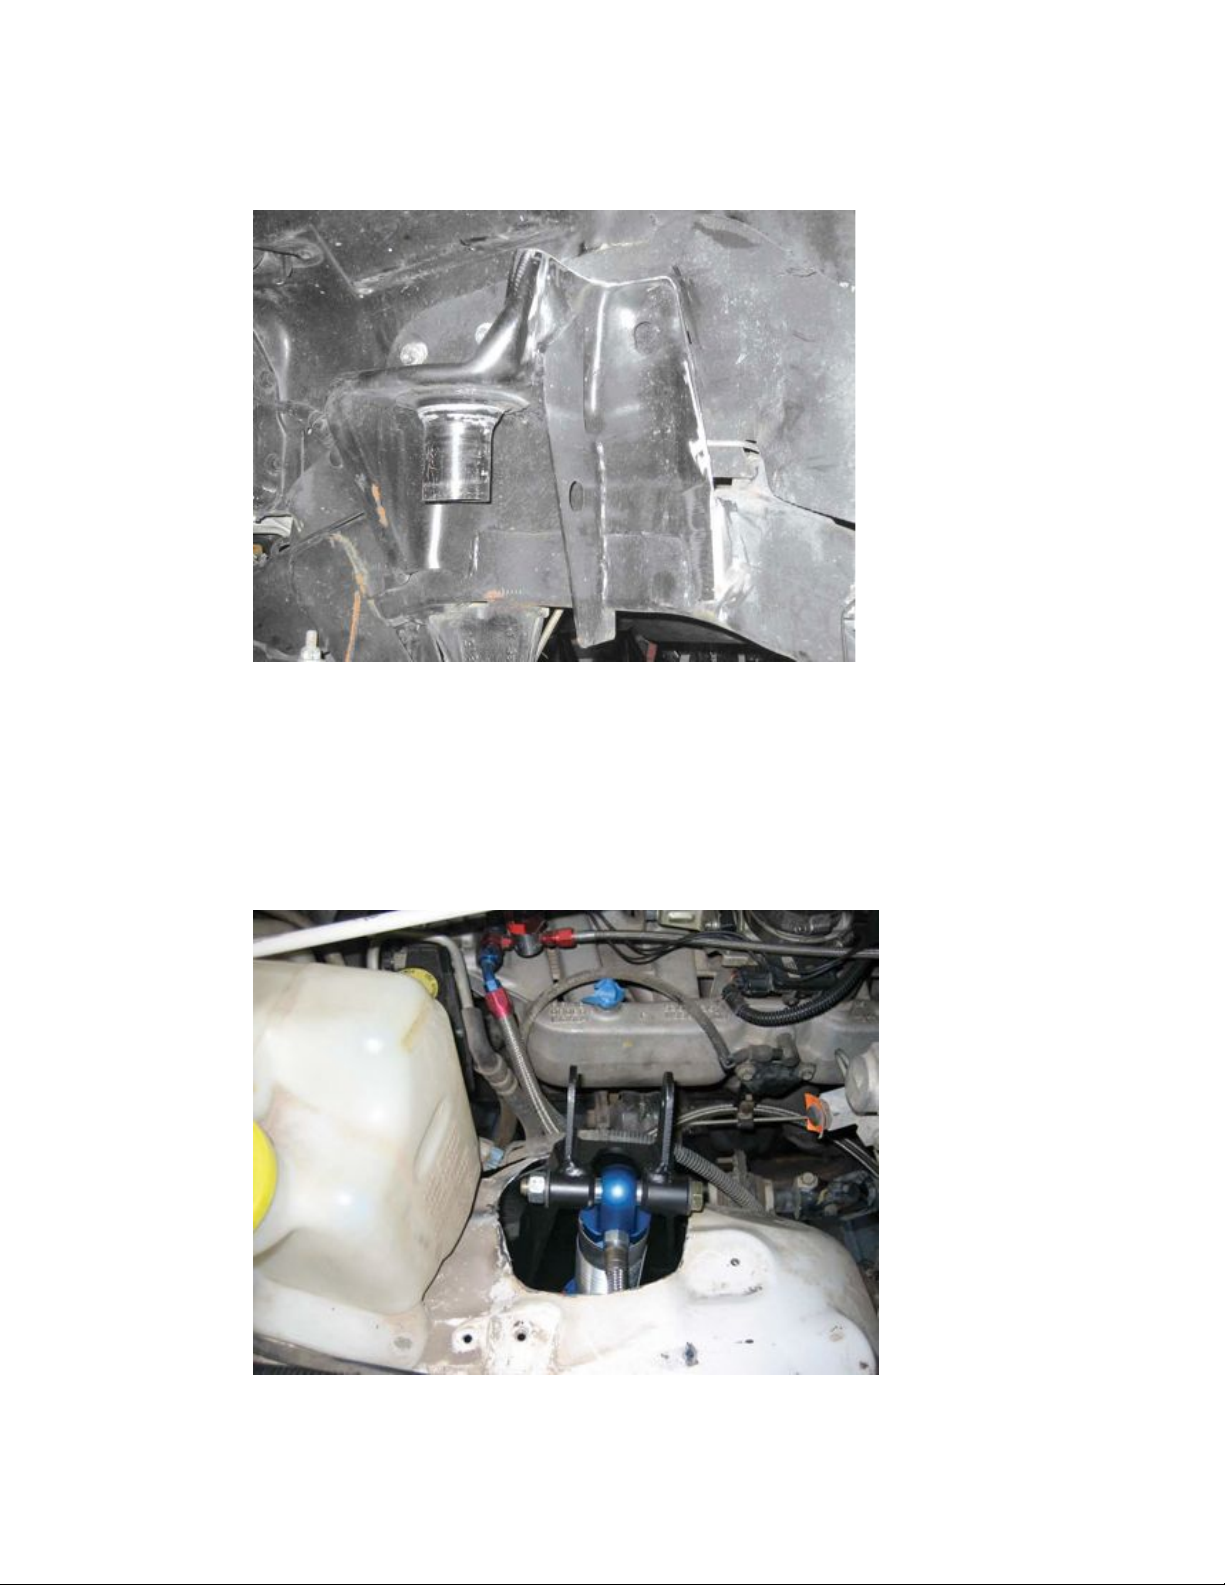
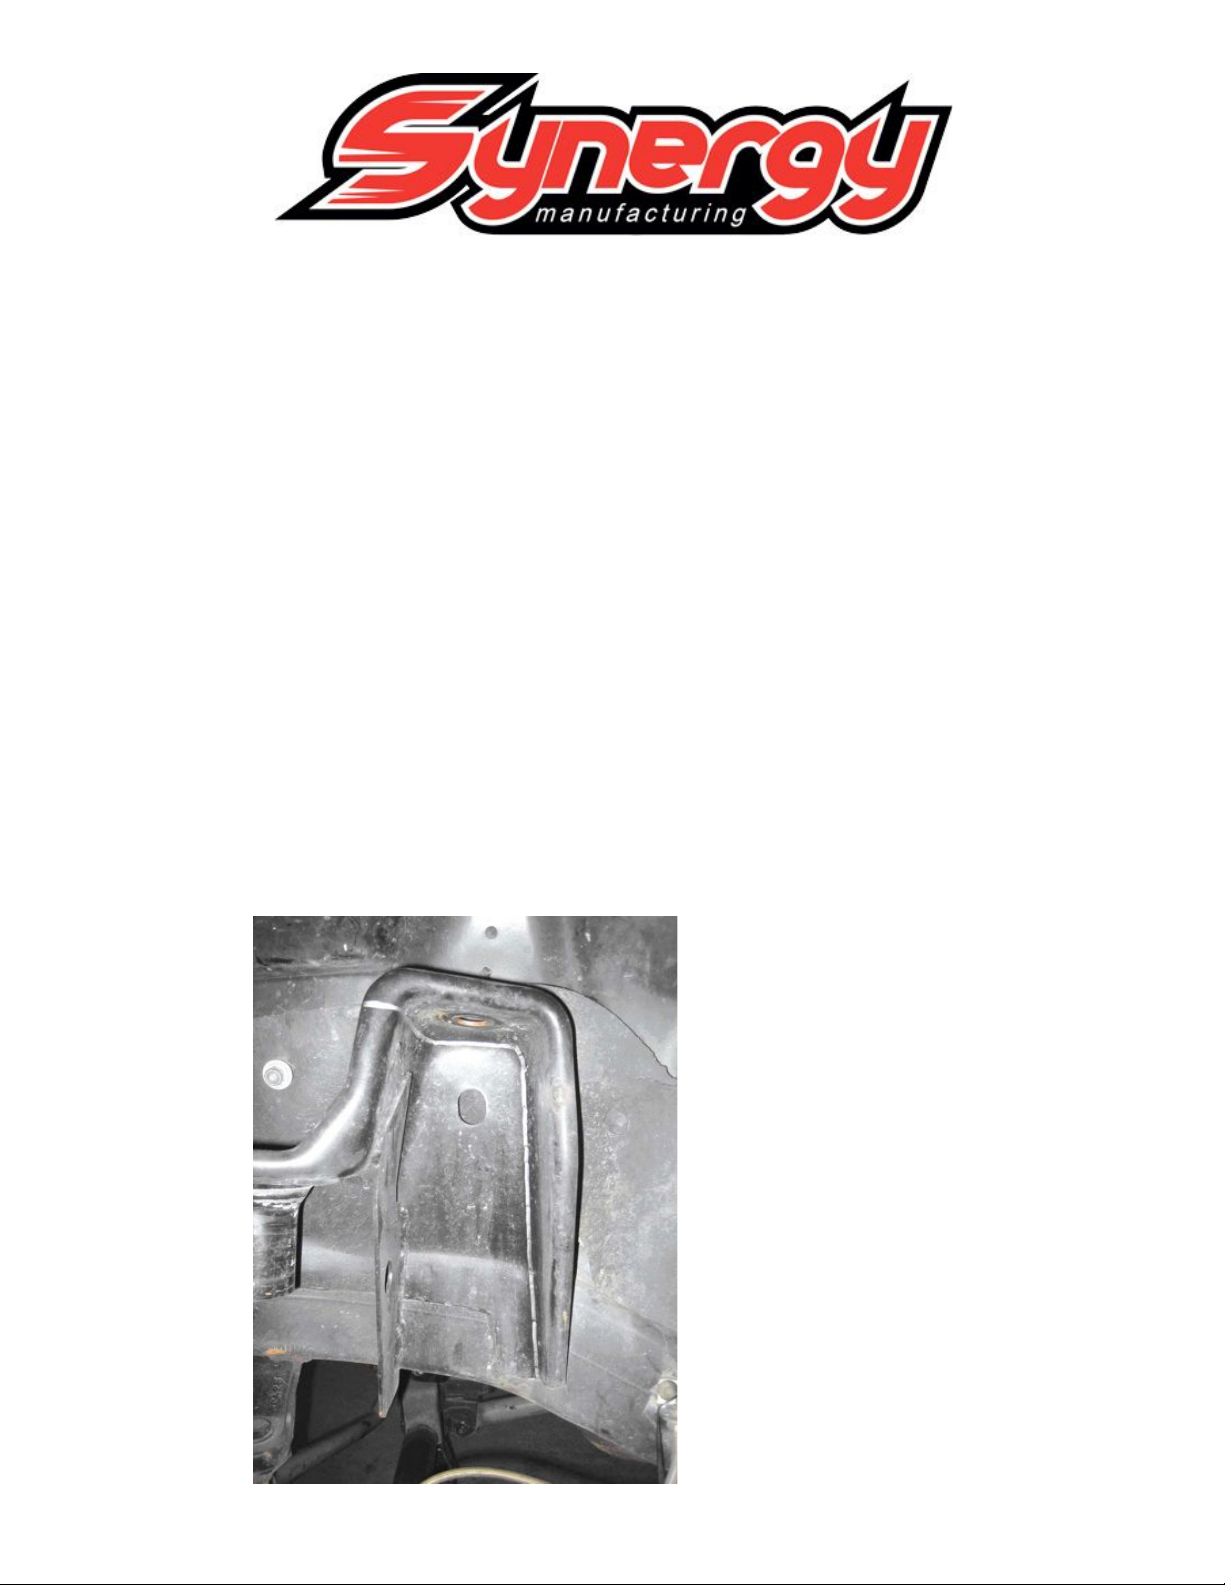
Figure 1 Mark the stock shock mount to be cut
2. Mark the rear and the top of the stock shock mount as shown in the picture
(Figure 1).
Figure 2 - The finished cut should like this
Note: DO NOT cut the bump stop mount off unless you are upgrading to our
hydraulic bump stop kit (PPM -5002).
3. Position the new shock mount bracket. This will provide a rough guide for cutting
the inner fender. The hole only needs to be large enough to fit the shock mount. If
your inner fender has been removed, ignore this step. See Figure 3
Figure 3
4. Clean off any paint around the edge of the shock mount where you will be
welding. Clamp the shock mount in position. Bolt the over-engine cross bar to the
Page 3

shock mounts using the supplied 3 1/2" long bolts. The sharper bend of the cross
bar should be positioned on the driver's side of the engine compartment. The
shock bracket should be positioned as shown in Figure 4.
Figure 4
5. Weld the shock bracket to the frame and coil bracket. Weld and let cool. Clean
and Paint the bracket after it has cooled.
6. Position the lower shock mount on the axle. Clean the surface area around the
new shock mount. Position the lower shock mount as shown in Figure 5.
Page 4

Figure 5
7. Weld around the lower shock mount. Clean and paint the shock new shock
bracket and axle.
8. Assemble the coilover shocks (or whichever shocks you Figure 4: Correct Shock
Mount Position are using) using the supplied hardware. The 1/2" x 4 1/2" bolt fits
in the upper mount, and the 1/2 x 2 1/2" bolt is used the lower mount. If your
shocks have remote reservoirs, install them now using the supplied hose clamps.
9. Install the limit straps using the supplied 1/2" x 1 1/4" bolts.
10. Washers are provided for the limit strap hardware.
11. Reinstall any under-hood components that may have removed. Some components
may need to be relocated or repositioned.
12. Make sure all bolts are Figure 5: Lower Shock Mount Position snug. Make
adjustments to the shocks, limit straps, and other items as necessary.
13. Enjoy your new shocks and bracket kit! Thank you for choosing Synergy
Suspension.
 Loading...