

Page 1

SYNERGY MFG. 870 INDUSTRIAL WAY, SAN LUIS OBISPO, CA (805) 242-0397
INSTALLATION INSTRUCTIONS
PPM-4018 JEEP JK COMPRESSOR MOUNT KIT
GENERAL NOTES:
• These instructions are also available on our website at
www.synergymfg.com Check the website for any updated instructions and
additional photos for reference.
Installation time 20 minutes to 1 hour.
Kit contents: (1) Compressor Bracket
Required Tools:
- 13mm Wrench (preferably a ratcheting wrench)
- 10mm Wrench
- Philips Head Screw Driver
*** Prior to mounting a 400H or 450 Series Viair compressor, perform the supplemental install procedure
on page 3.
1. Using fasteners supplied with your compressor, mount the compressor on the bracket, as indicated in
the following pictures – (for 450 series compressors – do not install the driver’s side rear fasteners,
until the bracket is installed in the engine compartment).
Page 2
Advisory: Do not bump, or pull the master cylinder away from the booster during this install. Doing so
will dislodge the booster O-Ring. If the O-Ring becomes dislodged, do not drive the Jeep and contact
tech support for additional information.
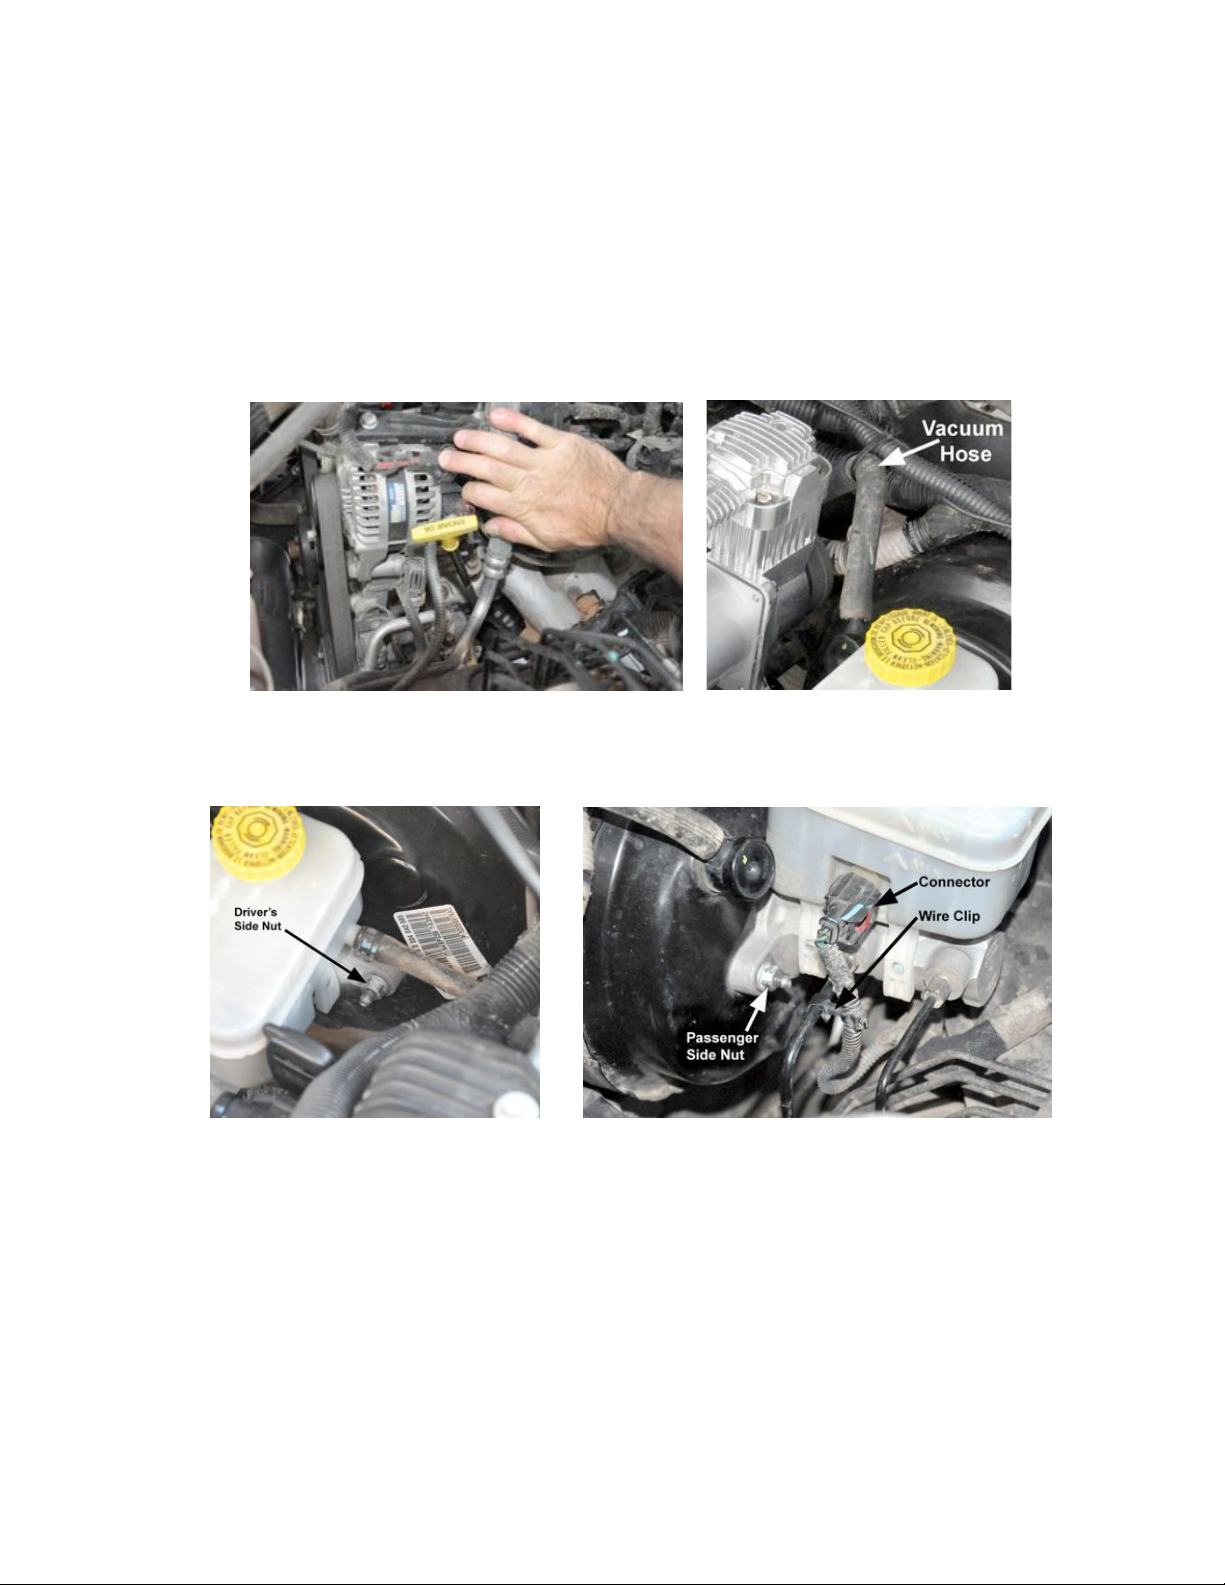
2.Using firm pressure and pushing as indicated in the following picture, bend the A/C hose toward the
distributor cap in order to provide clearance for the bracket.
3. Loosely zip tie the vacuum hose as indicated in the previous picture, in order to assure at least ½”
clearance around the compressor head.
4. Remove Driver’s and Passenger’s Side Master Cylinder Nuts as indicated in pictures:
5. Remove the brake fluid sensor wire connector – With a small flat head screw driver, slide the red tab
toward the passenger’s side. Press the tabs and pull the connector off of the brake fluid reservoir.
6. Disconnect the small plastic wire clip indicated in the previous picture.
7. Thread the connector and wire bundle under the steel brake line and re-attach as indicated in the
previous picture.
8. 13mm wrench – Remove both driver’s and passenger’s side master cylinder nuts.
9. 13mm wrench - Using the previously removed factory nuts, install the bracket with the compressor
installed.
10. 10mm wrench and Philips head screw driver - Using the one remaining fastener that was included
with your compressor, install the driver’s side rear compressor fastener.
2
Page 3
Jeep JK Compressor Mount Kit
Viair 400H or 450 Series
Installation Instructions Supplement
Kit Contents: (4) M5 X 20mm Machine Screws (4) M5 Serrated Flange Nuts
Required Tools: - 4mm Allen wrench - Measuring device (ruler or dial caliper, etc)
- 3/16” drill bit - Center Punch
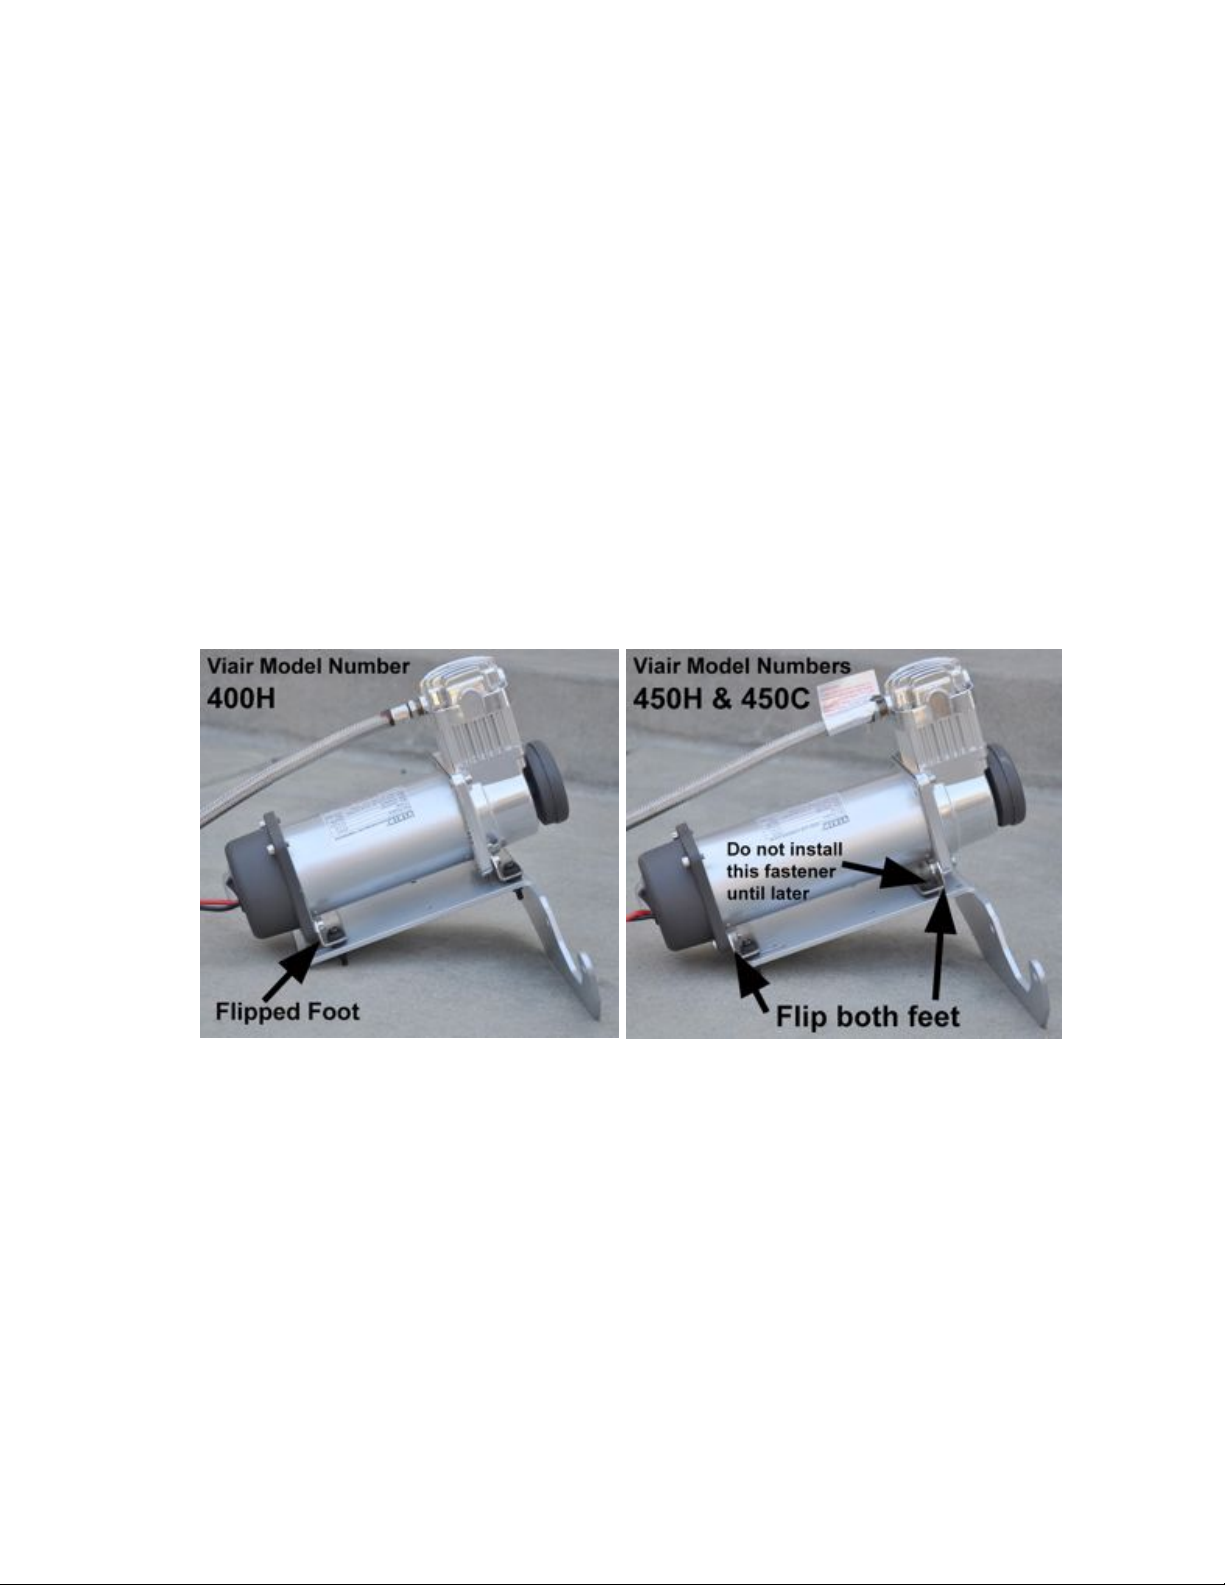
11. With a 4mm Allen Wrench and the supplied fasteners (One foot on the 400H gets flipped and
both feet on the 450 Series get flipped) flip and re-mount the feet brackets as indicated in the
following two pictures:
400H - The foot flip procedure for the 400H is complete at this time. Proceed with the standard
compressor mount bracket instructions at this time.
12. With both feet flipped on the 450, mount the compressor on the bracket as indicated in the previous
picture.
13. Slide the compressor as far to the front of the mounting slots as possible and mark the rear two holes
to be drilled.
14. Center punch and drill the rear holes.
15. The foot flip procedure is now complete. Proceed with the compressor mount bracket instructions at
this time.
3
 Loading...