


SYNCOMM Proprietary
Module
SYNCOMM Radio Port operation manual
1.Environment
Radio Port
Antenna
RS232 Cable: one set
Power module or Power supply: one set
PC or Notebook: one set
Antenna
Wire RS-232
RP
Power
Figure 1-1 Connection view of operation environment
Attention issues:
(1). Please make sure the antennas are connected with
Radio port before power on
(2). If no power module, you could use power supply
1
SYNCOMM Proprietary
2.Explication of operation
(1). Firstly, setup the environment as figure 1-1.
(2). Run Hyper Terminal, setup it and prepare for monitor RP’s
state. (Please refer the third item for how to setup hyper
terminal)
(3). Setup the parameter of RP. (Please refer the fourth item for
setup various parameter in RP)
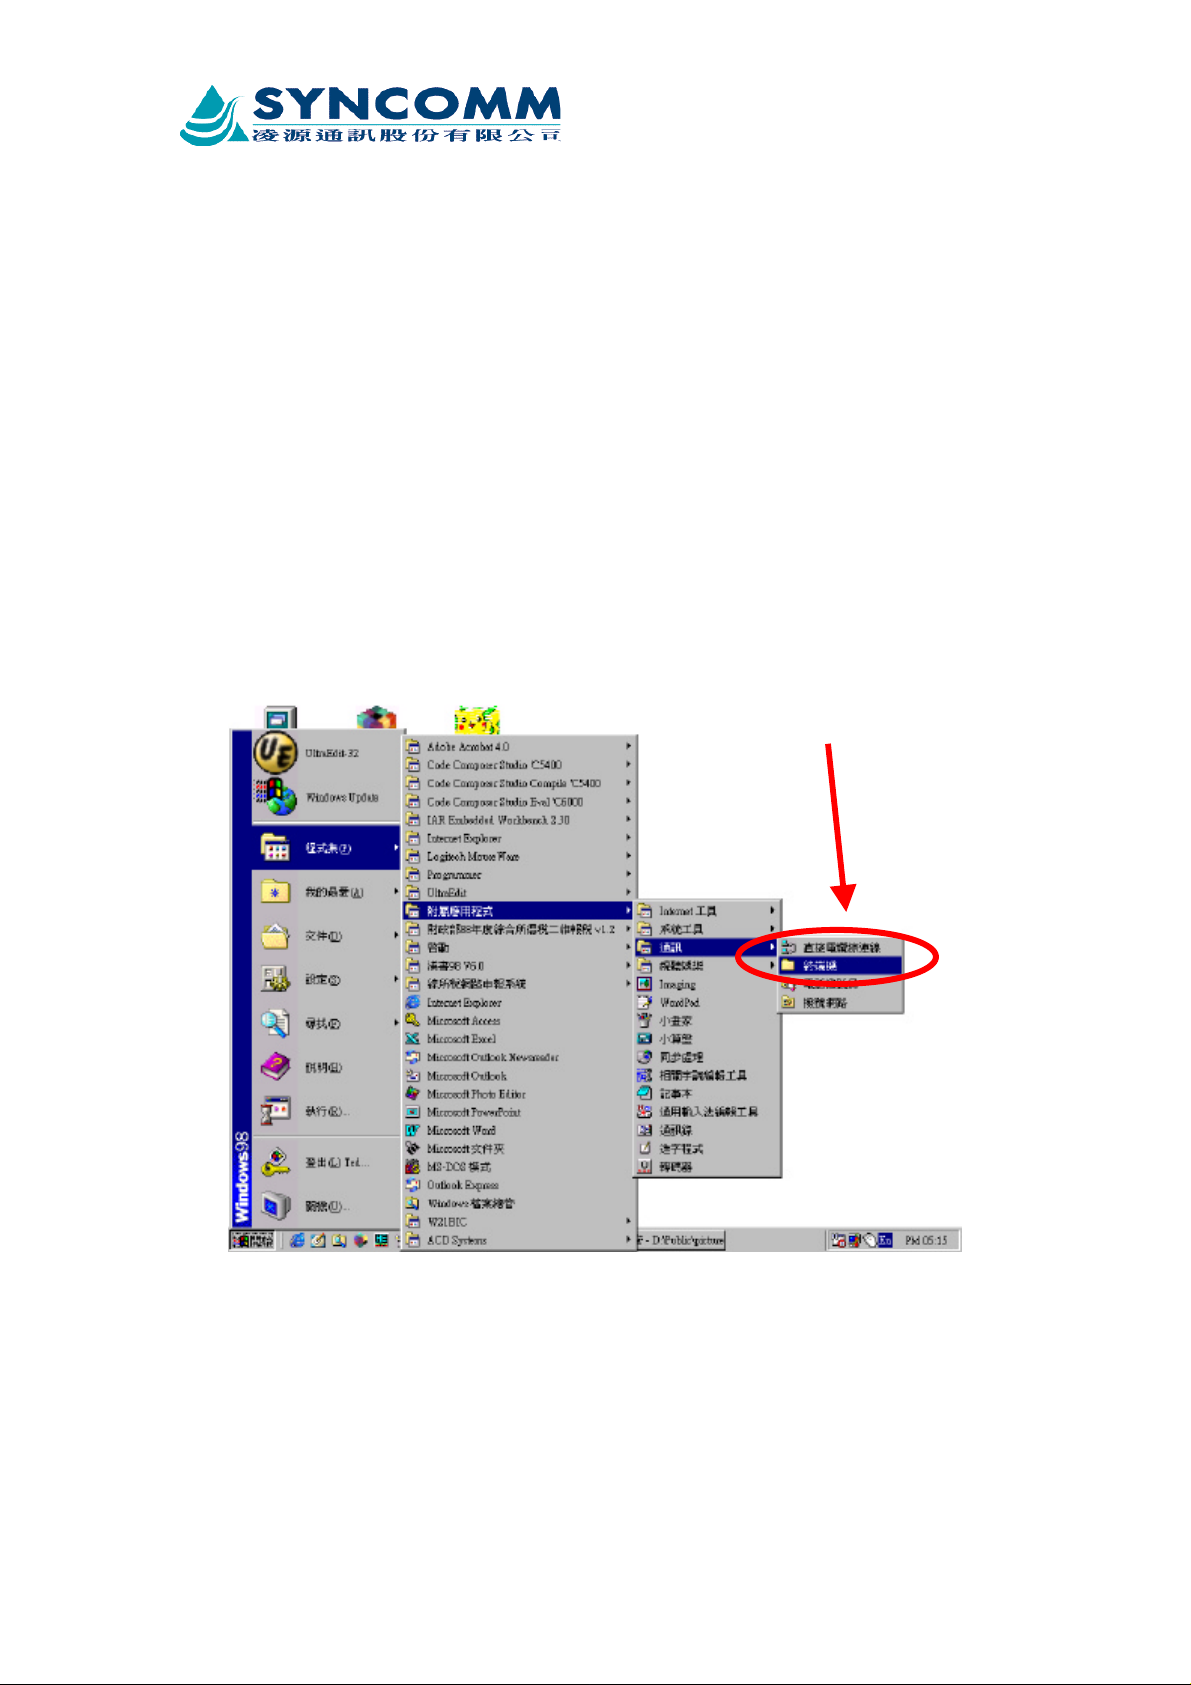
3.Explication of how to setup Hyper Terminal)
Step 1: Run Hyper terminal
Hyper Terminal
Figure 3-1 the path for executing Hyper Terminal
After ran the Hyper Terminal you could see the status as below.
If you couldn’t find Hyper Terminal, you must re-install it
2
SYNCOMM Proprietary
Figure 3-2 the screen after ran Hyper Terminal
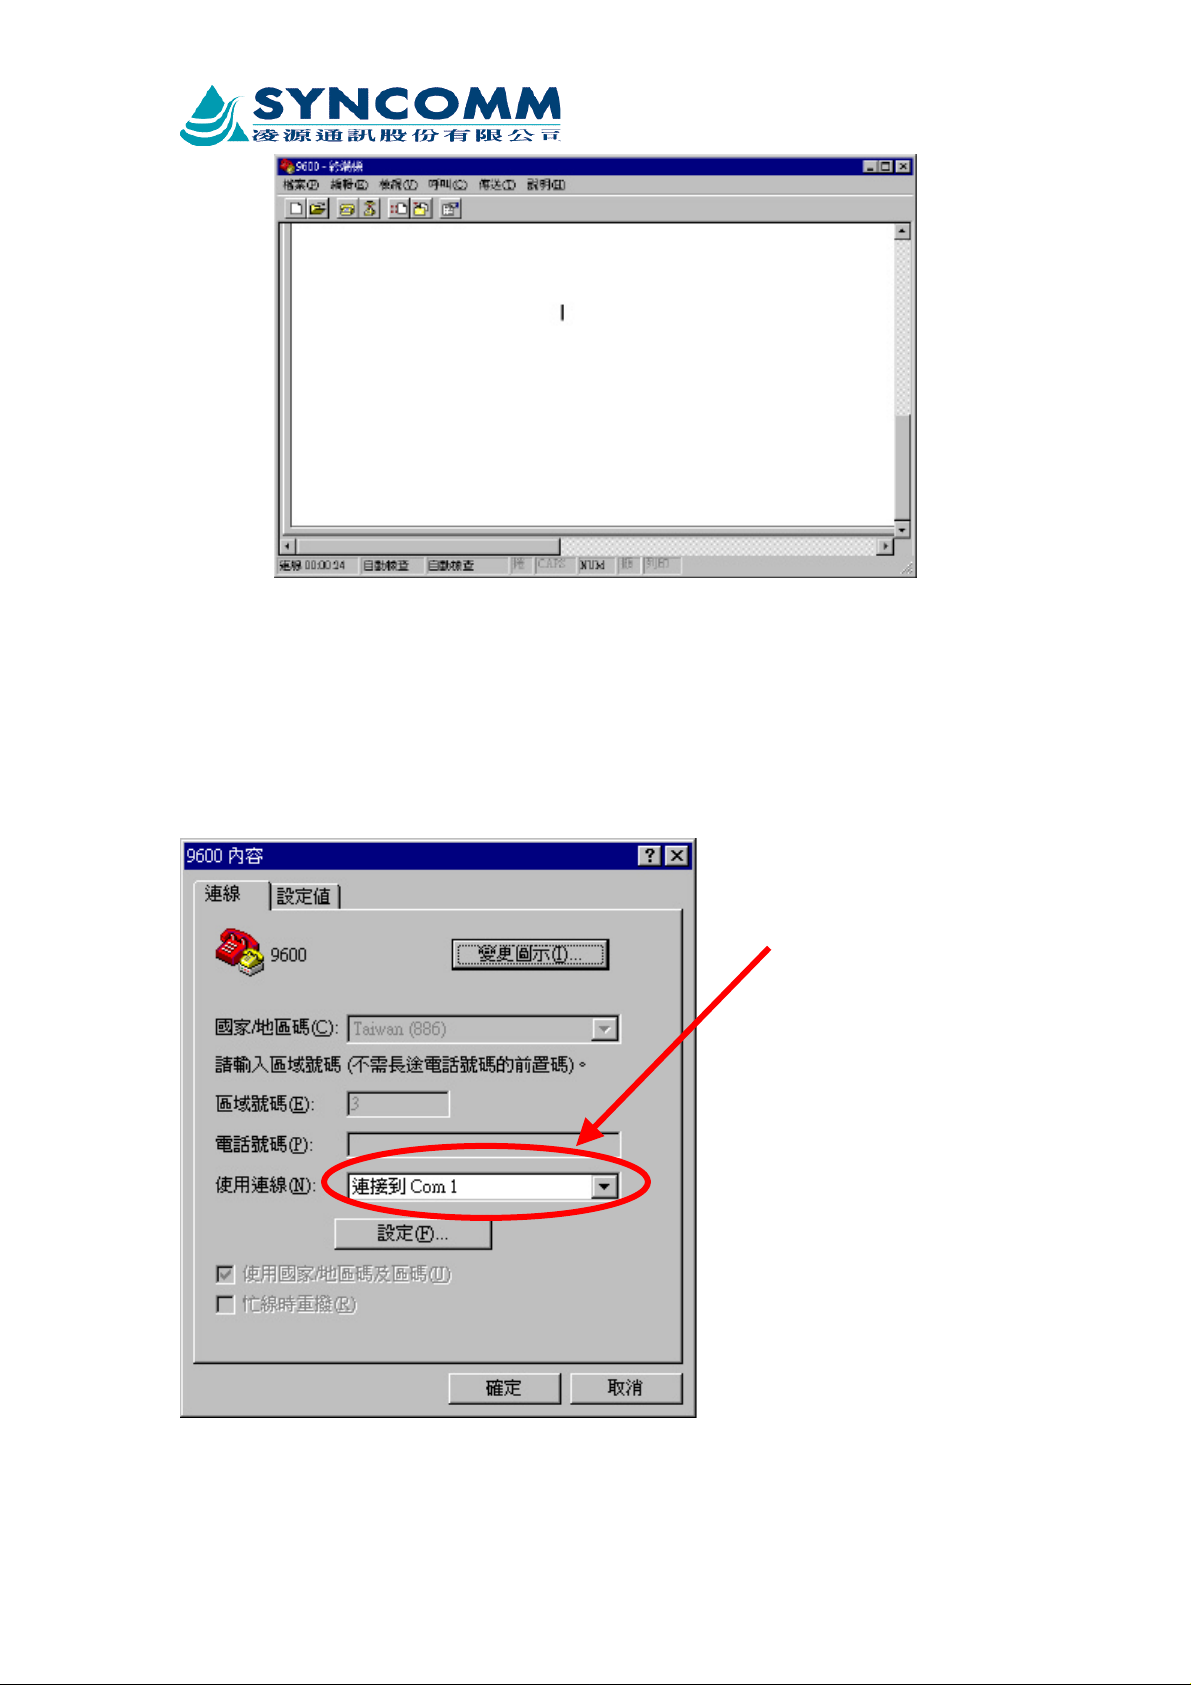
Step 2: Setting connection port
In figure 3-2,select “file”, select “content”, then get the screen
as below
Set the port that you connect
PC and RP use RS232
Figure 3-3 Select connection port
Step3: Port setting
3

SYNCOMM Proprietary
Set the data transfer rate (bits/second), bits per unit, parity
check, stop bits, data flow control as below.
Figure 3-4 Hyper Terminal port setting
4.Various parameter setting
After we done all the preceding action, we turn on the power of
RP and watch the windows of Hyper Terminal
(1). At first, the word “login” show on the window, and please
input the password 123
4

SYNCOMM Proprietary
(2). Enter main menu
(3). Input “rd” & press “Enter” to enter Research mode, there
are three kinds of mode, normal mode, research mode, and
test mode
5

SYNCOMM Proprietary
(4). Input 2 to enter RF test menu
(5). After enter RF Test menu, you can control to turn on of
turn off transmitter
6

SYNCOMM Proprietary
(6). If you Select 3, you can set the output power of
transmitter, the range from 0 to 255, mapping to output
power level from 0 to 800 mW, you can use this way to
setting output power level to correct output power level.
(7). Select 4, you can set the operation frequency of
transmitter, range from 0 to 599, mapping to 1.93 GHz
to 1.99GHz
7

SYNCOMM Proprietary
8
 Loading...