

Page 1

© 2011 Advanced American Telephones. All Rights Reserved. AT&T and the AT&T logo are trademarks of AT&T Intellectual Property licensed to Advanced American
Telephones, San Antonio, TX 78219. Synapse® is a registered trademark of Advanced American Telephones. Issue 5.0 9/11
AT&T SB67030/SB67031 Deskset
and Accessories
User’s Guide
Page 2

2
Synapse SB67030/031 Deskset and Accessories User’s Guide
C
ONTENTS
Preface......................................................................................................................................................................10
Topic Navigation ........................................................................................................................................................................................................................................11
Text Conventions .......................................................................................................................................................................................................................................12
Deskset and Optional Cordless Handset Menu Navigation..................................................................................................................................................13
Additional Documentation ....................................................................................................................................................................................................................13
Overview ..................................................................................................................................................................14
Synapse System Overview ....................................................................................................................................................................................................................15
Deskset Description..................................................................................................................................................................................................................................16
Deskset Hard Keys ...................................................................................................................................................................................................................17
Deskset Idle Screen.................................................................................................................................................................................................................18
Modes of Operation..................................................................................................................................................................................................................................19
Call Appearance Mode...........................................................................................................................................................................................................19
Line Appearance Mode..........................................................................................................................................................................................................20
Deskset Soft Keys......................................................................................................................................................................................................................................21
Deskset Status Indicators......................................................................................................................................................................................................................23
Call Indicators in Call Appearance Mode ......................................................................................................................................................................................24
Call Indicators in Line Appearance Mode......................................................................................................................................................................................25
Call Status Icons .......................................................................................................................................................................................................................26
Call Status LEDs ........................................................................................................................................................................................................................27
Deskset Dial-Pad Entry ...........................................................................................................................................................................................................................28
Deskset Confirmation Screens............................................................................................................................................................................................................29
Deskset Notification Screens...............................................................................................................................................................................................................29
Using the Deskset Speakerphone .....................................................................................................................................................................................................30
Using Deskset Help Screens ................................................................................................................................................................................................................31
Auto Attendant Information.................................................................................................................................................................................................................32
Caller Options ............................................................................................................................................................................................................................32
Page 3

3
Synapse SB67030/031 Deskset and Accessories User’s Guide
SB67040 Cordless Handset (Optional) ...........................................................................................................................................................................................33
Cordless Handset Description............................................................................................................................................................................................34
Cordless Handset Liquid Crystal Display (LCD) .........................................................................................................................................................36
Cordless Handset Soft Keys ................................................................................................................................................................................................38
Cordless Handset Screen Icons.........................................................................................................................................................................................39
Using the Cordless Handset Speakerphone................................................................................................................................................................40
Switching Between Deskset and Cordless Handset................................................................................................................................................40
Deskset/SB67040 Cordless Handset Comparison...................................................................................................................................................41
Deskset-Handset Interaction ..............................................................................................................................................................................................43
Answering a Call While Another Device is on a Call.....................................................................................................................................43
Incoming Calls...................................................................................................................................................................................................................43
Held Calls.............................................................................................................................................................................................................................43
Clocks ....................................................................................................................................................................................................................................43
Status .....................................................................................................................................................................................................................................43
Cordless Handset Battery Charging................................................................................................................................................................................44
Cordless Handset Low Battery Notification .......................................................................................................................................................45
Power-Save Mode............................................................................................................................................................................................................45
Cordless Handset Link Loss Notification ......................................................................................................................................................................46
Searching a List Using the Cordless Handset Dial Pad ................................................................................................................................47
Dial-Pad Entry.................................................................................................................................................................................................................... 48
TL7600 Cordless Headset (Optional)............................................................................................................................................................................................... 49
Cordless Headset Description ............................................................................................................................................................................................50
Cordless Headset Operation...............................................................................................................................................................................................51
Outgoing Calls.........................................................................................................................................................53
Active Call Screen .....................................................................................................................................................................................................................................54
Predialing.......................................................................................................................................................................................................................................................55
Live Dialing ...................................................................................................................................................................................................................................................56
Making a Call from a List.......................................................................................................................................................................................................................57
Making an Intercom Call (Line Appearance Mode)...................................................................................................................................................................58
Making Calls with the Cordless Handset .......................................................................................................................................................................................59
Active Call Screen....................................................................................................................................................................................................................59
Page 4

4
Synapse SB67030/031 Deskset and Accessories User’s Guide
Predialing......................................................................................................................................................................................................................................60
Live Dialing ..................................................................................................................................................................................................................................61
Making Calls with the Optional TL7600 Cordless Headset..................................................................................................................................................62
Incoming Calls.........................................................................................................................................................63
Incoming Call Screen...............................................................................................................................................................................................................................64
Incoming Call Indication ........................................................................................................................................................................................................................65
Call Appearance Mode...........................................................................................................................................................................................................65
Line Appearance Mode..........................................................................................................................................................................................................66
Answering a Call........................................................................................................................................................................................................................................67
Ignoring a Call.............................................................................................................................................................................................................................................68
Call Screening .............................................................................................................................................................................................................................................69
Auto Answering ..........................................................................................................................................................................................................................................70
Answering Calls in the Call Queue...................................................................................................................................................................................................71
Answer a Call with the Cordless Handset.....................................................................................................................................................................................73
Incoming Call Indication .......................................................................................................................................................................................................74
Answer a Call .............................................................................................................................................................................................................................75
Multiple Incoming Calls.........................................................................................................................................................................................................76
Call Management....................................................................................................................................................77
Call Management.......................................................................................................................................................................................................................................78
Placing a Call on Hold (Call Appearance Mode)........................................................................................................................................................................79
Placing a Call on Hold (Line Appearance Mode).......................................................................................................................................................................80
Transferring a Call Overview ...............................................................................................................................................................................................................81
Transfer Rules.............................................................................................................................................................................................................................81
Transferring a Call ..................................................................................................................................................................................................................82
Conferencing................................................................................................................................................................................................................................................84
Hold and Cancel a Conference .........................................................................................................................................................................................85
Parking a Call ..............................................................................................................................................................................................................................................87
Retrieving a Parked Call .......................................................................................................................................................................................................88
Call Management Using the Cordless Handset..........................................................................................................................................................................89
Active Call Screens..................................................................................................................................................................................................................90
Page 5

5
Synapse SB67030/031 Deskset and Accessories User’s Guide
Call Deck.......................................................................................................................................................................................................................................91
Transferring .................................................................................................................................................................................................................................92
Transferring to an Extension......................................................................................................................................................................................92
Transferring to an Outside Number........................................................................................................................................................................93
Conferencing...............................................................................................................................................................................................................................94
Placing a Conference Call on Hold.........................................................................................................................................................................95
Ending a Conference Call ............................................................................................................................................................................................96
Managing Held Calls ...............................................................................................................................................................................................................97
Held Call Options .....................................................................................................................................................................................................................99
Parking a Call ..........................................................................................................................................................................................................................100
Parking an Active or Held Call...............................................................................................................................................................................100
Retrieving a Parked Call From Any Extension................................................................................................................................................ 101
Using a Corded Headset ....................................................................................................................................................................................................102
Call Management Using a Headset ............................................................................................................................................................................................... 103
Accessing Items in Lists ......................................................................................................................................104
Accessing the Call Queue ..................................................................................................................................................................................................................105
Accessing the Park List ....................................................................................................................................................................................................................... 106
Accessing Voicemail..............................................................................................................................................................................................................................107
Accessing the Directory ...................................................................................................................................................................................................................... 109
Accessing the Call Log ........................................................................................................................................................................................................................ 110
About the Extension List.....................................................................................................................................................................................................................111
Accessing the Extension List ........................................................................................................................................................................................... 112
Accessing the Quick-Dial List........................................................................................................................................................................................................... 113
Editing Quick Dial Entries.................................................................................................................................................................................................. 114
About the Redial List ............................................................................................................................................................................................................................115
Accessing the Redial List................................................................................................................................................................................................... 116
Storing Redial Entries..........................................................................................................................................................................................................117
Deleting Redial Entries ....................................................................................................................................................................................................... 118
Searching the Directory or Extension Lists Using the Dial Pad ...................................................................................................................................... 119
Accessing the Held Calls List (Line Appearance Mode)......................................................................................................................................................120
Page 6

6
Synapse SB67030/031 Deskset and Accessories User’s Guide
Accessing and Managing Items in Lists with the Cordless Handset.............................................................................................................................121
About the Cordless Handset Extension List............................................................................................................................................................. 122
Accessing an Extension with the Cordless Handset............................................................................................................................................123
Accessing the Quick-Dial List with the Cordless Handset................................................................................................................................ 124
Accessing the Redial List with the Cordless Handset......................................................................................................................................... 125
Searching the Directory or Extension Lists Using the Cordless Handset Dial Pad .............................................................................. 127
Directory.................................................................................................................................................................128
Using the Directory................................................................................................................................................................................................................................ 129
Viewing Directory Entries ................................................................................................................................................................................................................... 130
Creating a New Personal List Entry .............................................................................................................................................................................................. 132
Editing a Personal List Entry............................................................................................................................................................................................................. 133
Storing Directory Entries from the Call Log or Redial List ................................................................................................................................................134
Deleting a Personal List Entry.......................................................................................................................................................................................................... 135
Directory Sort ........................................................................................................................................................................................................................................... 136
Accessing the Directory with the Cordless Handset ............................................................................................................................................................ 137
Voicemail................................................................................................................................................................139
Voicemail Overview ............................................................................................................................................................................................................................... 140
Group Mailbox Overview.................................................................................................................................................................................................... 141
Voicemail Messages ............................................................................................................................................................................................................. 143
Accessing Your Messages...................................................................................................................................................................................................................144
Message Playback.................................................................................................................................................................................................................145
Forwarding a Message........................................................................................................................................................................................................147
Forwarding a Message to an Extension............................................................................................................................................................. 148
Forwarding a Message to a Distribution List .................................................................................................................................................. 150
Forwarding a Message to a Group Mailbox.....................................................................................................................................................152
Recording an Introduction to Send with a Forwarded Message........................................................................................................... 153
Sending a New Message to a Distribution List........................................................................................................................................................................ 154
Deleting Messages .................................................................................................................................................................................................................................156
New Message Status Indications (! Icons).................................................................................................................................................................................. 157
Accessing Your Voicemail Remotely............................................................................................................................................................................................. 159
Page 7

7
Synapse SB67030/031 Deskset and Accessories User’s Guide
Accessing Personal Voicemail with the Cordless Handset................................................................................................................................................ 162
Voicemail Notification on the Cordless Handset................................................................................................................................................... 163
Retrieving Personal Voicemail with the Cordless Handset .............................................................................................................................. 164
Reviewing Voicemail Records with the Cordless Handset................................................................................................................................165
Managing Personal Voicemail with the Cordless Handset ...............................................................................................................................167
Call Log...................................................................................................................................................................170
Using the Call Log.................................................................................................................................................................................................................................. 171
Managing Missed Calls......................................................................................................................................................................................................................... 172
Reviewing the Call Log List...............................................................................................................................................................................................................173
Voicemail Messages in Call Logs...................................................................................................................................................................................175
Storing Call Log Entries....................................................................................................................................................................................................................... 176
Deleting Call Log Entries ....................................................................................................................................................................................................................177
Accessing the Call Log with the Cordless Handset .............................................................................................................................................................. 179
Using the Call Log with the Cordless Handset ...................................................................................................................................................... 180
Managing Missed Calls with the Cordless Handset.............................................................................................................................................. 181
Reviewing the Call Log with the Cordless Handset............................................................................................................................................. 182
Playing Voicemail Messages in the Call Log with the Cordless Handset ................................................................................................. 183
Deleting Call Log Entries with the Cordless Handset.........................................................................................................................................184
Paging .....................................................................................................................................................................186
Paging All Extensions or a Paging Zone..................................................................................................................................................................................... 187
Single-Zone Overhead Paging (ATA Required)........................................................................................................................................................................ 189
Multi-Zone Overhead Paging (ATA Required) ..........................................................................................................................................................................190
Paging with the Cordless Handset ................................................................................................................................................................................................191
Deskset Settings...................................................................................................................................................192
Deskset Menu ...........................................................................................................................................................................................................................................193
Deskset Settings...................................................................................................................................................................................................................................... 194
Display.........................................................................................................................................................................................................................................195
Page 8

8
Synapse SB67030/031 Deskset and Accessories User’s Guide
Sounds ........................................................................................................................................................................................................................................ 196
Preferred Audio ......................................................................................................................................................................................................................197
User Settings............................................................................................................................................................................................................................................. 198
Greetings ................................................................................................................................................................................................................................... 200
Recording a Greeting..................................................................................................................................................................................................201
Call Forward All and Call Forward–No Answer ..................................................................................................................................................... 202
Automatic Answering .......................................................................................................................................................................................................... 204
Voicemail Memory................................................................................................................................................................................................................. 205
Name Recording .................................................................................................................................................................................................................... 206
Registering an Optional Cordless Handset .............................................................................................................................................................. 209
Registering an Optional Cordless Headset............................................................................................................................................................... 212
Deregistering a Cordless Handset or Headset ....................................................................................................................................................... 213
Deregistering the Cordless Handset or Headset without the Deskset..............................................................................................214
Cordless Accessory Registration and Deregistration Time-Out.....................................................................................................................215
Setting and Changing a User Password..................................................................................................................................................................... 216
Admin Settings......................................................................................................................................................................................................................................... 217
Deskset Information ..............................................................................................................................................................................................................................218
Using Do Not Disturb (DND)..............................................................................................................................................................................................................219
Operator Auto-Attendant Settings ................................................................................................................................................................................................ 220
Cordless Handset Settings.................................................................................................................................................................................................................221
Setting Cordless Handset Contrast .............................................................................................................................................................................. 222
Setting the Cordless Handset Sounds ........................................................................................................................................................................223
Using the VOLUME key to set the Cordless Handset Ringer and Voice Volume.......................................................................... 224
Setting the Cordless Handset to Factory Default ................................................................................................................................................. 225
Viewing the Cordless Handset Product ID................................................................................................................................................................ 226
Web Interface........................................................................................................................................................227
Accessing the Web User Interface (WebUI)..............................................................................................................................................................................228
Error Handling .........................................................................................................................................................................................................................230
Basic Settings ...........................................................................................................................................................................................................................................231
Extension Directory................................................................................................................................................................................................................................233
Page 9

9
Synapse SB67030/031 Deskset and Accessories User’s Guide
Quick-Dial Keys........................................................................................................................................................................................................................................ 236
Voicemail Distribution ..........................................................................................................................................................................................................................237
Help ............................................................................................................................................................................................................................................................... 240
Troubleshooting....................................................................................................................................................241
Common Troubleshooting Procedures ........................................................................................................................................................................................ 242
Display Messages.................................................................................................................................................................................................................................... 244
Calls Generally......................................................................................................................................................................................................................................... 246
Incoming Calls.......................................................................................................................................................................................................................................... 250
Outgoing Calls ......................................................................................................................................................................................................................................... 252
Voicemail.....................................................................................................................................................................................................................................................255
Other Deskset Features....................................................................................................................................................................................................................... 257
WebUI........................................................................................................................................................................................................................................................... 260
PC/Deskset Interaction .......................................................................................................................................................................................................................261
SB67040 Cordless Handset...............................................................................................................................................................................................................262
TL7600 Cordless Headset...................................................................................................................................................................................................................269
Appendixes ............................................................................................................................................................274
Appendix A: Soft Keys ..........................................................................................................................................................................................................................274
Deskset Soft Keys.................................................................................................................................................................................................................. 275
Cordless Handset Soft Keys .............................................................................................................................................................................................277
Appendix B: Technical Specifications ........................................................................................................................................................................................... 278
Appendix C: Maintenance...................................................................................................................................................................................................................279
Appendix D: Important Safety Instructions................................................................................................................................................................................280
Appendix E: Limited Warranty..........................................................................................................................................................................................................282
Glossary..................................................................................................................................................................286
Page 10

Synapse SB67030/031 Deskset and Accessories User’s Guide
Preface 10
P
REFACE
This User’s Guide provides instructions for using your Synapse SB67030/031 telephone with firmware version 1.9.5 or newer,
and its optional accessories. See page 218 for instructions on checking the firmware version on the Deskset. Although the Quick
Start Guides also include information on using the devices, this guide has information on setting up the devices and more
complete information on feature usage.
Before using this AT&T product, please read “Appendix D: Important Safety Instructions” on page 280. Please thoroughly read
this user’s guide for all the feature operations and troubleshooting information necessary to operate your new AT&T product.
The following sections provide instructions for using this guide:
“Topic Navigation” on page 11
“Text Conventions” on page 12
“Deskset and Optional Cordless Handset Menu Navigation” on page 13.
For customer service or product information, contact the person who installed your system. If your installer is
unavailable, visit our web site at
www.telephones.att.com/smb or call 1 (888) 916-2007. In Canada,
dial
1 (888) 883-2474.
This electronic document must be viewed using Adobe Reader 9.2 or newer. You can download the reader free from
Adobe at
http://get.adobe.com/reader.
Some illustrations in this document contain very small text that is not intended to be read. Sometimes the image is
present just to help you find the correct screen, in others, full size text conveys the intended information.
Page 11

Preface 11
Synapse SB67030/031 Deskset and Accessories User’s Guide
Topic Navigation
This User’s Guide allows easy navigation between topics and the ability to return to your original topic. Figure 1 illustrates the
navigation conventions within the User’s Guide.
Figure 1. User’s Guide Navigation
Task Link
Click on this link to move to the beginning
of the instructions for this task.
Back to Table of Contents
Click on the page heading to
move to the Table of Contents.
Previous
and Next
Page
Back to
Last Page
Viewed
Page 12

Preface 12
Synapse SB67030/031 Deskset and Accessories User’s Guide
Text Conventions
Table 1 lists text formats and their uses.
Table 1. Description of Text Conventions
Text Format Description
Screen Identifies text that appears on the screen in a title, menu, or
prompt.
HARD KEY or DIAL-PAD KEY Identifies a hard key, including the dial-pad keys.
Identifies a soft key.
Figure 1, Table 1 Identifies a figure or table.
“Topic Navigation” on page 11 Identifies a hyperlink to another part of this document or, if it
begins with ”www”, an Internet web site. You need Internet
access to view web sites.
Example of a Note.
Example of a Caution.
Notes give more information, usually in a procedure.
A caution means that loss of data or unintended
circumstances may result.
Page 13

Preface 13
Synapse SB67030/031 Deskset and Accessories User’s Guide
Deskset and Optional Cordless Handset Menu Navigation
To access items in the menus, you can either use the navigation key to highlight the function and press SELECT or press a dial-
pad key. The procedures in this guide use dial-pad entry as the preferred method for selecting a function.
Additional Documentation
Downloadable copies of all Synapse documents, including user’s and administrator’s guides, installation instructions and
quick-start guides, are available at
www.telephones.att.com/synapseguides.
Page 14
Synapse SB67030/031 Deskset and Accessories User’s Guide
Overview 14
C HAPTER
1
O
VERVIEW
The Synapse® Business Phone System from AT&T is for businesses that need up to 100
extensions. This system is scalable from 1 to 39 outside lines, so as your business grows, your
phone system can too. The Synapse Business Phone System provides simplicity without
sacrifice—it's simple to install, manage, and use, without sacrificing any of the features you
need and expect from a business telephone system.
This chapter introduces the SB67030/031 Deskset and provides an overview of the Synapse
System and the external features of the Deskset.
“Synapse System Overview” on page 15
“Deskset Description” on page 16
“SB67040 Cordless Handset (Optional)” on page 33
“TL7600 Cordless Headset (Optional)” on page 49.
Page 15

Overview 15
Synapse SB67030/031 Deskset and Accessories User’s Guide
Synapse System Overview
Your Deskset is part of the Synapse System. Synapse differs from conventional telephone systems in that calls are not coordinated
by a central controller. Instead, Synapse uses a distributed control system over a Local Area Network (LAN). Figure 2 illustrates
a sample system with outside telephone connections in blue and Ethernet cables in red.
Figure 2. Sample Synapse System
Page 16

Overview 16
Synapse SB67030/031 Deskset and Accessories User’s Guide
Deskset Description
Figure 3 identifies and describes the display and key functional areas for the Deskset.
Figure 3. Deskset Layout
Liquid Crystal Display (LCD)
Provides controls and
information for using
the Deskset.
Voicemail Indicator
Illuminates when there are new
Voicemail messages.
Call Appearance/Line
Appearance
Five keys that access active
calls and held calls.
Corded Handset
Soft Keys
Four keys that produce
different actions, depending
on the LCD labels.
Hard Keys
Fixed-function keys.
Quick Dial or Call Queue
Provides easy access to
frequently dialed numbers or to
the Call Queue, depending on
your system setup.
Navigation
Moves the cursor up/down/
left/right on the display.
Page 17
Overview 17
Synapse SB67030/031 Deskset and Accessories User’s Guide
Deskset Hard Keys
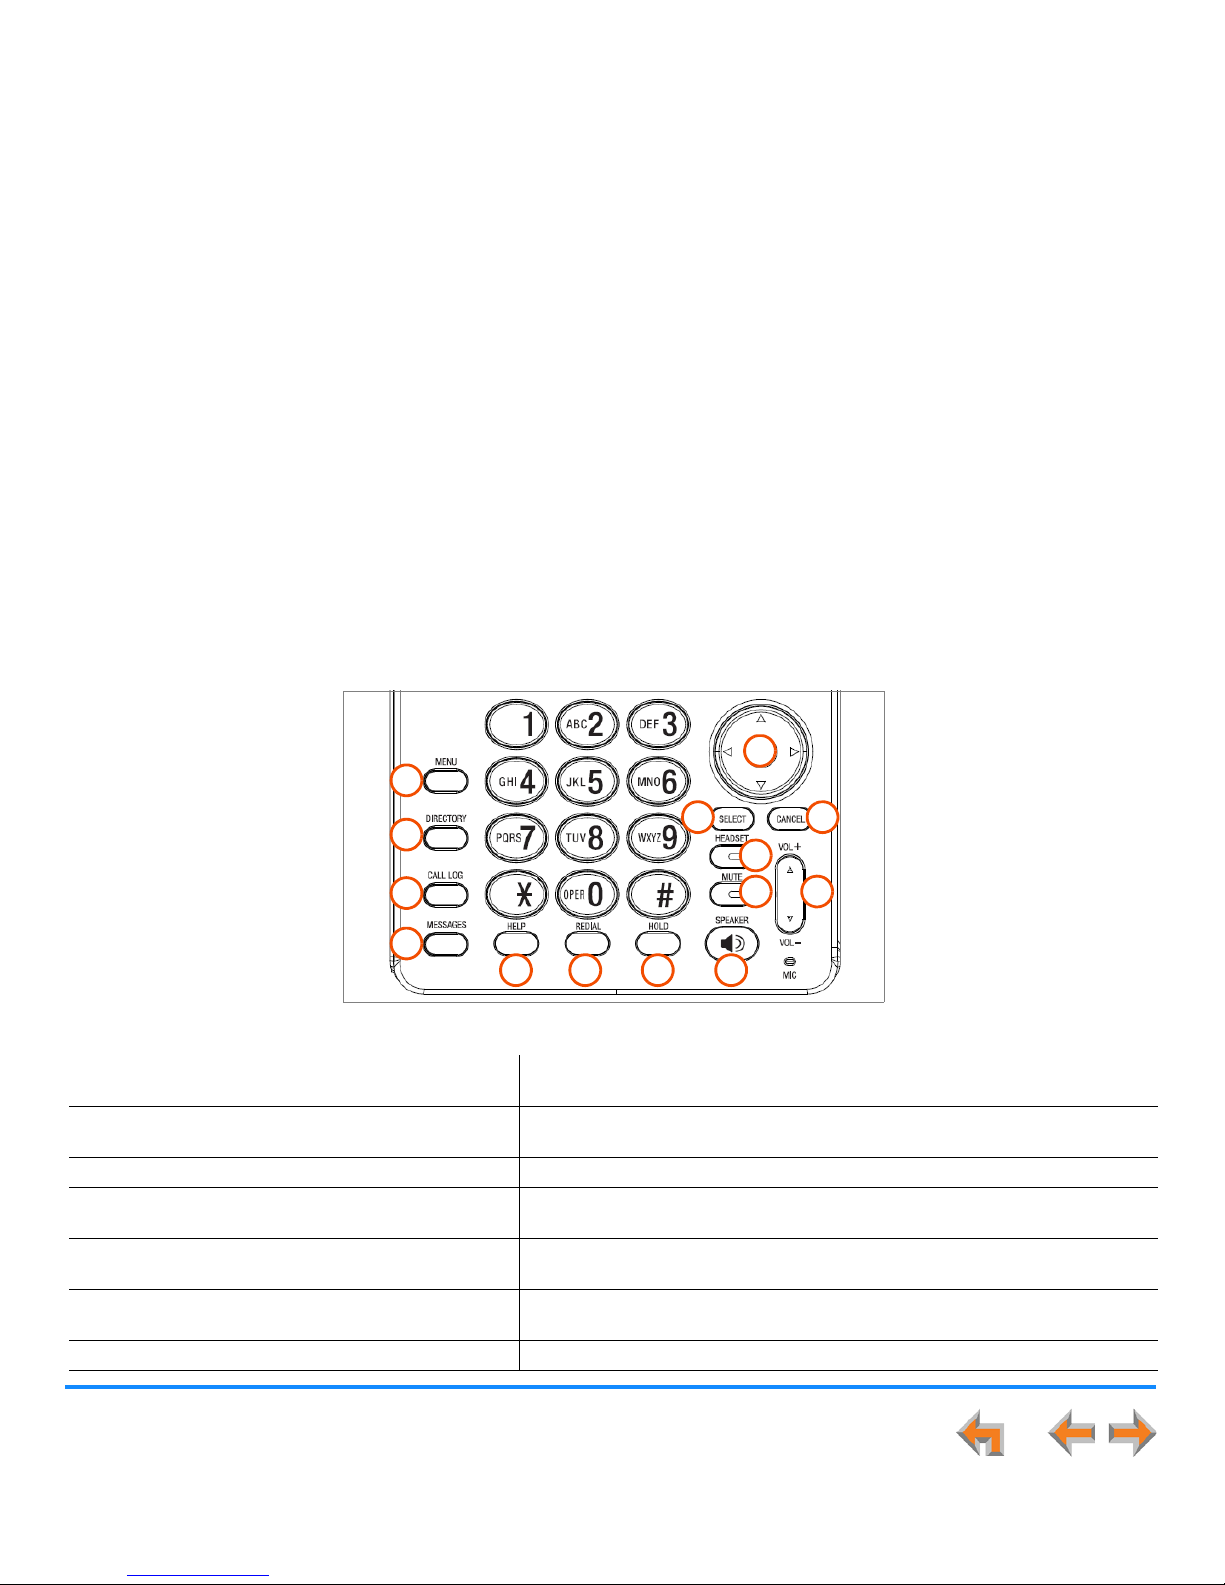
The hard keys include the standard telephone dial-pad keys and a set of function keys defined in Figure 4.
.
Figure 4. Deskset Function Keys
1. MENU Accesses the configuration menu. 8. SPEAKER On a call, switches voice to and from the speakerphone.
Can be used to answer or start a call, or to hang up.
2. DIRECTORY Accesses the Directory. 9. MUTE Turns mute on and off. When on, the other party cannot
hear you. Does not mute the optional Cordless Headset.
3. CALL LOG Accesses the incoming Call Log. 10. VOL+/VOL– Increases/decreases the ringer and voice volume.
4. MESSAGES Accesses Voicemail. 11. HEADSET Routes audio to corded headset or Cordless Headset.
Can be used to go off hook.
5. HELP Accesses Help. 12. CANCEL
Cancels the most recent operation and returns to previous
function.
6. REDIAL Accesses the Redial list. 13. SELECT Usually selects a highlighted option. Highlighted phone
numbers are dialed.
7. HOLD Places current active call on hold. 14. Navigation Moves the cursor up/down/left/right on the display.
1
2
3
4
5 6 7 8
9 10
11
1213
14
Page 18

Overview 18
Synapse SB67030/031 Deskset and Accessories User’s Guide
Deskset Idle Screen
Figure 5 identifies the basic elements and describes the call functions displayed on the Idle screen in Call Appearance mode. The
Idle screen appears when the system is first turned on and when there is no call activity. The display is backlit when you are using
it, but the backlight turns off 30 seconds after the most recent button press.
.
Figure 5. Idle Screen
DNDDNDDND CallFw d Page Mo r e 1/2
Quick
Dial
12:30PM Thu Feb 25 2010
2 New Missed Calls
5 New Messages
Press or to mov e highlight, then
press
SELEC T
.
EXT 249
John Smith
Date
Navigation Arrows
Appear when pressing the and arrows
on the navigation key will move the highlight.
Status Messages
Status indicators appear in this
space.
Call Appearance/Line
Appearance Icons
Show whether there is an active,
conference, or held call, or
whether there is a location
available for placing a call.
Quick Dial or Call Queue
When pressed, the Call/Line
Appearance icons change to
display up to six Quick-Dial
numbers. If Call Queue is set up
(Call Appearance mode only),
pressing the key displays the Call
Queue list, where you can view
and retrieve calls in the Call
Queue.
Extension Number and Name
Your extension number and
name appear in the Idle screen.
Extensions may be 3 or 4 digits.
New Missed Calls (Call
Appearance mode only)
Press SELECT when this is
highlighted to display the name,
number, and time of recently
received calls.
Help
Brief, context-sensitive help
for the current screen.
New Messages
Press SELECT when this is
highlighted to access the list of
new Voicemail messages.
Soft Keys
See “Deskset Soft Keys”
on page 21.
Page 19

Overview 19
Synapse SB67030/031 Deskset and Accessories User’s Guide
Modes of Operation
The system administrator can configure the Synapse system to operate in one of two different modes: Call Appearance mode and
Line Appearance mode. All Desksets operate differently in each mode. The appearance mode affects how you make, answer, and
manage calls. Each mode provides a unique set of configurable features. This User’s Guide includes information about, and
procedures for, both Call Appearance mode and Line Appearance mode.
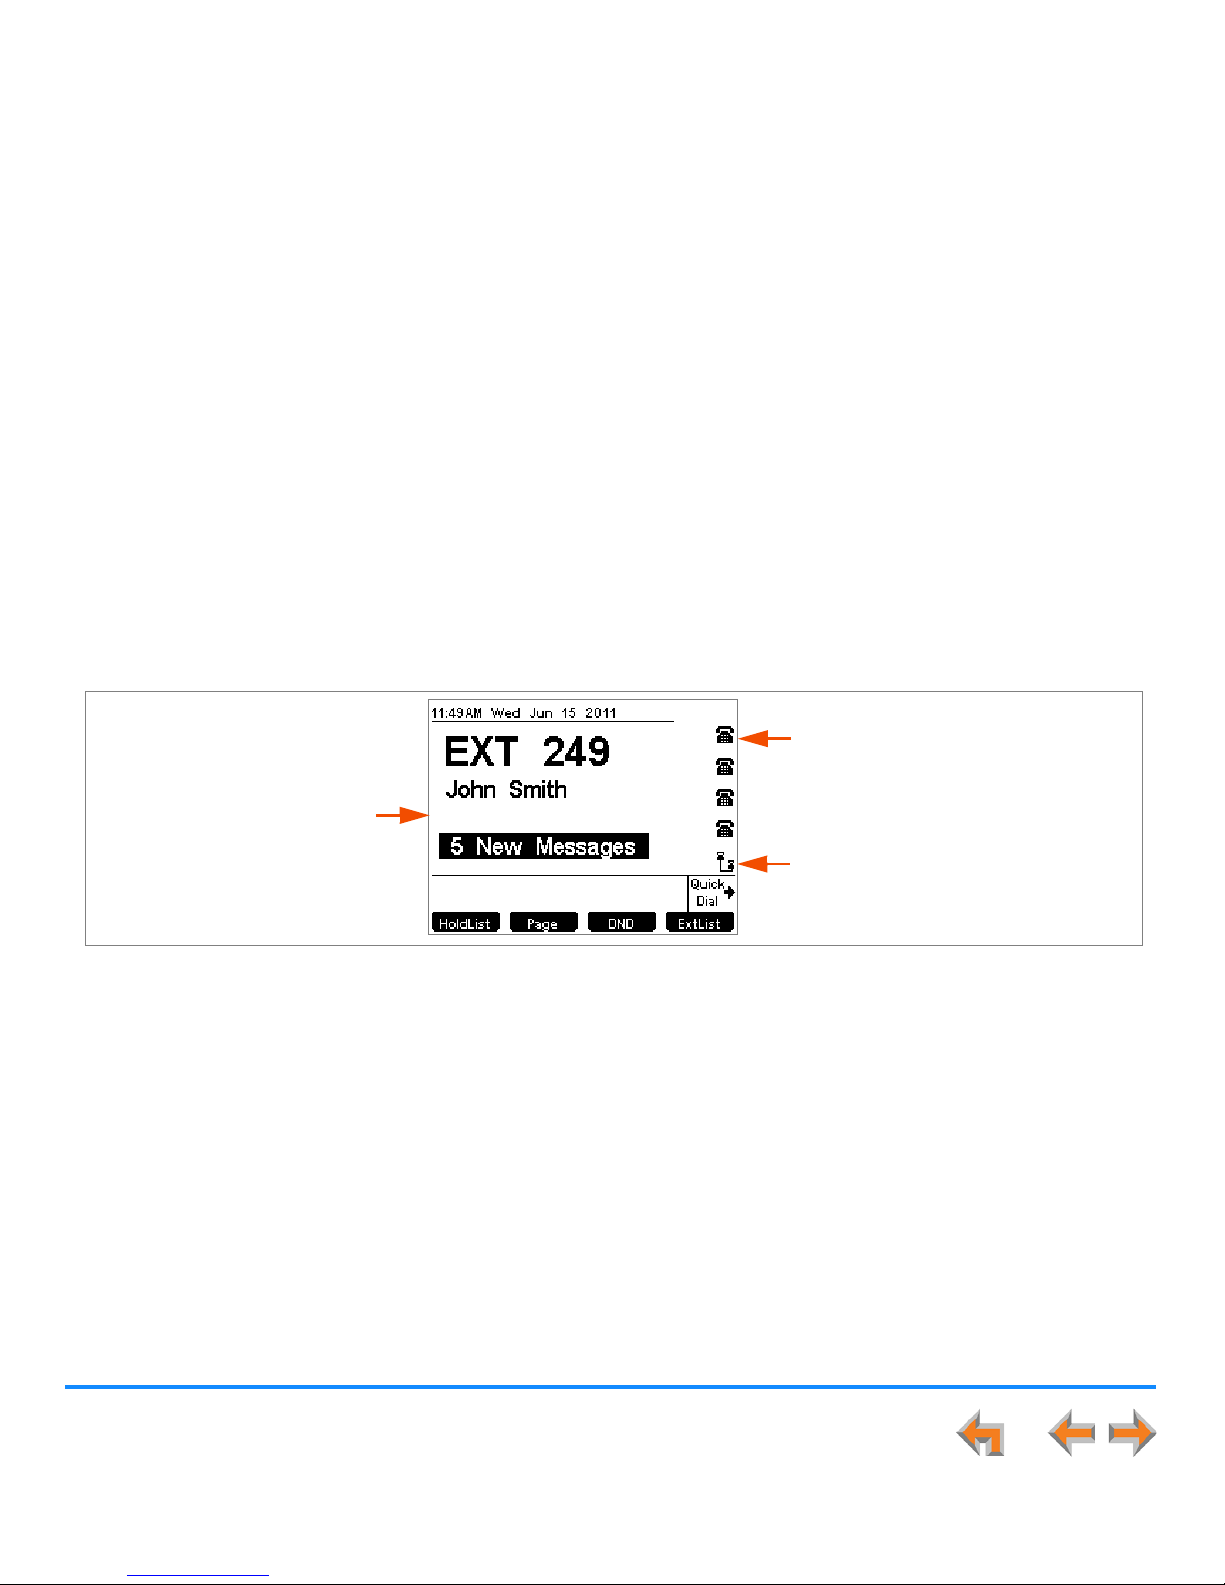
You know when your Deskset is in Call Appearance mode when the Idle Scree n displays New Missed Calls as shown in Figure 6.
The Idle screen appears when the Deskset is first turned on and when there is no call activity. In Line Appearance mode, the
Deskset does not display missed calls.
.
Figure 6. Idle Screen in Call Appearance mode
Call Appearance Mode
In Call Appearance mode, your Deskset has five virtual “lines” on which you can make and receive calls. These lines are called
Call Appearances in this User’s Guide. You can use Call Appearances for calls to and from external numbers (232-555-0176, for
example) or to and from other extensions (Extension 220, for example). You can access each Call Appearance by pressing a Call
Appearance key, as shown in Figure 3 on page 16.
DNDDNDDND CallFw d Page More 1 /2
Quick
Dial
12:30PM Thu Feb 25 2010
2 New Missed Calls
5 New Messages
Press or to mov e highlight, then
press
SELEC T
.
EXT 249
John Smith
Call Appearance Icons
Correspond to five
Call Appearance keys on
the Deskset.
Page 20
Overview 20
Synapse SB67030/031 Deskset and Accessories User’s Guide
Line Appearance Mode
In Line Appearance mode, the Idle Screen is as shown in Figure 7.
.
Figure 7. Idle Screen in Line Appearance mode
In Line Appearance mode, each line corresponds to a Line Appearance key on the Deskset as shown in Figure 3 on page 16.
Unlike Call Appearance mode, each Line Appearance key represents an actual physical line connected to the PSTN Gateway (the
Synapse system can have up to four PSTN Gateways providing up to 16 lines). The system administrator can configure your
Deskset with up to 4 lines on which you can make and receive external calls. One key is reserved for internal (“Intercom”) calls.
Other Desksets in the system share these lines and display the line status. Incoming calls on a line ring at all Desksets that share
that line. The Line Appearance key LED indicates whether a line is ringing, busy, or on hold.
The Line Appearance keys are used for receiving and making calls to external numbers. To call another extension in your office,
you must use an Intercom key. By default, the Intercom key is the fifth key, but your system administrator can configure additional
Intercom keys.
Line Appearance Icons/Line Names
Correspond to Line Appearance keys
on the Deskset. These icons appear, or
your system administrator can enter
line names.
Intercom Symbol
Indicates the Intercom line
for internal calls.
New Missed Calls
does not appear.
Page 21

Overview 21
Synapse SB67030/031 Deskset and Accessories User’s Guide
Deskset Soft Keys
The Deskset provides soft keys as illustrated in Figure 8. The soft key labels change according to the current task. For example,
if you are forwarding a call, the key labels displayed are different from those displayed if you are making a call. See “Appendix
A: Soft Keys” on page 274 for an alphabetical list of the labels that appear above the soft keys.
Table 2 and Table 3 describe the Deskset Idle screen soft keys, as shown in Figure 8.
Figure 8. Deskset Idle Screen
Table 2. Idle Screen Soft Keys (Call Appearance Mode)
Key Description Key Description Key Description Key Description
Turns Do Not
Disturb on or off.
Turns Call Forward
on or off.
Pages internal
extensions.
Moves to the next set of soft
keys. If this key appears,
there are more than four
soft keys available.
More 1/2 indicates that you
are on page one of two.
Accesses
Extension list.
Accesses Park list. Rings the
Cordless Handset.
DNDDNDDND CallFw d Page Mor e 1/2
Quick
Dial
12:30PM Thu Feb 25 2010
2 New Missed Calls
5 New Messages
Press or to move highlight, then
press
SELEC T
.
EXT 249
John Smith
Call Appearance mode
Line Appearance mode
Page 22

Overview 22
Synapse SB67030/031 Deskset and Accessories User’s Guide
Table 3. Idle Screen Soft Keys (Line Appearance Mode)
Key Description Key Description Key Description Key Description
Accesses Held
Calls list.
Pages internal
extensions.
Turns Do Not
Disturb on or off.
Accesses Extension list.
Page 23

Overview 23
Synapse SB67030/031 Deskset and Accessories User’s Guide
Deskset Status Indicators
Status indicators appear in the upper right-hand corner of the Deskset display, as shown in Figure 9 and Figure 10.
Figure 9. Example of DND On
Figure 10. Example of Call Forward On
Status messages include:
Auto Answer is on (Call Appearance mode only).
Do Not Disturb is on.
Call Forward All is on (Call Appearance mode only).
Voicemail is full.
Less than five minutes of Voicemail recording time is available.
The ringer is silenced.
Audible Ring Delay is delayed 10 seconds. The number that appears varies with the delay you have set.
The silent ringer and the Voicemail indicators alternate with each other and the other status indications. The Do Not
Disturb indicator supersedes the Auto Answer and Audible Ring Delay indicators, and the Call Forward All indicator
supersedes the Do Not Disturb, Auto Answer, and Audible RIng Delay indicators. When Do Not Disturb is on, there is no
indication for Auto Answer or Audible Ring Delay. When Call Forward All is on, the Do Not Disturb, Auto Answer, and
Audible RIng Delay indicators do not appear.
Page 24

Overview 24
Synapse SB67030/031 Deskset and Accessories User’s Guide
Call Indicators in Call Appearance Mode
If your system is set to Call Appearance mode, the five Call Appearance keys and icons, as shown in Figure 11, allow you to
manage your calls. The Deskset presents call information next to the Call Appearance keys at the side of the display. When there
is an incoming call, the Call Appearance key LED flashes. Icons on the screen identify the status of each call. Press the or
navigation key to move the highlight. The soft keys change accordingly. See “Call Status Icons” on page 26 for a complete
description of the available icons.
Figure 11. Sample Call Appearance Screen
Conferencing or transferring outside calls requires two Call Appearances, one for each call. When you are in a feature such as
the Directory, Call Log, Redial, or Voicemail, pressing a Call Appearance key does not dial a highlighted list entry.
Call Information
If you subscribe to caller
ID, call information
consists of the phone
number for all calls.
Incoming calls also have
the name if it is sent with
the phone number.
Call Appearance Keys
Call Appearance Icons
Call Appearance LED
Highlight Bar
Timer
Displays the duration of the
current call status, such as
how long the call has been
held.
Page 25

Overview 25
Synapse SB67030/031 Deskset and Accessories User’s Guide
Call Indicators in Line Appearance Mode
If your system is set to Line Appearance mode, the Line Appearance keys and icons, as shown in Figure 11, allow you to manage
your calls. The Deskset presents call information next to the Line Appearance keys at the side of the display. When there is an
incoming call, the Line Appearance key LED flashes. Icons on the screen identify the status of each call. When there are several
lines active, press Line Appearance keys to access calls. The soft keys change accordingly. See “Call Status Icons” on page 26
for a complete description of the available icons.
Figure 12. Sample Line Appearance Screen
Call Information
If you subscribe to caller
ID, call information
consists of the phone
number for all calls.
Incoming calls also have
the name if it is sent with
the phone number.
Line Appearance Keys
Line Appearance Icons
Line Appearance LED
Timer
Displays the duration of the
current call status, such as
how long the call has been
held.
Intercom Key
Page 26

Overview 26
Synapse SB67030/031 Deskset and Accessories User’s Guide
Call Status Icons
Table 4 shows and describes the call status icons.
Table 4. Deskset Call Status Icons
Icon Status Icon Status
Available
Indicates an available Call Appearance (or Line
Appearance if the system administrator has not
named your lines). Lifting the corded handset changes
the icon from Available to Off Hook.
Incoming Call
Indicates an incoming call when there are no other
calls.
Intercom (Line Appearance mode only)
Indicates an available Intercom line for internal calls.
Ringing
Flashes for incoming calls when there are other calls.
This icon also appears when there is an incoming call
with no other calls.
Off Hook
Indicates that you have lifted the corded handset,
pressed SPEAKER or HEADSET, or you are on a
phone call.
Silenced Ring
Flashes to indicate an ignored incoming call.
Predial (Call Appearance mode only)
Indicates that you have pressed at least one dial-pad
key. These numbers are dialed when you go off hook.
Ring Group Ringing (Call Appearance mode only)
Flashes for incoming Ring Group calls when there are
other calls. This icon also appears when there is an
incoming Ring Group or Call Queue call with no
other calls.
Message Recording (Call Appearance mode only)
This icon indicates that a message is being recorded.
On Hold
Flashes when the line is on hold.
Page 27

Overview 27
Synapse SB67030/031 Deskset and Accessories User’s Guide
Call Status LEDs
The Call Status LED flash patterns indicate call status as described in Table 5. In Call Appearance mode, the LEDs indicate call
status for a single Deskset. In Line Appearance mode, all Desksets that share lines also display the same LED activity. For example,
if someone puts a call on line 3 on hold, the Line Appearance key for line 3 flashes slowly on all the Desksets that share PSTN
line 3.
Conference
Indicates a conference call.
Conference On Hold
Flashes when a conference call is on hold.
Cordless Handset (Call Appearance mode only)
This icon indicates that the optional Cordless
Handset is currently in control of operations.
Table 5. Deskset Call Status LED Activity
LED Activity Description
Off No Call
Steady On Active Call
Fast Flash Ringing Call
Slow Flash Held Call
Table 4. Deskset Call Status Icons (Continued)
Icon Status Icon Status
Page 28
Overview 28
Synapse SB67030/031 Deskset and Accessories User’s Guide
Deskset Dial-Pad Entry
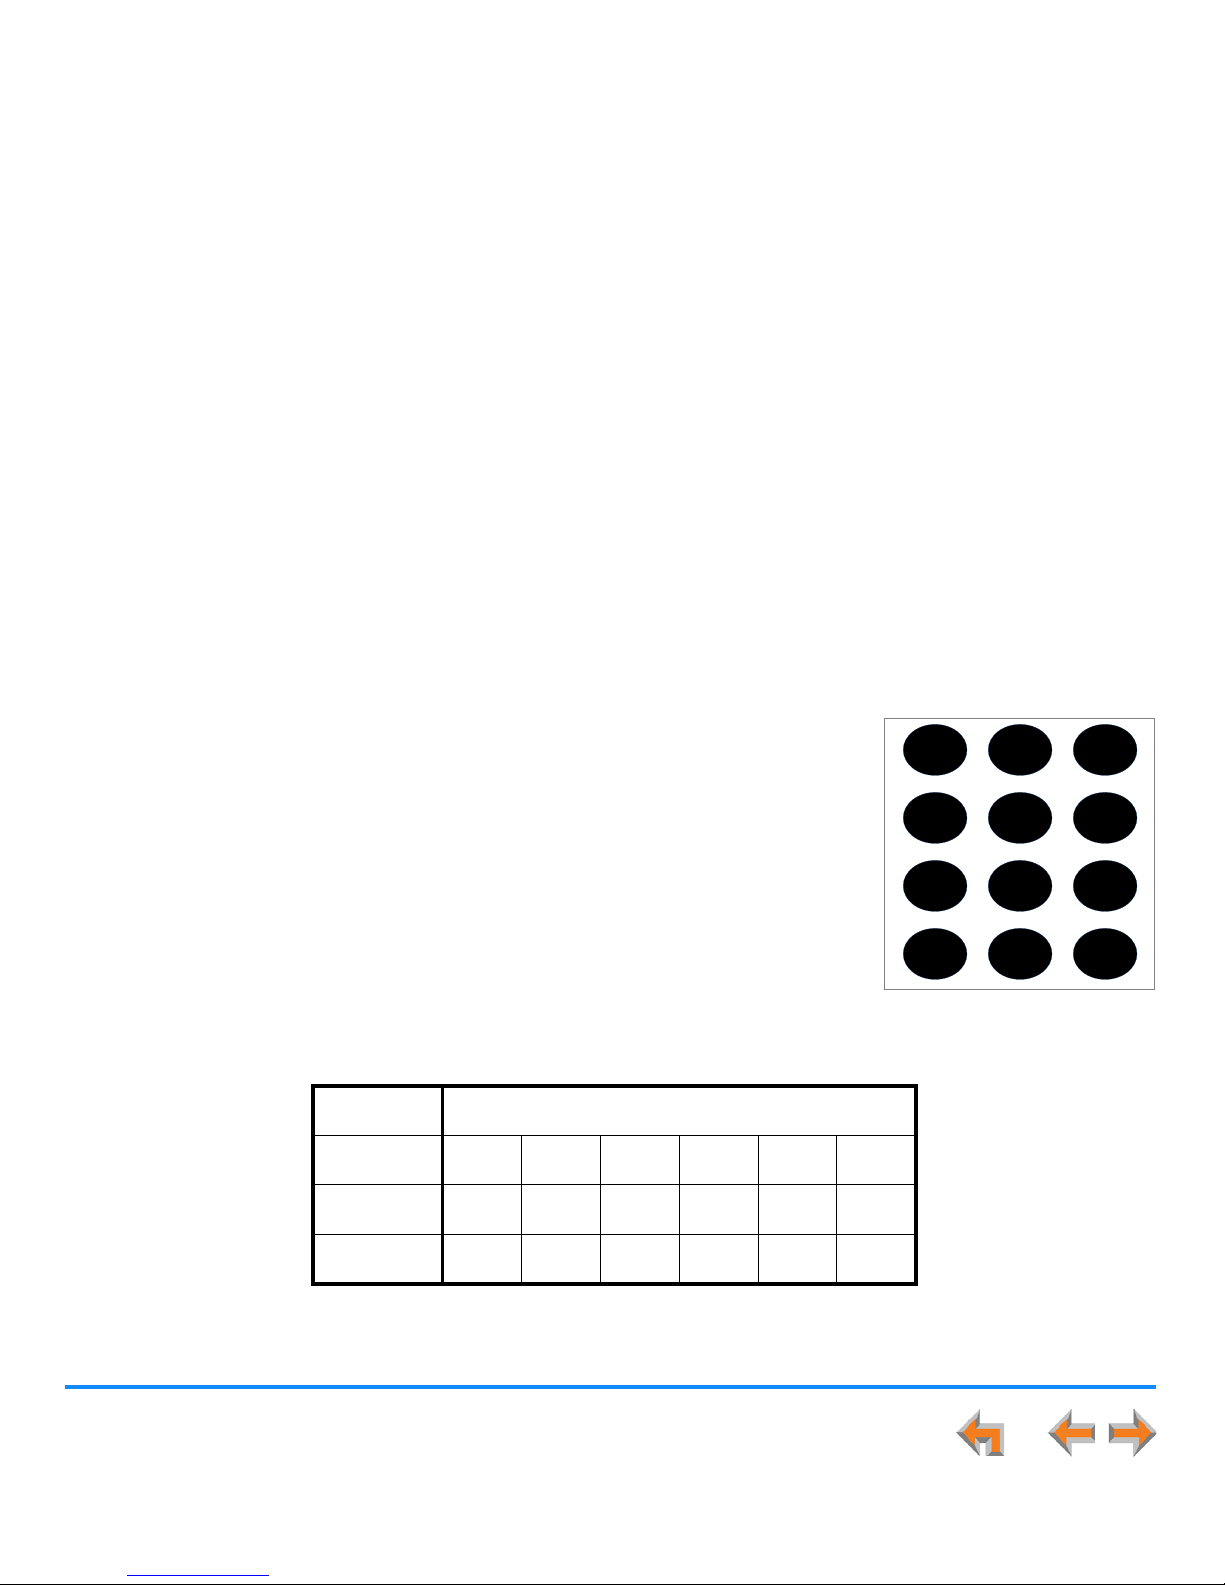
Use the dialing keys to enter alphabetical characters into a text field. Digits 2, 3, 4, 5, 6, and 8 have three assigned letters, while
digits 7 and 9 have four assigned letters, as shown in Figure 13. To enter a space, press 1. The keys function as follows:
1. Pressing the dialing key once enters the upper case first letter on the key.
2. Pressing the dialing key twice enters the upper case second letter on the key.
3. Pressing the dialing key three times enters the upper case third letter on the key.
4. Pressing the dialing key four times enters the number, or the upper case fourth letter for
keys 7 and 9 that require an additional press to cycle into lower case letters.
5. Pressing the dialing key five times enters the lower case first letter on the key.
6. Pressing the dialing key six times enters the lower case second letter on the key.
7. Pressing the dialing key seven times enters the lower case third letter on the key.
8. Pressing the key further cycles through the letters again.
The # and * keys have been assigned special characters, as shown in Figure 14. Repeatedly
pressing these keys cycles through each special character in the order shown.
Figure 14. Deskset Special Character Assignment
12 3
45 6
7
89
0
ABC DEF
GHI JKL MNO
PQRS TUV WXYZ
OPER
#
*
Figure 13. Dial Pad
Deskset Special Characters
Key Press 1st 2nd 3rd 4th 5th 6th
##
‘,
–.&
**
?!/()
Page 29

Overview 29
Synapse SB67030/031 Deskset and Accessories User’s Guide
Deskset Confirmation Screens
Confirmation screens require that you confirm a choice by pressing or , as
shown in Figure 15.
Deskset Notification Screens
Notification screens appear briefly to alert you that an action has been completed, provide
a status update, or give a warning, as shown in Figure 16.
Yes No
Are you sure you want to delet e
all messages ?
Press
Yes
to delet e all messages .
Press
No
to c ancel.
Messages
Figure 15. Confirmation Screen
DND CallFw d Pa ge Mo re 1/2
Quick
Dial
12:30PM Thu Feb 25 2010
Ext 249
John Smith
2 Missed Calls
0 New Messages
FWD ON
Call Forwarded to Voicemail
[Call Forw ard All is ON]
Press
CallFw d
to t urn off Call Forward.
Figure 16. Notification Screen
The notification message box overlays the previous screen to help provide context
for the message. While the notification is displayed on the screen, ignore any soft
keys and Help message on the screen below the notification message box.
Page 30

Overview 30
Synapse SB67030/031 Deskset and Accessories User’s Guide
Using the Deskset Speakerphone
When the speakerphone is active, the SPEAKER hard key is backlit.
To use the speakerphone:
To initiate a call, press SPEAKER. The key becomes backlit and you hear a dial tone. Begin dialing.
To end a call, press SPEAKER. The key backlight goes out.
During an active call, if you are using the corded handset or any corded or Cordless Headset, pressing SPEAKER
switches audio to the speakerphone. If the corded handset is not “hung up,” pressing SPEAKER changes between the
corded handset and the speakerphone.
Page 31
Overview 31
Synapse SB67030/031 Deskset and Accessories User’s Guide
Using Deskset Help Screens
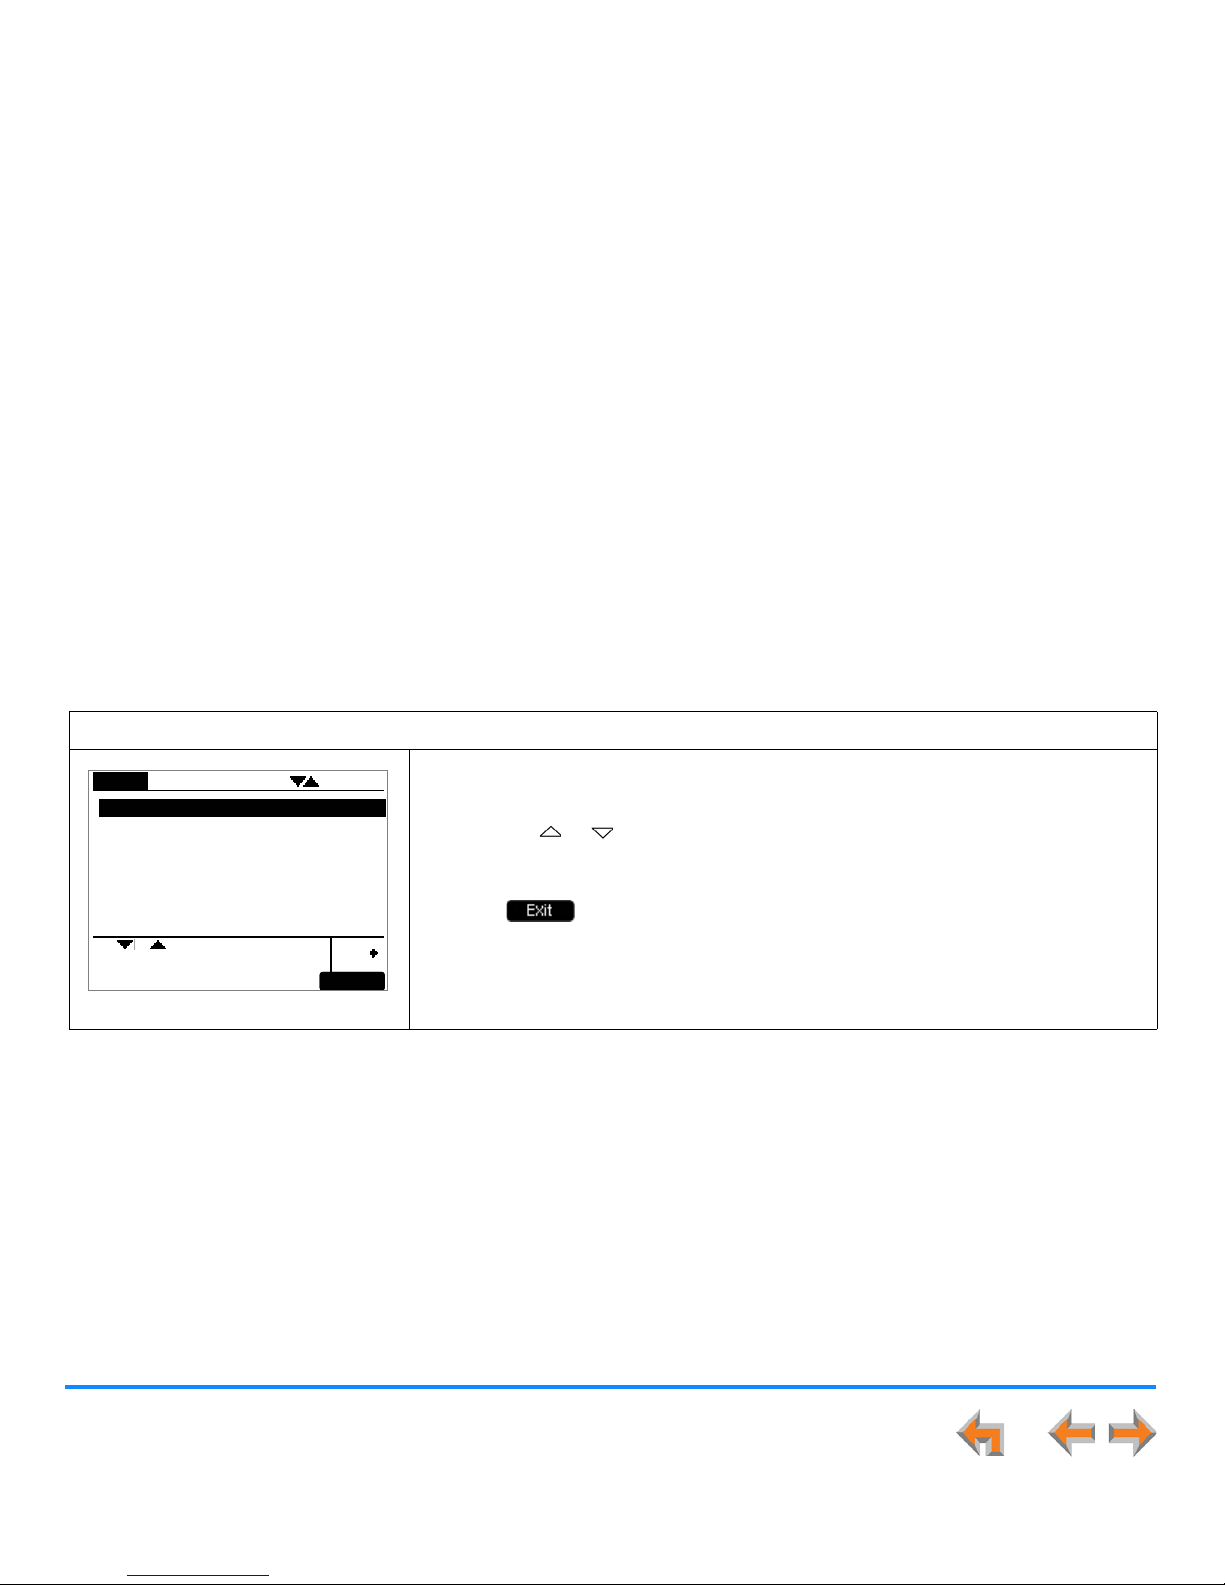
In addition to the brief Help messages at the bottom of each screen, you can view more Help on the Deskset screen. These are
very brief descriptions of how to use some of the features.
To use the Deskset Help:
Figure 17. Deskset Help
1. Press HELP to see a menu of features. Figure 17 shows the Help menu in Call
Appearance mode. The Help menu in Line Appearance mode is slightly different.
2. Press the or navigation key to highlight the desired feature.
3. Press SELECT.
4. Press to exit the Help.
Use or to scroll then press
SELECT or press 1-8.
Quick
Dial
Ex it
! "
$%&
Page 32

Overview 32
Synapse SB67030/031 Deskset and Accessories User’s Guide
Auto Attendant Information
When set to Call Appearance mode, the Synapse telephone system features an Auto Attendant that answers incoming calls and
automatically transfers them to a Synapse extension or extensions. The targets for these transfers may depend on the time of
day. The Auto Attendant’s interactive voice menu guides callers to the desired extension.
You may want to give your extension number to frequent callers so they can easily dial your extension number when the Auto
Attendant answers and asks the caller to enter your extension or to spell your name using the dial keys.
When the Auto Attendant is disabled, all outside calls go to the system operator or to a target that the system administrator
designates, which could be a group of extensions.
Caller Options
Until callers get through to a live person, they can press 0 at any time to redirect their call to the system operator, if one has
been designated and if the system administrator has enabled this feature.
When a caller is redirected to Voicemail, the caller has the option to press 5 to skip the greeting.
If your system administrator has set up Direct Inward Dialing, callers can dial the Direct Inward Dial telephone number to reach
you directly, bypassing the Auto Attendant. Your callers can also call your company's main number and be transferred to your
extension.
The Auto Attendant may be set up so that callers can access the Auto Attendant directory. This allows callers to use any touchtone phone's dial pad to spell your name, followed by pressing the pound (#) sign, to reach your extension.
This section applies to Call Appearance mode only.
Page 33
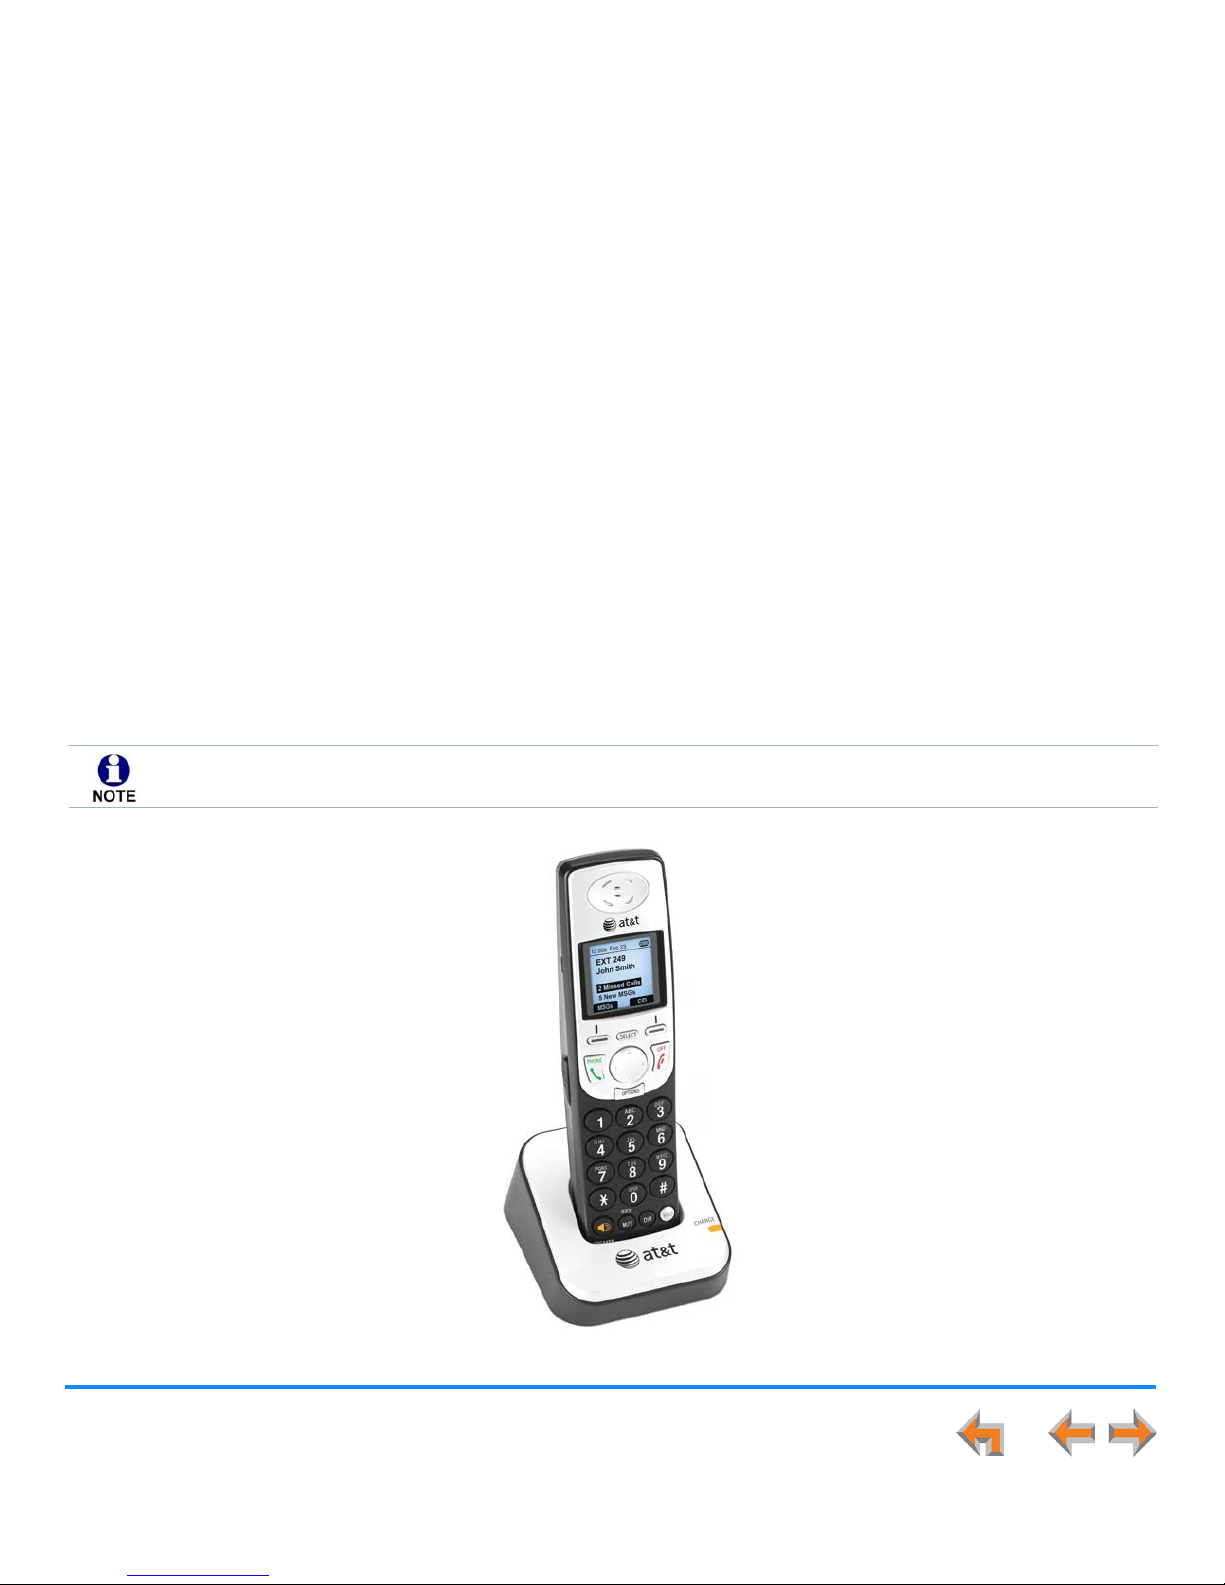
Overview 33
Synapse SB67030/031 Deskset and Accessories User’s Guide
SB67040 Cordless Handset (Optional)
The optional Cordless Handset, shown in Figure 18, supports most functions of the Deskset in Call Appearance mode, including
hands-free speakerphone, once it is registered to your Deskset. Use your Deskset to register your Cordless Handset. See
“Registering an Optional Cordless Handset” on page 209.
Figure 18. SB67040 Cordless Handset
The Cordless Handset cannot be used in Line Appearance mode. When the Synapse system is in Line Appearance
mode, you cannot register the Cordless Handset to your Deskset.
Page 34
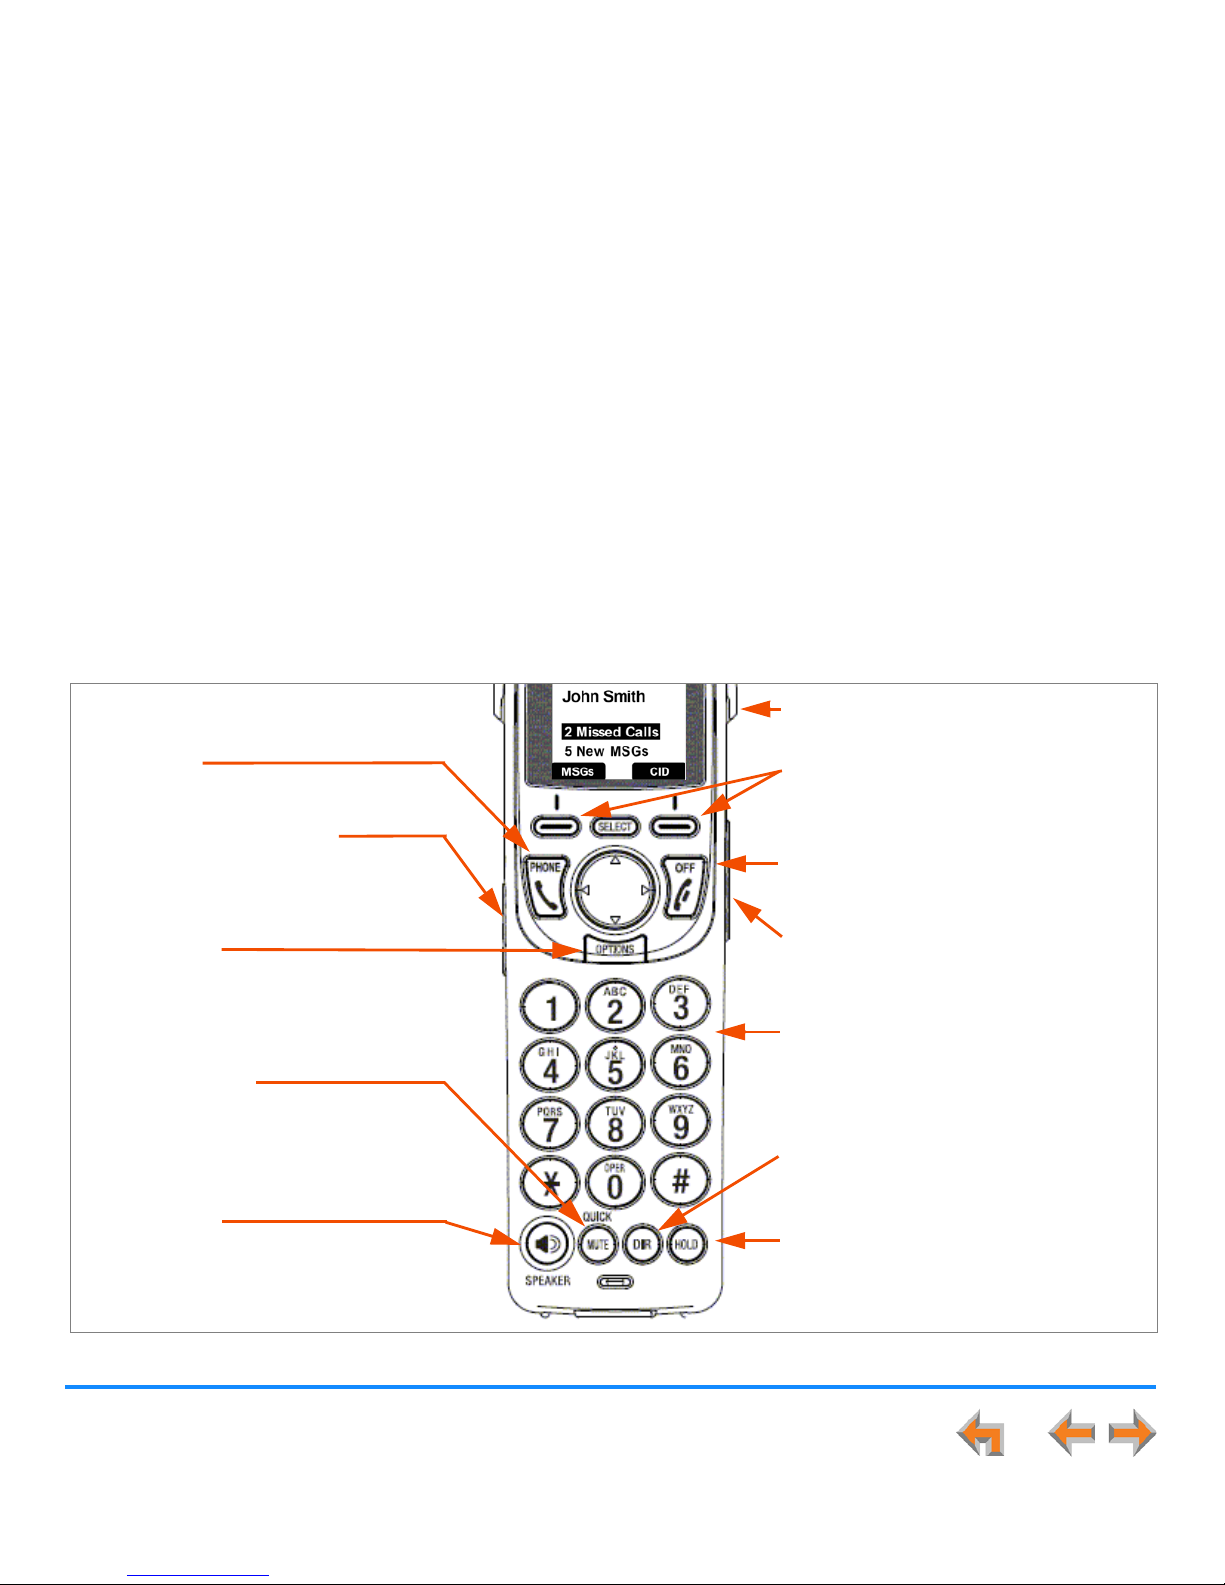
Overview 34
Synapse SB67030/031 Deskset and Accessories User’s Guide
Cordless Handset Description
Figure 19 and Figure 20 on page 35 illustrate and describe the Handset external features.
Figure 19. Handset Key Functions
PHONE
Starts or answers a call.
OFF
Ends current call.
OPTIONS
Accesses options depending on the
current mode.
MUTE/QUICK
Mutes the Handset microphone while
on an active or c on ference call. P re ss
and hold to access Quick-Dial
numbers.
DIR
Accesses the Directory.
VOLUME (on side)
Decreases and increases the ringer or
incoming voice volume.
Dial Pad, 0–9,
*, #
Dials, performs shortcuts, or accesses
areas in a list.
HOLD
Places active call on hold.
SPEAKER
Starts or answers a call in Idle mode.
During a call, toggles audio to and
from speakerphone.
Soft Keys
Labels in the display change
according to the current task.
Headset Jack (on side)
Lift the rubber flap to insert an
optional 2.5 mm corded headset into
the jack.
Belt Clip
Attaches here.
Page 35
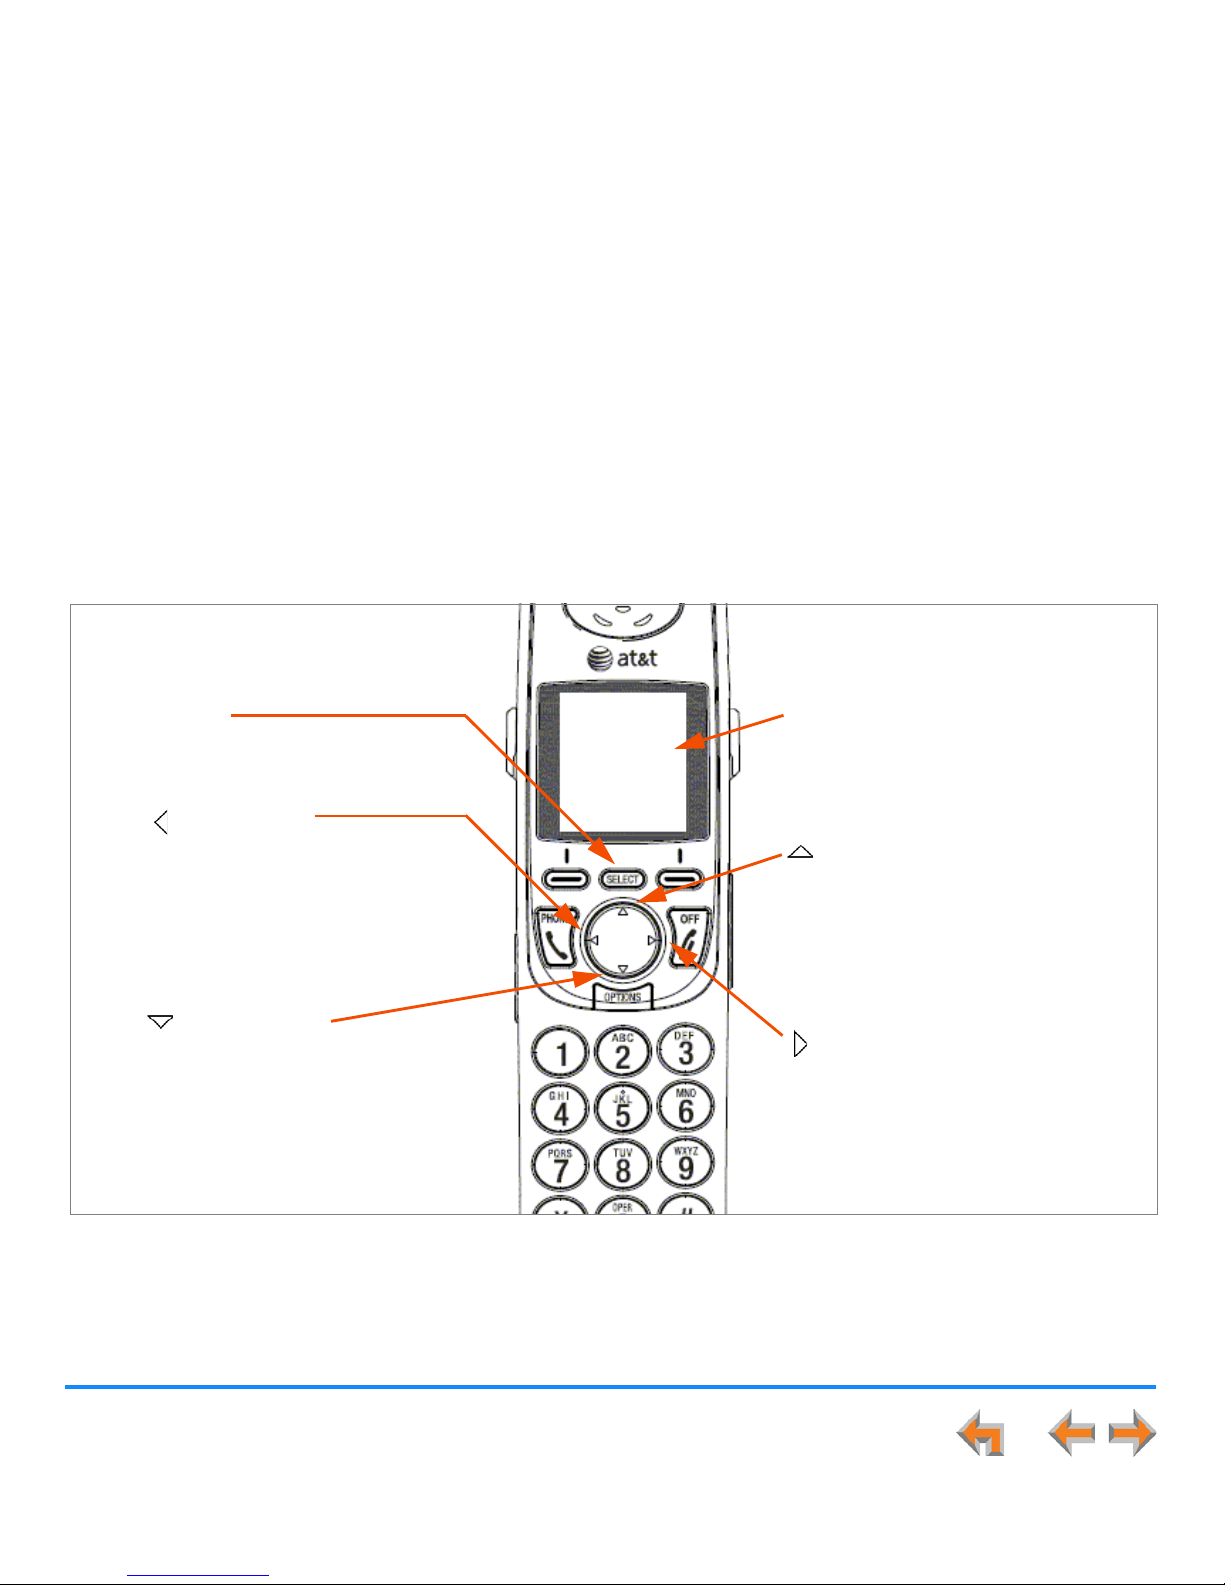
Overview 35
Synapse SB67030/031 Deskset and Accessories User’s Guide
Figure 20. Handset Key Functions
SELECT
Selects an option out of a menu
or list.
Navigate Up
Scrolls through list entries.
Highlights new messages or
new calls in Idle mode. Use
during message playback to
play previously numbered
message.
Navigate Right
Scrolls or cycles through list
entries. Use during message
playback to jump forward eight
seconds in message. Adjusts
display contrast level.
Navigate Left
Scrolls or cycles through list
entries. Performs backspace
function. Use during message
playback to jump back eight
seconds in message. Adjusts
display contrast level.
Navigate Down
Scrolls through list entries.
Highlights new messages or
new calls in Idle mode. Use
during message playback to
play next numbered message.
Liquid Crystal Display (LCD)
Provides instructions and status
information.
Page 36
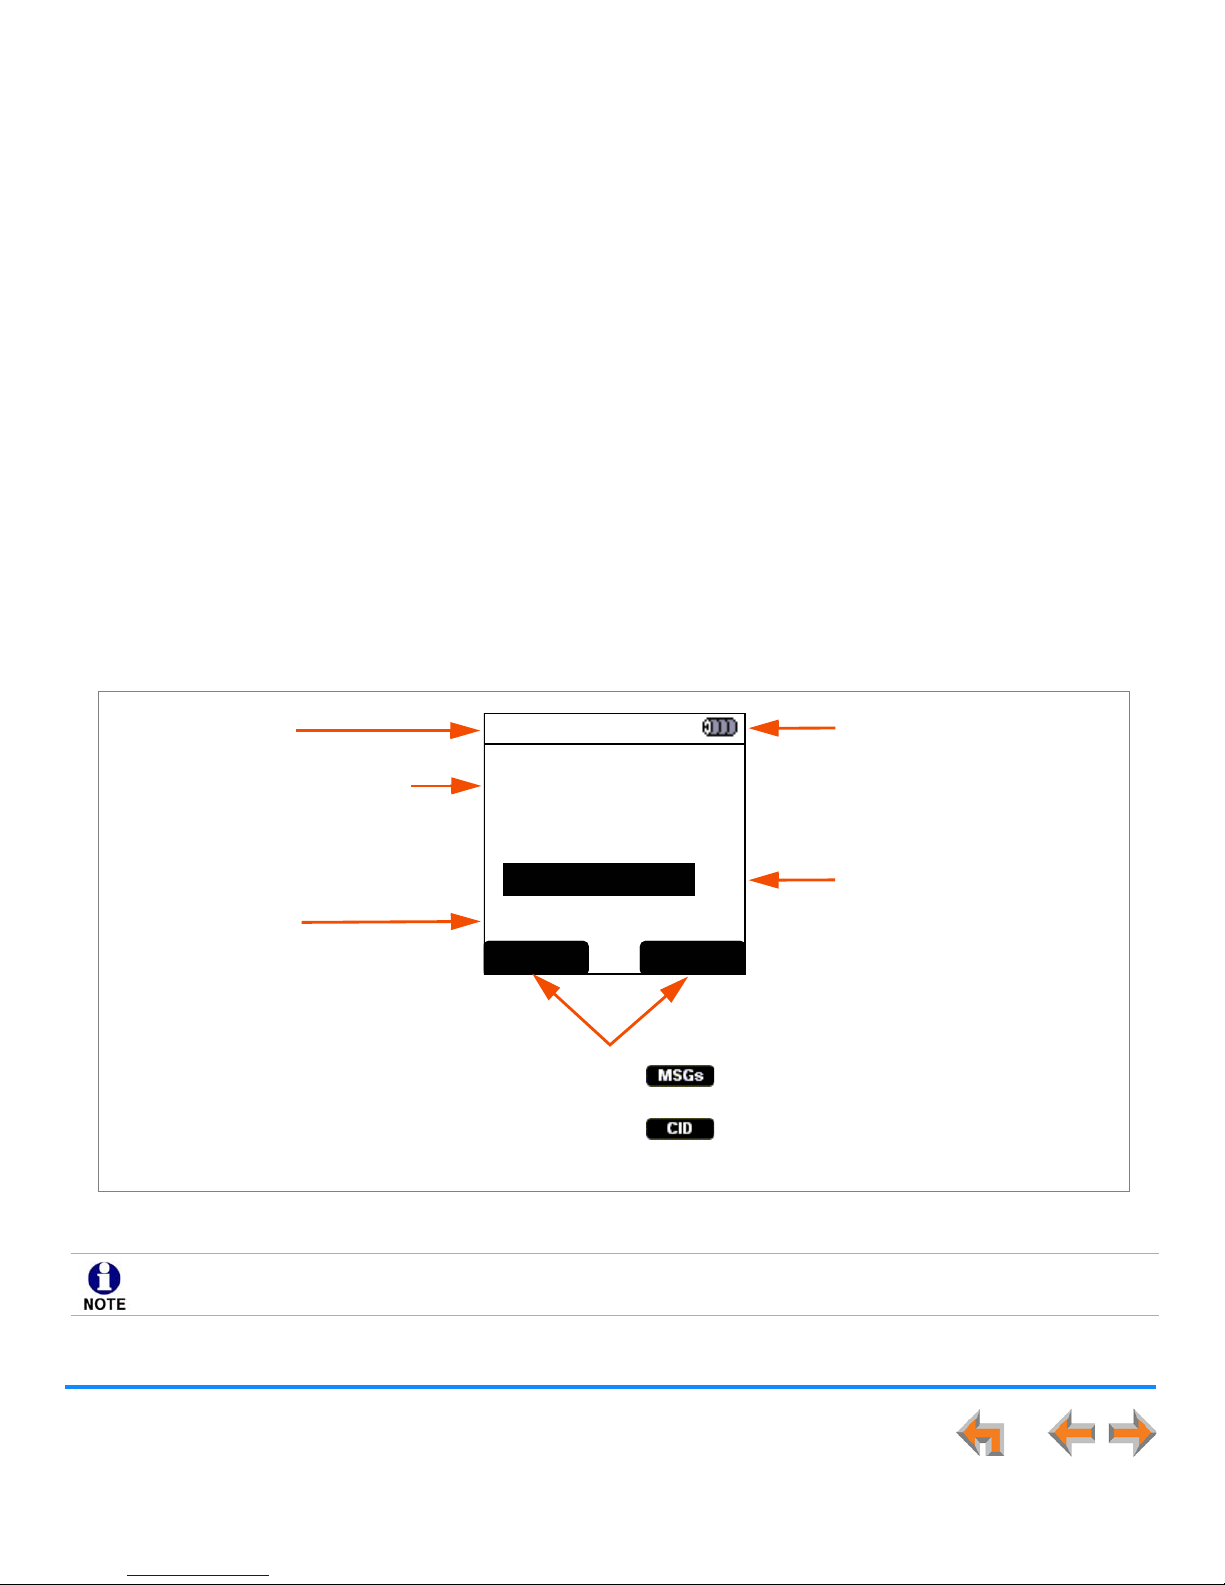
Overview 36
Synapse SB67030/031 Deskset and Accessories User’s Guide
Cordless Handset Liquid Crystal Display (LCD)
The Idle screen shown in Figure 21 appears when the Handset screen is on with no active or held calls.
Figure 21. Handset Idle Screen
12:30p Feb 23
2 Missed Calls
5 New MSGs
EXT 249
John Smith
MSGs CID
Status for Battery, Do Not
Disturb, or Call Forward, and
Voicemail memory full.
Time and Date
Extension Number and Name
The extension number and
name for this Handset.
Missed Calls
Number of new missed calls.
Press SELECT when
highlighted to see the
missed-calls list.
New Messages
Number of new messages. Press
SELECT when highlighted to see
a Message Review screen similar
to the one shown in Figure 217
on page 164. Once a new
message is reviewed, the
notification on the Idle screen
changes. The new message
count goes down by one.
Soft Key Labels
Press the key below to see the Message Review screen of old
and new messages similar to the one shown in Figure 219 on page 165.
Press the key below to see the entire Call Log.
See “Using the Call Log with the Cordless Handset” on page 180.
The Handset updates its status during use. There is a brief delay and the Handset screen goes blank. The Handset does
not respond to key presses during this update process.
Page 37
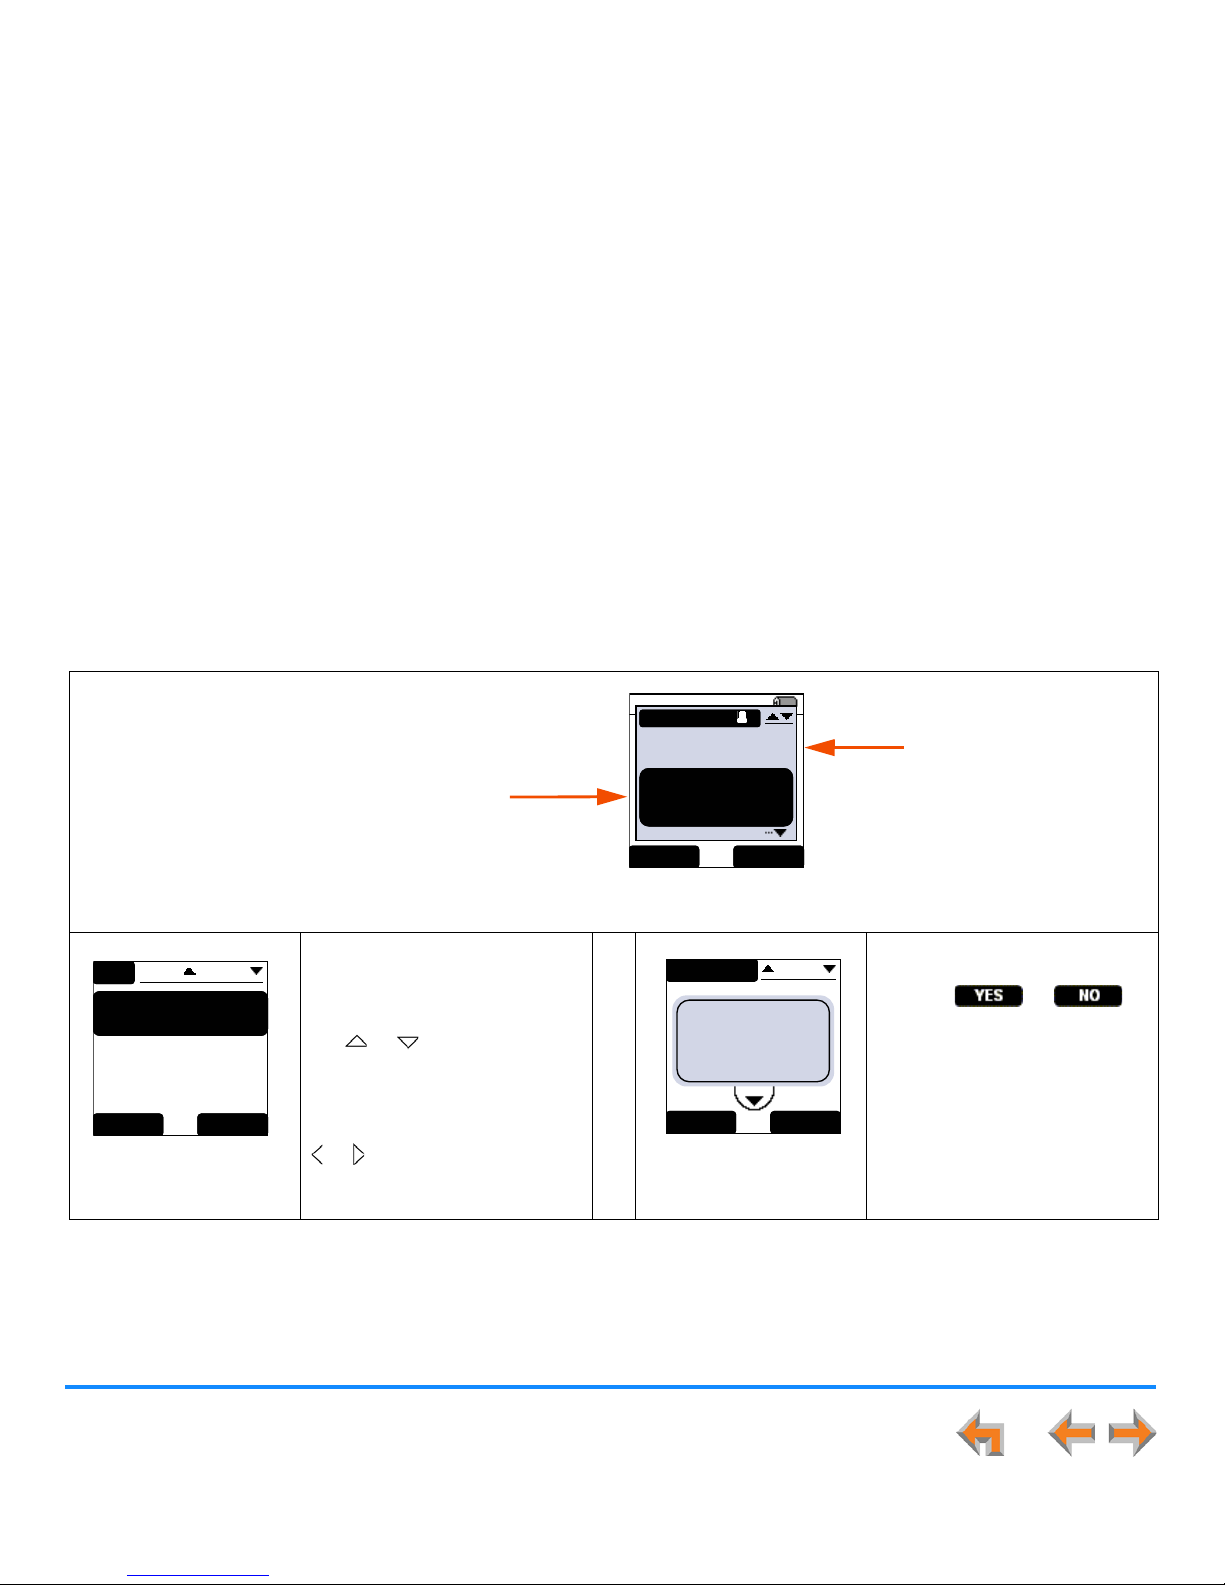
Overview 37
Synapse SB67030/031 Deskset and Accessories User’s Guide
The Handset provides other types of screens to assist you, as shown in Table 6.
Table 6. Cordless Handset Screen Types
List screens display a name
and phone number for each
entry. A Call Log entry also
displays the time called. Press
the or navigation key to
cycle through entries. The left
and right arrows on either side
of the name in Call Log entries
indicate that you can press the
or navigation key to view
dialing options.
Confirmation screens require
that you confirm a choice by
pressing or .
12:30p Feb 23
9-503-555-0194
00:12 ON A CALL
INCOMING
Graham Bell
232-555-0176
Mar y Williams
Charlie Johnson
IG NORE FWD-VM
Incoming Call
Additional
Incoming Calls
Incoming Call Screen
The highlighted entry in
the Incoming Call screen
displays name and number
(if available). The other
entries display name only.
ABC Account...
9-503-555-0194
Amy Lee
Angela Martin
Barry Crick
DIR
1/48
LIST EX I T
List Screen
MESSAGES
1/13
Graham Bell
1-800-916-2007
Jan. 10 @ 12:03pm
PREV
NEXT
05:10
Are you sure you
want to delete all
messages?
YES NO
Confirmation Screen
Page 38
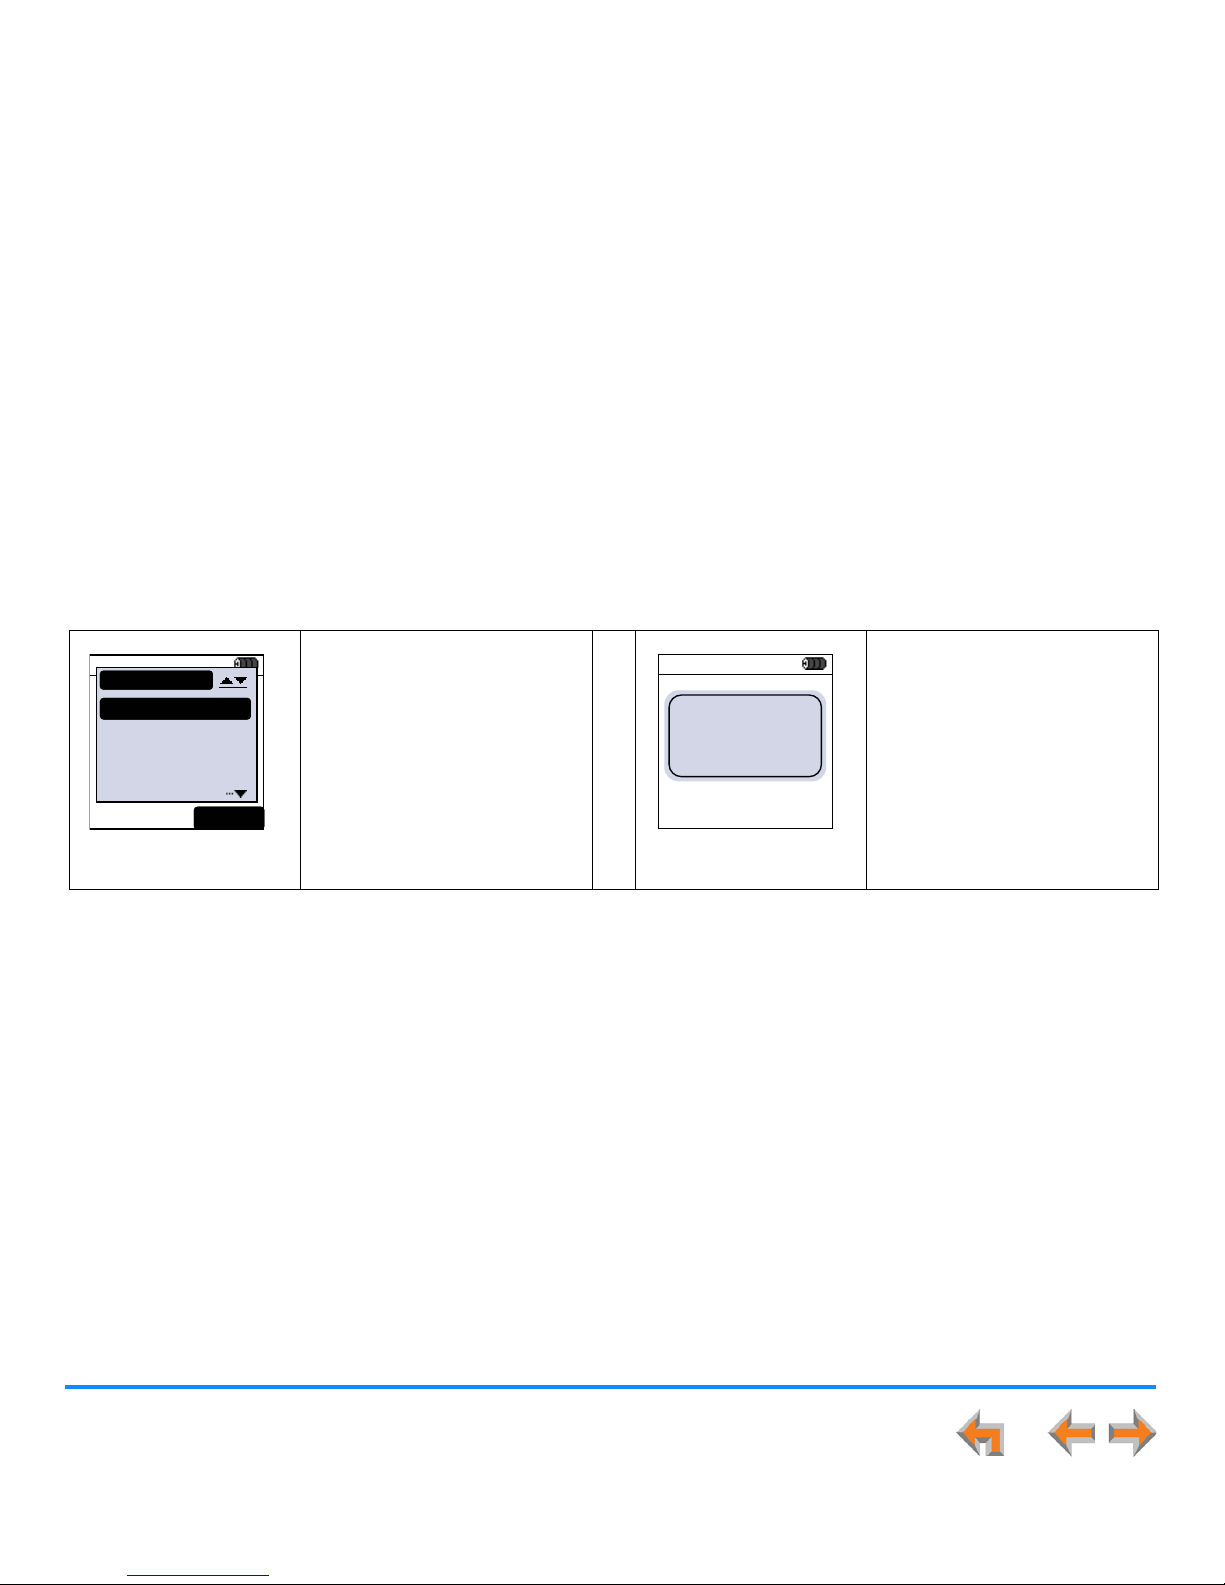
Overview 38
Synapse SB67030/031 Deskset and Accessories User’s Guide
Cordless Handset Soft Keys
The Handset provides soft keys as illustrated in Figure 21 on page 36. The Handset soft keys provide a variety of functions
determined by the current action. If you are forwarding a call, for example, the soft keys displayed are different from those
displayed if you are making a call. See “Appendix A: Soft Keys” on page 274 for an alphabetical list of the labels that appear
above the soft keys.
Interaction screens display
lists of choices you can make.
To access items in the Handset
menus, you can either use the
navigation key to highlight the
function and press SELECT or
press a dial-pad key. The
procedures in this guide use the
dial-pad entry as the preferred
method for selecting a function.
Notification screens alert you
that an action has been
completed, provide a status
update, or give a warning.
Table 6. Cordless Handset Screen Types (Continued)
12:30p Feb 23
2 Missed Calls
5 New MSGs
EXT 249
John Smith
SETTINGS
1. Display
2. Sounds
3. Restore Default
4. Deregister
EX IT
Interaction Screen
12:00a Dec 0112:00a Dec 0112:00a Dec 01
Sample
notification screen
Notification Screen
Page 39
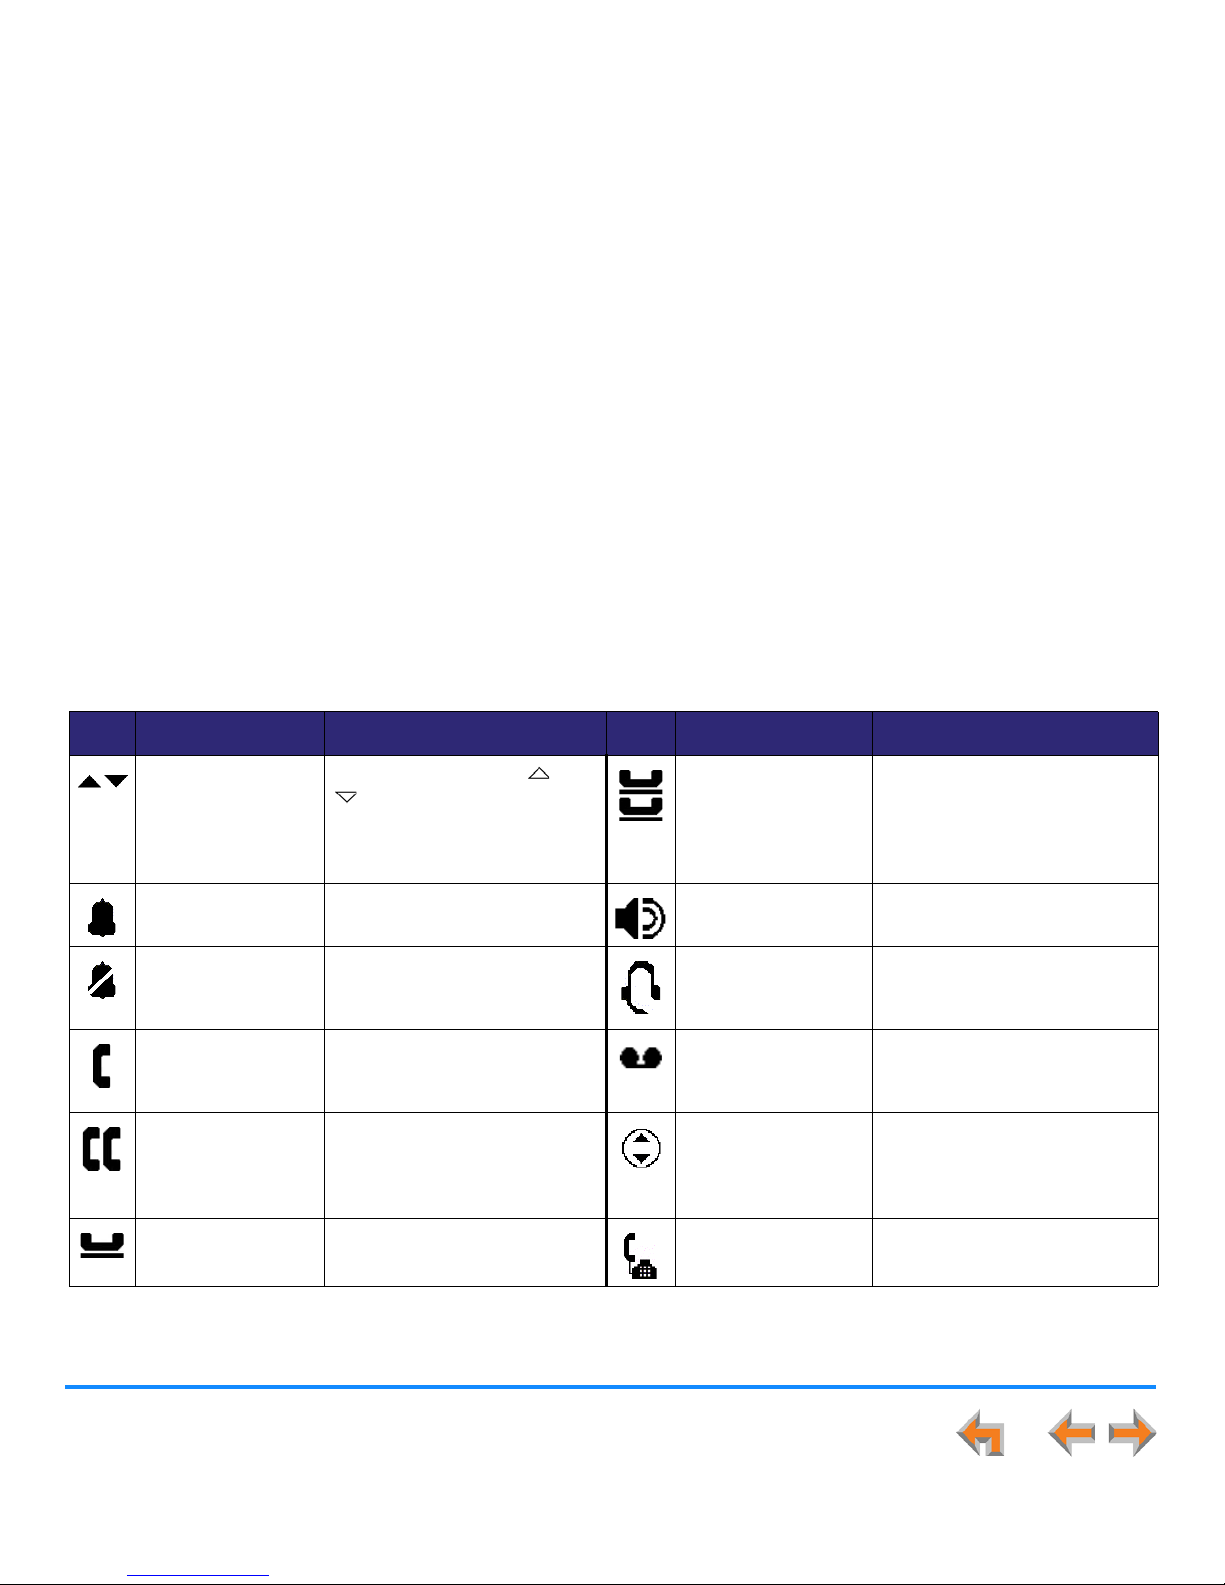
Overview 39
Synapse SB67030/031 Deskset and Accessories User’s Guide
Cordless Handset Screen Icons
The Handset screen icons provide an indication of Handset activity. Table 7 lists and describes the screen icons you might see.
Table 7. Cordless Handset Screen Icons
Icon Function Description Icon Function Description
Navigate up or
down list
Present whenever the or
navigation key can be used
to move the highlight bar to
the next or previous entry in a
list.
Conference on hold Appears when a conference
call is placed on hold.
Incoming ring or
ringer on
Appears during an incoming
call, or during volume control.
Speaker or page Appears when you switch to
speakerphone or when paging.
Silenced incoming
ring or ringer
silenced (muted)
Appears during an incoming
call, or during volume control.
Headset in use Appears when a Headset is on
a call.
Active call (off
hook)
Present during an active call. Voicemail message Appears in the Call Log to
indicate that a caller has left a
Voicemail message.
Conference Present during a conference
call.
Message playback
navigation
Present during message
playback to indicate that there
are additional messages
before or after this one.
Call on hold Appears when a call is placed
on hold.
Deskset in use Appears when the Deskset is
off hook.
Page 40
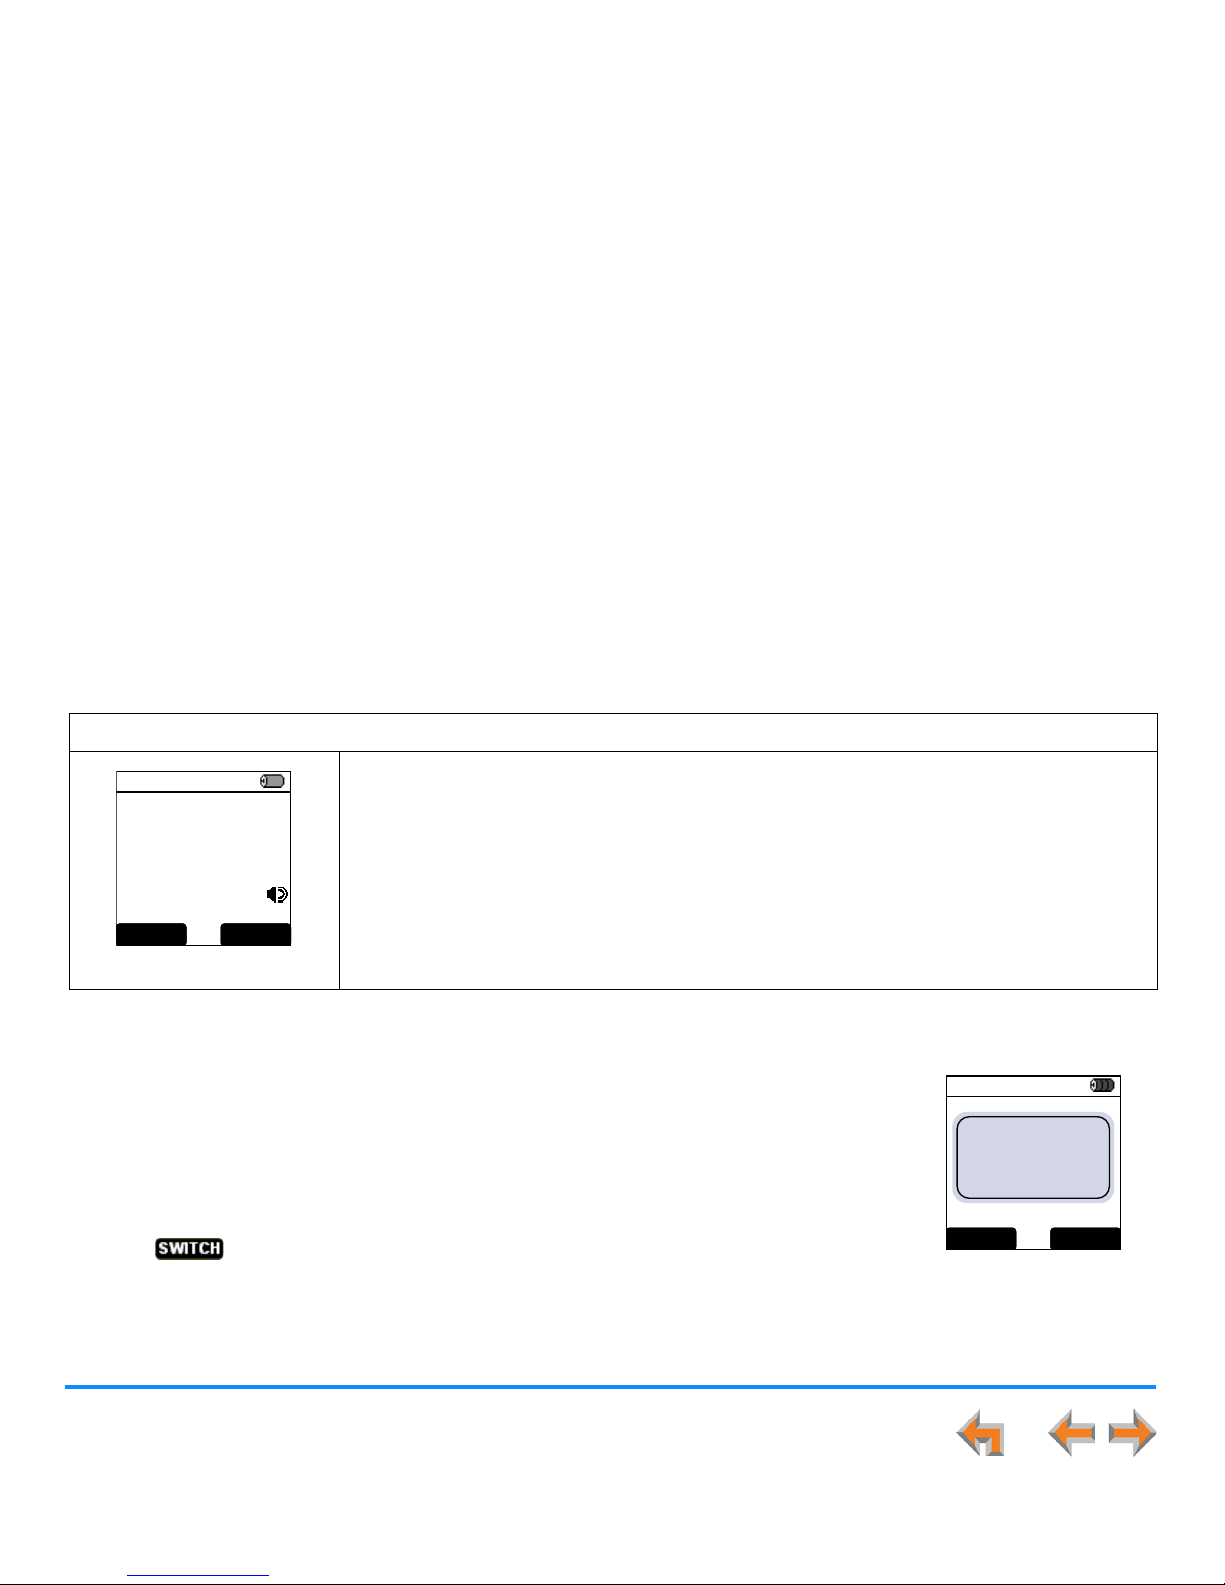
Overview 40
Synapse SB67030/031 Deskset and Accessories User’s Guide
Using the Cordless Handset Speakerphone
When the speakerphone is active, the SPEAKER hard key is lit. In Idle or Dial mode, this hard key behaves like PHONE, except
that audio is from the speakerphone.
Switching Between Deskset and Cordless Handset
When you are on a call at a Deskset and you need to move away from the Deskset, switch the
call to the Cordless Handset.
To switch a call from Deskset to Handset:
1. On the Handset, press PHONE. The Deskset-in-use notification screen shown in Figure 23
appears.
2. Press on the Handset.
To switch a call from Handset to Deskset:
1. On the Deskset, press the lit Call Appearance key, or press SPEAKER.
To use the speakerphone:
Figure 22. Speakerphone
To initiate a call, press SPEAKER. The key becomes lit, you hear a dial tone, and the
screen shown in Figure 22 appears. You can dial.
To end a call, press OFF. Pressing SPEAKER does not hang up calls. The key backlight
goes out and the Idle screen shown in Figure 21 on page 36 appears.
During an active call, pressing SPEAKER switches audio between the Handset and the
speakerphone.
12:30p Feb 23
Graham Bell
1-9-232-555-0176
00:56 ON A CALL
XFER CONF
EXT 201
Fraser Walters
2 New CALLS
0 New MSGs
Deskset in Use.
Press
SW ITCH
to
use this handset.
SWITC H
12:30p Feb 23
CANCEL
Figure 23. Deskset In Use
Page 41

Overview 41
Synapse SB67030/031 Deskset and Accessories User’s Guide
Deskset/SB67040 Cordless Handset Comparison
The following Deskset features are limited on the Handset:
Paging You can send pages only to all extensions (not to Paging Zones) from the Cordless Handset, but
you cannot receive them. See “Paging with the Cordless Handset” on page 191. If your Synapse
system includes an optional Overhead Paging (OHP) system, you cannot send pages though it.
View other held calls You can cycle though held calls in the Call Deck. See “Call Deck” on page 91. On the Deskset, held
calls are listed on the screen.
View simultaneous
incoming calls
You can cycle through simultaneous incoming calls. See “Multiple Incoming Calls” on page 76. On
the Deskset, multiple incoming calls are listed on the screen.
View Voicemail list You can cycle through individual Voicemail records. See “Retrieving Personal Voicemail with the
Cordless Handset” on page 164. On the Deskset, Voicemail records are listed on the screen.
Forward message to
extension
You can forward messages to an extension, but with limited functionality. See “To forward a
message:” on page 168. On the Deskset, you can add an introductory message and forward a
message to multiple extensions.
Directory You can access the Directory and choose to see all, personal, or system lists, but you cannot
change the sort order or create new Personal Directory entries. See “Accessing the Directory with
the Cordless Handset” on page 137.
Speakerphone Key You can route audio to or from the speakerphone and pick up calls by pressing SPEAKER, but
SPEAKER does not hang up calls. See “Using the Cordless Handset Speakerphone” on page 40.
Page 42

Overview 42
Synapse SB67030/031 Deskset and Accessories User’s Guide
In addition, the following Deskset features are not available on the Handset:
Operation in Line Appearance mode
Record a Voicemail greeting
Copy Call Log entries or Redial numbers into your Personal Directory list
Create, edit, or delete your Personal Directory list
Program Quick-Dial entries
Call screening
Auto Answer
Access to Group Mailboxes
Turning DND and Call Forward All on or off
Voicemail Distribution
Audible Ring Delay
Ring Group icon
Call Queue.
Page 43

Overview 43
Synapse SB67030/031 Deskset and Accessories User’s Guide
Deskset-Handset Interaction
This section identifies similarities and operating interactions between the Deskset and the optional SB67040 Cordless Handset in
Call Appearance mode.
Answering a Call While Another Device is on a Call
The Deskset, Cordless Handset, and Cordless Headset all share the same extension number. If there is an active call, it must be
placed on hold before other calls can be placed or answered by one of the other extension devices. You must also switch control
to the device you want to use.
Incoming Calls
Incoming Calls appear on the Deskset and Cordless Handset, and both devices ring. If one device answers the call, the other
device stops ringing but its Call Appearance indicators reflect the status of the call. This behavior allows an additional incoming
call to appear on either device. If there is a subsequent incoming call, the device currently on an active call emits an abbreviated
ringtone but the other device does not.
Held Calls
Both the Handset and Deskset display held calls. The Deskset shows held calls in the Call Appearance screen. The Handset
displays the current held call with an option to cycle through the Call Deck (see “Call Management” on page 78) using
the or Navigation key. When there are held calls, either device can retrieve a held call.
Clocks
The Handset and the Deskset show the current date and time. The clocks on each of the devices run independently, and the
system updates the real time frequently. Because the clocks are independent, there may be occasions when the time shown on
each is slightly different.
Status
The Handset and the Deskset show the current DND and Call Forward All status. They also show the same notifications for new
calls and new messages. This status is broadcast from the Deskset to the Cordless Handset as new events occur. This ensures
the Handset status remains the same as the Deskset status.
Page 44
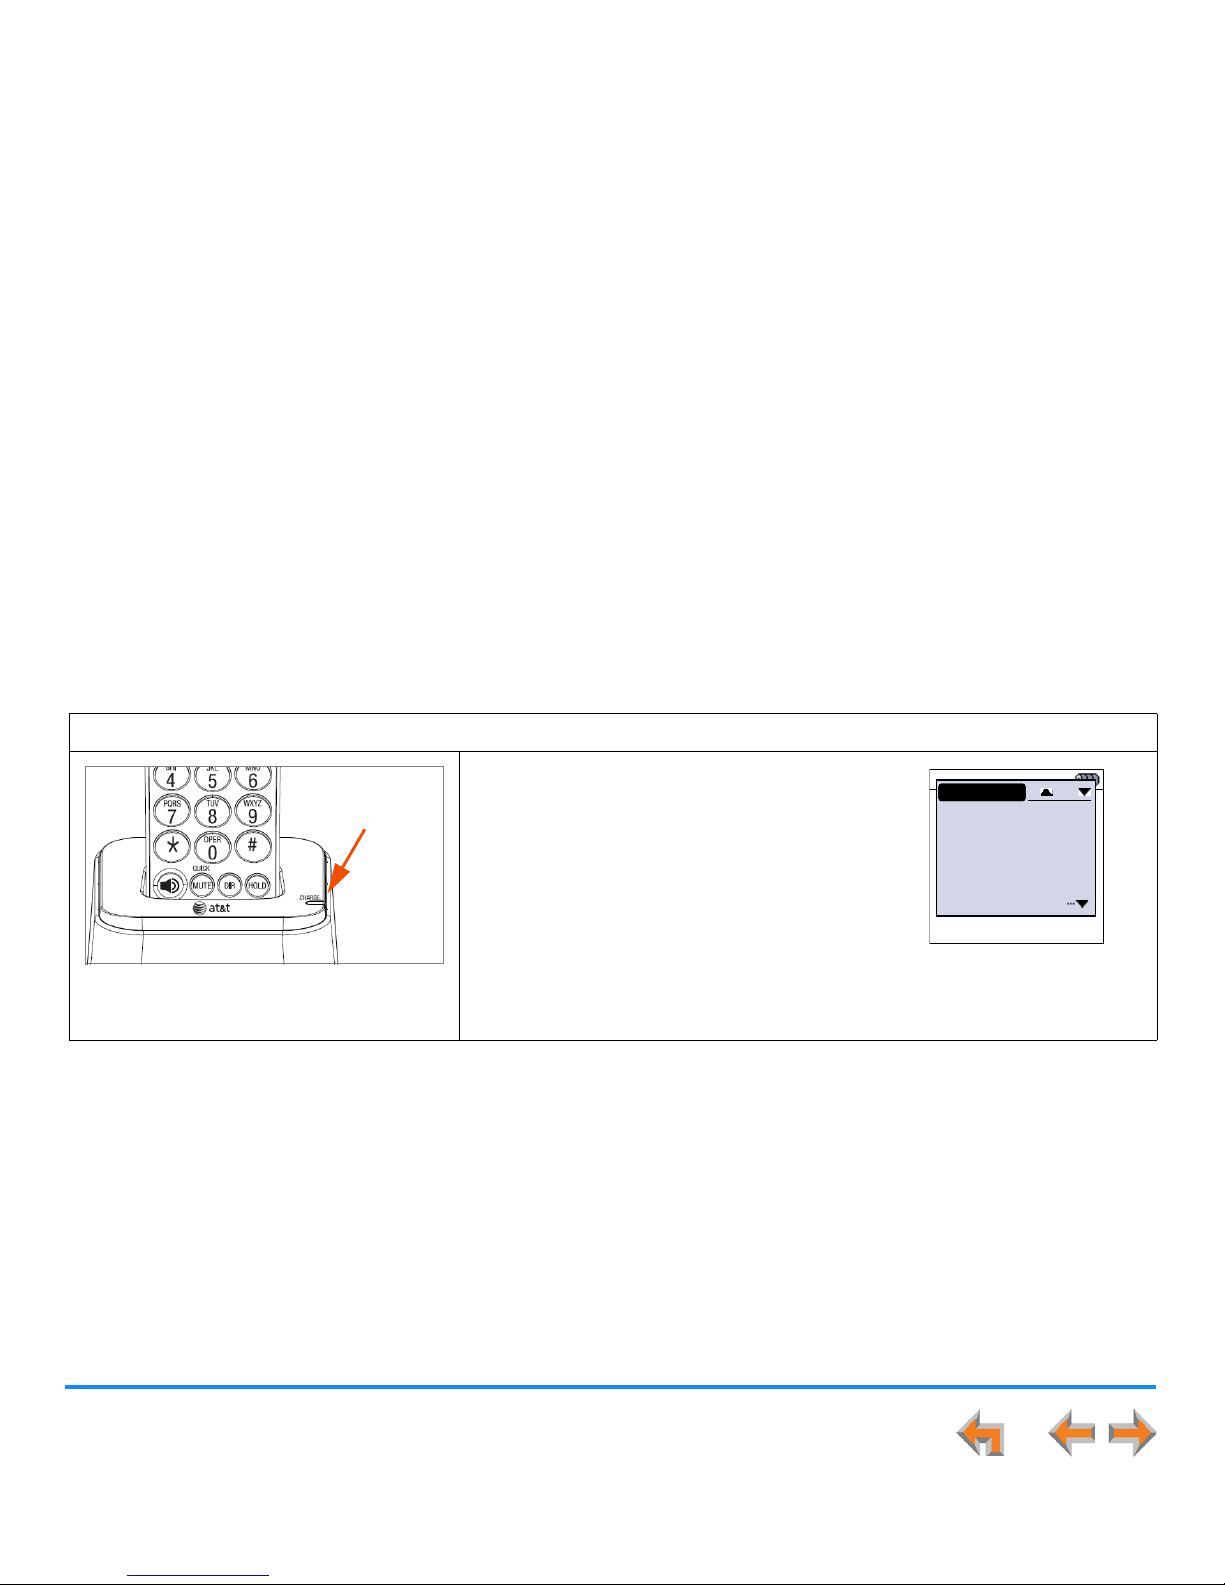
Overview 44
Synapse SB67030/031 Deskset and Accessories User’s Guide
Cordless Handset Battery Charging
Place the Handset in the charger when not in use. When fully charged, the Handset battery provides approximately five hours of
talk time or three days of standby time.
To charge the Handset battery:
Figure 24. Handset in Charger
Place the Handset in the charger, as shown in
Figure 24.
The CHARGE light is on when the
Handset is charging.
If the Handset has not yet been
registered, the Register screen shown
in Figure 25 appears within 15 seconds.
Follow the directions on the screen to
register the Handset to a Deskset. See
“Registering an Optional Cordless Handset” on page 209.
Charge Light
12:00a Jan. 0012:00a Jan. 00
To register Handset:
1. Go to your
Deskset.
2. Press MENU.
3. Select User
REGISTER
1/3
Figure 25. Register Screen
Page 45
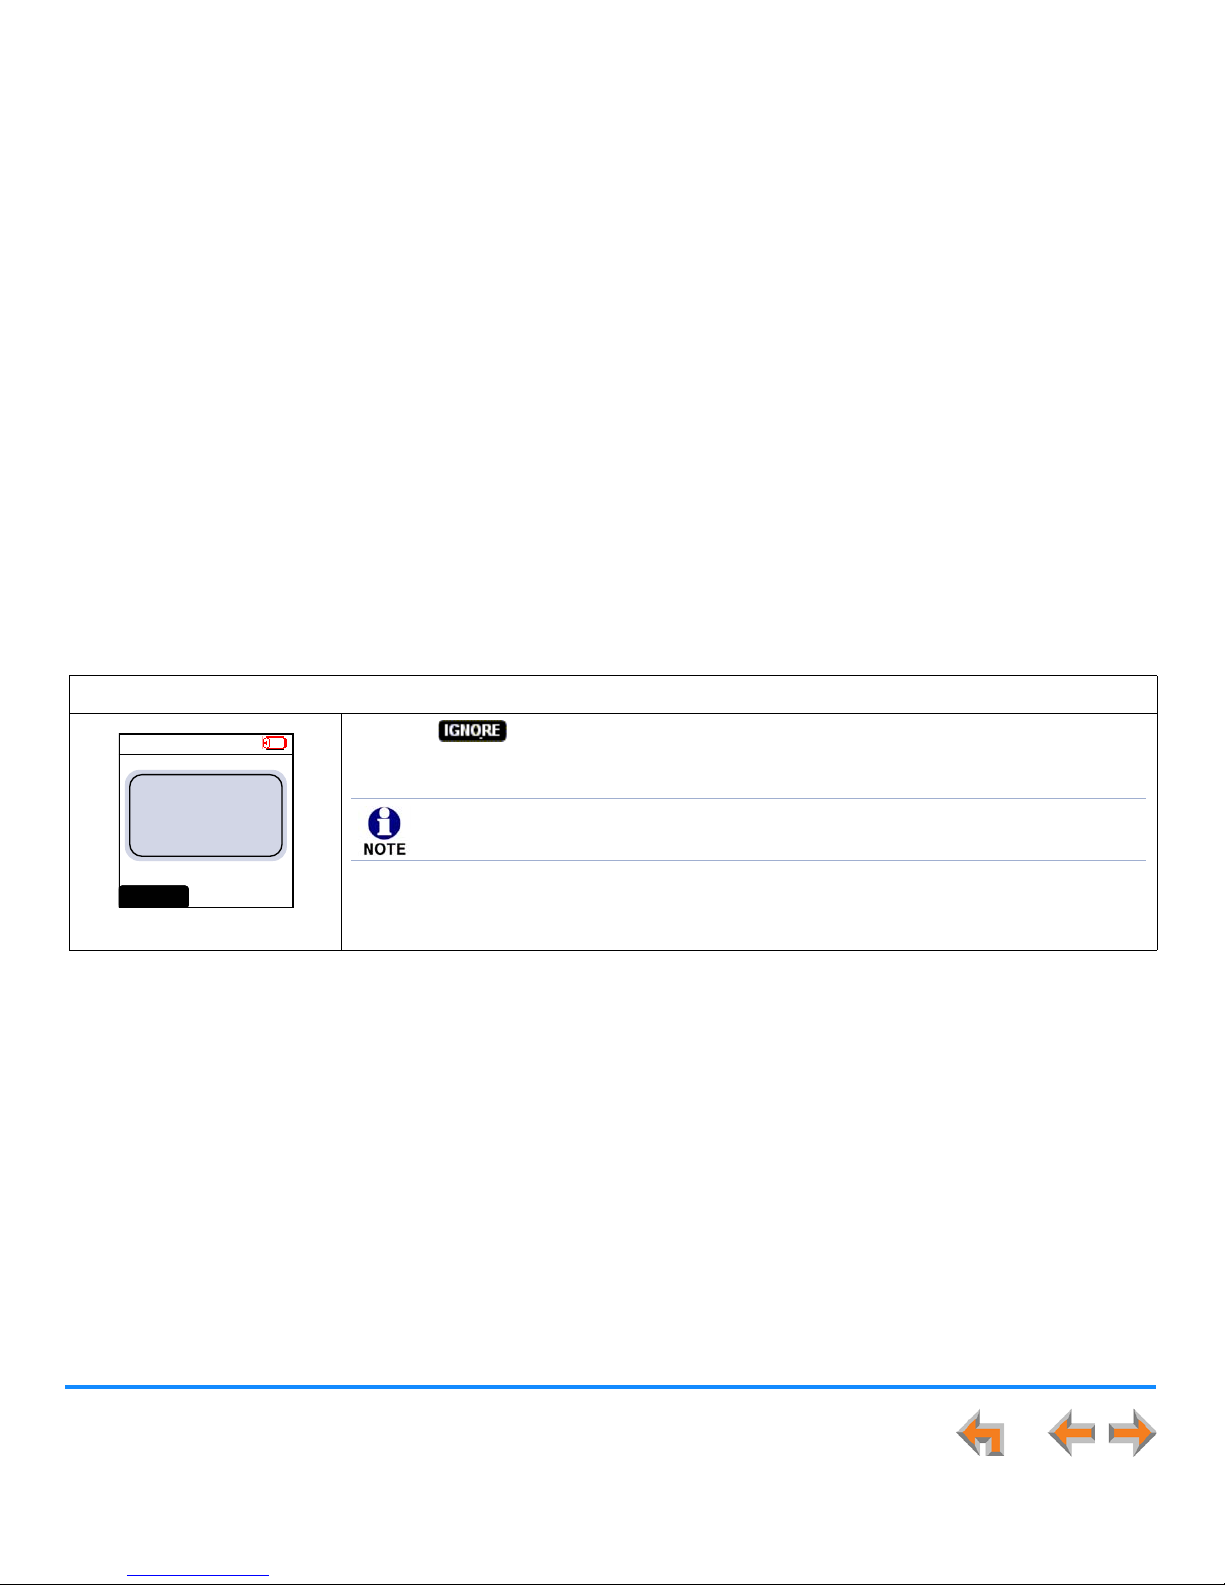
Overview 45
Synapse SB67030/031 Deskset and Accessories User’s Guide
Cordless Handset Low Battery Notification
When the battery is low, the Handset emits an alert tone and displays the notification screen shown in Figure 26.
Power-Save Mode
If you are not on an active call and press no keys for 30 seconds, the screen backlight turns off to save power. Press any key to
turn the backlight on.
To handle low battery notification:
Figure 26. Low Battery
1. Press to exit the notification screen.
2. Place the Handset into the charger.
12:30p Feb 23
2 Missed Calls
5 New MSGs
EXT 249
John Smith
Low Battery.
Please place in
charger.
IG NORE
If the Handset stops working when you are on a call because of low battery charge,
that call is automatically held on the Deskset.
Page 46
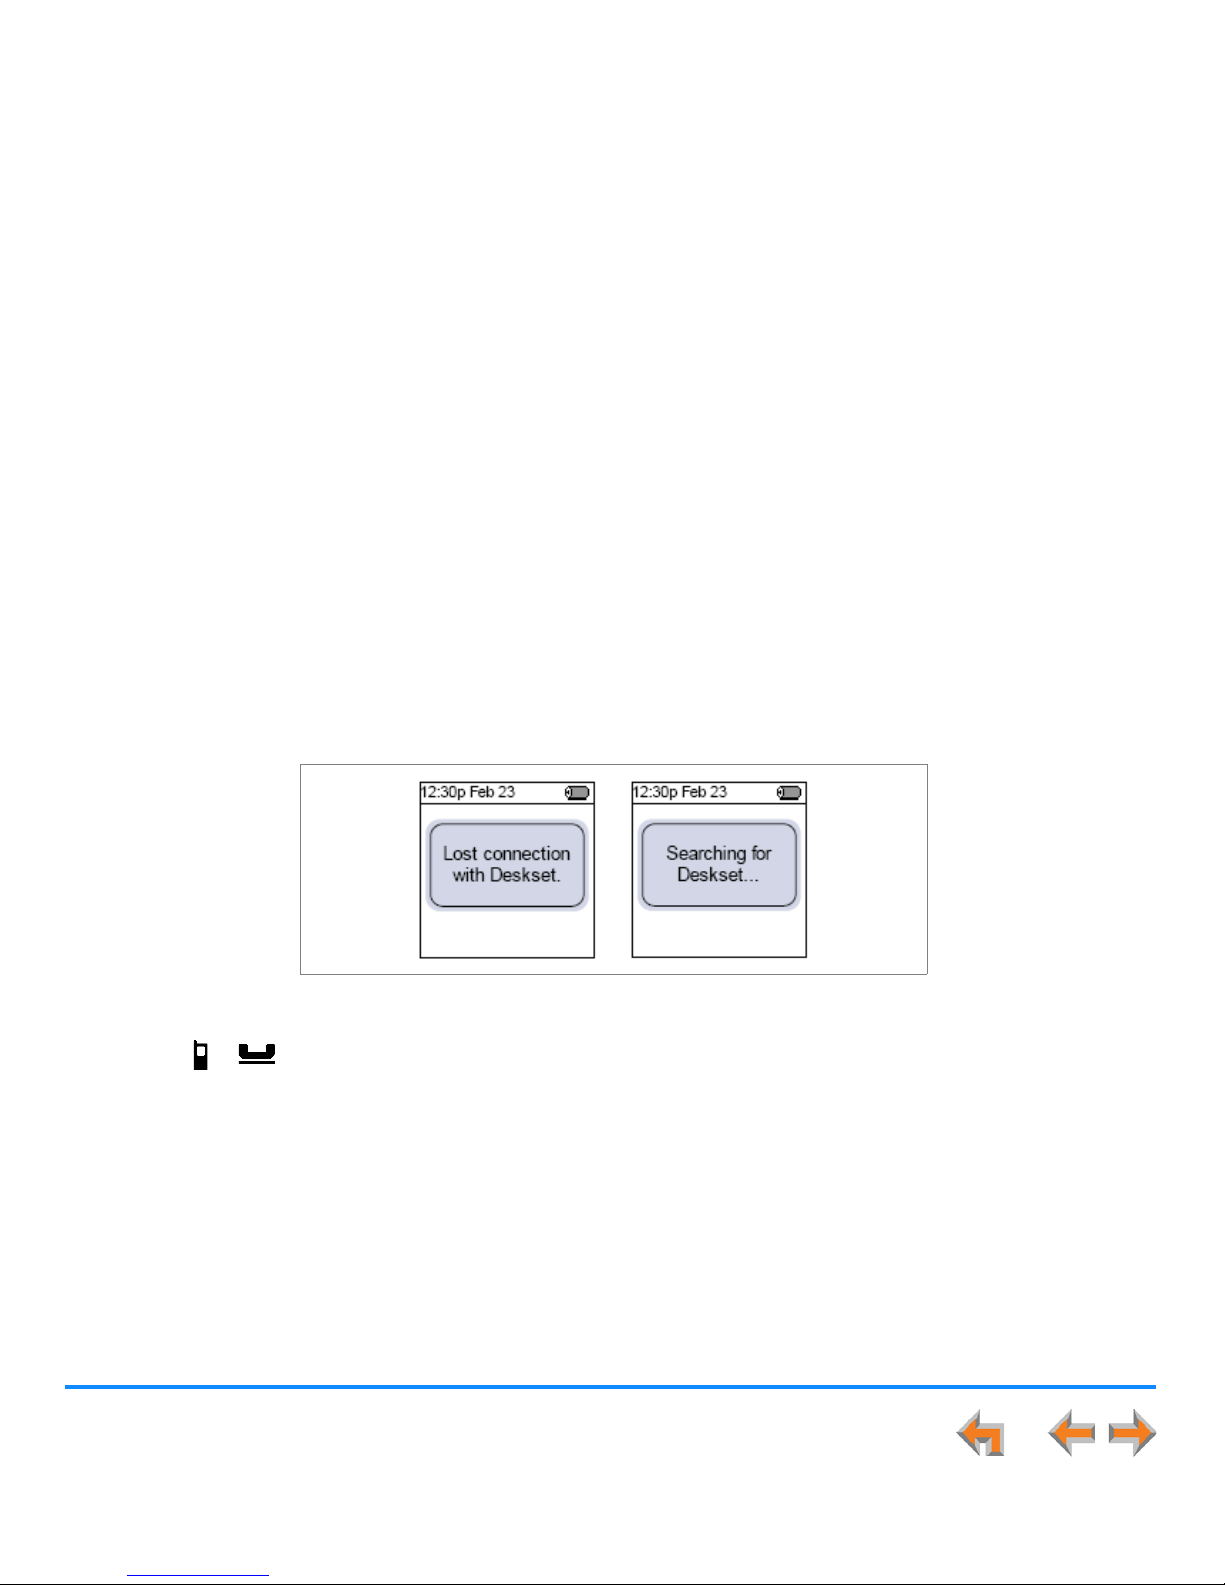
Overview 46
Synapse SB67030/031 Deskset and Accessories User’s Guide
Cordless Handset Link Loss Notification
If the Handset leaves the operating range of the Deskset, or if there is radio frequency (RF) interference, a Lost connection with
Deskset notification screen appears, as shown in Figure 27, and the Handset searches for the Deskset. If the Deskset is not found
within five seconds, the Searching for Deskset… notification screen appears. If you see either of these screens, move closer to
the Deskset.
.
Figure 27. Link Loss Notification Screens
If you are on a call when you lose the connection, the call is placed on hold. (The Deskset Call Appearance icon for that call
changes from to .) When you reestablish the connection, you can take the call off hold and continue the conversation.
Page 47
Overview 47
Synapse SB67030/031 Deskset and Accessories User’s Guide
Searching a List Using the Cordless Handset Dial Pad
To search for a list entry:
Figure 28. Directory
1. Press DIR to display the Directory shown in Figure 28.
OR
Press OPTIONS, then 4 to display the Extension list.
2. Pressing a dial-pad key causes a letter to display in the center of the Handset screen. See
“Dial-Pad Entry” on page 48 for more information on dial-pad keys. The Handset finds a
name that begins with that letter. If there is no name starting with that letter, the Handset
finds the next name in the alphabet. For example:
You press 5 twice to enter K. If an exact match is found, the highlight bar moves to
that entry.
You press 5 three times to enter L. If the Handset cannot find an exact match, the
highlight bar moves to the entry with the next closest alphabetical match.
ABC Account...
9-503-555-0194
Amy Lee
Angela Martin
Barry Cri ck
DIR
1/48
LIST EX I T
Page 48

Overview 48
Synapse SB67030/031 Deskset and Accessories User’s Guide
Dial-Pad Entry
Use the dialing keys to enter alphabetical characters to search the Directory and Extension lists. See “Accessing and Managing
Items in Lists with the Cordless Handset” on page 121. Digits 2, 3, 4, 5, 6, and 8 have three assigned letters, while digits 7 and 9
have four assigned letters. The keys function as follows:
1. Pressing the dialing key once displays names starting with the first letter on the key.
2. Pressing the dialing key twice displays names starting with the second letter on the key.
3. Pressing the dialing key three displays names starting with enters the third letter on the key.
4. Pressing the dialing key four times displays names starting with the number, or the fourth letter for keys 7 and 9 that require
an additional press to cycle into lower case letters.
5. Pressing the key further cycles through the letters again.
The # and * keys have been assigned special characters, as shown in Figure 29. Repeatedly pressing these keys cycles through
each special character in the order shown.
Figure 29. Handset Special Character Assignment
The Handset dial-pad keys are a little different from the Deskset dial-pad keys. All characters are uppercase, and the
special characters are different.
Cordless Handset Special Characters
Key Press 1st 2nd 3rd 4th 5th 6th
##&‘-.@
*
!()
*
+?
Page 49
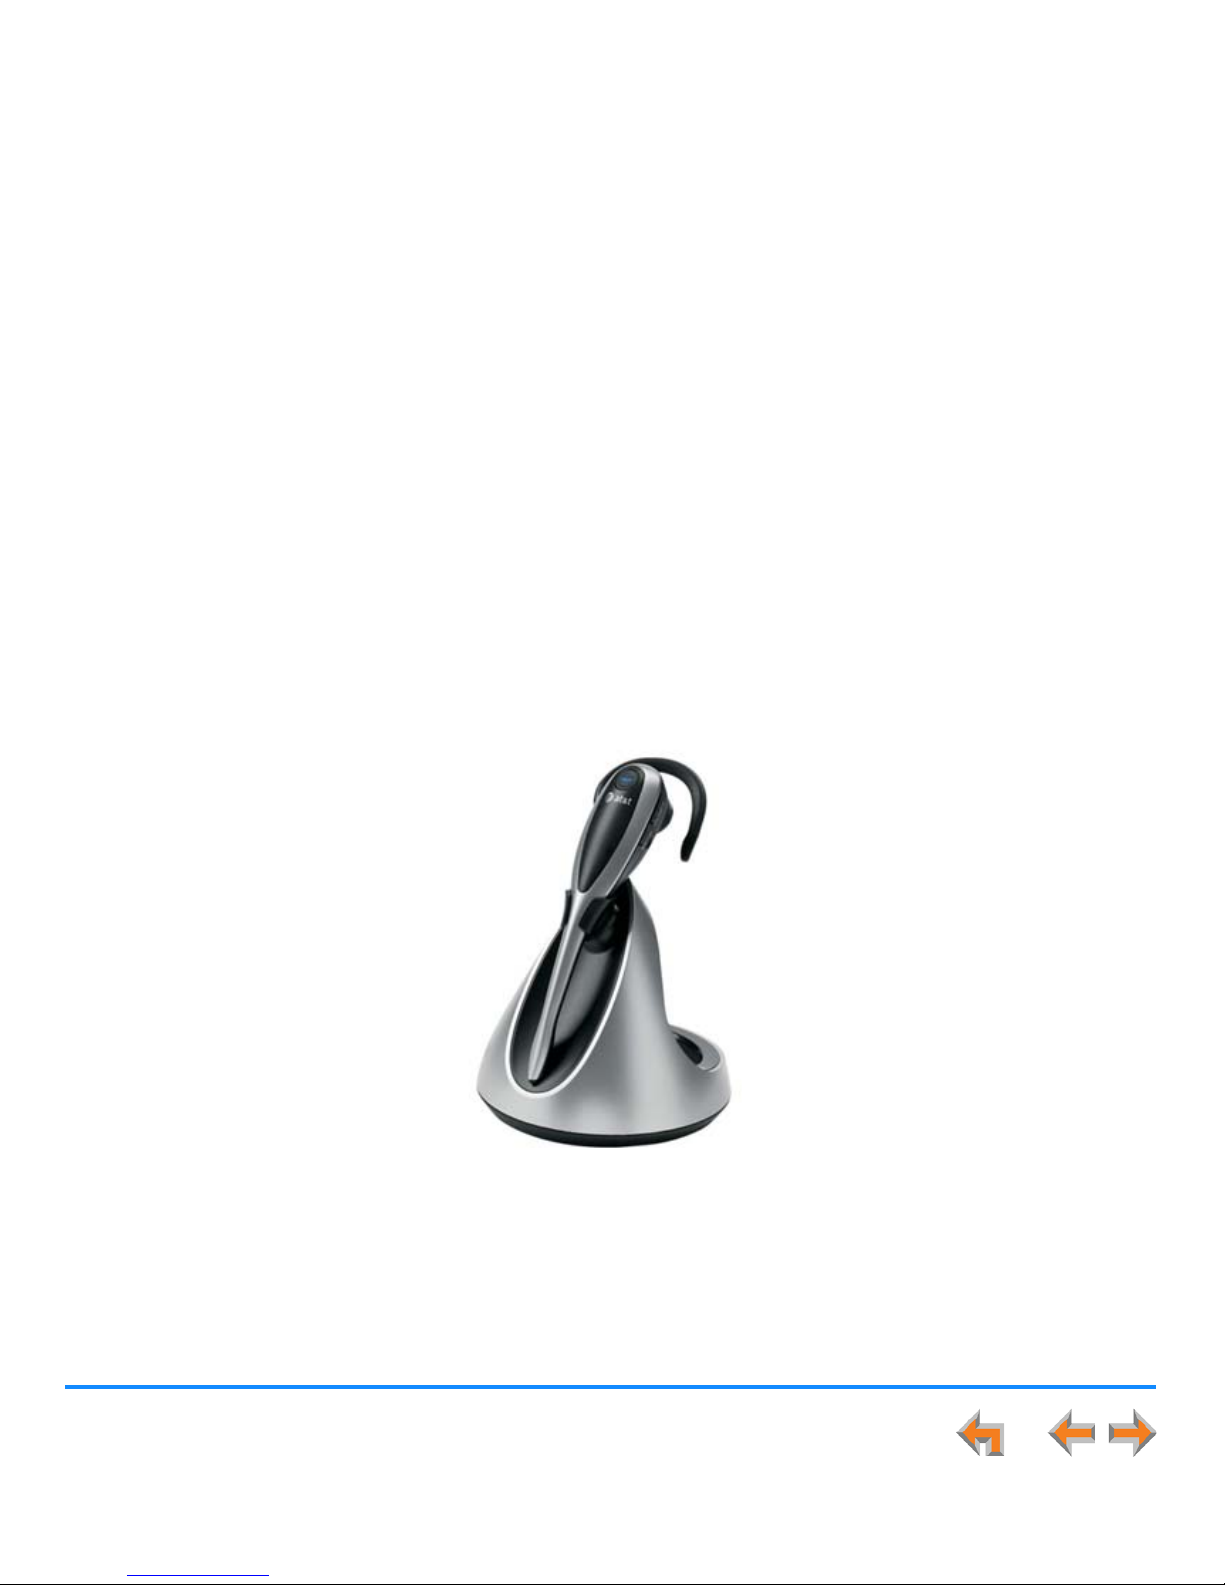
Overview 49
Synapse SB67030/031 Deskset and Accessories User’s Guide
TL7600 Cordless Headset (Optional)
This optional Cordless Headset, shown in Figure 30, provides a 500-foot range and easy one-button answering once it is
registered to your Deskset. Use your Deskset to register your Cordless Headset. See “To register the TL7600 Cordless Headset:”
on page 212.
Figure 30. Optional TL7600 Cordless Headset
Page 50
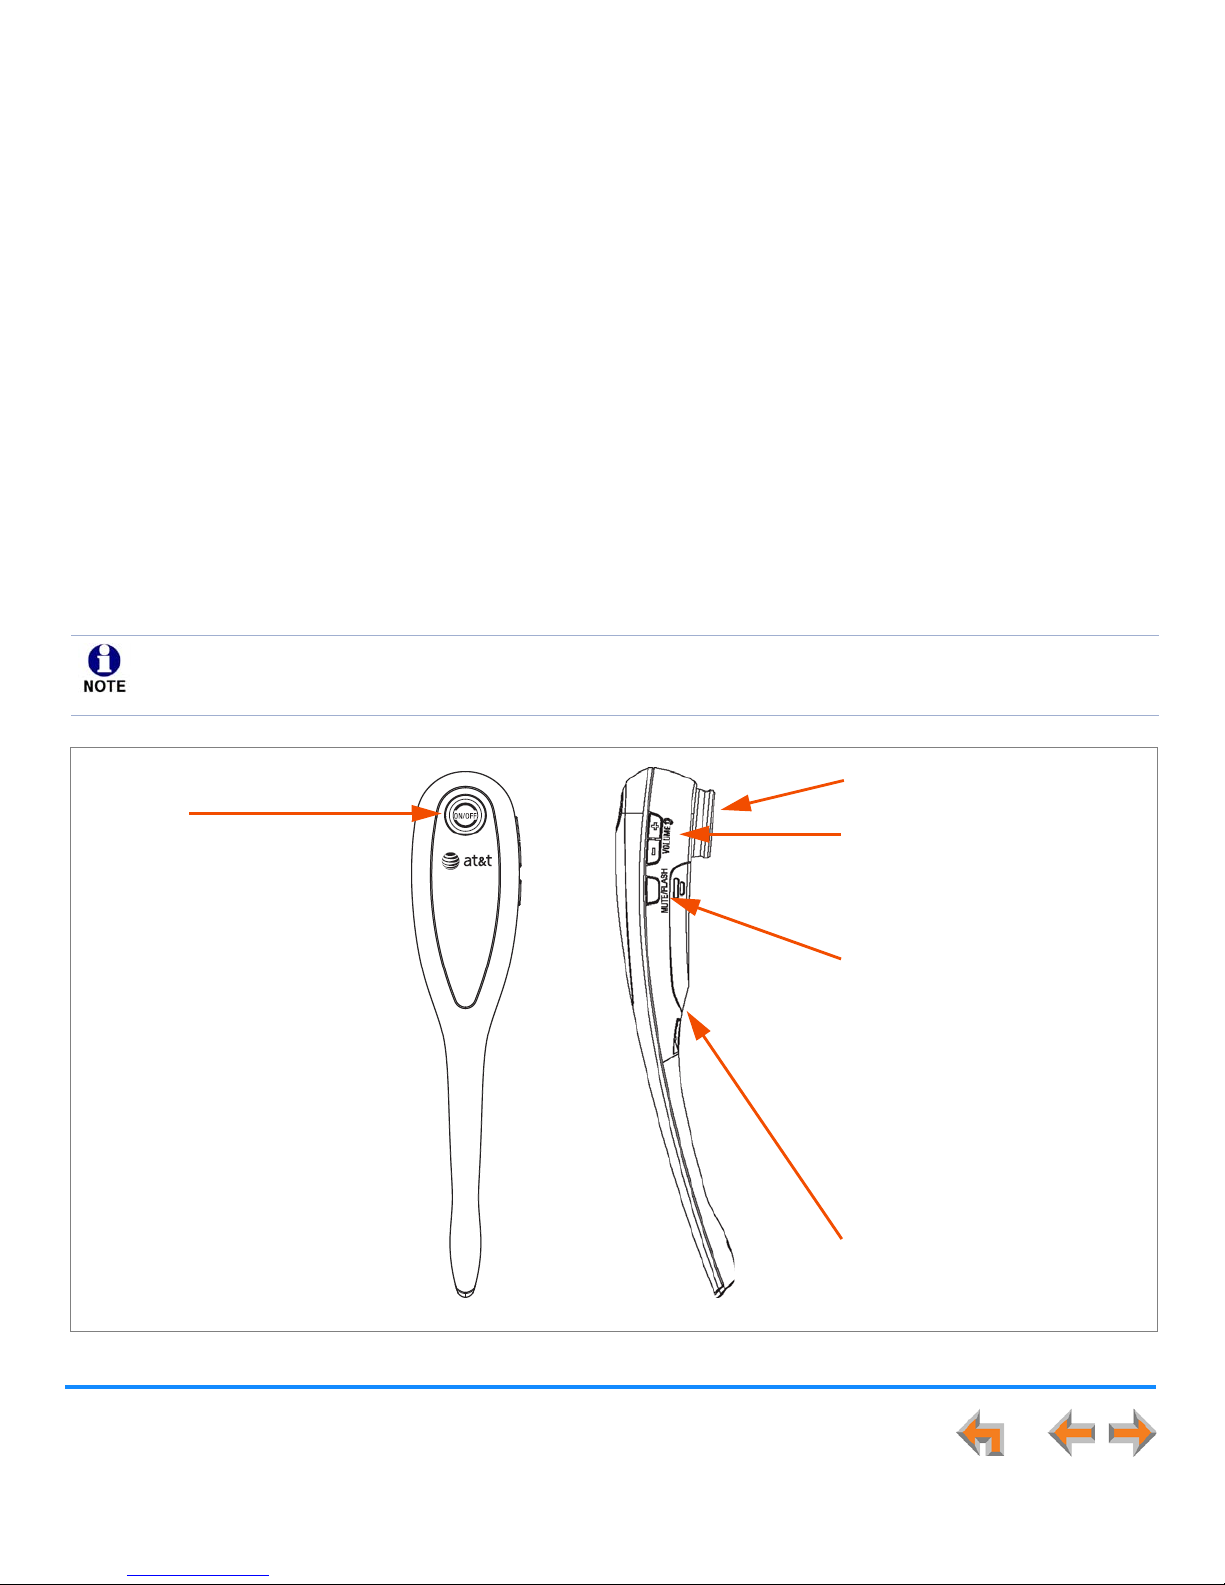
Overview 50
Synapse SB67030/031 Deskset and Accessories User’s Guide
Cordless Headset Description
Figure 31. TL7600 Cordless Headset Features
The registration process described in the manual that comes with the Cordless Headset is not appropriate for the Deskset,
which requires a different process. The correct process is described in “To register the TL7600 Cordless Headset:” on
page 212.
VOLUME +/–
Press the volume key on the side
of the Headset to adjust the
listening volume when on a call.
Earpiece
ON/OFF
Press to make and/or answer
a call, and to end a call.
The light is on when the
Headset is charging in the
Headset charger.
The light flashes slowly when
you are on a call and flashes
quickly when there is an
incoming call.
NOTE: To answer a call while
you are already on a call,
press ON/
OFF. The first call is
dropped. Press ON/
OFF to
answer the next call.
MUTE/FLASH
Press to mute the microphone
during a call. The Headset beeps
every 10 or 15 seconds while
you are on hold.
Press to mute the ringtone in the
earpiece when there is an
incoming call.
FLASH is inoperative with the
SB67030/031 Deskset.
Battery Cover
Open to install or replace the
battery.
Page 51
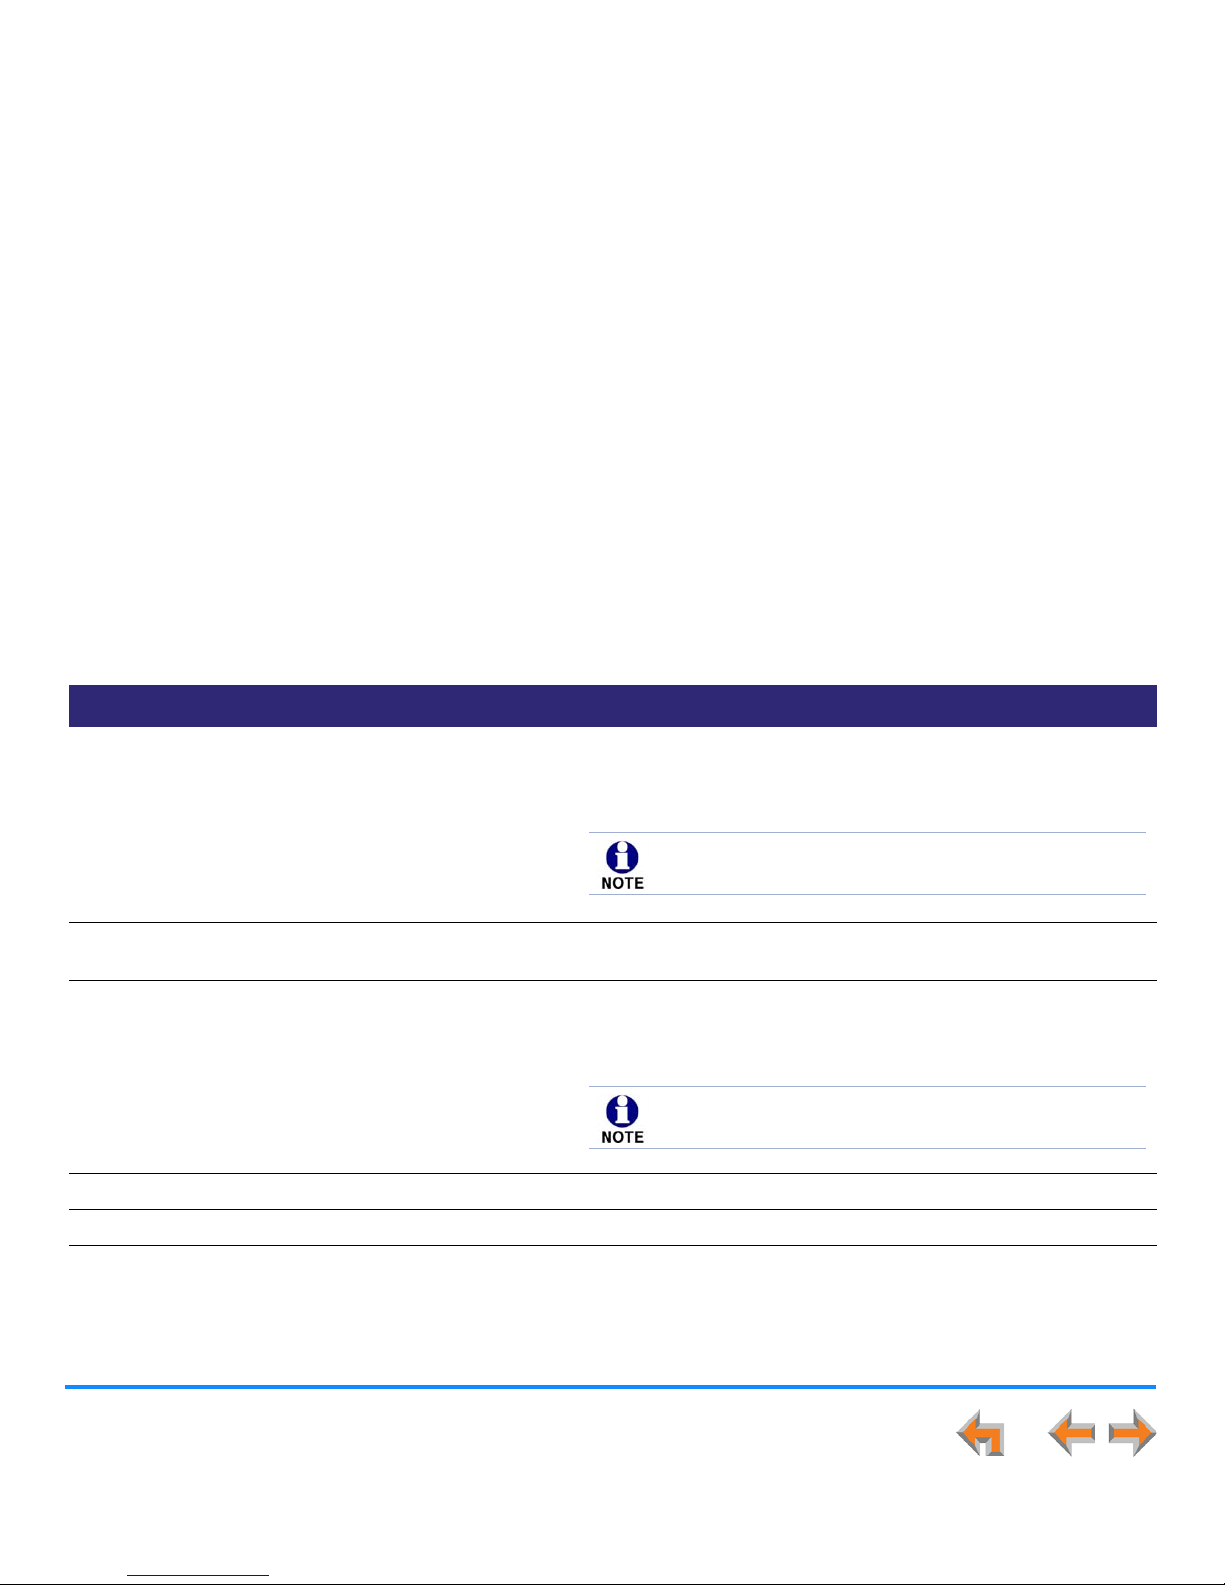
Overview 51
Synapse SB67030/031 Deskset and Accessories User’s Guide
Cordless Headset Operation
Table 8. TL7600 Cordless Headset Operation
Function Description Operation
Ringtone silencing Press MUTE/FLASH to temporarily silence the ringtone in the
Headset earpiece. This silences the ringtone without
disconnecting the call. The next incoming call rings normally at
the preset volume.
Volume control While on a call, press the VOLUME +/– keys on the side of the
Headset to adjust the listening volume.
Mute Press MUTE/
FLASH to turn the Headset microphone on or off.
When mute is on, there is a short beep every 10 or 15 seconds
until mute is turned off. The SB67030/031 Deskset does not
support the flash feature.
Answering a call Press ON/
OFF on the Headset.
Ending a call Press
ON/OFF on the Headset.
Auto off A call ends automatically when you put the Headset in the
charger.
The Headset does not have an external ringer. When you
receive calls, the Headset earpiece plays a ringtone.
The MUTE button on the Deskset does not mute the
Cordless Headset.
Page 52

Overview 52
Synapse SB67030/031 Deskset and Accessories User’s Guide
Alert tones Three short beeps. VOLUME +/– keys are pressed when the volume is already at
its highest or lowest setting.
The Headset is not registered and the Headset ON/OFF
button was pressed.
The Headset has gone out of range from the Deskset during a
call.
Low battery warning 1 short beep every 20 seconds. Battery getting low.
Key beep 1 short beep. When the Headset ON/OFF key is pressed to start or end a call.
ON/OFF light status On. Headset is registered to the Deskset and is charging in the
Headset charger.
Flashes quickly. There is an incoming call.
Flashes three times followed by
a pause, then repeats this cycle
three more times and then shuts
down.
The battery level is very low.
Flashes twice in orange and blue
every five seconds.
The Headset is not registered.
Flashes every 20 seconds. The battery is low and needs to be charged in the Headset
charger.
Flashes every three seconds. The Headset is in use.
Table 8. TL7600 Cordless Headset Operation (Continued)
Function Description Operation
Page 53
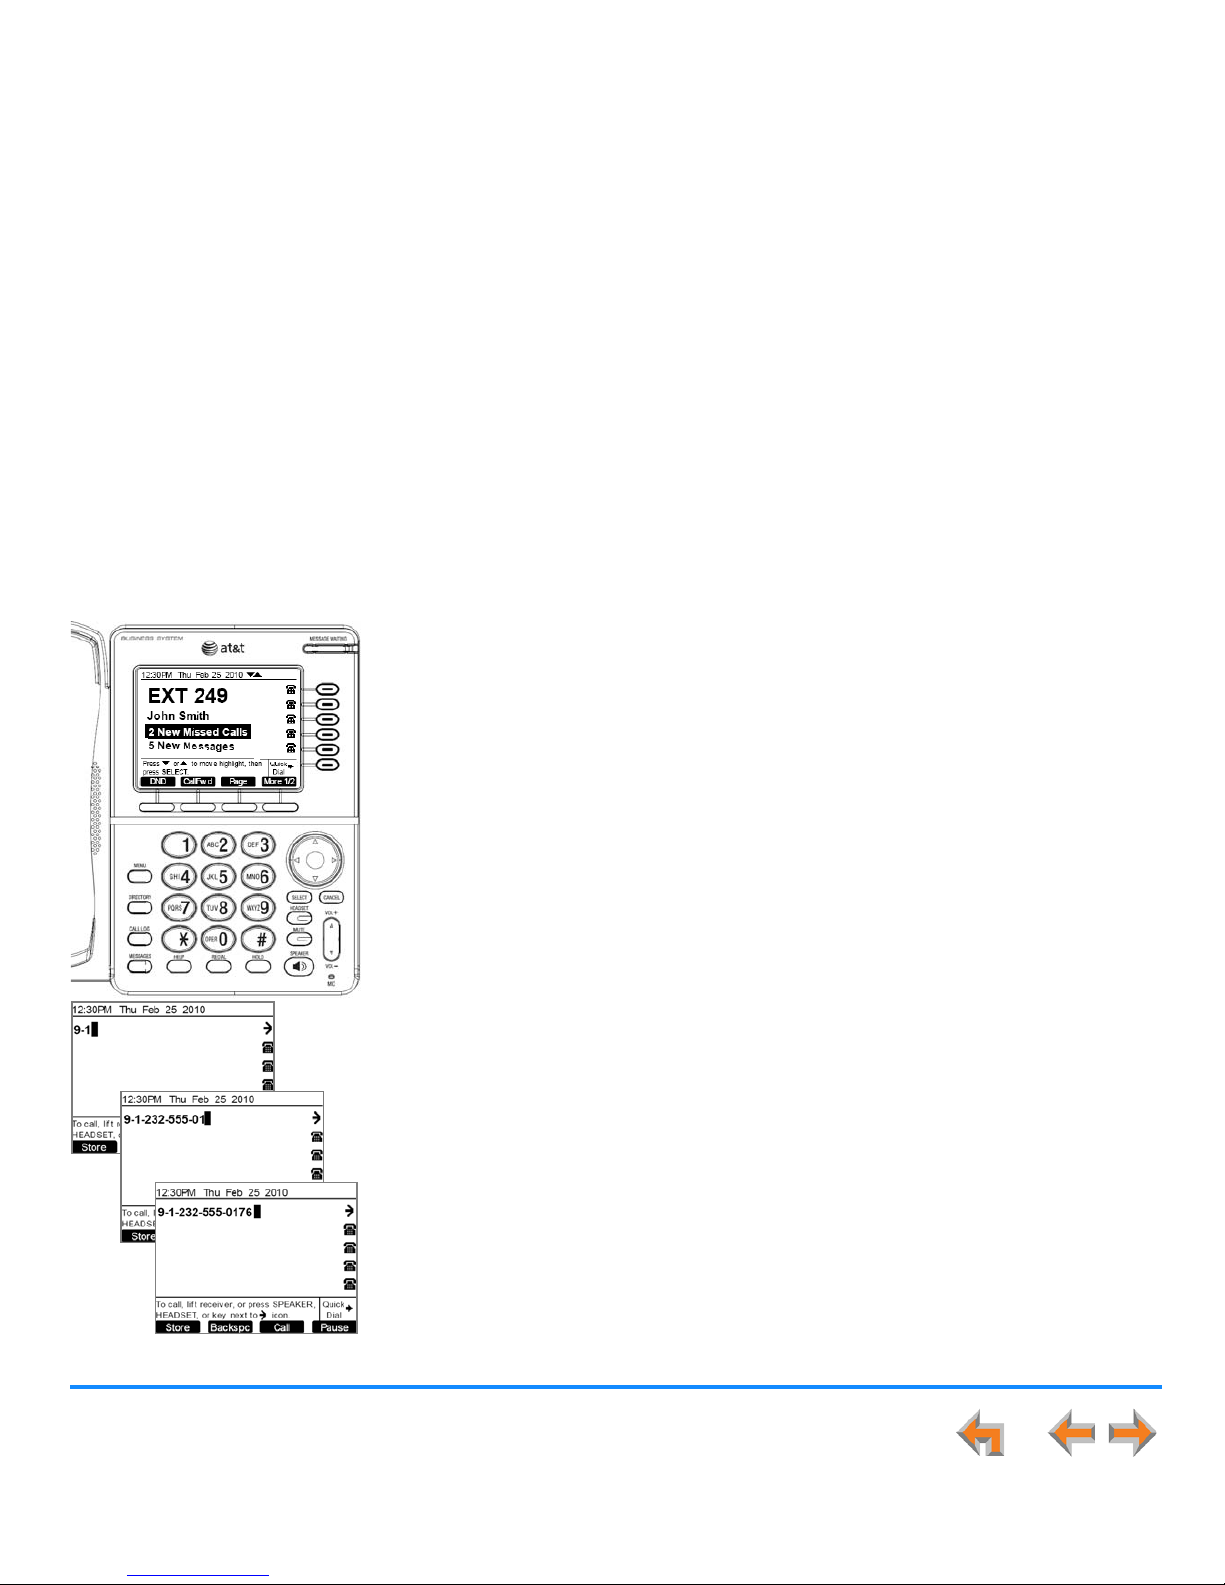
Synapse SB67030/031 Deskset and Accessories User’s Guide
Outgoing Calls 53
C HAPTER
2
O
UTGOING CALLS
The Deskset and the optional SB67040 Cordless Handset provide several methods for making
a call. You can also use the optional TL7600 Cordless Headset to complete a call that you
dialed on the Deskset or Cordless Handset. If you have an analog telephone such as a
conference phone connected via an optional Analog Terminal Adapter (ATA), you can make
basic phone calls with that telephone.
If you are in Idle mode or have calls on hold, you can predial a phone number and then go
off hook to call the number. You can make a call at any time by choosing an off-hook method,
then dialing a number. This is referred to as Live Dialing. You can also predial or live dial using
phone numbers from lists, such as the Directory, Call Log, Redial, Quick Dial, and Messages.
In Call Appearance mode, you can dial the extension for the system operator by pressing 0
(zero).
“Active Call Screen” on page 54
“Predialing” on page 55
“Live Dialing” on page 56
“Making a Call from a List” on page 57
“Making an Intercom Call (Line Appearance Mode)” on page 58
“Making Calls with the Cordless Handset” on page 59
“Making Calls with the Optional TL7600 Cordless Headset” on page 62.
Page 54
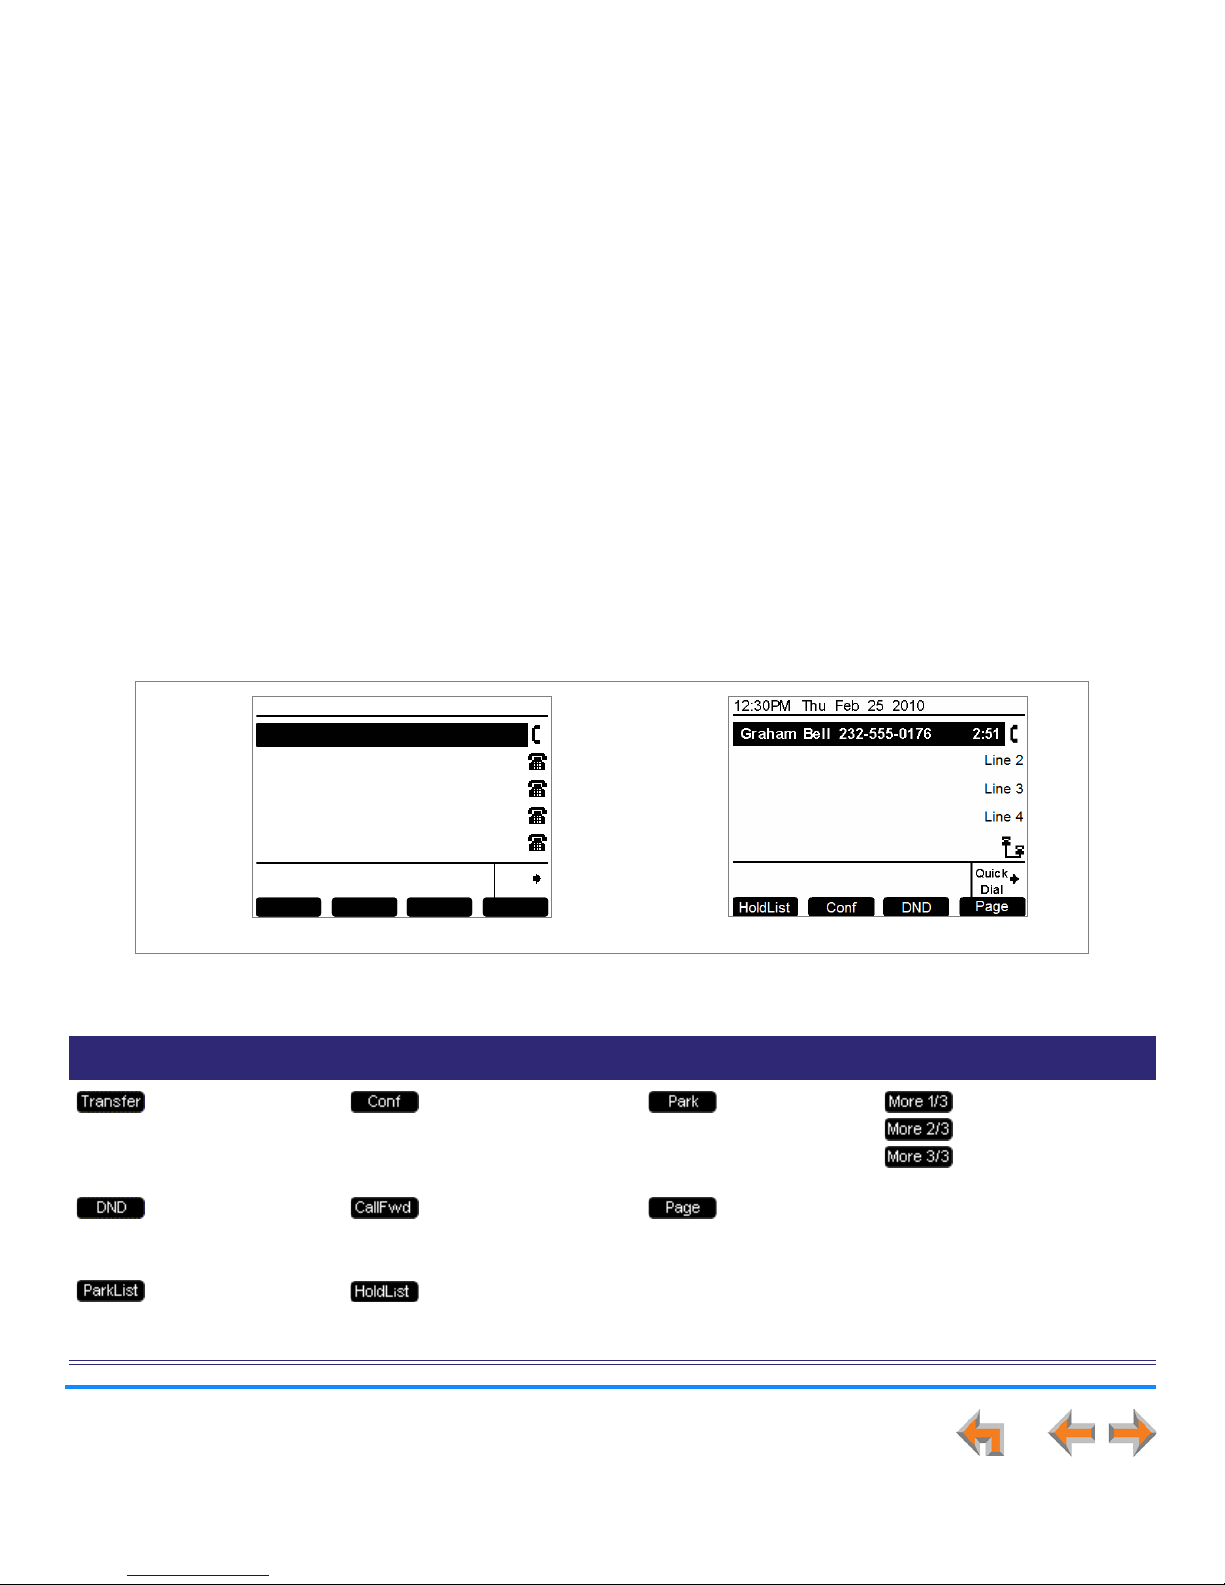
Outgoing Calls 54
Synapse SB67030/031 Deskset and Accessories User’s Guide
Active Call Screen
The Active Call screen, as shown in Figure 32, appears while you are on a call.
Table 9. Active Call Screen Description
Key Description Key Description Key Description Key Description
Call Appearance
mode only—Begins
transfer of a call.
Begins a conference
call.
Call
Appearance
mode only—
Parks a call.
Call Appearance
mode only—Moves
to the next set of
soft keys. More 1/3
indicates that you
are on page one of
three.
Turns Do Not
Disturb on or off.
Call Appearance
mode only—Turns
Call Forward on or off.
Pages all
extensions.
Call Appearance
mode only—
Accesses Park list.
Line Appearance
mode only—Access
the Held Calls list.
Transfer
Quick
Dial
12:30PM Thu Feb 25 2010
Graham Be ll 232-555-0176 2:51
Transfer Con f Pa r k Mor e 1/ 3
Figure 32. Active Call Screen
Call Appearance Mode
Line Appearance Mode
Page 55
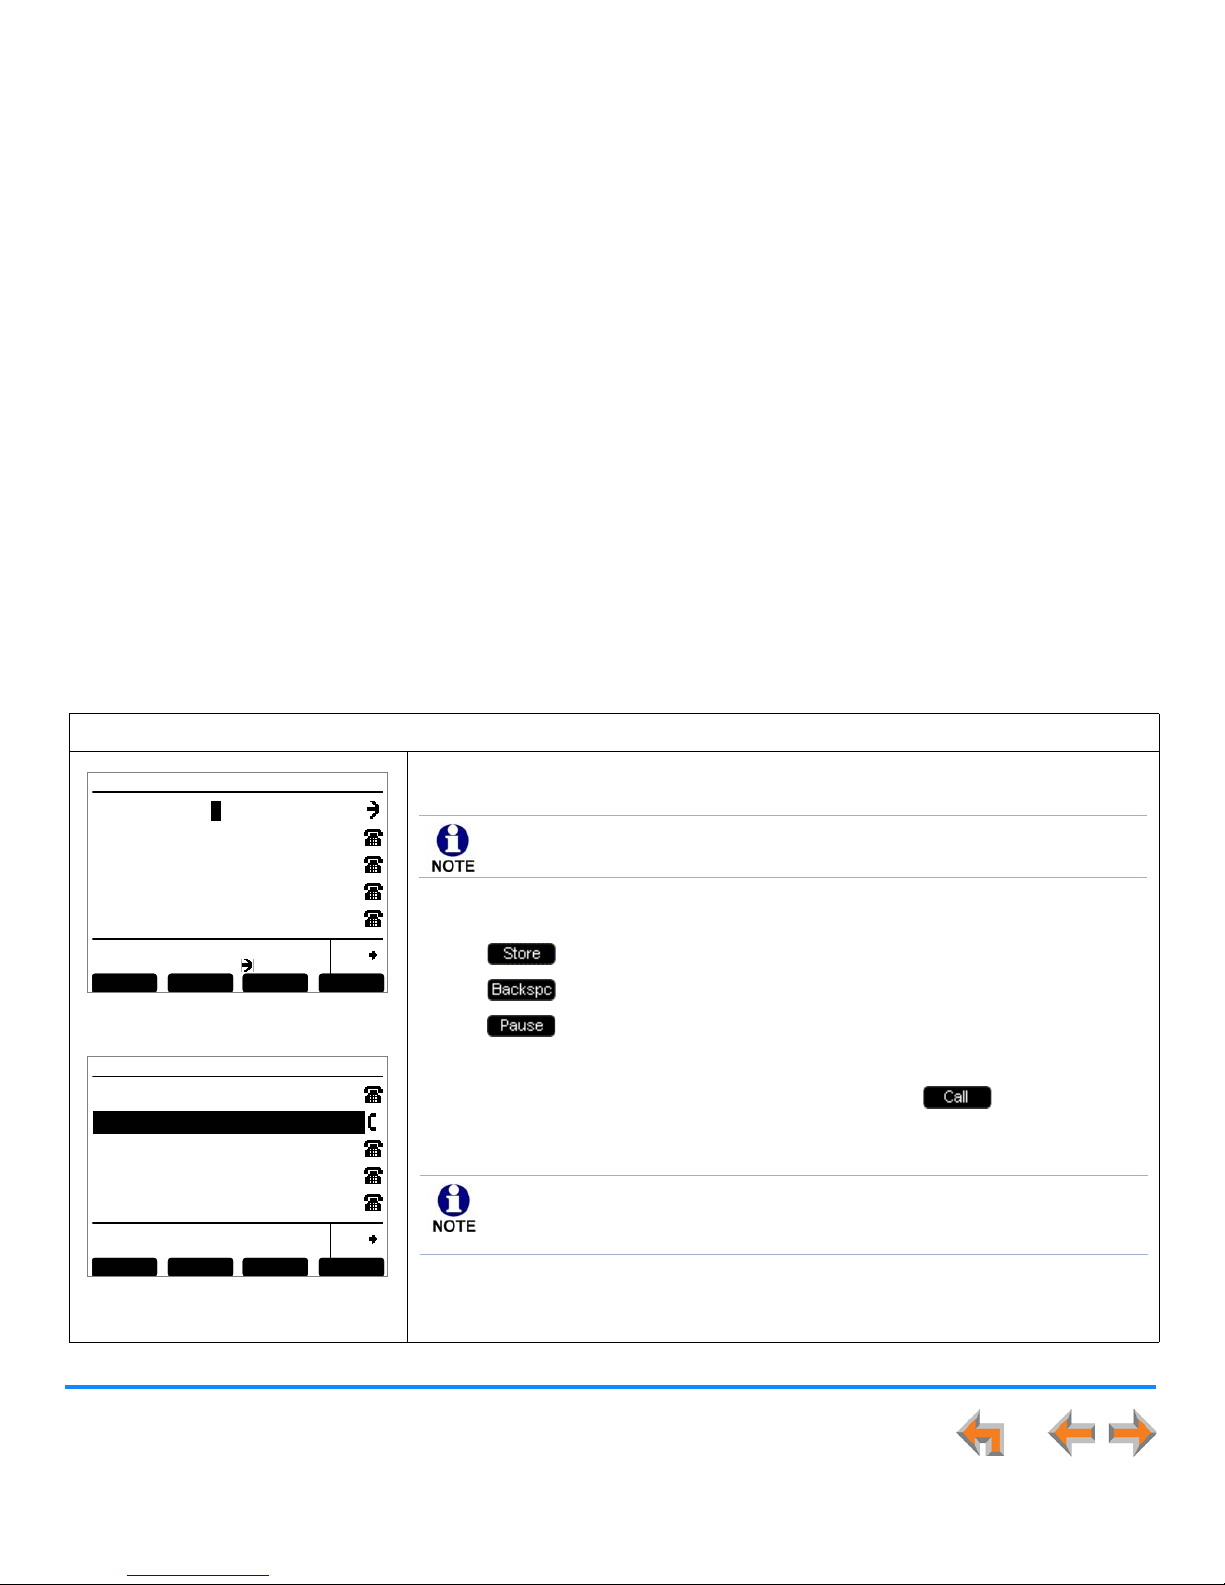
Outgoing Calls 55
Synapse SB67030/031 Deskset and Accessories User’s Guide
Predialing
Predial is only available when the Deskset is idle or when all calls are on hold. In Predial mode, there is no dial tone. You can
only predial one phone number at a time. To begin Predial, press a dial-pad key.
To make a Predial call:
Figure 33. Predial Number
Figure 34. Active Call
1. Enter the phone number (for example: 9-1-232-555-0176) using the dial pad, as
shown in Figure 33 (Call Appearance mode shown).
Before you call the number, you can press:
to store the number in your Personal list.
to delete the last digit entered.
to insert a two-second pause into the phone number.
CANCEL to cancel predial.
2. Lift the corded handset, or press SPEAKER, HEADSET, , or a Call
Appearance or Line Appearance key to go off hook and call the number, as shown
in Figure 34.
To do this with the Cordless Handset, see “Predialing” on page 60.
Transf er
Quick
Dial
12:30PM Thu Feb 25 2010
9-1-232-555-01
BackspcStore
To call, lif t receiv er, or pres s SPEAKER,
HEADSET, or key next to icon.
Call Pa u s e
Transfer
Quick
Dial
12:30PM Thu Feb 25 2010
Transfer Con f Pa r k
Graham Be ll 9-1-232-555-0176 2:51
Mor e 1/3
Call Appearance mode only—For outside calls, dial 9 or whatever digit, if any,
that must be dialed first. The hyphens appear automatically.
When you predial more digits than can be displayed, the digits move to the
left so that the most recently dialed digits can be seen. Three dots appear to
indicate that the earliest digits are no longer visible.
Page 56
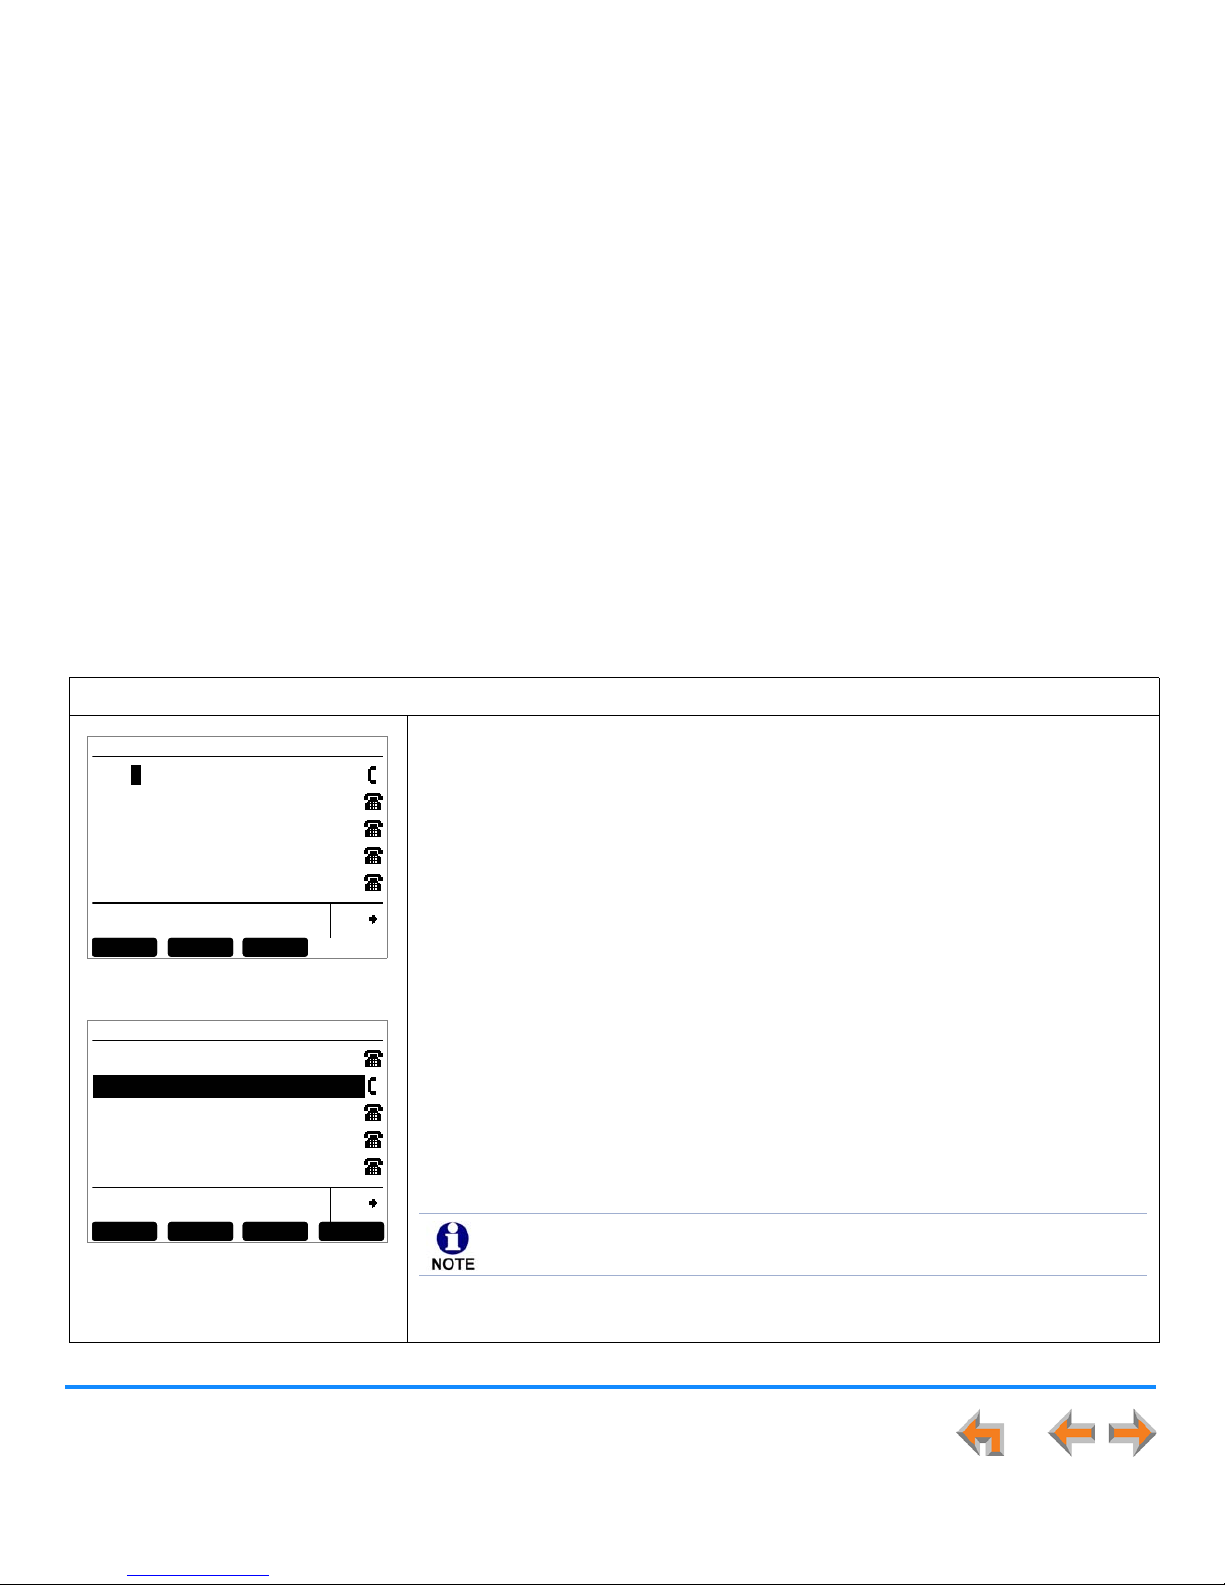
Outgoing Calls 56
Synapse SB67030/031 Deskset and Accessories User’s Guide
Live Dialing
You can make a call at any time by going off hook, then dialing a phone number.
To dial a live number:
Figure 35. Entering Digits
Figure 36. Active Call
1. Do one of the following to go off hook (to hear the dial tone) from Idle mode:
Lift the corded handset.
Press SPEAKER or HEADSET.
Press an available Call Appearance or Line Appearance key.
2. Enter the number you want to dial, as shown in Figure 35 (Call Appearance mode
shown).
Call Appearance mode only—For outside calls, enter 9 or whatever digit, if
any, that must be dialed first.
Hyphens are automatically inserted except when whatever digit, if any, which
must be dialed for outside call s is fo llo wed by a 0 for an outgoing international
call.
When you dial more digits than can be displayed, the digits move to the left
so that the most recently dialed digits can be seen. Three dots indicate that
the first digits are no longer visible.
The Active Call screen appears, as shown in Figure 36 (Call Appearance mode
shown).
To do this with the Cordless Handset, see “Live Dialing” on page 61.
Transfer
Quick
Dial
12:30PM Thu Feb 25 2010
9-1
Ex t L is t PagePa rk L is t
Transfer
Quick
Dial
12:30PM Thu Feb 25 2010
Transfer Con f Pa r k
Graham Be ll 9-1-232-555-0176 2:51
Mor e 1/3
When the active call begins, the soft keys change to a new set of options.
Page 57
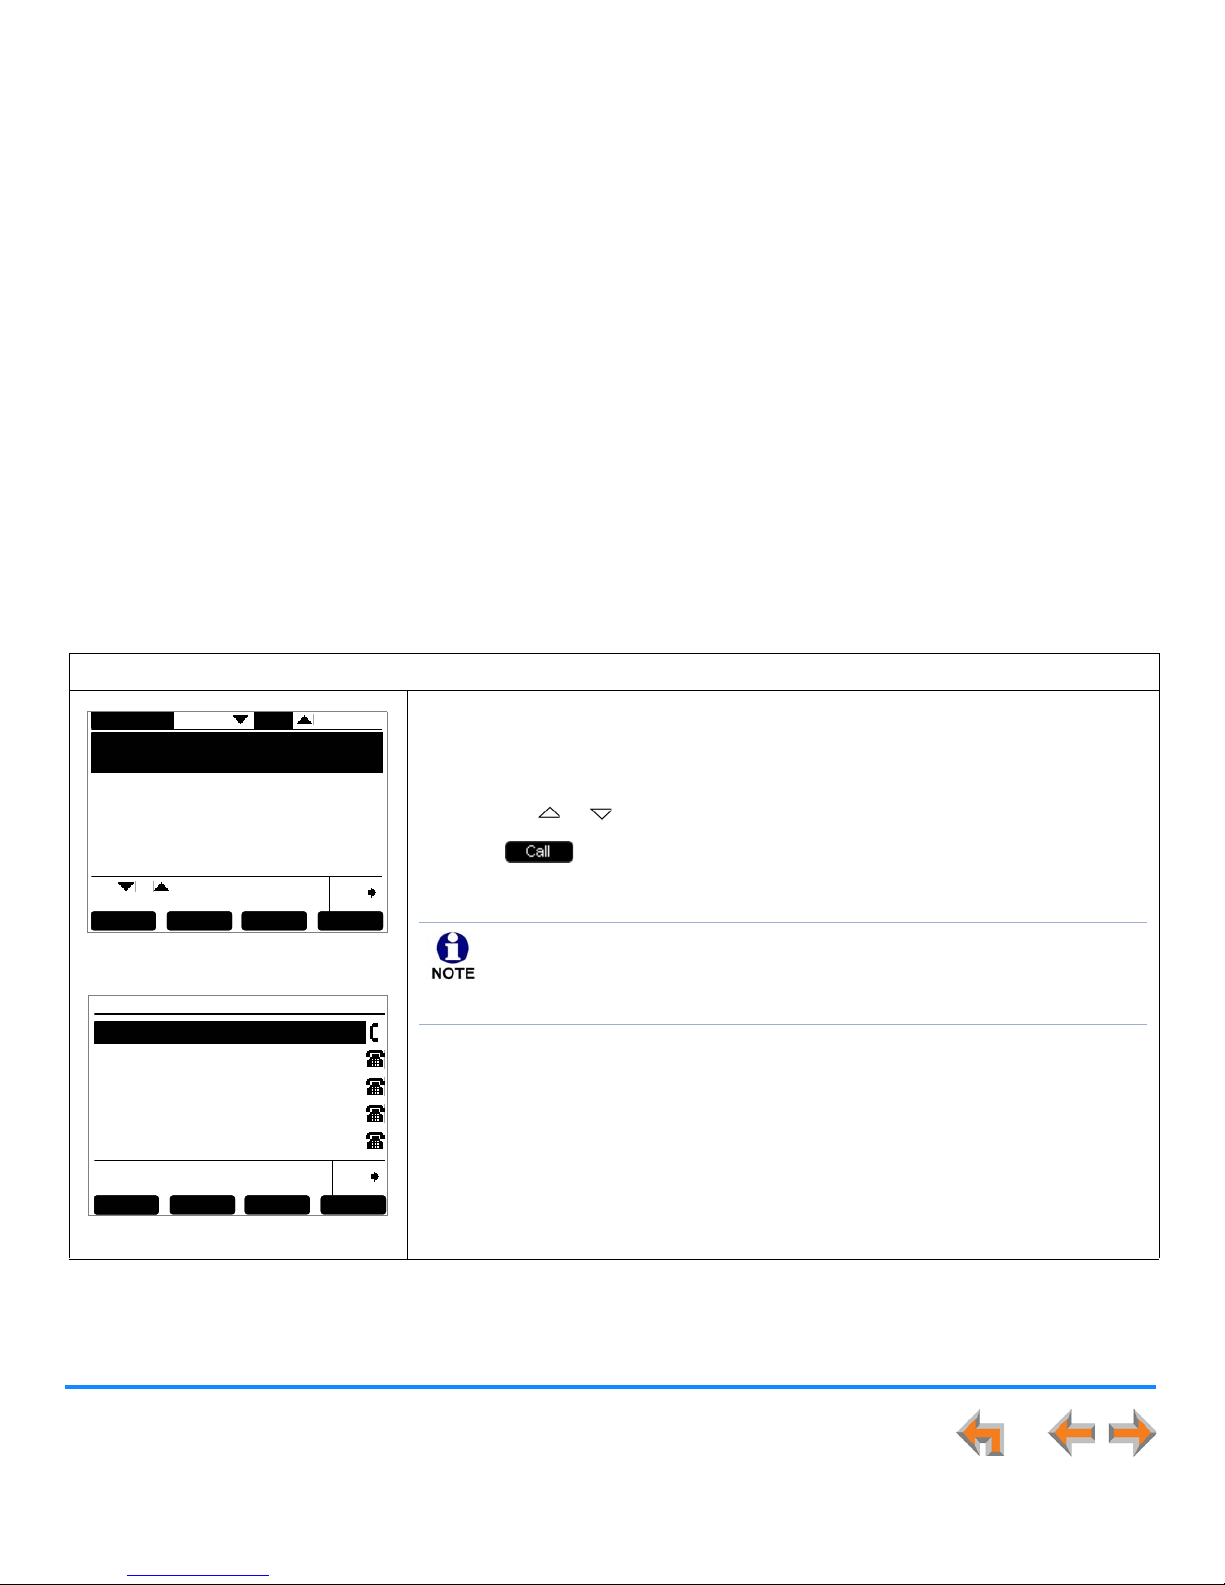
Outgoing Calls 57
Synapse SB67030/031 Deskset and Accessories User’s Guide
Making a Call from a List
To make a call from a list:
Figure 37. Directory
Figure 38. Active Call
1. Access the desired list entry. See “Accessing Items in Lists” on page 104.
For example, press DIRECTORY. The Directory screen appears, as shown in
Figure 37.
2. Press the or navigation key until you highlight the desired entry.
3. Press or SELECT to dial the highlighted number. The Deskset dials the
number and the Active Call screen appears, as shown in Figure 38 (Call
Appearance mode shown).
Mor e 1/3
Use or to scroll or use dial pad
f or quick s earch.
Quick
Dial
ABC Accountants Pe rs onal
9-503-555-0194
Amy Lee 203
Angela Martin 9-1-732-555-7318
Davis Caterer 9-1-317-555-0129
Charlie Johnson
9-1-888-883-2445
David Carter 9-1-443-555-0625
New
Directory 1/48
LastNme Call
Transfer
Quick
Dial
12:30PM Thu Feb 25 2010
Graham Be ll 232-555-0176 2:51
Transfer Con f Pa r k Mor e 1/ 3
Phone numbers are dialed as they appear in the lists. Call Appearance mode
only—For outside calls, enter 9 or whatever digit, if any, that must be dialed
before the phone number. When you dial from the Call Log, any required
outside calling prefix digit is automatically added.
Page 58
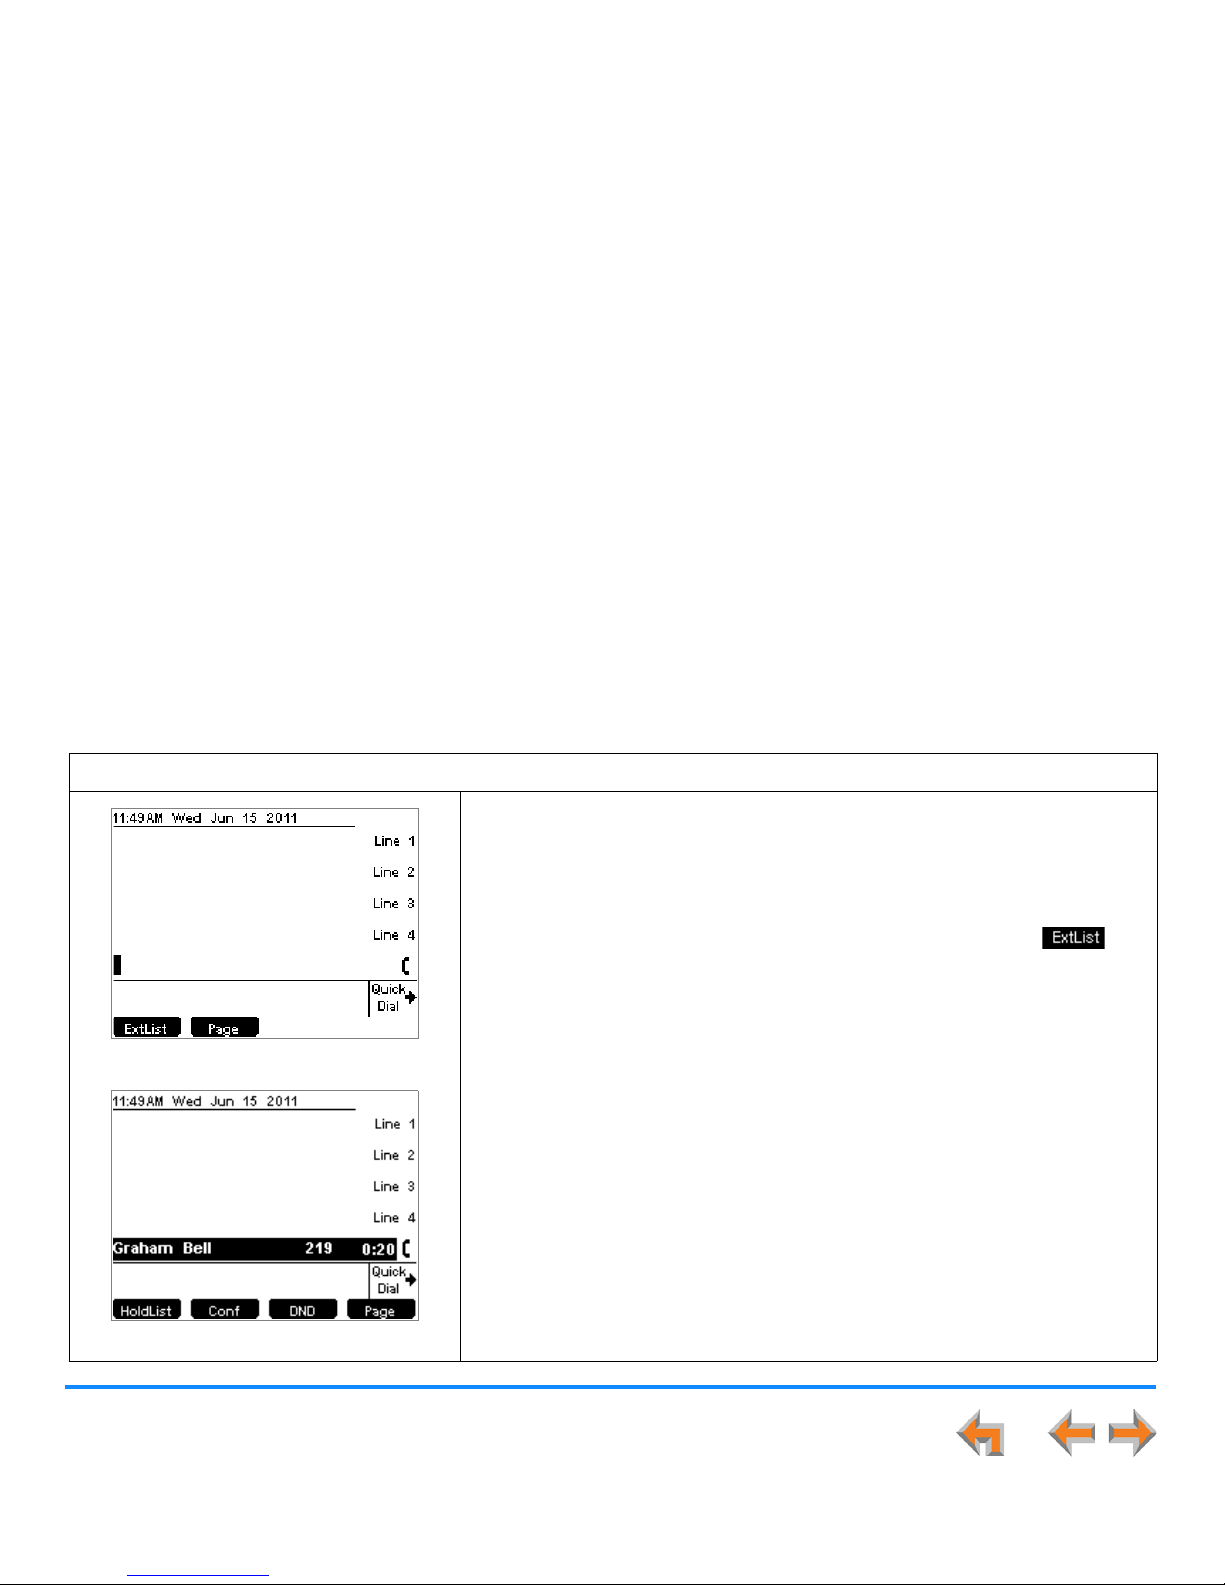
Outgoing Calls 58
Synapse SB67030/031 Deskset and Accessories User’s Guide
Making an Intercom Call (Line Appearance Mode)
In Line Appearance mode, your Deskset uses an outside line any time you go off hook by lifting the handset, pressing SPEAKER,
or by some other method. To make an internal (extension-to-extension) call, you must use the Intercom key. By default, key 5 is
the Intercom key, but your system administrator can configure additional Intercom keys to give you more Intercom lines.
To make an intercom call:
Figure 39. Making an Intercom Call
Figure 40. Active Intercom Call
1. With the Deskset in Idle mode and the handset “on hook,” do one of the
following:
Press the INTERCOM key, lift the handset (the screen shown in
Figure 39 appears) then dial the extension number.
Instead of dialing after lifting the handset, you can press the soft
key, highlight the desired extension number, then press SELECT to dial
the number.
Dial the extension number, then press the INTERCOM key.
The Deskset dials the extension in Speakerphone mode. To continue the
call using the handset, pick up the handset.
When your Intercom call is answered, the Active Call screen appears, as
shown in Figure 40.
Page 59
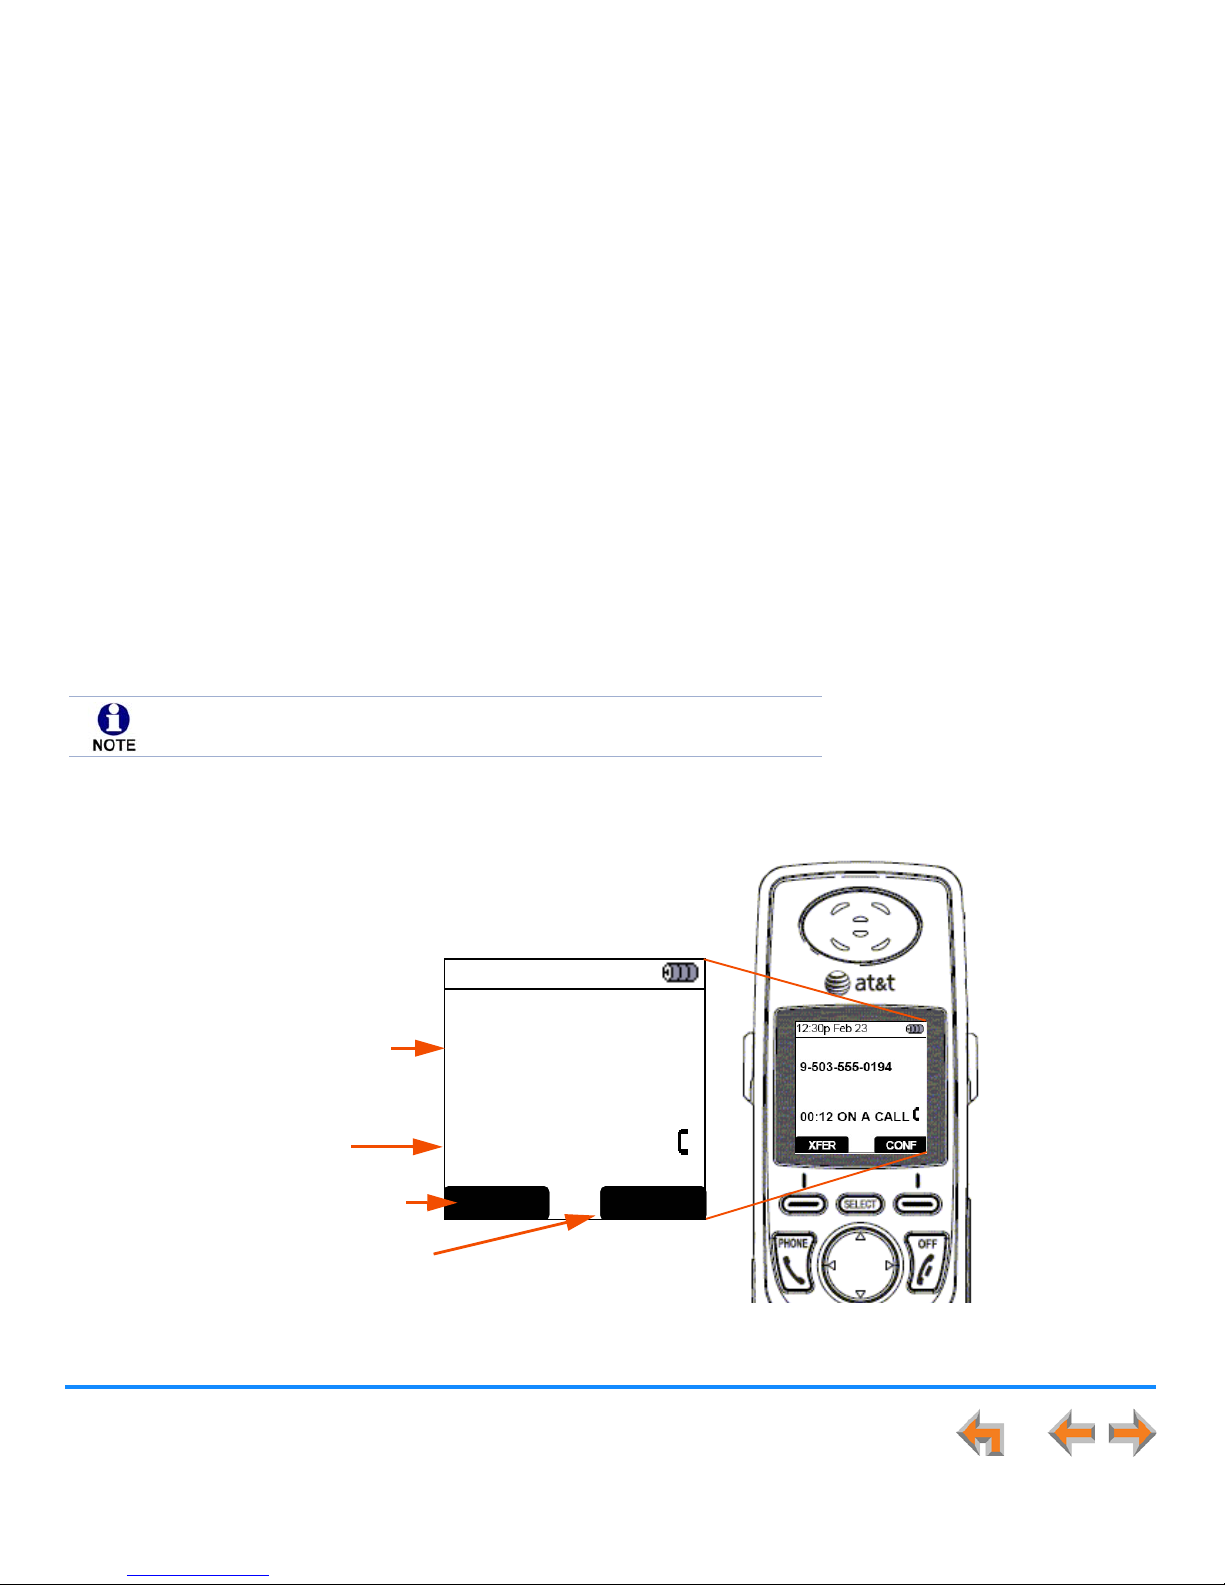
Outgoing Calls 59
Synapse SB67030/031 Deskset and Accessories User’s Guide
Making Calls with the Cordless Handset
You can also make calls with the optional SB67040 Cordless Handset.
Active Call Screen
The Active Call screen, as shown in Figure 41, appears while you are on a call.
Figure 41. Active Call Screen
Cordless Handset operation is compatible with Call Appearance mode only.
12:30p Feb 23
9-503-555-0194
00:12 ON A CALL
XFER CONF
Phone number
Call timer
Press to transfer
the call
Press to conference
the call
Page 60
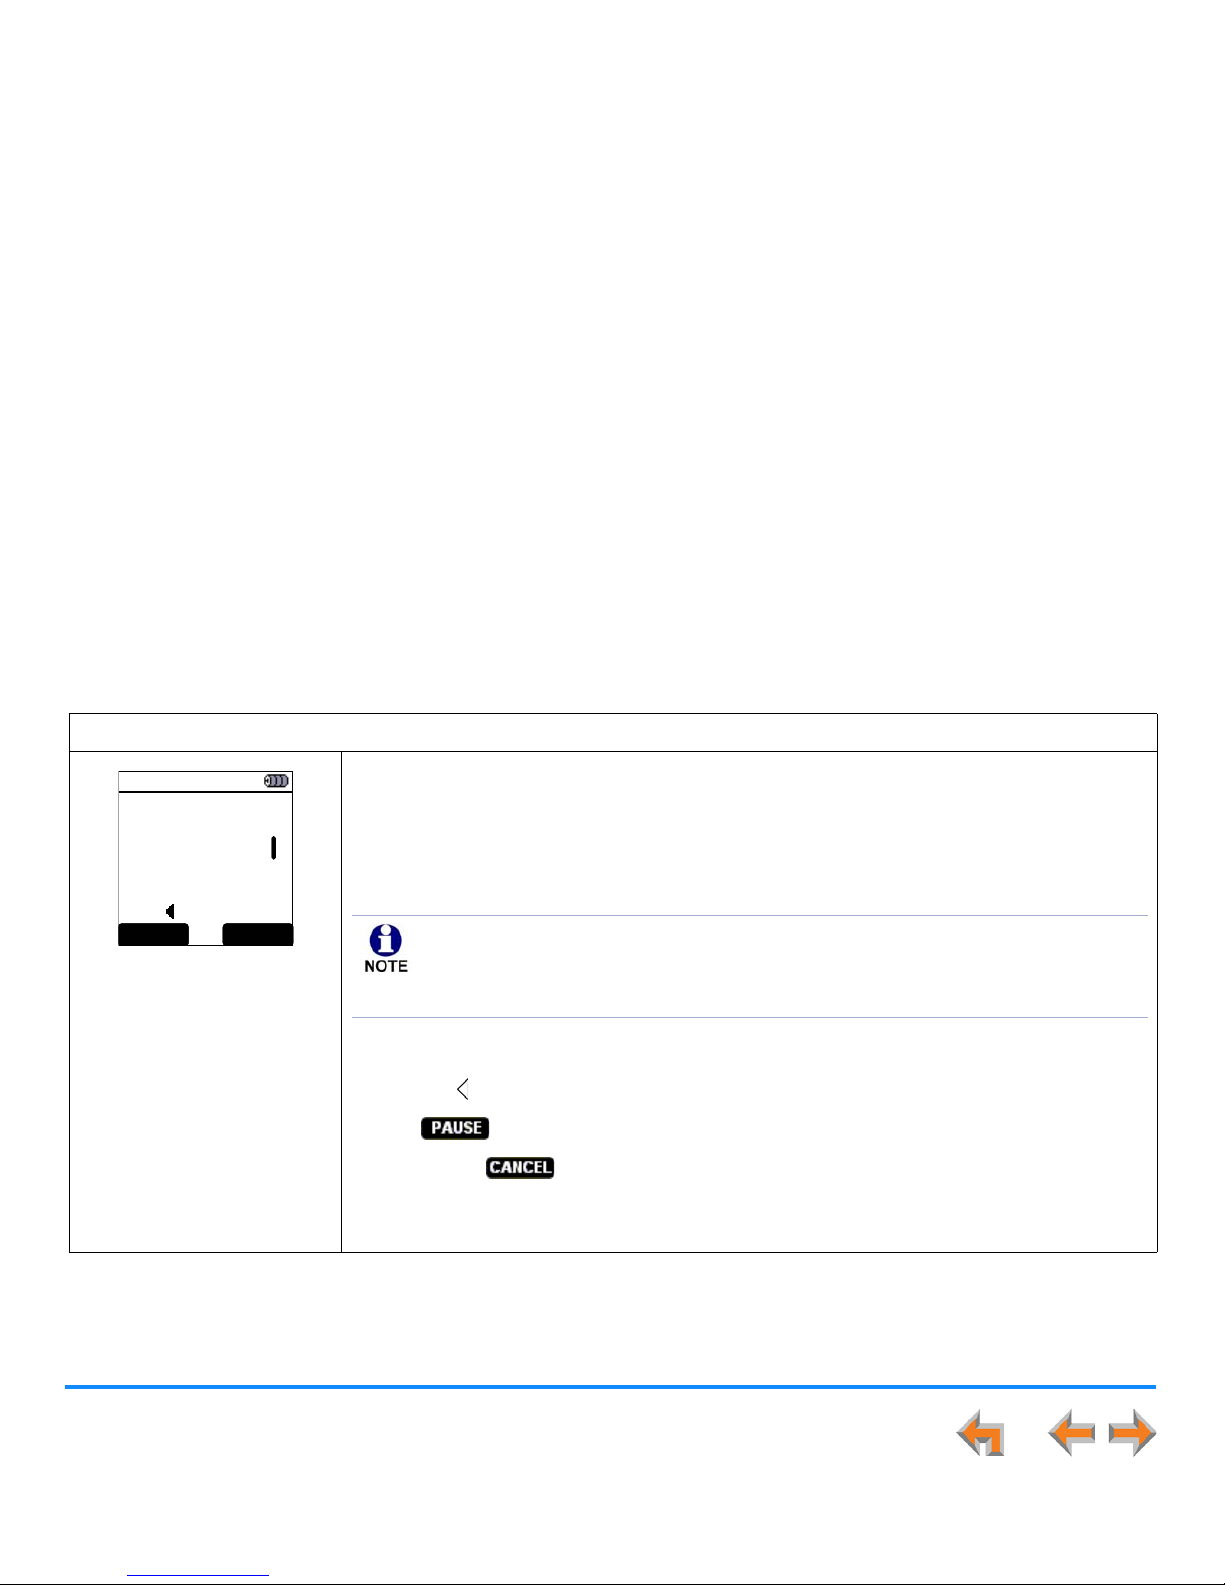
Outgoing Calls 60
Synapse SB67030/031 Deskset and Accessories User’s Guide
Predialing
You can dial a phone number before pressing PHONE or SPEAKER. Pressing a dial-pad key initiates Predial mode. In this mode,
the Handset produces no dial tone. You can also predial from a list.
To Predial a call:
Figure 42. Predial Mode
1. Enter the phone number using the dial-pad, as shown in Figure 42. (For outside calls, dial 9
or whatever digit, if any, that must be dialed first).
OR
Access a phone number from any of the lists described in “Accessing and Managing Items
in Lists with the Cordless Handset” on page 121.
Before you call the number, you can press:
The navigation key to delete a digit and move the cursor back one space.
to insert a two-second pause. The pause appears as a P in the phone number.
OFF or to clear all digits. The Idle screen appears.
2. Press PHONE or SPEAKER to dial the Predial digits.
12:30p Feb 23
9-1-706-555-016
Press to backspace
CANCELPAUSE
For outside phone numbers in Voicemail and CID lists, Synapse dials whatever digit, if
any, must be dialed first and then dials the number in the display. Therefore, numbers
that need editing (adding a preceding 1 or a country code, or removing the area code)
cannot be dialed from Voicemail.
Page 61
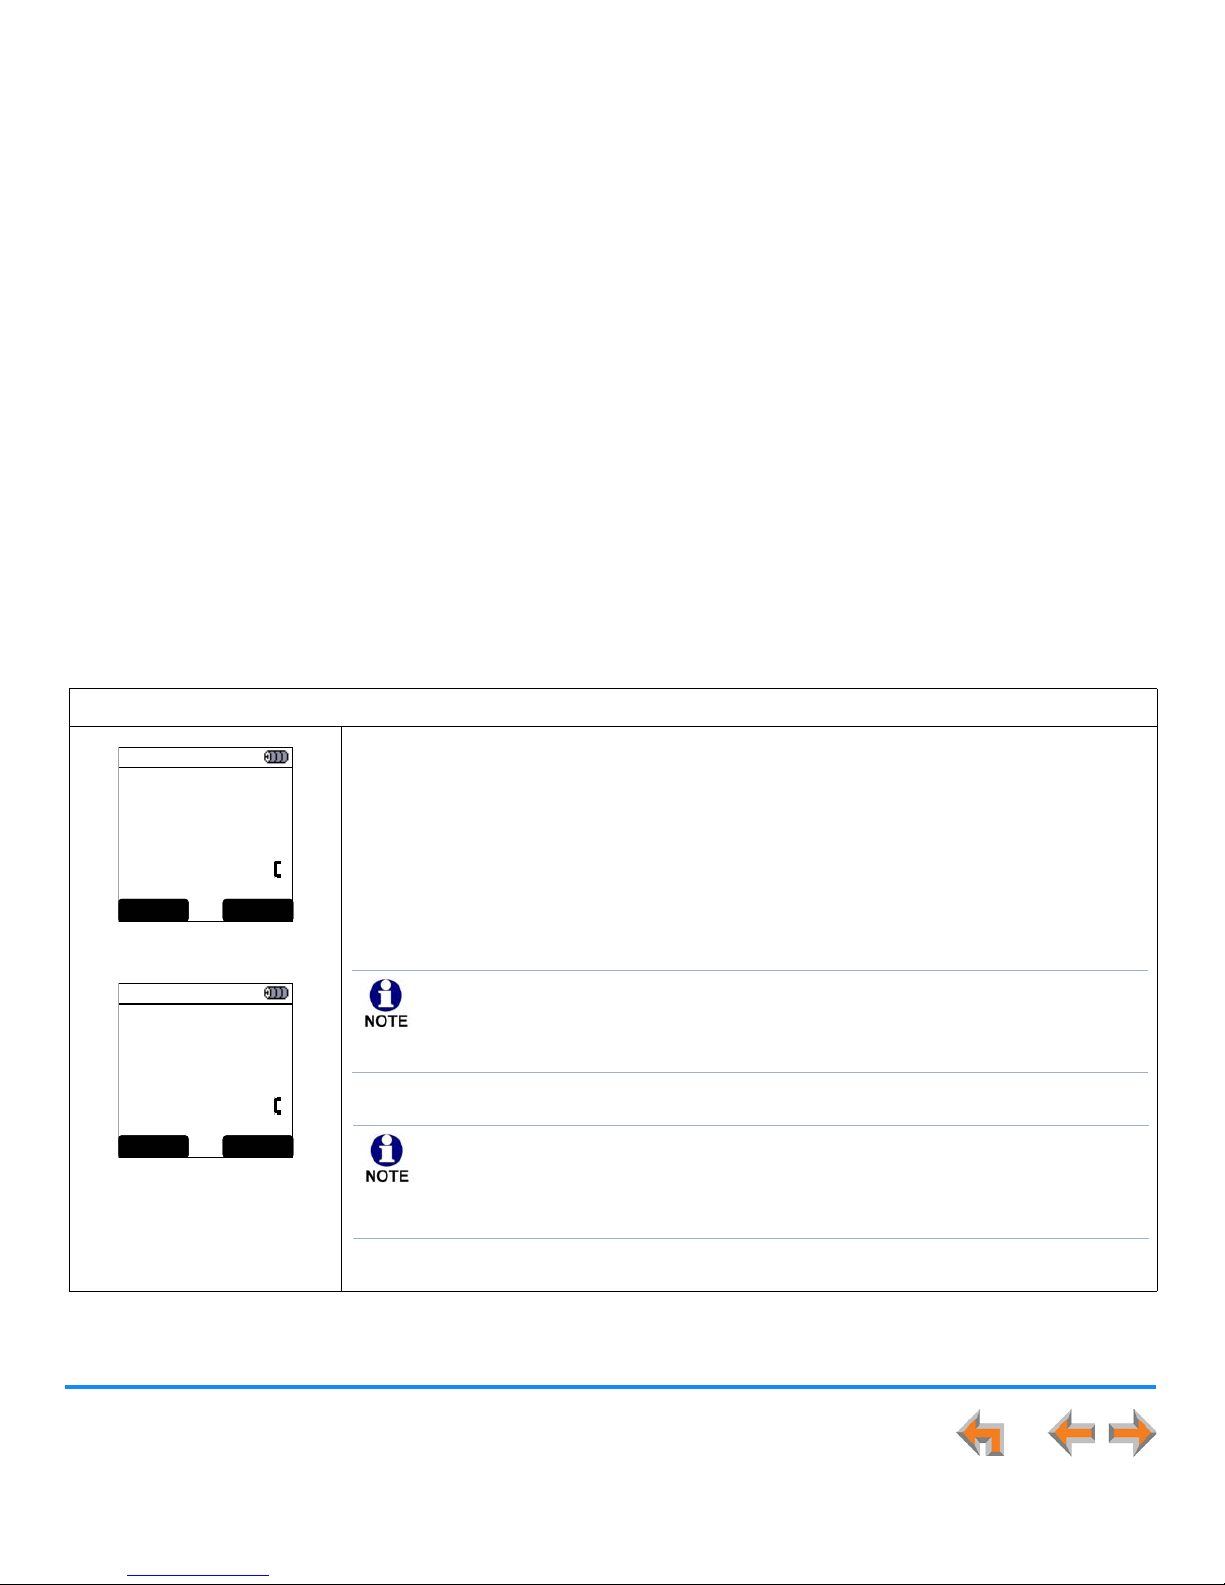
Outgoing Calls 61
Synapse SB67030/031 Deskset and Accessories User’s Guide
Live Dialing
Live dialing refers to dialing when the phone is already off hook (when there is already a dial tone).
To make a call off hook:
Figure 43. Live Dial Mode
Figure 44. Active Call
1. Press PHONE or SPEAKER to initiate a call, as shown in Figure 43.
You are now off hook and hear a dial tone.
2. Enter the number you want to dial. (For outside calls, dial 9 or whatever digit, if any, that
must be dialed first).
OR
Access a phone number from any of the lists described in “Accessing and Managing Items
in Lists with the Cordless Handset” on page 121.
The Active Call screen shown in Figure 44 appears.
EX T _# s CID
12:30p Feb 23
ON A CALL
12:30p Feb 23
9-503-555-0194
00:12 ON A CALL
XFER CONF
For outside phone numbers in Voicemail and CID lists, Synapse dials whatever digit, if
any, must be dialed first and then dials the number in the display. Therefore, numbers
that need editing (adding a preceding 1 or a country code, or removing the area code)
cannot be dialed from Voicemail.
After the Cordless Handset determines from the dialed number that this is an outside
call, or after a system extension answers, the soft keys change, as shown in Figure 44.
Hyphens are automatically inserted except when whatever digit, if any, which must be
dialed for outside calls is followed by a 0 (zero) for an international call.
Page 62
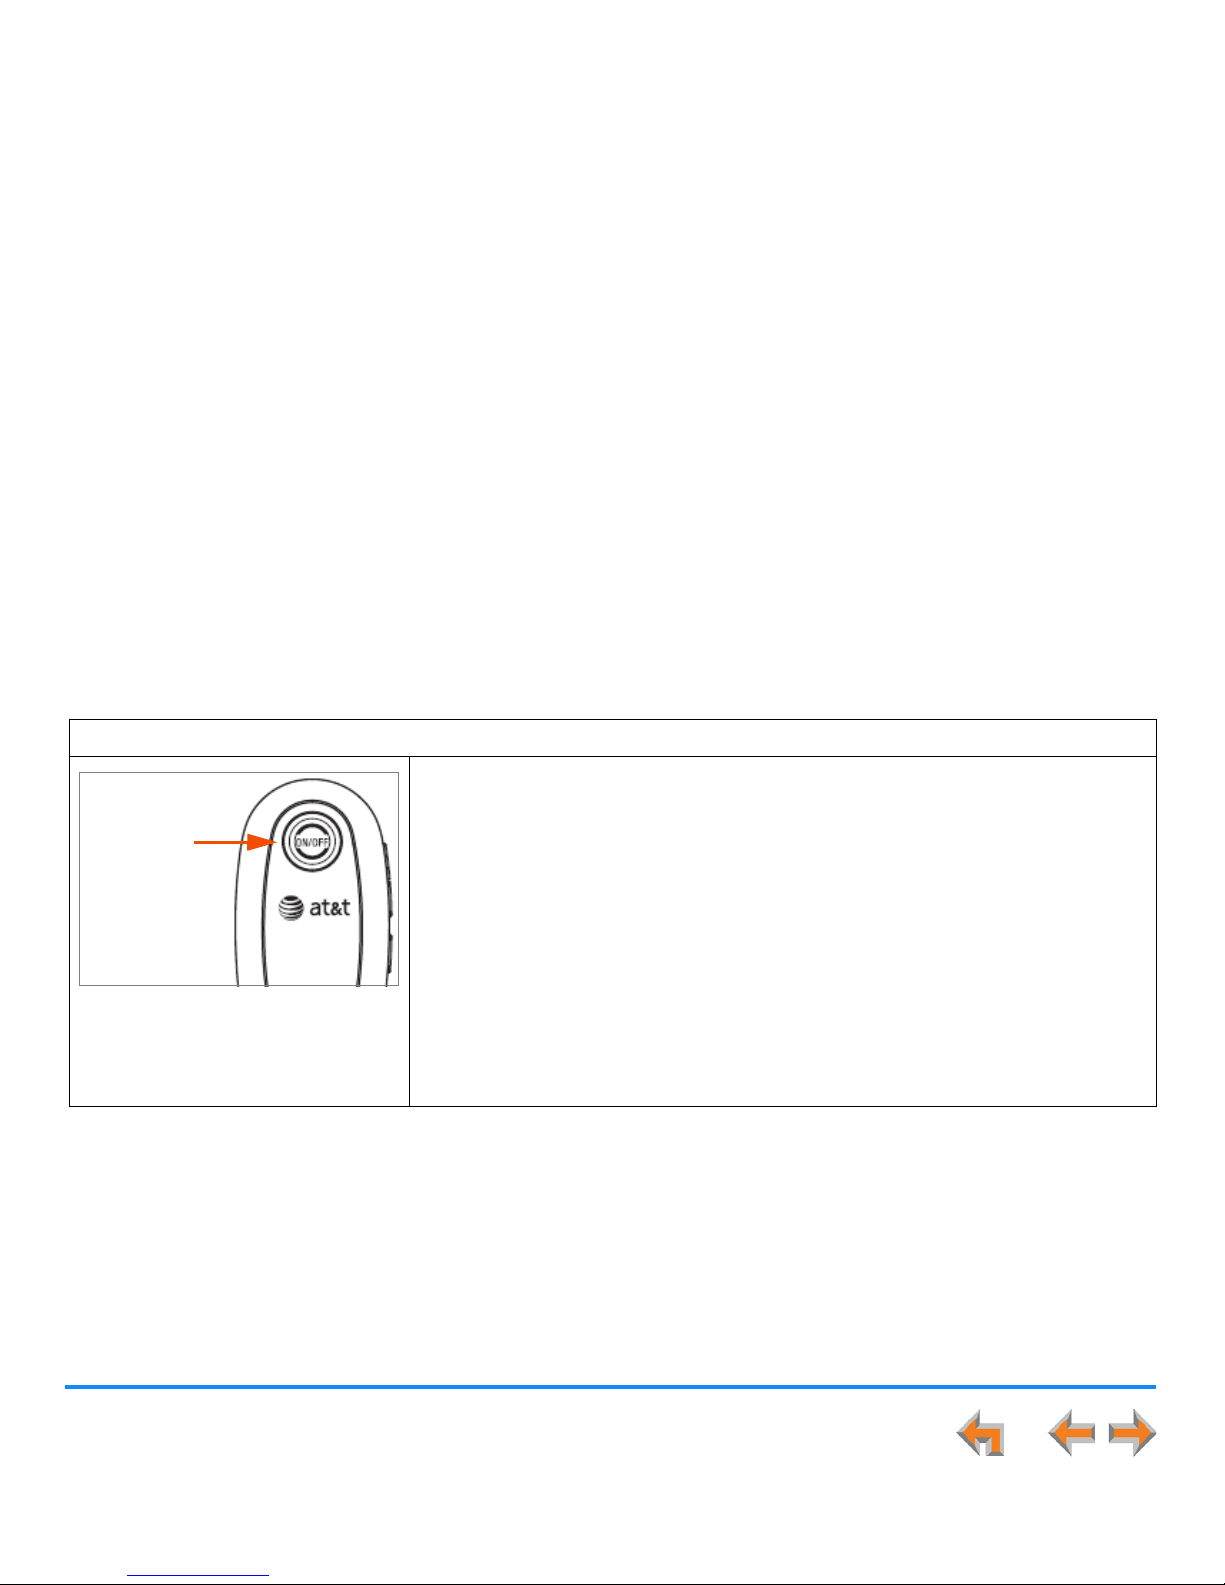
Outgoing Calls 62
Synapse SB67030/031 Deskset and Accessories User’s Guide
Making Calls with the Optional TL7600 Cordless Headset
If you have an optional TL7600 Cordless Headset registered to your Deskset, then you can make calls with the Headset. Use the
Deskset dial pad to dial the number.
To make a call with the Cordless Headset:
Figure 45. Making a Call
1. Press ON/
OFF on the Headset as shown in Figure 45. The Headset is active when
you hear a dial tone.
2. Dial the extension or phone number on the Deskset.
3. Press
ON/OFF on the Headset to end the call.
OR
1. Predial the extension or phone number on the Deskset or optional Cordless
Handset.
2. Press ON/
OFF on the Headset to initiate dialing and transfer the audio to the
Headset.
3. Press
ON/OFF on the Headset to end the call.
ON/OFF
Page 63
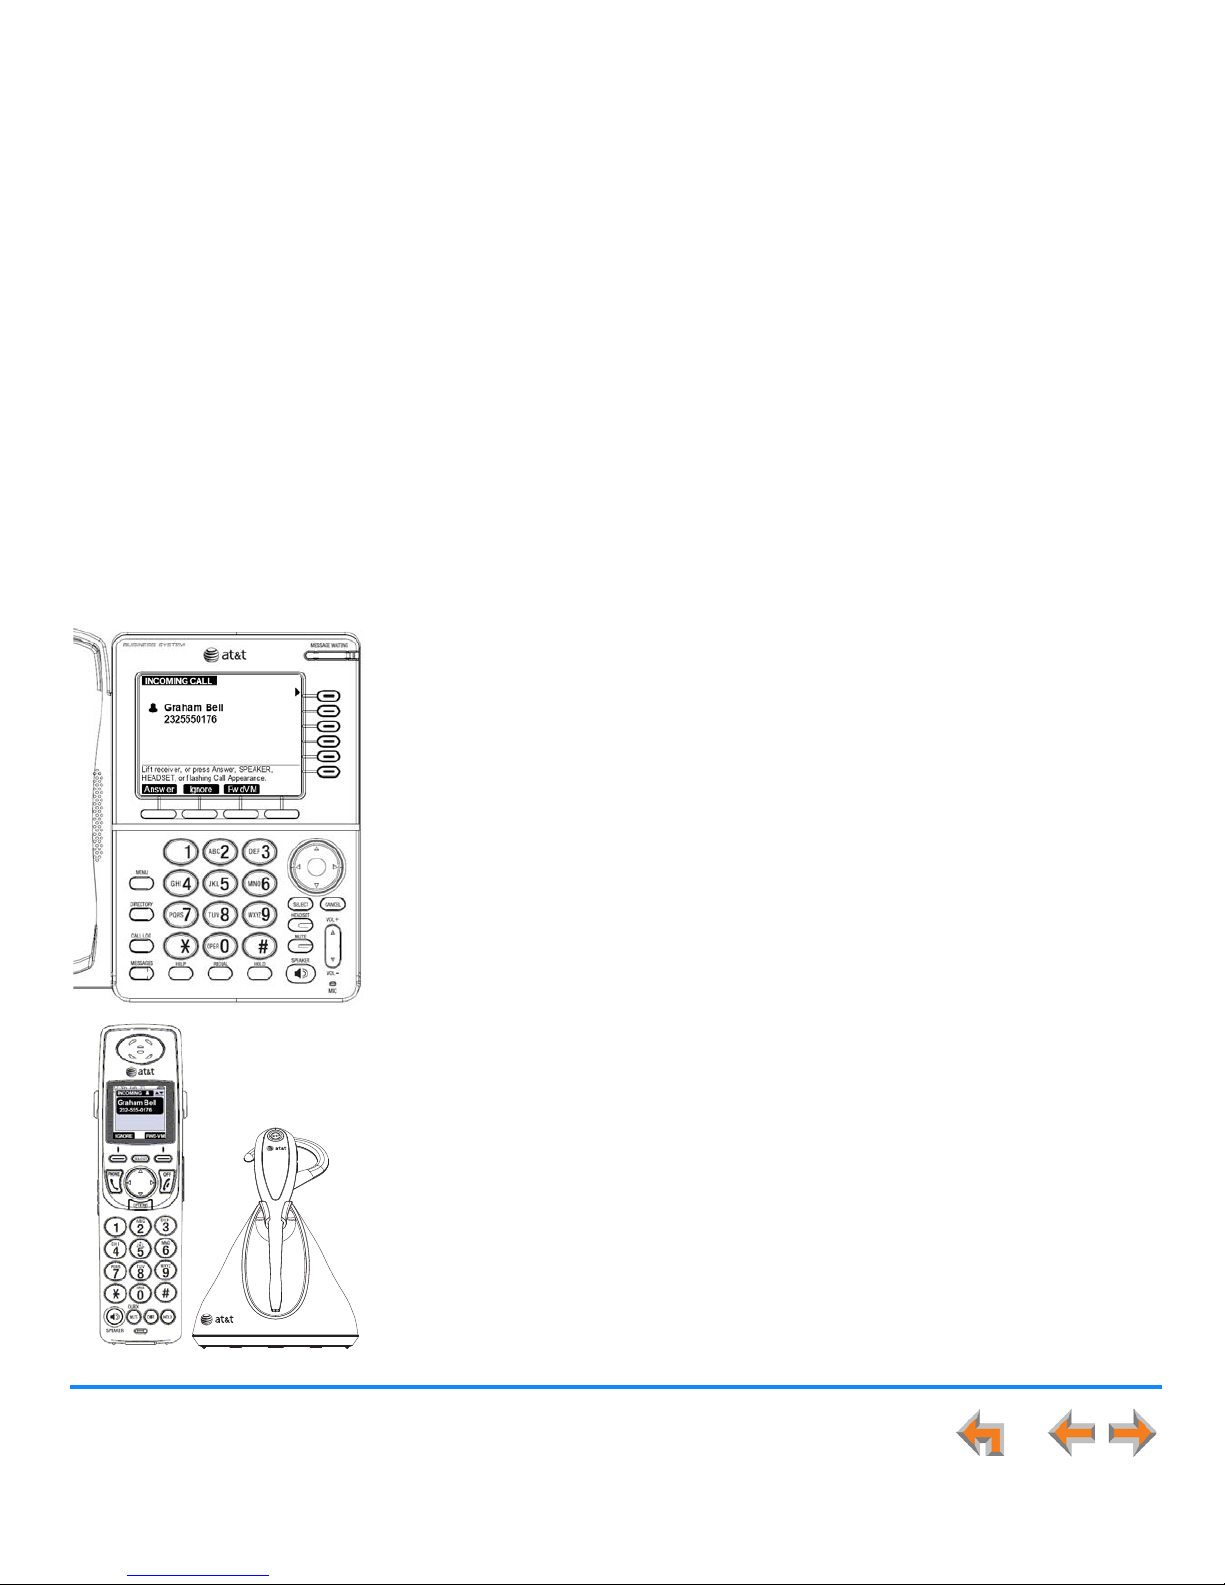
Synapse SB67030/031 Deskset and Accessories User’s Guide
Incoming Calls 63
C HAPTER
3
I
NCOMING CALLS
When a call comes in, the Deskset and the optional SB67040 Cordless Handset ring and the
incoming call information appears as shown in Figure 46 on page 64. The screen displays
the caller’s name and number (if available). If there is more than one incoming call, they are
displayed on the five Call Appearances or up to four Line Appearances on the screen. You
can answer or ignore each call.
You can also answer calls with the optional TL7600 Cordless Headset. When you hear the
ring, press ON/
OFF on the Headset. If you have an analog telephone such as a conference
phone connected via an optional Analog Terminal Adapter (ATA), you can also answer
phone calls with that telephone.
The following sections describe handling incoming calls:
“Incoming Call Screen” on page 64
“Incoming Call Indication” on page 65
“Answering a Call” on page 67
“Ignoring a Call” on page 68
“Call Screening” on page 69
“Auto Answering” on page 70
“Answering Calls in the Call Queue” on page 71
“Answer a Call with the Cordless Handset” on page 73.
Page 64
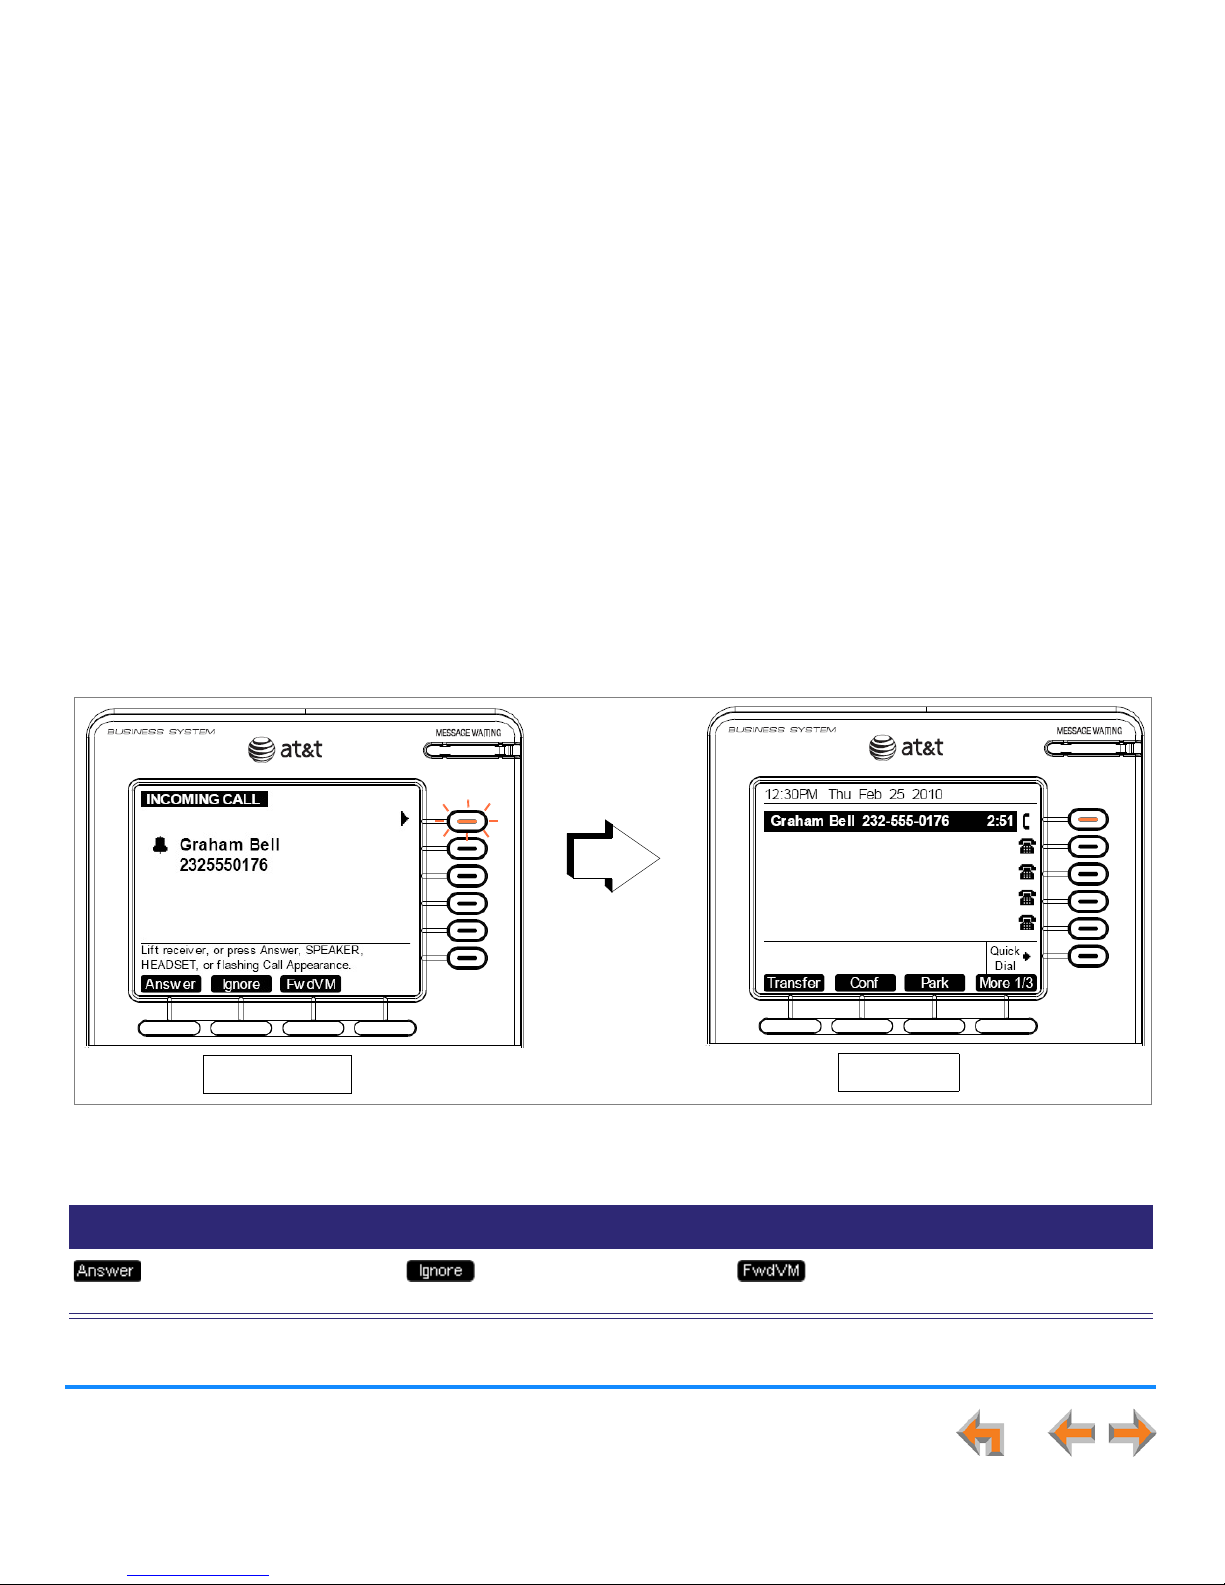
Incoming Calls 64
Synapse SB67030/031 Deskset and Accessories User’s Guide
Incoming Call Screen
A Deskset’s Incoming Call and Active Call screens are shown in Figure 46.
.
.
Table 10. Incoming Call Screen Soft Keys
Key Description Key Description Key Description
Answers incoming call. Silences ringer during
incoming call.
Call Appearance mode only—
Forwards incoming call to Voicemail.
Figure 46. Incoming Call and Active Call
Incoming Call
Press Answer
Active Call
Page 65
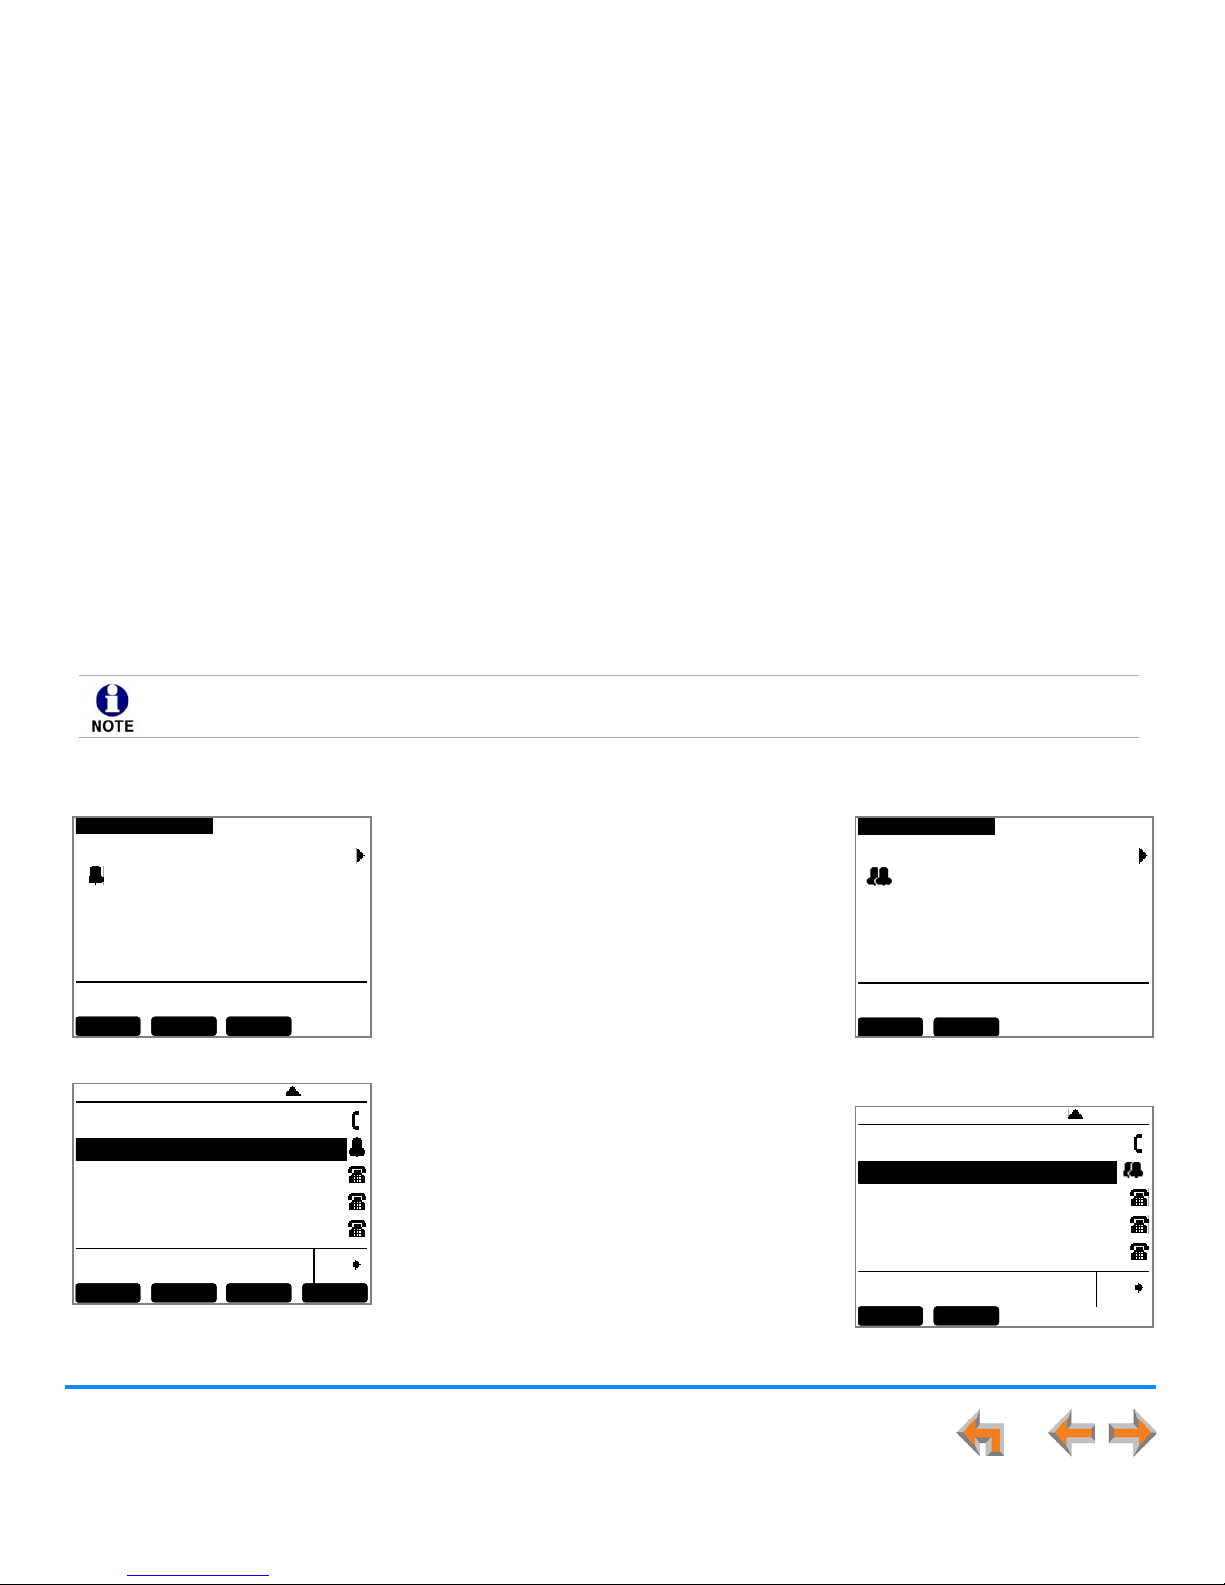
Incoming Calls 65
Synapse SB67030/031 Deskset and Accessories User’s Guide
Incoming Call Indication
When there is an incoming call, the Deskset rings. See “Sounds” on page 196.
Call Appearance Mode
Figure 47. Incoming Call
Figure 48. Incoming Call with
an Existing Call
When there are no active or held calls, an Incoming
Call screen appears, as shown in Figure 47, or if it is
a Ring Group call, as shown in Figure 49.
Your extension may be part of a Ring Group, which
allows a group of extensions to ring all at once or in
a sequence for the same call.
When there are active or held calls, or you are live
dialing, an Incoming Call screen appears, as shown
in Figure 48 or, if it is a Ring Group call, as shown in
Figure 50. There is a single, short ring. The incoming
call is highlighted and a flashing bell icon appears
next to the call information. (Graham Bell is the caller
in these figures.) You cannot forward Incoming Ring
Group Calls to Voicemail.
If your company has caller ID, the Incoming Call
screen displays caller information. If the caller ID
information is absent because it is unavailable,
UNKNOWN NAME and UNKNOWN NUMBER display. If
the caller chooses not to send the information,
PRIVATE NAME and PRIVATE NUMBER display.
Figure 49. Incoming Ring Group
Call with No Other Calls
Figure 50. Incoming Ring Group
Call
Do Not Disturb and Audible Ring Delay both affect the onset of ringing. See “Using Do Not Disturb (DND)” on page 219
and “Sounds” on page 196.
Answer Ignore Fw d VM
Graham Bell
2325550176
INCOM ING CALL
Lif t receiv er, or press Answer, SPEAKER,
HEAD SET, or f lashing C all Appearance.
Transfer
Quick
Dial
12:30PM Thu Feb 25 2010
Mor e 1/2Transfer Con f Pa r k
Graham Be ll 232-555-0176
Angela Marti 9- 1-732-555-7318
5:01
Answer Ignore
Graham Bell
2325550176
INCOM ING CALL
Lif t receiv er, or press Answer, SPEAKER,
HEAD SET, or f lashing C all Appearance.
Ring Group:
Sales
Transfer
Quick
Dial
12:30PM Thu Feb 25 2010
Graham Bell RG: Sales
Angela Marti 9- 1-732-555-7318
5:01
Answer Ignore
Page 66

Incoming Calls 66
Synapse SB67030/031 Deskset and Accessories User’s Guide
When there are no available Call Appearances, incoming calls are forwarded according to the Call Forward–No Answer
setting customized by the system administrator. The default setting for Call Forward–No Answer is Voicemail.
To see incoming call notifications on the Cordless Handset, see “Incoming Call Indication” on page 74.
Line Appearance Mode
When there are no active or held calls, the incoming call appears as shown in Figure 47 on page 65 (The soft key does
not appear).
If someone at another Deskset answers the call, your Deskset returns to Idle mode.
Page 67
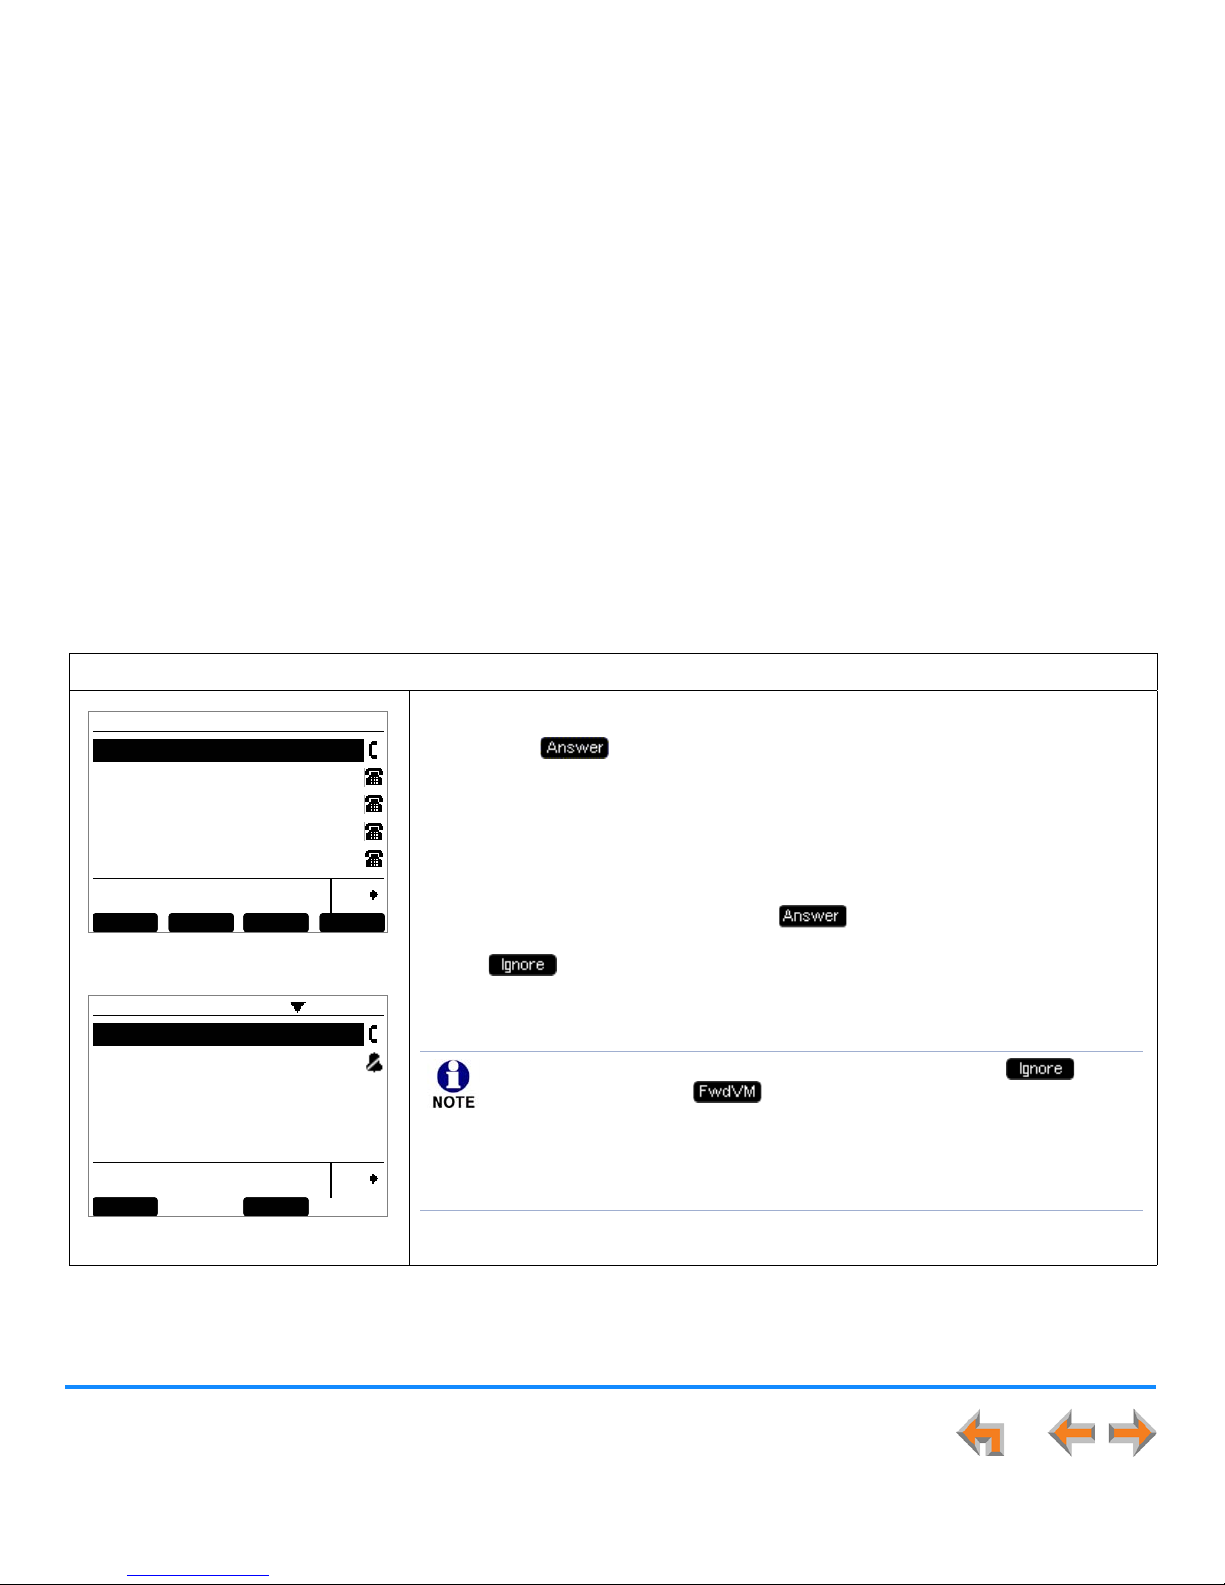
Incoming Calls 67
Synapse SB67030/031 Deskset and Accessories User’s Guide
Answering a Call
To answer a call:
Figure 51. Active Call
Figure 52. Ignored Call
Lift the corded handset.
Press to answer using the Preferred Audio Mode. See “Preferred
Audio” on page 197.
Press SPEAKER to use the speakerphone.
Press HEADSET to use the Cordless Headset or corded headset. See “Call
Management Using a Headset” on page 103.
For multiple incoming calls, press or press the corresponding Call
Appearance or Line Appearance key to answer each call. You can also press
to return the highlight to your active call.
The active call screen appears, as shown in Figure 51. Figure 52 shows an ignored
call (Call Appearance mode shown in both figures).
Transfer
Quick
Dial
12:30PM Thu Feb 25 2010
Graham Be ll 232-555-0176 2:51
Transfer Con f Pa r k Mor e 1/ 3
Transfer
Quick
Dial
12:30PM Thu Feb 25 2010
Answer Fw dVM
Graham Be ll 232-555-0176 3:34
Angela Martin 732-555-7318
If you are listening to Voicemail when a call comes in, press or (in
Call Appearance mode) to redirect the call and allow message
playback to continue.
Call Appearance mode only—If Auto Answer is enabled, the call is
automatically answered after the set time delay. See “Auto Answering” on
page 70.
Page 68
Incoming Calls 68
Synapse SB67030/031 Deskset and Accessories User’s Guide
Ignoring a Call
You can ignore an incoming call by pressing to silence the ringer. The silenced ringer icon appears. If you are on an
active or held call, after the ignored call has been forwarded, the highlight moves back to whatever call you were on before the
incoming call.
Once a call is ignored:
The key is no longer available on the incoming call screen.
If there is a registered Cordless Handset, it also stops ringing.
The Call Appearance or Line Appearance key LED continues to flash.
You can press the flashing Call Appearance or Line Appearance key to answer the incoming call.
In Line Appearance mode, when you have no other active calls, you can go off hook to answer the ignored call.
In Call Appearance mode, if an ignored call is highlighted, going off hook does not answer the call, but starts a new call
on the next available Call Appearance.
To answer a call: (Continued)
Once you answer a call:
Previous active calls are automatically placed on hold.
If you were predialing, that call is canceled.
To do this with the Cordless Handset, see “Answer a Call” on page 75.
Page 69
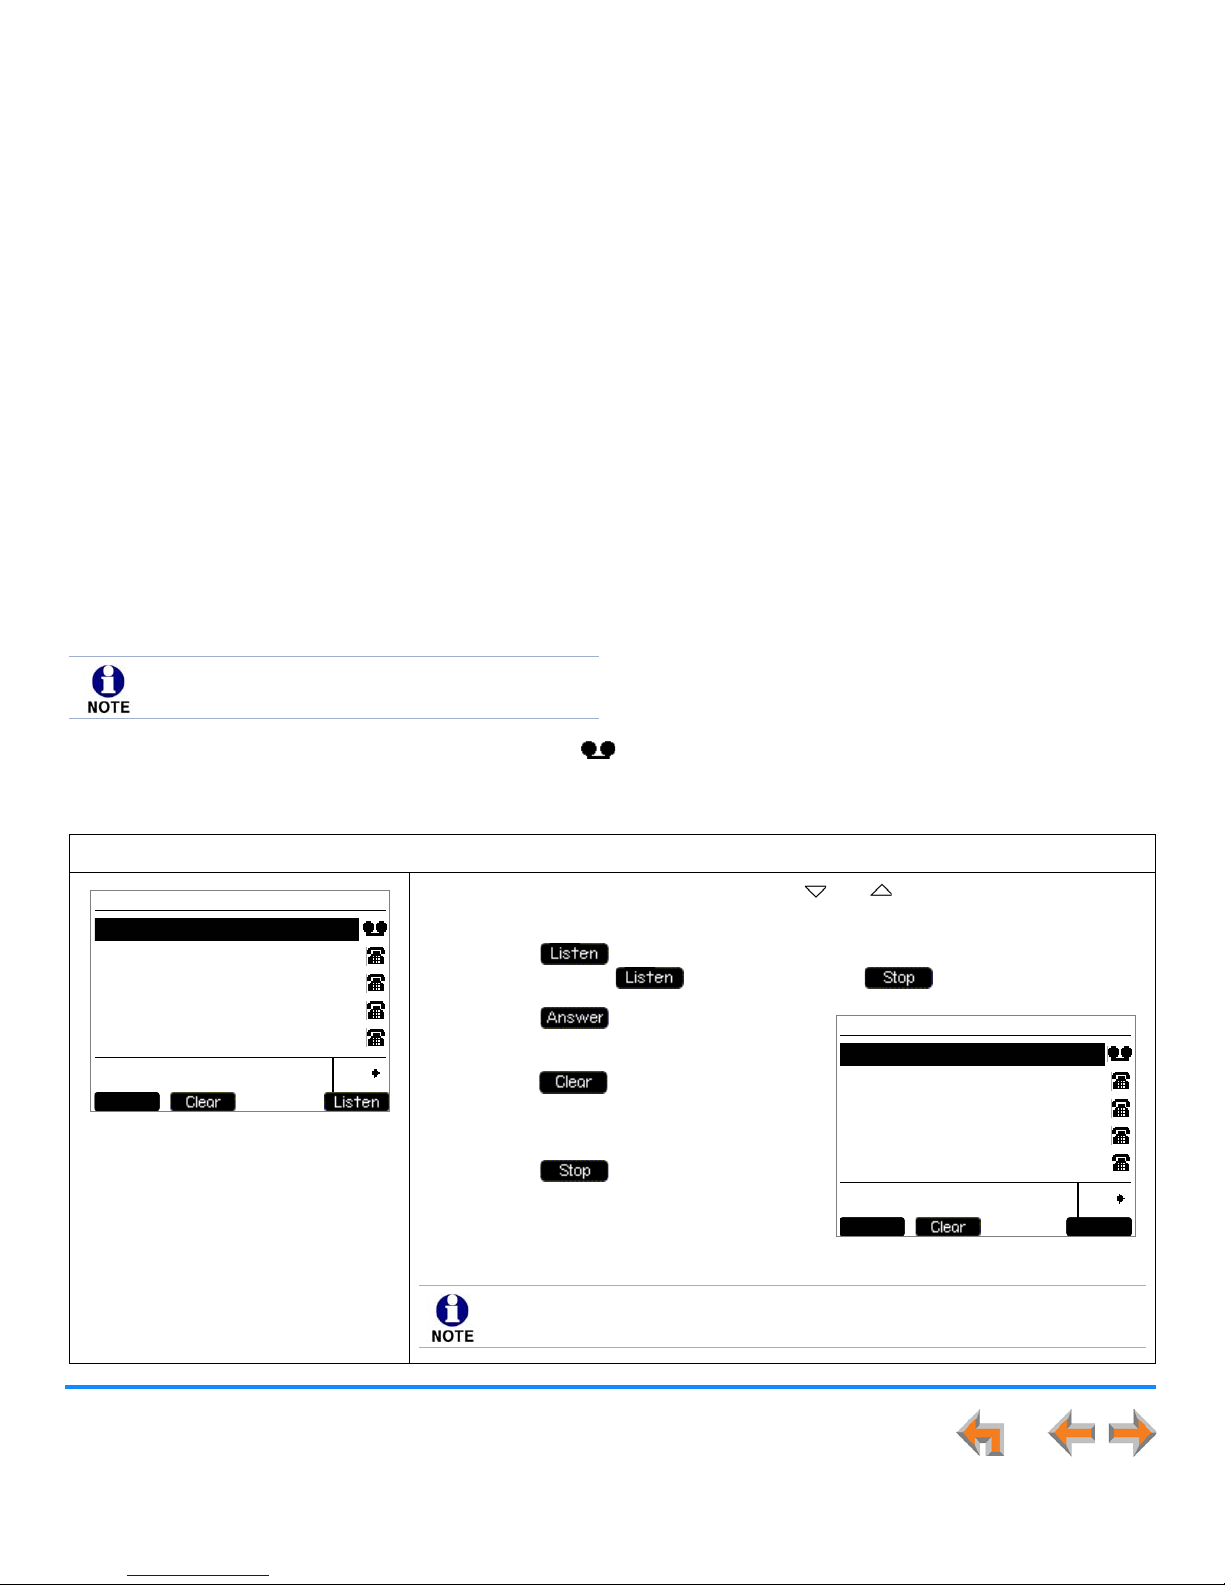
Incoming Calls 69
Synapse SB67030/031 Deskset and Accessories User’s Guide
Call Screening
When an incomin g call goes to Voic email, the Mess ag e icon ( ) appears to indicate that recording is in progress. You can listen
to the recording in progress and interrupt it at any time by answering the call. If another incoming call occurs while screening a
call, the highlight moves to the new call and there is an abbreviated ring.
This feature applies to Call Appearance mode only.
To screen a call:
Figure 53. Call Screening, Listen
If there is more than one active call, use the and navigation keys to highlight
the call marked with the Message icon.
Press to listen to a message that is being recorded, as shown in
Figure 53. The soft key changes to as shown in Figure 54.
Press to interrupt the
recording and talk to the caller.
Press to cancel call screening
for this call and return to the previous
screen.
Press to stop listening to the
message being recorded.
Transfer
Quick
Dial
12:30PM Thu Feb 25 2010
Answer
Graham Be ll 232-555-0176
Transfer
Quick
Dial
12:30PM Thu Feb 25 2010
StopAnswer
Graham Be ll 232-555-0176
Figure 54. Call Screening, Stop
Call screening is not available on the optional Cordless Handset or Cordless
Headset.
Page 70
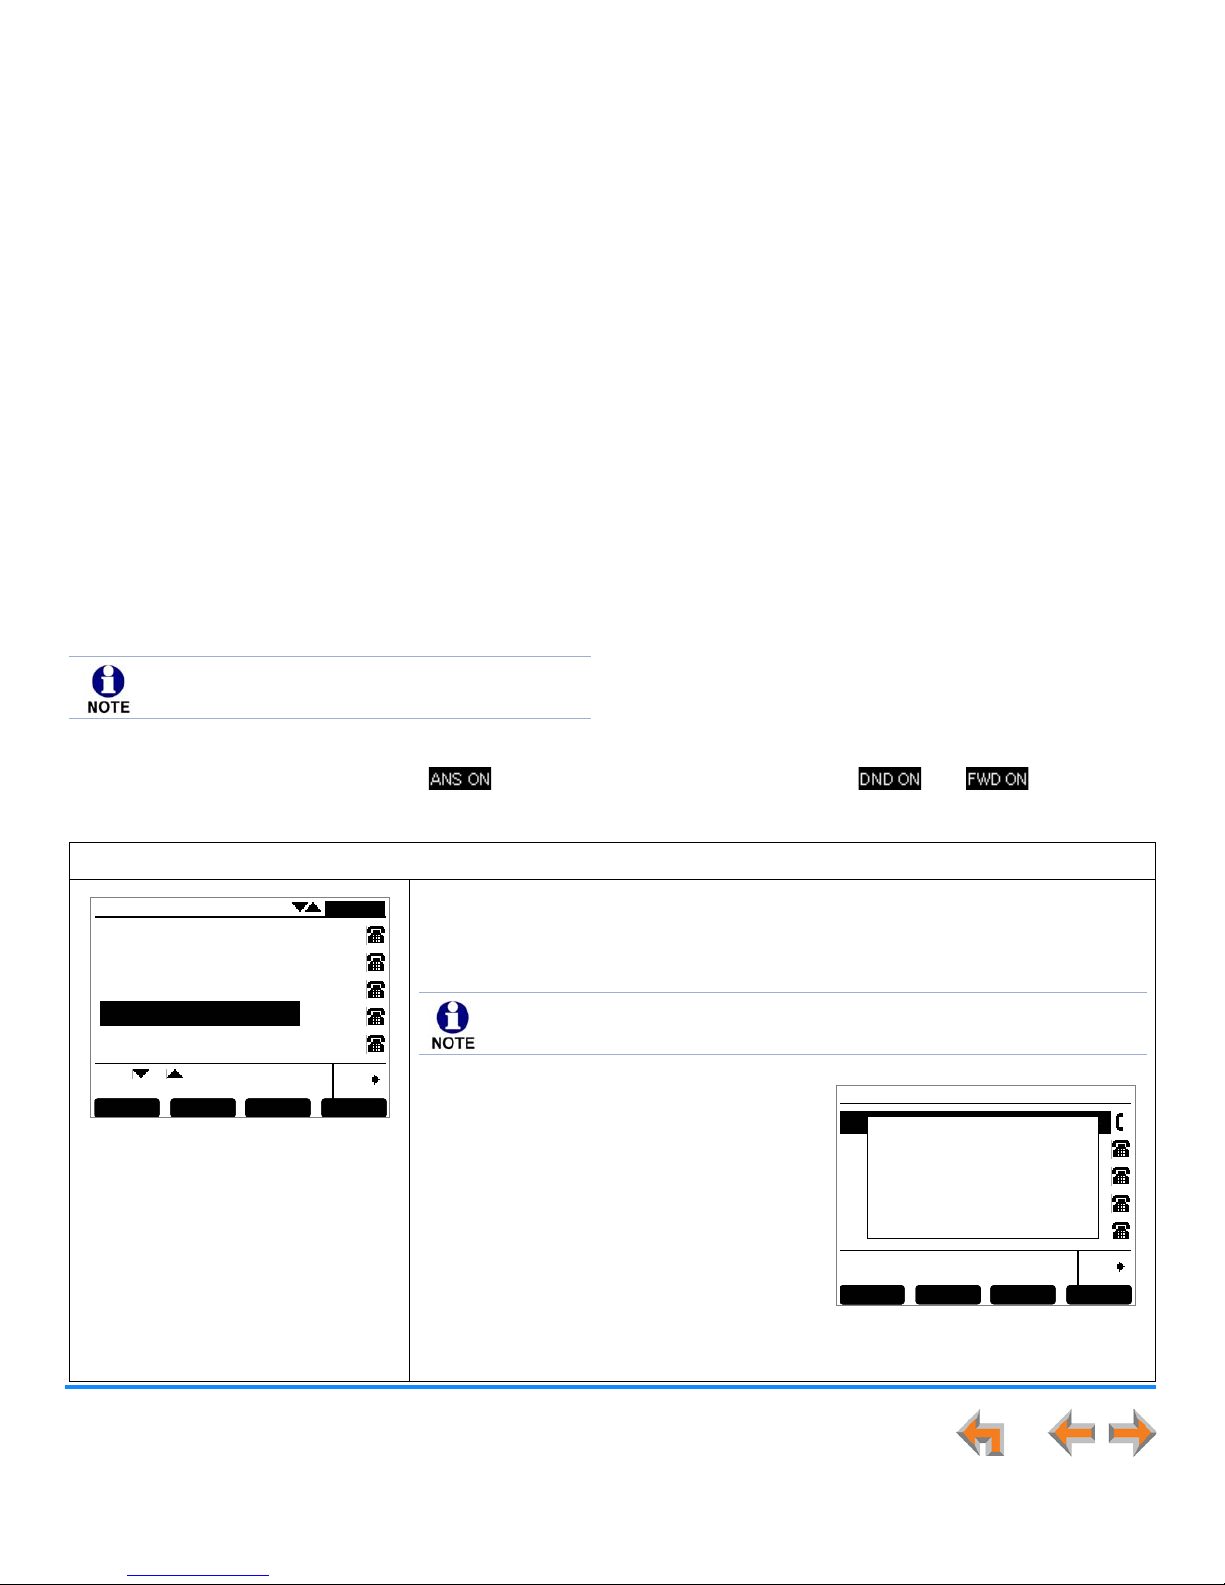
Incoming Calls 70
Synapse SB67030/031 Deskset and Accessories User’s Guide
Auto Answering
You can use the Deskset menu settings to set your Deskset to answer calls automatically, without your having to touch the phone
to answer. When you enable Auto Answer, appears at the top of the Deskset screen if and are not active,
since Auto Answer does not work if they are on.
This feature applies to Call Appearance mode only.
To respond to an Auto Answered call:
Figure 55. Idle Screen with Auto
Answer Indicator
In Idle mode, all incoming calls ring for the amount of time specified in the Auto
Answer Delay. See “Automatic Answering” on page 204. After the last ring, a twosecond notification screen appears, as shown in Figure 56, and you hear a warning
tone. Talk after the tone.
If you do not want the Deskset to automatically
answer the call, you can press CANCEL to send
the call to the Call Forward–No Answer target.
See “Call Forward All and Call Forward–No
Answer” on page 202.
If there are multiple incoming calls, Auto
Answer applies to the first (oldest) incoming
call. Subsequent incoming calls are handled
according the Call Forward–No Answer setting.
Auto Answer does not apply to Ring Group
calls. See “Incoming Call Indication” on page 65.
DNDDNDDND CallFw d Pa g e Mor e 1 /2
Quick
Dial
12:30PM Thu Feb 25 2010
2 New Missed Calls
5 New Messages
Press or to mov e highlight, then
press
SELEC T
.
EXT 249
John Smith
ANS ON
If the Auto Answer Delay is set to zero, you hear no ring. Instead, the Call
Answered screen appears and you hear the warning tone.
Transfer
Quick
Dial
12:30PM Thu Feb 25 2010
Graham Be ll 232-555-0176 2:51
Transfer Con f Pa r k Mor e 1/ 3
Call Answered.
Speak after the tone.
Figure 56. Call Auto Answered
Page 71

Incoming Calls 71
Synapse SB67030/031 Deskset and Accessories User’s Guide
Answering Calls in the Call Queue
Your system administrator may have set up your Deskset as a Call Queue Agent. The key in the bottom right corner will have a
Call Queue label. Incoming calls are directed to your Deskset and all other assigned Call Queue Agents.
This feature applies to Call Appearance mode only.
Page 72
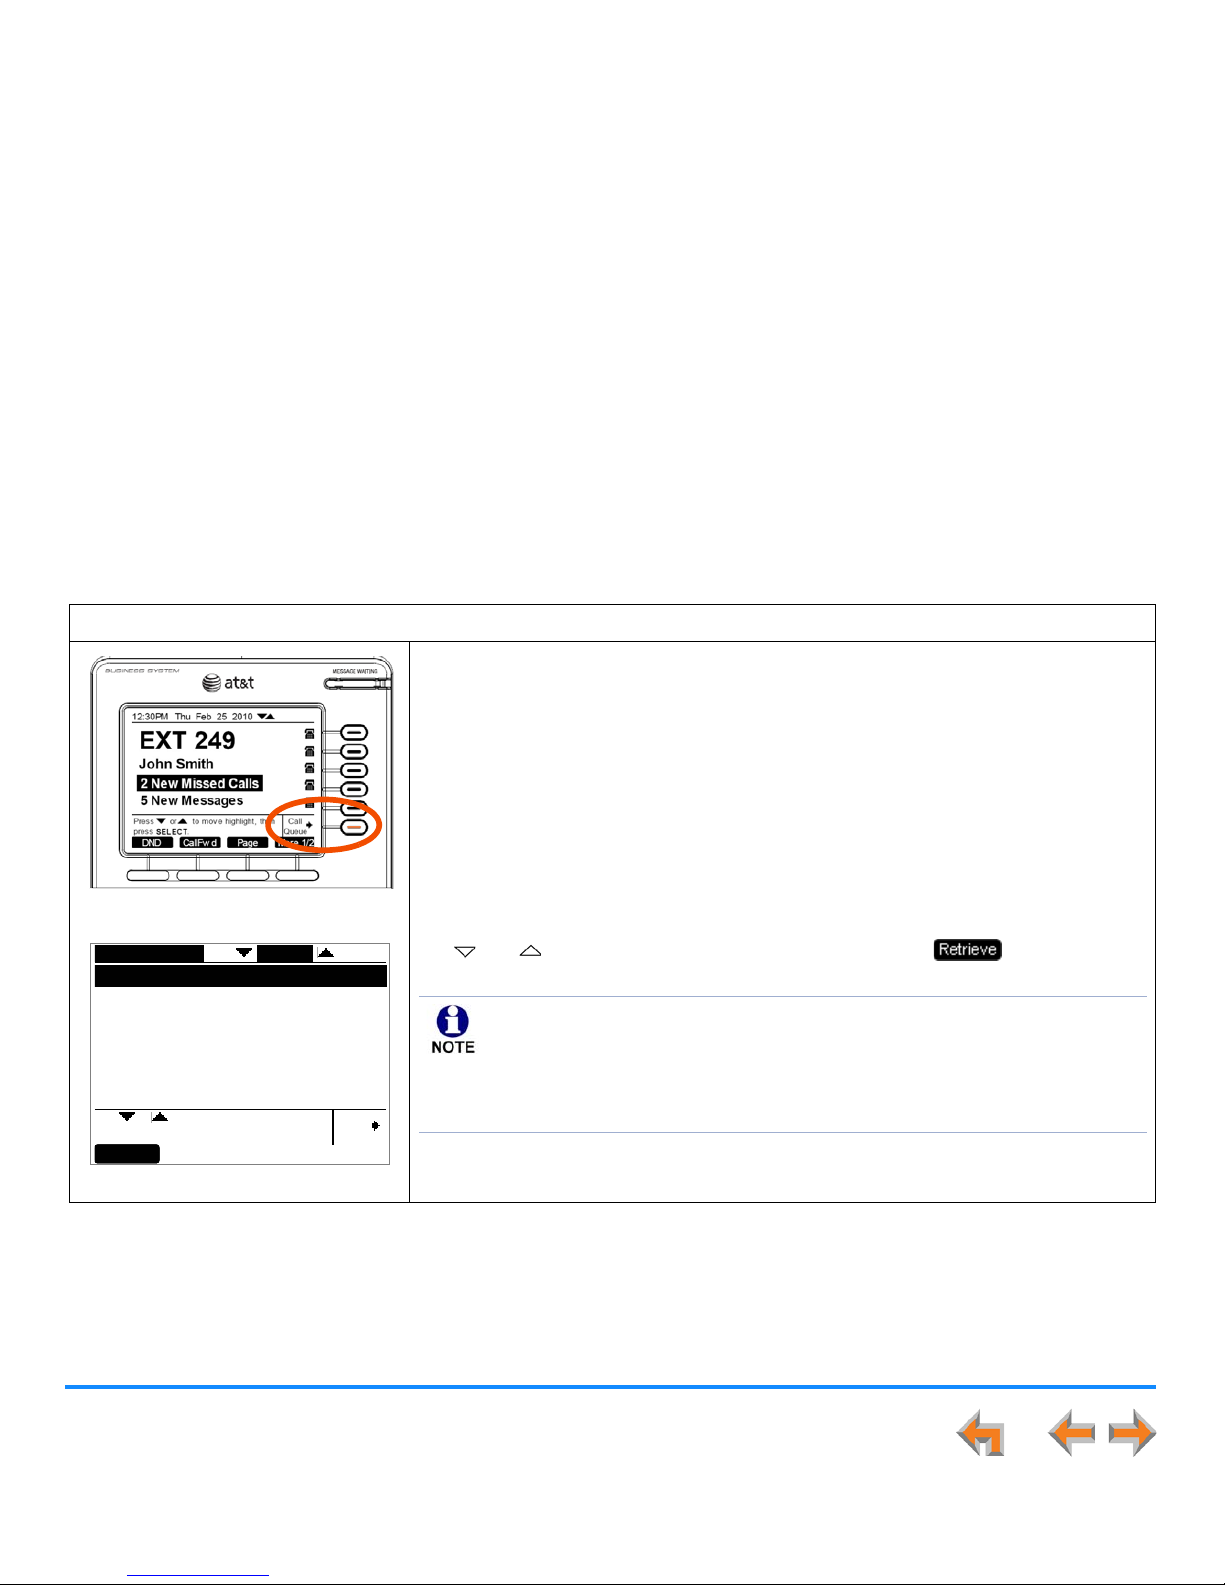
Incoming Calls 72
Synapse SB67030/031 Deskset and Accessories User’s Guide
To answer a call in the Call Queue:
Figure 57. Call Queue Indicated
Figure 58. Queued Calls List
When your Deskset is idle, incoming Call Queue calls ring at your extension and at all
other idle Call Queue extensions. You can answer these calls as described in
“Answering a Call” on page 67.
If no one answers an incoming call from the Call Queue, it rings indefinitely. Call
Forward–No Answer rules (see “Call Forward All and Call Forward–No Answer” on
page 202) do not apply to calls that are directed to Call Queue extensions.
If all Call Queue Agents are busy, incoming calls are held in the Call Queue. The Call
Queue key LED flashes orange slowly when there are calls waiting in the Call Queue,
as shown in Figure 57.
Press Call Queue to view the Queued Calls list, as shown in Figure 58. Use
the and navigation keys to highlight a call, and press or SELECT to
answer it.
Ret riev e
Call
Queue
Use or to scroll, then press
Retriev e to anser the call.
Charlie Johnson
Mary Williams
Linda Miller
ABC Accountants
Unknow n Caller
Milford Taxi
Queued Calls 1/10
Graham Bell
212-555-0154
706-555-0162
317-555-0129
305-555-0134
443-555-0625
732-555-7318
232-555-0176 3:01
2:58
2:47
2:32
1:44
1:24
0:35
Your system administrator can configure a wrap-up time, which defines a
period during which your Deskset will not ring for another queued call after
you complete a Call Queue call.
Depending on how your system is set up, calls from the Call Queue may ring
at your Deskset while you are on a call that isn’t from the Call Queue.
Page 73
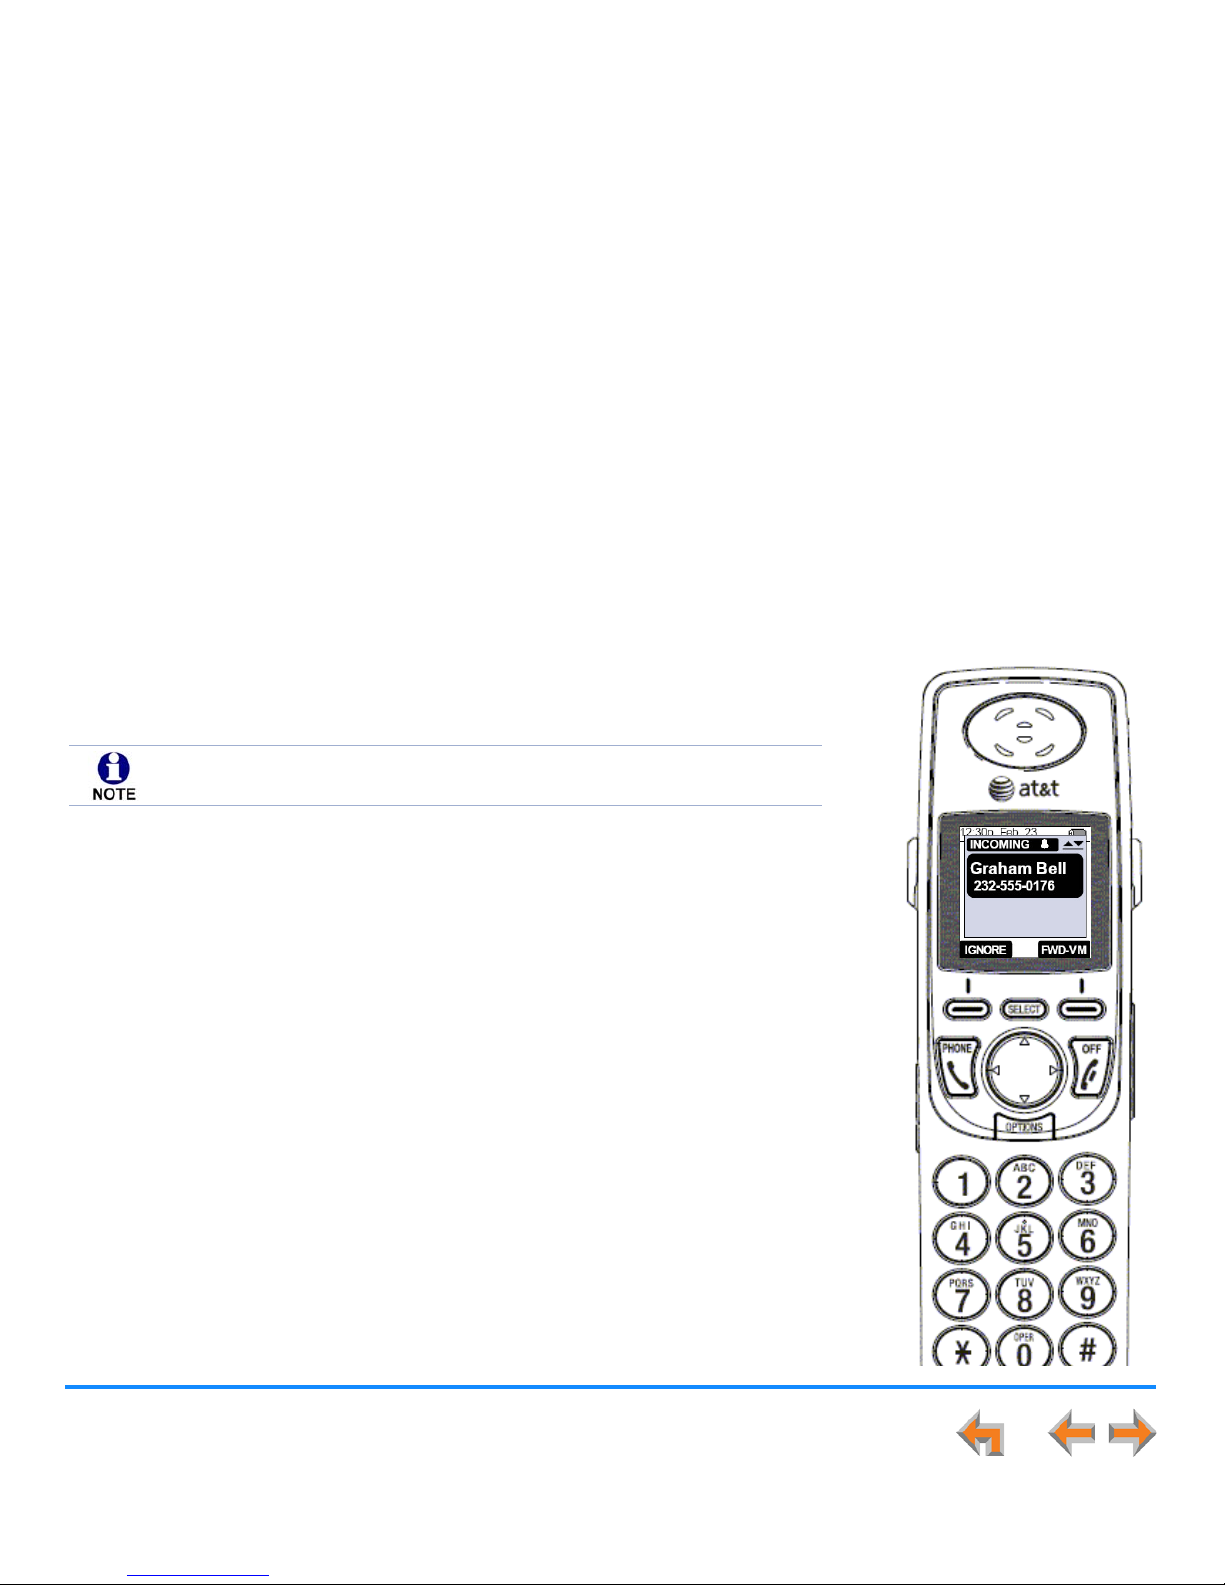
Incoming Calls 73
Synapse SB67030/031 Deskset and Accessories User’s Guide
Answer a Call with the Cordless Handset
You can also answer calls with the optional SB67040 Cordless Handset. When the extension
receives an incoming call, the Handset rings and the incoming call information appears as
shown at right. The screen displays the caller’s name and number (if available).
To answer the call, press PHONE.
This section contains the following:
“Answer a Call” on page 75
“Multiple Incoming Calls” on page 76.
Cordless Handset operation is compatible with Call Appearance mode only.
Page 74
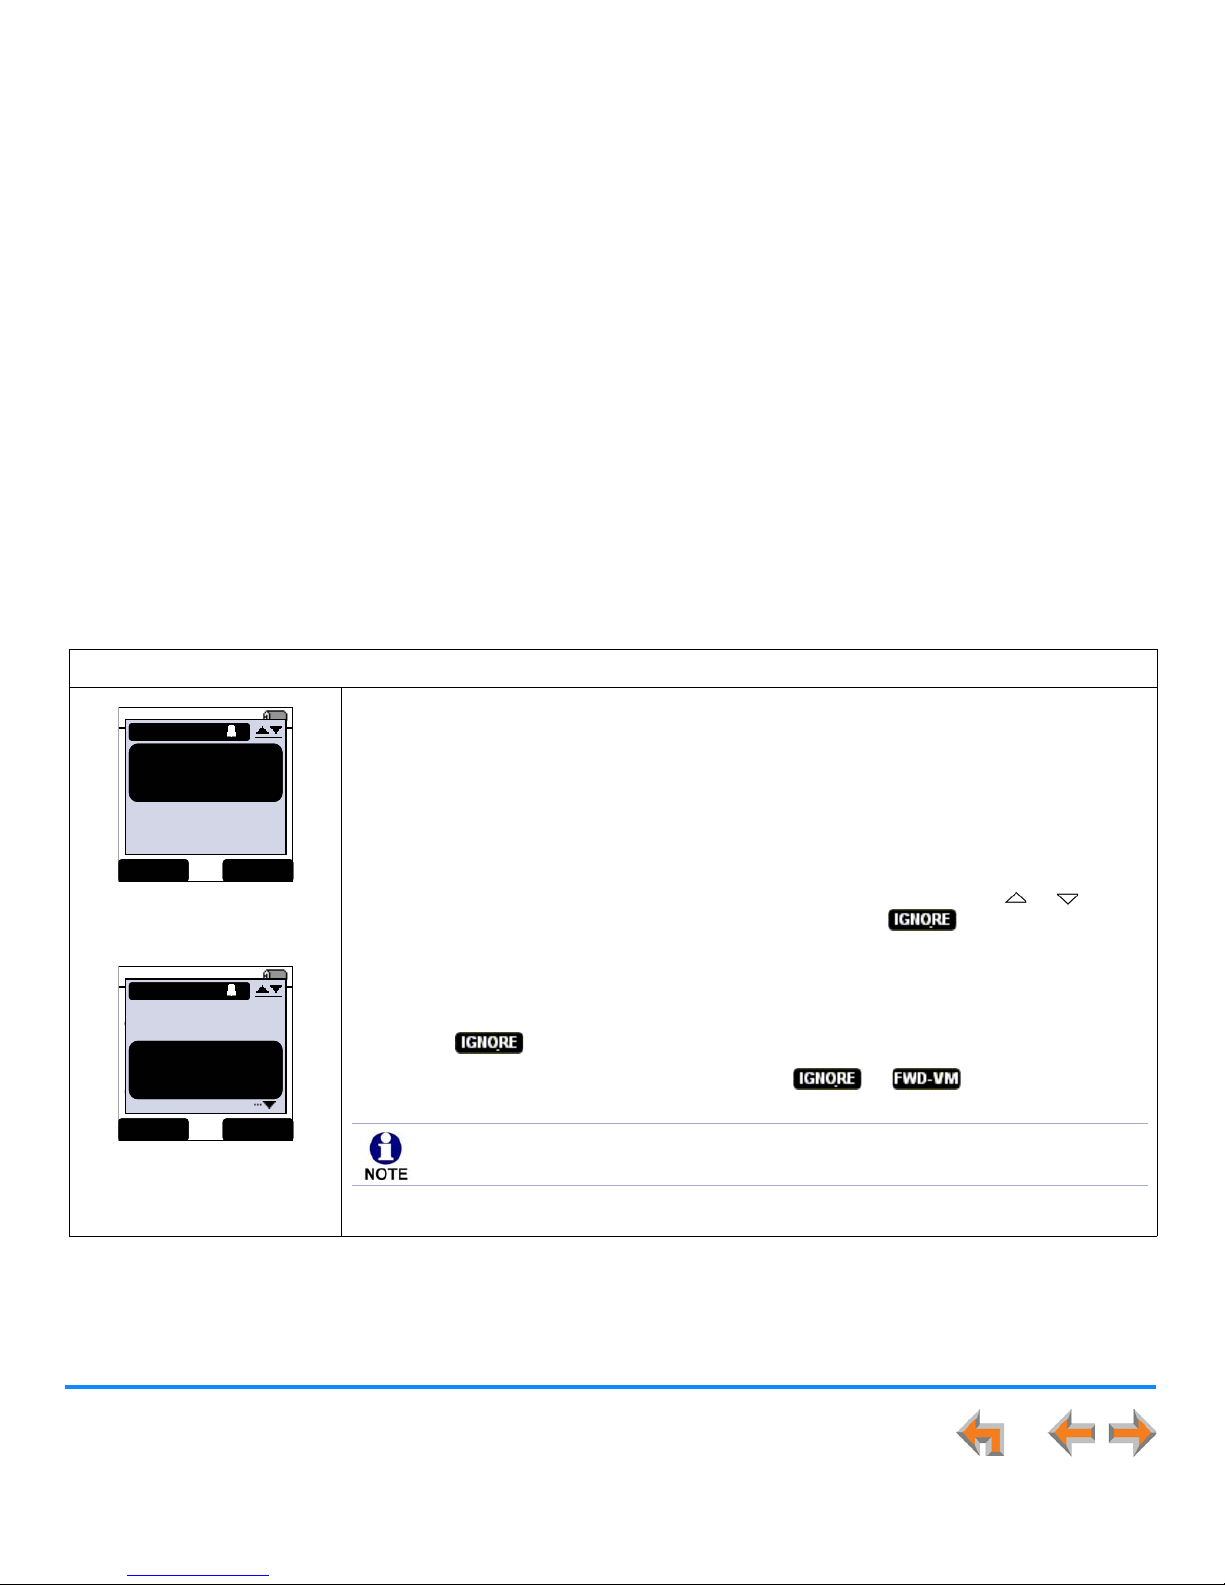
Incoming Calls 74
Synapse SB67030/031 Deskset and Accessories User’s Guide
Incoming Call Indication
Options for an Incoming call:
Figure 59. Incoming Call
with No Other Calls
Figure 60. Incoming Call
with an Existing Call
When there is an incoming call:
The Handset rings. See “Using the VOLUME key to set the Cordless Handset Ringer
and Voice Volume” on page 224.
The incoming call screen shown in Figure 59 appears.
If you are on an active call or live dialing, there is a single, short ring.
When there multiple incoming calls, the incoming call screen shown in Figure 60
appears. The most recent incoming call is highlighted. Press the or
navigation key to switch between the calls or press . See “Ignoring a Call”
on page 68.
Other actions during incoming calls:
If there is more than one incoming call, each remains in the display until you press
while the call is highlighted.
If you are in Voicemail review, pressing or allows message
playback to continue.
12:30p Feb. 23
2 Missed Calls
5 New MSGs
EXT 249
John Smith
INCOMING
Graham Bell
232-555-0176
IG NORE FWD-VM
12:30p Feb 23
9-503-555-0194
00:12 ON A CALL
INCOMING
Graham Bell
232-555-0176
Mar y Williams
Charlie Johnson
IG NORE FWD-VM
If the ringer sound is turned off, the incoming call screen still appears.
Page 75
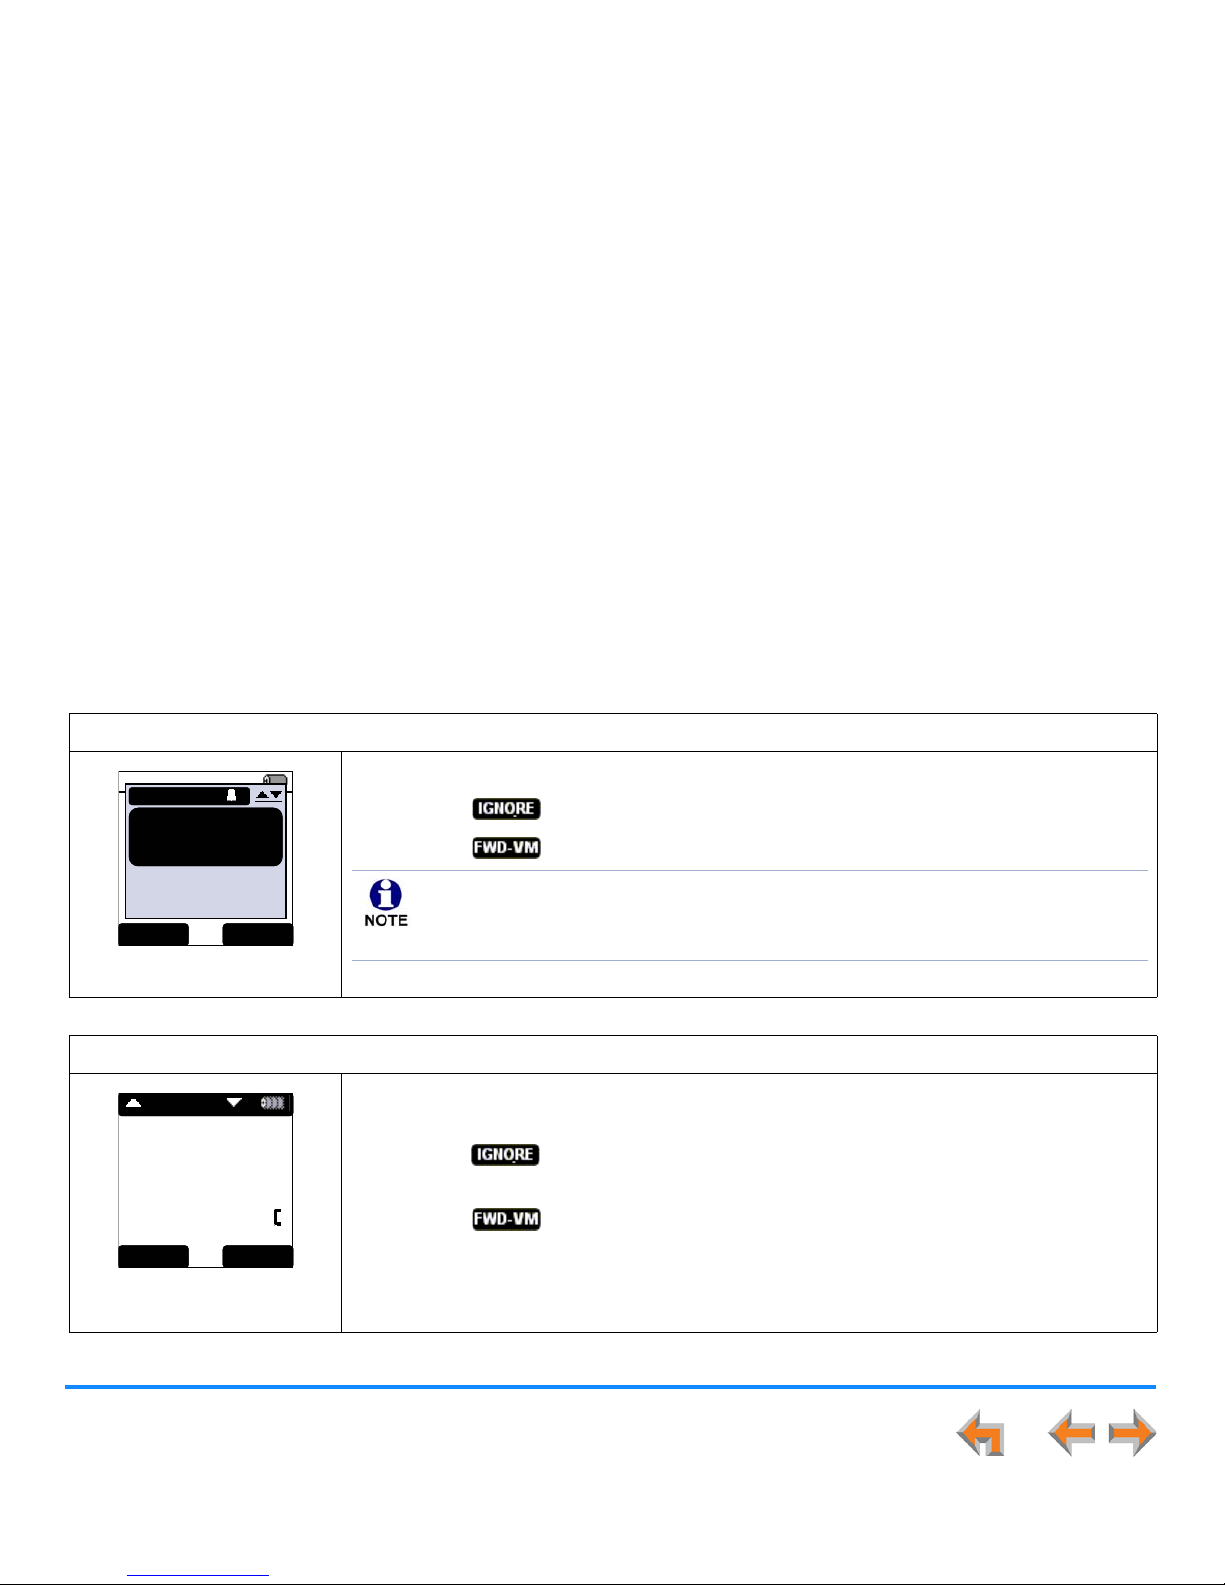
Incoming Calls 75
Synapse SB67030/031 Deskset and Accessories User’s Guide
Answer a Call
Examples of incoming call screens are shown below. Figure 61 shows a call received when the extension is idle. Figure 62 shows
a call received during an active call. Calls received during active calls ring only once.
Options for a call received while the extension is idle:
Figure 61. Incoming Call
Press SELECT, PHONE, or SPEAKER to answer the call.
Press to silence the ringer. You can still answer the call.
Press to forward the call to Voicemail.
Options for a call received during an active call:
Figure 62. Incoming Call
During an Active Call
Press PHONE or SELECT to answer the incoming call. The current call is automatically
placed on hold.
Press to silence the ringer. The call is placed in the Call Deck. See “Call Deck”
on page 91. You can still answer the call.
Press to forward the call to Voicemail.
Press SPEAKER to switch the current call to and from the speakerphone.
12:30p Feb. 23
2 Missed Calls
5 New MSGs
EXT 249
John Smith
INCOMING
Graham Bell
232-555-0176
IG NORE FWD-VM
Press Volume while the Handset is ringing to decrease or increase the
ringer volume.
Call screening is not available from the Cordless Handset.
Graham Bell
9-1-250-555-0123
02:01 ON A CALL
XFER CONF
NEXT CALL
Page 76
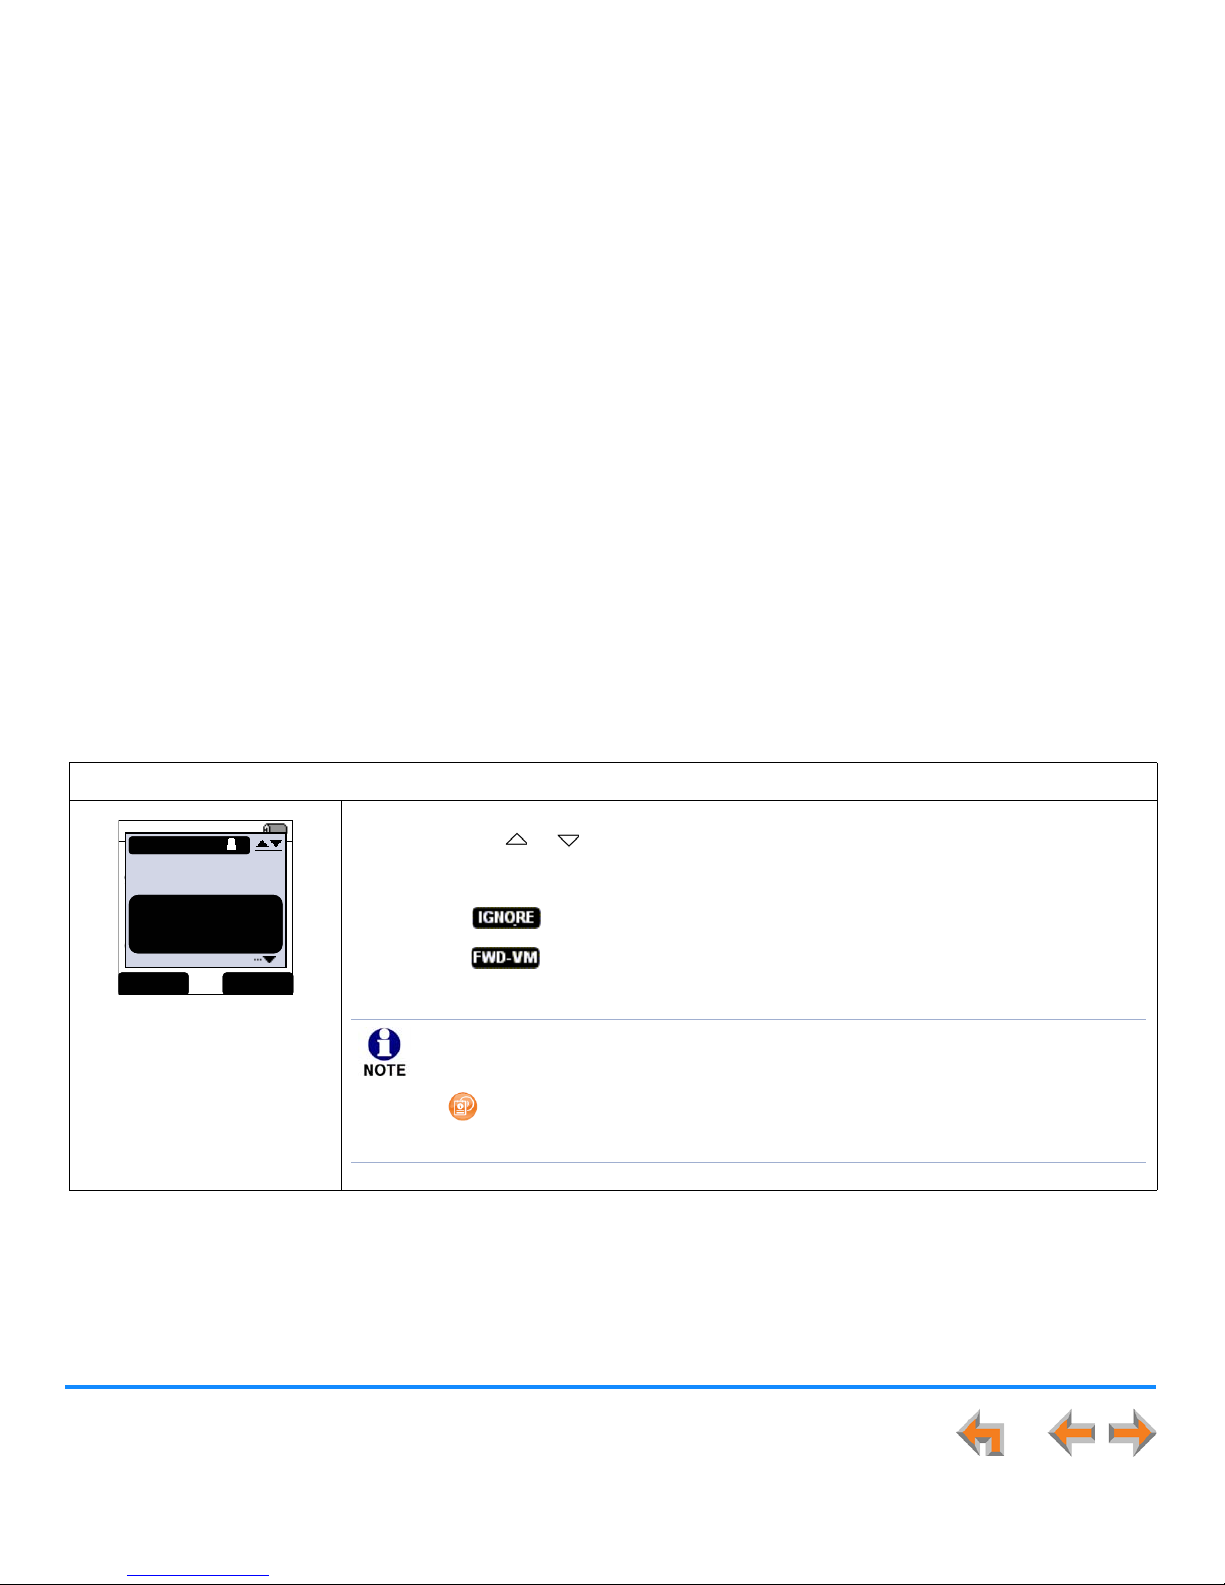
Incoming Calls 76
Synapse SB67030/031 Deskset and Accessories User’s Guide
Multiple Incoming Calls
If the Handset receives more than one call at a time, the calls display in a list on the screen. The most recent call is added to the
bottom of the list and appears as a two-line name and telephone number. The other pending calls appear in the list as one-line
entries, as shown in Figure 63. This screen remains active until you answer one of the calls or until all calls end or are forwarded.
If you answer one of the calls, then the remaining calls are placed in the Call Deck. See “Call Deck” on page 91.
Options during multiple incoming calls:
Figure 63. Multiple
Incoming Calls
Press the or navigation key to view the incoming calls.
Press SELECT, PHONE, or SPEAKER to answer the highlighted call.
Press to silence the ringer of the highlighted call.
Press to forward the highlighted incoming call to Voicemail.
Press Volume to decrease or increase the ringer volume.
12:30p Feb 23
9-503-555-0194
00:12 ON A CALL
INCOMING
Graham Bell
232-555-0176
Mar y Williams
Charlie Johnson
IG NORE FWD-VM
Unanswered incoming calls are handled according to the Call Forward–No Answer
setting.
The system administrator sets the call-forwarding options. For more
information on this setting, see the Synapse Administrator’s Guide at
www.telephones.att.com/synapseguides.
Page 77
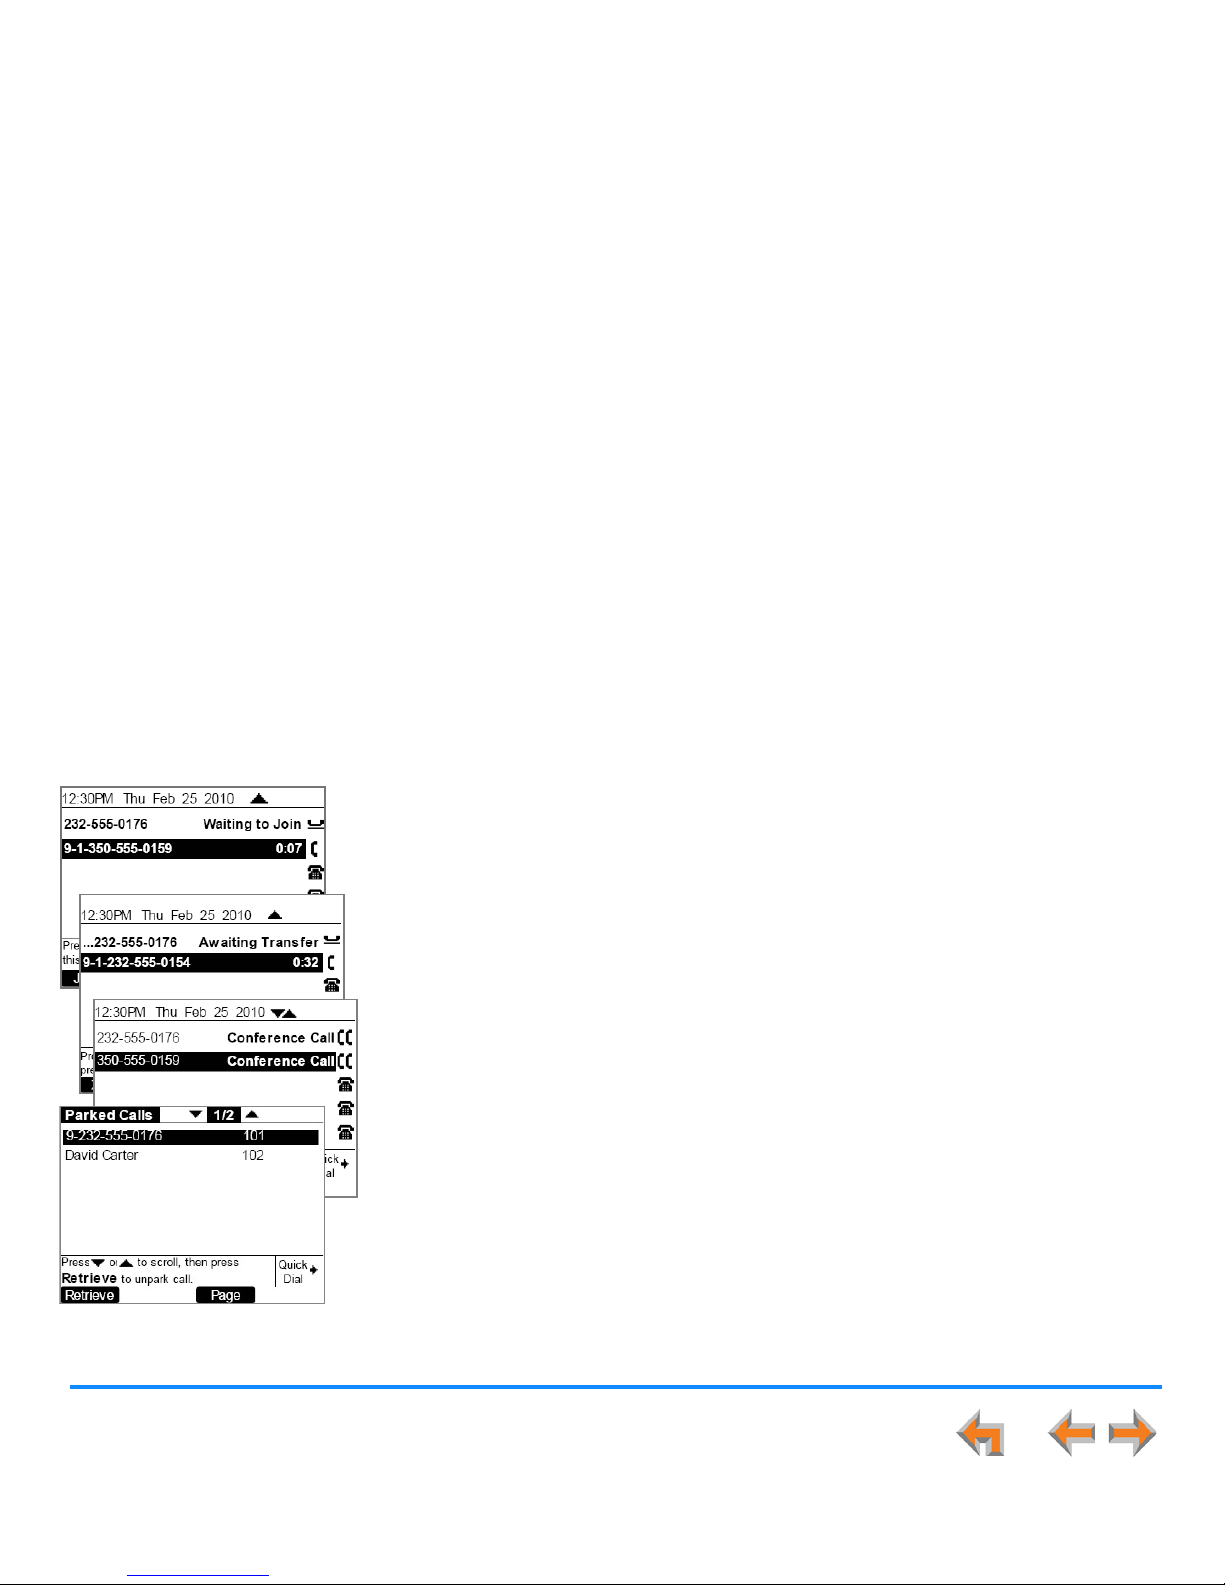
Synapse SB67030/031 Deskset and Accessories User’s Guide
Call Management 77
C HAPTER
4
C
ALL
M
ANAGEMENT
The Deskset and optional SB67040 Cordless Handset give you various call management
options.
Deskset call management features and procedures differ depending on whether your system
is in Call Appearance or Line Appearance mode. This chapter describes the differences
between the two modes.
“Call Management” on page 78
“Placing a Call on Hold (Call Appearance Mode)” on page 79
“Placing a Call on Hold (Line Appearance Mode)” on page 80
“Transferring a Call Overview” on page 81
“Conferencing” on page 84
“Parking a Call” on page 87
“Call Management Using the Cordless Handset” on page 89
“Call Management Using a Headset” on page 103.
Page 78
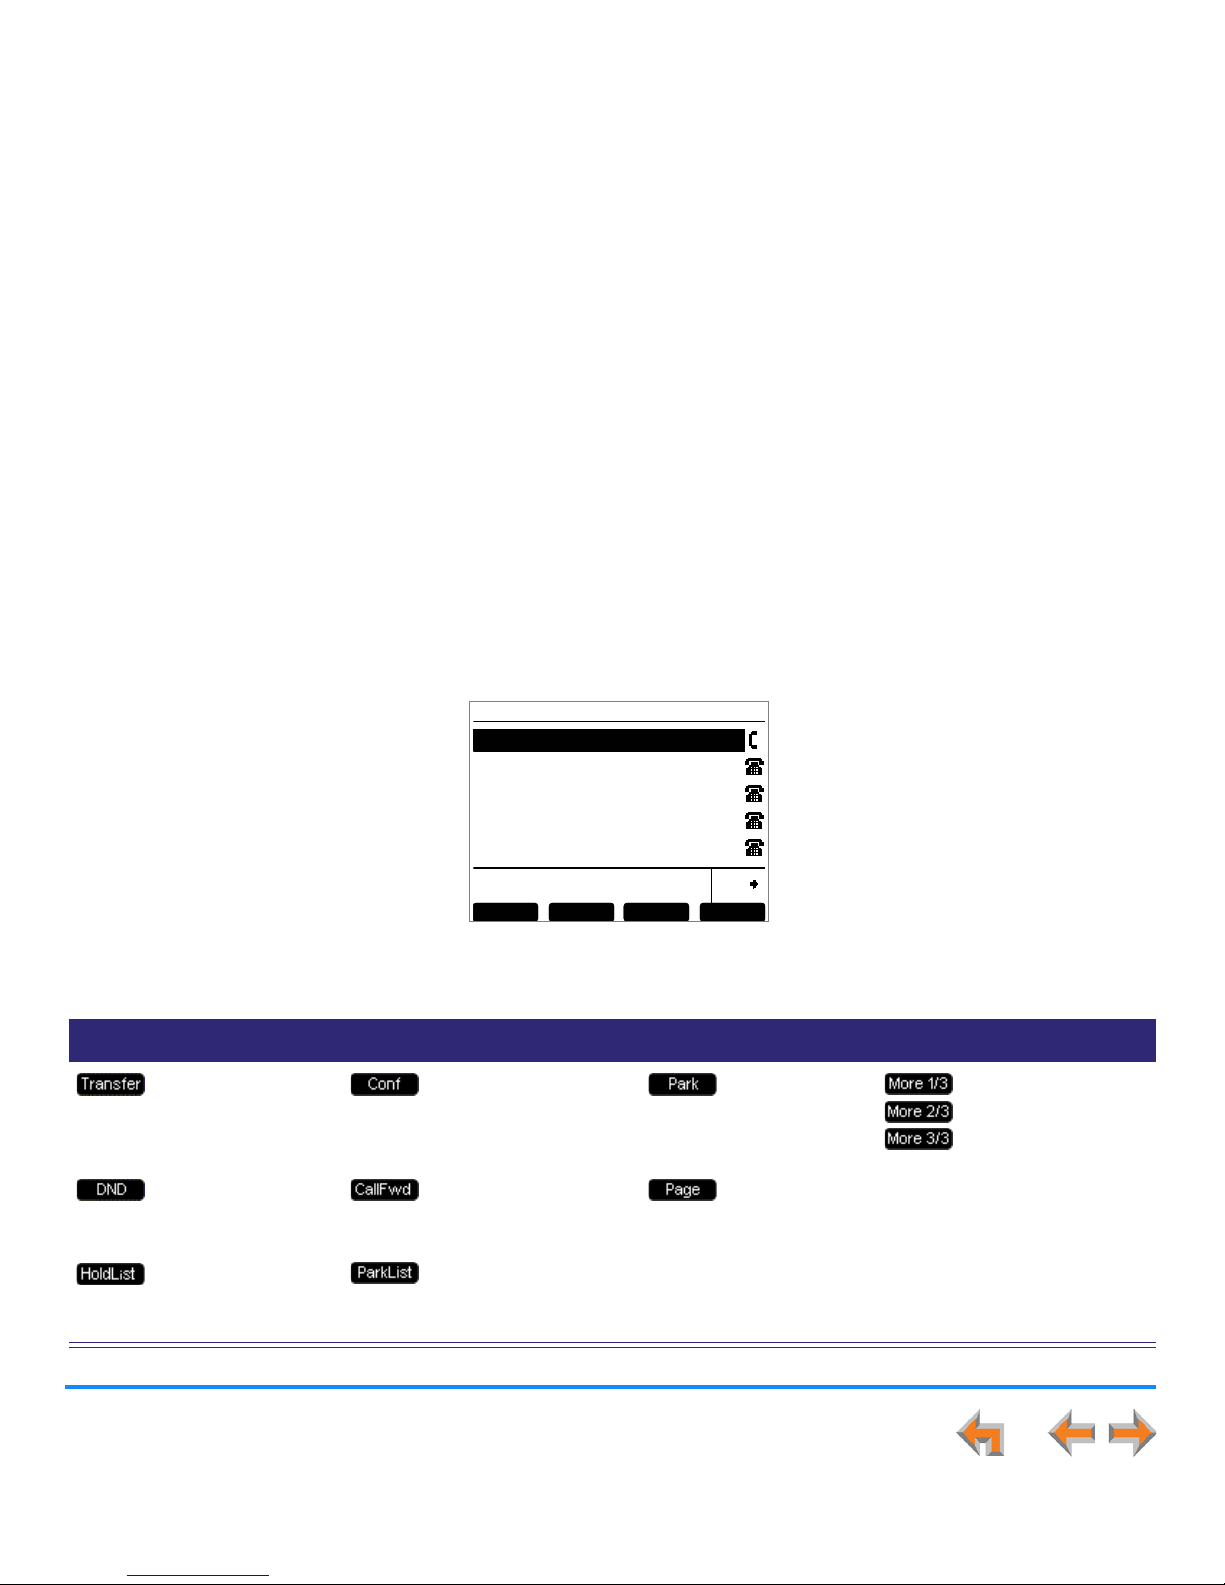
Call Management 78
Synapse SB67030/031 Deskset and Accessories User’s Guide
Call Management
The Deskset Call Management functions begin with the Active Call screen shown in Figure 64.
.
Table 11. Active Call Screen Description
Key Description Key Description Key Description Key Description
Call Appearance
mode only—Begins
transfer of a call.
Begins a conference
call.
Call
Appearance
mode only—
Parks a call.
Call Appearance
mode only—Moves
to the next set of
soft keys. More 1/3
indicates that you
are on page one of
three.
Turns Do Not
Disturb on or off.
Call Appearance
mode only—Turns
Call Forward on or off.
Pages all
extensions.
Line Appearance
mode only—Access
the Held Calls list.
Call Appearance
mode only—Accesses
Park list.
Transfer
Quick
Dial
12:30PM Thu Feb 23 2008
ABC Accou... 9-503-555-0194
0:01
Transfer Con f Pa r k Mor e 1/ 3
Transfer
Quick
Dial
12:30PM Thu Feb 25 2010
ABC Accou... 9-503-555-0194
0:01
Transfer Con f Pa r k Mor e 1/ 3
Figure 64. Active Call Screen (Call Appearance mode shown)
Page 79
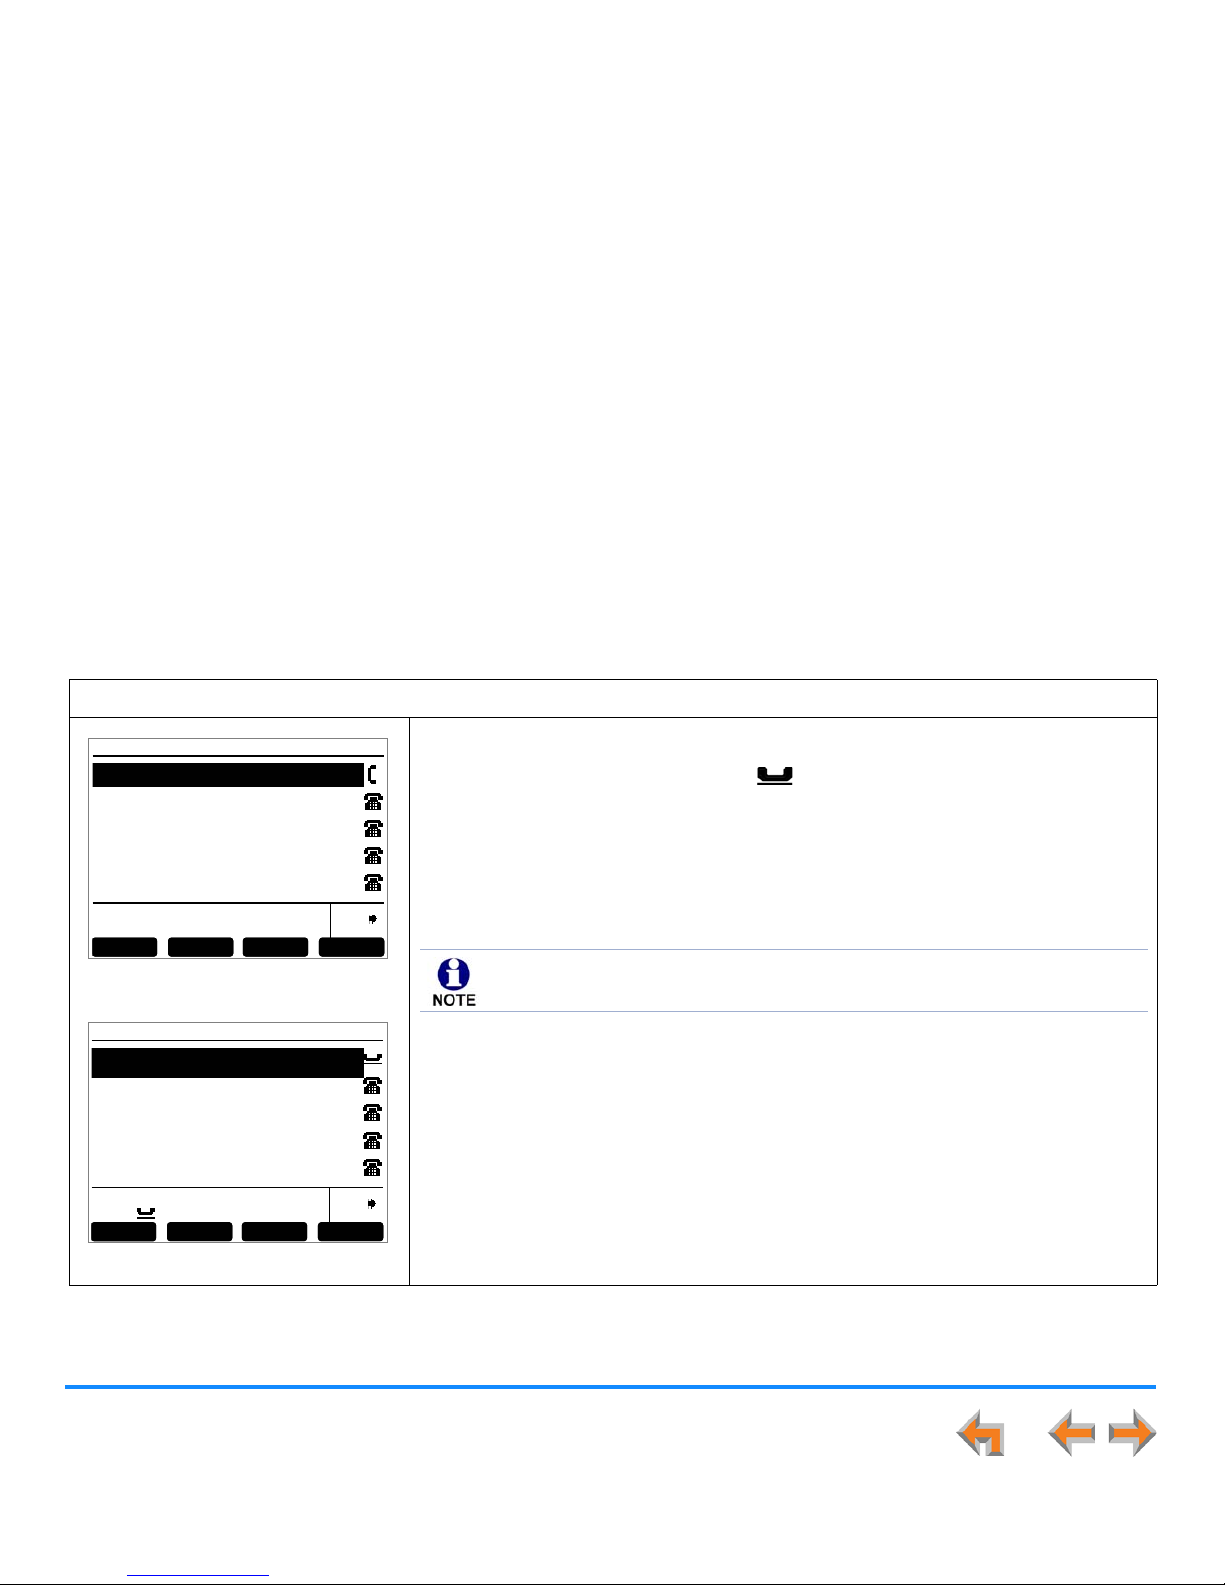
Call Management 79
Synapse SB67030/031 Deskset and Accessories User’s Guide
Placing a Call on Hold (Call Appearance Mode)
To hold calls and manage held calls:
Figure 65. Active Call
Figure 66. Call Held
1. When you are on an active call, as shown in Figure 65, press HOLD.
The Held Call Appearance icon appears next to the highlighted call, as
shown in Figure 66.
If a call has been on hold for longer than three minutes, the Deskset reminds
you with a brief ring every 30 seconds.
2. To take the call off hold, highlight the call and press SELECT, or press the
associated Call Appearance key.
To do this with the Cordless Handset, see “Managing Held Calls” on page 97.
Transfer
Quick
Dial
12:30PM Thu Feb 25 2010
Graham Be ll 232-555-0176 2:51
Transfer Con f Pa r k Mor e 1/ 3
Transf er
Quick
Dial
12:30PM Thu Feb 25 2010
Transf er Conf Pa g e Mor e 1 /3
To retriev e held call, press key
next to icon.
Graham Be ll 232-555-0176 2:51
Lifting the corded handset, or pressing SPEAKER or HEADSET, takes you off
hook on an Idle line; it does not take the highlighted call off hold.
Page 80
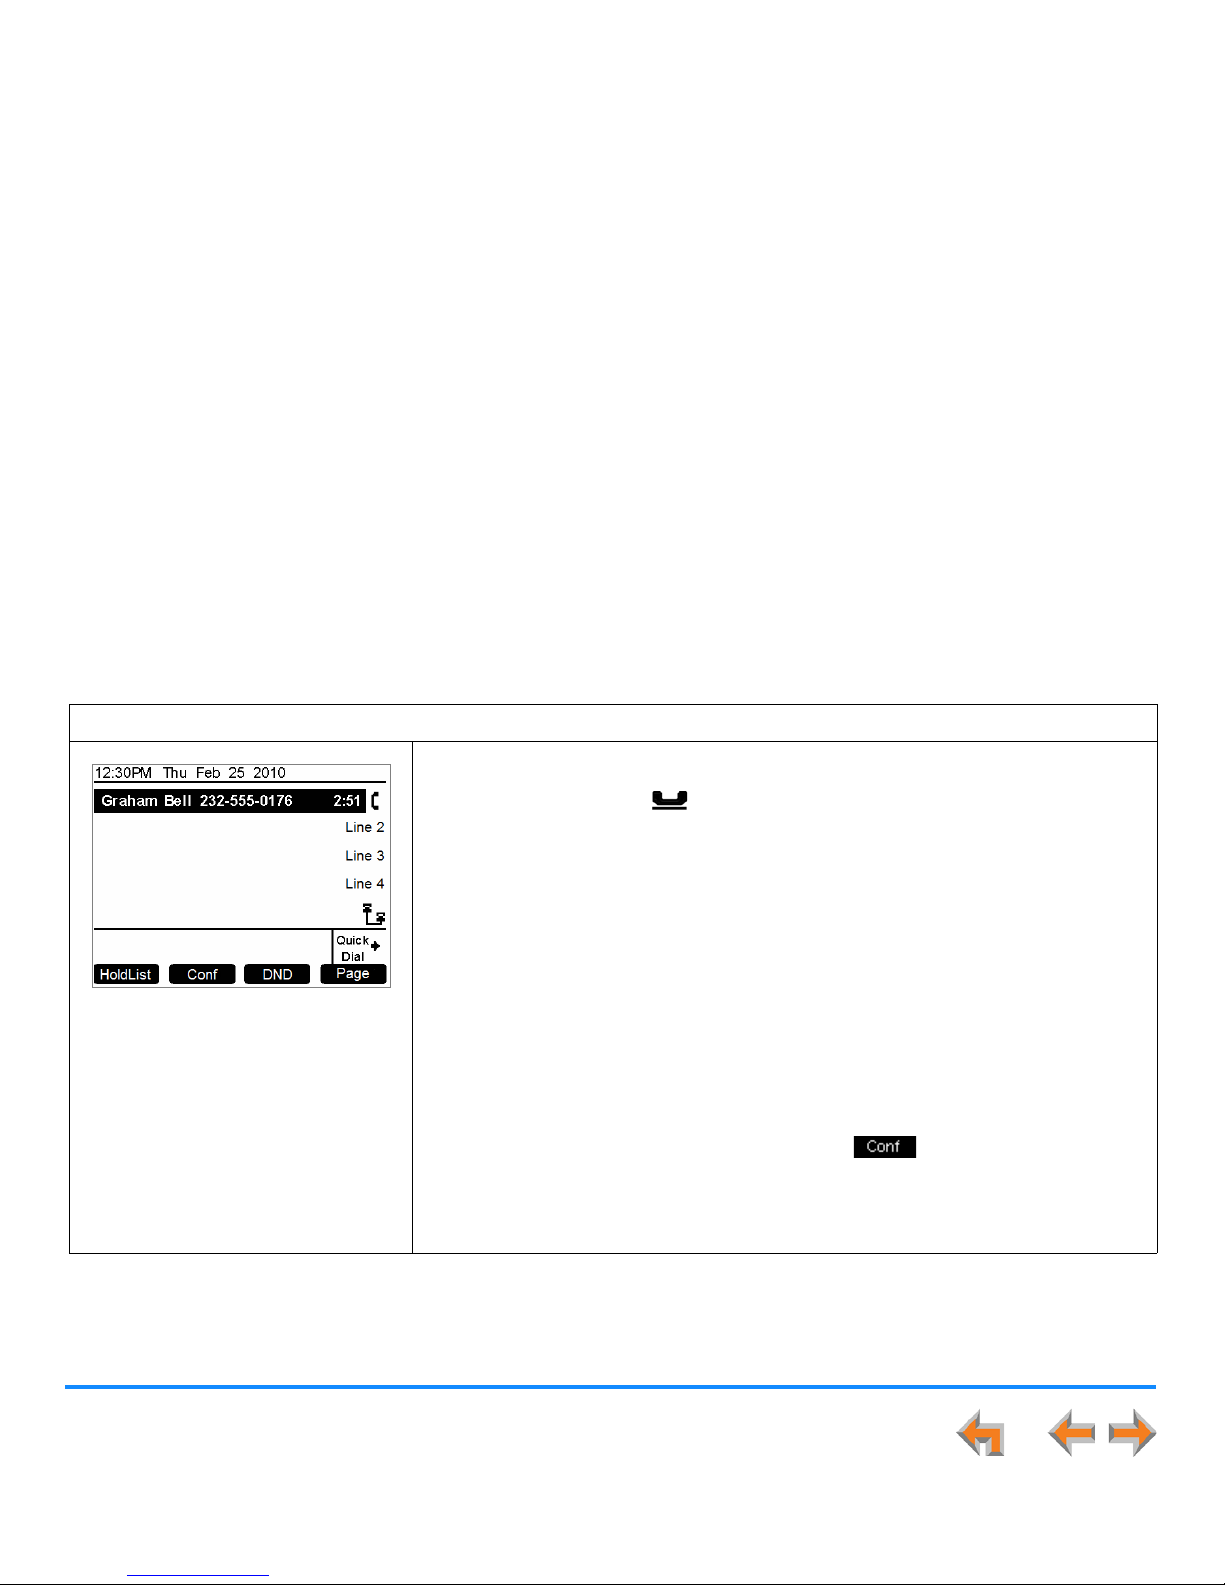
Call Management 80
Synapse SB67030/031 Deskset and Accessories User’s Guide
Placing a Call on Hold (Line Appearance Mode)
In Line Appearance mode, all Desksets that share assigned lines can view held calls and take calls off hold.
To hold calls and manage held calls:
Figure 67. Active Call
1. When you are on an active call, as shown in Figure 67, press HOLD.
The Held Call icon appears and the Line Appearance LED flashes slowly.
On other Desksets that are assigned that line, the Line Appearance LED
flashes slowly. Someone at any other Deskset assigned that line can press the
flashing Line Appearance key to take the call off hold, making it an active call
on their Deskset.
All Desksets, including those that are not assigned that line, can view and take
your call off hold from the Held Calls list. See “Accessing the Held Calls List
(Line Appearance Mode)” on page 120.
When you put an Intercom call on hold, only you can take the call off hold.
When a call is on hold, you can use the Deskset Menu to access other
functions.
When a call is on hold, you can also press to start a conference call.
See “Conferencing” on page 84.
2. To take the call off hold, press the Line Appearance key for that call.
Page 81

Call Management 81
Synapse SB67030/031 Deskset and Accessories User’s Guide
Transferring a Call Overview
You can transfer an active or a held call to an internal extension or outside number.
The transfer recipient does not have to talk to you before receiving the transferred call. If you do not talk to the transfer recipient
before transferring the call, you are making an “unsupervised” transfer. If you talk to the transfer recipient before completing the
transfer, you are making a “supervised” transfer.
Yo u c an tr an sfer a call to an outside number only if this function has been enabled by your system administrator. The call transfer
function is enabled by default.
Transfer Rules
The following rules apply when transferring a call:
An extension can transfer only one call at a time.
The Transfer action can be canceled by pressing CANCEL. The call remains on hold.
To transfer calls with the Cordless Handset, see “Transferring” on page 92.
This section applies to Call Appearance mode only. To make calls available to other Desksets when your system is in
Line Appearance mode, put a call on hold. Someone at another Deskset can retrieve the call if that line has been assigned
to their Deskset as described in “Placing a Call on Hold (Line Appearance Mode)” on page 80. To view and access held
calls on all lines, see “Accessing the Held Calls List (Line Appearance Mode)” on page 120.
Page 82
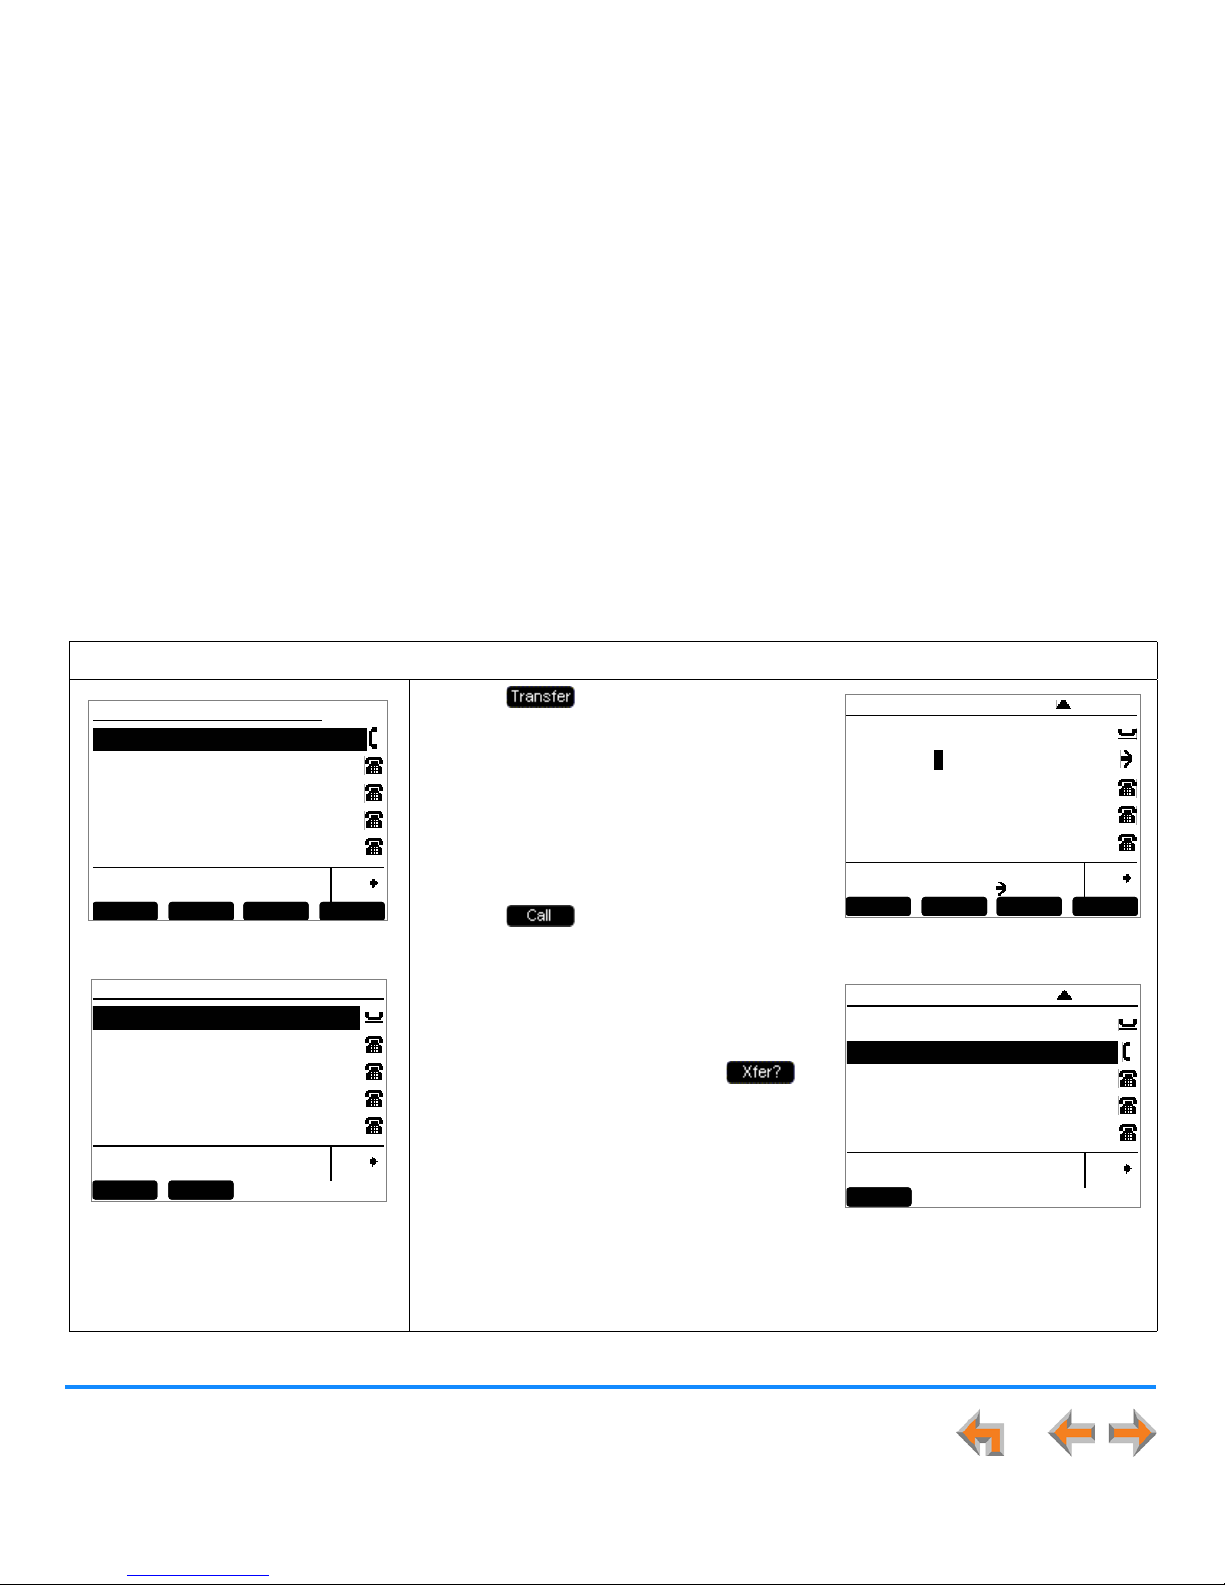
Call Management 82
Synapse SB67030/031 Deskset and Accessories User’s Guide
Transferring a Call
To transfer a call to an extension or phone number:
Figure 68. Active Call
Figure 69. Awaiting Transfer
1. Press from the Active Call screen,
as shown in Figure 68. The highlighted call
is put on hold. The Awaiting Transfer
message appears, as shown in Figure 69.
2. Dial a number, as shown in Figure 70, or
access an entry from the Directory, Call Log,
Extension, or Messages list. See “Accessing
Items in Lists” on page 104.
3. Press or SELECT. You can also
retrieve a parked or held call.
You can now speak to the person to whom
you are transferring the call and announce
the transfer, as shown in Figure 71.
4. To complete the transfer, press . A
Call Transferred screen appears for two
seconds. When the transfer is complete, the
screen returns to Idle mode.
The Transfer action can be canceled by
pressing CANCEL. The call remains on hold.
To do this with the Cordless Handset, see
“Transferring” on page 92.
Transfer
Quick
Dial
12:30PM Thu Feb 25 2010
Graham Be ll 1-9-232-555-0176 0:01
Transfer Con f Pa r k Mor e 1/ 3
Quick
Dial
12:30PM Thu Feb 23 2008
Transf er Conf Page Mor e 1 /3
To retriev e held call, pres s key
next to icon.
Graham Be ll 9-800-95552007 3:00
Quick
Dial
12:30PM Thu Feb 23 2008
More 1/3Par kConfTransf er
Graham Be ll 9-1-232-555-0176 0:01
Transf er
Quick
Dial
12:30PM Thu Feb 25 2010
Mailbox
Call ex tension, ret riev e a held call, place
outs ide call, or trans fer t o Mailbox.
...232-555-0176
Aw aiting Transfer
Ex t Li s t
Transf er
Quick
Dial
12:30PM Thu Feb 25 2010
To call, lif t receiv er, or pres s SPEAKER,
HEADSET, or key next to icon.
Pa us eCallBackspcStore
...232-555- 0176 Aw aiting Transfe r
9-1-232-555
Figure 70. Entering the Transfer
Number
Transf er
Quick
Dial
12:30PM Thu Feb 25 2010
...232-555-0176 Aw aiting Tr ansfer
Xfer?
Press
Xfer
?
to c onfirm transf er, or
press CANCEL.
9-1-232-555-0154 0:32
Figure 71. Transfer Pending
Page 83
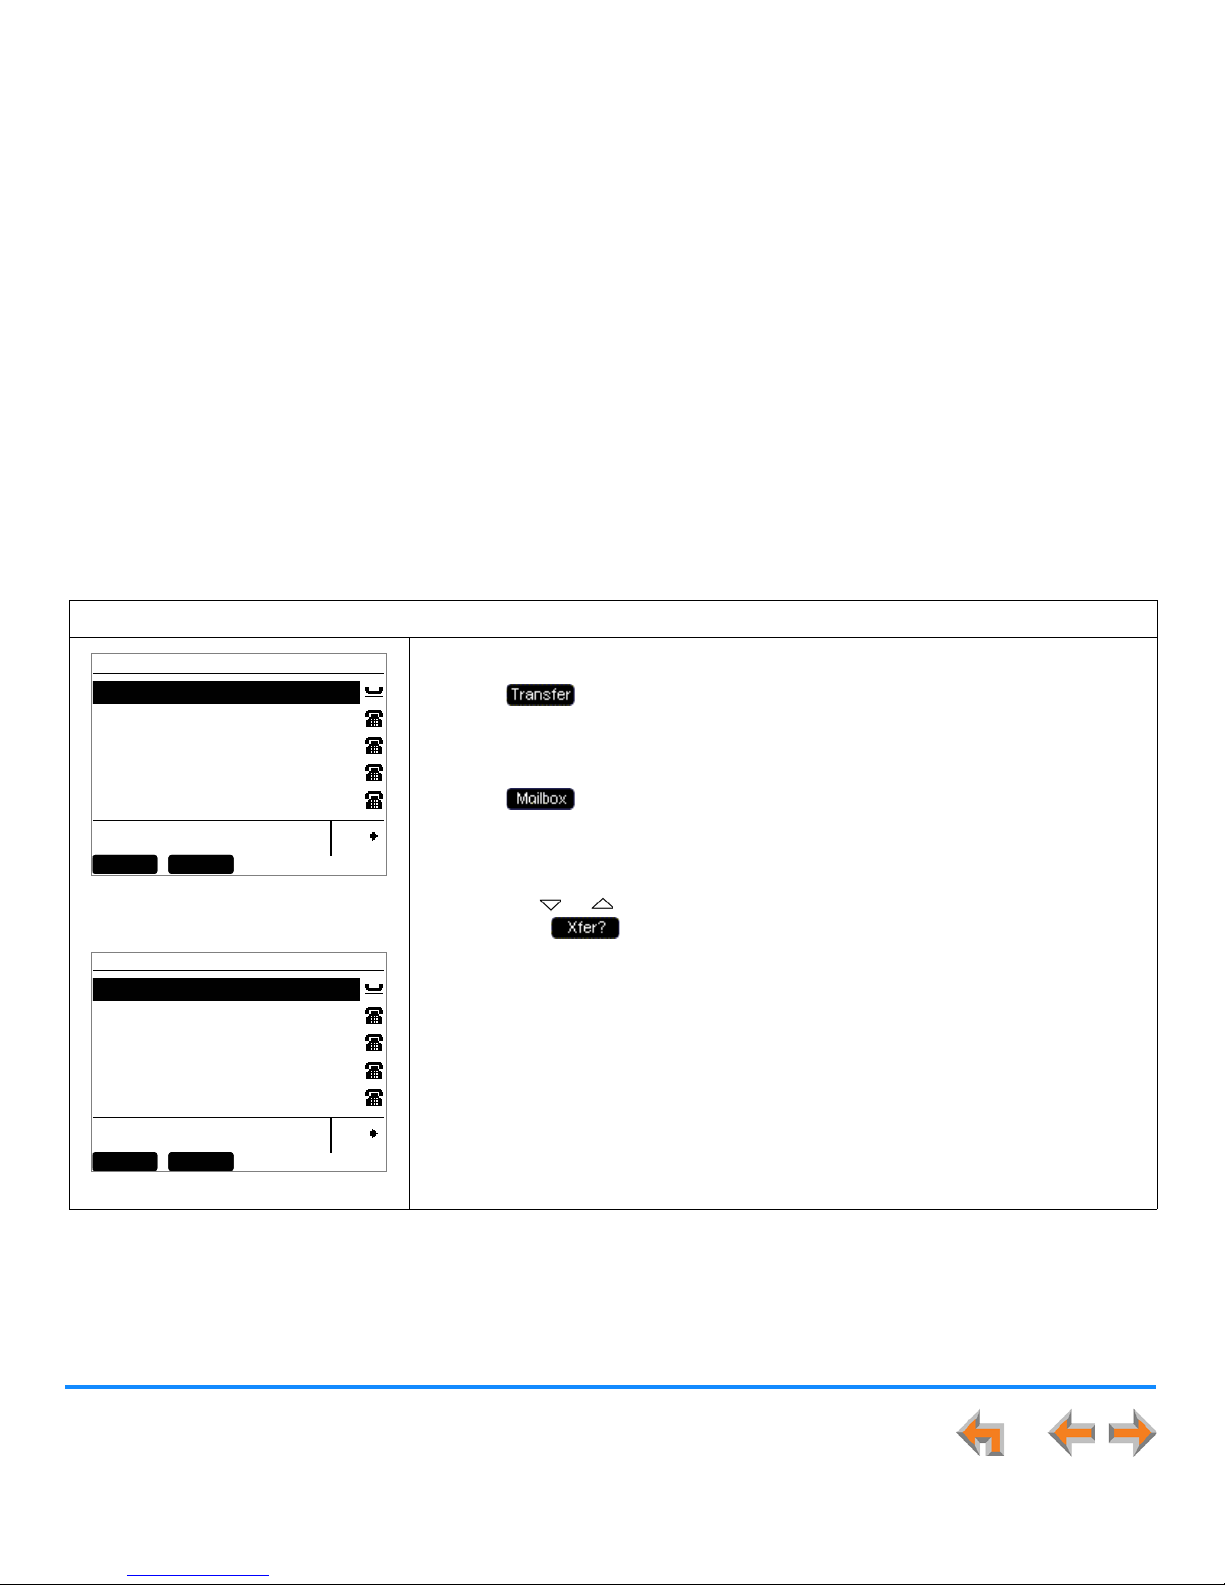
Call Management 83
Synapse SB67030/031 Deskset and Accessories User’s Guide
To transfer a call to a Mailbox:
Figure 72. Awaiting Transfer with
Mailbox Option
Figure 73. Mailbox List
You can transfer a call to a Personal Mailbox or to a Group Mailbox (if available).
1. Press from the Active Call screen.
The call is automatically put on hold. The Awaiting Transfer message appears,
as shown in Figure 72.
2. Press .
The Mailboxes list appears, as shown in Figure 73. If there are no Group Mailboxes,
only your Personal Mailbox appears.
3. Press the or navigation key to highlight the desired Mailbox, and press
SELECT or .
4. A Call Transferred screen appears for two seconds. When the transfer is
complete, the screen returns to Idle mode.
Transf er
Quick
Dial
12:30PM Thu Feb 25 2010
Mailbox
Call ex tension, ret riev e a held call, place
outs ide call, or trans fer t o Mailbox.
...232-555-0176
Aw aiting Transfer
Ex t Li s t
Transf er
Quick
Dial
12:30PM Thu Feb 25 2010
Mailbox
Call ex tension, ret riev e a held call, place
outs ide call, or trans fer t o Mailbox.
...232-555-0176
Aw aiting Transfer
Ex t Li s t
Page 84
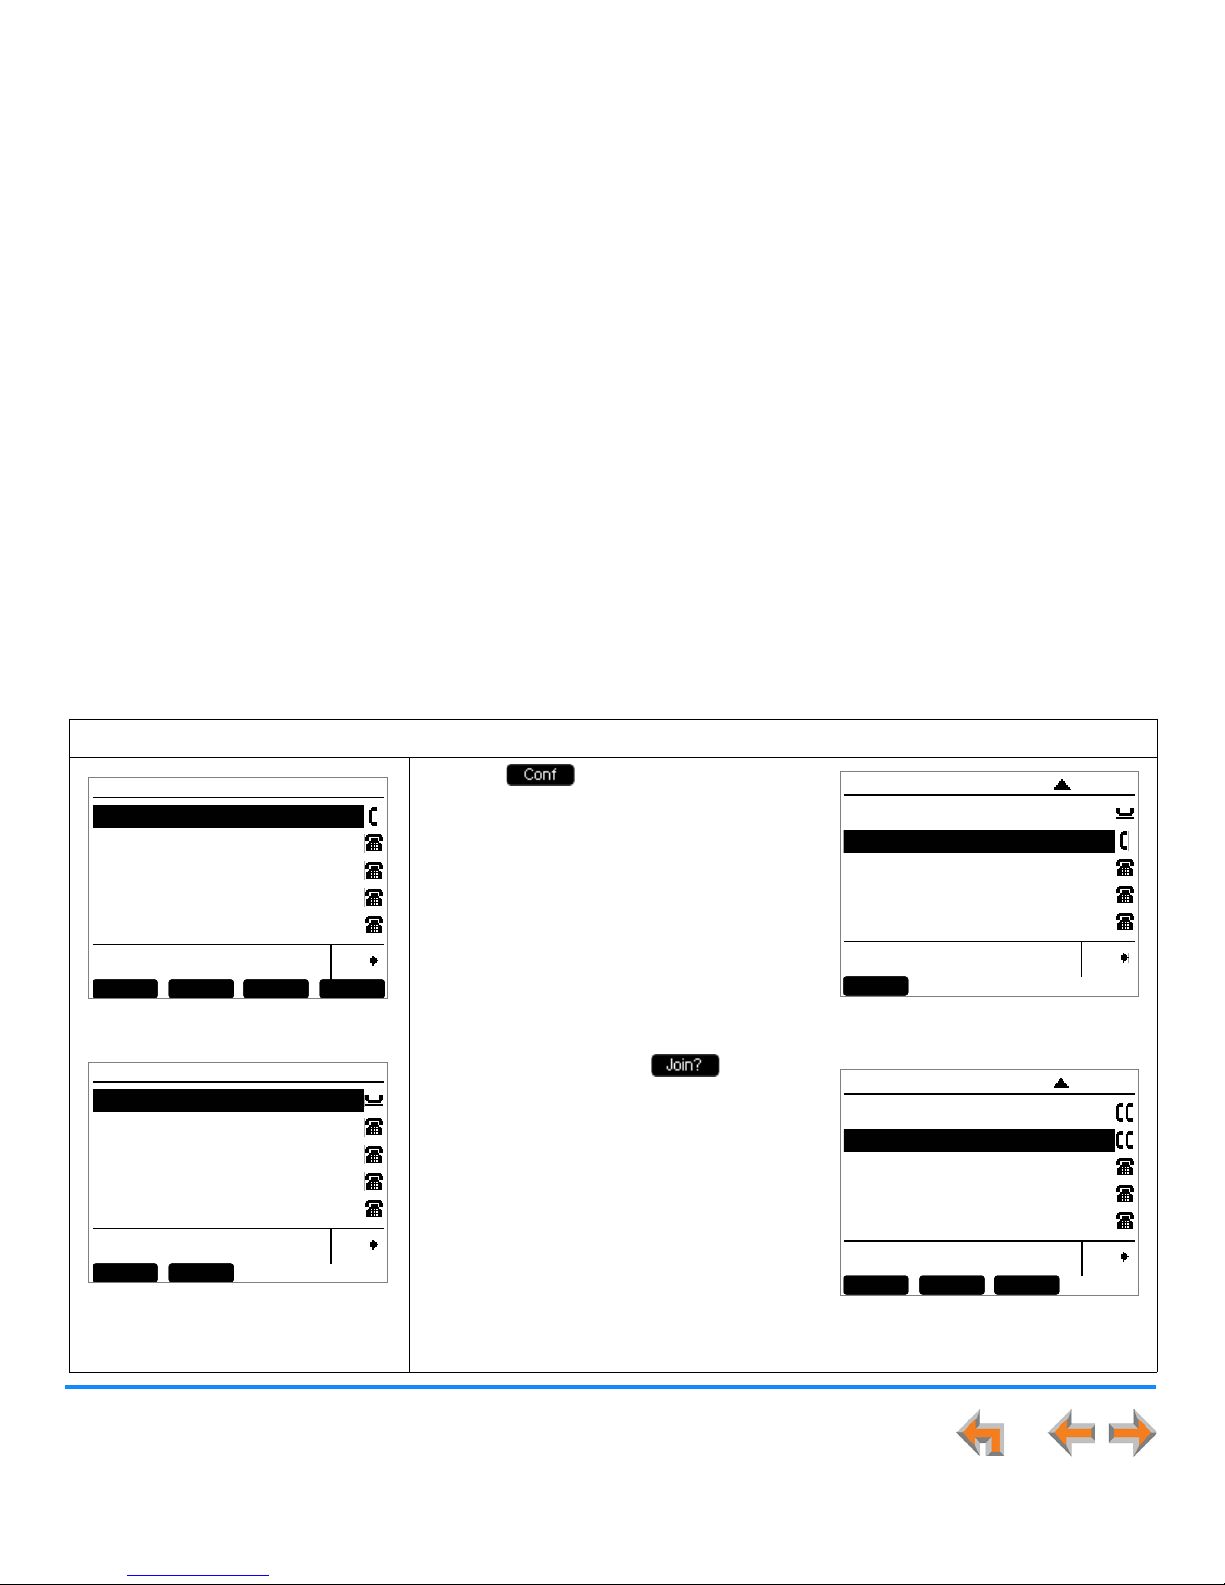
Call Management 84
Synapse SB67030/031 Deskset and Accessories User’s Guide
Conferencing
You can set up a conference call with yourself and two telephone numbers (either internal, outside, or with both). The figures
below show Call Appearance mode, but the procedure is the same in Line Appearance mode.
To conference:
Figure 74. Active Call
Figure 75. Waiting to Join
1. Press from an Active Call screen,
as shown in Figure 74.
The active call is placed on hold and the
screen in Figure 75 appears.
2. Establish a second call. You can dial the
second call normally, or you can get it from
one of the lists. See “Accessing Items in
Lists” on page 104.
Once the second call has been established,
the screen shown in Figure 76 appears.
3. To join the calls, press .
Your extension is now in conference with
the other two phone numbers, as shown in
Figure 77.
If you hang up while on the conference, the
conference ends. If you make or take
another call, the conference continues
without you. You can rejoin by pressing a
corresponding Call Appearance or Line
Appearance key.
To do this with the Cordless Handset, see
“Conferencing” on page 94.
Transfer
Quick
Dial
12:30PM Thu Feb 25 2010
Graham Be ll 232-555-0176 2:51
Transfer Con f Pa r k Mor e 1/ 3
Transf er
Quick
Dial
12:30PM Thu Feb 25 2010
232-555-0176
Waiting to Join
Ex t Li s t Par k Li s t
Call 2nd num ber or retreiv e held or
parked c all.
Transf er
Quick
Dial
12:30PM Thu Feb 25 2010
232-555-0176 Waiting to Join
9-1-350-555-0159 0:07
Join?
Press Join? to st art conf erence with
this call or press CANCEL.
Figure 76. Second Call
Established
Transfer
Quick
Dial
12:30PM Thu Feb 25 2010
En dC on f Dr op
232-555-0176 Confe re nce Call
350-555-0159 Confe re nce Call
Page
Figure 77. Conference Complete
Page 85
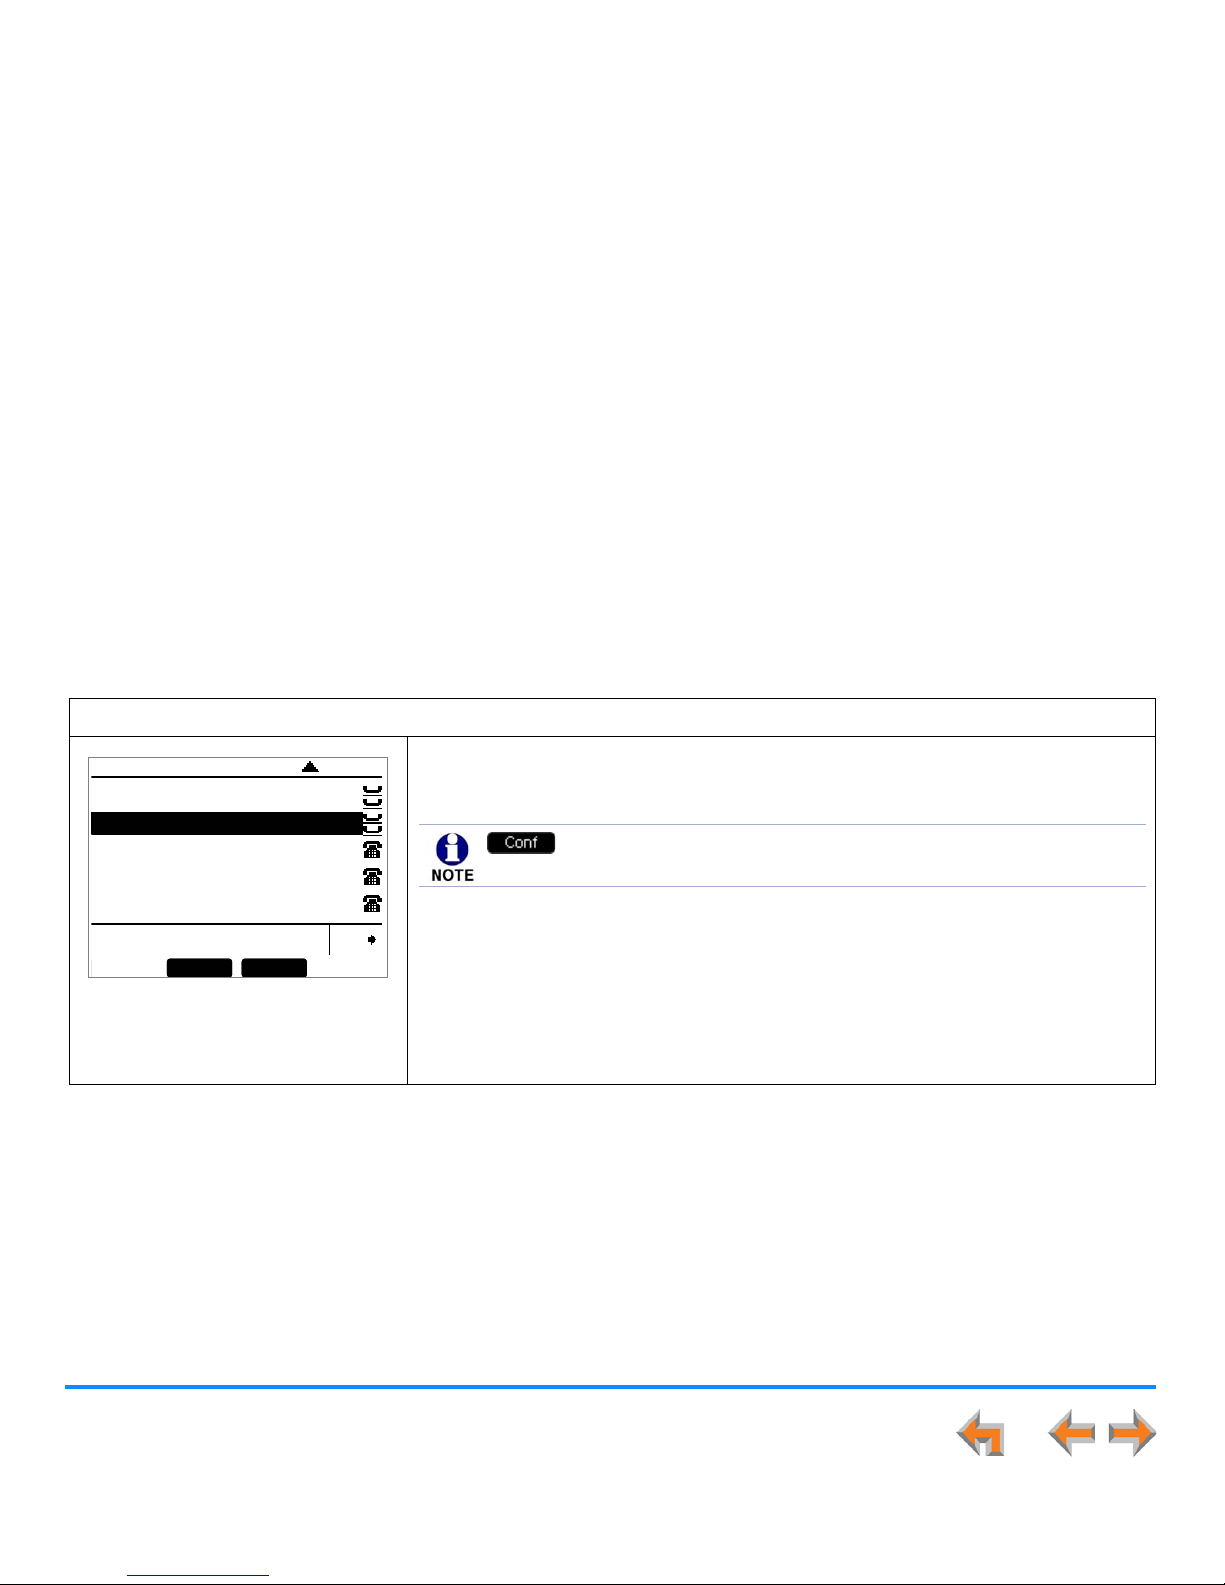
Call Management 85
Synapse SB67030/031 Deskset and Accessories User’s Guide
Hold and Cancel a Conference
The figures below show Call Appearance mode, but the procedure is the same in Line Appearance mode.
To put a conference on hold:
Figure 78. Held Conference
When you are participating in a conference call, you can put both calls on hold by
pressing HOLD. The other callers can continue communicating with each other. The
held conference icon, as shown in Figure 78, designates a held conference.
A conference is automatically put on hold when you:
Press an available Call Appearance or Line Appearance key to start a new call.
Answer an incoming call.
Press a Call Appearance or Line Appearance key to take the conference call off hold.
Transf er
Quick
Dial
12:30PM Thu Feb 25 2010
To retriev e held conf erence, press k ey
next to either conference call.
232-555-0176
Conference Call
350-555-0159 Conference Call
Pa geDr op
is unavailable during an active call if you have another conference on
hold.
Page 86
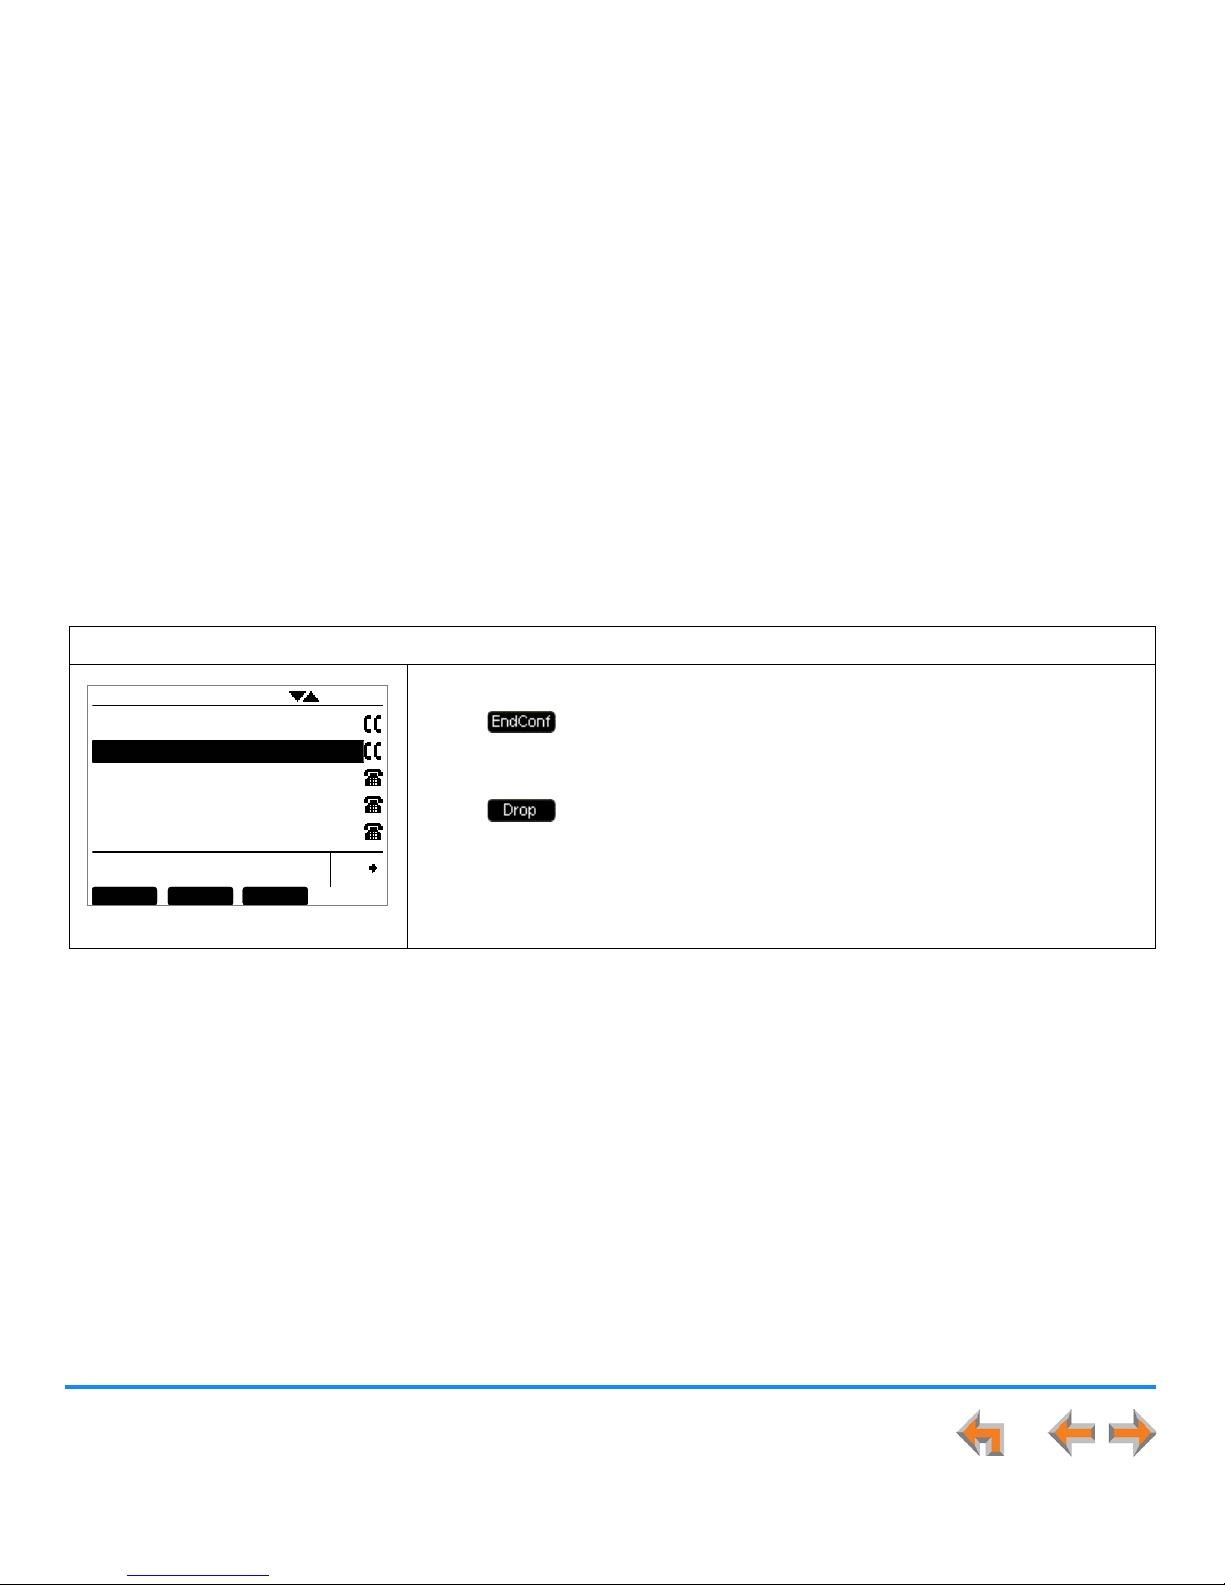
Call Management 86
Synapse SB67030/031 Deskset and Accessories User’s Guide
To cancel a conference:
Figure 79. Conference
From the Conference screen shown in Figure 79, you can press:
to end the conference. Both calls hang up and the system returns to
whatever Call Appearance or Line Appearance you were on before the
conference call.
to terminate the highlighted call. The other call remains active.
Transfer
Quick
Dial
12:30PM Thu Feb 25 2010
350-555-0159
Confe re nce Call
232-555-0176
Conf erence Call
En dC on f Dr op Page
Page 87
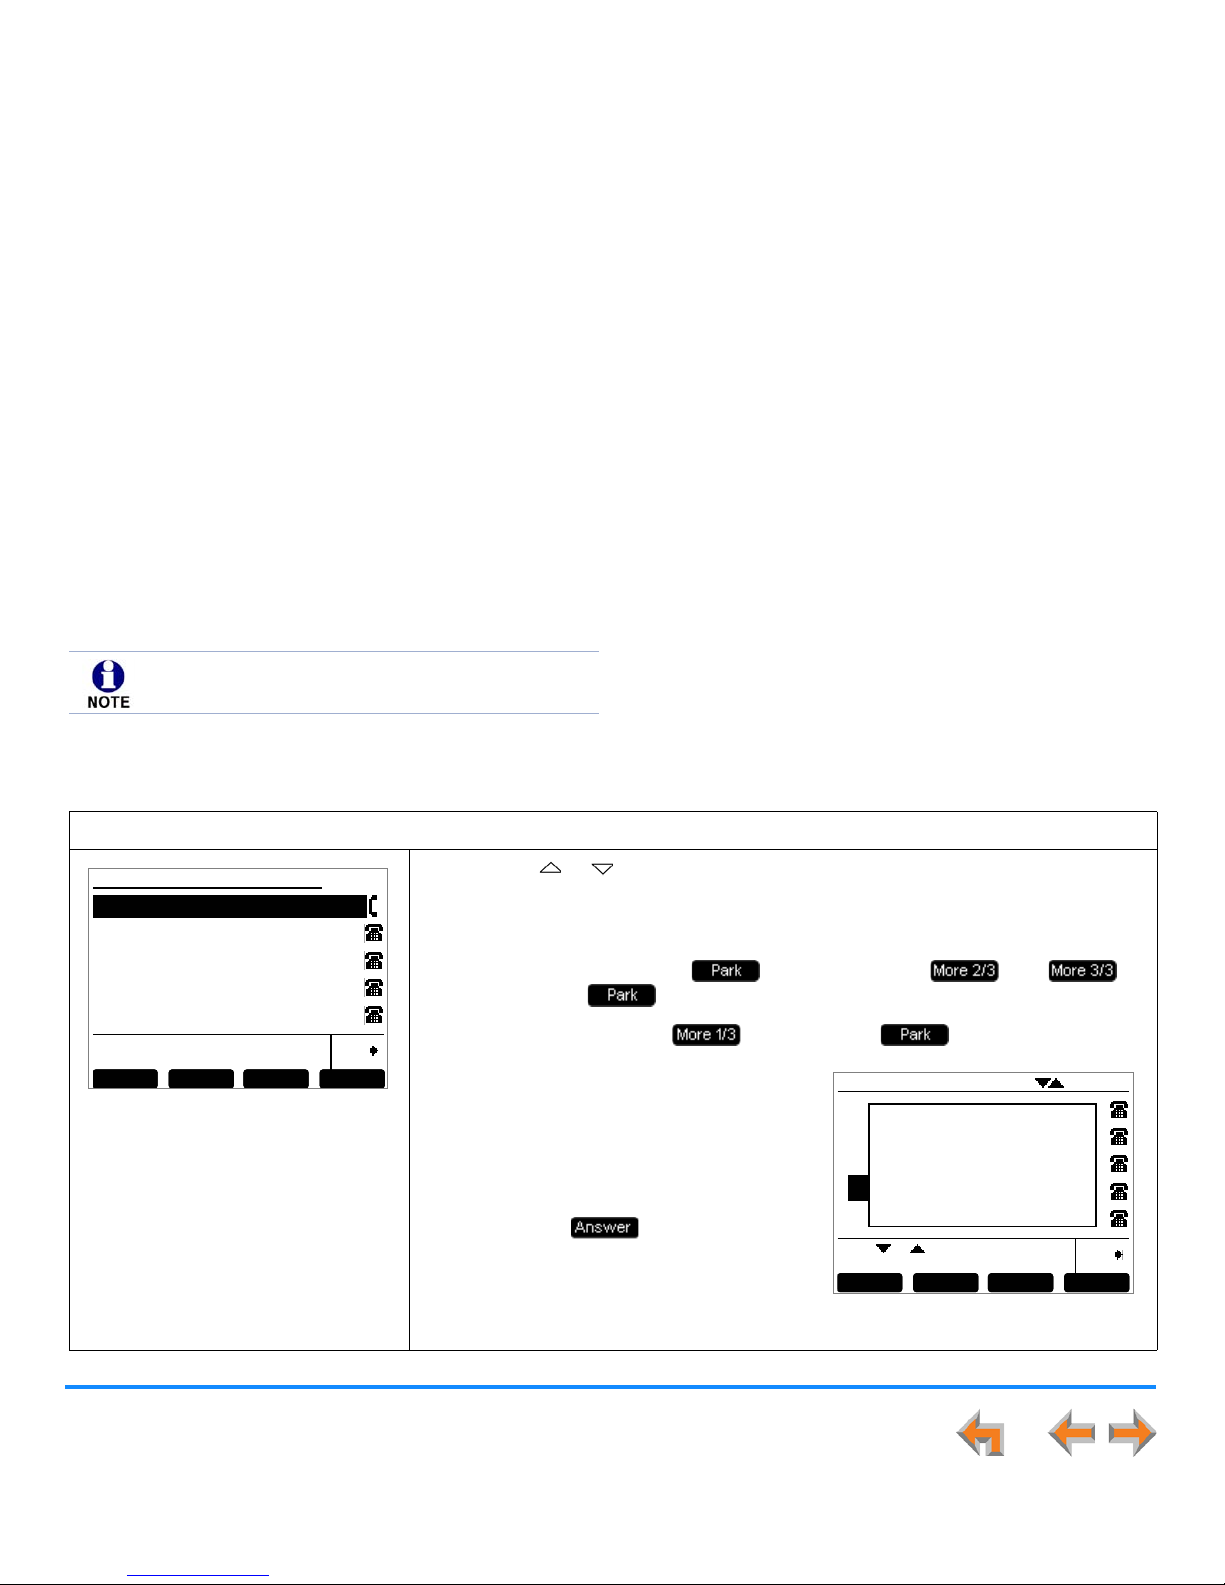
Call Management 87
Synapse SB67030/031 Deskset and Accessories User’s Guide
Parking a Call
The Deskset allows you to park either active or held outside calls. Parking a call is similar to putting a call on Hold, but any
extension on the system can retrieve a parked call. See “Retrieving a Parked Call” on page 88.
This feature applies to Call Appearance mode only.
To park a call:
Figure 80. Select Call
1. Press the or navigation key to highlight an active or held outside call, as
shown in Figure 80.
2. To park a call:
For an active call, press . If necessary, press then to
display the soft key.
For a held call, press and then press .
The screen shown in Figure 81 appears for
five seconds, then the Idle screen appears.
Pick up a parked call within three
minutes or the Deskset rings.
To answer a call that is ringing back,
press the soft key that appears
when there is an incoming call.
To do this with the Cordless Handset, see
“Parking a Call” on page 100.
Transfer
Quick
Dial
12:30PM Thu Feb 25 2010
Graham Be ll 1-9-232-555-0176 0:01
Transfer Con f Pa r k Mor e 1/ 3
Quick
Dial
12:30PM Thu Feb 23 2008
Transf er Conf Page Mor e 1 /3
To retriev e held call, pres s key
next to icon.
Graham Be ll 9-800-95552007 3:00
Quick
Dial
12:30PM Thu Feb 23 2008
More 1/3Par kConfTransf er
Graham Be ll 9-1-232-555-0176 0:01
DND CallFw d Page Mor e 1/2
Quick
Dial
12:30PM Thu Feb 25 2010
Ext 249
John Smith
2 Missed Calls
0 New Messages
Press or to mov e highlight, then
press
SELEC T
.
Graham Bell
912325550176
Call Parked on Extens ion 101.
Pr ess ParkList to retrieve call.
Figure 81. Parked Call
Page 88
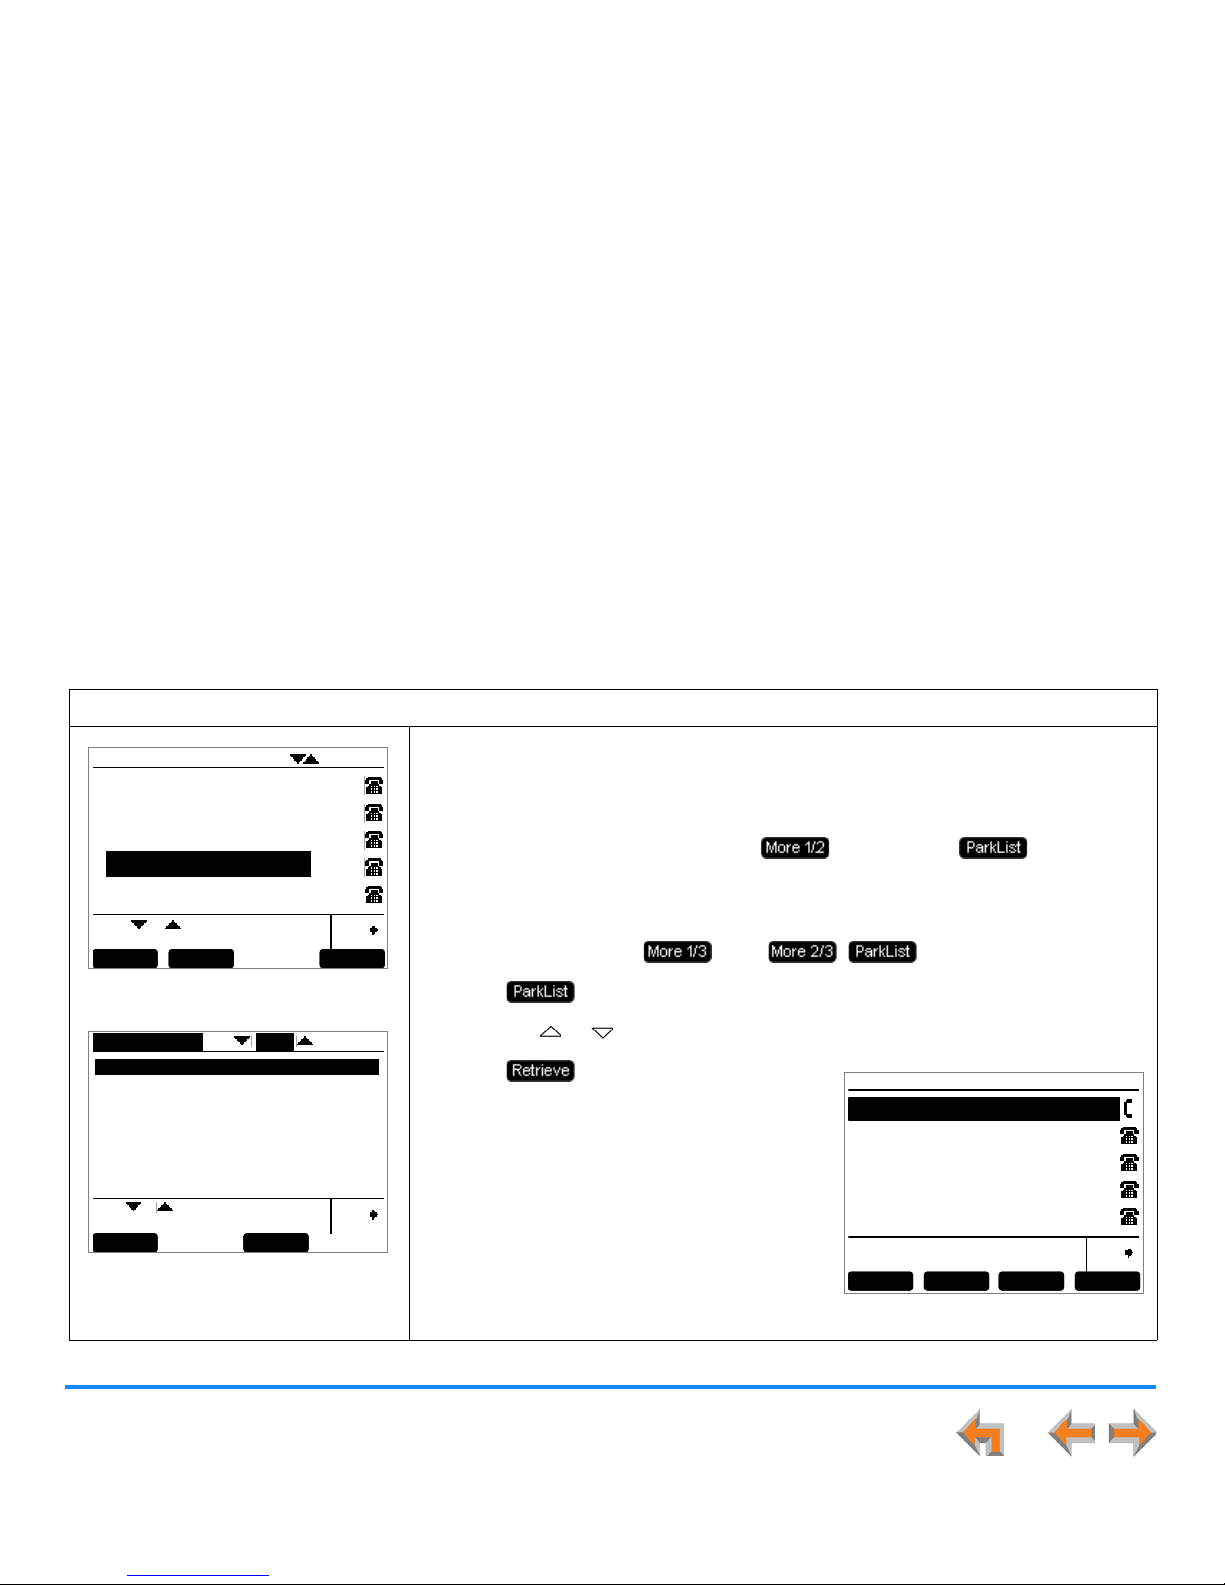
Call Management 88
Synapse SB67030/031 Deskset and Accessories User’s Guide
Retrieving a Parked Call
You can retrieve parked calls from any extension in the system.
To retrieve a parked call:
Figure 82. Idle Screen, More 2/2
Figure 83. Parked Call List
If you know the extension number of the parked call, dial it. You will retrieve the
parked call.
OR
1. From Idle or from a held call, press to display the soft key, as
shown in Figure 82.
OR
In Active mode, press , then . appears.
2. Press to display the Parked Calls list, as shown in Figure 83.
3. Press the or navigation key to highlight the desired entry.
4. Press to retrieve the parked call.
The Active Call screen appears, as shown in
Figure 84.
To do this with the Cordless Handset, see
“Parking a Call” on page 100.
Quick
Dial
12:30PM Thu Feb 25 2010
Ext 249
John Smith
2 New Missed Calls
0 New Messages
Press or to mov e highlight, then
press
SELEC T
.
Ex t L is t Pa r kL i s t Mo re 2 /2
Ret riev e
Quick
Dial
9-232-555-0176 101
Par ked Calls 1/2
David Carter
102
Press or to scroll, then press
Re tri e ve
to unpark call.
Page
Transfer
Quick
Dial
12:30PM Thu Feb 25 2010
Graham Be ll 1-9-232-555-0176 0:01
Transfer Con f Pa r k Mor e 1/ 3
Figure 84. Call Retrieved
Page 89
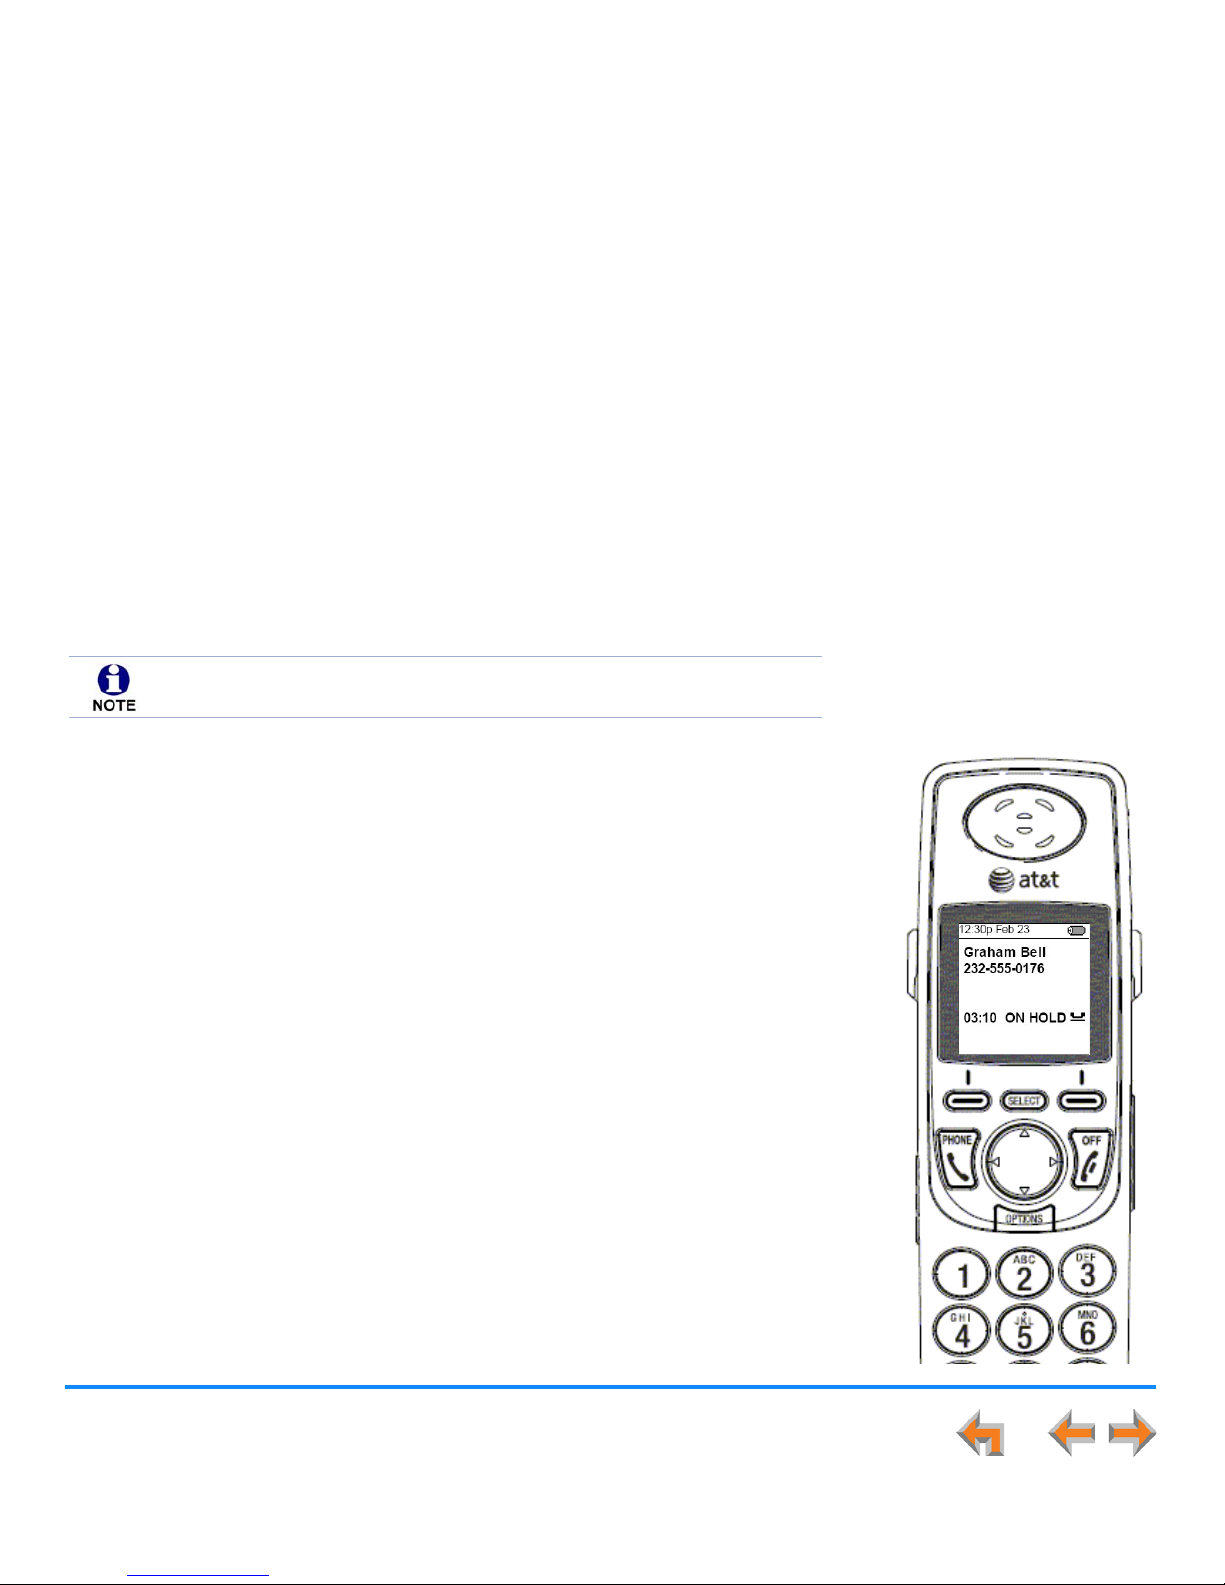
Call Management 89
Synapse SB67030/031 Deskset and Accessories User’s Guide
Call Management Using the Cordless Handset
You can also manage calls with the optional SB67040 Cordless Handset using the following
functions:
“Call Deck” on page 91
“Transferring” on page 92
“Conferencing” on page 94
“Managing Held Calls” on page 97
“Held Call Options” on page 99
“Parking a Call” on page 100
“Using a Corded Headset” on page 102.
Cordless Handset operation is compatible with Call Appearance mode only.
Page 90
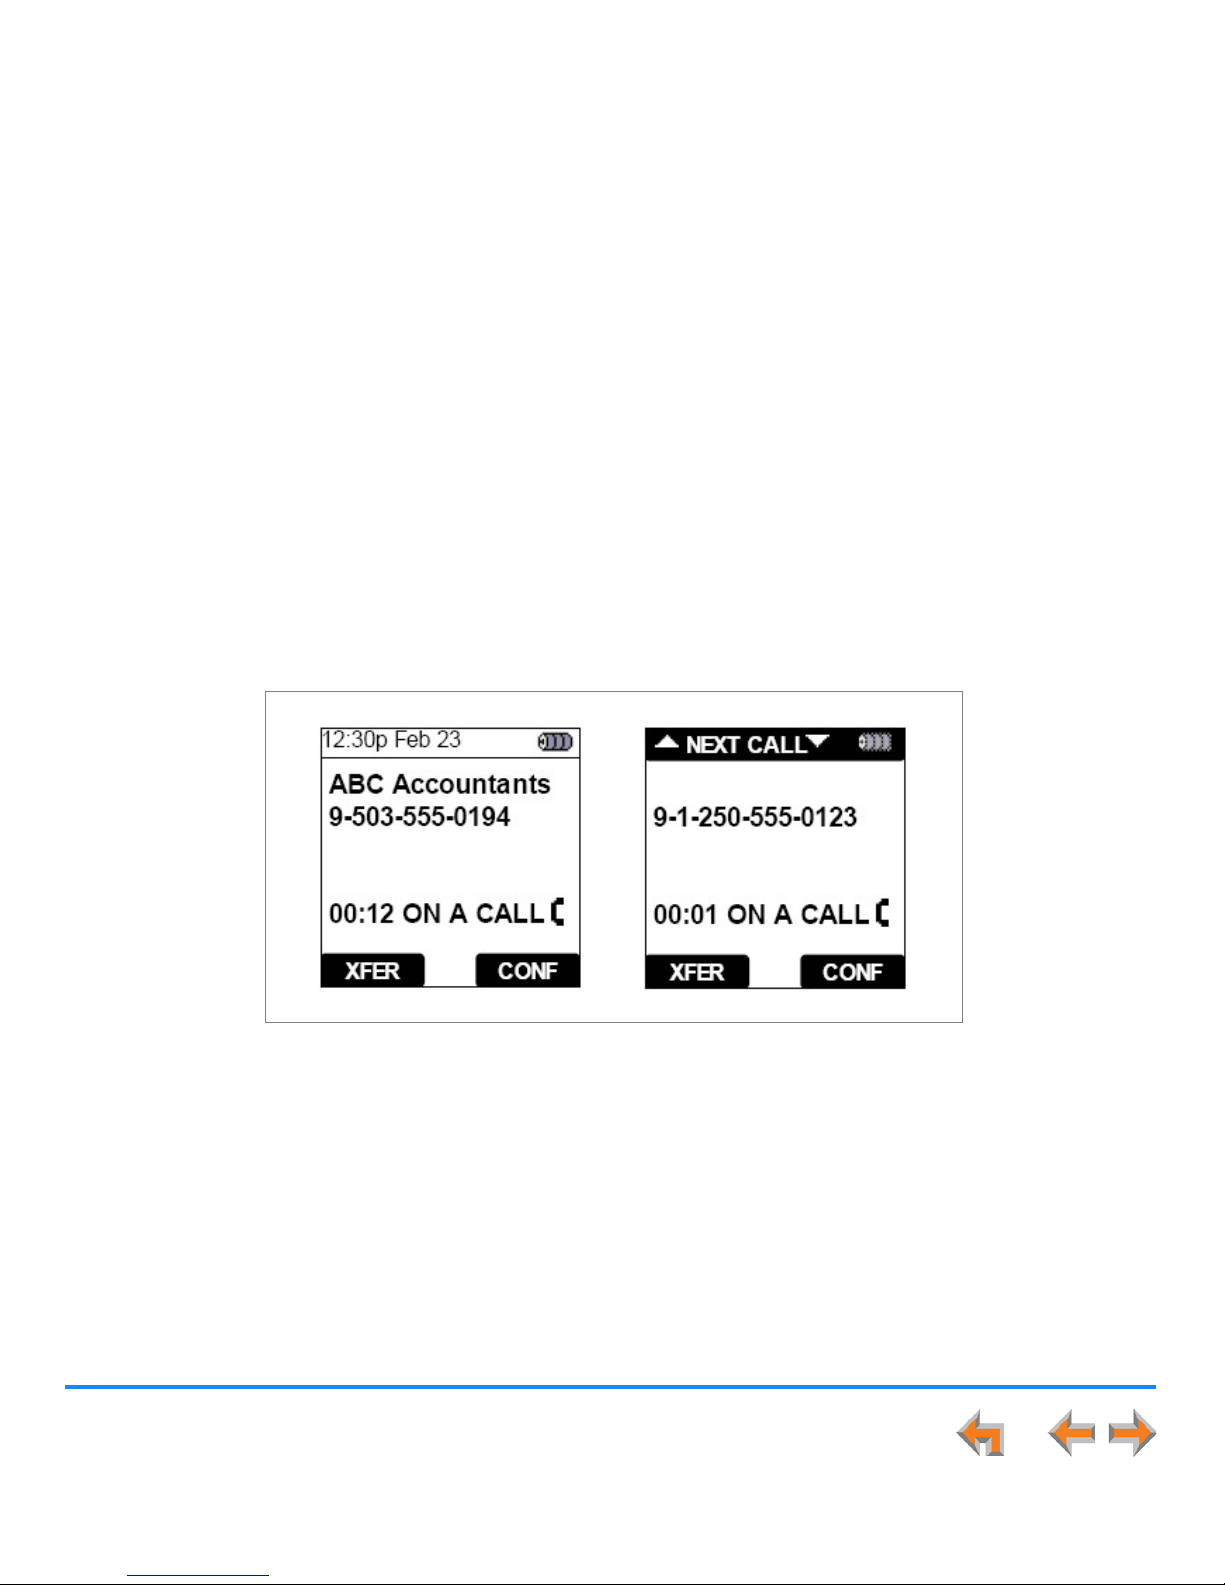
Call Management 90
Synapse SB67030/031 Deskset and Accessories User’s Guide
Active Call Screens
The Handset Call Management functions begin with one or more active calls, as shown in Figure 85.
.
Figure 85. Active Call Screens
Page 91
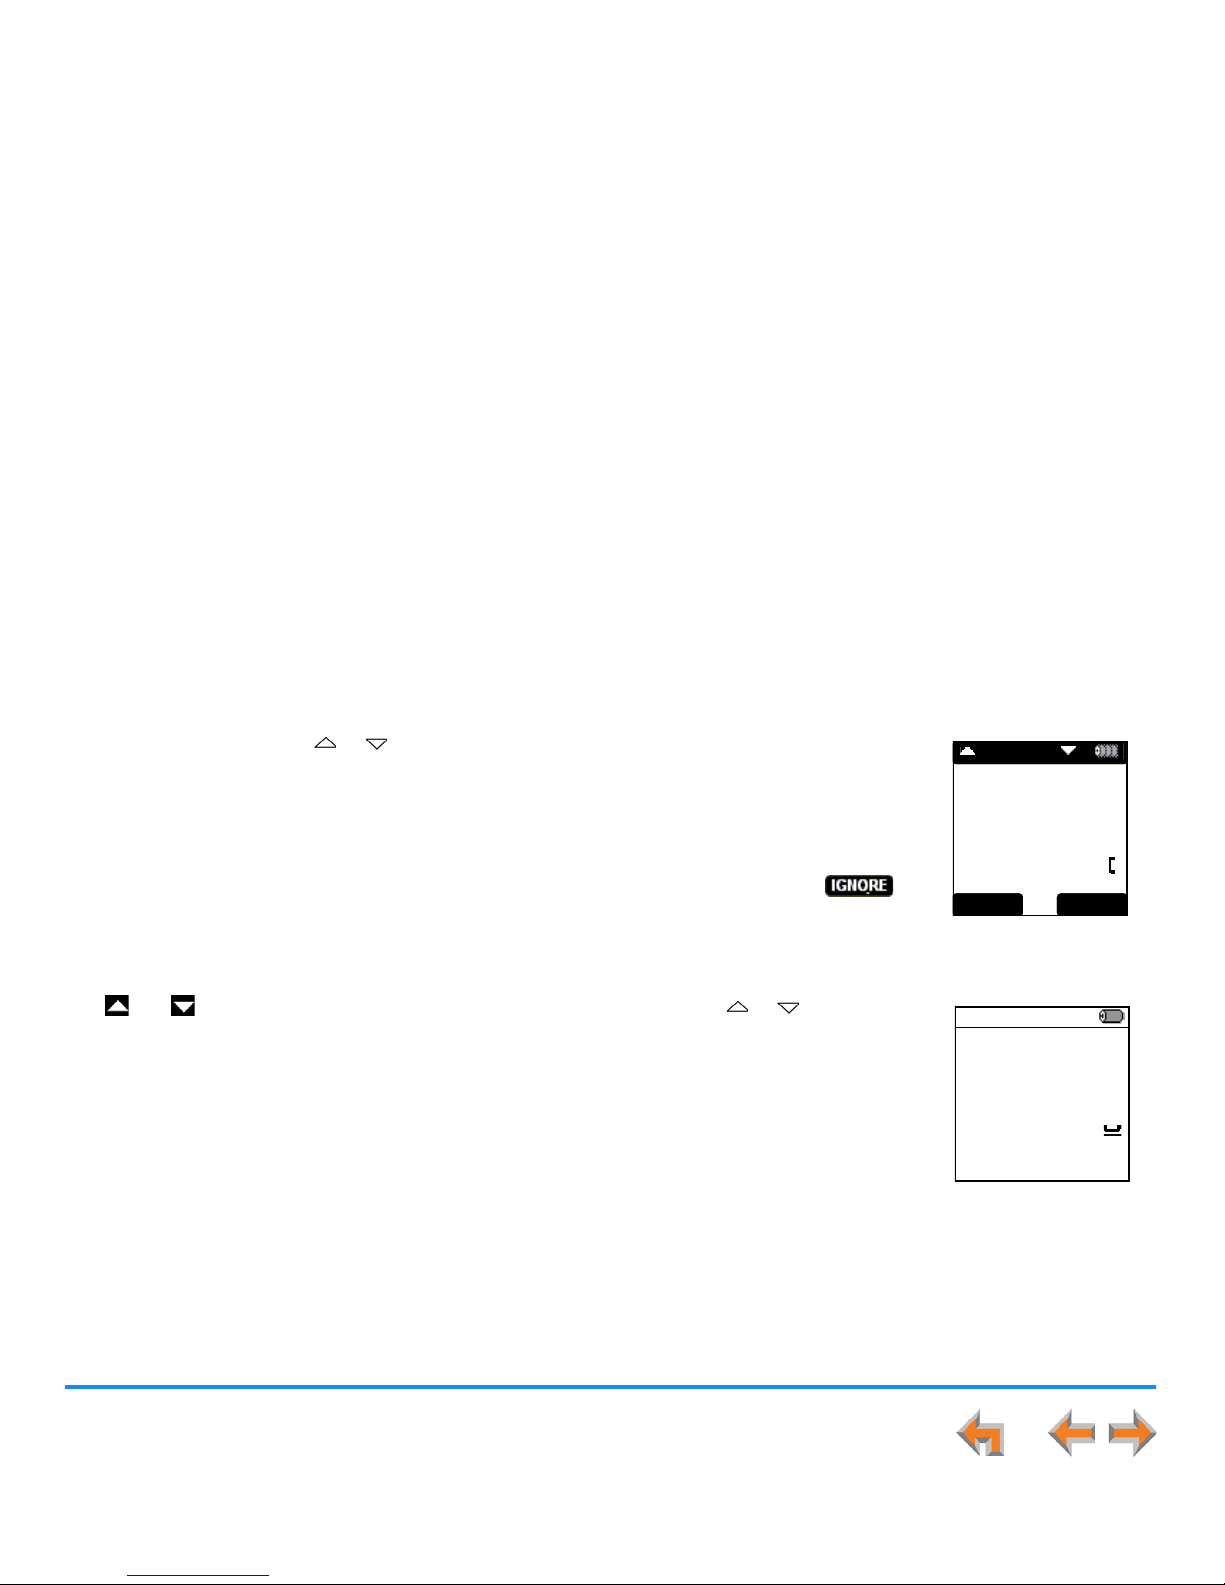
Call Management 91
Synapse SB67030/031 Deskset and Accessories User’s Guide
Call Deck
The Call Deck is the list of active, held, parked, and ringing calls. Because the screen is too small to easily display multiple calls
at the same time, the Handset stacks them like a deck of cards in order of priority. The top of the display no longer displays the
date and time. Instead, the phrase Next Call appears.
Review calls by pressing the or navigation key. The Call Deck loops; after reaching the last
call in the deck, press the navigation key again to return to the beginning. The order of priority is:
a. Incoming calls — Always on top.
b. Active calls — On top, as shown in Figure 86, except when there is an incoming call.
c. Ignored calls — When you have received multiple incoming calls and have pressed
during an incoming call.
d. Held calls — As shown in Figure 87.
The and icons at the top of the display indicate that you can press the or navigation
key to view other calls.
If you navigate away from a current active call but are still in the Call Deck, you switch back to the
active call after 10 seconds of inactivity.
Graham Bell
9-1-250-555-0123
02:01 ON A CALL
XFER CONF
NEXT CALL
Figure 86. Active Call
with Incoming Call
12:30p Feb 23
Graham Bell
232-555-0176
03:10 ON HOLD
Figure 87. Held Call
Page 92
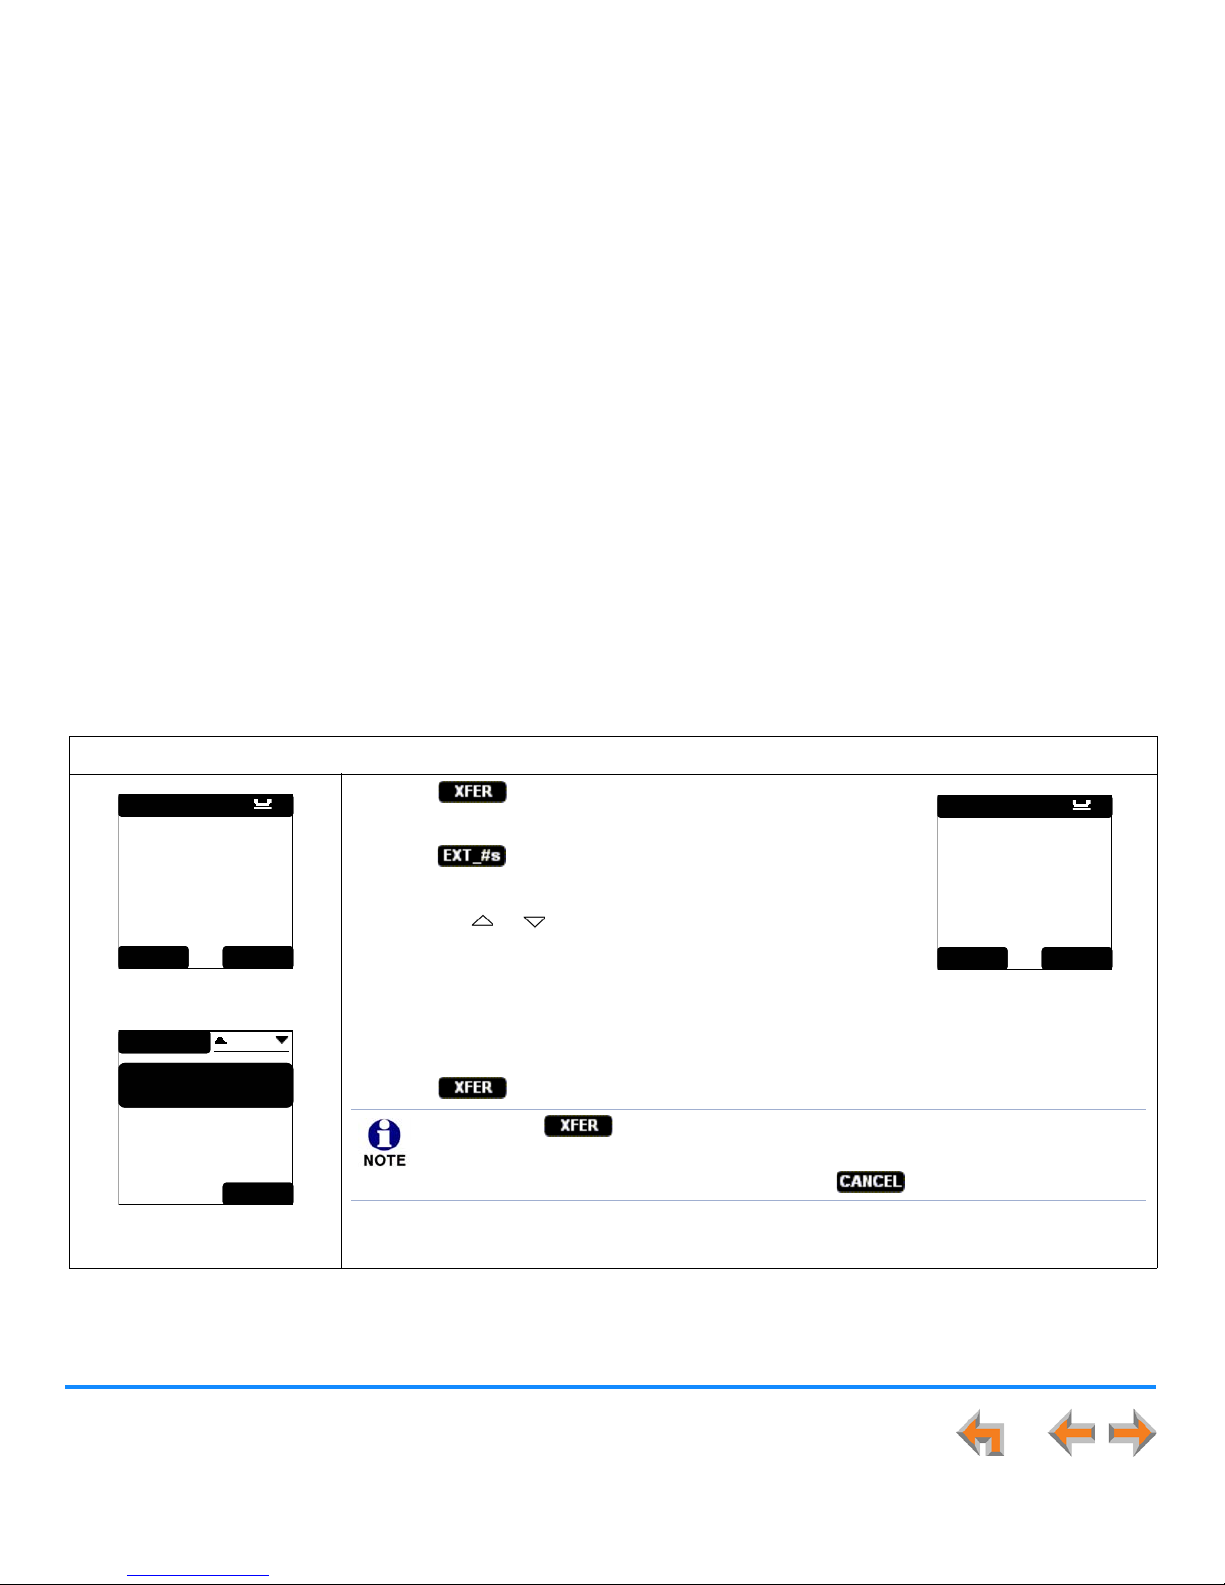
Call Management 92
Synapse SB67030/031 Deskset and Accessories User’s Guide
Transferring
As with the Deskset, you can transfer an active or held call with the Cordless Handset.
Transferring to an Extension
To transfer an active or held call to an extension with the Cordless Handset:
Figure 88. Transfer To
Figure 89. Extension List
1. Press . The Handset displays the screen shown in
Figure 88.
2. Press to display the EXTENSION list, as shown in
Figure 89.
3. Press the or navigation key to scroll through the
Extension list entries.
4. Press SELECT, SPEAKER, or PHONE to select an Extension
number as a transfer destination.
The screen shown in Figure 90 appears.
5. Press to complete the transfer.
Transfer To:
EXT _ # s CANCEL
Graham Bell
Amy Lee
203
Douglas Lewis
Edgar Williams
Gary Keys
EXT EN SI ON 1/16
EXI T
Graham Bell
Transfer To:
203
Press XFER to
complete
CANCELXFER
Figure 90. Transfer
Confirmation
You can press before the extension picks up (unsupervised transfer) or after
the extension picks up (supervised transfer).
The Transfer action can be canceled by pressing . The call remains on hold.
Page 93
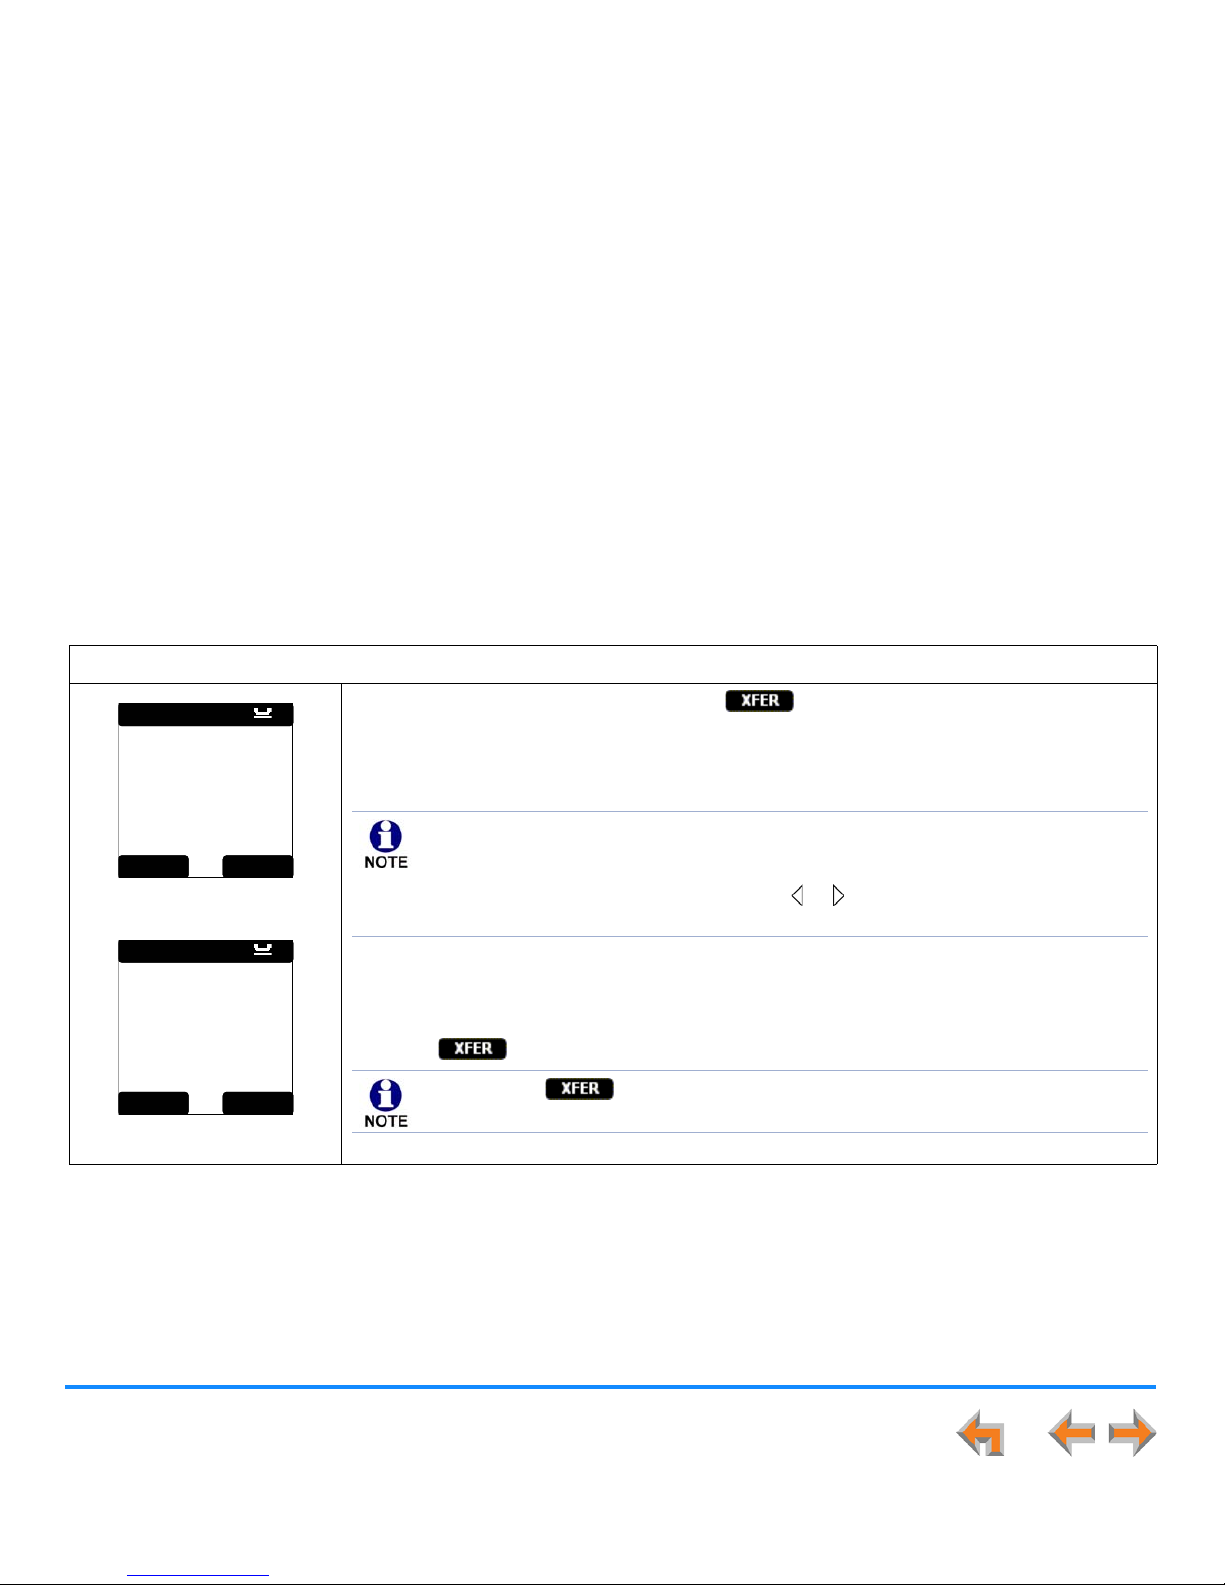
Call Management 93
Synapse SB67030/031 Deskset and Accessories User’s Guide
Transferring to an Outside Number
To transfer an active or held call to an outside number with the Cordless Handset:
Figure 91. Outside Transfer
Figure 92. Pending Transfer
1. From either an active or held call, press . An active call is placed on hold, and the
Handset displays the screen shown in Figure 91.
2. To transfer a call to an outside number, dial the number directly or access the outside
number through the Call Log, Redial list, Directory, or Quick Dial.
3. To dial the selected number as a transfer destination, press SPEAKER or PHONE.
A screen similar to the one shown in Figure 92 appears.
4. Press to complete the transfer.
Transfer To:
EXT _ # s CANCEL
Graham Bell
Graham Bell
Transfe r To:
John Stanley
1-232-423-2234
Pr es s XFER to
complete
CANCELXFER
For outside phone numbers in Voicemail and CID lists, Synapse dials whatever digit, if
any, must be dialed first and then dials the number in the display. Therefore, numbers
that need editing (adding a preceding 1 or a country code, or removing the area code)
cannot be dialed from Voicemail. Press the or navigation key to alter Call Log
entries.
You can press before the extension picks up (unsupervised transfer) or after
the extension picks up (supervised transfer).
Page 94
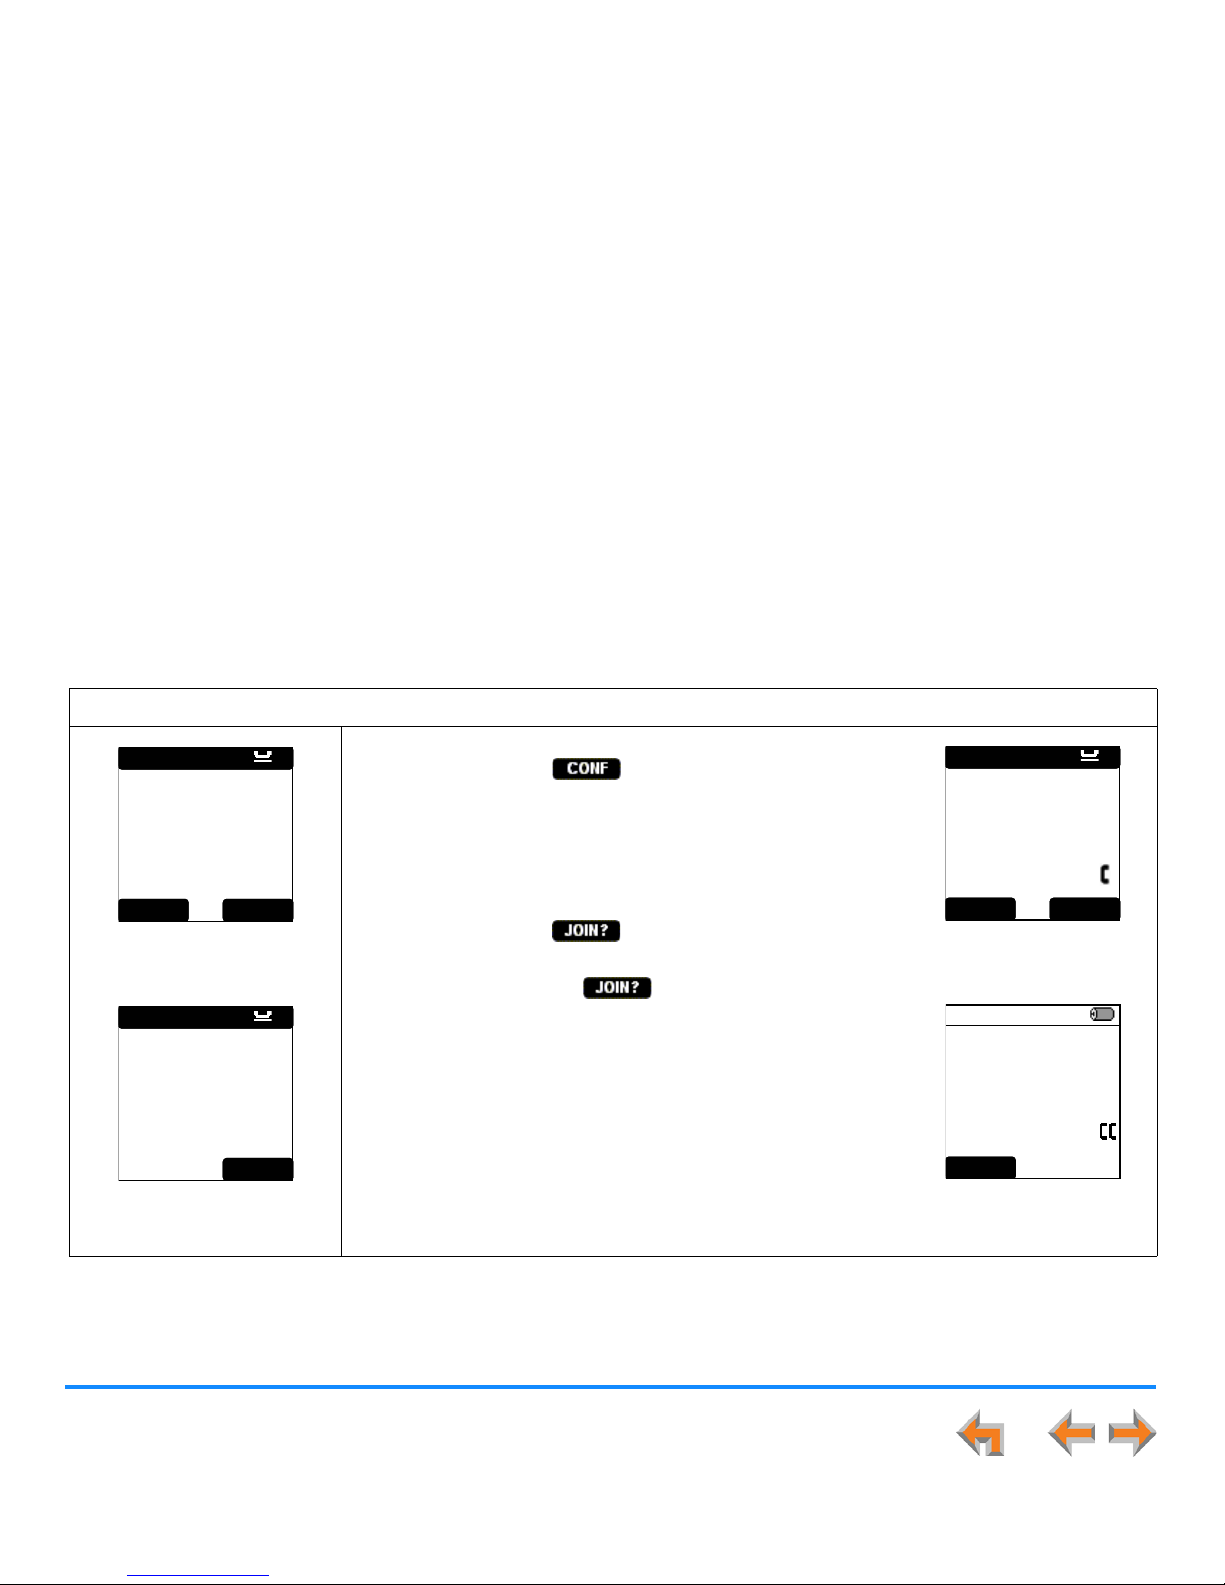
Call Management 94
Synapse SB67030/031 Deskset and Accessories User’s Guide
Conferencing
You can set up a conference call with two other numbers (either internal, outside, or with both).
To set up a conference with the Cordless Handset:
Figure 93. Start
Conference
Figure 94. Dial Second Call
1. When you have connected with the first call to be
conferenced, press . The active call is automatically
placed on hold and the Start Conference screen shown in
Figure 93 appears.
2. Establish a second call. The second call can be dialed
normally, as shown in Figure 94, or it can be from one of the
lists. Once the second call has been established, the screen
changes to display , as shown in Figure 95.
3. To join the calls, press .
The selected parties are now in conference, as shown in
Figure 96.
Graham Bell
Confe re nce wi th:
EX T_ # s CANCEL
Graham Bell
Confe re nce wi th:
9-1-604-555-01
CANCEL
Graham Bell
Confe re nce wi th:
9-604-555-0129
Press JOIN? to
complete
CANCELJOIN?
Figure 95. Join
Conference
12:30p Feb 23
Graham Bell
1:09
Mary Williams
0:03
ON A CALL
DROP
Figure 96. Conference
Confirmed
Page 95
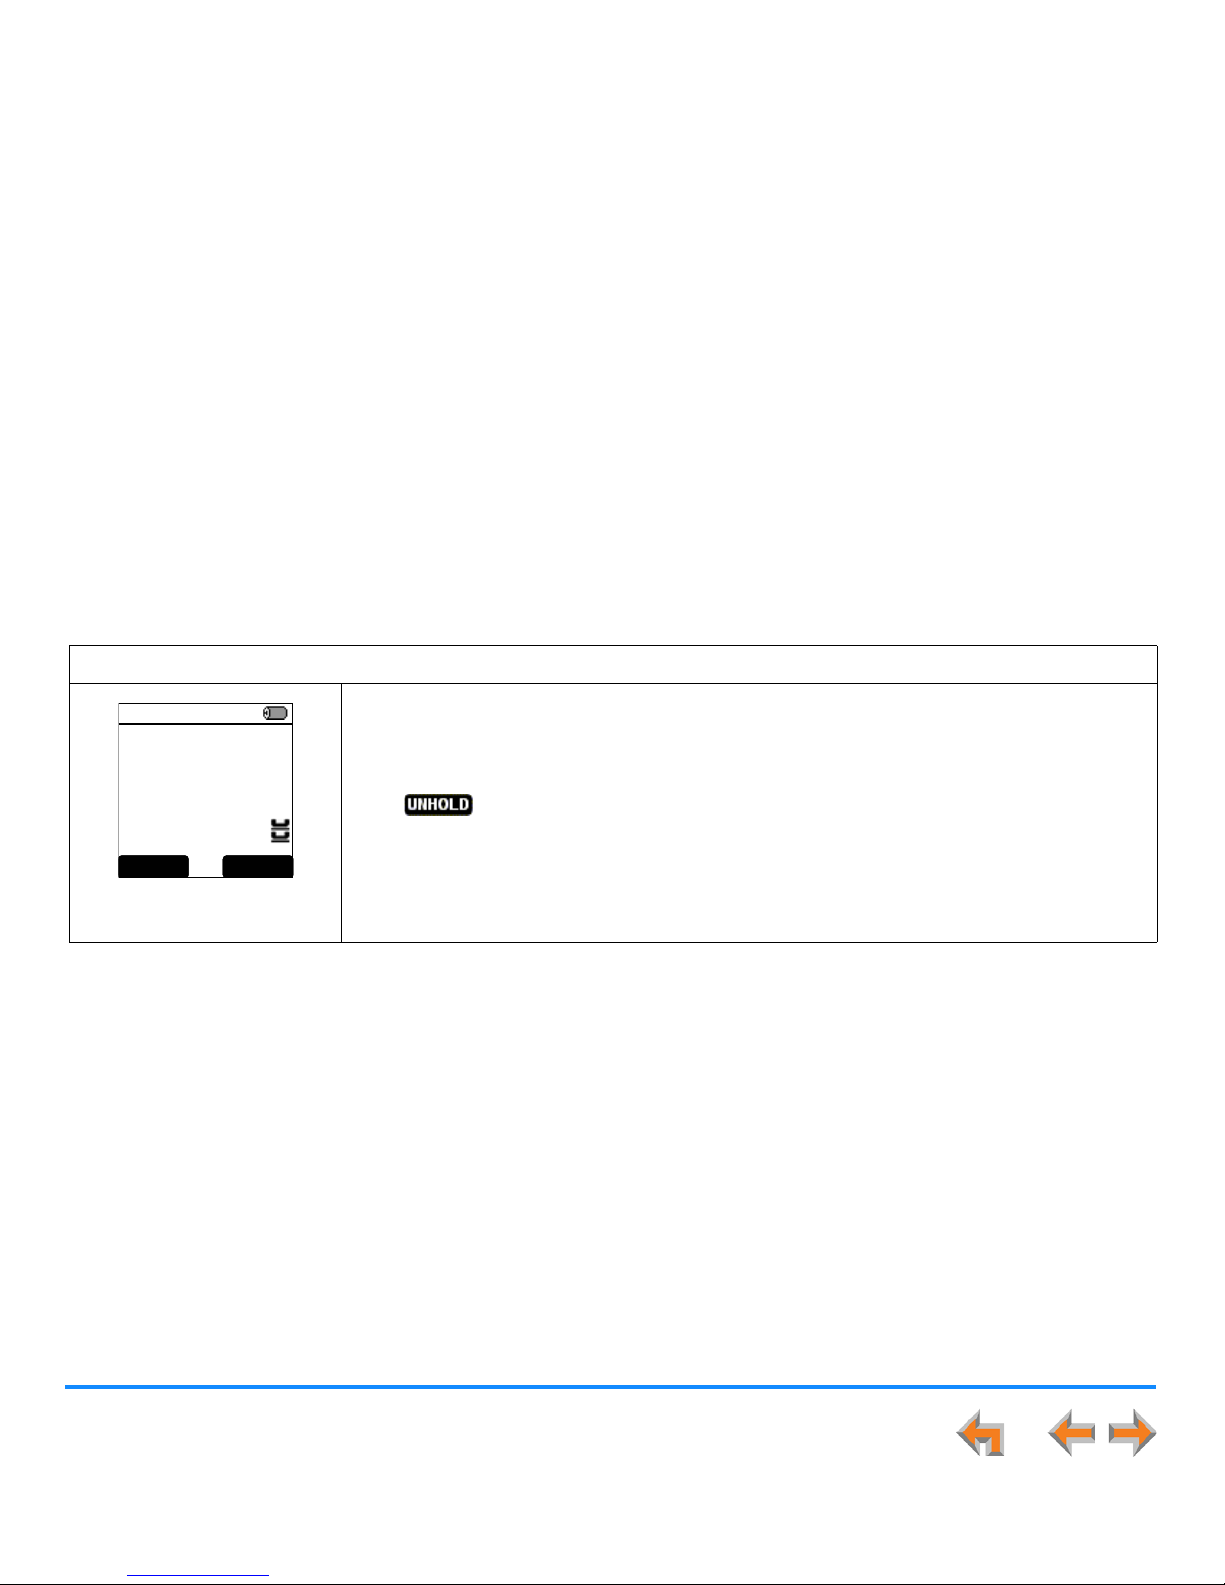
Call Management 95
Synapse SB67030/031 Deskset and Accessories User’s Guide
Placing a Conference Call on Hold
To put a conference on hold with the Cordless Handset:
Figure 97. Conference on
Hold
Press HOLD or PHONE to place the conference on hold. A screen similar to the one shown in
Figure 97 appears. If you press PHONE, you hear a dial tone and are in the Live Dial mode.
The first and second calls are placed on hold but are able to communicate with each other.
Press to release the call from hold.
12:30p Feb 23
Graham Bell
01:09
Mary Williams
00:03
ON HOLD
DROP UNHO LD
Page 96
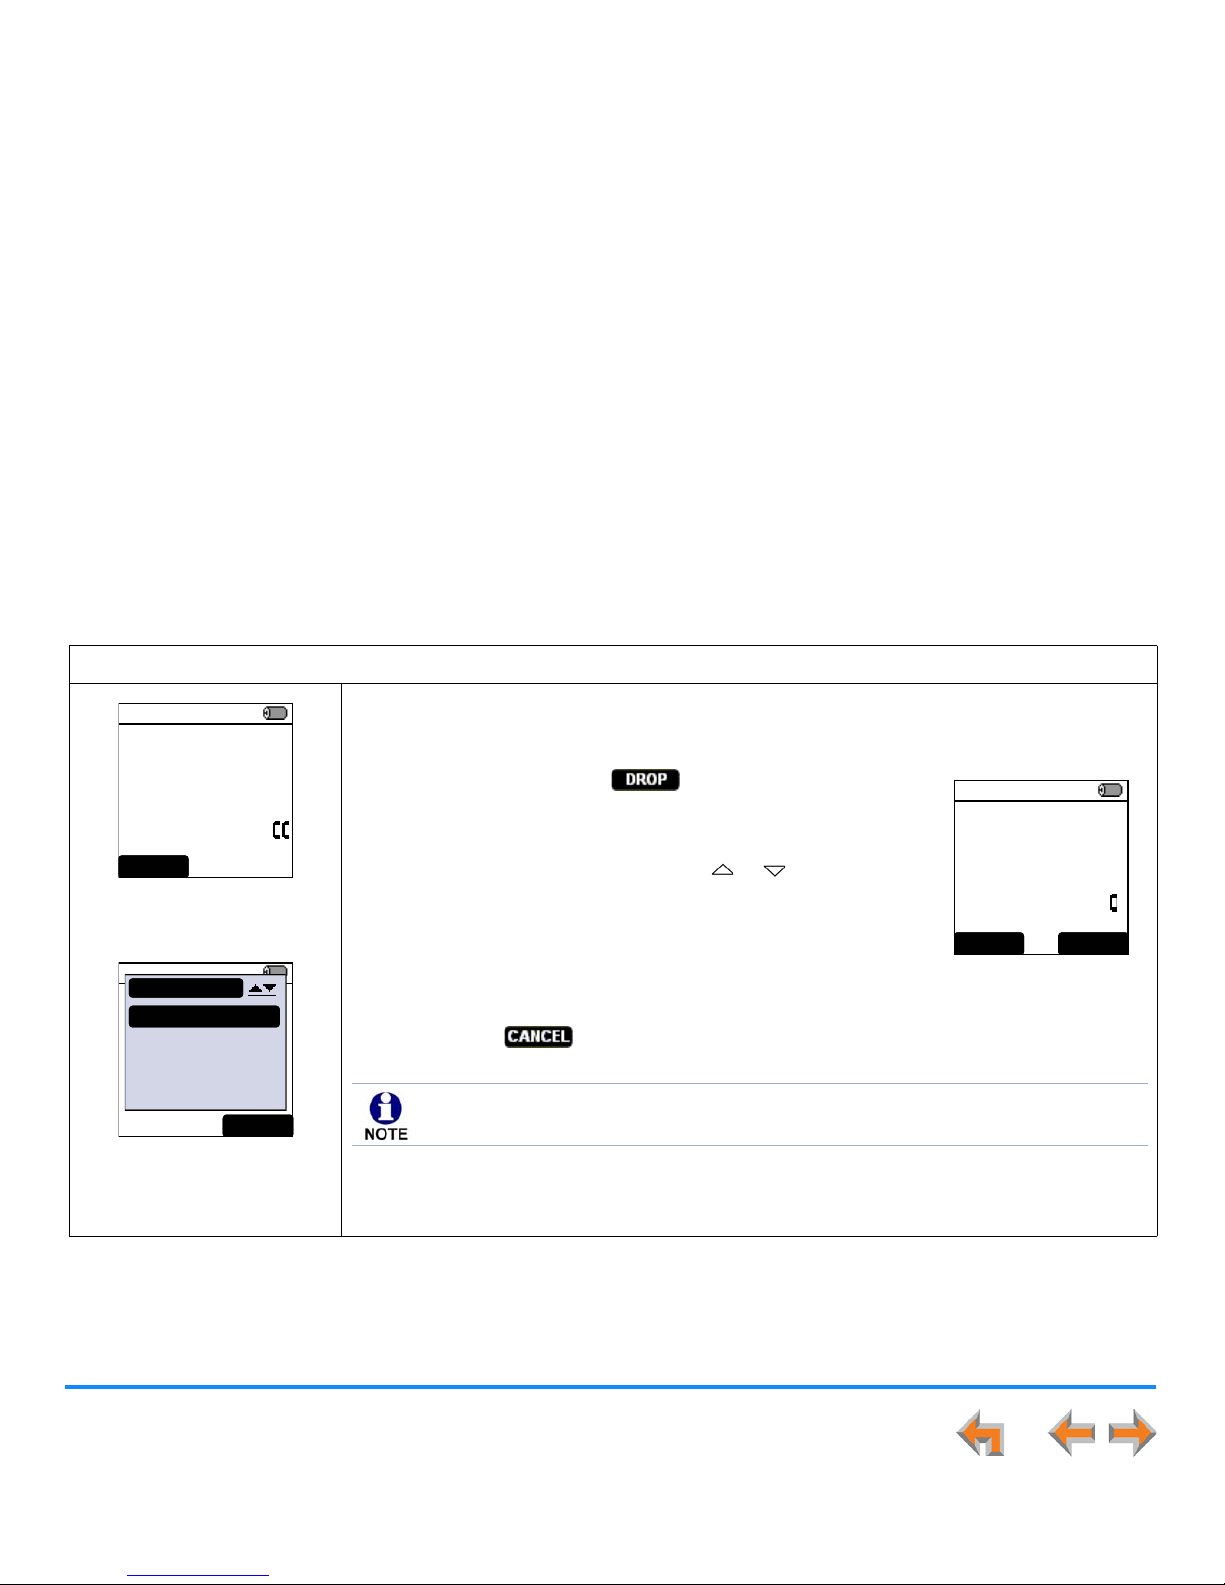
Call Management 96
Synapse SB67030/031 Deskset and Accessories User’s Guide
Ending a Conference Call
To end a conference call with the Cordless Handset:
Figure 98. Current
Conference
r
Figure 99. Drop Conference
Call
You have the following options:
To hang up all calls, press OFF.
To drop one call, press from the conference screen
shown in Figure 98.
a. Scroll through the list to the call you want to drop, as
shown in Figure 99, using the or navigation key.
b. Press SELECT to drop the highlighted call from the
conference and hang it up. You return to an active call
mode with the remaining call, as shown in Figure 100.
OR
Press to return to the three-way conference as
shown in Figure 98.
12:30p Feb 23
Graham Bell
1:09
Mary Williams
0:03
ON A CALL
DROP
12:30p Feb 23
Conference with:
CANCEL
DROP CALL
Gr aha m B ell
Mary Williams
Mary Williams
9-1-888-722-7702
00:32 ON A CALL
XFER CONF
12:30p Feb 23
Figure 100. Active
Call
If you have held calls, the system returns to Held Calls mode. If there are no held
calls, the system returns to Idle mode.
Page 97
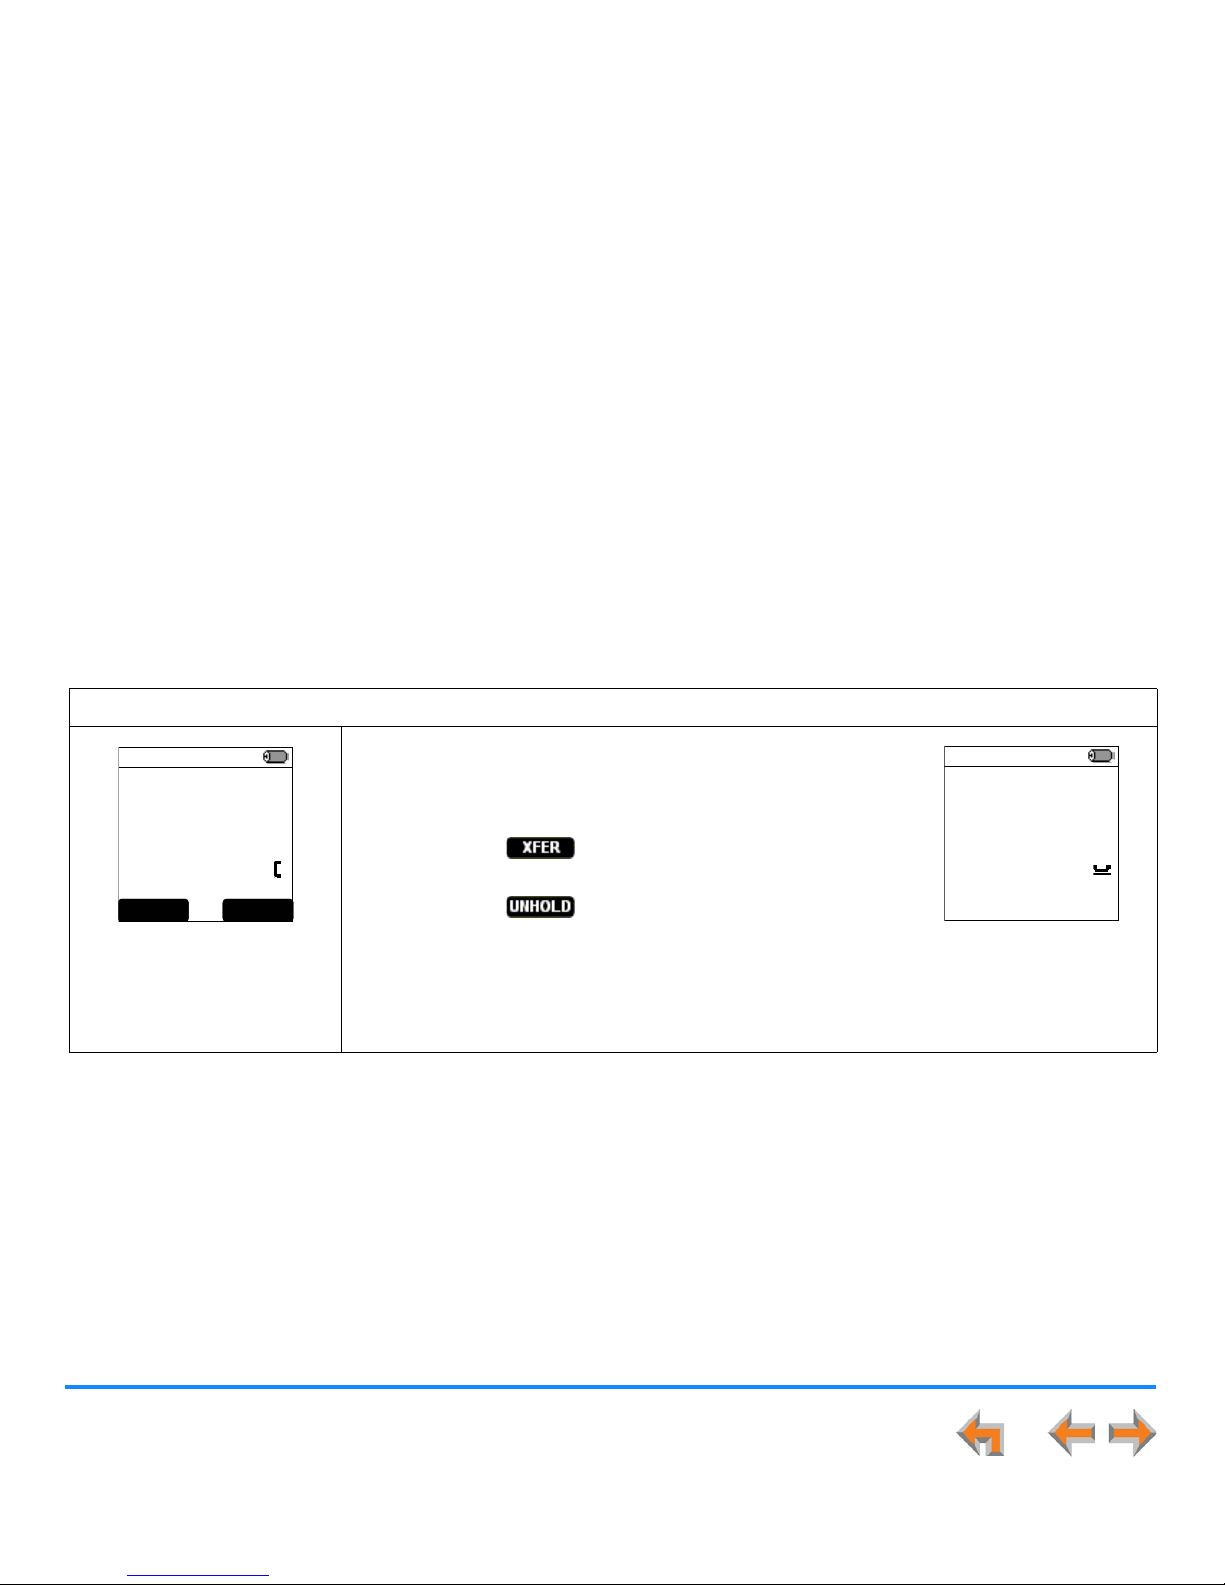
Call Management 97
Synapse SB67030/031 Deskset and Accessories User’s Guide
Managing Held Calls
You can put a maximum of five calls on hold.
To place an active call on hold and to retrieve it with the Cordless Handset:
Figure 101. Active Call
Press HOLD.
The screen changes from ON A CALL, as shown in
Figure 101, to ON HOLD, as shown in Figure 102.
Press to transfer the held call to another
number.
Press to retrieve the held call.
Press PHONE to start a new call.
Press the dial-pad keys to make a new call while on
hold. See “Predialing” on page 60.
12:30p Feb 23
Graham Bell
232-555-0176
2:51 ON A CALL
XFER CONF
12:30p Feb 23
Graham Bell
232-555-0176
03:10 ON HOLD
Figure 102. Call on Hold
Page 98
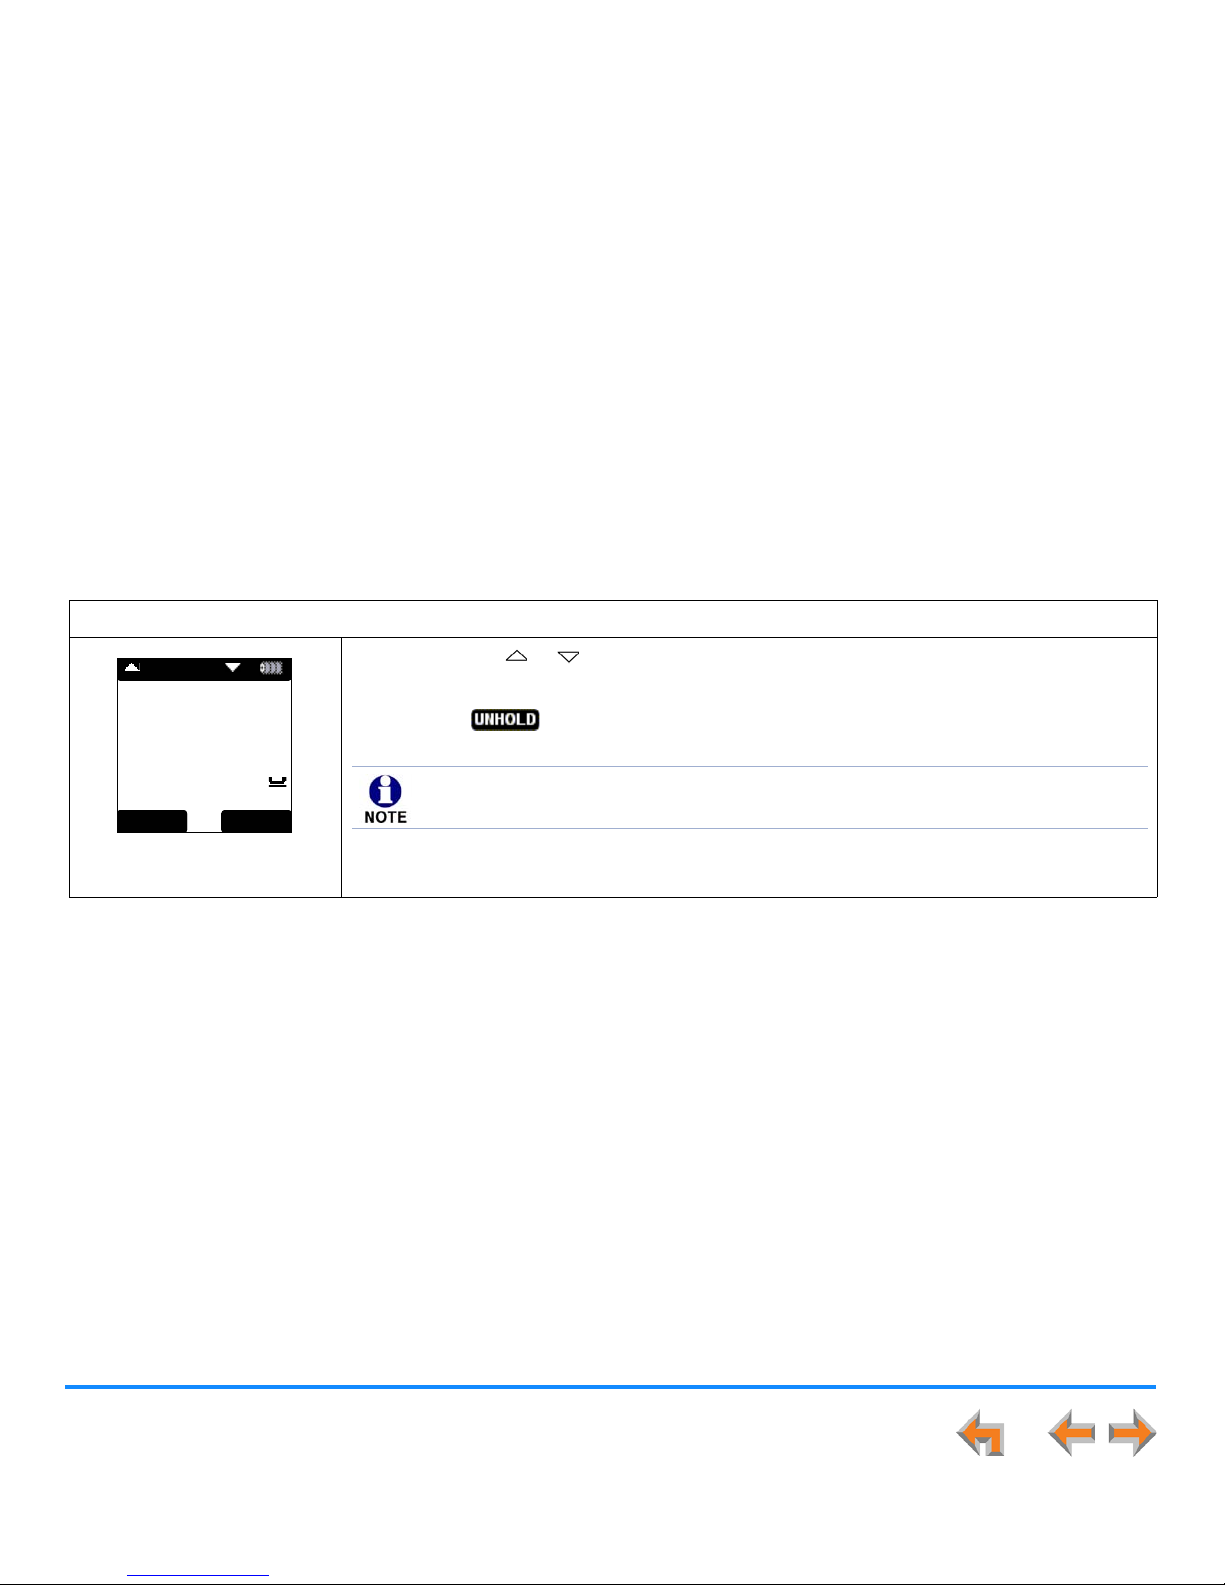
Call Management 98
Synapse SB67030/031 Deskset and Accessories User’s Guide
To retrieve a held call when there is more than one call in the Call Deck with the Cordless Handset:
Figure 103. Call on Hold in
the Call Deck
Press the or navigation key to review calls in the Call Deck, as shown in
Figure 103.
Press when the call you want to retrieve is displayed. You return to the active
call.
Graham Bell
232-555-0176
03:00 ON HOLD
XFER UNHOLD
NEXT CALL
Pressing PHONE or SPEAKER does not release the call from hold. Those keys start a
new call. Pressing SELECT has no effect.
Page 99
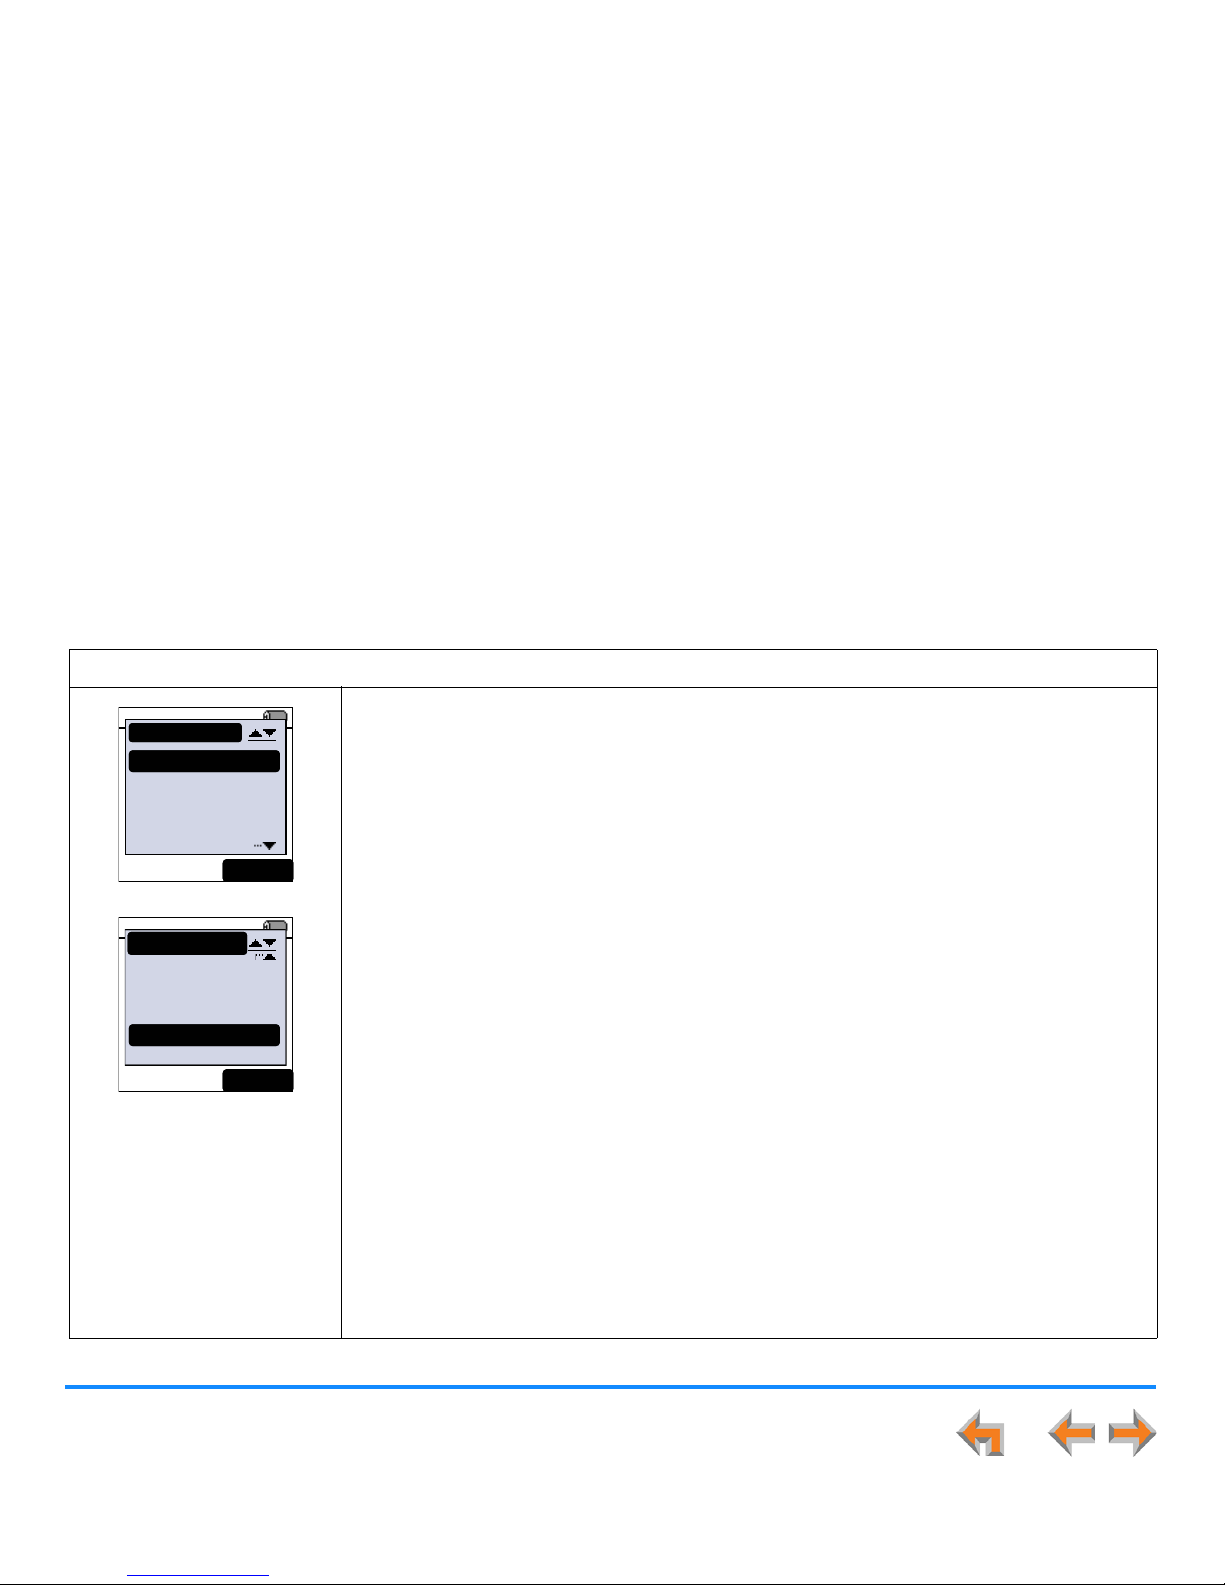
Call Management 99
Synapse SB67030/031 Deskset and Accessories User’s Guide
Held Call Options
To view Held Call options with the Cordless Handset:
Figure 104. Hold Options
Press OPTIONS with a held call displayed to access the Hold options, as shown in Figure 104
and listed below.
12:30p Feb 23
Graham Bell
9-800-916-2007
03:10 ON HOLD
EX IT
OPTIONS
1. Redial
2. Page All
3. Park
4. Parked Calls
12:30p Feb 23
Graham Bell
232-555-0176
03:10 ON HOLD
8. Messages
5. Exte nsion List
6. Call Log
7. Conference
EX IT
OPTIONS
1. Redial Accesses the Redial list. See “Accessing the Redial List with the Cordless
Handset” on page 125.
2. Page All Pages all other extensions. See “Paging with the Cordless Handset” on
page 191.
3. Park Places the current held call in the Parked Calls list. See “Parking an
Active or Held Call” on page 100.
4. Parked Calls Accesses the Parked Calls list. See “Parking a Call” on page 100.
5. Extension List Accesses the Extension list. See “Accessing an Extension with the
Cordless Handset” on page 123.
6. Call Log Accesses the Call Log. See “Accessing the Call Log with the Cordless
Handset” on page 179.
7. Conference Goes to conference setup and uses the current held call. See
“Conferencing” on page 94.
8. Messages Retrieves Voicemail. See “Retrieving Personal Voicemail with the
Cordless Handset” on page 164.
Page 100
Call Management 100
Synapse SB67030/031 Deskset and Accessories User’s Guide
Parking a Call
Placing a call on hold and parking a call are similar operations. The difference is that a held call can only be retrieved at the
Deskset or Handset that placed the call on hold, and a parked call can be retrieved at any extension.
Parking an Active or Held Call
To park an active call with the Cordless Handset:
Figure 105. Call Options
Figure 106. Parked Call
1. Press OPTIONS from an active or held call to display the OPTIONS screen, as shown in
Figure 105.
2. Press 3 to park the call, as shown in Figure 106.
The parked call is given a parked call number and is available at all system extensions.
To page others to let them know about this call, see “Paging with the Cordless Handset” on
page 191.
12:30p Feb 23
Graham Bell
9-800-916-2007
03:10 ON HOLD
EX IT
OPTIONS
1. Redial
2. Page All
3. Park
4. Parked Calls
Graham Bell
1-232-555-0176
parked at 109
Graham Bell
1-232-555-0176
parked at 109
Graham Bell
1-232-555-0176
parked at 109
CIDMSGs
EXT 201
Fraser Walters
2 New CALLS
5 New MSG's
12:30p Feb. 23
Graham Bell
parked at
109
When a held call is parked, it is removed from the Held Call list.
 Loading...