

Page 1
L4630BA(EN).fm Page 1 Thursday, June 15, 2006 3:42 PM
LCD COLOUR TV
LCD-B20A6
Owner’s Manual
Table of Contents
DECLARATION OF CONFORMITY ..................................................................................................................1
PRECAUTIONS.................................................................................................................................................2
OPERATING CONTROLS AND FUNCTIONS ..................................................................................................3
PREPARATION FOR USE ................................................................................................................................4
SET UP FOR USE.............................................................................................................................................5
OPERATIONS ...................................................................................................................................................7
MAINTENANCE.................................................................................................................................................8
TROUBLESHOOTING GUIDE ..........................................................................................................................8
SPECIFICATIONS.............................................................................................................................................8
Features
• Stereo Sound System
• On-Screen Display
• Sleep Timer
• Teletext
•
Auto Power Off Function- If there is no signal input from
the antenna terminal and no user operation for 15 minutes,
the TV will turn itself off automatically.
• S-VIDEO Input- allows you to get better picture detail and
clarity for the playback of S-VHS VCR tapes, Video Discs,
Satellite System, Video Game or Video Cameras.
Supplied Accessories
• Remote control
• Two R6 (AA) batteries
•Owner’s Manual
DECLARATION OF CONFORMITY
This product complies with the requirement of the directives
EMC-Directive: 89 / 336 / EEC
Low Voltage Directive: 73 / 23 / EEC
CE Marking: 93 / 68 / EEC
We declare that the following product:
LCD COLOUR TV, Model LCD-B20A6
is in compliance with following Regulations.
Model/Serial Number
To aid reporting in case of loss or theft, please record the TV’s model
and serial numbers in the space provided. The numbers are located at
the rear of the TV.
Model number: LCD-B20A6
Serial number:
A Note About Recycling
This product’s packaging materials are recyclable and can be reused.
Please dispose of any materials in accordance with
your local recycling regulations.
This product consists of materials which can be
recycled and reused if disassembled by a specialised
company.
Batteries should never be thrown away or incinerated
but disposed of in accordance with your local
regulations concerning chemical wastes.
Contact your council for details.
EN55013: 2001 + A1: 2003
EN55020: 2002 + A1: 2003
EN61000-3-2: 2000, EN61000-3-3: 1995 + A1: 2001
EN60065: 2002
EN60825-1: 1994 + A1: 1996 + A2: 2001
Printed in EU
Help Phone Number in the UK : 0870 383 3010
1EMN21945
L4630BA*****
EN
Page 2
L4630BA(EN).fm Page 2 Thursday, June 15, 2006 3:42 PM
PRECAUTIONS
WARNING:
TO REDUCE THE RISK OF FIRE OR ELECTRIC
SHOCK, DO NOT EXPOSE THIS APPLIANCE
TO RAIN OR MOISTURE.
.
CAUTION
RISK OF ELECTRIC SHOCK
DO NOT OPEN
CAUTION:
TO REDUCE THE RISK OF ELECTRIC SHOCK,
DO NOT REMOVE COVER (OR BACK). NO
USER SERVICEABLE PARTS INSIDE. REFER
SERVICING TO QUALIFIED SERVICE
PERSONNEL.
The lightning flash with arrowhead symbol,
within an equilateral triangle, is intended to
alert the user to the presence of uninsulated
“dangerous voltage” within the product’s
enclosure that may be of sufficient magnitude
to constitute a risk of electric shock to
persons.
The exclamation point within an equilateral
triangle is intended to alert the user to the
presence of important operating and
maintenance (servicing) instructions in the
literature accompanying the appliance.
POWER SUPPLY
The main power supply is engaged when the main plug is
plugged in a 220-240V, 50Hz AC outlet. To operate the unit,
press
STANDBY-ON to turn on the unit.
WARNING: LIVE PARTS INSIDE.
CAUTION
1) Do not attempt to open the cabinet. There are no parts
you can service inside. Refer all servicing to qualified
service personnel.
2) Slots and openings in the cabinet and the sides or bottom
are provided for ventilation. To ensure reliable operation
and to protect the unit from overheating, these openings
must not be blocked or covered.
Avoid installation in enclosed spaces such as bookcases
unless proper ventilation is provided.
3) Keep the unit away from radiators and other heat sources.
4) Do not push objects of any kind into the unit through the
cabinet slots or openings as they could touch electrically
live parts or short circuit parts resulting in a fire or electric
shock.
5) To prevent fire or shock hazard, do not expose this
apparatus to dripping or splashing, no objects filled with
liquids, such as vases, should be placed on the apparatus.
6) Use this unit in a horizontal (flat) subsoil only.
7) Do not place any combustible objects on the device
(candles, etc.).
8) The LCD panel used in this product is made of glass.
Therefore, it can break when the product is dropped or
applied with impact. Be careful not to be injured by
broken glass pieces in case the LCD panel breaks.
DO NOT REMOVE ANY SCREWS.
The LCD panel is a very high technology product with
921,600 thin film transistors, giving you fine picture
details. Occasionally, a few non-active pixels may appear
on the screen as a fixed point of blue, green or red. Please
note that this does not affect the performance of your
product.
9)Disconnect the mains plug to shut off when find troubles
or not in use.
10)The mains plug shall remain readily operable.
11)Read both manual instructions to ensure correct and safe
installation and interconnection of the unit in multimedia
systems.
12)Keep the distances 20 cm around apparatus of ventilation
openings.
Connection to Power
Before Switching on make sure that the voltage of your
electricity supply is the same as that indicated on the rating
plate.
Mains Cord
This appliance may be fitted with a non-rewireable plug. If it
is necessary to change the fuse in a non-rewireable plug the fuse
cover must be refitted. If the fuse cover is lost or damaged, the
plug must not be used until a replacement available from the
appliance manufacturer is obtained.
It is important that the colour of the replacement fuse cover
corresponds with the rating marking on the base of the plug.
If the plug has to be changed because it is not suitable for your
socket, or becomes damaged, it should be cut off and an
appropriate plug fitted following the wiring instructions
below. The plug removed must be disposed of safely as
insertion into a 13A socket is likely to cause an electrical
hazard. For your own safety read the following instructions
carefully before attempting to connect this unit to mains.
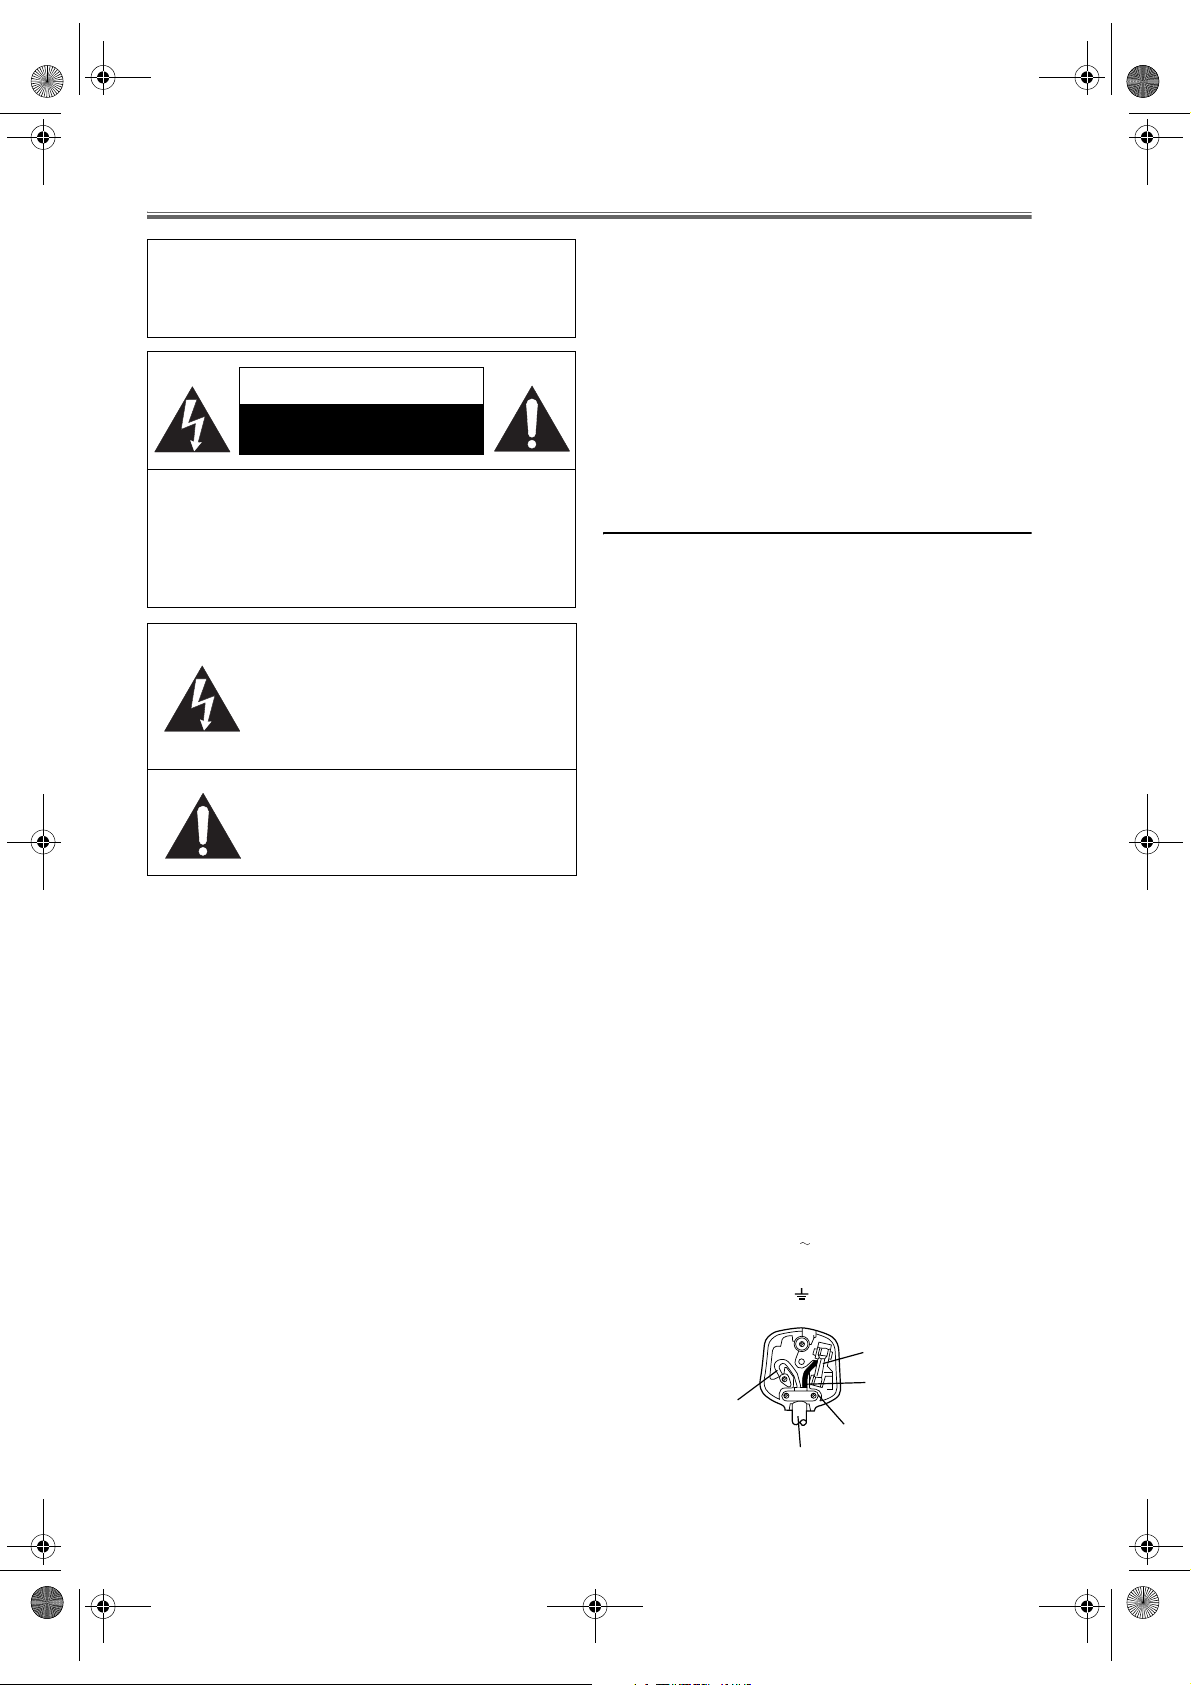
The wires in this mains lead are coloured in accordance with
the following code:
BLUE=NEUTRAL, BROWN=LIVE
Important
As the colours of the wires in the mains lead of this appliance
may not correspond with the coloured markings identifying
the terminals in your plug, proceed as follows:The wire which is coloured blue must be connected to the
terminal which is marked with the letter N or coloured black.
The wire which is coloured brown must be connected to the
terminal which is marked with the letter L or coloured red.
No connection is to be made to the earth terminal of the plug.
If a 13 Amp (BS 1363) Plug is used, a 5 Amp Fuse must be
fitted, or if any other type of Plug is used a 5 Amp Fuse must
be fitted, either in the Plug or Adaptor, or on the Distribution
Board.
Mains Supply: 220 - 240 V 50 Hz - AC only
Do not make any connection to the larger pin marked with the
letter “E” or by the symbol or coloured green or green and
yellow.
FUSE
BROWN
BLUE
(Neutral)
OUTER SHEATH OF THE WIRE
(Live)
CORD GRIP
2 EN
Page 3
0
2
8
9
4
6
5
2
L4630BA(EN).fm Page 3 Thursday, June 15, 2006 3:42 PM
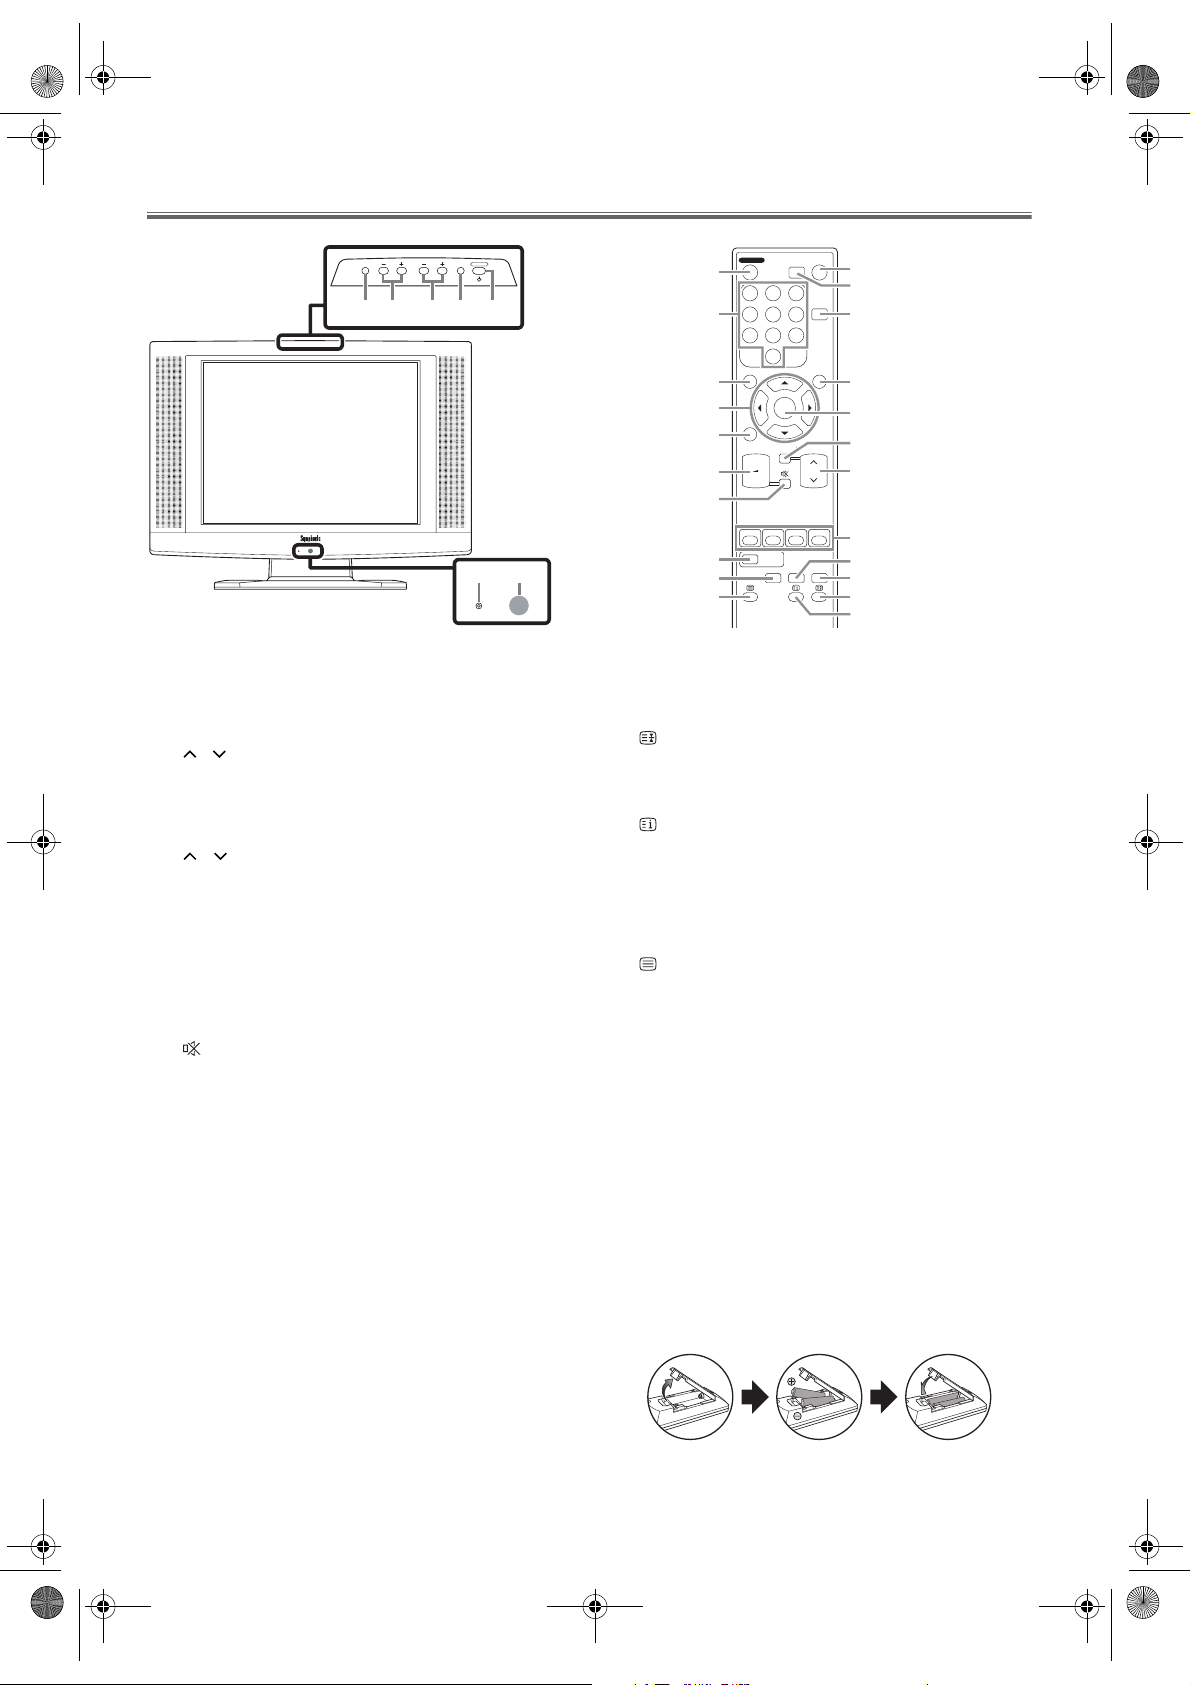
OPERATING CONTROLS AND FUNCTIONS
FRONT PANEL REMOTE CONTROL
STANDBY-ON
SELECT
PROG.VOL.SETUP
12 34 5
ON/OFF
624
ON/OFF
SETUP
1.
Press to display the menu on the TV screen.
2. VOL. +/
3. PROG. +/
4. SELECT (front panel) / INPUT SELECT (remote control)
5. STANDBY-ON
6. ON/OFF (standby) indicator
7. 0-9 number buttons
8. (mute)
9. PROG RETURN
10. SOUND SELECT
11. SLEEP
Installing The Batteries
1) Open the battery compartment cover.
2) Insert “R6” penlight batteries into battery compartment in the
direction as indicated by the polarity (
installed with incorrect polarity may damage the remote unit.
3) Close the cover.
4) Push the cover on it’s top side until it clicks in order to fit the
cover completely to the compartment.
-
Press to control the volume level.
VOL. + (front panel)
(front panel) / +/- (vol.) (remote control)
Same function as ENTER (remote control). See 22. ENTER.
-
(front panel) /
/ (prog.) (remote control)
Press to select memorised channel.
Press to select item you want to adjust in the picture control
mode. (Only
PROG. +/- (front panel))
Press to select the setting mode from the menu on the TV
screen (Only
/ (page) (remote control)
PROG. +/- (front panel)).
Press to go to the next page or the previous page of Teletext.
Press to select TV or video input (AV1 or AV2) mode.
Press to turn the TV ON or OFF (standby).
Lights up when power is on.
Press two digits to directly access the desired channel.
Remember to press “0” before a single digit channel.
Press to mute the sound portion of the TV programme
(Volume level display turns LIGHT RED from LIGHT
VOL. +/
-
BLUE). Press this button again or press
+/
-
front panel or
(vol.) on the remote control to restore
on the
sound.
Press to go back to the previously viewed channel. For
example, pressing this button once will change channel
display from P03 (present channel) to P10 (previously
viewed channel) and pressing it a second time will return
from P10 to P03.
Press to change sound modes.
Press to set the Sleep Timer.
+/
–
) markings. Batteries
STANDBY-ON
5
123
456
7
7809
SETUP
1
21
BACK
23
+
2
-
8
RED
13
17
20
12. DISPLAY
Press to display the channel number or input source on the
screen. If you press it again, the display will disappear.
13. COLOR SYSTEM
Press to select the input signal from the tuner or external
devices.
14. (hold)
Press to hold the current page of Teletext.
15. RED/GREEN/YELLOW/CYAN
Press to directly select the page numbers of Teletext shown
at the bottom of the TV screen.
16. (index)
Press to go back to the start page of Teletext.
17. REVEAL
Press to call up the hidden information of Teletext.
18. SUB CODE
Press to select subpages of Teletext.
19. EXPAND
Press to enlarge fonts of Teletext.
20. (text)
Press to switch Teletext on or off, or transparent mode.
21. Cursor K / L / s / B buttons
Press to select the setting mode from the menu on the TV
screen.
Press to select item you want to adjust in the picture control
mode.
22. ENTER
Press to determine the setting mode from the menu on the
TV screen.
Press to select or adjust from a particular menu
(for example: Language Selection, Channel Presetting, or
Picture Adjustment).
23. BACK
Press to return to the previously displayed menu.
24. Infrared sensor window
Receives the infrared rays transmitted from the remote
control.
DISPLAY
ENTER
PROG RETURN
GREEN YELLOW CYAN
COLOR
SYSTEM
EXPANDREVEAL
INPUT
SELECT
SLEEP
SOUND
SELECT
SUB CODE
4
1
11
1
2
9
3
1
1
1
1
1
3 EN
Page 4

L4630BA(EN).fm Page 4 Thursday, June 15, 2006 3:42 PM
REAR PANEL
25
26
27
28
29
30
25. RGB scart jack
AV-IN1: Connect to the scart jack of a DVD player or
set top box.
Table Stand
Tilt Stand
Adjust the stand to change the angle of TV
(-5°~10°).
26.
S-VIDEO input jack
AV-IN2: Connect to the S-VIDEO output jack of a
video camera or VCR using the S-VIDEO cable (not
supplied).
Note: The S-VIDEO jack is given priority over the
VIDEO jack.
27.
VIDEO input jack
AV-IN2: Connect to the video output jack of a video
camera, VCR or video game.
28.
AUDIO L/R input jacks
AV-IN2: Connect to the left/right audio output jacks of
a video camera, VCR or video game.
Note: The AUDIO L (input) jack is for mono input.
The sound is heard from both speakers. Use this jack for
monaural audio equipment to be hooked up.
29.
Aerial input jack
Connect to an antenna, cable system or satellite system.
30. Headphone jack
Connect headphone (not supplied) for personal
listening.
Note: Do not connect earphones that have an L-shaped
plug. The plug may interfere with the cabinet.
5˚
10˚
PREPARATION FOR USE
Unpacking
The stand of this TV is folded when
you purchased. Place this TV facedown on a flat surface covered with
the soft cloth. Bend the stand slowly
to forward until it clicks.
Do not bend from this side.
Connections
VHF
VHF/UHF
MIXER
UHF
RF cable (not supplied)
If you want to fold the stand again, insert
a thin rod into the hole in the right side of
the stand as illustrated, bend the stand
backward while you keep pushing the hole.
1)
Insert the RF cable plug into the Aerial input jack at the back
of this unit.
2) Plug this unit into an AC outlet.
3) The STANDBY-ON indicator on the front panel lights on, then
press
STANDBY-ON on the front panel or the remote control to
turn the unit on.
PROG. (+/
•
-
or / ) can also be used to turn the unit on.
4 EN
Page 5

L4630BA(EN).fm Page 5 Thursday, June 15, 2006 3:42 PM
SET UP FOR USE
• Unless stated, all operations described are based on remote control
use. Some operations can be carried out using the buttons on the
front panel.
Language Selection
If you want to change the language of the on-screen menu, follow the
procedure below.
1) Connect the power cord to a standard AC outlet.
Note: If some digits appear in the corner of the screen, press
STANDBY-ON without unplugging the power cord.
2) Press STANDBY-ON to turn on the TV.
3) Press SETUP so that the menu display appears on the TV screen.
4) Press Cursor K / L to point to “INITIAL”, then press
ENTER.
5) Press Cursor K / L to point to “LANGUAGE”, then press
ENTER.
6) Press Cursor K / L repeatedly to select your desired language,
then press
• The selected language will be indicated by yellow.
7) Press SETUP to exit.
SETUP
PICTURE
BACK LIGHT [BRIGHT]
INITIAL
Automatic Channel Presetting
You can programme the tuner to scan only the channels that you can
receive in your area.
1) Press STANDBY-ON to turn on the TV.
2) Press SETUP so that the menu display appears on the TV screen.
3) Press Cursor K / L to point to “INITIAL”, then press
ENTER
4) Press Cursor K / L to point to “CH TUNING”, then press
ENTER
5) Press Cursor K / L to point to “AUTO”, then ENTER.
• The tuner scans and memorises all the active channels in your area.
When AUTO is completed, the lowest memorised channel
reappears on the screen, and you can use
panel or
channels.
• If you press
and the lowest memorised channel will appear on the TV screen.
Sorting of TV channels from P01 to P06 will be performed
automatically as follows.
P01 : BBC1 P04 : CH4
P02 : BBC2 P05 : CH5
P03 : ITV P06 : SKY NEWS
ENTER .
INITIAL
CH TUNING
LANGUAGE
.
.
LANGUAGE
DEUTSCH
ENGLISH
ESPAÑOL
FRANÇAIS
ITALIANO
NEDERLANDS
SVENSKA
POLSKI
PROG. +/
-
on the front
/ (prog.) on the remote control for the memorised
SETUP during the scanning, this operation will stop
SETUP
PICTURE
BACK LIGHT [BRIGHT]
INITIAL
AUTO
START FINISH
INITIAL
CH TUNING
LANGUAGE
CH TUNING
AUTO
MANUAL
MOVE
Manual Channel Presetting
You can preset a channel manually and individually.
1) Follow the steps 1) to 4) in the “Automatic Channel Presetting”.
2) Press Cursor K / L to point to “MANUAL”, then press
ENTER
.
3) Press Cursor K / L to point to “POSITION”, then press
ENTER
.
4) Press the Number buttons or Cursor K / L to select your
desired position number, then press
• You can select position number 01-99.
• If “ON” appears on the right side of “SKIP”, press
Cursor K / L to point to “SKIP”. Then, press ENTER to
select “OFF”.
• If you want to remove scrambled signals, press
Cursor K / L repeatedly to point to “DECODER”. Then,
press ENTER to select “ON”.
ENTER
.
5) Press Cursor K / L to point to “CHANNEL”, then press
ENTER
.
6) Press Cursor K / L to start scanning.
• The tuner will begin to search up or down automatically.
When a channel is found, the unit will stop searching and the
picture will appear on the TV screen.
• You can select desired channel number by using
the Number buttons. You must refer to the following
Channel Plan table and press three digits to select the channel
number.
(To select channel 24, press “
and “4”.)
• If this is the channel you want, press
CH Indication PAL I
01–10 IRA–IRJ,GAP
02–12 –
13–20 –
21–69 E21–E69
74–78 X, Y, Z, Z+1, Z+2
80–99, 100 S1–S20, GAP
71–86 –
90–106 –
121–141 S21–S41
142–153 –
0” button first and then press “2”
ENTER.
Channel Plan
TV Channel
This unit can receive Hyper and Oscar frequency bands.
7) Press SETUP to exit.
Note: • To confirm that a channel has been added, press
/ (prog.).
• If you insert the RF cable plug into the Aerial input jack
after manual channel presetting, a picture will be distorted.
In this case, press
/ (prog.) to select the same channel
again.
SETUP
PICTURE
BACK LIGHT [BRIGHT]
INITIAL
MANUAL
POSITION
CHANNEL
DECODER
SKIP
P55
055
[OFF]
[OFF]
INITIAL
CH TUNING
LANGUAGE
CH TUNING
AUTO
MANUAL
MOVE
5 EN
Page 6

L4630BA(EN).fm Page 6 Thursday, June 15, 2006 3:42 PM
Decoder Allocation
Some TV channels transmit encoded TV signals which can only be
viewed with a purchased or hired decoder. You can connect such a
decoder to this unit. The following function will automatically
activate the connected decoder for the desired TV channel.
1) Press STANDBY-ON to turn on the TV.
2) Press / (prog.) or the Number buttons to select the TV
channel which you would like to allocate the decoder to.
3) Press SETUP so that the menu display appears on the TV screen.
4) Press Cursor K / L to point to “INITIAL”, then press
ENTER
.
5) Press Cursor K / L to point to “CH TUNING”, then press
ENTER
.
6) Press Cursor K / L to point to “MANUAL”, then press
ENTER.
7) Press Cursor K / L to point to “DECODER”.
8) Press ENTER to select “ON” (Decoder switched on).
• To switch off the decoder, press
ENTER to select “OFF”.
9) Press SETUP to exit.
• The decoder has now been allocated to this TV channel.
SETUP
PICTURE
BACK LIGHT [BRIGHT]
INITIAL
MANUAL
POSITION
CHANNEL
DECODER
SKIP
P55
055
[ON]
[OFF]
INITIAL
CH TUNING
LANGUAGE
CH TUNING
AUTO
MANUAL
MOVE
To Skip a Preset Channel
The channels you can no longer receive or seldom watch can be set to
be skipped when you access channels by pressing
/ (prog.).
1) Follow the steps 1) to 4) in the “Automatic Channel Presetting”.
2) Press Cursor K / L to point to “MANUAL”, then press
ENTER
.
3) Press Cursor K / L to point to “POSITION”, then press
ENTER
.
4) Press the Number buttons or Cursor K / L to select relevant
position number, then press
ENTER
.
5) Press Cursor K / L to point to “SKIP”, then press ENTER to
select “ON”.
• To memorise the channel again, press
change to “OFF”.
ENTER
. “ON” will
6) Press SETUP to exit.
Note: • To confirm that a channel has been deleted, press
/ (prog.).
Channel Reprogramming
You can move a channel allocated to a position to another while
keeping the total number of the positions the same. When you move
a channel, all the other channels in the positions will be affected.
1) Follow the steps 1) to 4) in the “Automatic Channel Presetting”.
2) Press Cursor K / L repeatedly to point to “MOVE”, then press
ENTER
.
3) Press Cursor K / L repeatedly to select the position number you
want to change the channel, then press
• You cannot select a position number where “- - -” appears next
to the number. This is because SKIP is set to “ON” for this
position number.
ENTER
.
4) Press Cursor K / L repeatedly to move the selected channel to
the programme number you want to assign, then press
ENTER
5) Press SETUP to exit.
SETUP
PICTURE
BACK LIGHT [BRIGHT]
INITIAL
MOVE
P01: 02
P06: 08
P02: 03
P07: 09
P03: 05
P08: 10
P04: 06
P09: 11
P05: 07
P10: 04
INITIAL
CH TUNING
LANGUAGE
MOVE
P01: 02
P02: 03
P03: 05
P04: 06
P05: 07
P06: 08
P07: 09
P08: 10
P09: 11
P10: [04]
CH TUNING
AUTO
MANUAL
MOVE
MOVE
P01: 02
P02: 03
P03: [04]
P04: 05
P05: 06
Position
Number
P06: 07
P07: 08
P08: 09
P09: 10
P10: 11
Channel
Number
Stereo Sound System
This TV will receive stereo and bilingual broadcasts.
Selecting the Sound Mode
You can select each mode by pressing
remote control. Each mode is indicated on the TV screen as following.
• During reception of stereo broadcasts
Mode Audio output
Stereo Stereo STEREO
L L audio from the both speakers LEFT
R R audio from the both speakers RIGHT
Normal Monaural - None -
• During reception of bilingual broadcasts
Mode Audio output
Main Main audio from the both speakers MAIN
Sub Sub audio from the both speakers SUB
Main / Sub
• Main audio from the left speaker
• Sub audio from the right speaker
SOUND SELECT on the
Display on
the TV screen
Display on
the TV screen
MAIN + SUB
.
SETUP
PICTURE
BACK LIGHT [BRIGHT]
INITIAL
INITIAL
CH TUNING
LANGUAGE
MANUAL
POSITION
CHANNEL
DECODER
SKIP
P55
055
[OFF]
[ON]
CH TUNING
AUTO
MANUAL
MOVE
MANUAL
POSITION
CHANNEL
DECODER
SKIP
P55
055
[OFF]
[ON]
6 EN
Page 7

L4630BA(EN).fm Page 7 Thursday, June 15, 2006 3:42 PM
OPERATIONS
Watching a TV Programme
1)
Press STANDBY-ON to turn on the TV.
2) Select the desired channel with / (prog.) or the Number
buttons.
• Enter a channel numbers as a two-digit number within 2.5
seconds for the quickest results. For example, to select channel
6, press
0 and 6. If you only press 6, channel 6 will be selected
after 2.5 seconds.
• You can only select channels 1–99.
3) Adjust the volume to the desired listening level using
VOL. +/
-
on the front panel or +/
-
(vol.) on the remote
control.
• If you want to mute the sound temporarily (e.g. during a
telephone call), press
you press
(mute) again, the sound will return at its original
(mute) on the remote control. When
volume level.
4) Adjust picture controls for a natural looking image.
(See “Picture Adjustment”.)
External Input Mode
• To use the RGB scart jack for connecting a device, select “AV1”.
• To use the AUDIO/VIDEO input jacks, select “AV2”.
Using INPUT SELECT
Press
INPUT SELECT to select “AV1” or “AV2” mode.
Using the Number buttons
Press
0, 0, 1 with the Number buttons, so that “AV1” appears on
the TV screen.
Press 0, 0, 2 with the Number buttons, so that “AV2” appears on
the TV screen.
Note: • When you use the S-VIDEO connection, S-VIDEO jack is
given priority over the VIDEO jack.
TV Colour System Change
Different countries use different television colour systems. You can
change the system by pressing
When you select AUTO by pressing
distinguish the system automatically according to the input signal
from the tuner or external devices.
If the picture on the TV screen is black and white, select the system
manually by using
COLOR SYSTEM. Each time you press COLOR
SYSTEM, TV screen will change as follows.
for tuner input (TV):
AUTO or PAL
for external input (VIDEO):
AUTO, PAL, NTSC3.58 or NTSC4.43
COLOR SYSTEM.
COLOR SYSTEM, this unit will
Teletext Reception
Many TV channels transmit Teletext information along with their TV
channels. With this unit, you can retrieve and display it on the screen
using the built-in Teletext decoder.
1) Press (text) to switch the Teletext decoder on. Your unit
now shows Teletext for the TV channel you have selected. Press
(text) again to show Teletext in transparent mode.
2) If you want to select another page, type in the number of the
page with
Note: • To enlarge fonts, press EXPAND.
the Number buttons.
• To select Teletext subpages, press SUB CODE.
• To directly select the page numbers shown at the bottom of
the TV screen, use
RED/GREEN/YELLOW/CYAN.
• To call up the hidden information, press REVEAL.
• To hold the current page, press (hold).
• To go back to the start page, press (index).
3) Press (text) to switch the Teletext decoder off.
Setting the Sleep Timer
The sleep timer function allows you to have the power automatically
turn off after a set time period.
1) Press STANDBY-ON to turn on the TV and press SLEEP on the
remote control.
2) You may change the sleep time by pressing SLEEP on the remote
control repeatedly. The timer can be set up to 90 minutes. Each
time
SLEEP is pressed the time increases by 30 minutes. (The
timer display counts up and sleep timer will be displayed on the
screen when you press
Note: • When you disconnect the unit from the AC outlet or when
you have a power failure, the sleep time will be lost.
SLEEP on the remote control.)
To Cancel the Sleep Timer
Press
SLEEP repeatedly until “0” is displayed.
Picture Adjustment
The picture can be adjusted according to your personal preferences.
These settings are automatically stored after exiting the picture menu.
1) Press SETUP so that the menu display appears on the TV screen.
2) Press Cursor K / L to point to “PICTURE”, then press
ENTER.
3) Press Cursor K / L to select an item you want to adjust, then
ENTER
press
.
• The selected item will be indicated by yellow.
4) Press Cursor s / B to adjust the level, then press ENTER
SETUP
PICTURE
BACK LIGHT [BRIGHT]
INITIAL
PICTURE
BRIGHTNESS
CONTRAST
COLOUR
SHARPNESS
TINT
_
_
_
_
_
.
+
+
+
+
+
5) Press SETUP to exit.
Cursor s Cursor B
BRIGHTNESS
CONTRAST to decrease contrast to increase contrast
COLOUR to pale to brilliant
SHARPNESS to soft to clear
TINT to purple to green
“TINT” appears only when receiving NTSC signals from an
additional device connected by either RGB scart jack or AUDIO/
VIDEO input jacks.
to decrease
brightness
to increase
brightness
Note: • In the above steps, the picture adjustment display will
disappear from the TV screen automatically after about 60
seconds if you do not press any buttons. Press
ENTER so that “PICTURE” is selected.
SETUP and
Back Light Selection
1)
Press SETUP so that the menu display appears on the TV screen.
2) Press Cursor K / L to point to “BACK LIGHT”.
3) Press ENTER to select the mode you wish.
4) When done, press SETUP to exit.
SETUP
PICTURE
BACK LIGHT [BRIGHT]
INITIAL
SETUP
PICTURE
BACK LIGHT [NORMAL]
INITIAL
SETUP
PICTURE
BACK LIGHT [DARK]
INITIAL
Status Display
To check the Channel number & Audio mode, press DISPLAY. Each
time you press DISPLAY, TV screen will change as illustrated:
When you select the channel using the Number buttons, select the
desired channel (position number).
<OFF>
<CHANNEL NUMBER and AUDIO MODE>
P08
STEREO
Press once
7 EN
Page 8

L4630BA(EN).fm Page 8 Thursday, June 15, 2006 3:42 PM
MAINTENANCE
Picture Screen Cleaning
•If the LCD panel should require cleaning, wipe it with a cotton or
soft cloth. Before cleaning the picture screen, disconnect the power
cord.
Service
• Should your LCD colour TV become inoperative, do not try to
correct the problem by yourself. There are no user-serviceable parts
inside. Turn the unit off, unplug the power cord, and take the unit
to a Service Centre for servicing.
Cabinet Cleaning
• Wipe the front panel and other exterior surfaces of the TV with a
soft cloth immersed in lukewarm water and wrung dry.
• Never use a solvent or alcohol. Do not spray insecticide liquid near
the TV. Such chemicals may cause damage and discoloration to the
exposed surfaces.
TROUBLESHOOTING GUIDE
Sometimes a performance problem can be easily solved by checking seemingly apparent but often overlooked possibilities.
Before arranging for service, check these items. It could save your time and money.
QUICK SERVICE CHECK LIST
PR OB L EM
Remote Control Doesn’t Work
Bars On Screen
Picture Distorted
Picture Rolls Vertically
No Colour
Poor Reception on Some Channels
Weak Picture
Lines or Streaks in Picture
Ghosts in picture
Picture Blurred
Sound OK, Picture Poor
Picture OK, Sound Poor
Try a new channel, if OK, then possible station trouble. × × × × × × × × × × × ×
Is TV plugged in?
Power at outlet?
Is TV’s STANDBY-ON on? ×
Is antenna connected to terminal on the back of the set? × × × × × ×
If outside antenna is being used, check for broken wire. × × × × × × × × × × ×
Check for local interference. × × × ×× ××
Turn off with STANDBY-ON and then turn it on after about a minute. ×
Adjust COLOUR control. ×
Adjust CONTRAST & BRIGHTNESS control. ××
Check batteries in Remote Control. ×
Move the TV away from the nearby appliances which have Magnetism.
Turn off using STANDBY-ON, then turn it on again 30 minutes or so later.
Temperature around is too low. ×××
Life of the Back Light is approximately 50,000 hours. Ask the Service Center to replace. × ×
It is quality of the LCD Panel. ×
POSSIBLE REMEDY
××
No Picture or Sound
SPECIFICATIONS
Different colour marks on screen
Black or Luminous point on Screen
×
General Specifications
Television system: PAL I TV standard
Channel coverage
Channel Plan
TV Channel
CH Indication PAL I
01–10 IRA–IRJ,GAP
02–12 –
13–20 –
21–69 E21–E69
74–78 X, Y, Z, Z+1, Z+2
80–99, 100 S1–S20, GAP
71–86 –
90–106 –
121–141 S21–S41
142–153 –
Terminals
S-Video input: Mini DIN 4-pin jack
Video input: RCA connector x 1
Audio input: RCA connector x 2
AUDIO/VIDEO: 21 pin scart jack with RGB Input
Headphone: 1/8" stereo (3.5 mm)
Stereo Sound System
2 speakers
2 ways Audio input (SCART & RCA)
Sound output: 1 W, 8 ohm x 2
© 2006-2007 FUNAI EUROPE GMBH. All rights reserved.
Other Specifications
Remote control: Digital encoded infrared light
Power requirements: AC220-240 V, 50 Hz
Power consumption (Maximum): 50 W
LCD: 20"
Dimensions (H x W x D):
(including the table stand)
Weight:
(including the table stand)
system
466 mm x 594 mm x 231 mm
6.3 kg
• Designs and specifications are subject to change without notice
and without our legal obligation.
EN
 Loading...