

Page 1
S
36
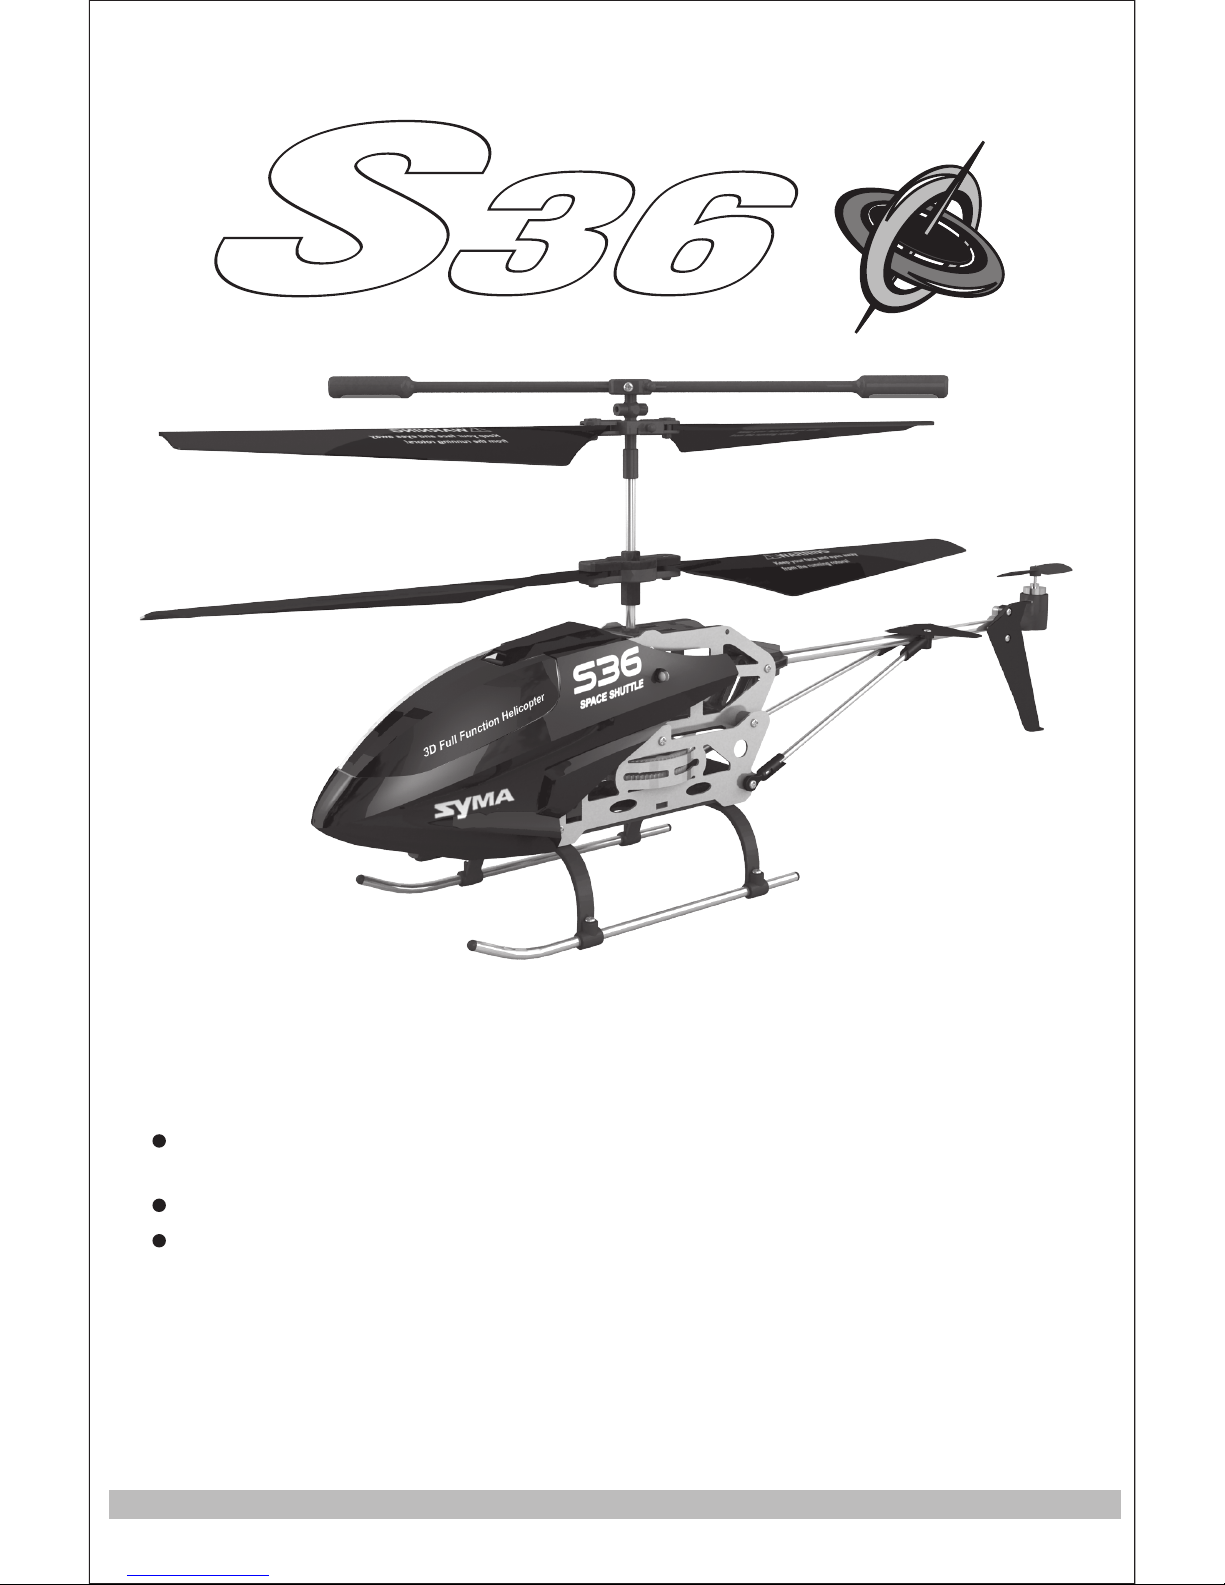
2.4G R/C Helicopter
Die-cast structure is applied, makes the action of this helicopter more flexible with
stable flying performance.It can be flied indoor.
Main characteristics
Built-in Gyro stabilizer can ensure accurate positioning in the air.
Modular design structure is applied, more simple for assembly and convenient for
maintenance.
The materials and specification mentioned in this instruction manual or the parts
inside this package is for reference only.Our company won’t be responsible for any
adaption of the outer package.Nor shall we keep our customers informed in advance.
Any information updated or changed,please be subject to the website of Syma
flying model company.
Gyroscope System
AGES 14+
Page 2

-1-
PREFACE
Dear customers:
Hello!
Thank you for purchasing our flying model.Please read this instruction manual carefully
in order to master the skill required in order to master the skill more quickly and operate
this product more safely.In the mean time, please well keep the original of this instruction
manual for future reference.
IMPORTANT INSTRUCTION
1.This product is not a toy but one precisive equipment that integrating mechanics and electronics
with expertise of aerodynamics and high-frequency transmitting.It requires to be correctly
assembled and debugged so as to prevent the accident from being happened.The product
owner should operate or control it in safe way.Please noted that we won’t take any responsibility
for any wrong operation as this may result in severe injury or loss of property and we can not
control the operating process during the time when the user assemble or use this product.
2.This product is suitable to be used by people who has operating experience in flying model or
age no less than 14 years old.
3.The flying ground we required should be the local field and legal for remote control flying.
4.Once this product is sold , we won’t be responsible for any safety responsibility during the time
the user operates or uses or controls this product.
5.If there is any problem occurred during the time of using, operating or repairing, please reach
our sales agent for details.The sales agent that we authorized will provide you with the technical
support and after-sale service.
SAFETY & CAUTIONS
This R/C flying model is one high dangerous commodity.Please make sure that it should
be flied far away from the crowd.Please also pay more attention to the phenomenon such
as incorrect assembly or damaged model or incorrect connection of electronic control
equipment.Please also pay attention to the flying safety when operating and know more
about the accident that may be happened due to your own negligence.
1. Keep it far away from the barrier or crowd.
2.Keep it far away from the moisten environment.
3.Use this product correctly and avoid operating by your own.
4. Keep it far away from the high-speed rotating part and heat source.
5. Please conform to the sequence of power ON/OFF.As the picture below shown, incorrect
sequence of power ON/OFF may cause this product out of control and affect your own
safety or others. Please form a good habit of switching on or switching off this product
correctly.
Page 3

-2-
-+-
+
-+-
+
BATTERY INSTALLATION AND CHARGING
Unscrew and remove battery cover
from R/C unit, insert 4 ‘AA’
batteries, noting polarity indicators.
Replace battery cover.
Charging Helicopter
A. Remote control
charging
B. Computer charging
Battery Installation
Battery cover
4×1.5V batteries
ON/OFF Switch
Charge port
Plug wire in helicopter
Charging it for 60-70 minutes and you can fly about 5-6 minutes!
WHEN CHARGING BE SURE TO TURN THE WITCH
ON HELICOPTER TO “OFF”
GET TO KNOW YOUR TRANSMITTER
ON/OFF Switch
Power and indicator
High/Low
speed switch
Left control lever
UP / Down
Right control lever
Forward / backward
Turn left / Turn right
Turn left / Turn right
trimmer
USB Charge port
(A) Charging helicopter with Remote Controller: plug provided USB cord into
R/C and into helicopter. Turn on R/C, the light on the USB plug will light
up until the helicopter is fully charged – light will turn off when fully charged.
A full charge takes approximately 70 minutes.
(B) Charging helicopter with computer: plug provided USB cord into computer
and into helicopter. Turn on R/C, the light on the USB plug will light up until
the helicopter is fully charged –light will turn off when fully charged. A full
charge takes approximately 60 minutes.
Page 4
-3-
I R
I R
BATTERY LOADING FOR HELICOPTER AND READY
TO FLY
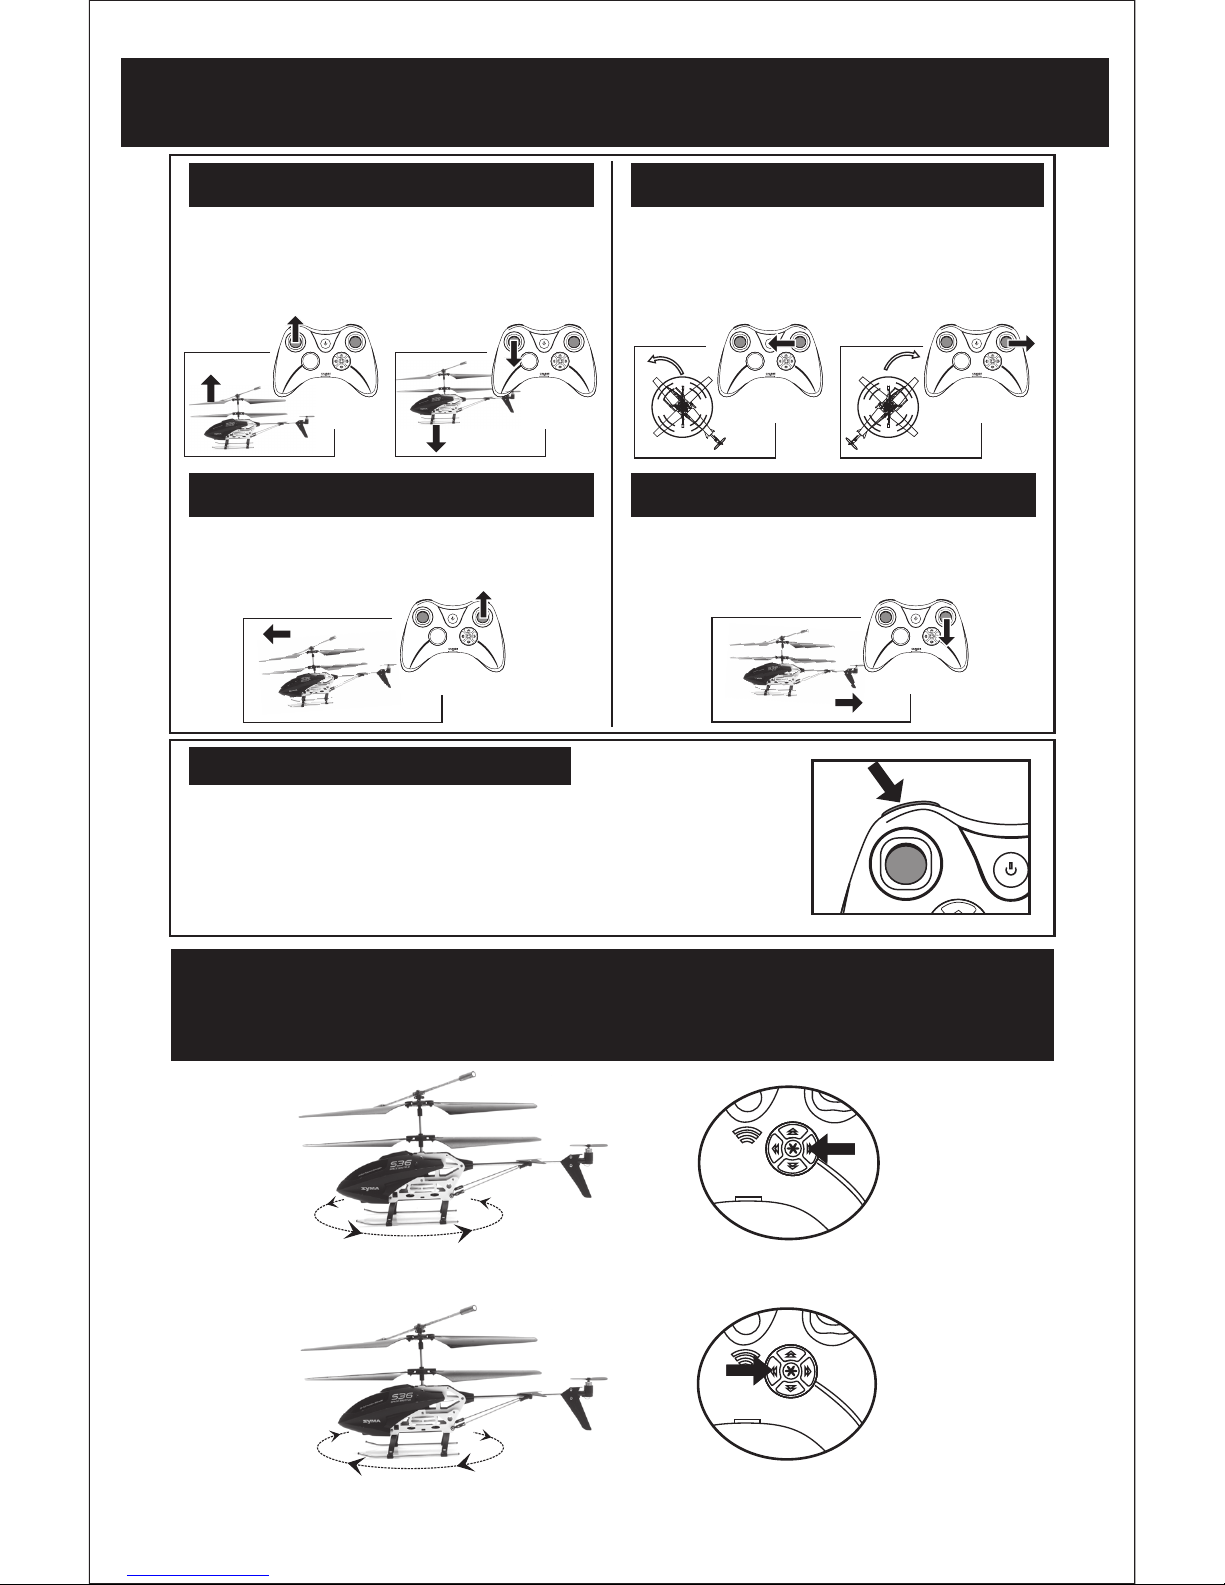
Hover up and down
Learn how to hover (fly in place) first-once
you’ve mastered this operation, flying is easy.
Once you can hover, try moving up and down
with the throttle stick (left). Move the throttle
stick gradually.
Push the right control throttle up - the nose of
helicopter will point downward, the tail motor
will activate, and the helicopter will fly forward.
Pull right control throttle down – the nose of
helicopter will point upward, the tail motor
will activate, and the helicopter will fly backward.
Turn left,turn right
Forward Reverse
Pull the direction control lever to the left or to
the right, the helicopterwill turn to the left or
to the right.
High/Low speed Function
Low Speed:Press the High/Low speed switch key
for one time, the buzz will send out one
sound.
High Speed:Please press the High/Low speed switch
once again, the buzz will send out two
sounds.
Calibration Trim Control: if the helicopter is turning excessively
to the right or left, or turning out of control, adjust the trim
control button using the instruction below.
If helicopter rotates counter-clockwise…Continually push right R/C calibration
until excessive turning stops.
If helicopter rotates clockwise…Continually push left R/C calibration until
excessive turning stops.
Page 5
-4-
OVERHAUL
Reason
PARTS (OPTIONAL)
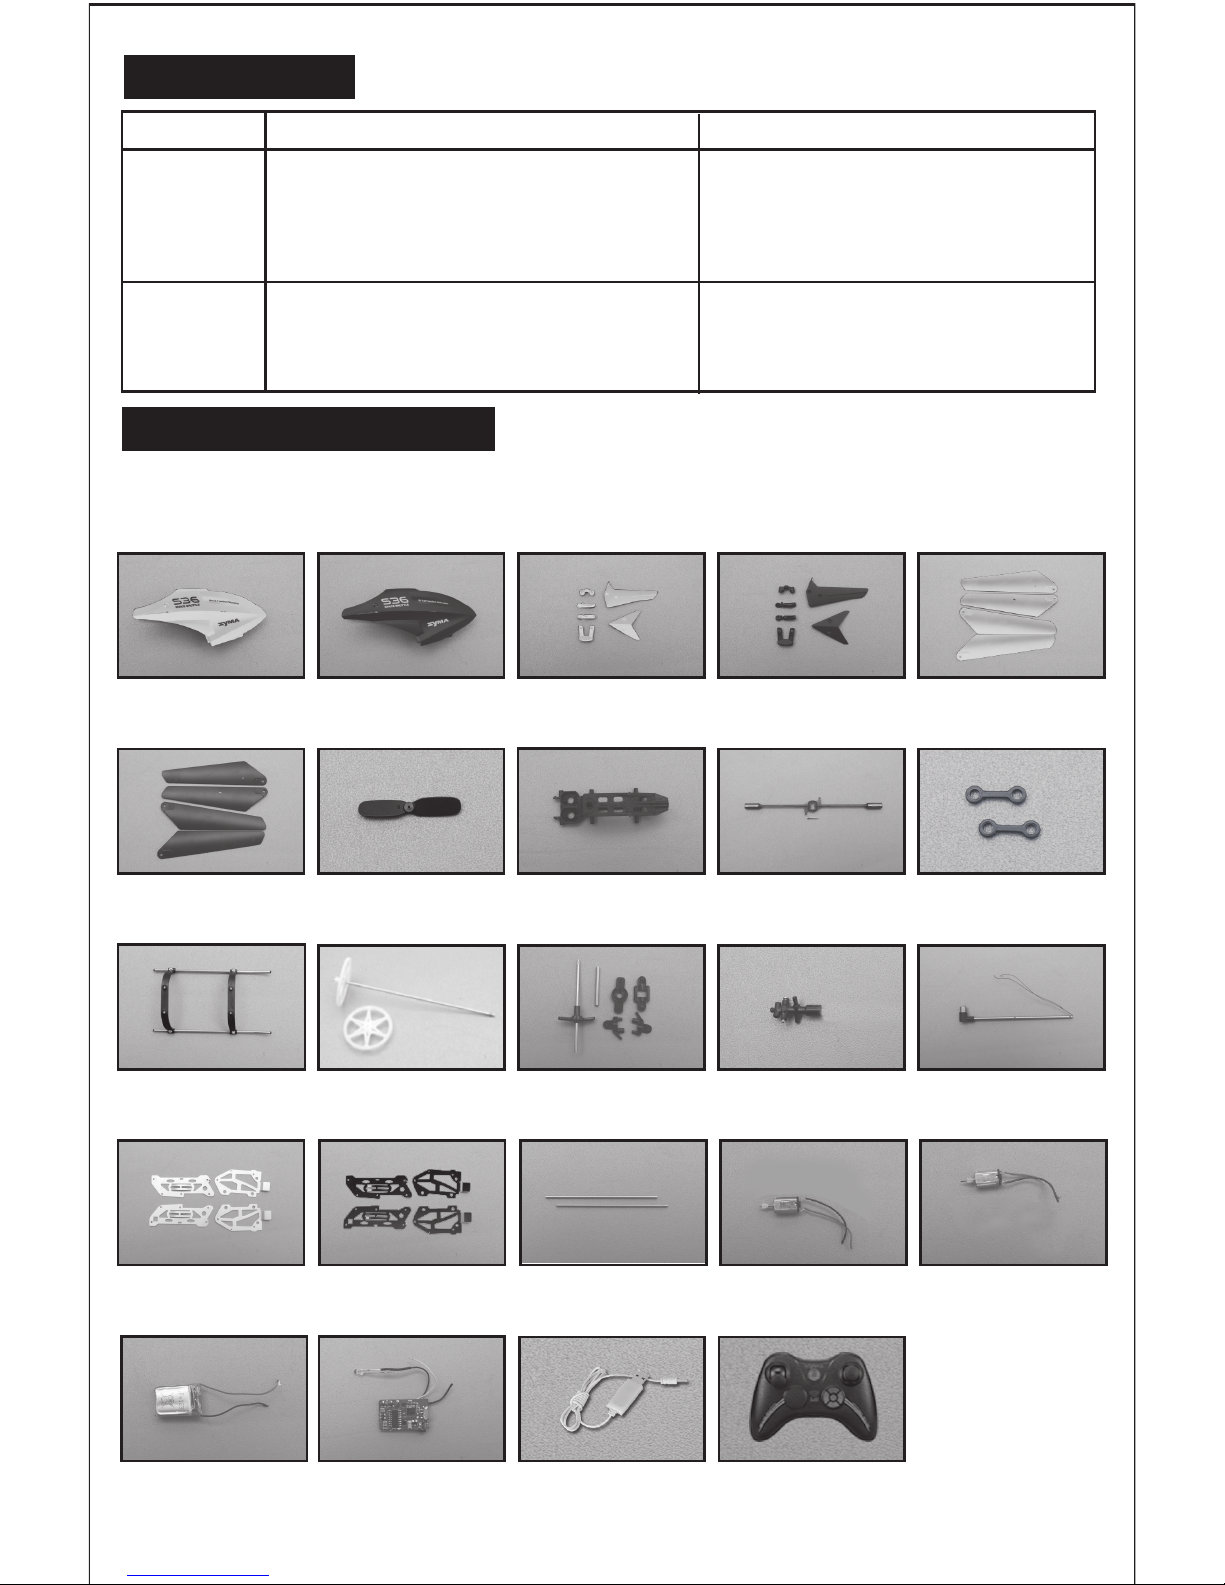
Below are the parts available for your kindly selection.In order to facilitate our customers for placing an
order, we specially offer all kinds of parts for your kindly selection.You can buy these parts via our local
agent as well.
Head Cover(Black)
Main frame
Head Cover(White)
Tripod
Tail blade Balance bar
Tail decoration
(Black)
Tail decoration
(White)
Connectine buckle
Upper / Down
blade clip
TransmitterBattery
Main blades(Black)
Main blades(White)
USB Charge CableReceiving board
Tail supporting
tube assembly
Aluminum plate
assembly (Silver)
Aluminum plate
assembly (Black)
Main seatGear assembly Tail assembly
Main motor A Main motor B
Problem
Solution
No response
from the
helicopter
1.Insufficient power with the helicopter.
2.Insufficient power with the transmitter,
power indicator keeps flashing.
3.The band of the transmitter does not
correspond to the decoding of the
helicopter.
1.Please charge to the helicopter.
2.Replace the battery inside the
transmitter.
3.Adjust the band on the transmitter
and keep it the same as the helicopter.
The
helicopter’s
response is
not smart.
1.Insufficient power with the transmitter.
2.Transmitter of the same frequency is
used nearby.
1.Replace the battery.
2.Change to another place where there
is no the same frequency interfering
with it.
S36-01A S36-02A S36-02B S36-03A
S36-03B S36-03C S36-04 S36-05A S36-05B
S36-06 S36-07 S36-08 S36-09 S36-11
S36-12A
S36-15
S36-17
S36-12B
S36-16
S36-12C S36-13A S36-13B
S36-14
S36-01B
Page 6
-5-
1
2
5
7
29
32
33
34
35
30
31
6
10
3
8
28
9
11
12
26
13
15
19
20
24
25
18
17
21
22
23
36
14
27
16
4
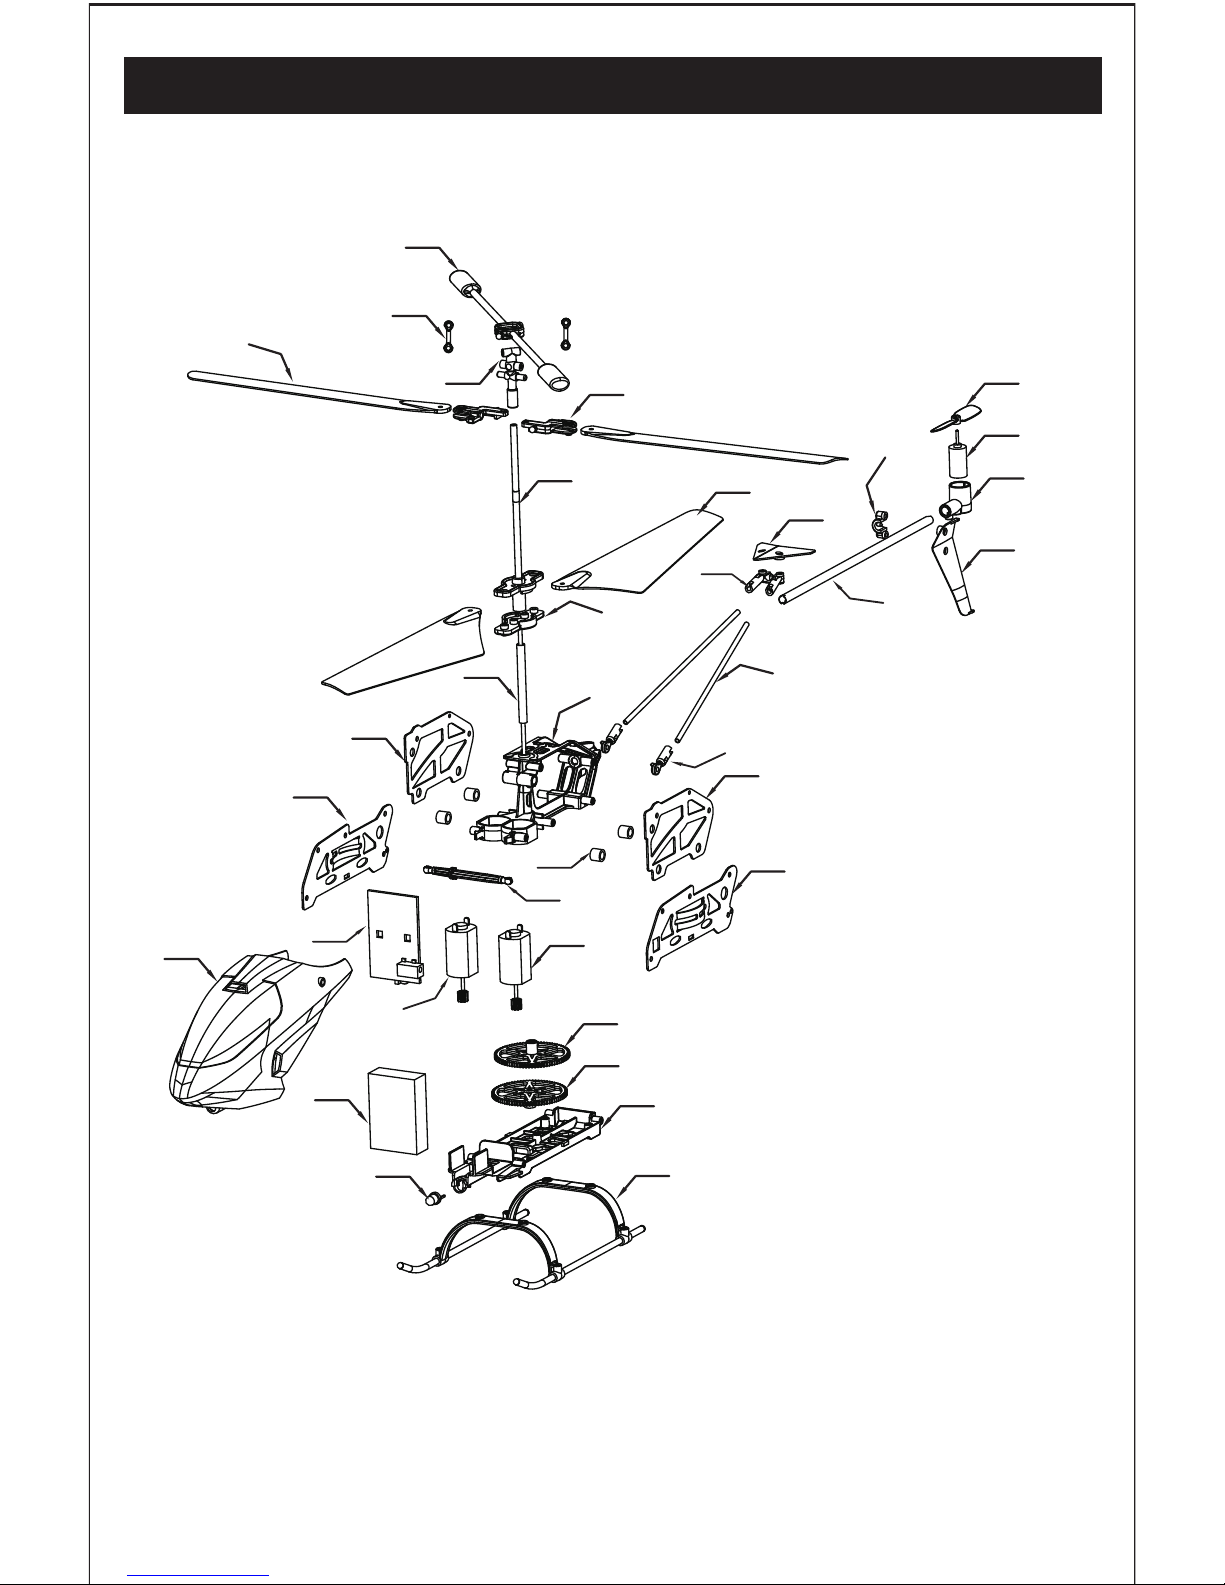
BREAKDOWN & DIAGRAM
Page 7
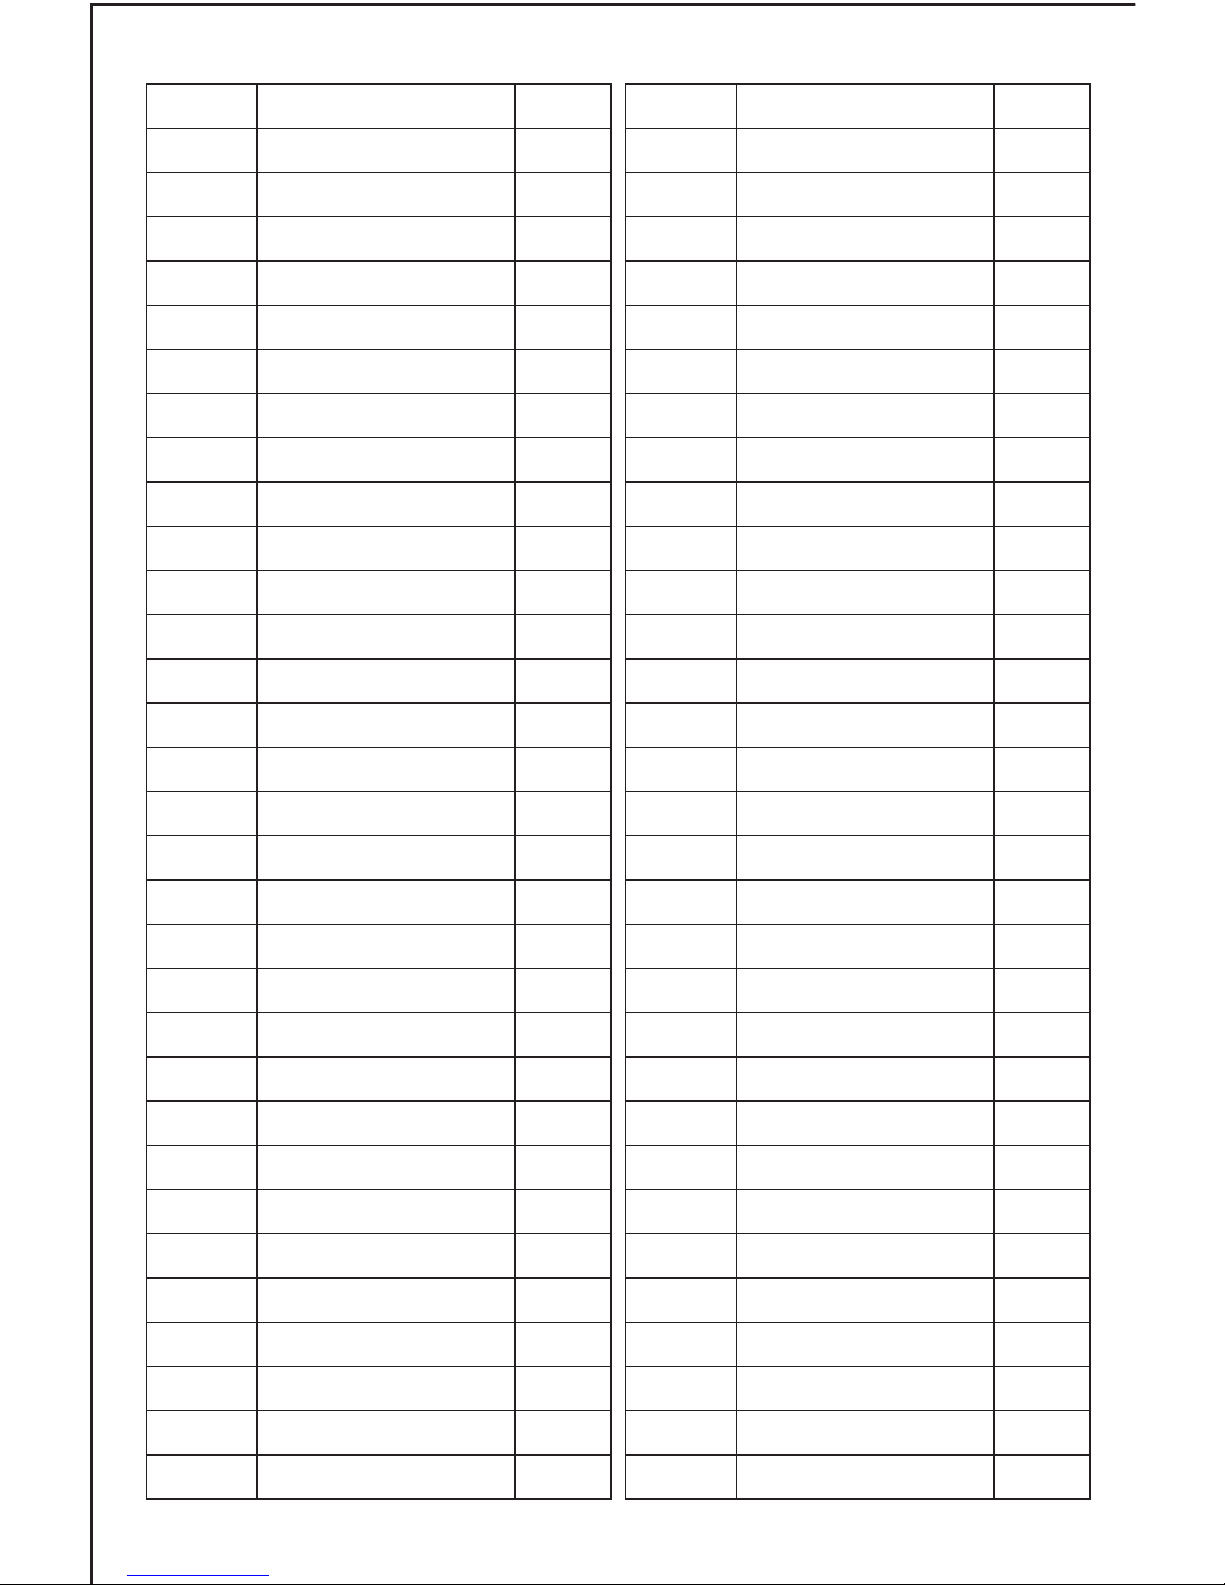
-6-
01
02
03
04
05
06
07
08
09
10
11
12
13
14
15
16
17
18
19
20
21
22
23
24
25
26
27
28
29
30
31
32
33
34
35
36
1
1
1
1
1
1
1
1
1
1
1
1
1
1
1
1
1
1
1
1
1
1
1
1
1
1
1
1
1
1
2
2
4
2
2
2
Balance bar
Connetine backle
Spindle seat
Upper blade
Down blade
2.0 Stainless steel tube
Upper blade clip
Down blade clip
2.5 Stainless steel tube
Main frame
Stop collar
Head fixing part
Up left aluminum plate
Up right aluminum plate
Down left aluminum plate
Down right aluminum plate
Up blade motor
Down blade motor
Down blade gear
Up blade gear
Base rack
LED light
Head cover
Tail decoration
Tail supporting tube
Tail balancing weight
Tail balancing
Tail dangling connecting
Tail tube
Tail dangling
Tail gearbox
Tail motor
Tail blade
Tripod
circuit board
battery
Number Product Name Quantity Number Product Name Quantity
Page 8
-7-
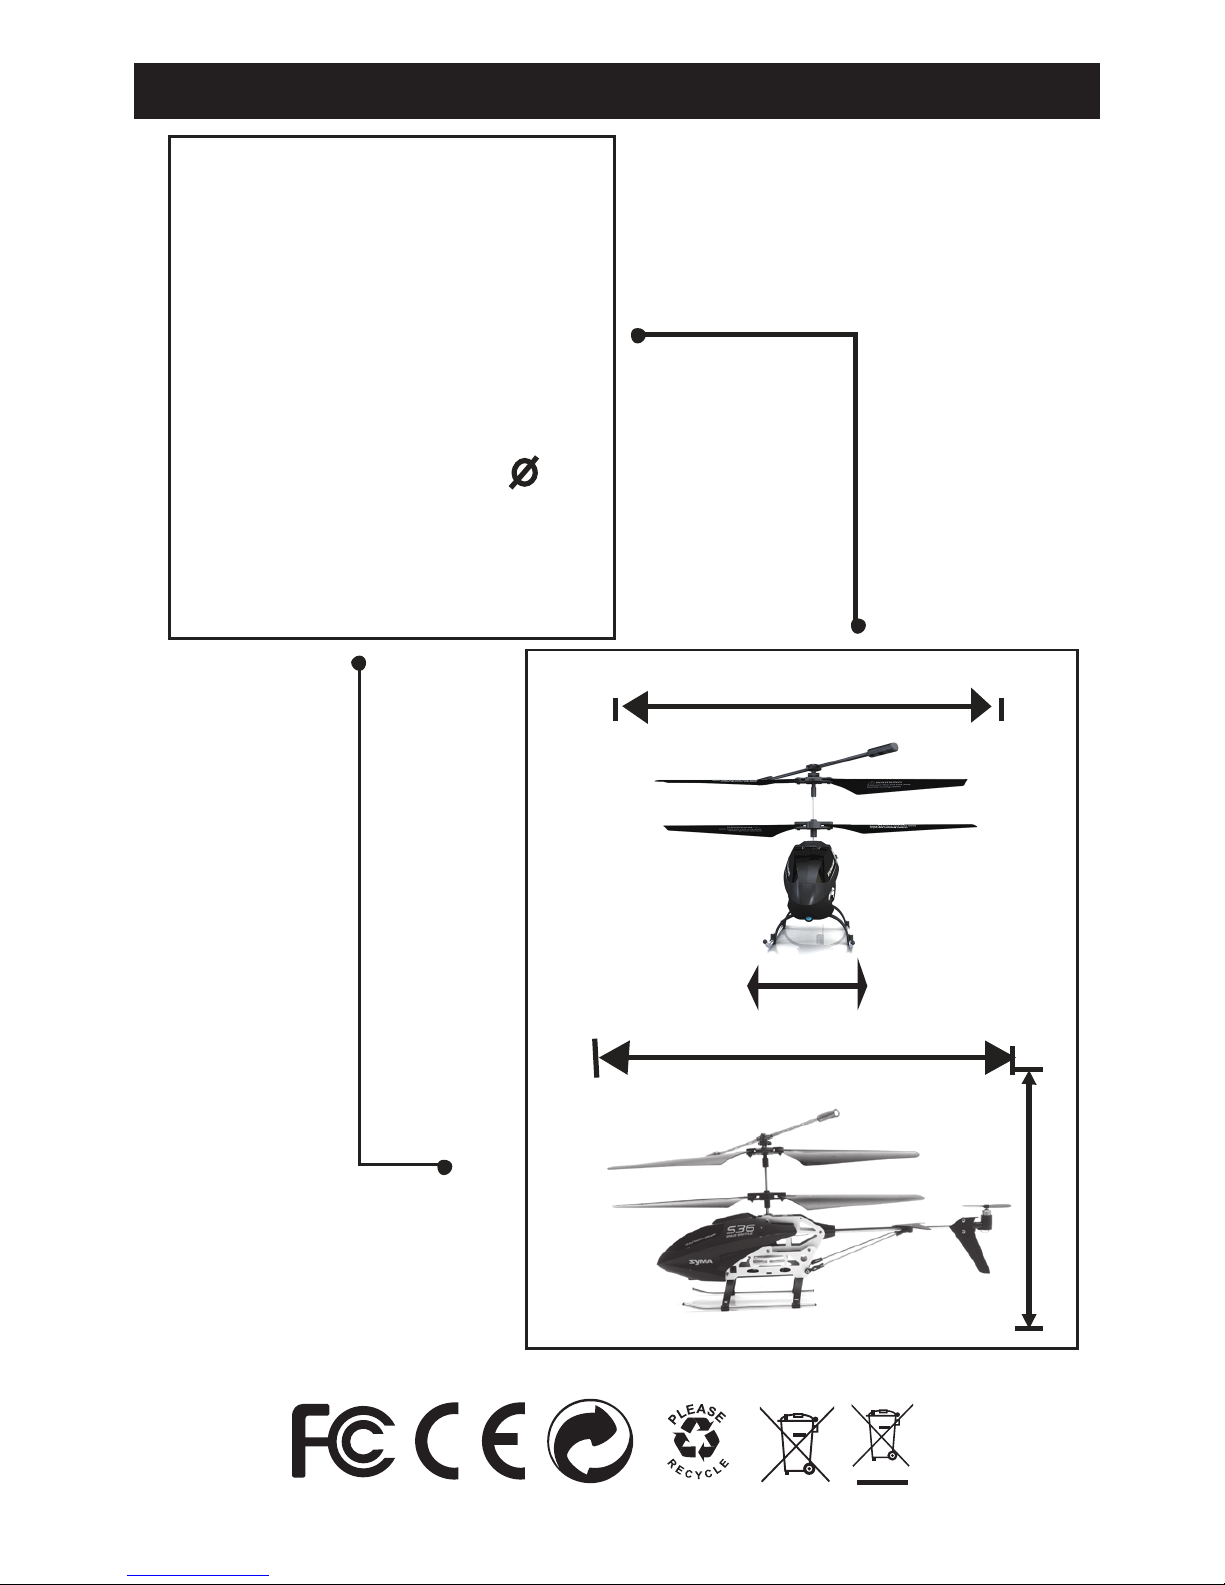
197mm
45mm
240mm
110mm
Diameter of main rotor: 197mm
Length of fuselage:240mm
Width of fuselage: 45mm
Height of fuselage: 110mm
Battery: 3.7V/150mAh
Gyroscope: Tail-locking gyro
Code of main engine:M20x2
Code of negative engine: 6
MAIN PARAMETER
 Loading...