

Page 1
8+
USER MANUAL
MAIN FEATURES
● Utilizes the 4-axis structure, enabling the drone to be even
more flexible, speedy.It can fly indoor .
● Built-in 6-axis gyro stabilizer to ensure accurate positioning
in-flight.
● The structure uses a modular design which makes it easy to
install and repair.
● Headless function making it easy for directional control.
● Pressure-fixed-position hovering function for Auto Hover Mode.
● 360° stunt flip.
● Auto take-off and landing.
● HD wifi real-time transmission aerial for getting the fun of
different photography.
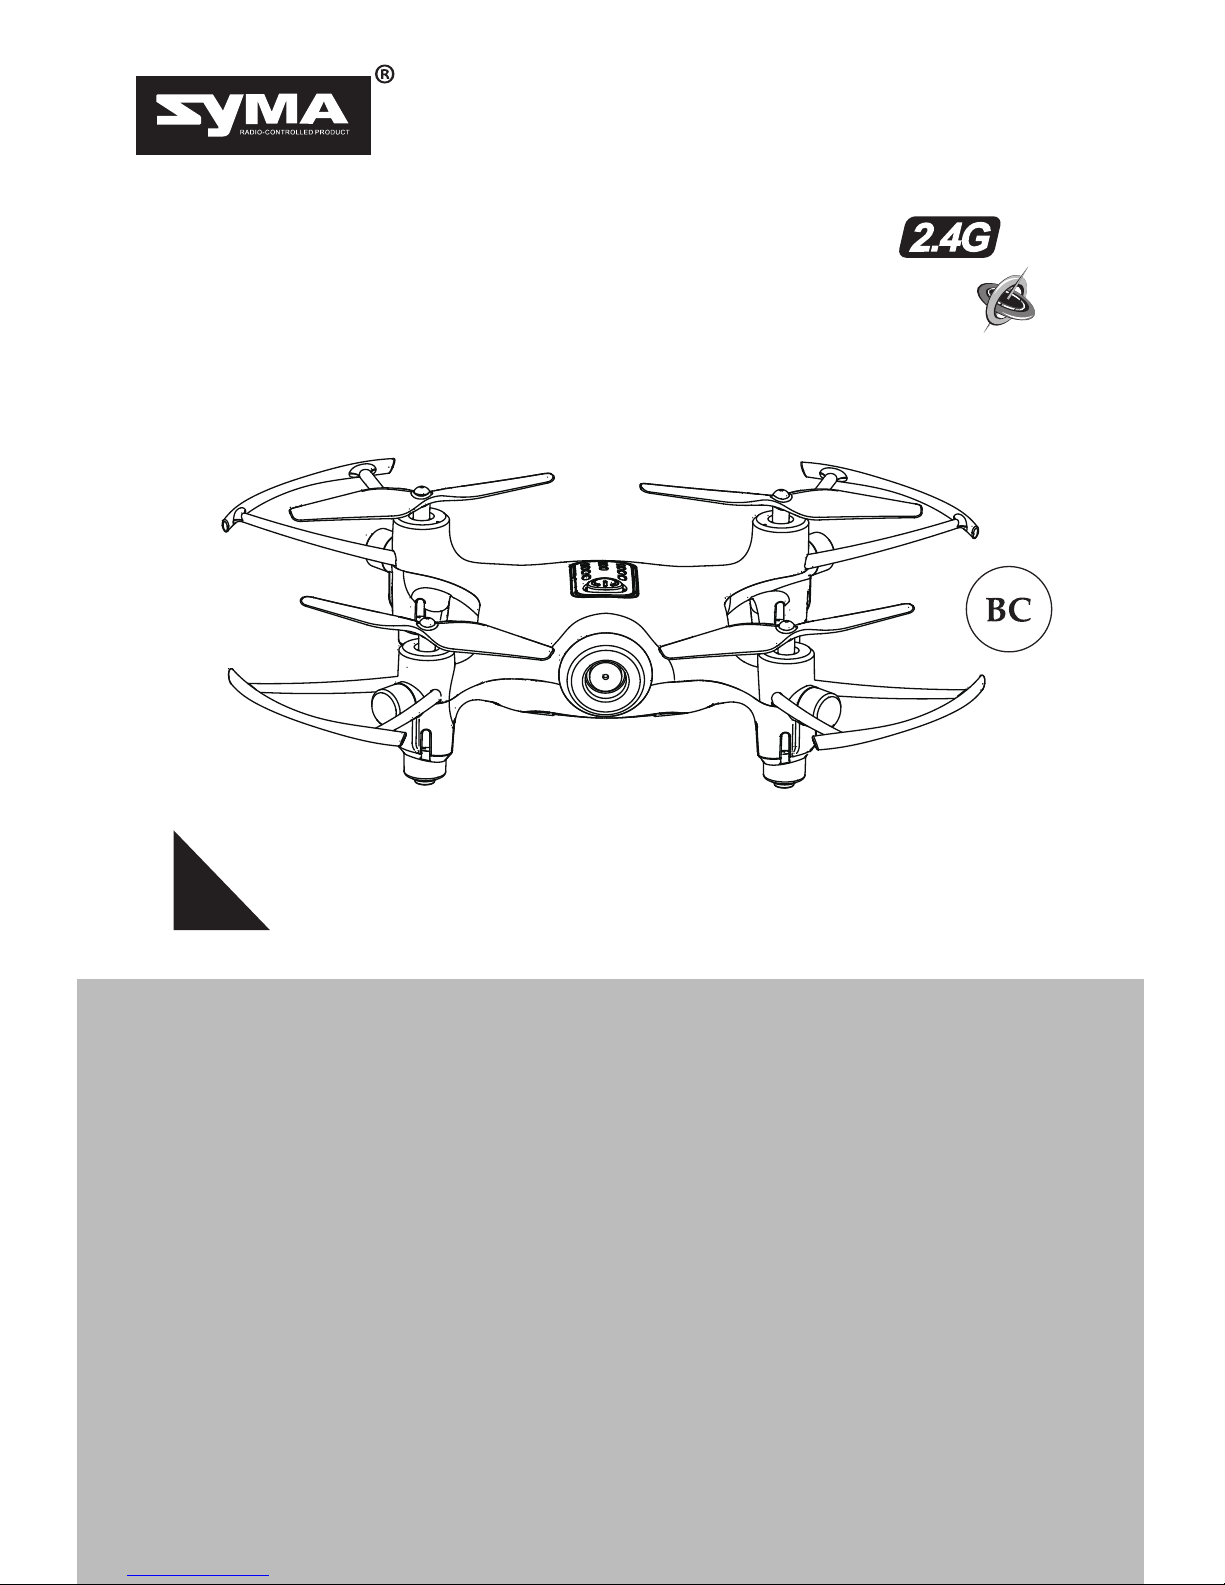
GYRO REMOTE CONTROL SERIES
4-CHANNEL PRESSURE FIXED POSITION HOVERING
REMOTE CONTROL DRONE
X
21W(720P)
1
Page 2

-1-
Repair and maintenance
1. Please store the smaller-sized drone accessories in places that are out
of reach of children.
2. This drone is very powerful. For all first-time flights, the left joystick
must be slowly pushed up in order to prevent the drone from ascending
too fast to avoid unnecessary collision and possible damage or injury.
3. When the flight is ended, first turn off the power of the remote control.
Then turn off the power of the drone.
4. Avoid placing the batteries in places with high temperatures and
exposure to heat.
5. Take extra precaution to ensure that the drone is at a minimum distance
of 15 feet from the pilot, other people, and animals in order to prevent
bodily injury during flight operation.A minimum separation distance of 20
cm must be maintained between the user's body and the device under
normal use condition.
6. This drone is for people ages 8+. It must be flown always within the
line of sight of the pilot (or instructor) and flown safely.
7. Non-rechargeable batteries are not to be recharged;Batteries are to be
inserted with the correct polarity;Different types of batteries or new and
used batteries are not to be mixed.
8. When the drone is not in use, please remove the batteries in the remote
control.
9. The supply terminals are not to be short-circuited.
10.Attention:Drone assembly under adult supervision.
11.The pilot is responsible for the safe operation and safe distance from
uninvolved persons and property on the ground and from other airspace
users and shall never fly the drone above crowds (> 12 persons).
12.Discharge the battery to 40%-50%(On a full charge, fly for half of the
total flight time) if it will not be used for 10 days or more,this can
greatly extend the battery life.
13.Open the battery cover of the toy with screwdriver.
14.The packing has to be kept since it contains important information.
Safety Guide
1. Use dry and soft cloth to clean this product.
2. Avoid exposing this product to heat.
3. Do not immerse this product in water, otherwise, the electronic parts will
be damaged.
Page 3
-2-
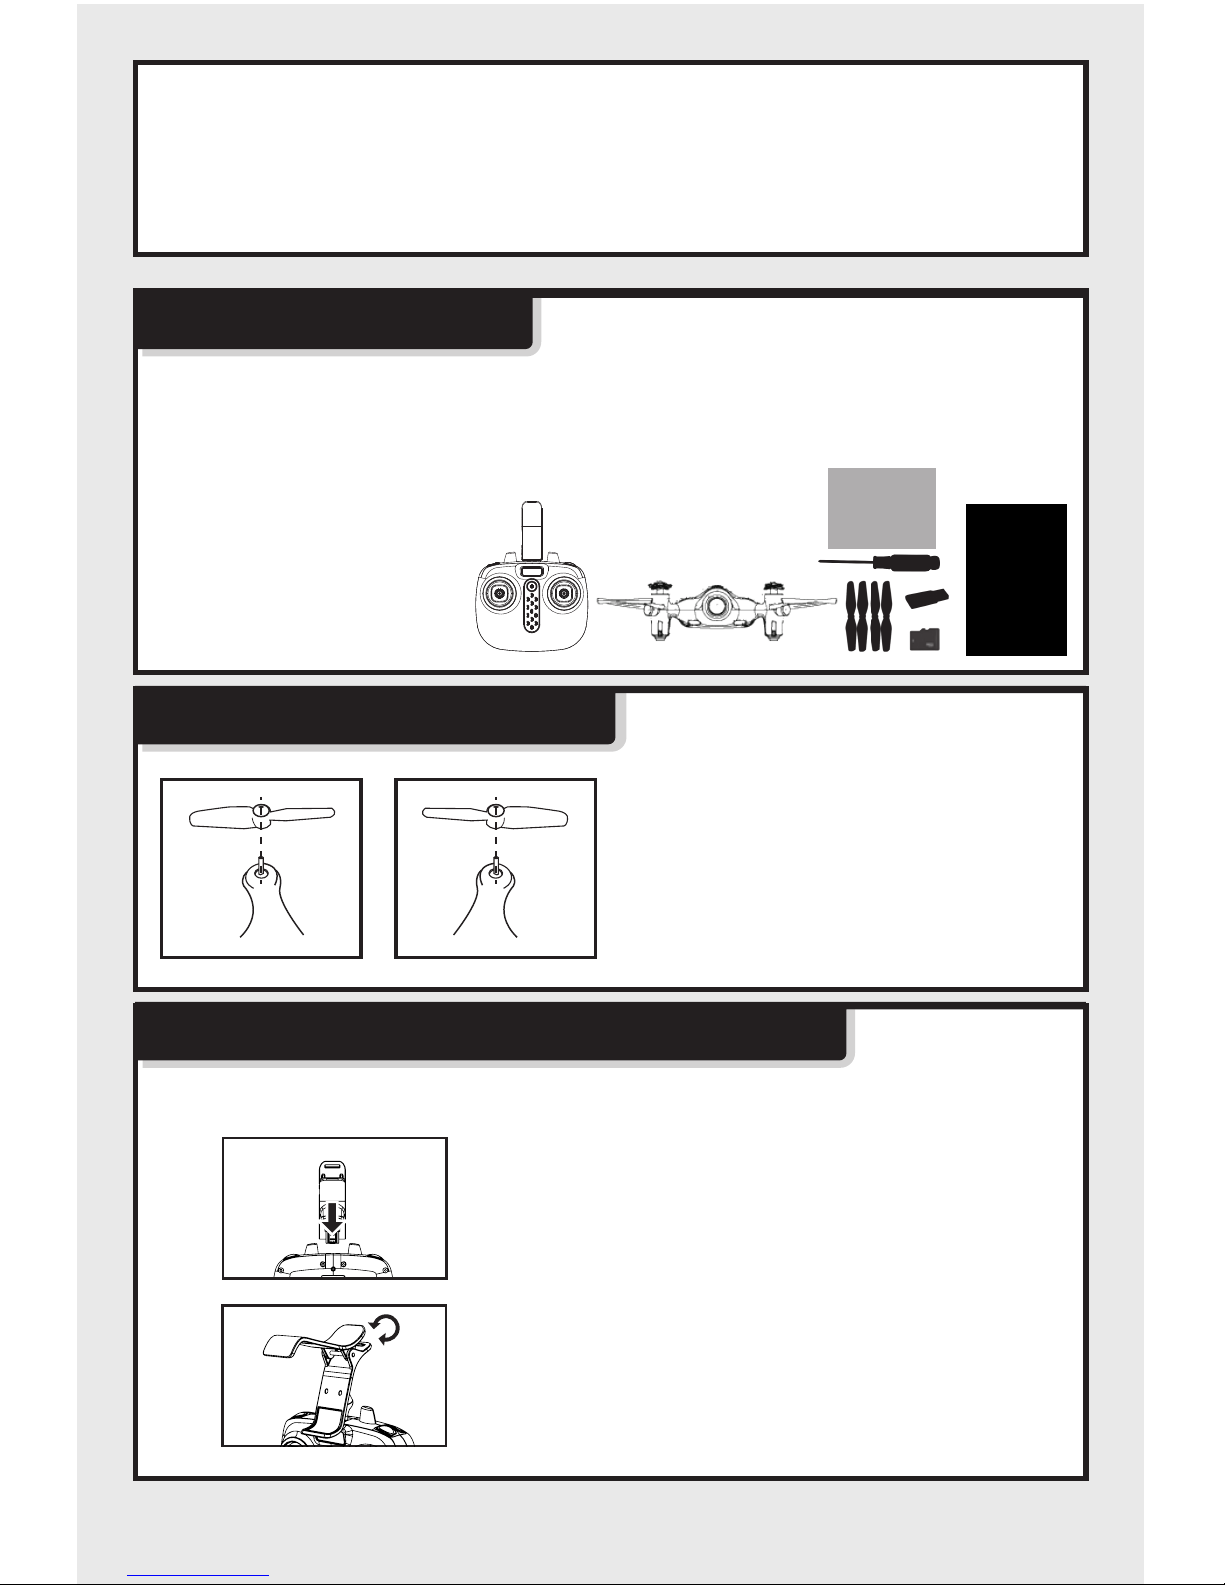
The following items can be found in this product package:
4.Transformers used with the toy are to be regularly examined for damage to
the cord,plug,enclosure and other parts,and that,in the event of such
damage,the toys must be used with this transformer until the damage has
been repaired.
Package Description
• Drone
• Remote Control
• Instruction Manual
• Screwdriver
• Memory Card
• Card Reader
• Main Blades
• USB Cable
• Mobile Phone Retaining Clip
Phone Clip Attachment/Removal Method
Phone clip holder installation:
1.Insert the phone clip holder into the
connector at the top of the remote
control.
2.Press the spring clip to adjust for size.
Blade replacement method
B
B
A
A
1、Pull out the blades that need to be
replaced.
2、As shown on left, the blade A is
mounted to the arm "A" position, and
the blade B is mounted to the arm "B"
position.
Page 4

-3-
Battery changing methods for drone
Battery Changing And
Charging Methods For Drone
1.Press the power button on
the top of the drone to 1-2S
make sure the drone is
turned “OFF”.
2.Push the battery cover
of drone backwards.
4.After battery replacement,
fasten the battery cover again.
3.Pull out the battery plug
from the battery socket.
Precautions as follows during charging of battery:
- Avoid placing the active batteries in places with direct exposure,
sunlight and high temperatures. For example, naked light or electrical
equipment installations; otherwise it may cause damages or explosions .
- Avoid immersing the batteries in the water. The batteries shall be
Battery charging methods for drone
The charging time is about 90 minutes; Hover flight time
is approximately 4.5 minutes.
Phone clip holder dismantle:
1.Pull up the phone clip holder from
behind the remote control.
Connect the battery power cord to the
USB, then connect the USB interface to the
computer. (The indicator light of the drone
will turn on while charging,and turn off when
charging completed.It takes about 90 minutes
to completely charge the battery. )
Page 5
-4-
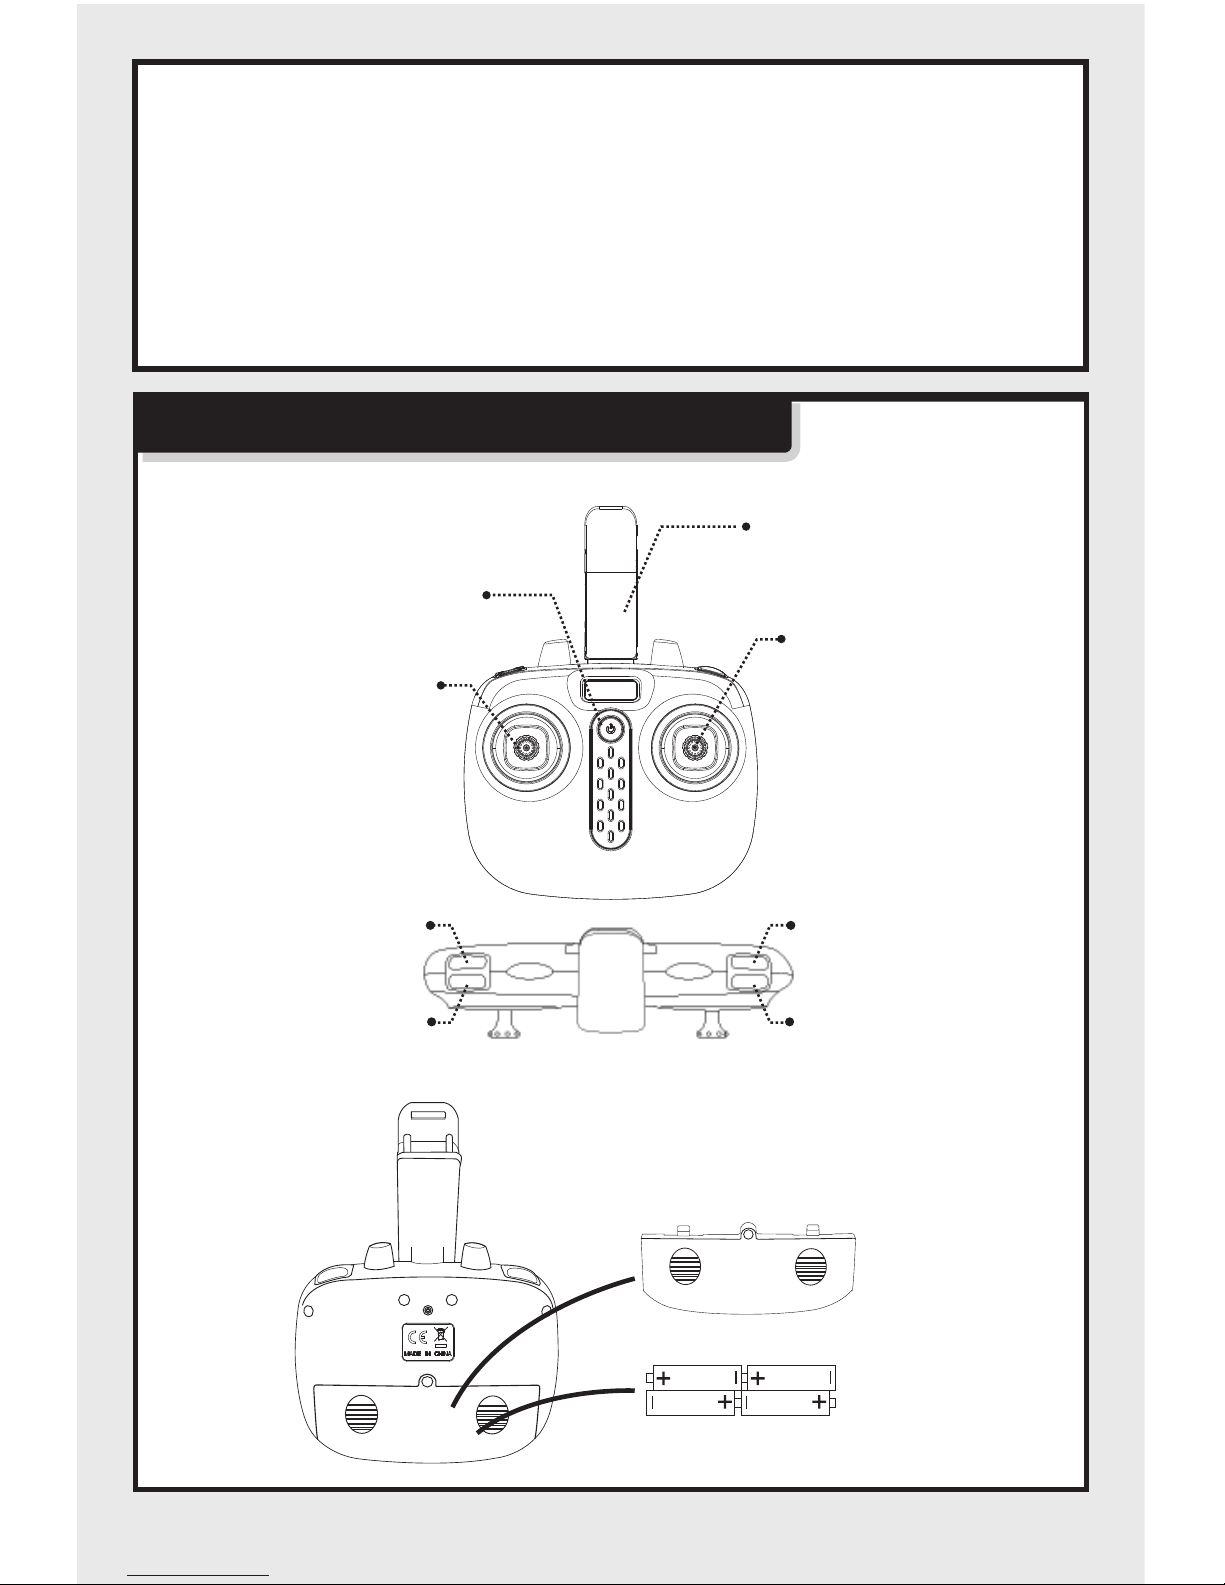
Understanding Your Remote Control
Remote control’s button function description:
Battery installation for remote control:
Power ON/OFF
Mobile Phone
Retanining Clip
Battery cover
4 x AA Alkaline Batteries
Left joystick - Keep
pushing in for
trimming. To clear
all the trimming
settings, keep
pushing in and
push the power
button at the same
time.
Right joystick - Push in
over 3 seconds to enter
headless mode then push
in again to exit. Quickly
push in and release to
change high / low speed,
(one beep means low
speed and two beeps
means high speed.)
Photo
Video
360° Stunt flip button
Push for auto take-off
and landing.
- Avoid dismantling the batteries.
- During the charging of battery, avoid leaving the charging place.
- Rechargeable batteries are to be removed from the toy before being
charged;
- Rechargeable batteries are only to be charged under adult supervision;
- Exhausted batteries are to be removed from the toy;
- Caution:Risk of explosion if battery replaced by an incorrect type,dispose
of used batteries according to the instructions.
stored in a cool and dry place.
Page 6
-5-
1. During the battery installation, it must be ensured
that the polarities of the batteries are matched with
that of the battery box. No battery shall be installed
with the opposite polarity.
2. Do not use new and old batteries together.
3. Different types of batteries are not be mixed.
4. Do not use rechargeable batteries.
Product features
1. Low-voltage Protection:
1. Battery Installation Method: Open up the battery cover at the back of the
remote control. Correctly place 4 x AA alkaline batteries in the battery
box in strict adherence to the polarity instructions (the AA alkaline
batteries are not included).
2. Over-current Protection:
If the drone encounters a direct impact from
a foreign object,or is obstructed, or if the
blades are not rotating, the drone will go into
over-current protection mode.
When the two indicator lights at the rear of
the drone start flashing, it means that the
drone's battery power is low. At this time,
please control the drone return.The drone
will automatically slow down when it is
short of power.
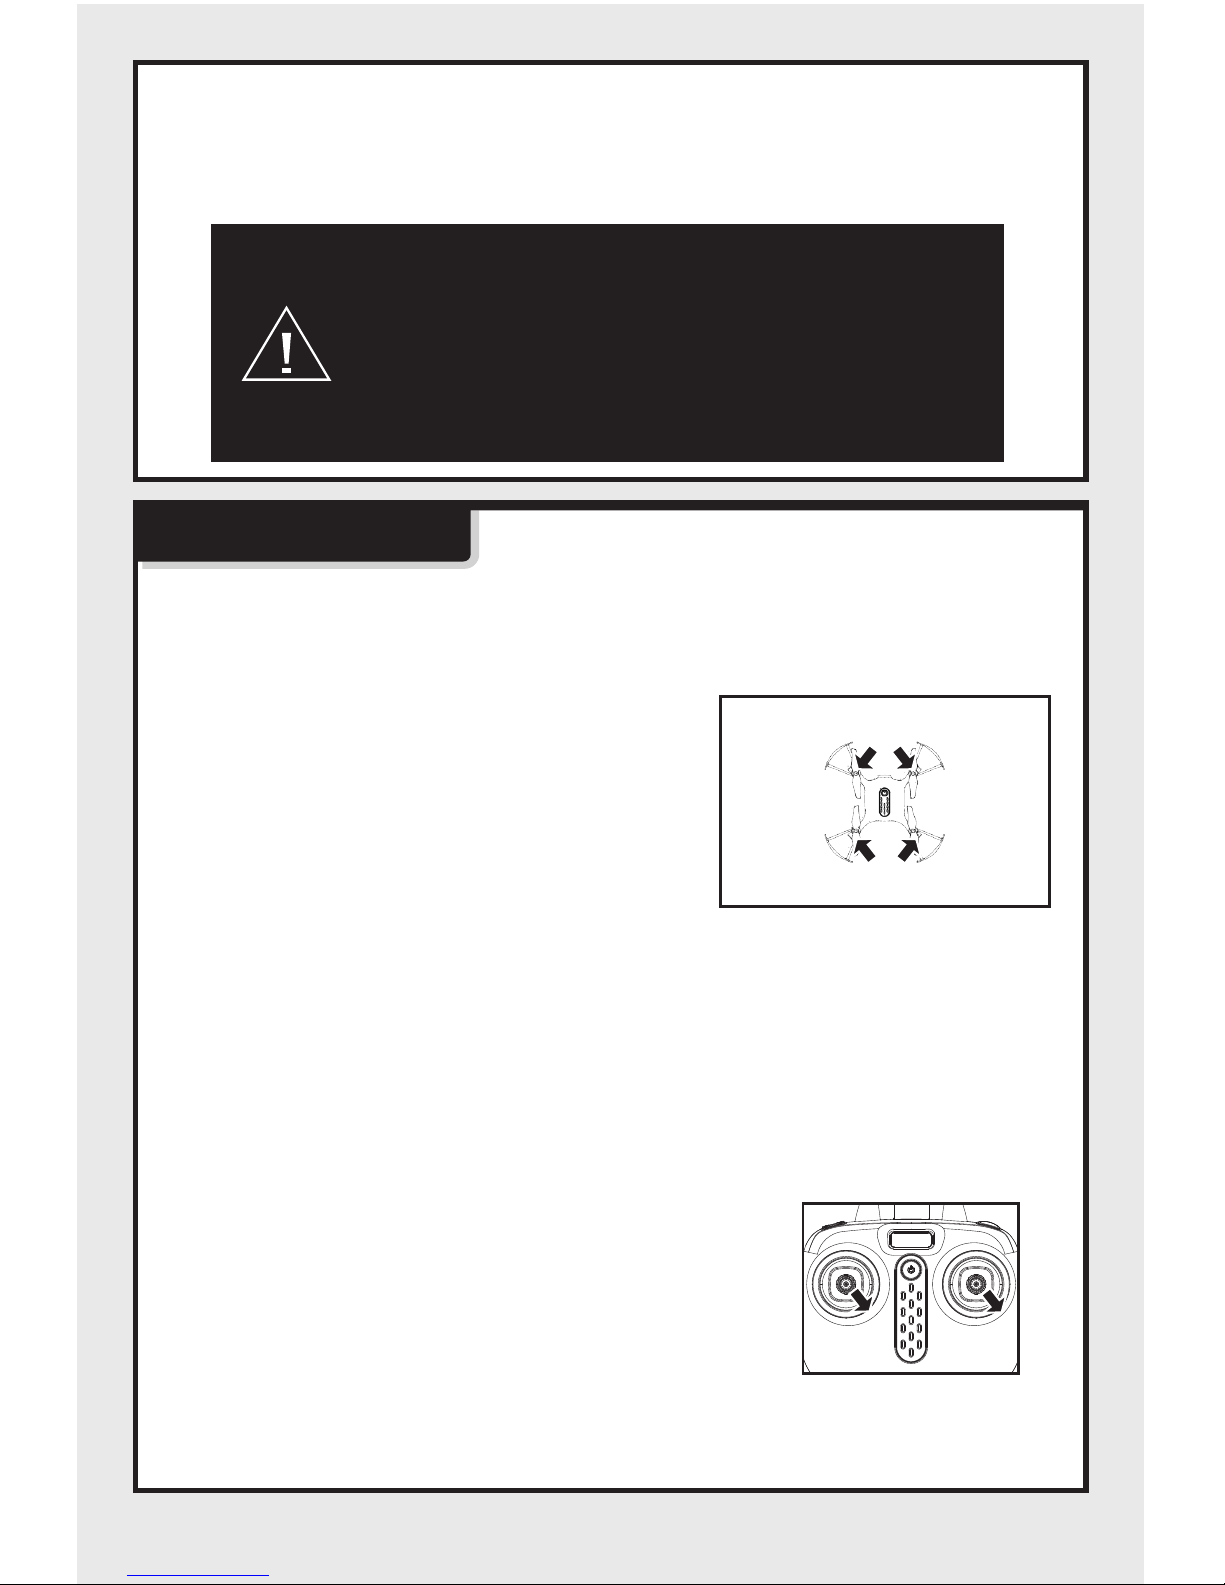
3. Level Calibration Function:
Place the drone on a level surface and at
the same time, push both left and right
joysticks to the lower right corners for 2 to
3 seconds; the rear LED light indicator on
the drone will blink rapidly, and it will return
back to the normal status after about 2
to 3 seconds. The level calibration is
successful.
rear indicator light
(Flight control light) green
front indicator light
(WiFi signal light) red
Page 7

-6-
5. 360° Stunt Flip Function:
When you are familiar with the basic actions,
you can proceed to explore even more exciting
stunt actions. Fly the drone to a height of 3M
above the ground, push the upper right corner
button (Stunt Flip Button) on the remote control
and simultaneously push the right joystick to the
farthest position of Front/Back/Left/Right, the
drone will now execute the Front/Back/Left/Right
stunt flip action.
6. Auto Hover Function:
After using the left joystick (throttle)
to control the ascending / descending
flight of the drone,release the left
joystick (accelerator) and the drone
will hover at that height when the
joystick is released.
Note: Drone will have the best stunt flip action when the batteries
are fully charged.
3M
4. Fast/Slow Speed Function:
Slow speed by default when first powered-on.
Possible to switch the function mode of fast/
slow speed by pressing in on the right joystick
for a short time. It is switched into fast speed
mode when two “beep” sounds come from the
remote control,pressing in on the right joystick for
a short time under fast speed mode and then one
“beep” sound would come from the remote control,
then it is then switched back into slow speed mode.
7. Headless function:
1. Defining forward direction:
1. Push on the power button of the
remote control.
Page 8

-7-
Front
Back
Left Right
3. Push the left joystick (throttle) on the remote
control up to the farthest position and then pull
down to the farthest position. When the remote
control issues a long beep sound, it means the
frequency and defining forward direction
functions are completed.
2. Calibration for the definition of the front:
1. When the drone encounters a direct impact
with foreign objects in the headless mode,
if there is an occurrence of deviation of the
defined direction, it is only required to push
both the left and right joysticks to the bottom
left corners simultaneously after placing the
flying direction of the drone in the correction
position. When the rear LED light indicator
of the drone is in a long “ON” mode after
slowly flashing for 3 seconds, it indicates the
calibration is complete.
3. Toggling between headless function and normal function:
1. After the drone is matched with the
corresponding frequency, the drone would be
in normal pattern by default. At this time the
indicator light on the drone would be in a state
of on for a long time. After pressing in on the
right joystick of the remote control for 2
seconds, the remote control would make a
sound of “beep, beep, beep” to show that it
has entered into a state of headless mode.
Pressing in on right joystick for 2 seconds
then a long sound of “beep” would be heard to
show an exit status.(When under the state of
headless mode, four indicator lights on the
drone are led lights which flicker once every
four seconds)
2. Press the power button on the top of the drone
to 1-2s make sure the drone is turned“ON”, and
adjust the specified direction of the drone’s head
under the headless mode as the new forward
direc.
Page 9

-8-
2. Under the headless mode, the operator
does not need to differentiate the head
position of the drone, and only needs to
control the drone's direction front/back/left/
right by using the right joystick direction on
the remote control.
Front
Back
Left Right
Front
Left
Back
Right
Front
Left
Back
Right
For Android phones,download and install the SYMA GO APP by visiting
the www.symatoys.com or by scanning the QR code.
For IOS Apple phones,download and install the SYMA GO APP by visiting
the App Store or by scanning the QR code.
8.Wifi real-time transmission funtion
1.Downloading the installation software
Reminder: QR codes are provided on the packaging box and at the
bottom of the user manual. Please visit website www.symatoys.com
or the App Store/Google Play to obtain the newest SYMA GO App.
2.How to connect
1.Connect the model to its power source, the camera indicator light should
turn green. Within 10 seconds, the light will flash slowly and the
camera will be waiting for a connection with a smartphone.
2.At this time, enter the “Settings” option on your phone, and turn on WiFi.
In the WiFi search list, look for a network called “FPV-WIFI- ****” and
connect to it. Once connection has been established, exit the “Settings”
option.
3.Open the SYMA GO App, click the “START” icon to enter the control
interface. A full bar in the WiFi signal icon indicates the strongest
possible signal.
1. Open up SYMA GO
APP.
3. The phone’s screen
will display real-time
images.
2. Click the "START" icon,
the system will enter the
APP operation interface
automatically.
Page 10

-9-
3. Interface icon instructions
Mobile APP control interface
Take photo
WIFI Signal
Record
Time
Right Joystick
Trimming A
Trimming C
Return
Flight-track
Headless mode
Gravity induction mode
Check the memory card memory (need to connect WIFI, and
read the memory card data need to wait a few seconds)
Check the phone memory
Click for display/hide
the toolbar
One key
start/stop
Left Joystick
One Key take-off/
Landing
Trimming B
Display/hide Joystick
High-Low Speed
switch
Level Calibration/defining
headless forward direction
Adjust the scale can change
the flight distance
Flight-track operation interface
Press the flight-track button to enter into the
flight-track interface, and the air vehicle will
flight in accordanne with recorded route.
4. Real-time aerial photography uploading:
Photo/Record: When the 720P WiFi camera is operating normally,press the photo/
record icon in the real-time upload interface to take photos/videos.(Photos/recordings
that were taken can be viewed in the “View Photo and Video” folder)
Note: When using the real-time upload operation in the app, the
range for the operating distance of the aircraft will reduce by
half. The WiFi real-time upload function is optimal in spacious
environments.
5. 720P WIFI camera storage function:
1.When there is a Micro SD card installed in the 720P WIFI camera, photos and videos
will be stored in both the phone's internal storage and in the micro SD card. When
there is no storage card installed in the 720P WIFI camera, photos and videos will
only be stored in the phone's internal storage .
Page 11

-10-
Step 2: Press the power button on the top of
the drone to 1-2S make sure the
drone is turned “ON”.
Flight Preparation And Switching
The Drone On And Off
1. Flight Preparation
Step 1: Push the power button of the remote
control.
Step 3: Push the left joystick (accelerator) up
to the highest point and then push
down to the lowest point. When the
led indicator lights in the drone
change from quick flashing to
continuous light, it means that the
drone goes into the flight standby
mode.
2. Turning on the drone
Method 1: push the left joystick (accelerator)
to the highest point and then back
to the center, the blades of the
drone start rotating slowly.
note:When using the remote control to take photo/video ,If the drone
is not loaded into the memory card, even if the indicator light will
flash, no storage function.
2.When using the remote control to take photo ,the rear indicator light flashes on the
drone , when record video , after the indicator light continued to flash twice stop,
and then flash twice again ,press the photo/video button again to stop.
Page 12

-11-
Method 2: Move the left and right joysticks
inwards in an internal loop of “8” for 1
second, the blades of the drone start
rotating slowly.
Method 3: When the drone is stationary,press
the B button, the drone automatically
takes off and hovers at a certain
height.
3. Turning off the drone
Method 1: Push the left joystick (Accelerator)
to the lowest level and hold there for
2 to 3 seconds, the drone can then
be turned off.
Method 2: Move the left and right joysticks
inwards in an internal loop of “8” for 1
second, and the drone can be turned
off.
Method 3: When the drone is in flight, press the
B button, the drone will descend to
the ground and lands.
1.If the drone is out of the range of the flight, the indicator light will
flash slowly, and then slow down.
2.When the remote control is switched off or the power is cut off, the
drone will automatically slow down to stop.In the process , open
the remote control to control again.
Page 13

-12-
Operating direction
When the left joystick (Accelerator)
is pushed upwards or downwards,
the drone will ascend or descend
correspondingly.
When the right joystick (Direction
Rudder) is pushed upwards or
downwards, the drone will advance
forward or backward correspondingly.
Drone Controlling Diagram
Ascending and descending control Forward and backward control
Trimming operation
When the left joystick (Accelerator)
is pushed towards the left or right,
the drone will turn left or right
correspondingly.
When the right joystick (Direction
Rudder) is pushed towards the left or
right, the drone will fly sideways to the
left or right correspondingly.
While the drone is hovering in the air, it
automatically flies forward/backwards, press in
on the left joystick and at the same time push
the right joystick forward/backward slightly to
fine tune the direction. Don’t release the left
joystick until the drone is flying in a stable state.
Forward and backward trim control
Left turning and right turning control
Left side flying and right side flying
control
Page 14

-13-
While the drone is hovering in the air and
automatically flies left/right, press in on the left
joystick and at the same time push the right
joystick left/right slightly to fine tune the direction.
Don’t release the left joystick until the drone is
flying in a stable state.
Left/right side flight trim control
While the drone is hovering in the air, when the
drone automatically rotates and flies towards the
left/right, press in on the left joystick and at the
same time move joystick to the right or left to
adjust the direction. Don’t release the left
joystick until the drone is flying in a stable state.
Left/right side turning trim control
Memory card installation / removal
Memory card installation
Put the memory card into the
slot in the tail of the drone as
shown on the left.
Pull the memory card out of the
slot in the tail of the drone as
shown on the left.
Memory card removal
Note:Do not remove or insert the memory card when the drone is powered on.
Page 15

-14-
Warning: Changes or modifications to this unit not expressly approved
by the party responsible for compliance could void the user’s authority
to operate the equipment.
NOTE: This equipment has been tested and found to comply with the
limits for a Class B digital device, pursuant to Part 15 of the FCC Rules.
These limits are designed to provide reasonable protection against
harmful interference in a residential installation. This equipment
generates, uses and can radiate radio frequency energy and, if not
installed and used in accordance with the instructions, may cause
harmful interference to radio communications.
However, there is no guarantee that interference will not occur in a
particular installation. If this equipment does cause harmful interference
to radio or television reception, which can be determined by turning the
equipment off and on, the user is encouraged to try to correct the
interference by one or more of the following measures:
●Reorient or relocate the receiving antenna.
●Increase the separation between the equipment and receiver.
●Connect the equipment into an outlet on a circuit different from that to
which the receiver is connected.
●Consult the dealer or an experienced radio/TV technician for help.
“This device complies with FCC radiation exposure limits set forth for
general population (uncontrolled exposure).
This device must not be collocated or operating in conjunction with any
other antenna or transmitter.”
Decoration of Conformity lnserts:
“Hereby, GuangDong Syma model aircraft lndustrial co.,ltd, declares
that this drone is in compliance with the essential requirements and
other relevant provisions of Directive 1999/5/EC
A copy of the full DoC is attached
Page 16

-15-
Accessories/Parts List
LiPo Battery
Card ReaderUSB Cable
Receiver Board
Mobile Phone
Retaining Clip
Protective FrameRotor BladeBody
(White)
Body
(Black)
Motor B Motor A
Lamp Cover
Battery Cover
(Black)
Battery Cover
(White)
Light Board
Silicone Rubber
Ring
Remote Control
Page 17

-16-
Product descriptions
03 04
03
06
08
09
01
07
07
07
07
05
09
08
11
13
14
14
02
16
04
08
07
07
07
07
08
14
14
15
12
10
09
09
05
06
Camera Cover
Camera Connecting Parts
Lamp Cover
Silicone Rubber Ring
01
02
03
04
05
06
07
08
09
10
11
12
13
14
15
16
Product NameNO. Qty. Product NameNO. Qty.
Protective Gear
Battery
Battery Cover
Top Main Body assembly
Bottom Main Body
Blade(Clockwise Direction)
Blade(Counter Clockwise Direction)
Motor(Clockwise Direction)
Motor(Counter-clockwlse Direction)
1
1
2
2
2
2
4
4
4
1
1
1
1
4
1
1
Light Board
Camera Board assembly
X21W(720P) Memory card slot
Page 18

-17-
Drone Length : 13.6cm Drone’s Width : 13.6cm
Drone’s Height : 3.1cm Motor’s Model : 8
Battery : 3.7V 380mAh lithium battery
13.6cm 13.6cm
3.1cm
13.6cm
Main Specifications
Problem Reason Solution
The drone
has no
response
1. The drone has entered into
lowvoltage protection.
2. When the power of the remote
control is weak, the power light
indicator will blink.
1. Charge up the drone.
2. Change the batteries of
the remote control.
The flight
response of
the drone is
not sensitive
1. The power of the remote
control is weak.
2. There is an interference with
the same frequency as that of
the remote control.
1. Change the batteries.
2. Change to a place where
there is no interference
with the same frequency.
Rectification procedures
Page 19

-18-
Problem Reason Solution
The drone is
flying towards
its side in one
direction during
hovering
1. The drone is not calibrated
level to the ground.
1. Re-adjust the calibration
until the drone is level
to the ground. For further
details, see No.3 on Page
5 for details (Function of
horizontal adjustment).
In the headless
state, it is biased
towards the front
direction
Fixed high
instability / up and
down movement
1. Many collisions may cause
head biasness.
1. The drone is not calibrated
level to the ground.
2. Unstable air pressure under
the severe weather condition.
3. Violent collision resulting in
data disorder of gyroscope.
1. Re-define the front
direction. For further
details, see on Page 6
for details (Headless
Function).
1. Re-adjust the calibration
until the drone is level
to the ground. For further
details, see No.3 on Page
5 for details (Function of
horizontal adjustment).
2. Avoid to fly under the
severe weather condition.
3. Make horizontal
adjustment again, see
No.3 on Page 5 for details
(Function of horizontal
adjustment).
Page 20

The company has the right of final interpretation
of this instruction manual statement.
Manufacturer
Guangdong Syma Model Aircraft Industrial Co., Ltd.
The Crossing of No.2 West Xingye Road and North Xingye Road,Laimei.
Industrial Park Chenghai District Shantou City Guangdong China.
QR code for android
system
QR code for apple
iOS system
 Loading...