

Page 1
USER’S GUIDE
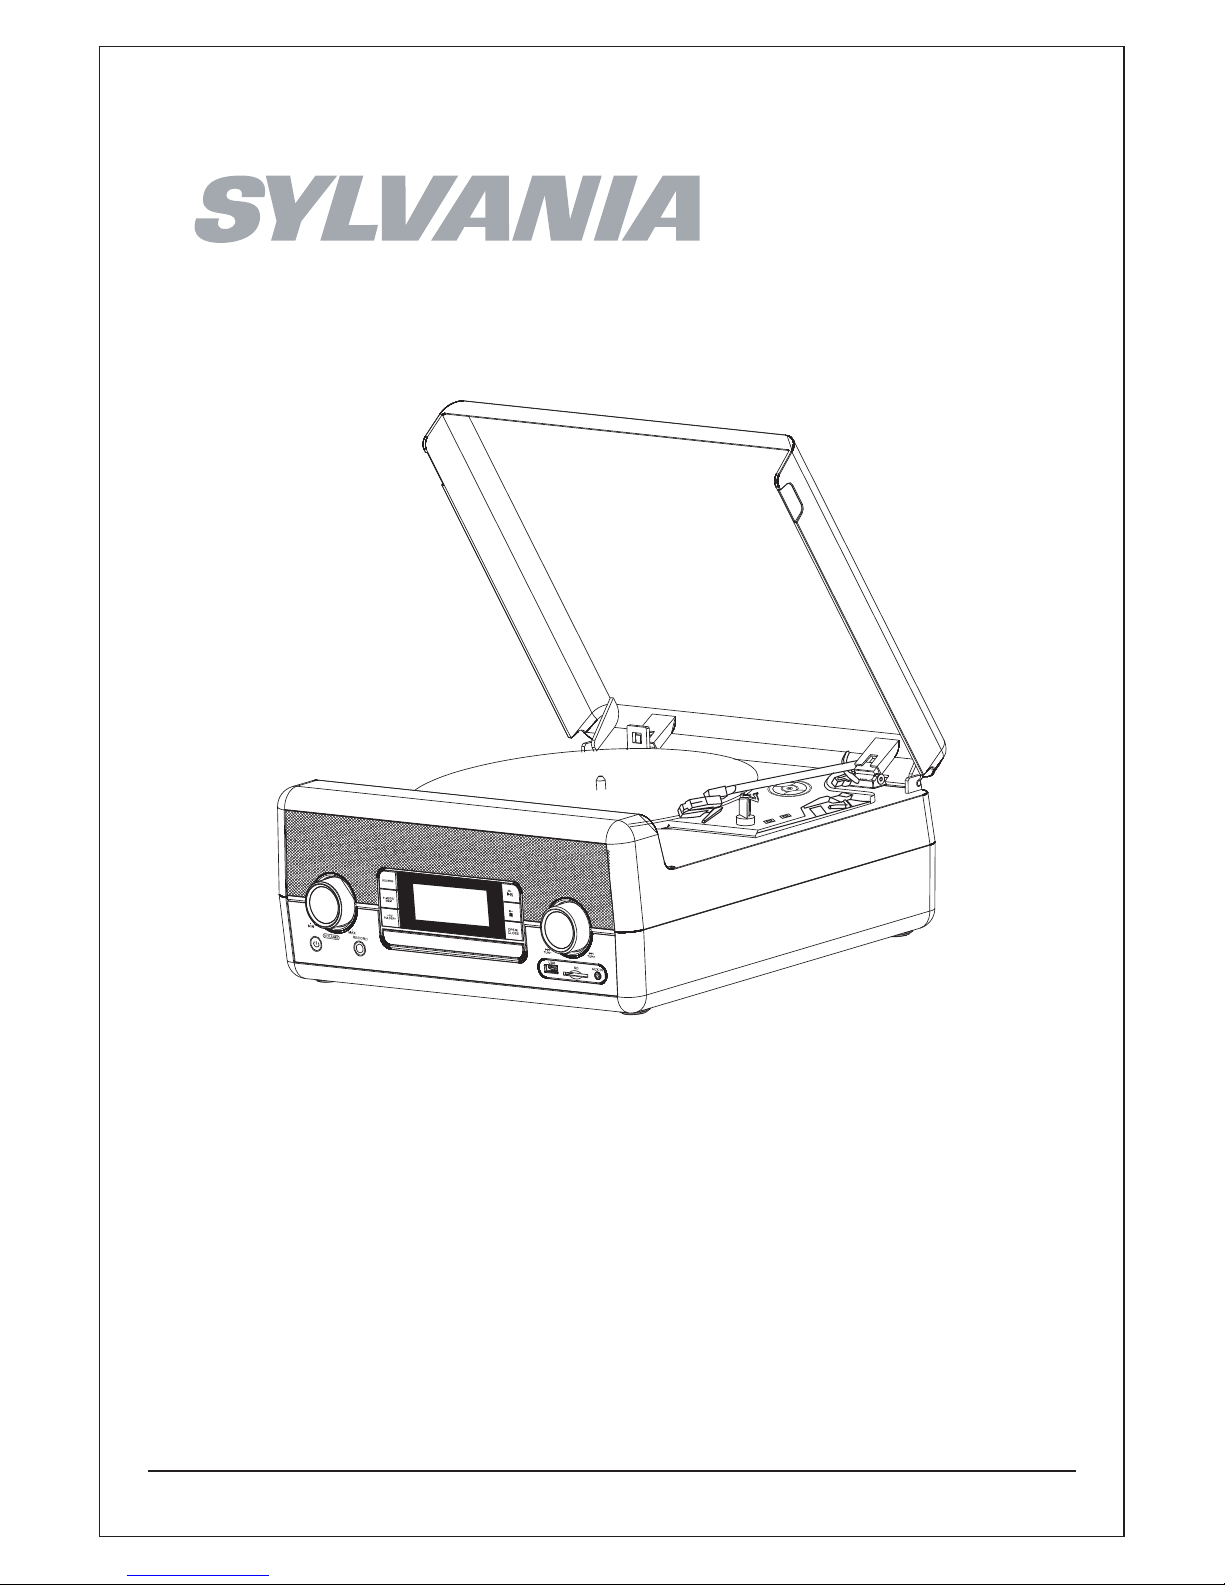
SRCD875
CD Radio Turntable with USB
PLEASE READ BEFORE USING THIS EQUIPMENT
Page 2
1
Page 3
13. Unplug this apparatus during lightning storms or
when unused for long periods of time.
14. Refer all servicing to qualifed service personnel.
Servicing is required when the apparatus has been
damaged in any way, such as power-supply cord
or plug is damaged, liquid has been spilled or
objects have fallen into the apparatus, the
apparatus has been exposed to rain or moisture,
does not operate normally, or has been dropped.
NOTE: This equipmenthas beentestedand found to comply or has
been dropped.
with the limits for a Class B digital device, pursuant to Part 15 of the
FCC Rules. These limits are designed to provide reasonable
protection against harmful interference in a residential installation.
This equipment generates, uses, and can radiate radio frequency
energy and, if not installed and used in accordance with the
instructions, may cause harmful interference to radio communications.
However, there is no guarantee that interference will not occur in a
particular installation. If this equipment does cause harmful
interference to radio or television reception, which can be determined
by turning the equipment off and on, the user is encouraged to try to
correct the interference by one or more of the following measures:
•
Reorient or relocate the receiving antenna.
•
Increase the separation between the equipment and receiver.
•
Connect the equipment into an outlet on a circuit different from
that to which the receiver is connected.
•
Consult the dealer or an experienced radio/TV technician for
help .
•
The apparatus shall not be exposed to dripping or splashing and
that no objects flled with liquids, such as vases, shall be placed
on apparatus.
•
Main plug is used as disconnect device and it should remain readily
operable during intended use. In order to disconnect the apparatus
from the mains completely, the mains plug should be disconnected
form the mains socket outlet completely.
•
Battery shall not be exposed to excessive heat such as sunshine,
fire or the like.
•
Caution marking is located at the rear or back of the apparatus.
•
The marking information is located at the rear or back of apparatus.
L’appareil ne doit pas être exposé aux écoulements ou aux
éclaboussures et aucun objet ne contenant de liquide, tel qu’un
vase, ne doit être placé sur l’objet.
La prise du secteur ne doit pas être obstruée ou doit être facilement
accessible pendant son utilisation. Pour être complètement
déconnecté de l’alimentation d’entrée, la prise doit être débranchée
du secteur.
Les piles ne doivent pas être exposées à de forte chaleur, tel qu’à
la lumière du soleil, au feu ou autres choses de semblable.
Attention marquage est situé à l’arrière ou à l’arrière de l’appareil.
Les informations de marquage est situé à l’arrière ou à l’arrière de
l’appareil.
FCC Warnings
Additional Warnings
1 Read these Instructions.
2
Keep these Instructions.
3
Heed all Warnings.
4
Follow all instructions.
5
Do not use this apparatus near water.
6
Clean only with a dry cloth.
7
Do not block any ventilation openings. Install in
accordance with the manufacturer’s instructions.
8
Do not install near any heat sources such as radiators,
heat registers, stoves, or other apparatus (including
amplifers) that produce heat.
9
Do not defeat the safety purpose of the polarized or
grounding - type plug. A polarized plug has two blades
with one wider than the other. A grounding type plug
has two blades and a third grounding prong. The wide
blade or the third prong are provided for your safety.
When the provided plug does not ft into your outlet,
consult an electrician for replacement of the obsolete
outlet.
10
Protect the power cord from being walked on or
pinched particularly at plugs, convenience receptacles,
and the point where they exit from the apparatus.
11
Only use attachments/accessories specifed by the
manufacturer.
12.
Important Safety Instructions
This symbol indicates that this product
incorporates double insulation between
hazardous mains voltage and user
accessible parts.
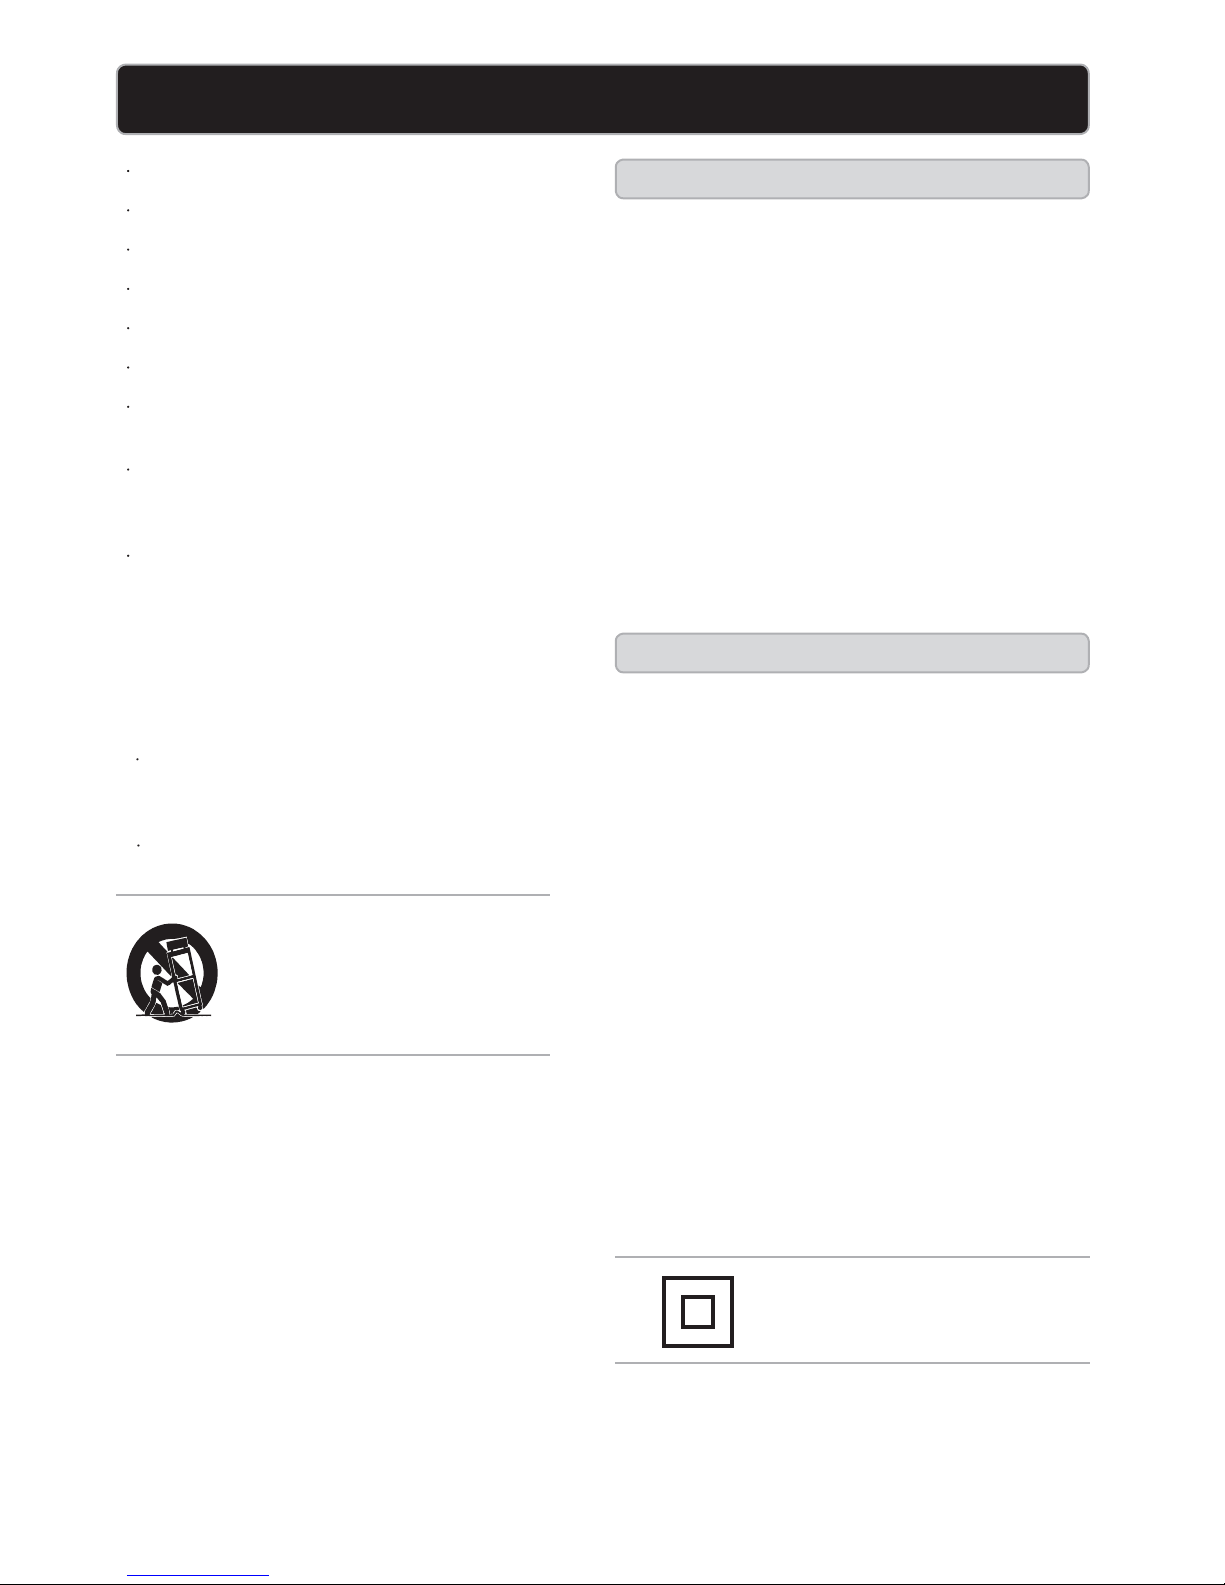
Use only with a cart, stand, tripod,
bracket, or table specifed by the
manufacturer, or sold with the apparatus.
When a cart is used, use caution when
moving the cart/apparatus combination
to avoid injury from tip-over.
2
Page 4
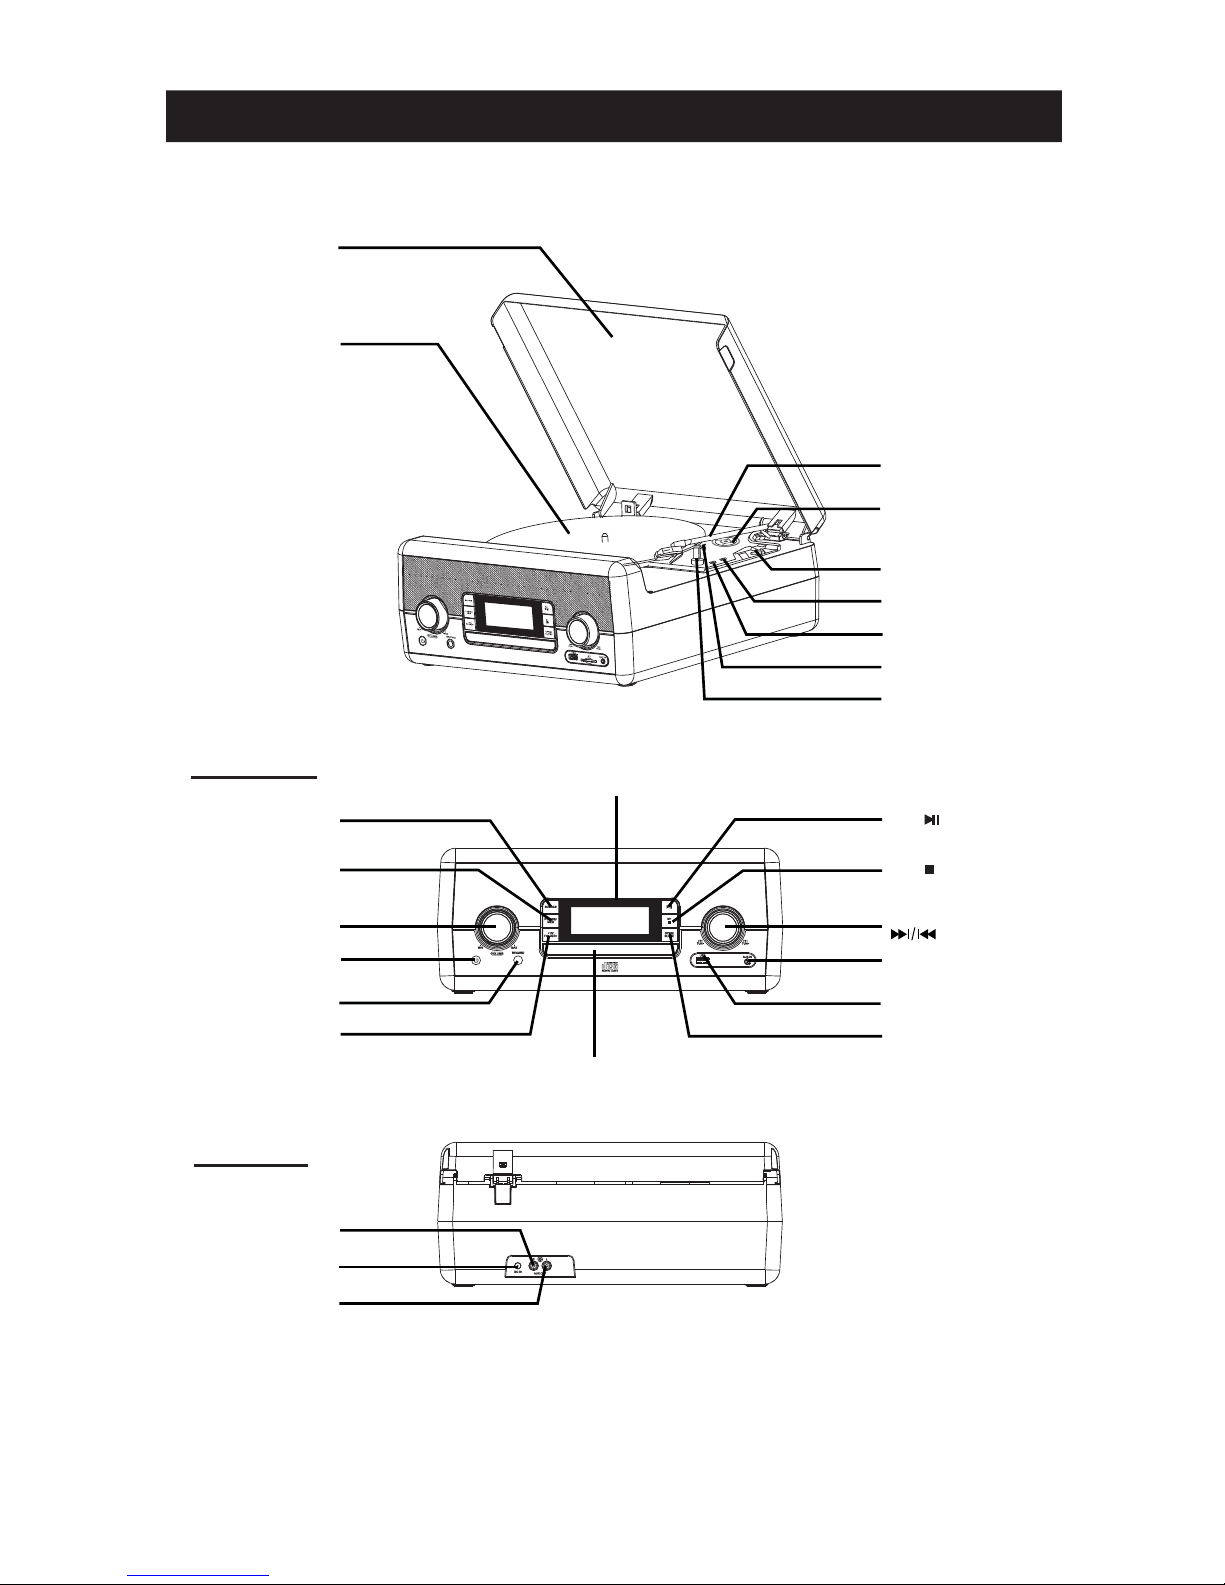
Control Location
3
Dust Cover
Turntable
Tone arm
DC input
AUX output (L)
AUX output (R)
SOURCE button
P-MODE/MEM button
VOLUME Control
POWER button
RECORD button
+10 / FOLDER+ button
CD Compartment
LCD Display
M+ / button
M- / button
TUN+/-
Controls
AUX input
USB port
OPEN / CLOSE button
REAR SIDE
FRONT SIDE
45 RPM Adaptor
Tone arm control lever
Auto stop control switch
Speed selector
Hold Down Clip
Tone arm rest
Page 5
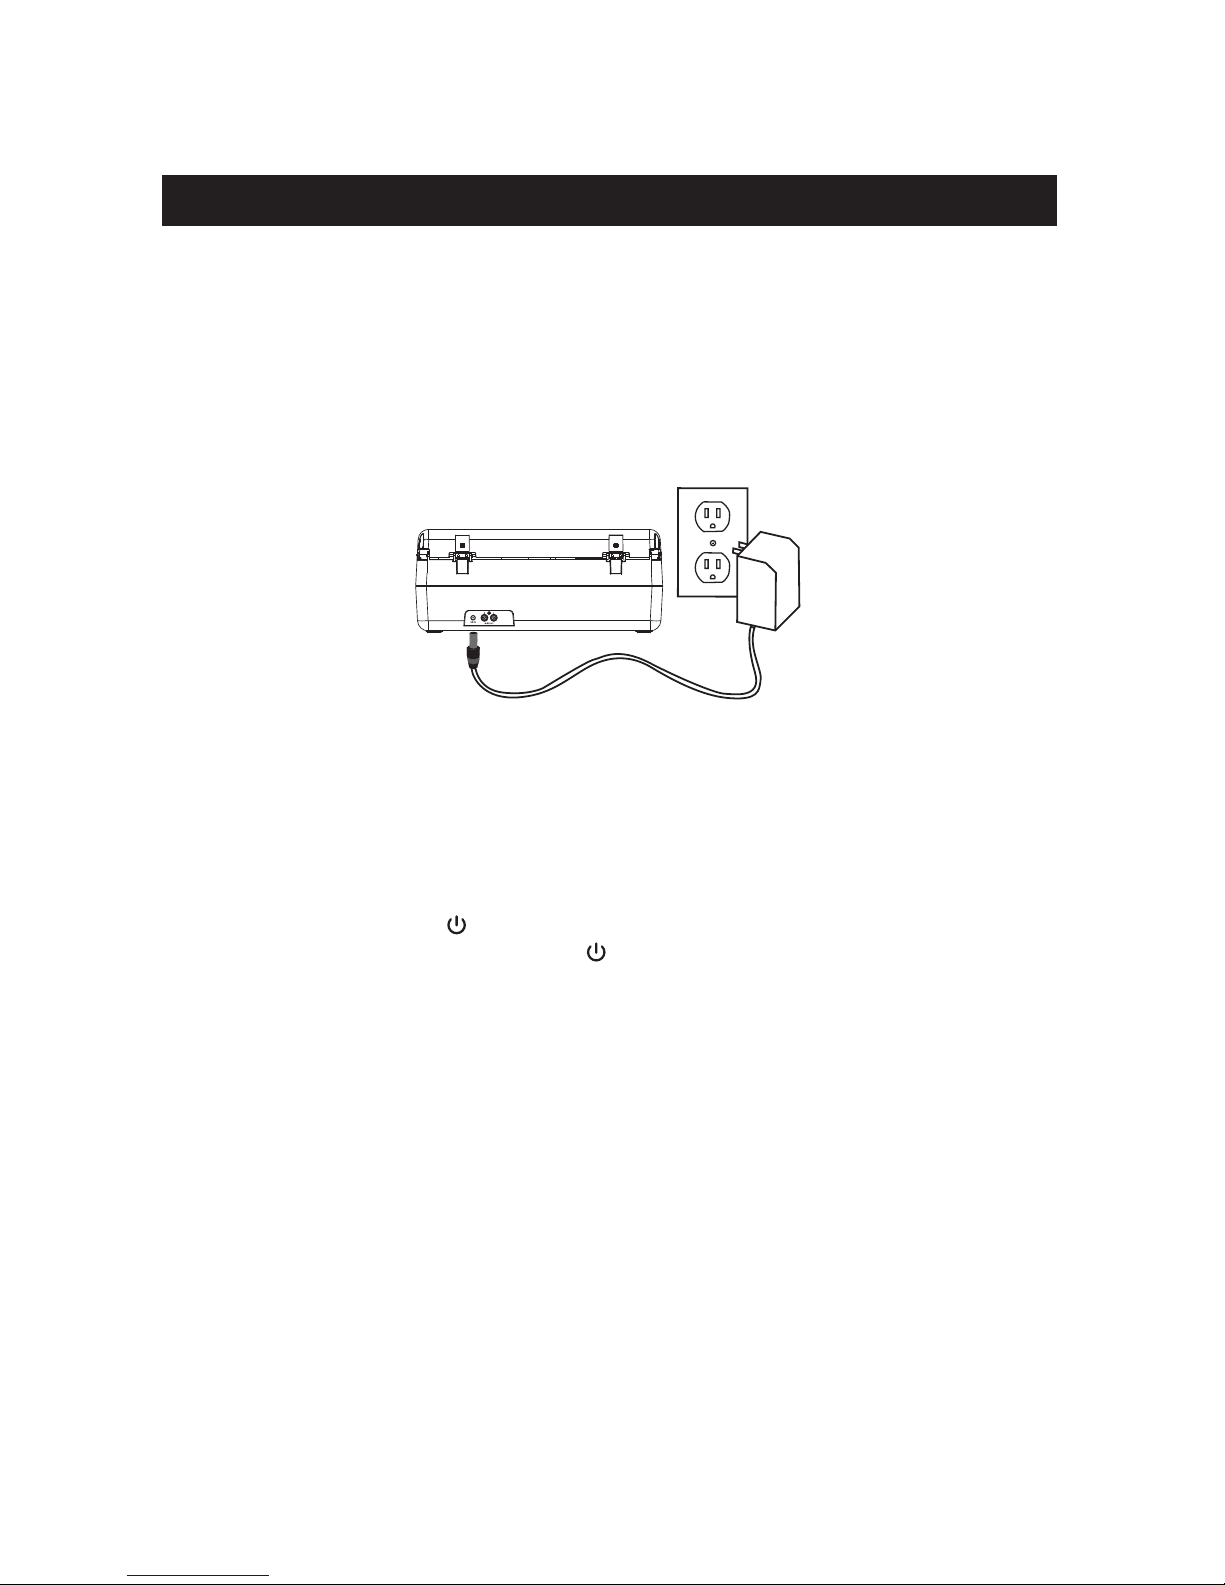
This unit operates using the supplied AC Adapter (Operate at 120V ~ 60Hz)
Connecting AC Adaptor
NOTE: Only use the supplied adapter.
1. Plug the AC adaptor into normal a power outlet socket.
2. Insert the DC plug of the AC adaptor cord into the DC IN Jack at the back of the unit.
Switching On for the first time
Plug into AC power by following instructions on the previous Connecting AC adaptor
section. Press the POWER button to turn on the unit. The LCD Display will be lighted
up. To turn the unit off, press the POWER button again to turn the unit off.
Switching between different sources (Radio/CD/USB/PHONO/AUX)
After turning on the unit, press and toggle SOURCE button to switch different sound
sources.
Adjusting sound volume level
After turning on the unit, turn the VOLUME control to adjust the level of sound volume.
Power Source
4
Page 6
WARNING! THIS PRODUCT USES A CLASS 1 LASER. AVOID ANY DIRECT
EXPOSURE TO THE LASER BEAM. USE OF CONTROLS, ADJUSTMENTS OR
PROCEDURES NOT LISTED IN THIS GUIDE MAY RESULT IN HAZARDOUS
EXPOSURE.
Handing Compact Discs
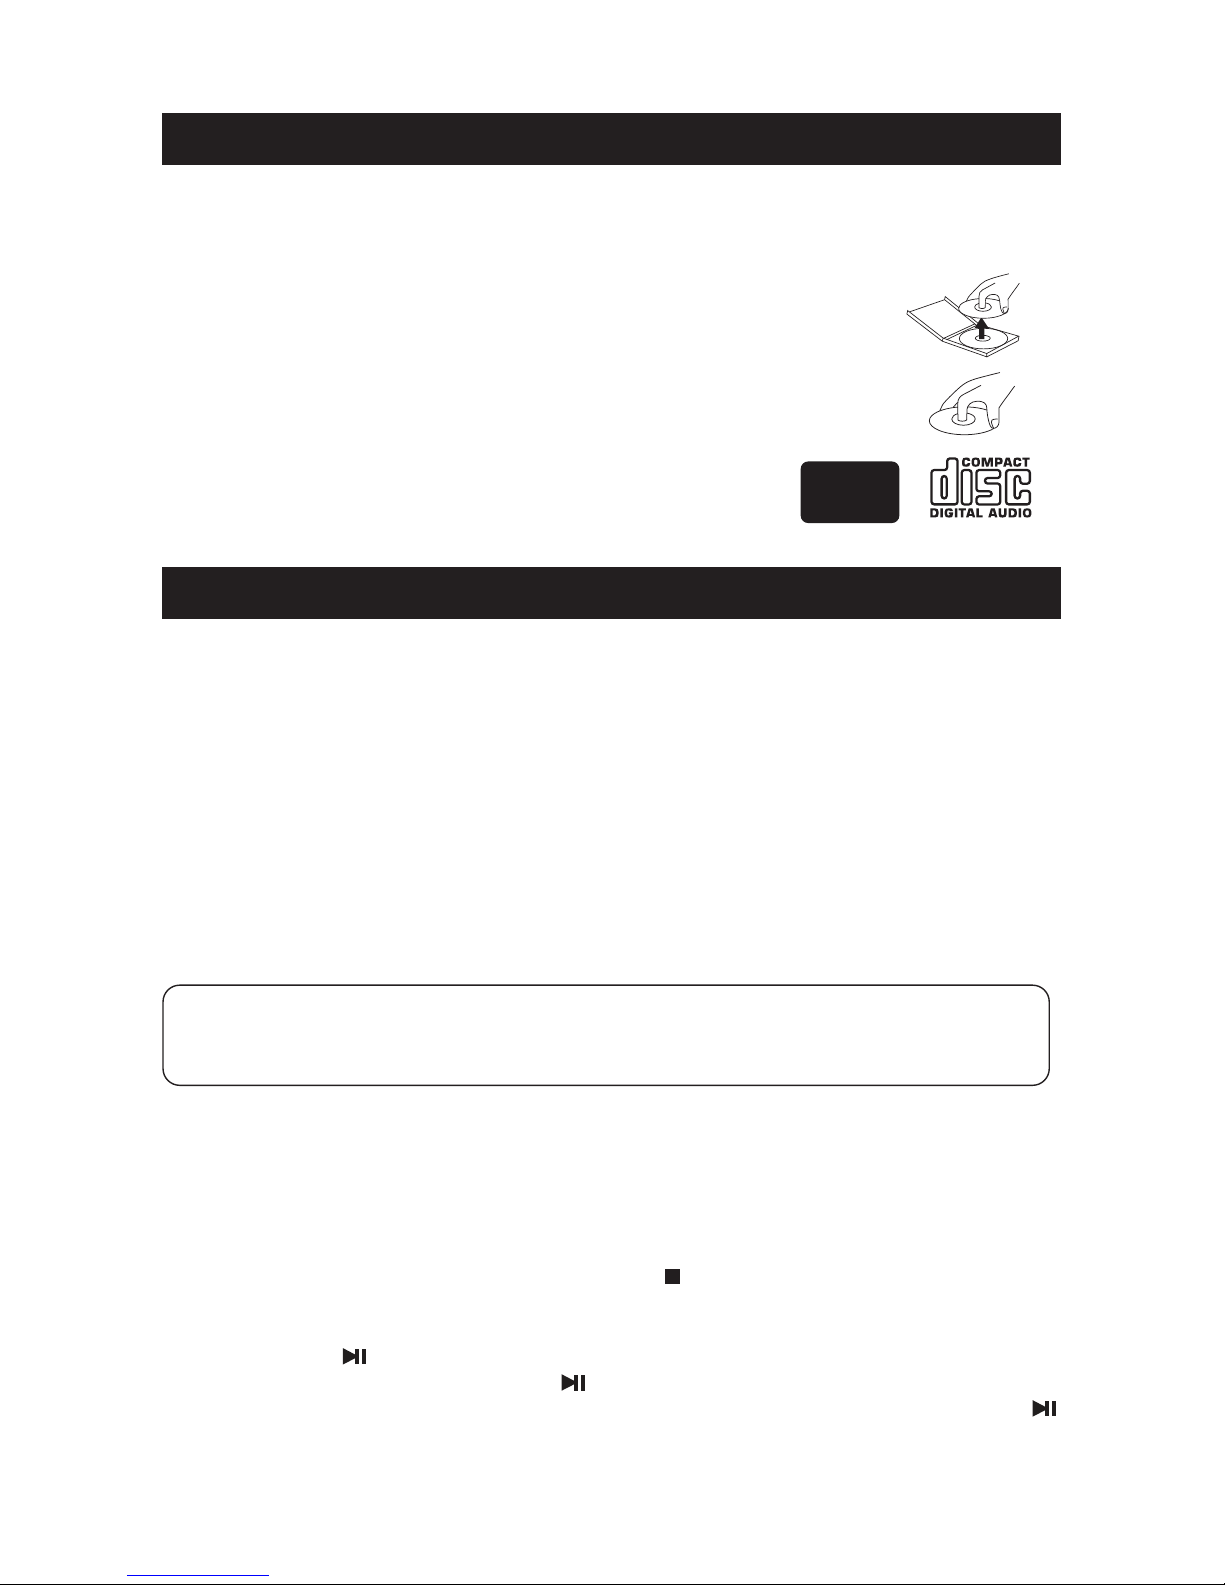
To remove a CD from its storage case, press down on the center of case
and lift the disc out.
Hold the disc by the edges. Avoid touching the recorded side of the disc.
Compatible Compact Discs
Only compact MP3 format discs or music discs identified with
marking shown right can be used with your CD Player.
Loading CDs / MP3 Disc
1. Press and toggle the SOURCE button to switch to CD mode.
2. Press the OPEN/CLOSE button on the front of the unit to open the CD door.
3. Hold the CDs / MP3 disc by its edge with CD graphical side facing up and put it onto the
CD compartment after the CD door is opened. Make sure that the disc label is facing
up.
4. Press the OPEN/CLOSE button again to close the CD door and make sure the
VOLUME control is not in minimum position.
CDs / MP3 Disc playback
After loading the disc, the disc will begin spinning and the total number of the tracks on the
disc will be shown on the display.
USB Device Playback (MP3 file only)
1. Press and toggle the SOURCE button to switch to USB mode.
2. Insert the USB device into the USB port. The LCD display show “----“ a few second,
the total music files number show on display.
3. Make sure the VOLUME control is not in minimum position.
4. When removing USB
device that press theM-/ button to stop playing first.
Play / Pause Control
Press the M+ / button to play the CDs / MP3 Disc / USB. To pause playback
temporarily by pressing again the M+ / button. Music playback will be paused and the
current elapsed track time will be shown and blanking on the display. Press the M+ /
button again to resume playback.
Remark:
If there is no disc in the unit, “NO” or “ERR” will be indicated on the display.
If the CD cannot be read, “NO or ERR” will be indicated on the display.
Operate the CDs / MP3 Disc / USB
5
Care And Maintenance of Disc
MP3
Disc
Page 7
Stop playback
To stop playback, press the M- / button on the unit. The total number of tracks of the
CDs / MP3 Disc / USB will be displayed.
Skip track
During playback, tune the TUN+ / or TUN- / controls to skip to the next or previous
tracks.
High-speed music search
During playback, tuning and hold the TUN+ / or TUN- / controls to skip/search
through the current track at high speed in forward or backward directions. When the TUN+ /
or TUN- / controls are released, normal playback speed will be resumed
immediately.
+10 / FOLDER+ skip control
During playback, press the +10 / FOLDER+ button to skip to next folder. Press and hold the
+10 / FOLDER+ button to skip up by 10 tracks if destination track is inside the folder.
Repeat playback modes (Repeat 1 / Repeat Folder / Repeat all)
During playback, press the P-MODE / MEM button until the REP1 icon is displayed to
select the current track to be repeated. The selected track will be repeated continuously.
Repeat the Current Track
Repeat All Tracks
During playback, press the P-MODE/ MEM button until the ALL icon is displayed. All
tracks/files on the CDs / MP3 Disc/ USB will be repeated continuously.
Repeat Folder (for MP3 disc only)
During playback, press the P-MODE/ MEM button until the FOLDER icon is shown on the
display. All tracks/files inside the desired folder will be repeated continuously.
Note: REPEAT FOLDER – this function is not available for normal music CD.(Only for MP3
Disc / MP3 files on USB flash-drive)
Programmed CDs / MP3 Disc / USB playback
Return to normal playback
Press the P-MODE/ MEM button until NO repeat indicator is displayed. The normal
playback will be resumed.
This unit can be programmed to play up to 20 tracks in CD / USB mode. Load the music CD
disc onto the CD compartment.
1. Press P-MODE/ MEM button once in the stop mode. “P-01” will be shown on the display
and blinking.
2. Tune the TUN+ / or TUN- / controls to select the desired track to be
programmed.
3. Press P-MODE/ MEM button again to confirm the selected track.
6
Page 8
4. Repeat steps 2-3 to program up to 20 tracks.
5. Press the M+ / button to play the programmed tracks after programming is
completed. The “PROG” icon will be displayed during the programmed playback.
6. Tune the TUN+ / or TUN- / controls repeatedly until you reach the desired
programmed tracks number.
7. To clear program and resume normal playback, press the M- / button twice during
playback, or open the CD door, or change to next mode to clear the programmed tracks.
RECORDING CDs Disc
During CD playback, press RECORD button to record the CD audio from start current track
in MP3 format.
Press RECORD button again to stop recording.
The stored file name after recording will be “ TRK1.MP3 “ in file “RIP”.
NOTE: This Music system can only record tracks on CDs disc.
The unit is designed to receive FM Stereo radio band.
Tuning the FM Radio
1. Press and toggle the SOURCE button on the front of the unit to switch to FM Radio
mode. “FM” will appear on the display.
2. Adjust the TUN+ / or TUN- / controls on the front of unit to tune the frequency of
desired radio station.
3. The tuning frequency will be displayed on the LCD display.
4. To turn off the unit power, press the button switch to off the unit.
Saving an FM Radio Station
1. Follow the instructions for Tuning the FM Radio.
2. Adjust the TUN+ / or TUN- / controls to tune the FM radio to the desired
station.
3. Press the P-MODE / MEM button on the front of unit, flash MEM icon and preset
number P01 will appear on the LCD display, indicating which preset the current station
will be saved to.
4. Press the M+ / or M- / buttons to select preset number.
5. Press again the P-MODE/MEM button to confirm saved.
6. Repeat above steps 2 - 5 to preset up to 20 stations.
7. To retrieve one of the preset stations already programmed, press M+ / or M- /
buttons repeatedly until you reach the desired program number of the station.
Remark:
The unit can store up to 20 tracks in the programmable memories. During the
programmed playback, user can still select the “repeat 1 / repeat all” functions.
RADIO Operation
7
Page 9
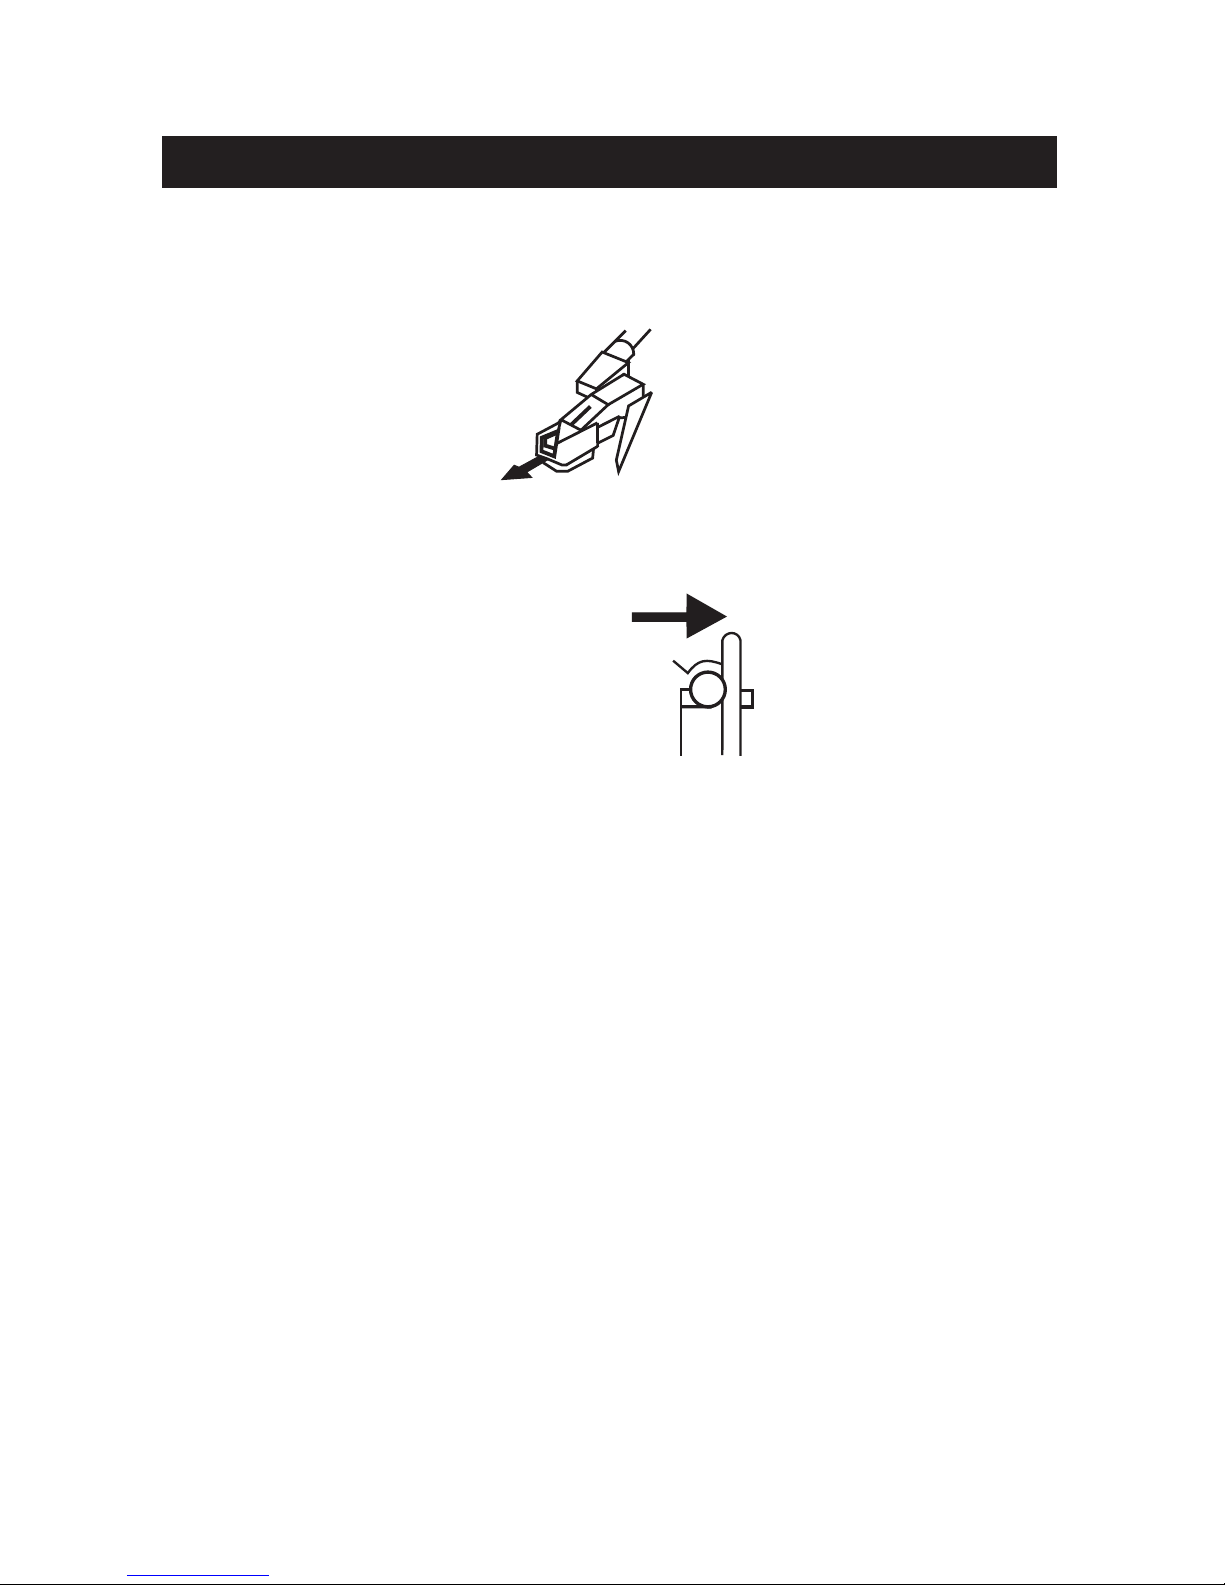
Gently open the dust cover.
1. Lift the dust cover all the way up until it stop, the cover will now stay open.
2. Remove white protective needle cover by gently pulling towards the front of the unit.
3. Release tone arm HOLD DOWN CLIP by gently pushing to the right. This will unlock
TONE ARM from its arm rest. Re-lock the HOLD DOWN CLIP when moving the unit to
another location.
Turntable Operation
1. Press and toggle the SOURCE button on the front of the unit to switch to PHONO
mode.
2. Set the SPEED SELECTOR to the correct speed (33, 45 or 78rpm).
3. Place the record on the turntable.
4. Move the TONE ARM to the desired starting point on the record. The record will start
playing.
5. Turn the VOLUME CONTROL to adjust the volume to the desired level.
6. Slide the AUTO STOP CONTROL SWITCH to choose the auto stop function.
7. At the end of the record, the TONE ARM will stop automatically. You must return the
TONE ARM to TONE ARM REST manually.
ADAPTER for 45 RPM (Accessory)
This adaptor allows you to play 45 RPM records.
1. Place the 45 RPM ADAPTER over the spindle.
2. Gently place your 45 RPM record onto the turntable.
3. Follow the steps under turntable operation to play you record.
PHONO Operation
8
Page 10

RECORDING PHONO
During PHONO playback, press RECORD button to record the PHONO audio from start
current track in MP3 format.
Press RECORD button again to stop recording.
The stored file name after recording will be “ REC1.MP3 “ in file “REC”.
Setting up (AUX IN) connection
AUX-IN jack will allow you to connect external music player or external sound source to the
main unit.
1. Plug into a 3.5mm audio cable (not included) into your external music player and
connect the other end (3.5mm jack) into the AUX IN jack on the front of the unit.
2. Make sure your external music player is turned on.
3. Press and toggle the SOURCE button to switch to AUX mode on the unit.
4. Start music playback on your external music player.
5. Adjust VOLUME control to control the sound level of music playback from the speakers
on the unit.
1. You can run the audio from the unit into your home stereo, television or other stereo
source by using the AUX output.
2. To make this connection, you need a standard RCA cable (not include). Plug the red
and white connectors on one end of the cable into the red and white AUX OUT jack on
the rear of the unit. The other end of the cable will plug into the AUX INPUT jacks of
your selected component.
3. Operate the unit as usual, you can hear the sound exported from the unit.
NOTE: You can still listen to your unit when using the Audio Output feature.
AUX IN Operation
AUX OUT Operation
9
Page 11

Power Output. . . . . . . . . . . . . . . . . .
Speakers . . . . . . . . . . . . . . . . . . . . . .
1.5 watt RMS x 2 channels
4Ohms5W,x2.
CD Disc- Disc Diameter . . . . . . . . . .
120mm / 80mm
Record Speed. . . . . . . . . .. .. . . . . . .
33 1/3, 45 or 78 RPM
AC Adapter input . . . . . . . . . . . . . . .
AC120V~60Hz
DC INPUT . . . . . . . . . . . . . . . . . . . .
DC9V 1.2A
Radio Frequency. . . . . . . . . . . . . . .
FM: 87.5 – 108MHz
USB . . . . . . . . . . . . . . . . .. . . . . . . . .
Support USB flash-drive up to 16GB
Dimensions (H x W x D) . . . . . . . . .
370mm(W) x 153.5mm(H) x 383mm(D)
IMPORTANT: Due to continual revision and improvement on our products design,
specifications are subject to change without further notice.
Specifications
10
Page 12
LIMITED PRODUCT WARRANTY
This quality product is warranted to be free from manufacturer’s defects in material and workman-ship,
provided that the unit is used under the normal operating conditions intended by the manufacturer.
Should you have any problem with this product, please and it is highly recommended to visit our website
at
www.curtisint.com
before you take any other steps as we have additional copies of instruction manuals,
operating manuals and trouble shooting tips on our website which gives you the answer on most of the
questions you could have in operating the unit.
TERMS OF WARRANTY
C.I. Service Dept. warrants this product to be free from defects in materials and workmanship for 90 days on
parts and 90 days on labor. If you originally purchased your product more than 90 days ago, a repair fee
may apply.
Nothing within this warranty shall imply that C.I. will be responsible or liable for any damage to any items
placed in this product, whether due to any defect of the product, or its use, whether proper or improper.
EXCLUSIONS
Save as herein provided, C.I. Service Dept. (Canada) or C.I. Service Dept. (USA), there are no other
warranties, conditions, representations or guarantees, express or implied, made or intended by C.I. or its
authorized distributors and all other warranties, conditions, representations or guarantees, including any
warranties, conditions, representations or guarantees under any Sale of Goods Act or like legislation or
statue is hereby expressly excluded. Save as herein provided, C.I. Service Dept. (Canada) or C.I. Service
Dept. (USA), shall not be responsible for any damages to persons or property, including the unit itself,
howsoever caused or any consequential damages arising from the malfunction of the unit and by the
purchase of the unit, the purchaser does hereby agree to indemnify and save harmless C.I. from any claim
for damages to persons or property caused by the unit.
TO OBTAIN REPAIRS UNDER THE TERMS OF THIS WARRANTY
1. The original purchaser must present a copy of the original bill of sale and the service warranty card.
2. Any alterations, abuse, misuse, battery corrosion or accidental damage voids the warranty.
3. The warranty does not cover cabinets and accessories.
4. No warranty or insurance contained or set out shall apply when damage or repair is caused by power
failure; damage in transit or when moving the unit; improper power supply; use for commercial or
industrial purposes; service calls resulting in customer education, etc.
5. The defective product should be mailed to:
Canada U.S.A
C.I. Service Dept. Curs Internaonal Ltd
315 Awell Drive
Toronto, ON
M9W 5C1
c/o Lotus International Company
6880 Commerce Blvd.
Canton MI 48187
U.S.A.
For service assistance and product information, please call: 1-800-968-9853.
If mailing the product, the freight must be prepaid and a money order for $7.00 should be included
to cover the cost of insurance and the return of the product.
6. C.I. reserves the right to repair or replace the parts which have become defective.
Model No. Date Purchased Serial No.
is a registered trademark of OSRAM SYLVANIS Inc. used under licence.
 Loading...