

Page 1
Page 2
WARNINGS
TO Prevent fire or shock hazard, do not use this plug with an extension cord, receptacle or add other
outlet unless the blades can be can be fully inserted to prevent blade exposure. To prevent fire or shock
hazard, do not expose this appliance to rain or moisture.
WARNING
RISK OF ELECTRICSHOCKRISK OF ELECTRICSHOCK
DO NOT OPEN
DO NOT OPENDO NOT OPEN
The lightning flash with arrowhead symbol,within an equilateral triangle is intented to
alert the user to the presence
of uninsulated' dangerous vo-
ltage' within the product's enclosure that may be of sufficient magnitude to constitute a
risk of electric shock to persons.
CAUTION : TO REDUCE THE
RISK OF ELECTRIC SHOCK
DO NOT REMOVE COVER (
OR BACK),NO USER SERV-
ICEABLE PARTS INSIDE R-
EFER SERVICING TO QUA-
LIFIED SERVICE PERSON-
NEL
The exclamation point within
an equilateral triangle is int-
ended to alert the user to the
presence of important opera-
ting and maintenance (servi-
cing) instructions in the liter-
ature accompany-ing the ap-
plicance
IMPORTANT SAFETY INSTRUCTIONS
1 Read these instruction.
2 keep these instructions.
3 heed all warnings.
4 Follow all instructions.
5 Do not use this product near water(swimming pool, beach, lake etc.).
6 Clean only with a dry cloth.
7 Do not block any of the ventilation openings.Install in accordance with the manufacturer's instructions .
8 Do not install near any heat sources such as radiators, heat registers . Stoves or other apparatus
(including amplifiers)that produce heat.
9 Do not defeat the safety purpose of the polarized or grounding-type plug, A polarized plug has two
blades with one wider than the other. A grounding type plug has two blades and a third grounding
prong. The wide blade or the third prong is provided for your safety. If the provided plug does not
fit into your outlet, consult an electrician for replacement of the obsolete outlet.
10 Protect the power cord from being walked on or pinched particularly at receptacles and the point
where they exit from the stereo.
11 Only use attachments/accessories specified by the manufacturer.
12 Unplug this apparatus during lightning storms or when unused for long periods of time
13 Refer all servicing to qualified service personnel. Servicing is required when the system has been
damaged in any way, such as a damaged power-supply cord or plug . Has been exposed to rain or
moisture ,does not operate normally , or has been dropped.
14 This appliance should not be exposed to dripping water or splashing water and objects filled with
water, such as vases, should not be placed on this unit
1
Page 3

Before Use
Choose unit installation location carefully .Avoid placing it in direct sunlight or close to a source of heat .
Also avoid locations subject to vibrations and excessive dust , cold or moisture . Keep away from sources that hum , such
as transformers or motors .
Do not open the cabinet as this might result in damage to the circuitry or electrical shock . If a foreign object should get into
the set , contact your dealer .
Be sure not to handle discs with dirty fingers . Never insert a disc that has a crack on the surface .
When removing the power plug from the wall outlet , always pull directly on the plug , never yank the cord .
To keep the laser pickup clean , do not touch it , and do not forget to close the disc tray .
Do not attempt to clean the unit with chemical solvents as this might damage the finish . Use a clean , dry cloth .
Keep this manual in a safe place for future reference .
Beware of Condensation
When the player (or a compact disc) is moved from a cold to a warm place or is used after a sudden temperature change ,
there is the danger of condensation . Water vapor in the air could condense on the mechanism or the laser pickup . If droplets
of water form on these parts , correct playback will be impossible because the laser cannot read the information from the
disc correctly . To prevent this , if you are going to use the player in a condition where condensation could occur , you should
leave the player for 1 or 2 hours after plugging it into an AC outlet depending on the amount of condensation . If this is done ,
the player will stabilize at the temperature of its surroundings .
For U.S.A.
TO THE USER
This equipment has been tested and found to comply with the limits for a Class B digital device , pursuant to Part 15 of the
FCC Rules. These limits are designed to provide reasonable protection against interference in a residential area. This device
generates and uses radio frequency energy and if not installed and used in accordance with the instructions , it may cause
interference to radio or TV reception . If this unit does cause interference with TV or radio reception you can try to correct the
interference by one or more of the following measures :
A)Reorient or relocate the receiving antenna .
B)Increase the separation between the equipment and receiver .
C)Plug the equipment into a different outlet so that it is not on the same circuit as the receiver .
If necessary , consult the dealer or an experienced radio / TV technician for additional suggestions .
CAUTION:
Changes or modifications to this equipment not expressly approved by the manufacturer for compliance could void the users
authority to operate this equipment .
2
Page 4
Listening to Compact Disc
Compact Disc
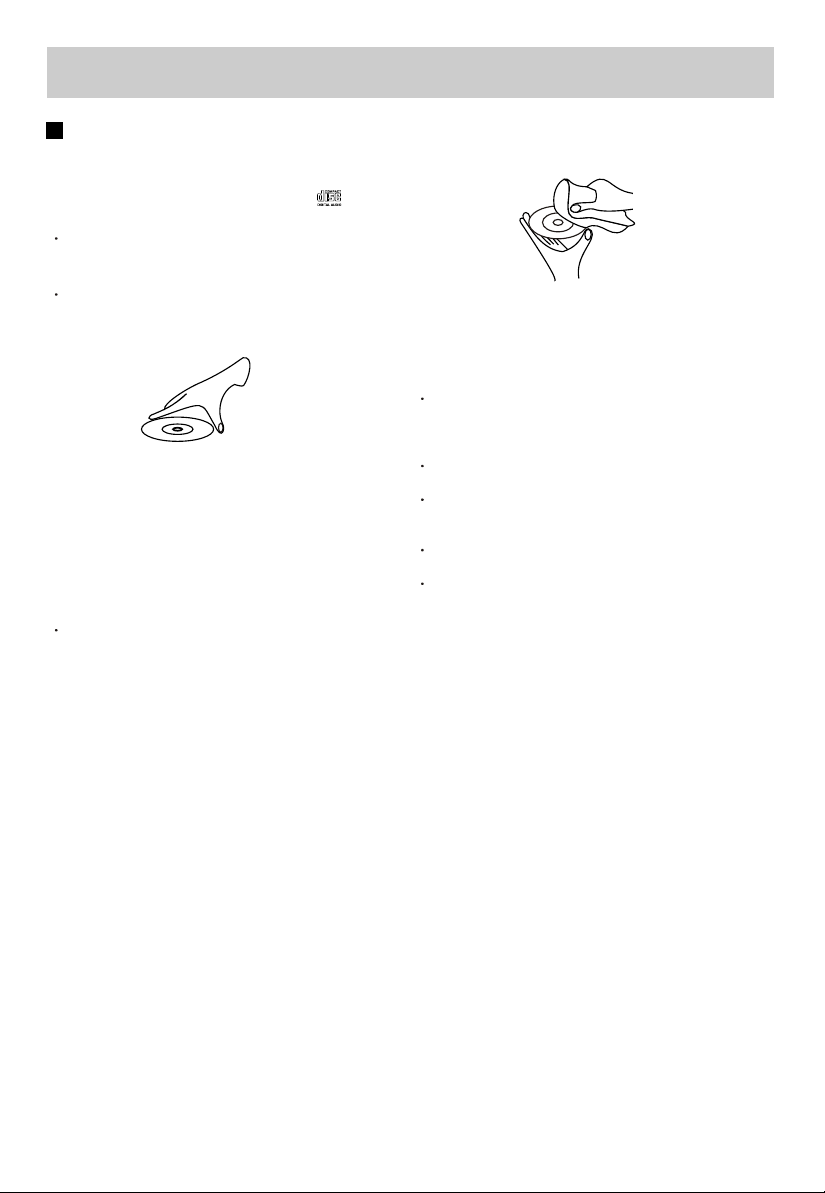
Handing the Discs :
This unit has been designed specifically for sound
reproduction f om compact discs bearing the mark .
No other discs can be used .
Always place the compact disc in the disc tray with
label facing upward . (Compact discs can be
on one side) .
To remove a disc from its storage case , press down
center of the case and lift the disc out , hold
by the edge .
r
the
player only
on the
ing it carefully
CLEAN FROM CENTER TO EDGE
HANDLE DISC ONLY AS SHOWN
Fingermarks and dust should be carefully wiped off
the disc recorded surface with a soft cloth (not included) .
Never use chemicals such as : record sprays ,
sprays or fluid , benzine or thinner to
Such chemicals will do
plastic surface .
Discs should be returned to their cases after use
serious scratches that could cause the laser pickup to skip .
Do not expose discs to direct sunlight or high
temperature for extended periods .
Long exposure to high temperature can warp the disc .
Do not stick paper or write anything with a ball
the surface of the label side .
Do not use irregular shaped CD`s (octagonal ,
etc .) ,all of which can damage the unit .
irreparable damage to the disc`s
anti- static
clean compact discs .
to avoid
humidity and
point pen on
heart-shape,
Page 5

Basic Operation
Power on .
Connect the power plug into the wall
outlet .
(A)
(B)
(B)BBS
Bass Boost Sound.
Press once to switch on BBS / Press again to switch off.
(A)Listening through Earphones / Headphones .
PHONES
The sound from all speakers is cut off .
4
Page 6

Listening to a Record
Switch the PHONO CD TUNER knob to
select PHONO .
Select player speed .
33
Remove the tone arm-rest holder .
Lift the Que-lever and move the tone arm
gently to the desired position over the record .
Lower the Que-lever slowly .
The tone arm will return to the tone arm-rest
automatically after reaching the end of the
record .
Page 7

Listening to CD
Switch the PHONO CD TUNER knob
to select CD .
Open the tray , and place the CD on the tray .
OPEN / CLOSE
Close the tray and start playing the CD .
OPEN / CLOSE
CD`s should be placed in their trays with the label side up .
The CD will start playing from the first track .
(A) Stopping the CD play .
STOP
(B)Pausing the CD play .
Pressing the PLAY / PAUSE button will restart
playing the CD .
Do not switch off the unit during CD-function , because
it will damage the unit .
(C)Press the button once to the beginning of the
next track .
Press the button once to go back to the start of
the current track . Press the button twice to go
back to the start of the previous track .
(D)Fast Reverse (FR) and Fast Forward (FF)
You can reverse or forward to any point in a selected
track by pushing and holding the FR or FF button .
NOTE : Do not push both buttons together as this
may damaged the unit .
As the unit is tracking quickly , forward or backward
you will hear your selection playing at a distorted
speed . Simply release the depressed button to
continue playing at normal speed at the desired
position in the selected track .
6
Page 8

Listening to Radio
Switch the PHONO CD TUNER knob to
select TUNER .
Switch the AM / FM knob to select desired
band .
Tune to the desired frequency .
(A) FM reception
Any strong FM station will cause the FM stereo indicator
light to illuminate .
Weaker stations cannot be received in stereo so the light
will not illuminate and reception will automatically switch
to mono .
(B) Antenna
For optimal FM reception be sure to stretch the built-in
FM antenna wire located at the lower back of the unit
and move it around until the station you have tuned in
is being received clearly .
7
Page 9

Repeat Play
Program
Page 10

Specifications
AMPLIFIER section
Output Power ........................................... 2W + 2W (U.S.A. / Canada)
Frequency Response ................................ 60 to 20,000Hz
TUNER section
FM Section
Frequency Range ..................................... 87.5 to 108.5MHz
AM Section
Frequency Range ..................................... 525 to 1710KHz (U.S.A. / Canada)
CD PLAYER section
Frequency Response ................................ 60 to 20,000Hz +/- 4dB
Signal - to - Noise ratio .............................. 55dB (1EC - A)
PHONO section
Motor ....................................................... DC servo motor
Drive System ............................................ Belt Drive
Speeds .................................................... 33 - 1/3rpm , 45rpm and 78rpm
Wow & Flutter .......................................... 0.4% (WRMS)
Stylus ...................................................... 402 - M208 - 165
Output Level ............................................. 160 ~ 380mV (5cm/sec at 1kHz)
SPEAKER SYSTEM section
Impedance ............................................... 8 ohms
Input Power .............................................. Max. 5W
GENERAL
Power Requirements ................................. 120V AC , 60Hz (U.S.A. / Canada)
Power Consumption .................................. 19W
Dimension (W x H x D) ............................... 20 x 7.30 x 13 (approx.)
Weight .................................................... 35.27 lbs. (Approx.)
Standard Accessories ............................... Operating Instruction Booklet
Warranty Card
45 rmp Adaptor
9
Page 11

Troubleshooting guide
In case of trouble with the unit , please look through this chart and see if you can solve the problem by yourself before calling
your dealer .
Problem
Power does not come on when the
power switch is pressed
No sound comes out of the speakers The volume is turned down (to MIN)
The sound is noisy The unit is too close to a TV set or
Can not listen to any station , or signal
appears weak
The sound is distorted
Play stop immediately after starting to
a
pl y the CD , or play pauses or stops
during play
No sound
Specific CD is noisy , or playback stops
or skips
CD Player Tuner unit The whole unitCD Player Tuner unit The whole unit
Unit is unplugged
The input selector does not match the
playback source
another similar appliance
The station is not tuned in properly
A TV set is being used nearby
The antenna is not oriented properly
The CD is inserted upside down
The CD is dusty or dirty , or there is
condensation on the CD
The CD player is paused
The CD is scratched , damaged or
warped
The disc is very dirty
Cause
Solution
Connect the unit to the AC power
supply
Adjust the volume
Re-select the input source
Turn off the TV or other appliance ,and
relocate the unit
Tune in the station correctly
Turn off the TV set
Re-orient the antenna until reception
improves
Insert the CD with the printed side
upper most
Clean and dry the CD
Press the PLAY / PAUSE button
The CD should be changed
Clean the CD
10
 Loading...