

Page 1
MODEL NO. SIP1005
PORTABLE DOCKING STATION FOR iPOD
OWNER'S MANUAL
H
HOUR
PM
SKIP/REV
M
CLK SET
PLAY/PAUSE
SKIP/REV
MIN
PLEASE READ BEFORE OPERATING THIS EQUIPMENT
Page 2
SAFETY INSTRUCTIONS
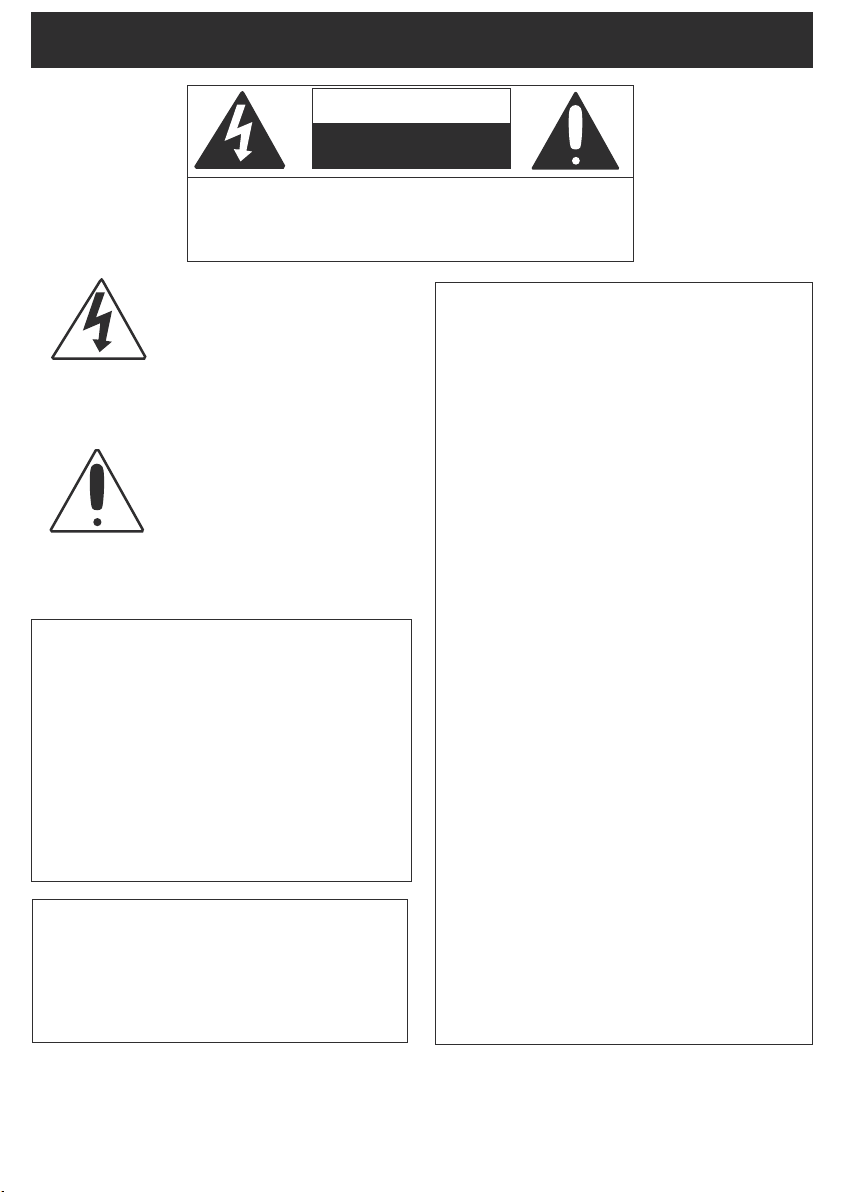
CAUTION
RISK OF ELECTRIC SHOCK
DO NOT OPEN
CA UTION : TO REDU CE TH E RIS K OF ELECTR IC
SHOCK, DO NOT REMOVE COVER (OR BACK). N O
USER-SERVICEABLE PARTS INSIDE. REFER SERVICING TO QUALIFIED SERVICE PERSONNEL.
DANGEROUS VOLTAGE:
The lightning flash with arrowhead
symbol, within an equilateral trian-
gle is intended to alert the user to
the presence of uninsulated dan-
gerous voltage within the product’s
enclosure that may be of sufficient
magnitude to constitute a risk of
electric shock to persons.
ATTENTION:
The exclamation point within an
equilateral triangle is intended to
alert the user to the presence of
important operating and maintenance (servicing) instructions in
the literature accompanying the
appliance.
FCC WARNING:
This equipment may generate or use
radio frequency energy. Changes or
modifications to this equipment may
cause harmful interference unless the
modifications are expressly approved in
the instruction manual. The user could
lose the au t h o rity to op e r a t e this
equipment if an unauthorized change or
modification is made.
SURGE PROTECTORS:
It i s recom m e n d e d t o use a s u r g e
protector for AC connection. Lightning
and power surges ARE NOT covered
under warranty for this product.
INFORMATION:
This equipment has been tested and
found to comply with the limits for a
Class B digital device, pursuant to Part
15 of the FCC Rules. These limits are
designe d to pr o v i d e re a s o n able
protection against harmful interference
in a residen t i a l in s t a l lation . T h i s
equipment generates, uses and can
radiate radio frequency energy and, if
not installed and used in accordance
with the instructions, may cause harmful
interference to radio communications.
However, there is no guarantee that
interference will not occur in a particular
ins t a l lation. I f th i s equip m e n t doe s
cause harmful interference to radio or
television reception, w h ich c a n be
determined by turning the equipment off
and on, the user is encouraged to try to
correct the interference by one or more
of the following measures:
* Reorie nt o r relocate the r eceiv ing
antenna.
* Increase the separation between the
equipment and receiver.
* Connect the equipment into an outlet
on a circuit different from that to which
the receiver is connected.
* Consult the dealer or an experienced
radio/TV technician for help.
1
Page 3

SAFETY INSTRUCTIONS
Before using the unit, be sure to read all operating instructions carefully . Please note that these
are general precautions and may not pertain to
your unit. For example, this unit may not have
the capability to be connected to an outdoor
antenna.
1. READ INSTRUCTIONS
All the safety and operating instructions should
be read before the product is operated.
2. RETAIN INSTRUCTIONS
The safety and operating instructions should be
retained for future reference.
3. HEED WARNINGS
All warnings on the product and in the operating
instructions should be adhered to.
4. FOLLOW INSTRUCTIONS
All operating and use instructions should be followed.
5. CLEANING
Unplug this product from the wall outlet before
cleaning. Do not use liquid cleaners or aerosol
cleaners. Use a dry cloth for cleaning.
6. ATTACHMENTS
Do not use attachments not recommended by
the product's manufacturer as they may cause
hazards.
7. WATER AND MOISTURE
Do not use this product near water–for example:
near a bathtub, washbowl, kitchen sink or laundry tub; in a wet basement; or near a swimming
pool.
8. ACCESSORIES
Do not place this product on an unstable cart,
stand, tripod, bracket or table.
The product may fall, causing
serious injury and serious damage to the product. Use only
with a cart, stand, tripod, bracket or table recommended by the
manufacturer or sold with the
product. Any mounting of the product should follow the manufacturer’s instructions, and should
use a mounting accessory recommended by the
manufacturer.
8A. An appliance and cart combination should be
moved with care. Quick stops, excessive force
and uneven surfaces may cause the appliance
and cart combination to overturn.
9. VENTILATION
Slots and openings in the cabinet and in the
back or bottom are provided for ventilation, to
ensure reliable operation of the product and to
protect it from overheating. These openings
must not be blocked or covered. The openings
should never be blocked by placing the product
PORTABLE CART WARNING
(symbol provided by RETAC)
on a bed, sofa, rug or other similar surface. This
product should never be placed near or over a
radiator or heat source. This product should not
be placed in a built-in installation such as a
bookcase or rack unless proper ventilation is
provided or the manufacturer's instructions have
been adhered to.
10. POWER SOURCES
This product should be operated only from the
type of power source indicated on the marking
label. If you are not sure of the type of power
supply to your home, consult your appliance
dealer or local power company. For products
intended to operate from battery power, or other
sources, refer to the operating instructions.
11. GROUNDING OR POLARIZ ATION
This product is equipped with a polarized alternating-current line plug (a plug having one blade
wider than the other). This plug will fit into the
power outlet only one way. This is a safety feature. If you are unable to insert the plug fully into
the outlet, try reversing the plug. If the plug
should still fail to fit, contact your electrician to
replace your obsolete outlet. Do not defeat the
safety purpose of the polarized plug.
12. POWER-CORD PROTECTION
Power-supply cords should be routed so that
they are not likely to be walked on or pinched by
items placed upon or against them, paying particular attention to cords at plugs, convenience
receptacles, and the point where they exit from
the appliance.
13. LIGHTNING
To protect your product from a lightning storm,
or when it is left unattended and unused for long
periods of time, unplug it from the wall outlet
and disconnect the antenna or cable system.
This will prevent damage to the product due to
lightning and power-line surges.
14. POWER LINES
An outside antenna system should not be located in the vicinity of overhead power lines or
other electric light or power circuits, or where it
can fall into such power lines or circuits. When
installing an outside antenna system, extreme
care should be taken to keep from touching
such power lines or circuits as contact with them
might be fatal.
15. OVERLOADING
Do not overload wall outlets and extension cords
as this can result in a risk of fire or electric
shock.
16. OBJECT AND LIQUID ENTRY
Never push objects of any kind into this product
through openings as they may touch dangerous
2
Page 4

SAFETY INSTRUCTIONS
voltage points or short out parts that could result in
fire or electric shock. Never spill or spray any type
of liquid on the product.
17. OUTDOOR ANTENNA GROUNDING
If an outside antenna is connected to the product, be sure the antenna system is grounded so
as to provide some protection against voltage
surges and built-up static charges. Section 810
of the National Electric Code, ANSI/NFPA 70,
provides information with respect to proper
grounding of the mast and supporting structure,
grounding of the lead-in wire to an antenna discharge product, size of grounding conductors,
location of antenna discharge product, connection to grounding electrodes and requirements
for grounding electrodes.
ANTENNA
LEAD IN
WIRE
GROUND
CLAMP
ANTENNA
DISCHARGE UNIT
(NEC SECTION 810-20)
ELECTRIC
SERVICE
EQUIPMENT
NEC - NATIONAL ELECTRICAL CODE
S2898A
EXAMPLE OF ANTENNA GROUNDING AS PER
NATIONAL ELECTRICAL CODE
GROUNDING CONDUCTORS
(NEC SECTION 810-21)
GROUND CLAMPS
POWER SERVICE GROUNDING
ELECTRODE SYSTEM
(NEC ART 250, PART H)
18. SERVICING
Do not attempt to service this product yourself
as opening or removing covers may expose you
to dangerous voltage or other hazards. Refer all
servicing to qualified service personnel.
19. REPLACEMENT PARTS
When replacement parts are required, be sure
the service technician uses replacement parts
specified by the manufacturer or those that have
the same characteristics as the original part.
Unauthorized substitutions may result in fire,
electric shock or other hazards.
20. SAFETY CHECK
Upon completion of any service or repairs to this
product, ask the service technician to perform
safety checks to determine that the product is in
proper operating condition.
21. WALL OR CEILING MOUNTING
The product should be mounted to a wall or ceiling only as recommended by the manufacturer.
22. DAMAGE REQUIRING SERVICE
Unplug the product from the wall outlet and refer
servicing to qualified service personnel under
the following conditions:
a. When the power-supply cord or plug is
damaged.
b. If liquid has been spilled or objects have
fallen into the product.
c. If the product has been exposed to rain or
water.
d. If the product does not operate normally by
following the operating instructions. Adjust
only those controls that are covered by the
operating instructions, as an adjustment of
other controls may result in damage and will
often require extensive work by a qualified
technician to restore the product to its
normal operation.
e. If the product has been dropped or the
cabinet has been damaged.
f. When the product exhibits a distinct change
in performance this indicates a need for
service.
23. HEAT
The product should be situated away from heat
sources such as radiators, heat registers, stoves
or other products (including amplifiers) that produce heat.
24. NOTE TO CATV SYSTEM INSTALLER
This reminder is provided to call the CATV system installer's attention to Article 820-40 of the
NEC that provides guidelines for proper grounding and, in particular, specifies that the cable
ground shall be connected to the grounding system of the building, as close to the point of cable
entry as practical.
3
Page 5

4
AC Operation:
Unwind the AC power cord and extend it to
its full length. Insert the small plug of the AC
power cord to the unit. Insert the AC plug of
the cord into any convenient 120V 60Hz
household outlet.
Please note that this unit is equipped with a
polarized AC plug which has one blade wider
than the other. This is a safety feature to
reduce the likelihood of electric shock. This polarized AC plug will only fit in a polarized
AC outlet. If you find that you cannot insert this plug you’re your outlet, you may have an
obsolete non-polarized outlet. Please do not try to defeat this safety feature by using a
non-polarized adaptor or by filling the wider blade to make it fit into your outlet. If this plug
does not fit into your outlet, you should contact a qualified licensed electrician to replace
your obsolete outlet.
AC Plug
AC Outlet
DC Operation:
Install eight (8) “C” size batteries (not included) into the battery compartment on the bottom of the unit as the polarity marking inside the battery compartment.
Note: when the AC cord is plug in the unit. Battery power will be cut off automatically.
Protect Your Furniture:
This model is equipped with non-skid rubber ‘feet’ to prevent the product from moving
when you operate the controls. These ‘feet’ are made from non-migrating rubber material specially formulated to avoid leaving any marks or stains on your furniture.
However certain types of oil based furniture polishes, wood preservatives, or cleaning
sprays may cause the rubber ‘feet’ to soften, and leave marks or a rubber residue on
the furniture. To prevent any damage to your furniture we strongly recommend that you
purchase small self-adhesive felt pads, available at hardware stores and home
improvement centers everywhere, and apply these pads to the bottom of the rubber
‘feet’ before you place the product on fine wooden furniture.
POWER SOURCE
Page 6

5
1. FUNCTION SELECTOR (POWER OFF -- IPOD/AUX -- RADIO)
2. CLK (CLOCK) SET BUTTON
3. BAND SWITCH (FM ST -- AM)
4. HOUR BUTTON
5. SKIP/FWD
BUTTON
6. PLAY/PAUSE BUTTON
7. FM ANTENNA
8. SKIP/REV
BUTTON
9. MIN (MINUTE) BUTTON
10. TUNING KNOB
11. AC IN JACK (REAR OF UNIT)
12. AUX IN JACK (REAR OF UNIT)
13. AUX OUT JACK (REAR OF UNIT)
14. BATTERY COMPARTMENT (BOTTOM OF UNIT)
15. LCD DISPLAY
16. VOLUME KNOB
LOCATION OF CONTROLS
15
16
14
Page 7

6
iPod BRACKET NO. iPod MODEL
1
2
3
4
5
6
iPod Nano 2GB, 4GB
iPod Nano 2nd Gen.* 2GB, 4GB, 8GB
iPod Mini 4GB, 6GB
iPod with Video 30GB
iPod with Video 60GB, 80GB
3rd Gen. iPod 10GB, 15GB, 20GB
4th Gen. iPod 20GB
U2 iPod 20GB
iPod Photo, Color, U2 iPod 20GB, 30GB
iPod with Color Display 20GB
PLEASE MOVE THE CONNECTOR TO THE LEFT SIDE BEFORE INSERTTING THE BRACKET.
PERIPHERALS
Page 8

OPERATION
CLOCK SETTING:
• Slide the FUNCTION Selector to POWER OFF or iPod/AUX position.
• Press and hold the CLK (Clock) button. Press the HOUR button simultaneously and
repeatedly to adjust the hour.
• Press and hold the CLK (Clock) button. Press the MIN (Minute) button simultaneously and repeatedly to adjust the minute.
Note: If the unit has not connected to the AC power and the batteries had not installed.
When you connect the unit to AC power or install the batteries again. Clock need to
reset.
Listening with Radio:
• Slide the FUNCTION Selector to RADIO position to power on the unit.
• Slide the BAND Switch to AM or FM-ST (Stereo) position as desire. The radio station frequency will appear on the display.
• Turn the TURNING Knob to receiver a radio station as desire.
• Turn the VOLUME Knob to adjust the volume as desire.
• When finished listening, slide the FUNCTION Selector to POWER OFF position to
power off the unit.
ANTENNAS
AM - This unit has a build in ferrite rod antenna, which provides adequate reception in
most areas. If reception is weak, turn the unit to improve reception.
FM - The FM Rod Antenna is for FM reception only. If reception is weak, adjust the
length and the direction of the antenna.
Listening and Charging The iPod (iPod not included)
• Chose the correct adaptor as the list on page 6 to hold the iPod tightly on the unit.
• In power off mode, insert the iPod to the docking on the front of unit.
• Slide the FUNCTION Selector to the iPod/AUX position.
• The iPod will be power on automatically.
• Set the iPod to plays the music as usual, or
Press the Play/Pause button on the unit to start playback.
Press this button again to pause playback. Press again to resume normal
playback.
Press the SKIP FWD/REV buttons on the unit to searching
music.
• Adjust the volume by turn the volume knob on the unit or press volume control buttons on the iPod.
• When finished listening, power off the unit by slide the FUNCTION Selector to
POWER OFF position.
7
Page 9

8
NOTE:
• If your iPod don't fit to the enclosed adaptor ,connect it via the AUX IN jack as the
section of AUX IN below.
• To recharge the iPod, insert the iPod to the docking, the iPod will be recharge automatically.
AUX IN JACK:
• Connect a 3.5mm mini jack stereo connection cable (not included) to the AUX IN
jack on the rear of unit to the Phones/Line out/ AUX out jack on the external device
such like MP3 Players, CD Discman, MP4 Players …. etc.
• Slide the FUNCTION Selector to iPod/AUX position.
• Turn the VOLUME Knob to adjust the volume as desire.
• When finished listening, slide the FUNCTION Selector to POWER OFF position to
power off the unit.
AUX OUT JACK:
• To connect an external amplifier, connect a 3.5mm mini jack connection cable (not
included) to the AUX OUT jack on the rear of unit to the AUX IN/LINE IN jack on the
external amplifier.
• Plays the Radio or Music as above procedure.
OPERATION
Page 10

TROUBLESHOOTING GUIDE
No sound is heard.
No sound is heard.
iPod does not
dock properly
iPod does not
respond to the
unit
POSSIBLE CAUSE
GENERAL
Power is not on.
VOLUME Control is set
to minimum.
RADIO
Station has not been
tuned properly.
FM reception is weak.
Wrong function is
selected.
Using no or wrong iPod insert. Make sure the dock insert is the
iPod didn’t install properly . Remove your iPod from the dock
iPod is not installed properly. Remove your iPod from the dock
Slide the FUNCTION Selector.
Adjust the VOLUME
Control.
Tune s tation prop erly.
Extend the FM antenna.
Slide the FUNCTION
selector to the radio
position.
proper fit for your iPod.
and check for obstruction on the
connectors in the dock and on your
iPod . Then reseat it in the dock.
and check for obstruction on the
connectors in the dock and on your
iPod . Then reseat it in the dock.
NOITULOSMELBORP
working properly before docking into
the unit. Please refer to your iPod
manual for details.
iPod didn’ t
charge up
iPod is not installed properly . Remove your iPod from the dock
and check for obstruction on the
connectors in the dock and on your
iPod . Then reseat it in the dock.
SPECIFICATION
Power Requirement: AC ~ 120V 60Hz
Batteries: DC12V (1.5V x 8 “C” size, UM-2 batteries)
Frequency Range: FM 88 - 108 MHz
AM 530 - 1710 KHz
Power Consumption: 18W
9
doPi ruoy erus ekam esaelP.pu dekcol si doPi is
Page 11

LIMITED PRODUCT WARRANTY
This quality product is warranted to be free from manufacturer’s defects in material and workman-ship,
provided that the unit is used under the normal operating conditions intended by the manufacturer.
Should you have any problem with this product, please and it is highly recommended to visit our website at
www.curtisint.com before you take any other steps as we have additional copies of instruction manuals,
operating manuals and trouble shooting tips on our website which gives you the answer on most of the
questions you could have in operating the unit.
TERMS OF WARRANTY
C.I. Service Dept. warrants this product to be free from defects in materials and workmanship for 1 year on
parts and 90 days on labor. If you originally purchased your product more than 90 days ago, a repair fee
may apply.
Nothing within this warranty shall imply that C.I. will be responsible or liable for any damage to any items
placed in this product, whether due to any defect of the product, or its use, whether proper or improper.
EXCLUSIONS
Save as herein provided, C.I. Service Dept. (Canada) or C.I. Service Dept. (USA), there are no other
warranties, conditions, representations or guarantees, express or implied, made or intended by C.I. or its
authorized distributors and all other warranties, conditions, representations or guarantees, including any
warranties, conditions, representations or guarantees under any Sale of Goods Act or like legislation or
statue is hereby expressly excluded. Save as herein provided, C.I. Service Dept. (Canada) or C.I. Service
Dept. (USA), shall not be responsible for any damages to persons or property, including the unit itself,
howsoever caused or any consequential damages arising from the malfunction of the unit and by the
purchase of the unit, the purchaser does hereby agree to indemnify and save harmless C.I. from any claim
for damages to persons or property caused by the unit.
TO OBTAIN REPAIRS UNDER THE TERMS OF THIS WARRANTY
1. The original purchaser must present a copy of the original bill of sale and the service warranty card.
2. Any alterations, abuse, misuse, battery corrosion or accidental damage voids the warranty.
3. The warranty does not cover cabinets and accessories.
4. No warranty or insurance contained or set out shall apply when damage or repair is caused by power
failure; damage in transit or when moving the unit; improper power supply; use for commercial or
industrial purposes; service calls resulting in customer education, etc.
5. The defective product should be mailed to:
Canada
C.I. Service Dept. C.I. Service Dept.
315 Attwell Dr 2215 Kenmore Avenue
Toronto, Ontario
M9W 5C1
For service assistance and product information, please call: 1-800-968-9853.
If mailing the product, the freight must be prepaid and a money order for $7.00 should be included
to cover the cost of insurance and the return of the product.
6. C.I. reserves the right to repair or replace the parts which have become defective.
U.S.A
Ste 100
Buffalo, N.Y.
14207
Model No. Date Purchased Serial No.
 Loading...