

Page 1
Page 2

1
- 1 -
WARNINGS
WARNING
TO Prevent fire or shock hazard, do not use this plug with an extension cord, receptacle or add other
outlet unless the b la des can be can be fully inserted to prevent blade exposure . To prevent fire or shock
hazard, do not expose this appliance to rain or moisture.
T he lightn ing fla s h with a r rowhead sym bol,within an equilateral triangle is intented to
alert the user to the pre sence
of un insulated' dangerous vo-
ltage' w ithin the product's enclosure that may be of sufficient magnitude to constitute a
risk of electric shock to persons.
CAUTION : TO REDUCE THE
RISK OF EL ECTRIC SHOCK
DO NOT REMOVE COVER (
OR BACK),NO USER SERVICEABLE PARTS INSIDE REFER SERVICING TO QUALIFIED S ER VICE PE RS ON NEL
The exclamation point within
an equila te ra l tria n g le is in tended to alert the user to the
presence of important operatin g a n d ma in te nanc e (s e rv ic ing) in struc t i on s in the li ter ature accompany-ing th e applicance
IMP ORTA NT SA F ET Y IN ST RUCTION S
1 Read these instruction.
2 ke ep the se ins tructions .
3 he ed a ll warn ings .
4 Follow all instructions.
5 D o not use this product near water(swimming pool, beach, lake etc.).
6 Clean only with a dry cloth.
7 D o not block any of the ventilation openings.Install in accordance with the manufacturer's instructions .
8 D o not install near any heat sources such as radiators, h eat registers . S toves or o ther apparatus
(including amplifiers)that produce heat.
9 D o not defeat the safety purpose of the polarized or grounding-type plug, A polarized plug has two
blades with one wider than the other. A grounding type plug has two blades and a third grounding
prong. The wide blade or the third prong is provided for your safety. If the provided plug does not
fit into your outlet, consult an electrician for replacement of the obsolete outlet.
10 Protect the pow er cord from being walked on or pinched particularly at receptacles and the point
wh ere t he y ex it fr om the ste r eo .
11 Only use attachm ents/accessories specified by the manufacture r.
12 Unplug this apparatus during lightning storms or w hen unused for long periods of time
13 Refer all servicing to qualified service personnel. Servicing is required when the system has been
da m a ged in any w a y, such a s a da m a ge d power-supply c ord or plug . Ha s be e n e xpo sed to rain or
moisture ,does not operate norm ally , or has been dropped.
14 This appliance should not be exposed to dripping water or splashing water and objects filled with
w ater, such as vases, should not be placed on this unit
Page 3
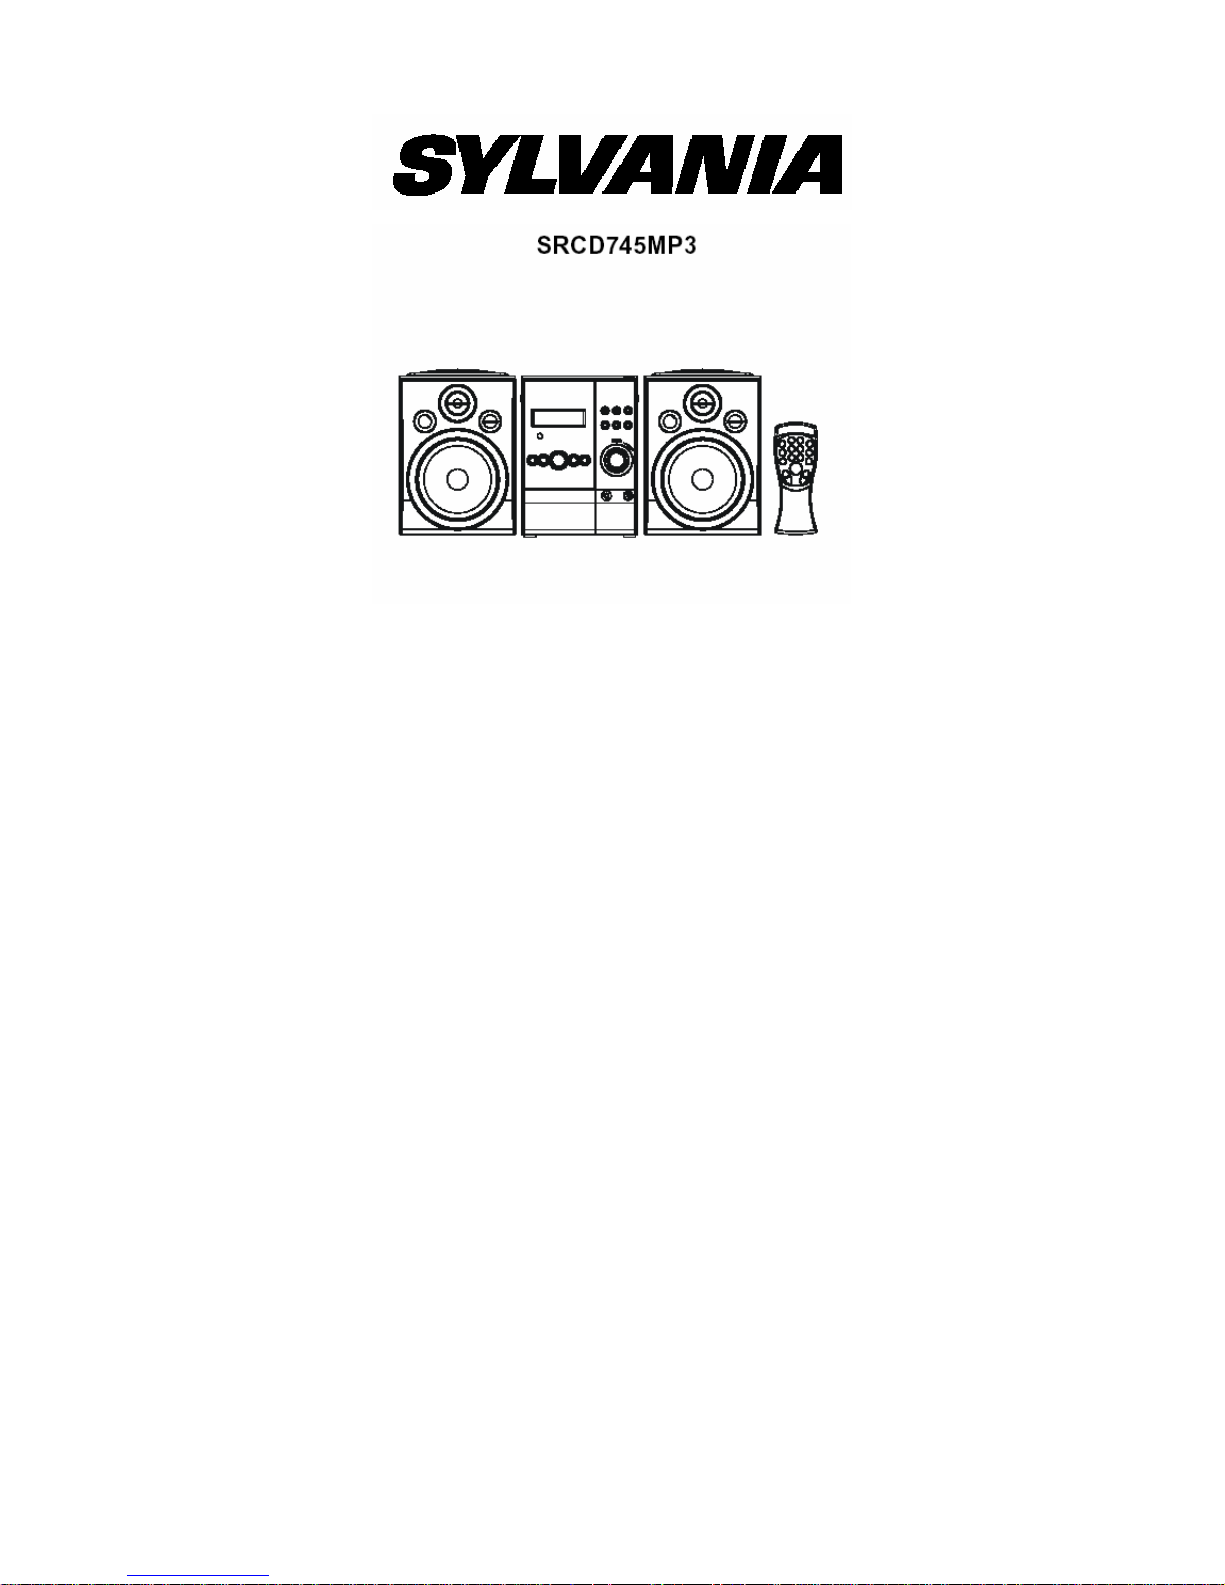
RCD745MP3
Micro Hifi System with Compact Disc/MP3 Player, Digital PLL AM/FM-stereo
radio and Remote Control.
INSTRUCTION MANUAL
Please read this instruction manual carefully and familiarize yourself with your new HiFi
System before using it for the first time. Please retain this manual for future reference.
TABLE OF CONTENTS
• Location and Controls ..............................................................................
• Remote Control ..........................................................................................
• Connecting to Power ................................................................................
• Power Supply .............................................................................................
• Headphones ...............................................................................................
• Tuner Operation .........................................................................................
• Compact Disc/MP3 Operation .................................................................
• Clock Function ...........................................................................................
• Special Functions ......................................................................................
• Important ................................................................................................................
• Specifications ........................................................................................................
2
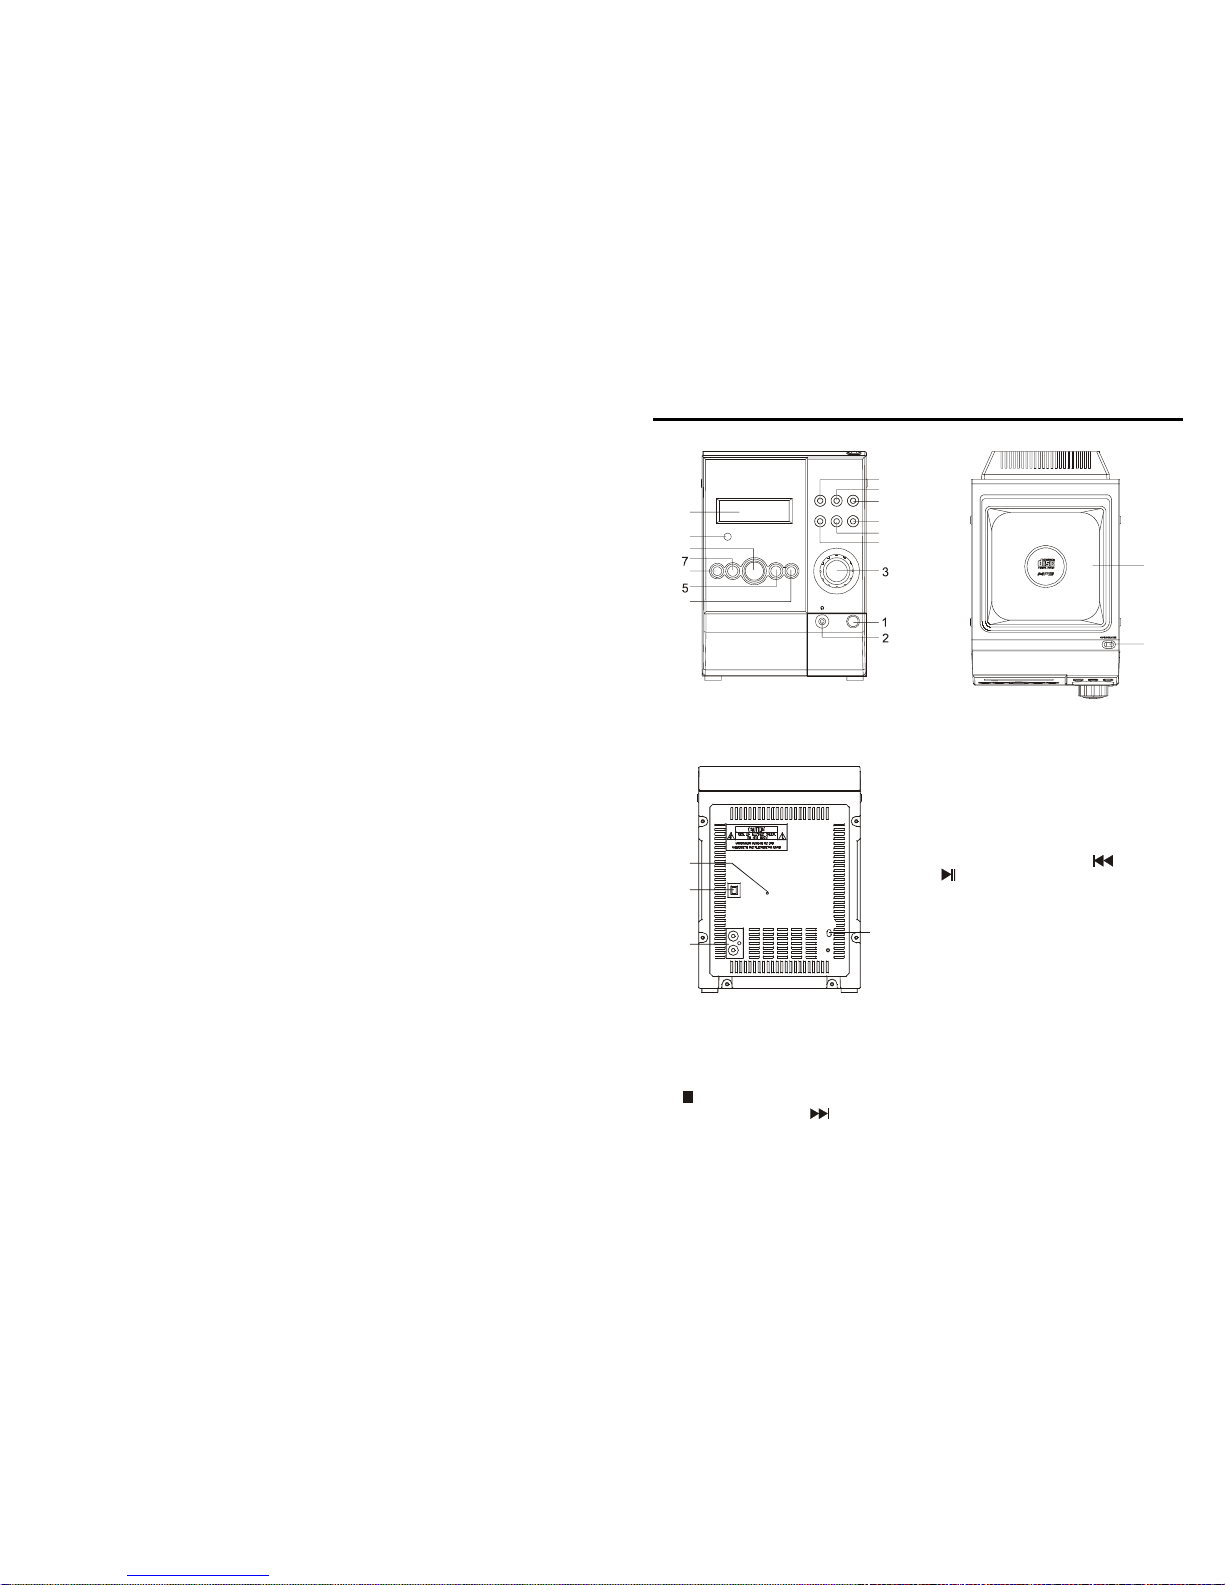
LOCATION OF CONTROLS
- 2 - - 3 -
7 TUNING DOWN/CD SKIP Button
8 PLAY/PAUSE & CD/MP3 Button
9 REMOTE Sensor
10 LCD Display
11 P.EQ Button
12 RANDOM/M-DOWN Button
13 TIMER Button
14 TUNER/BAND Button
15 REPEAT/M-UP Button
16 MEMORY/PROGRAM Button
17 CD Compartment OPEN/CLOSE Button
18 CD Compartment flap
Rear Panel
19 FM ANTENNA
20 AM ANTENNA
21 SPEAKER terminals R / L
22 AC POWER Cord
1 STANDBY/ON Button
2 HEADPHONE JACK
3 VOLUME (+/-) Button
4 STOP Button
5 TUNING UP/CD SKIP Button
6 MUTE Button
3
4
5
5
6
6
8
11
13
13
14
Page 4

- 4 - - 5 -
REMOTE CONTROL
1 STANDBY/ON Button
2 CD /MP3 Button
3 TUN/BAND Button
4 P.EQ Button
5 MEM/PROG Button
6 SLEEP Button
7 RANDOM/MEM-DN Button
8 MUTE Button
9 TRACK/TUNING Button
10 TRACK/TUNING Button
11 - VOLUME Button
12 + VOLUME Button
13 PLAY/PAUSE Button
14 STOP Button
15 REPEAT/MUM-UP Button
16 TIMER Button
17 CLOCK Button
PREPARATION BEFORE USE (Batt. not included)
1. Remove the battery cover from the back of the remote control unit.
2. Insert two "AAA" size batteries. Insert the batteries with the
+ and - terminals matching the indication inside the battery
compartment.
3. Replace the cover.
BATTERY REPLACEMENT
When the remote control operation becomes unstable
or the distance from which remote control is possible
becomes shorter, replace the batteries with new ones.
USING THE REMOTE CONTROL UNIT
• To use remote control unit, point it at the remote sensor and press the button gently and
frimly. Remote control is possible within about 5m (approx. 16FT). However, since the
remote control range is less when the unit is used at an angle, use directly in front of the
remote sensor, as far as possible.
• Do not expose the remote sensor to strong light (direct sunlight or artificial lighting) and
make sure that there are no obstacles between the remote sensor and the remote
control unit.
• The remote control also incorporates a stand-by facility. Please note, this does not turn
the unit off.
CONNECTING TO POWER
CAUTION
Do not plug the power cord into an AC wall outlet until all connections have been made.
Be sure to make the correct connections, paying attention to the left and right speakers.
Plug in the cables securely; loose connections will result in unsatisfactory sound
reproduction or cause noise problems.
1. Speaker Jacks - Connect the left and right speakers to these ternimals.
2. AC Cord - Plug into a conveniently located 120V AC, 60Hz outlet.
SPEAKER CONNECTION
1. Place the speakers in convenient locations on either side of the unit. Usually a distance
of five to eight feet between speakers provides the best stereo effect, but this may vary
depending on the size and acoustics of the room.
2. Locate the Speaker Terminals on the rear of the unit and connect the left speaker to
the jack marked L and the right speaker to the jack marked R.
CAUTION
Only connect the speakers which are supplied with the unit. The use of any other or
additional speakers may cause damage to the unit. Never operate the unit without the
speakers connected.
SAFETY PRECAUTION
Do not allow this unit to be exposed to rain or moisture.
Mains Supply: 120V 60Hz - AC only
This symbol means that this unit is double insulated. An earth connection is not required.
POWER SUPPLY
Remove the stereo carefully from the box, retaining the packaging for future use.
AC POWER OPERATION
Plug the power cord into an AC outlet having 120V, 60Hz only. Connecting this unit to other
power sources may damage the unit.
NOTES:
1.The AC plug supplied with the unit is polarized to
help minimize the possibility of electric shock. If the
polarized plug does not fit into a nonpolarized AC
outlet, do not file or cut the wide blade; it is the user's
resonsibility to have an electrican replace the obsolete outlet.
Page 5

- 6 - - 7 -
2.The power cord should be unplugged from the outlet when the unit is not going to be
used for a long period of time.
HEADPHONE
This unit will accept stereo headphones (not included) with a 3.5mm plug and an impedance
of 8 ohms or greater.
The speakers are automatically disconnected when headphones are connected to the
PHONES JACKS (2).
AM/FM TUNER
OPERATION
• Press the STANDBY/ON Button (1) to power the unit.
• Press the TUNER/BAND Button (14) on the unit or on the remote control(3) to choose
the Tuner mode.
• Select the desired frequency band by pressing the TUNER/BAND Button (14/3) again.
• Tune to the desired radio station by pressing the TUNING UP or TUNING DOWN
BUTTONS (5/9 or 7/10).
• To turn off the unit, press the STANDBY/ON Button (1).
MANUAL / AUTOMATIC TUNING
• To tune a station, press and release the TUNING UP or TUNING DOWN BUTTONS
(5/9 or 7/10).
• To activate the automatic tuning, press and hold the TUNING UP / DOWN BUTT ONS for
more than two seconds. The unit will automatically search for the first available broadcast
of sufficient signal strength it can receive, and stop there.
MEMORIZING PRESET STA TIONS
You can store up to 50 radio stations into the memory: 30 for FM and 20 for AM .
To memorize preset stations:
• Press the STANDBY/ON BUTTON (1) on the main unit.
• Press the TUNER/BAND Button (14/3) on the unit or on the remote control to choose the
Tuner mode.
• Select the desired frequency band by pressing the TUNER/BAND Button (14/3) again.
The desired band appears on the display.
• Tune to the desired station by pressing the TUNING UP or TUNING DOWN BUTTONS
(5/9 or 7/10) on the main unit.
• Press the MEMORY/PROGRAM BUTTON (16/5). MEMORY will appear in the display
and a preset number will also appear on the display.
• Press the REPEAT/M-UP BUTTON (15/15) or RANDOM/M-DOWN BUTTON (12/7) to
select the desired preset station number.
• Press the MEMORY/PROGRAM BUTTON (16/5) again to memorize the station into
the chosen preset number.
• Repeat the above mentioned steps until all desired presets are programmed.
LISTENING TO A PRESET STA TION
• Press the STANDBY/ON BUTTON (1) on the main unit.
• Press the TUNER/BAND Button (14/3) to choose the Tuner mode.
• Select the desired frequency band (FM or AM) by pressing the TUNER/BAND Button
(14/3) again.
• Press the REPEAT/M-UP BUTTON (15/15) or RANDOM/M-DOWN BUTTON (12/7) to
select the desired station.
ANTENNA
• For FM reception there is a built-in FM antenna wire (19) at the rear side of the unit.
Move the wire around to obtain the best reception.
• For AM there is a Loop antenna (20) at the rear of the unit. You may have to orient the
Loop antenna to obtain the best reception.
FM & FM-STEREO RECEPTION
• When in FM mode and the station is broadscasting in Stereo, “
” appears on the
LCD display.
HANDLING COMPACT DISC
• To remove a disc from its storage case, press down on the centre of the case and lift
the disc out, holding it carefully by the edges.
• Fingerprints and dust should be carefully wiped off the disc's recorded surface with a
soft cloth. Unlike conventional records, compact discs have no grooves to collect dust
and microscopic debris so gently wiping with a soft cloth should remove most particles.
Wipe in a straight line from the inside to the outside of the disc. Small dust particles
Page 6

B) In the MP3 mode
This unit can also read as below :
1. It can be reading as " 8 cm " and " Multi Section " of MP3 DISC.
2. It can be "Playback Transfer Rate in 56-256 kbps".
LISTENING TO COMPACT DISC (AUDIO CD)
Playing The CD
1. If in Tuner mode, press the CD / MP3 button (8/2) to select the CD function, the CD
indicator and the elapsed time of all current track number will appear on the display.
2. When putting into the disc, it starts playing the CD from the first track automatically,
and the "
" indicator will appear on the display.
3. Press the PLAY / PAUSE button again to pause playing the CD, and the"
" indicator
will appear on the display.
4. To resume playback, press the PLAY / PAUSE button again.
5. To stop playback, press the STOP(4/14) button.
Selecting A Different Track During AUDIO CD Play
1. Press the
SKIP Button or SKIP Button (5/9 or 7/10), the required track
number appears on the display.
2. Press the PLAY / PAUSE button (8/13) on the unit. Starting again with the track that is
currently selected.
LISTENING TO MP3 DISC (CD)
Playing The MP3
1. If in Tuner mode, press the CD / MP3 button (8/2) to select the MP3 mode, the MP3
indicator and the total tracks on the disc will appear on the display.
2. When putting into the disc, it starts playing the MP3 from the first track automatically,
and the "
" indicator will appear on the display.
3. Press the PLAY / PAUSE button again to pause playing the MP3 , and the " " indicator
will appear on the display.
4. To resume playback, press the PLAY / PAUSE button once more again.
5. To stop playback, press the STOP button(4/14).
Note:
Using the
SKIP Button or SKIP Button (5/9 or 7/10) to select the track, when
playing the MP3, errors can occur. Switch the unit off for a few seconds, and then turn
it on to restart playing the MP3.
Selecting A Different File (song) During MP3 Play
1. Press the
SKIP Button or SKIP Button (5/9 or 7/10), the required file (song)
9
- 8 - - 9 -
and light stains will have absolutely no effect on reproduction quality.
• Never use chemicals such as record sprays, antistatic sprays, benzine, or thinners to
clean compact discs. These chemicals can irreparably damage the disc's surface.
• Discs should be returned to their cases after use. This avoids serious scratches that
could cause the Laser pickup to skip.
• Do not expose discs to direct sunlight, high humidity, or high temperatures for extended
periods. Long exposure to high temperatures can warp the disc.
• Do not stick paper or write anything with a ballpoint pen on the label side of the disc.
COMPACT DISC/MP3 OPERA TION
LOADING AND UNLOADING COMPACT DISCS
• Press the STANDBY/ON Button (1) to power the unit.
• Press the CD/MP3 button on the unit (8) or on the remote(2) to select the CD / MP3
operation.
• Open the disc compartment by pressing the CD Open Button (17).
• When the disc compartment has opened, remove a disc from its case and place it
carefully in the compartment with the label side facing up. Locate smaller, 3'' discs, in
the centre depression of the compartment.
• Close the disc compartment.
When the compartment is fully closed, the disc will start turning automatically. The total
number of tracks of the CD will appear on the LCD display.
CAUTION
• Do not put anything except a compact disc into the compartment. Foreign objects can
damage the mechanism.
• Keep the disc compartment closed when not in use to prevent dirt and dust from
entering the mechanism.
• Never place more than one disc into the disc compartment at any time.
• If the disc is correctly loaded , the following information will be displayed:
Total number of tracks on the disc
Total playing time
Notes: After the disc compartment is fully closed, the disc information may not appear on
the display, This means that the disc is improperly loaded (most likely it is upside
down). To check, open the disc compartment again and reload the disc.
LISTENING TO COMPACT DISC AND MP3 DISC (CD)
Press the CD / MP3 button (8/2) to select the CD / MP3 operation.
A) In the CD mode
This unit can read CD, CD-R, CD-RW.
Page 7

11
- 10 - - 11 -
number appears on the display.
2. Press the PLAY / PAUSE button (8/13). Starting again with the track that is currently
selected.
Playing The MP3
1. In STOP mode press the MEMORY/PROGRAM (16/5)button to enter the first chapter
2. Then press the SKIP/SEARCH(5/9 or 7/10) once to enter next chapter ,
3. If you set off the chapter, then select the tracks you liked, then press PLAY/PAUSE(8/13)
button to start.
Note: In MP3 mode, the unit can not memory tracks.
REPEAT PLAY
1. When playing the CD / MP3, if you desire to repeat the same track only, press the REPEAT
/ M-UP button (15/15) once and the "
ONE
" display will light up.
2. To repeat all disc, press the REPEAT / M-UP button twice and the " " display will light
up.
3. To cancel repeat play, press the STOP button (4/14) or press the REPEAT / M-UP button
(15/15) until the repeat indicator disappeared.
Note : If in "REPEAT ALL" mode, the normal & program playing will also effect in this function.
RANDOM PLAY
1. In STOP mode, press the RANDOM (12/7) button once, the "RANDOM" indicator will
light up.
2. The disc starts playing automatically, and the tracks will be played randomly.
3. To cancel random play, press the STOP button(4/14) until the random indicator
disappears.
STOPPING PLAY
1. Press the STOP button(4/14) if you wish to stop play. The disc and total numbers of
tracks will now appear on the display.
2. Open the CD door on the unit to remove the CD.
PROGRAMMED DISC PLAY
It is not possible to enter programs during disc play. Press the Stop button (4) first, then follow
the instructions below.
Press the MEMORY/PROGRAM button (16/5). The following information will be displayed
on the CD Display.
00 P -- 00
Press the Forward and Reverse Skip Track buttons (5/9 and 7/10) to select the track to be
stored in location "1" ( i.e. track 03).
01 P -- 03
Press the MEMORY/PROGRAM button (16/5). The first program selection is now stored
in the program memory.
02 P -- 00
Select the next track to be programmed using the Forward and Reverse Skip Track
buttons ( i.e. track 05).
02 P -- 05
Press the PLAY/PAUSE button (8/13) to play this stored tracks.
Continue entering tracks in this way until all the desired tracks are stored (up to a limit of
99). When the MEMORY/PROGRAM button (16/5) is pressed to store the 99th track, the
display will return to the 1st program location.
Notes: If the Play/Pause button (8/13) is pressed before the MEMORY/PROGRAM button (16/
5) is pressed to store a track, that track will not be programmed, and the disc will start
playing from the first selected track. Any track can be programmed to play more than
once.
Listening to Programmed Tracks
Press the Play Pause button (8/13). Disc play will start at the beginning of the first programmed track.
To Clear The Program Memory
Simply press STOP button(4/14) to clear the programmed tracks.
CLOCK FUNCTION
Adjusting the clock
This unit has its own digital clock function in the STANDBY mode. If the unit is disconnected
from the mains, you will need to reset the clock.
• Press the CLOCK button (17) on the remote control for a second to adjust clock.
• The unit will then display the time and the hours will start flashing.
• Adjust the hours by pressing the Tuning Up or Down Buttons (5/9 or 7/10).
• Press the CLOCK button (17) again, the minutes will start flashing.
• Adjust the minutes by pressing the Tuning Up or Down Buttons (5/9 or 7/10).
• Press the CLOCK button (17) to store the time.
Note: Clock setting can be done in STANDBY Mode only.
Page 8

12
The Sleep Timer is a count-down timer for switching the system to a stand-by mode after
a specified time. It enables you to listen to the radio, a CD or a cassette prior to falling
asleep. The Sleep Timer can be set from 90 to 10 minutes.
• Switch on the system by pressing the STANDBY/ON button either on the system
or on the remote control.
• Select the sound source by pressing the TUNER or CD button on the unit or on the
remote control.
• Press the SLEEP button (6) on the remote control to set the sleep time.
• The word SLEEP and the number 90 appear on the display.
• The system will now play for 90 minutes.
• To decrease the sleep time in steps of 10 minutes, press and hold SLEEP button until
number 10 appears.
• After a few seconds, the previous display is shown again (e.g. with Tuner or CD
information).
• To switch off the system before the SLEEP time has elapsed, press the STANDBY/ON
button on the system or the remote control.
SPECIAL FUNCTIONS
MUTE
• Press the Mute button (8) on the remote control to switch off the sound. The
"MUTE”
indicator will appear.
• Press Mute again to restore the sound at the previous level.
PRESET EQUALIZER
• The Quality of the sound can be adjusted to suit the type of music playing ( ROCK,
CLASSIC, POP and JAZZ).
• Simply Press the P.EQ button on Remote Control (11/4) which matches the type of
music playing.
ATTENTION!
THIS PRODUCT IS ALSO ABLE TO REPRODUCE CD-RW DISCS, HOWEVER IT COULD
HAPPEN THAT DURING PLAYBACK SOME TYPE OF DISCS CANNOT BE PLAYED PROPERLY.
THEREFORE, FULL PLAYABILITY WITH ALL CD-RW DISCS IS NOT GUARANTEED.
13
Timer Function
1. After adjusting the clock, and in standby mode, press the TIMER button (13/16)
"ON" appears on the display.
2. Press the CLOCK button (17) on the remote control, the hours will start flashing,
adjust it by pressing the Tuning Up or Down Buttons (5/9 or 7/10).
3. Press the CLOCK button (17) button again, the minutes will start flashing,
adjust it by pressing the Tuning Up or Down Buttons (5/9 or 7/10).
4. Press the CLOCK button (17) button once more to set TIMER ON time.
5. After adjusting "TIMER ON", press TIMER button (13/16) , "TIMER OFF" appears
on the display and flashing.
6. Repeat the above steps 2 to 3, and then press the CLOCK button (17) once
more to set TIMER OFF time.
7. After adjusting "TIMER ON" and "TIMER OFF", press the TIMER button (13/16)
"TIMER" appears on the display.
8. The system will be switched on automatically at "TIMER ON" order and start
playing. And then the unit also will be switched off automatically at "TIMER OFF" .
Checking the Timer ON settings
• Set the system to the Standby mode by pressing the STANDBY/ON button either on the
system or on the remote control.
• The time is displayed.
• Press the TIMER button (13/16) once. "TIMER" appears on the display.
ACTIVA TING THE TIMER
• Set the system to the Standby mode by pressing the STANDBY/ON button
either on the system or on the remote control.
• The time is displayed.
• If "TIMER " does not appear on the display, press the TIMER button (13/16).
• As soon as the adjusted TIMER ON time is reached, the TUNER, CD player will start
playing.
SWITCHING OFF THE TIMER FUNCTION COMPLETELY
• Press the TIMER button (13/16) until the word TIMER disappears from the
display.
• The TIMER function is now completely switched off.
SLEEP TIMER
Since movement of the CD mechanism and the sensitive circuitry may cause interference to
a radio tuner nearby switch this unit off while operating other radio devices.
- 12 - - 13 -
Page 9

IMPORTANT
This product utilizes a laser
Danger - Invisible laser radiation when opened and interlock failed or defeated. Avoid
direct exposure to the beam.
Caution - Use of controls, adjustments, or procedures not listed in this manual may
result in hazardous radiation exposure.
Concerning Compact Discs
Only compact discs identified with this mark can be used with
this player.
SPECIFICATIONS
Power Supply
AC: 120V ~ 60Hz
Radio Frequency Coverage
FM: 87.5 - 108 MHz
AM: 530 - 1700 kHz
CD Player
Pick Up: 3-Beam. Semiconductor Laser
Encoding: 16-Bit Linear, 2 x oversampling
Design and specifications are subject to change without notice.
- 14 -
 Loading...