

Page 1

USER MANUAL
VERSION 0.1.1 FINISH ON 2008/12/25
CONTENTS
YOUR G-NETBOOK TOUR...............................................................................................................1
1 PRODUCT OVERVIEW................................................................................................................... 3
MAIN FEATURES ................................................................................................................................3
ENRICHED EXPERIENCE ..................................................................................................................... 3
OFFICE ASSISTANT .............................................................................................................................3
2 SYSTEM OVERVIEW......................................................................................................................3
3 HARDWARE OVERVIEW............................................................................................................... 4
4 QUICK START.................................................................................................................................. 5
5 GET TO KNOW THE APPLICATION .............................................................................................7
Ⅰ. INTERNET SERVICE ......................................................................................................................7
1. Firefox ......................................................................................................................................7
2. Email ......................................................................................................................................11
3. Chatting ..................................................................................................................................18
Ⅱ. ENTERTAINMENT ....................................................................................................................... 21
1. Painting................................................................................................................................... 22
2. Flash Player ............................................................................................................................23
3. Gallary ....................................................................................................................................25
4. Vivi Player..............................................................................................................................26
Ⅲ. WORK........................................................................................................................................29
1. Abiword..................................................................................................................................30
2. Calculator ...............................................................................................................................35
3. Calendar..................................................................................................................................35
4. Gnumeric ................................................................................................................................41
5. PDF Viewer ............................................................................................................................43
6. StarDict................................................................................................................................... 44
Ⅳ、SYSTEM MANAGER.................................................................................................................. 47
1. File Manager...........................................................................................................................47
2. Desktop & Language..............................................................................................................50
3. Software Upgrade...................................................................................................................51
Ⅴ. SETTINGS................................................................................................................................... 53
1. Wireless Setting......................................................................................................................53
2. Network setting ......................................................................................................................55
3. Sound setting ..........................................................................................................................56
4. Date/Time setting....................................................................................................................56
Page 2
1
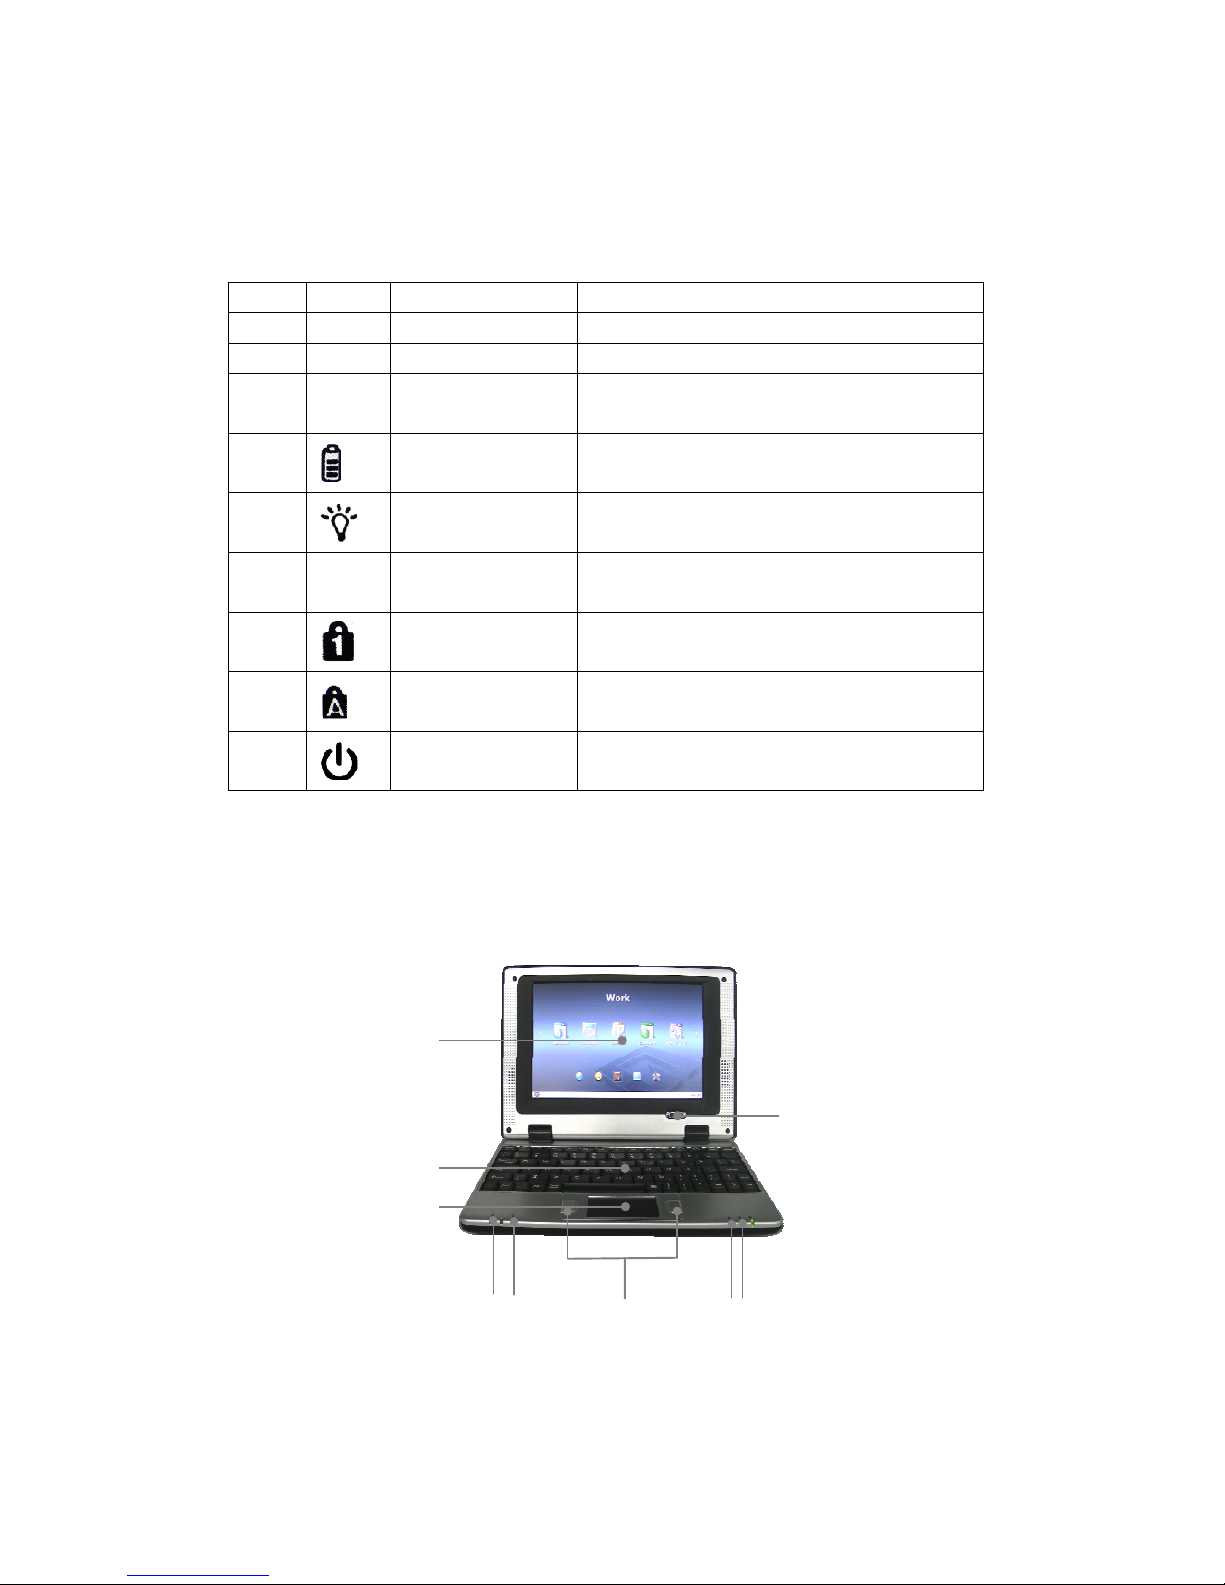
Your G-NETBOOK Tour
Top view (Figure 1)
# Icon Item Description
1 Diplay screen Display computer output.
2 Keyboard For entering data into your computer.
3 Touchpad Touch-sensitive pointing device which
functions like a computer mouse.
4
Charging indicator
5
Power indicator Indicates the G-netbook is power on.
6 Click buttons(left
and right)
The left and right buttons function like the left
and right mouse buttons.
7
Num Lock When Num Lock is on, the embedded keypad is
in numeric mode.
8
Caps Lock Indicates the status of entering capital letters.
9
Power button Turns the computer on and off
Figure 1
9
3
2
1
8
765
4
Page 3
2
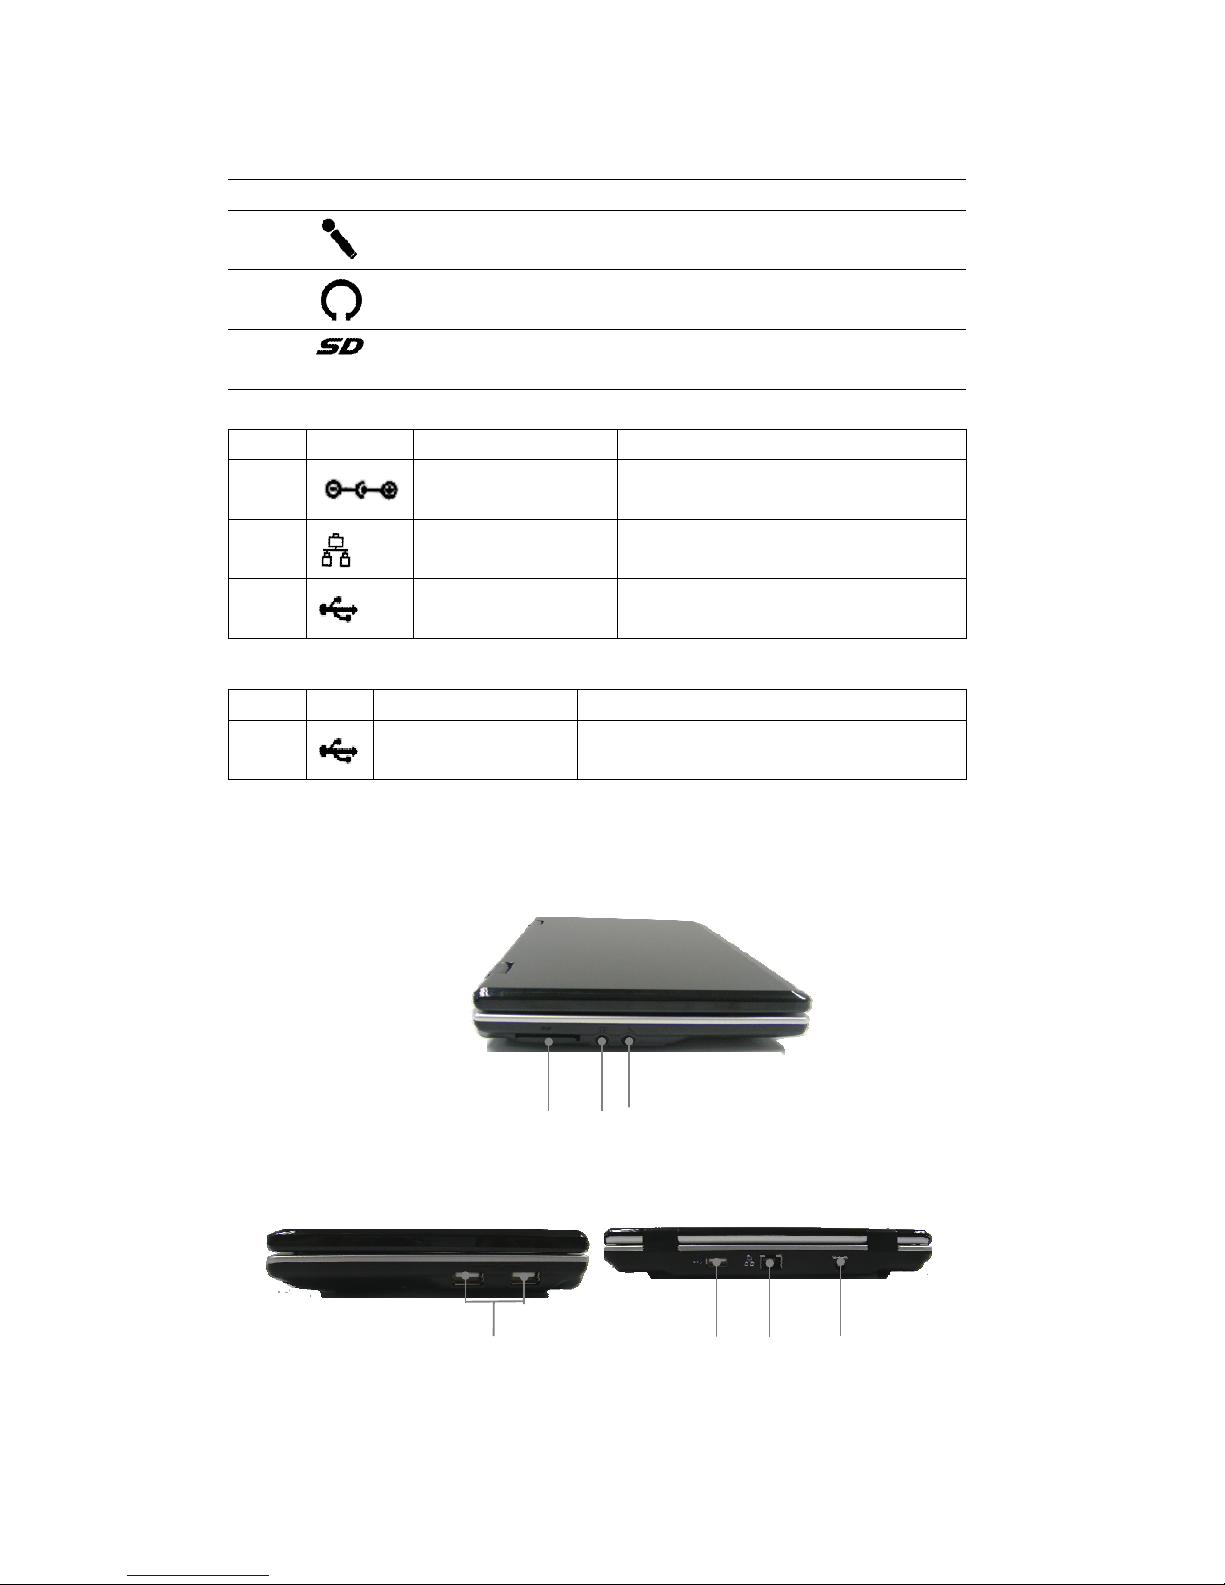
Left view (Figure 2)
Closed back view (Figure 3)
Right view (Figure 4)
# Icon Item Description
1
Microphone-in
jack
Accepts input from external microphones.
2
Headphone/speaker
/line-out jack
Connects to line-out audio devices
(e.g.: speakers, headphones).
3
Storage Expansion slot Accepts one Secure Digital(SD) card, used to
expand the capacity of My Files.
# Icon Item Description
4
DC-in jack Connects to AC adaptor
5
Ethernet (RJ-45) port Connects to an Ethernet 10/100-based
network.
6
USB port Connects to USB2.0 devices (e.g., USB
mouse)
# Icon Item Description
7
USB port Connects to USB2.0 devices (e.g., USB
mouse)
Figure 2
3
21765
4
Figure 4
Figure 3
Page 4

3
1 Product Overview
The G-netbook is an affordable product with low power consumption, designed for
communication and digital multimedia entertainment by accessing the Internet through a
broadband terminal. It can be used without the threat of viruses. In addition to a variety of
multimedia entertainment and high-speed broadband Internet access functions, the Netbook can
be used for other purposes, such as the chatting, gallery, Flash player, Abiword, calculator, PDF,
Stardict, etc. Also, it provides the user with personalized Flash desktops.
Main Features
一 7-INCH TFT-LCD
一 True color image display
一 Broadband Internet access
一 Highly secure virus free Linux OS
一 All kinds of application software packages
Enriched experience
一 Internet surfing, information searching and news reading
一 Instant online communication with family, friends or classmates
一 Download and enjoy Music
一 Picture and image sharing
Office assistant
一 Office software package
一 E-mail receiving and sending management
一 Daily work plan and management
一 PDF viewer
2 System Overview
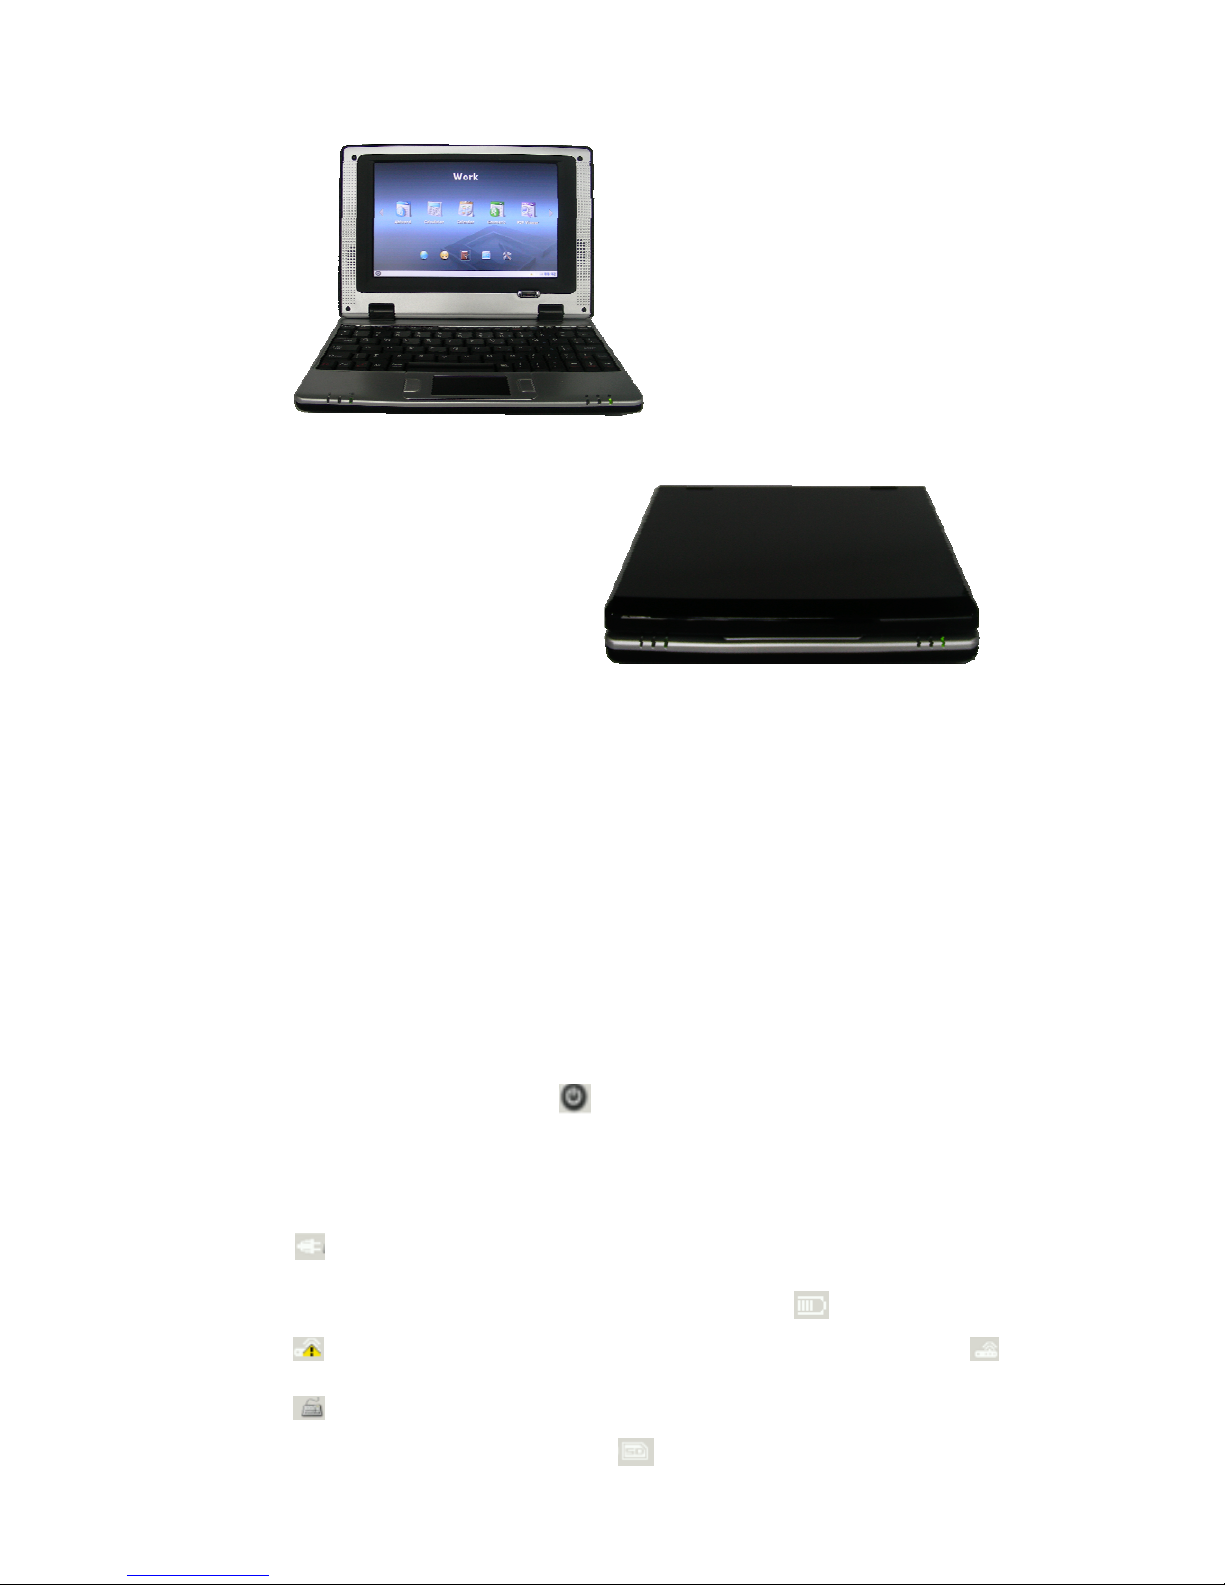
The G-netbook, a highly portable & compact design, a perfect performance, is adaptability and
robustness. G-netbook’s optimized Linux based operating system ensures optimum performance
with the minimum system resources.
Page 5

4
3 Hardware Overview
LCD Size / Type 7" Wide
LCD Resolution 800x480 (~WVGA)
LCD Type TFT
Graphic Integrated 3D Graphic GPU
Processor
Freescale iMX31 533MHz (ARM11)
Memory
128MB DDR I400
Storage
1GB~4GB SD card inside
Audio
Stereo Sound Codec
Microphone
1 Internal Microphone
Speakers
2 Internal Stereo Speakers
Audio Jack - Out (3.5mm)
1
Audio Jack - In (3.5mm)
1
Video Out
AV out (for optional)
LAN / Connector
10/100 Mbps / RJ-45
USB ports
USB 2.0 x 3
Memory Card Reader
SD(SDHC)
Wireless
802.11 a/b/g
Input Device
Build-in 80 keyboard / Capacitive TouchPad
Battery
3.7V/4100mAh Li-Polymer
Battery Life
3.5 hours under operating mode
AC Adapter Output
5V,3A
AC Adapter Input
100-240 VAC,
50/60Hz universal
Unit Weight
1.5 lbs
Unit Dimensions (W x D x H)
220mmx152mmx31mm
Warranty
1 Year Warranty,
(6 months for battery)
Page 6
5
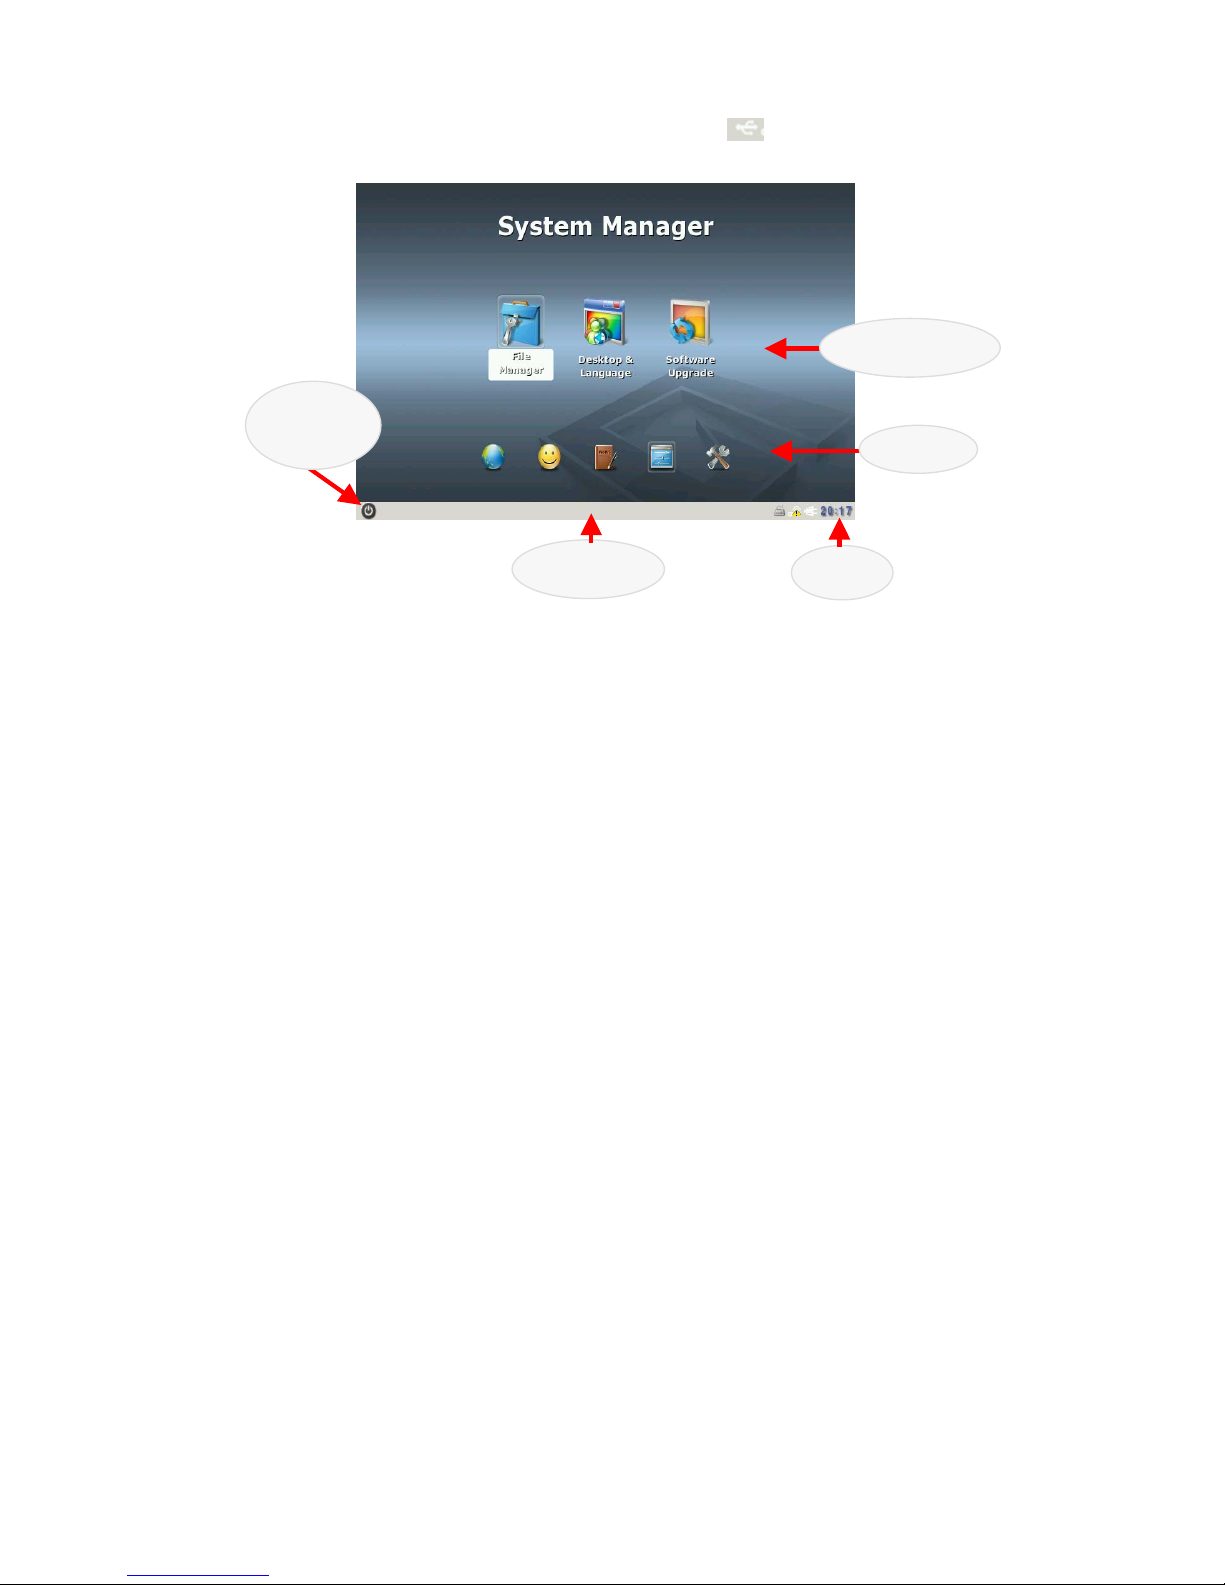
4 Quick Start
1. Power on or power off the G-netbook through its I/O button.
2. Acquaint yourself with the desktop: The desktop is divided into 4 areas: the menu, application
area, task bar and the clock.
3. Open an application:
Move the cursor to the desired application icon, and click to open the related application.
Notes:
To effectively use resources, you can open only 3 applications at the same time.
4. Power off: Click the power-off icon
on the desktop. On the displayed prompt box, click
OK to exit the system. To go back to the system, click Cancel.
5. In the right part of Task bar there are a group of icons.
Icon
indicates the G-netbook DC jack is connected with adaptor. In this case, the
G-netbook’s power is from adaptor. If not, the icon will change into
.
Icon
indicates Wifi is not connected. When it is connected, the icon will change into .
Icon
indicates keyboard input ways. Right click it and you can choose your favorite way.
If you input a SD card to the SD slot, icon
will appear on the desktop. Clicking it can
outline
Page 7
6
delete SD card. If you input a USB device to USB port, icon will show on the desktop.
Menu
Application
Clock
Power-off
b
utton
Task bar
Page 8
7
5 Get to know the application
Ⅰ. Internet Service
Internet Service is like a platform, through which users can browse the Internet, and engage in
network chats, send/receive email anytime, anywhere.
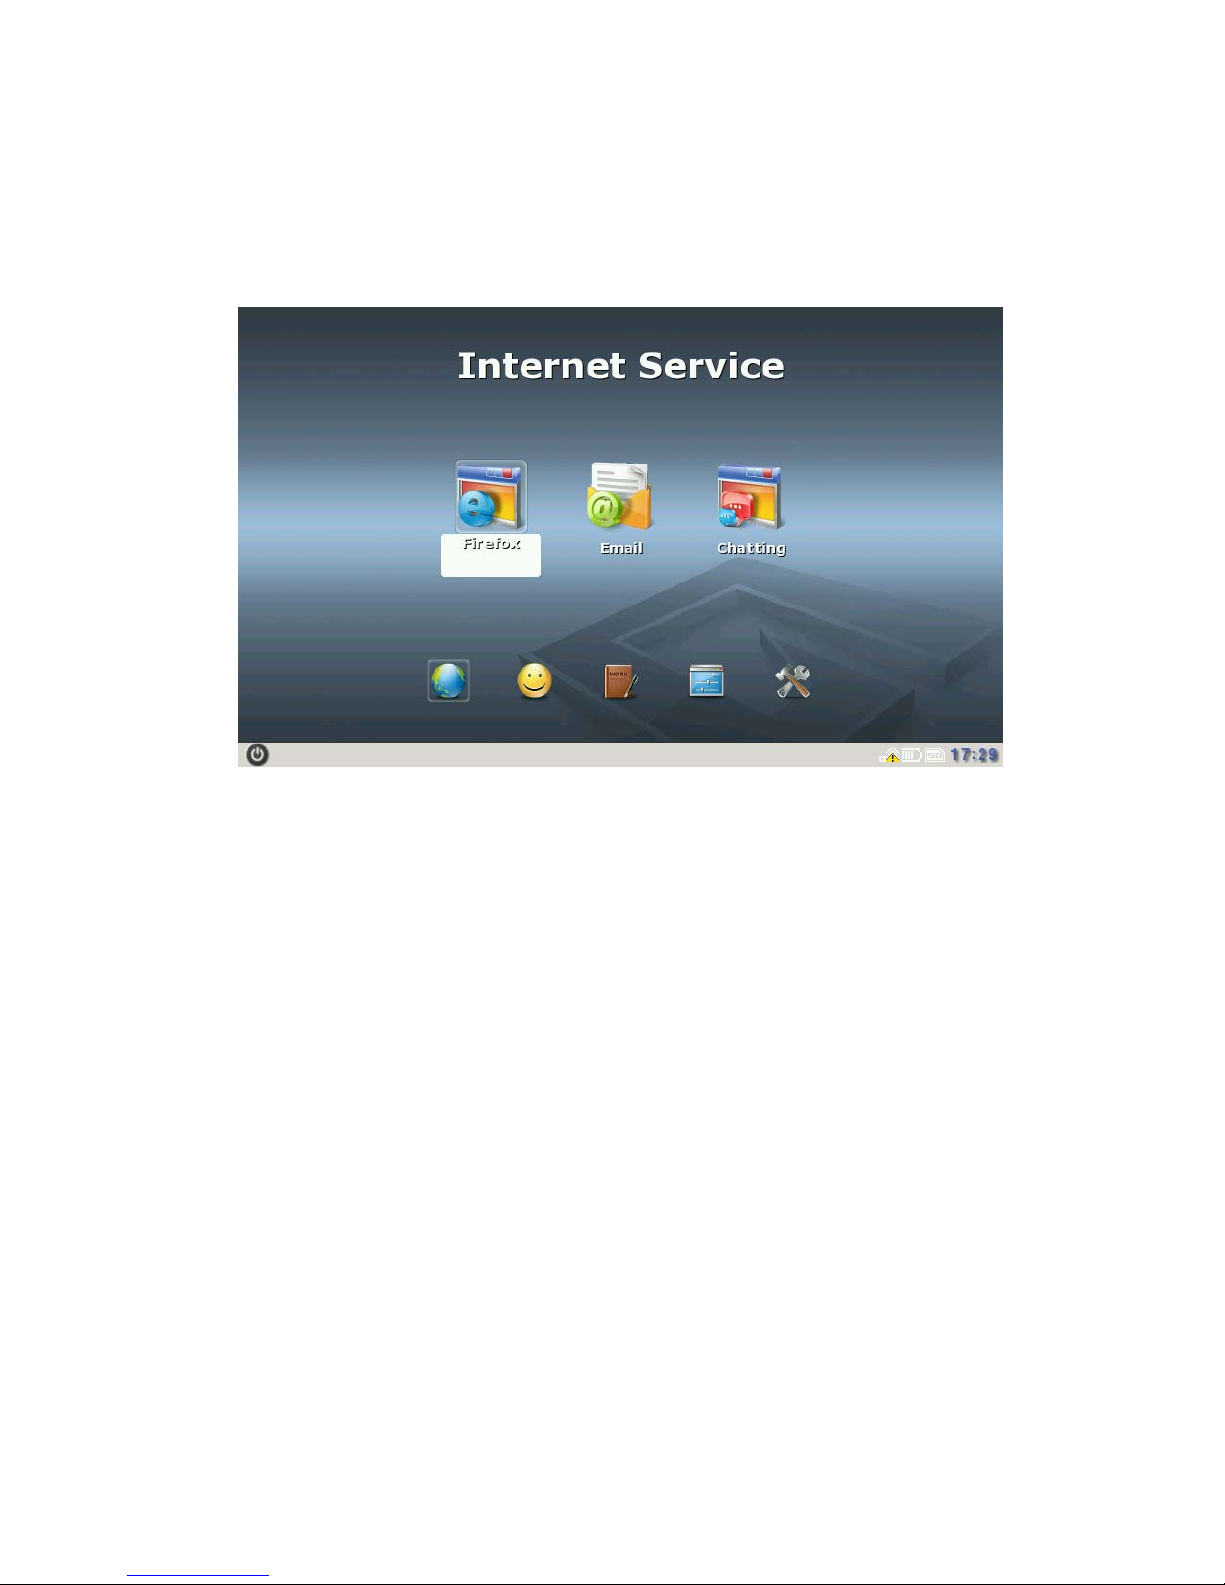
1. Firefox
Firefox is a kind of browser which allows the user to open multiple pages in the same window
and does not limit the page quantity. The system resource occupation rate is relatively low. Its
major functions include webpage browsing, webpage saving, online video, and opening pictures
or files.
⑴ To open Firefox, click the Firefox icon on the desktop, as shown in Figure 1:
Page 9
8
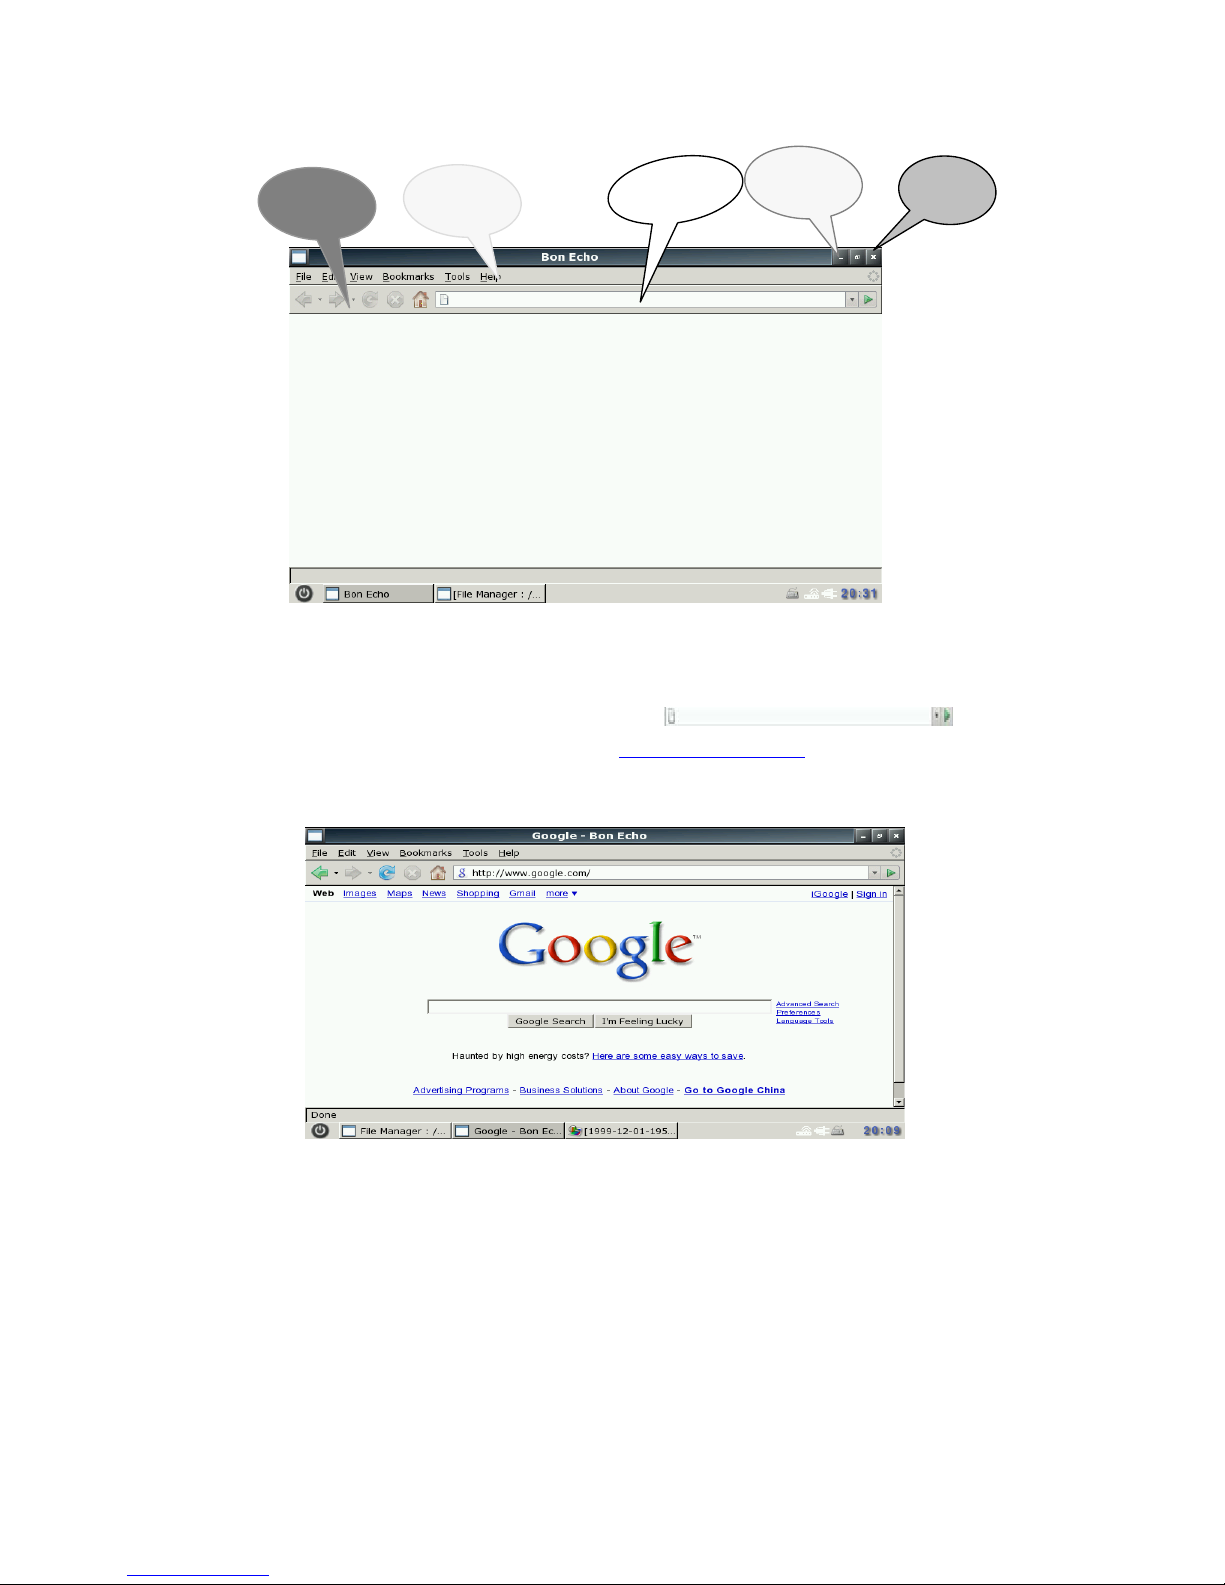
⑵ Enter the web page address to be visited in
on the
interface in Figure 1. For example, access http://www.google.com
. The homepage of Google
is opened in the window, as shown in Figure 2:
⑶ You can open multiple web pages in the Firefox, but only the currently browsed window is
displayed. To create a window, select File→New tab in the menu. To switch between
different tab pages, click the related tab. The tab-browsing interface is shown in Figure 3:
Figure 1
Figure 2
Close
Address bar
Minimize
Menu bar
Toolbar
Page 10

9
To close the current tab page, select File→Close in the menu.
To close the Web Browsing window, select File→Quit in the menu.
⑷ To save the favorite web page in the desired mode, select File→Save Page As in the menu,
as shown in Figure 4. Enter the file name to be saved, select the saving directory, an click the
button to save the file.
⑸ For the personal private information stored in the browser, the Firefox provides the Clear
Private Data function through the Too ls menu. Select Tools→Clear Private Data in the
menu. Check the data to be cleared, and click the Clear Private Data Now button to clear
the personal private information, as shown in Figure 5.
Figure 3
Figure 4
Page 11

10
Figure 5
⑹ The bookmark management function of Firefox is equal to the My Favorite function of
Windows IE, but it is more powerful. To open the powerful bookmark manager, select
Bookmarks→Organize Bookmarks in the menu. With this function, you can add a
bookmark to the current page or manage bookmarks. Just experience the specific operation
by yourself!
⑺ You can watch flash programs online by using the Firefox. When you browse web pages,
Firefox can display animated pictures on the web page or play the online flash program. You
can click to play the flash program.
⑻ To obtain the help information of Fierfox, select Help→Help Contents in the menu, as
shown in Figure 6:
Figure 6
Page 12

11
2. Email
Email is a client email receiving and sending manager, that can be operated easily just like
Outlook. If you have ever operated Outlook, you can use Email Box as easy as turning your hand
over.
⑴ Click to open the Email application on the desktop, as shown in Figure 1:
Figure 1
The interface shown in Figure 1 will be displayed only when Email Box is opened for the first
time.
Click
on this interface to enter the Email Box, as shown in Figure 2.
To exit the Email Box, click
.
Click
on this interface, to enter the interface for setting the user account, as shown in
Figure 3. Set the personal account as prompted by the options on the interface.
Figure 2
Page 13

12
⑵ For example, set the account anywhere@126.com
, as described below:
① Fill in the following content on the Basic tab page of the interface in Figure 3, as shown in
Figure 4:
Name of this account: anywhere (you can fill your desired name)
Full name: anywhere
Mail address: anywhere@126.com
(the email box to be set, namely, the email box to be
managed by using Email Box)
Protocol: pop3 (depending on the email box set by the user; here the POP3 for the 126
email box is used)
Server for receiving: pop.126.com (depending on the email box set by the user; here pop
of the 126 email box is used to receive emails)
SMTP server (send): smtp.126.com (depending on the email box set by the user; her smtp
of the 126 email box is used to send emails)
User ID: anywhere
Password: ***** (the email box password set by the user; her the password for
anywhere@126.com
is used)
Figure 3
Page 14

13
② Fill in the following content on the Receive tab page of the interface in Figure 3, as shown
in Figure 5:
Check Filter messages on receiving (you can select it as needed. Here it is selected).
Default inbox: inbox (the default inbox; you can also select another one)
Check ‘Get all’ checks for new messages on this account.
③ Fill in the following content on the Send tab page of the interface in Figure 3, as shown in
Figure 6:
Check SMTP Authentication (SMTP AUTH) (this option must be selected, because
SMTP is used to send emails here).
Figure 4
Figure 5
Page 15

14
Authentication method: Automatic
User ID: anywhere
Password: ****** (the email box password)
④ Fill in the following content on the Compose tab page of the interface in Figure 3, as shown
in Figure 7:
Direct input:anywhere@126.com
Fill in the relevant email addresses in Cc, Bcc and Reply-To ad needed. Here, no email
address is filled in.
⑤ Fill in the following content on the SSL tab page of the interface in Figure 3, as shown in
Figure 8:
Check doesn’t use SSL under POP3.
Check doesn’t use SSL under SMTP.
Figure 6
Figure 7
Page 16

15
⑥ Fill in the following content on the advanced tab page of the interface in Figure 3, as
shown in Figure 9:
Check Specify SMTP Port: 25 (SMTP port 25 is used for the 126 email box. You can fill in
a different port number according to the email box type).
Check Specify POP Port: 110 (POP port 110 is used for the 126 email box. You can fill in
a different port number according to the email box type).
Check Put sent message in, and then click
to select the location for saving the sent
email. Here the sent folder is selected.
Check Put draft message in, and then click
to select the location for saving the draft
email. Here the draft folder is selected.
Check Put queued message in, and then click
to select the location for saving the
queued email. Here the queued folder is selected.
Check Put deleted message in, and then click
to select the location for saving the
deleted email. Here the deleted folder is selected.
Figure 8
Page 17

16
By now, you have performed the relevant settings for the email box anywhere@126.com
.
Then, click
on the interface in Figure 9.
⑶ Edit the account information, as shown in Figure 10.
After the above settings in Steps 1 and 2, the Edit accounts interface will display the
anywhere account. You can click
on this interface to add an account, click
to edit an existing account, click
to delete an existing account, click and
to sort the existing accounts, and click to use the selected
account as the default account.
⑷ To enter the main interface of Email Box, click
on the interface in Figure 10, as
Figure 9
Figure 10
Page 18

17
shown in Figure 11.
To get the email in the email box anywhere@126.com
just set, click Get or Get all on the
interface in Figure 11, as shown in Figure 12.
To cancel the ongoing operation of receiving email, click
on the interface in Figure
12. Now, you have a general idea about how to use the Email Box email client. Email Box
is used basically the same as Outlook. If you are an Outlook user, you will get familiar with
Email Box soon.
Figure 11
Figure 12
Page 19

18
3. Chatting
Chatting is an instant communication tool, which enables multiple persons to communicate with
each other at the same time. It provides multiple protocols for the user.
1. Configuring AIM with Pidgin
1) Click to open Chatting.
ⅰ. Click Accounts →Add/Edit to display the window as shown in Figure 1.
ⅱ. Click the Add button on the interface in Figure 1, to display the Add Account window,
as shown in Figure 2. Configure as follows:
■ Protocol: AIM
■ Screen name: Your AIM user name (excluding the symbol@ or network
domain)
■ Local alias: Leave this field null.
■ Remember password: To let Pidgin remember your password, check this box
(after this option is selected, the system will not prompt you to enter the
password when you log in to the system).
Figure 1
Page 20

19
. Click Save to save the setting.
Congratulations! Now, you can connect to the AIM service using Pidgin.
2. Configure Google Talk (XMPP) at Chatting
a) Open Chatting.
b) Click Accounts →Add/Edit to display the window as shown in Figure 1.
1. Click the Add button on the interface in Figure 1, to display the Add Account window, as
shown in Figure 2 and Figure 3. Configure as follows:
◆ Protocol: Google Talk
◆ Screen name: Your Google Talk username (excluding the symbol@ or network
domain)
◆ Domain: gmail.com
Figure 2
Figure 1
Page 21

20
◆ Resource: Gaim
◆ Password: To increase the security, you are recommended to leave this field null. To
log in automatically, enter your password.
◆ Local alias; Leave this field null.
◆ Remember Password: To let Gaim remember your password, check this box (after
this option is selected, the system will not prompt you to enter the password when you log
in to the system).
1 Click the Advance tag, and configure as follows on this tab:
Connect port:5222
Connect server: talk.google.com
Proxy Options: Use Global Proxy Settings
Figure 2
Page 22

21
⑤ Click Save to save the setting.
Congratulations! Now, you can connect to the Google Talk service using Pidgin.
The above part just simply introduces the usage of Instant Messaging. You need to use it
by setting other protocols.
Ⅱ. Entertainment
In the Entertainment, you can enjoy Flash game, multimedia, paint what you like and show your
favorite pictures, all of that give your mind a relaxation!
Figure 3
Page 23

22
1. Painting
Painting is a drawing tool, which help the user to create simple or elaborate images. These
images can be black and white or colorful, and saved in the .JPG and .PNG forms. The image can
be used as wallpaper or pasted to another file. The scanned photo can also be check and edited
using the relevant function.
To open the program, click the Painting icon on the desktop, Click the Load image file button
on the toolbar, select a file and click open, to display an interface, as shown in Figure 1.
1) Creating an image
Click the “Paint” button
on the toolbar. By default, you can draw a line by pressing
the left key of the mouse and dragging the cursor.
Click the round black button in the toolbox. A small box appears under the pencil. Click to
draw a circle.
Click the square black button in the toolbox. A small box appears under the pencil. Click to
draw a square.
Round and square button with different size are available in the toolbox. Click them to draw
the related circles and squares with various sizes.
Click the “paste Text” button
on the toolbar, and key in text in the image.
2) Applying colors
Select colors from the toolbox to paint your image colorful.
Click the fog spot button in the toolbox, to get a spraying effect in the drawing.
Click the Flood Fill button on the toolbar to fill color in the selected area.
Toolbar
Minimize
Close
Figure 1
Page 24

23
To customize your color, click the button in the toolbar.
3) Processing an image
To select a rectangle area, click Make Selection
on the toolbar.
To specify the area to be display, click Pan Window
on the toolbar.
To select the rectangle area to be copied or cut, click Make Selection on the toolbar. Drag
cursor by pressing the left key of the mouse to define the area to be copied or cut .Click the
Paste button
on the toolbar to paste the area.
To cancel/redo your operation, click the Undo
/Redo button on the toolbar.
2. Flash Player
As a flash player, Flash Player is used to play flash animation. The Flash Player of MINIBOOK is
in three play modes: normal. low quality and half size.
1) Click the Flash Player icon on the desktop to open Flash Player, as shown in Figure1.
2) Select File→Open in the menu on the interface in Figure 1,to display a dialog box. Select the
flash file to be played and then click the Open button in the dialog box to play the flash file,
as shown in Figure 2.
Menu bar Minimize
Close
Figure 1
Page 25

24
3) To play the flash file in the low quality play mode, select Control→Low quality in the menu,
as show in Figure 3.
4) To play the flash file in the half size play mode, select Control→Half size in the menu, as
show in Figure 4.
Figure 2
Figure 3
Page 26

25
5) To stop playing the currently played flash file, select File→Close in the menu.
3. Gallary
Gallery is an image-viewing tool that can be easily operated. It supports a big variety of image
browsing functions, including thumbnail generating, zoom-in and zoom-out functions.
1) Click the Gallery icon on the desktop to open Gallery as shown in Figure 1:
2) Open the folder where the images are located, and click to browse the images in this folder.
To view the next image of the currently opened image, left click on the right window in Figure 1.
3) As needed, click the
/ / / con on the toolbar to zoom in/zoom out/adjust the image
Figure 4
Figure 1
Toolbar
Minimiz
Close
Picture
list
Menu bar
File list
Page 27

26
size to a proper window/set the image proportion to 1:1.
4) Right click the picture in image list and select Delete from the shortcut menu. On the
displayed dialog box, click the
button to delete the file, or click the
button to cancel the deleting, as shown in Figure 2.
5) To rename an image, right click in the picture list and select Rename from the shortcut menu.
6) To display the image in full screen, right click in the right part of Figure 1 and select Full
Screen from the shortcut menu. To exit the full careen display, right click and select Exit Full
Screen from the shortcut menu.
7) Gallery supports image editing using other editors. Right click and select the related option
from the shortcut menu. Open the image in the editing tool and edit it.
8) To set the image as wallpaper, right click and select Edit→ Set as Wallpaper from the
shortcut menu.
9) To play images in the slideshow mode, open an image using image Gallery, right click and
select Start Slideshow from the shortcut menu.
To pause slideshow, right click and select Pause Slideshow from the shortcut menu.. To stop
slideshow, select Stop Slideshow from the shortcut menu.
4. Vivi Player
As a multimedia player, Vivi Player can be used to play files of mp3, avi, wma and other formats.
1) Click the Media Player icon on the desktop to open the interface, as shown in Figure 1.
Figure 2
Page 28

27
2) Simplified playing of multiple types of files
In the past, each type of media file format requires an independent player, and you must
download and configure these player.
With Vivi Player, you need not bother about configuration of each player. Media Player can
support playing of mp3, wma, wav, wmv, asf, avi, mpg, mpeg, mp2, mp4, mov and other video
formats.
3) Easy customization to satisfy your personal taste
When a movie is player, you can suspend playing, tune the volume, or go to your favorite part by
dragging the progress bar. You can even enlarge the picture to the full screen.
4) High quality multimedia enjoyment
Vivi Player can provide the continuous watching effect even the file in multiple media types is
played.
The following example describes how to operate Vivi Player.
Step 1: click the Vivi Player icon on the desktop to open the interface, as shown in Figure 1.
Figure 1
o to next file
Minimiz
Close
Play list
Menu bar
Vo l u m e
ogress ba
r
o to previous file
Pause
lay
u
ll screen
Page 29

28
Step 2: Click File→Open for opening a file to display the interface, as shown in Figure 2.
Step 3: Select a video file and click the Open button to return to the main interface of Media
Player. Click the playing button to play the video file, as shown in Figure 3.
Setp4: During the playing process, you can adjust the volume or click the play list button to
display the play list .Select the video file to be played from the play list, as shown in Figure 4.
Figure 1
Figure 2
Figure 3
 Loading...