

Sykla One User Manual
Model ONE
User Guide

1. Introduction
Con gratulations on pur c hasing the SYK LA Mode l ONE.
We are confident that you will be happy with the quality
and features of this elegant timepiece.
The Sykla smart watch has the follow ing features:
1. Always ON Technology ( Andro id and iPhone)
2. Handle incoming calls (Android and iPhone)
3. Handle SMS messaging (Android)
4. Notification of SMS (Android)
5. Weather displa y (Android)
6. Pedometer (Android and iPhone)
7. Heart rate monitor (A ndroi d and iPhone)
8. Phone anti-lost (Android)
9. Find phone (Android)
10. Camera remote contr ol (Android)
11. Waterproof
2

Warnings:
The watch is made to function in an amb ient
temperature of ~15 to 120 degrees Fahrenheit.
When charging please make sure there is dry
surface, good ventilation and sufficient clearance.
When connecting to the USB port plea se us e the
provided USB cable only.
If you disassemble, reverse e ngineer or modify the
device in any way it WILL void your warranty.
The device uses a Li-ion battery, whic h contains
harmful che micals. User beware.
The battery may burst if handled incorrectly. Please
do not expos e the battery t o hard knocks,
puncture it, and keep it away from extreme heat or
fire.
To discard the watch, please take the watch to your
3

local recycling or w aste manag ement facility for
proper disposal.
Improper removal of watch bands, screws, or back
cover w ill damage the watch and void the
warranty.
2. In The Box
Sykla Smart Watch
USB cable and wall charger
User Guide
3. Bef ore using the Sykla Smart Watch
Make sure the Smart Watch is fully charged. Please
charge the Smart W atch for 3 hours before use.
4
Smart Watch overview:
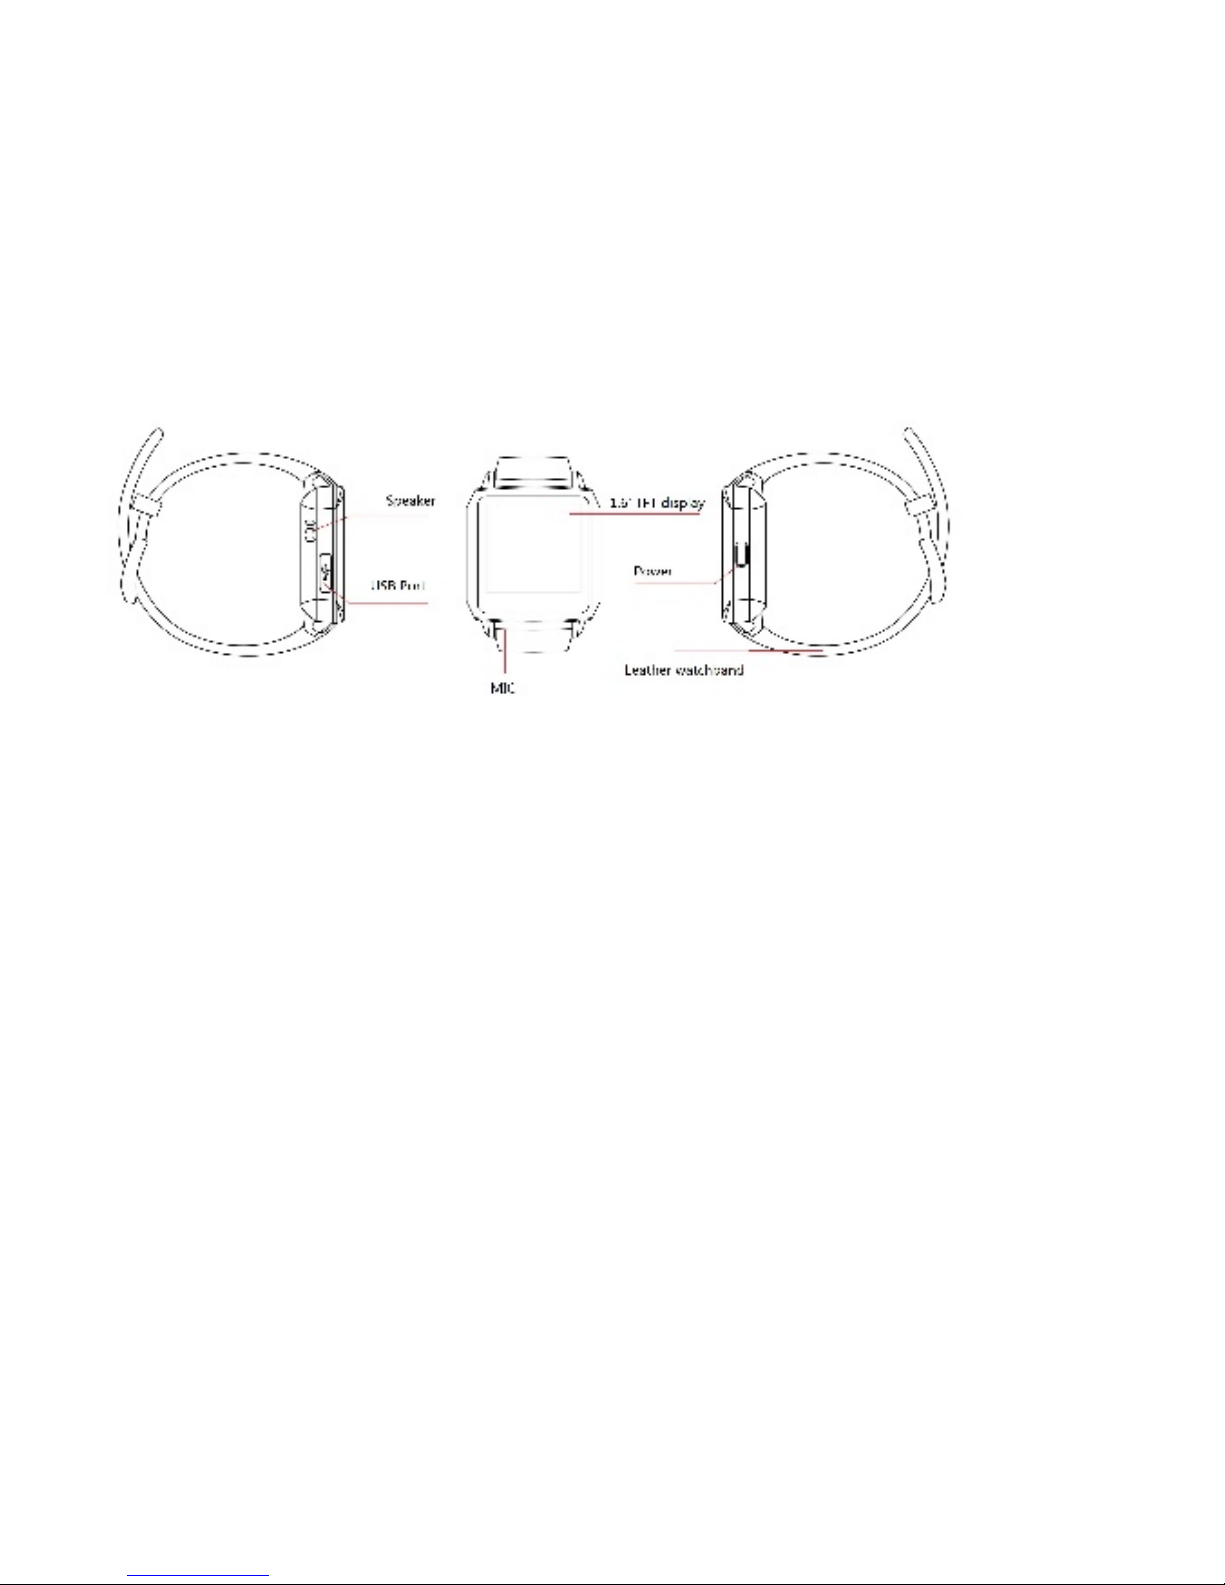
Figure 1: Smart Watch Physical Characteristics
Figure 1 shows the loc ation of the physical interfaces:
• 1.6” TFT display – dis pla y t he user interface on
watch, and ALWAYS display t he tim e as a regular
watch in standby state
• USB port – for charging
• Power – long press to switch ON/Off the Smart
Watch. S h o rt pres s to sw i tch the display On/Off and
5

to change t ime display image
• MIC and speaker – For voice communic ati on
3.1 Powe r On/ Off
Press and hold the power button 5 seconds to turn on/off
th e device.
3.2 Reset the Smart watch
Press power button for over 6 seconds to reset when the
watch is dead.
4A. Getting Started (Androi d)
The Smar t Watc h wor ks in tandem wi th an Android
Smart Phone through Bluetooth. T he prerequisite s are :
a) The Android version shall be at least 2.2.
b) The smart phone needs to be loaded w ith the
“SmartWatch” Applic ation package (AP K) to
6

interwork with Smart Watch. The APK is obtained
by visiting Google Play, download to the smart
phone and install. This is a simple procedure.
c) Procedure to download and install the
“Smartwatch” into the Smart phone.
4.1 Android APK download and installation
Turn on smart watch →Main menu → APP
download→Scan the QR code by phone (Fig.2)→ Visit
the link to download the APK (Fig.3)→Install the APK on
the phone.
7

Fig.2 Fig.3
4.2 Connect Smart Watch with the phone using
Bluetooth.
Settings on your phone→ Click Bluetooth ( Fig.4 ) →
8
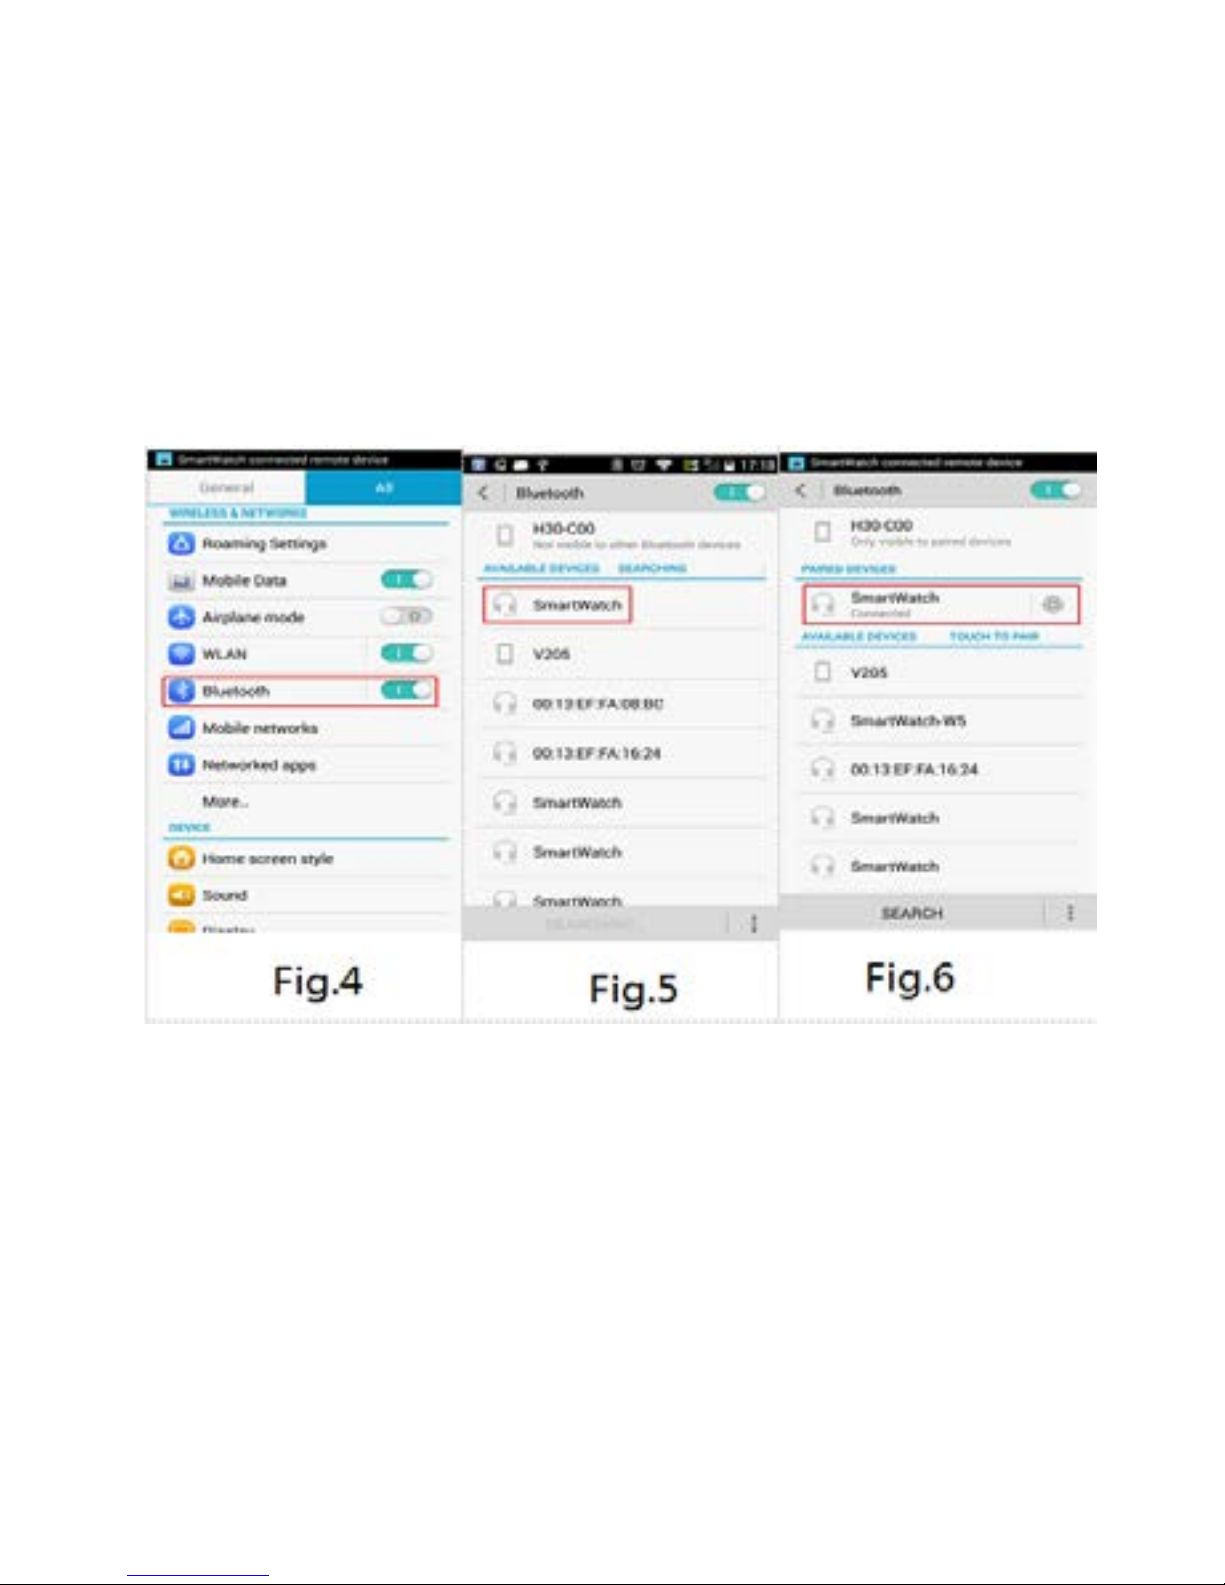
Find "Smartwatch" in Bluetooth device list ( Fig.5 ) →
Pair with phone ( Fig.6 ).
9

4B. Getting Started (iPhone)
When connect via Bluet ooth to your iPhone the Smar t
Watch has some basic and useful func tional it y l ike
making and receiving phone calls and use Siri voice
control.
a) Make sure Bluetooth and Visible is enabled on t he
Smart Watch.
b) On your iPhon e go to Settings > Bluetooth
c) Locat e t he “SmartWat ch” and connect to i t
d) The Smart Watch will indicate “Connected”
5. Smart W atch – User interaction and navigation
Navigation:
The Smart watch uses Tap and Swipe for navigation for
going from one menu to ano the r.
10
For menus with sub-menus, returning to the previous
menu is by swiping downwards on the screen.
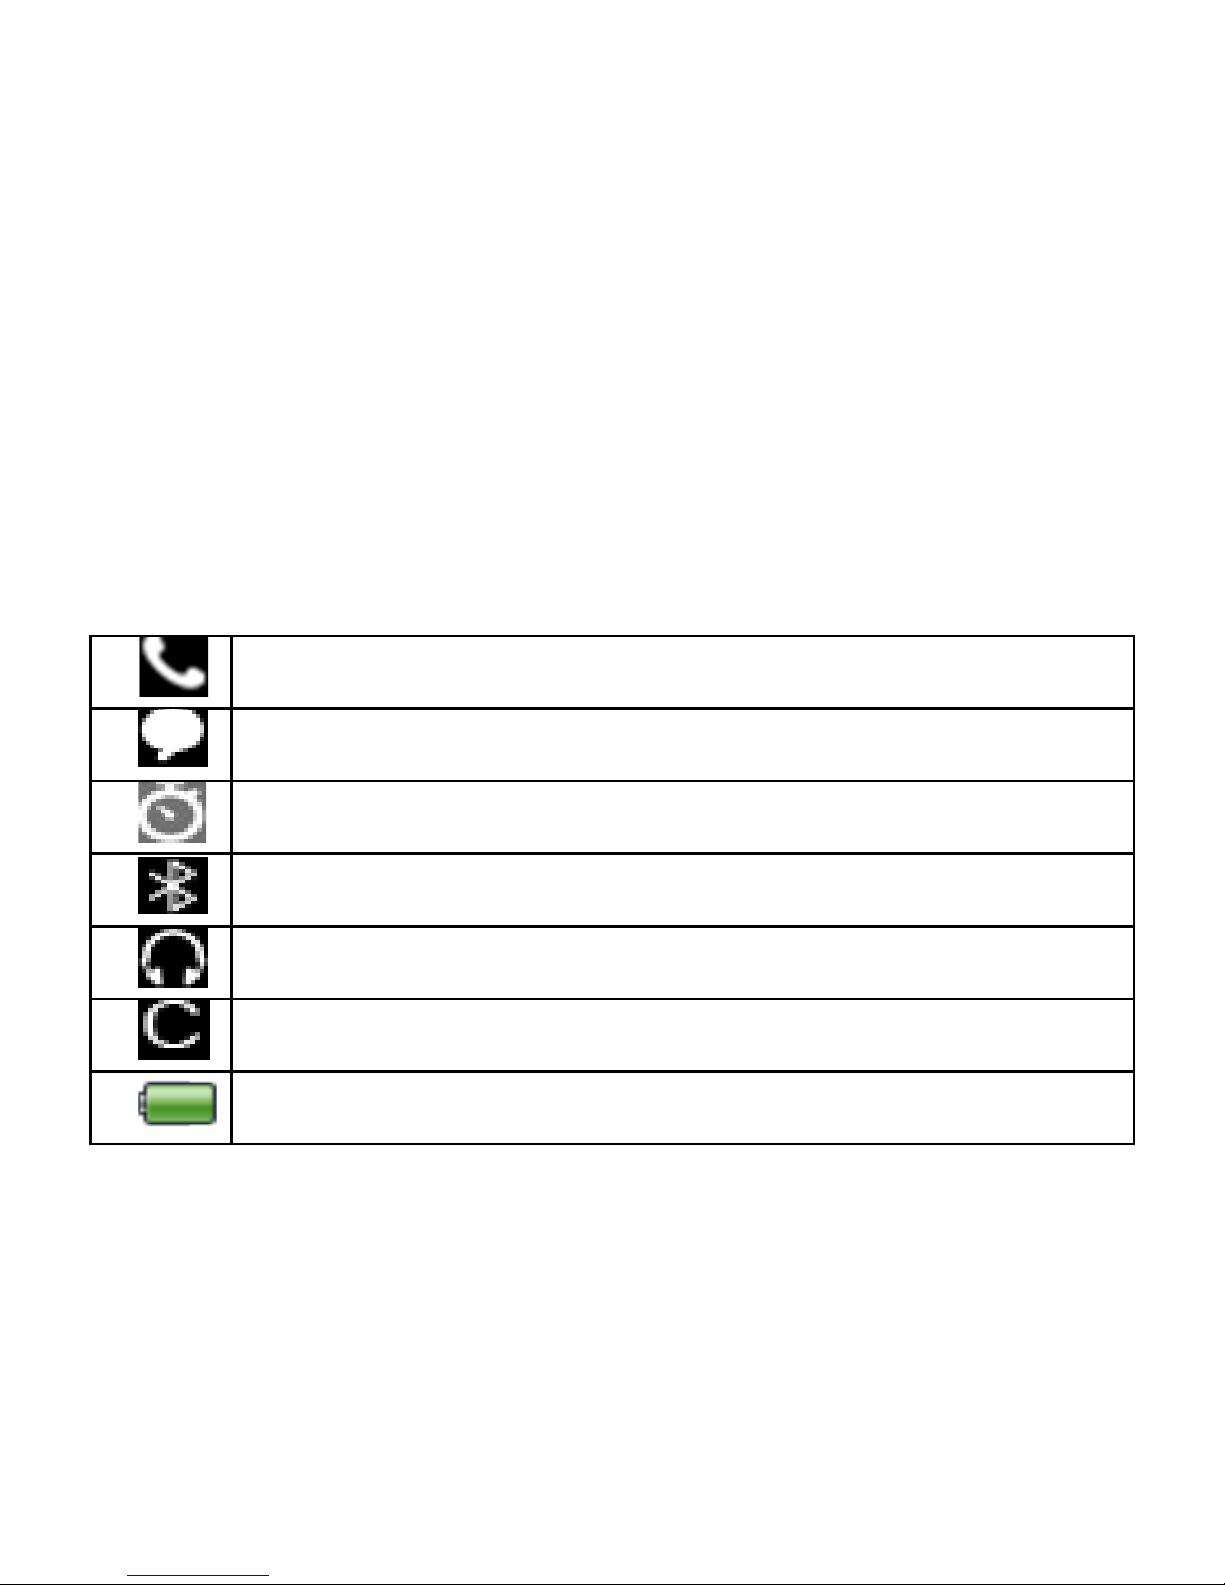
Smart Watc h notifications :
Smart w atch has the following notification icons:
Mis sed c alls
Unread message
Stopwatch on
Bl u etooth on
Smart watch is connected wi t h phone
Smart watc h is synchronized with phone
Battery status
11

6. Functions and Settings on the APK (Android
Only)
6.1 Find watch:
Click on "Find watch" menu ( Fig.7 ), Smart Watch will
ring and v ibrate ( Fig.8 ).
6. 2 C amera:
Click on the "camera" menu ( Fig.9 ) and press OK to
confirm ( Fig.10 ). The watch will also display the same
interface ( Fig.11 ), and photos can be taken by pressing
the round button on t he watch.
6.3 Sync contacts:
Click“Sync contacts”( Fig.12) → Confirm the request in
the smart watch ( Fig.13 )→ Synchronize the contacts
( Fig.14 ).
12
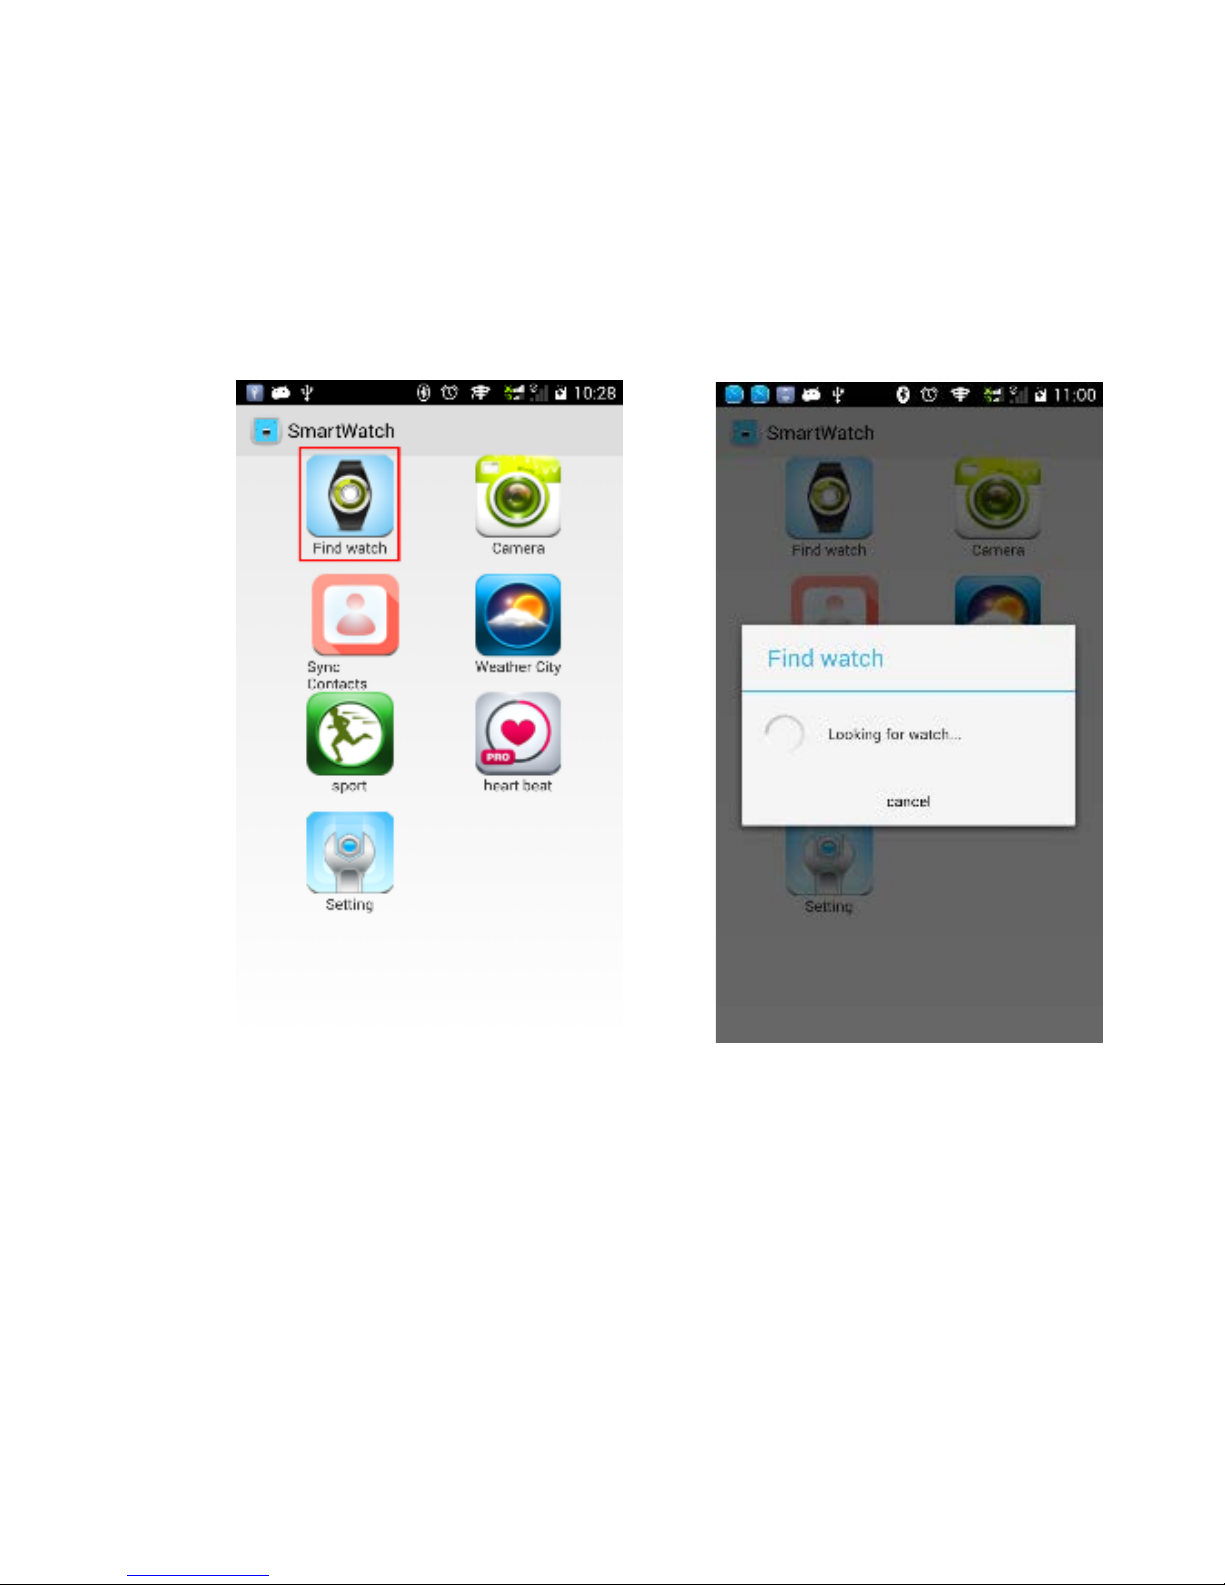
Fig.7
Fig.8
13

14
 Loading...