

SY Electronic Technical 4XC00A01 User Manual

- 0 -
Instruction MANUAL
Scouting Trail Camera
None Cellular Model 4G Model
(Any contents related to 4G/MMS are for 4G model only.)
V1.1

- 1 -
Contents
1. Quick Start.............................................................................................................................. - 1 -
1.1 What in the Box?...........................................................................................................- 1 -
1.2 How to Get the Camera Ready?................................................................................ - 1 -
1.3 How to Setup the Camera?.........................................................................................- 2 -
1.3 Camera Default Settingsin Red Letter............................................................................. - 3 -
2. Whole View and Details of Camera........................................................................................- 4 -
2.1 Figure 1: Front View of Camera;..................................................................................... - 4 -
2.2 Figure 2: Bottom View of Camera;..................................................................................- 5 -
2.3 Figure 3: Internal, Side and Back View of Camera......................................................... - 5 -
3. Introduction...............................................................................................................................- 6 -
3.1 Fully Functionality Introduction...................................................................................... - 6 -
3.2 Power Supply....................................................................................................................- 6 -
3.3 SD Card Selection............................................................................................................ - 7 -
3.5 USB Connection............................................................................................................... - 8 -
3.6 Attention........................................................................................................................... - 8 -
3.7 Key Features..................................................................................................................... - 9 -
4. Operation List.........................................................................................................................- 10 -
4.1 Video/Photo Playback.................................................................................................... - 10 -
4.2 Delete..............................................................................................................................- 10 -
4.3 Format of SD Card......................................................................................................... - 10 -
4.4 Auto Power Off...............................................................................................................- 10 -
4.5 Operation Menu..............................................................................................................- 10 -
5. Specification............................................................................................................................ - 16 -
6. Trouble Shooting.....................................................................................................................- 17 -
6.1 Photos Do Not Capture Subject of Interest....................................................................- 17 -
6.2 Camera Stops Taking Images or Won’t Take Images.................................................... - 17 -
6.3 Night Vision Flash Range Doesn’t Meet Expectation................................................... - 17 -
6.4 Photos Do Not Capture Subject of Interest....................................................................- 18 -
7. Warranty................................................................................................................................. - 18 -
8. FCC Warning..........................................................................................................................-19-
- 1 -
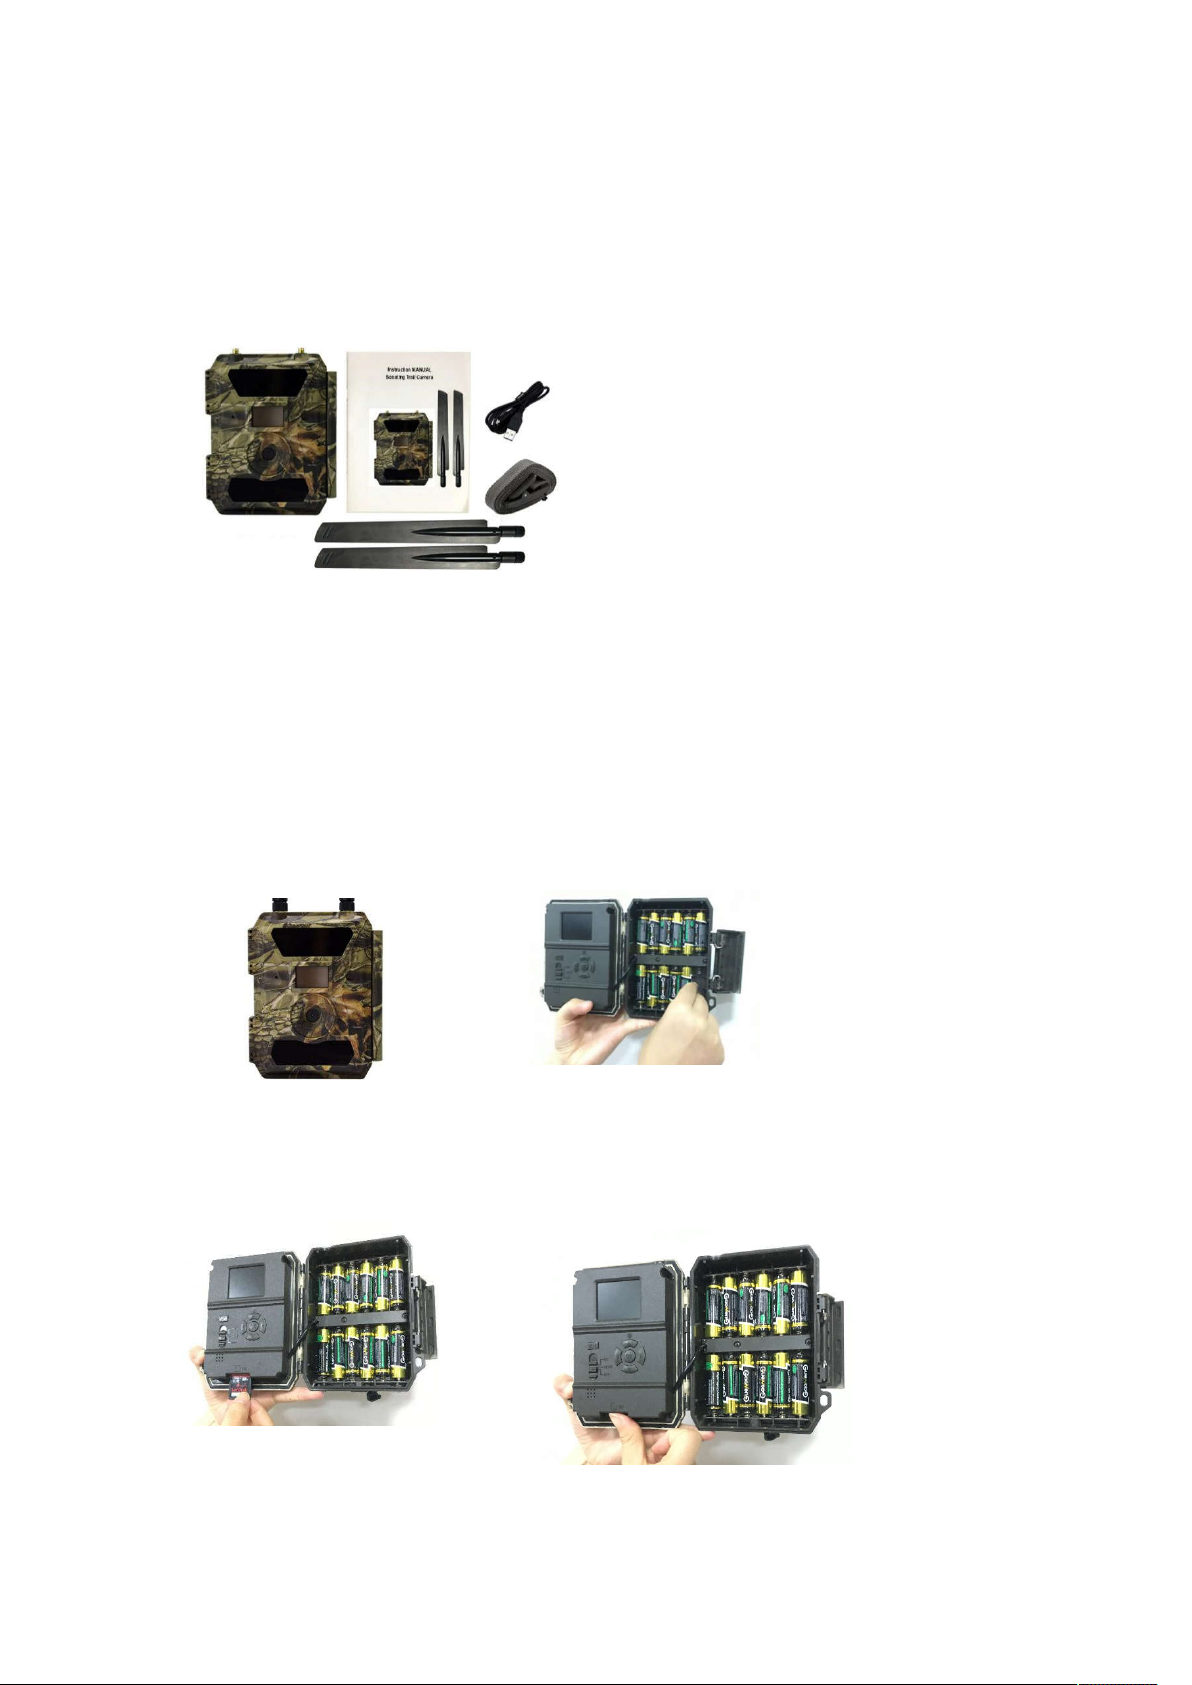
1. Quick Start
Antenna
1.1 What in the Box?
Trail camera x 1
Instruction manual x 1
Mounting strap ×1
×2 (4G Model Only)
1.2 How to Get the Camera Ready?
1. Insert the batteries
Open camera house and insert the batteries as electrodes marked in battery
case.
Note: 12AA Alkaline or Ni-MH are recommended. For better performance, pls
choose the “Battery Type” of the batteries in using.
2. Insert the SD card
Note: 8-32GB SD card is recommended. Please insert it with correct direction
as marked.

- 2 -
3. Mount the Antenna & Insert SIM card (for 4G Model Only)
1.3 How to Setup the Camera?
1. Power on the Camera
Switch to ON; camera is ready to work upon motion triggers (screen will not
light up upon “ON”). You can mount it out to work directly after this if default
settings are preferred. Pls refer to page3 below for default settings in red
letters.
2. Configure Camera Settings
Switch to SETUP, screen will light up. Press M key, you will enter the menu to
view & change settings. Please press arrow keys for navigation and OK key to
confirm settings.
Note: please switch to ON to enable the camera to work after you get preferred
settings.
3. How to Connect the Camera to Network (for 4G Model Only)?
Different from none cellular models, the 4G model has a signal “Searching”
process when you switch the power key to SETUP.
If it comes with a signal bar and no other pop-up, it means the network is
auto-matched and no manual setup is needed. Fill in phones/emails in “Send
to”, you will be able to receive photos upon motion triggers.
If it comes with a pop-up “SIM Auto Match failed…”, please go to “SIM Auto
Match” under “4G”, select “Manual”, and fill in local operator APN details in
“Manual Setup”, the camera will connect to their network to send photos.
Note: This camera can send photos to 2 phones & 2 emails. It’s set to send
photos to phones via MMS, and to emails via SMTP (data). If you prefer more
personalized way of sending, please configure in menu accordingly.

- 3 -
1.3 Camera Default Settingsin Red Letter
Cam
Cam ID
Cam Mode
Image Size
Night Mode
Multi-shot
PIC+Video/Video
ON
Video Size
Video Length
PIR
Sensitivity
Delay
Time Lapse
Timer
4G
4G Switch
ON/OFF
SIM Auto Match
Manual Setup
MMS
SMTP
FTP
Send To
SIM PIN
ON
SMTP/FTP Pic
Size
Max Num/Day
SMS Ctrl
Other
Language
Date/Time
Time Stamp
Battery Type
Frequency
SD Cycle
Reset
Password
About
OFF/ ON
Photo/ Video
PIC + VIDEO
IR LEDs
All/ Part
5MP/8MP/12MP
Balanced
Min. Blur
Max Range
IP/2/3/4/5P
1080P/720P/D1
High/Middle/Low
OFF/ON
OFF/ON
OFF/ON
Auto/Manual
MMS/4G
ON/OFF
Default/Manual/O
FF
ON/OFF
Phone/Email
640*480/1920*144
0
English…
Month : date :
year;
hour : minute :
second
OFF/ON
Alkaline/NI-MH
50Hz/60Hz
OFF/ON
Yes/No
OFF/ON(6 digits)
05~59Secs
Ver: /IMEI: /MCU:
Unlimited/1~99
By Trigger/All the
Time
Daily Report
OFF/ON
- 4 -
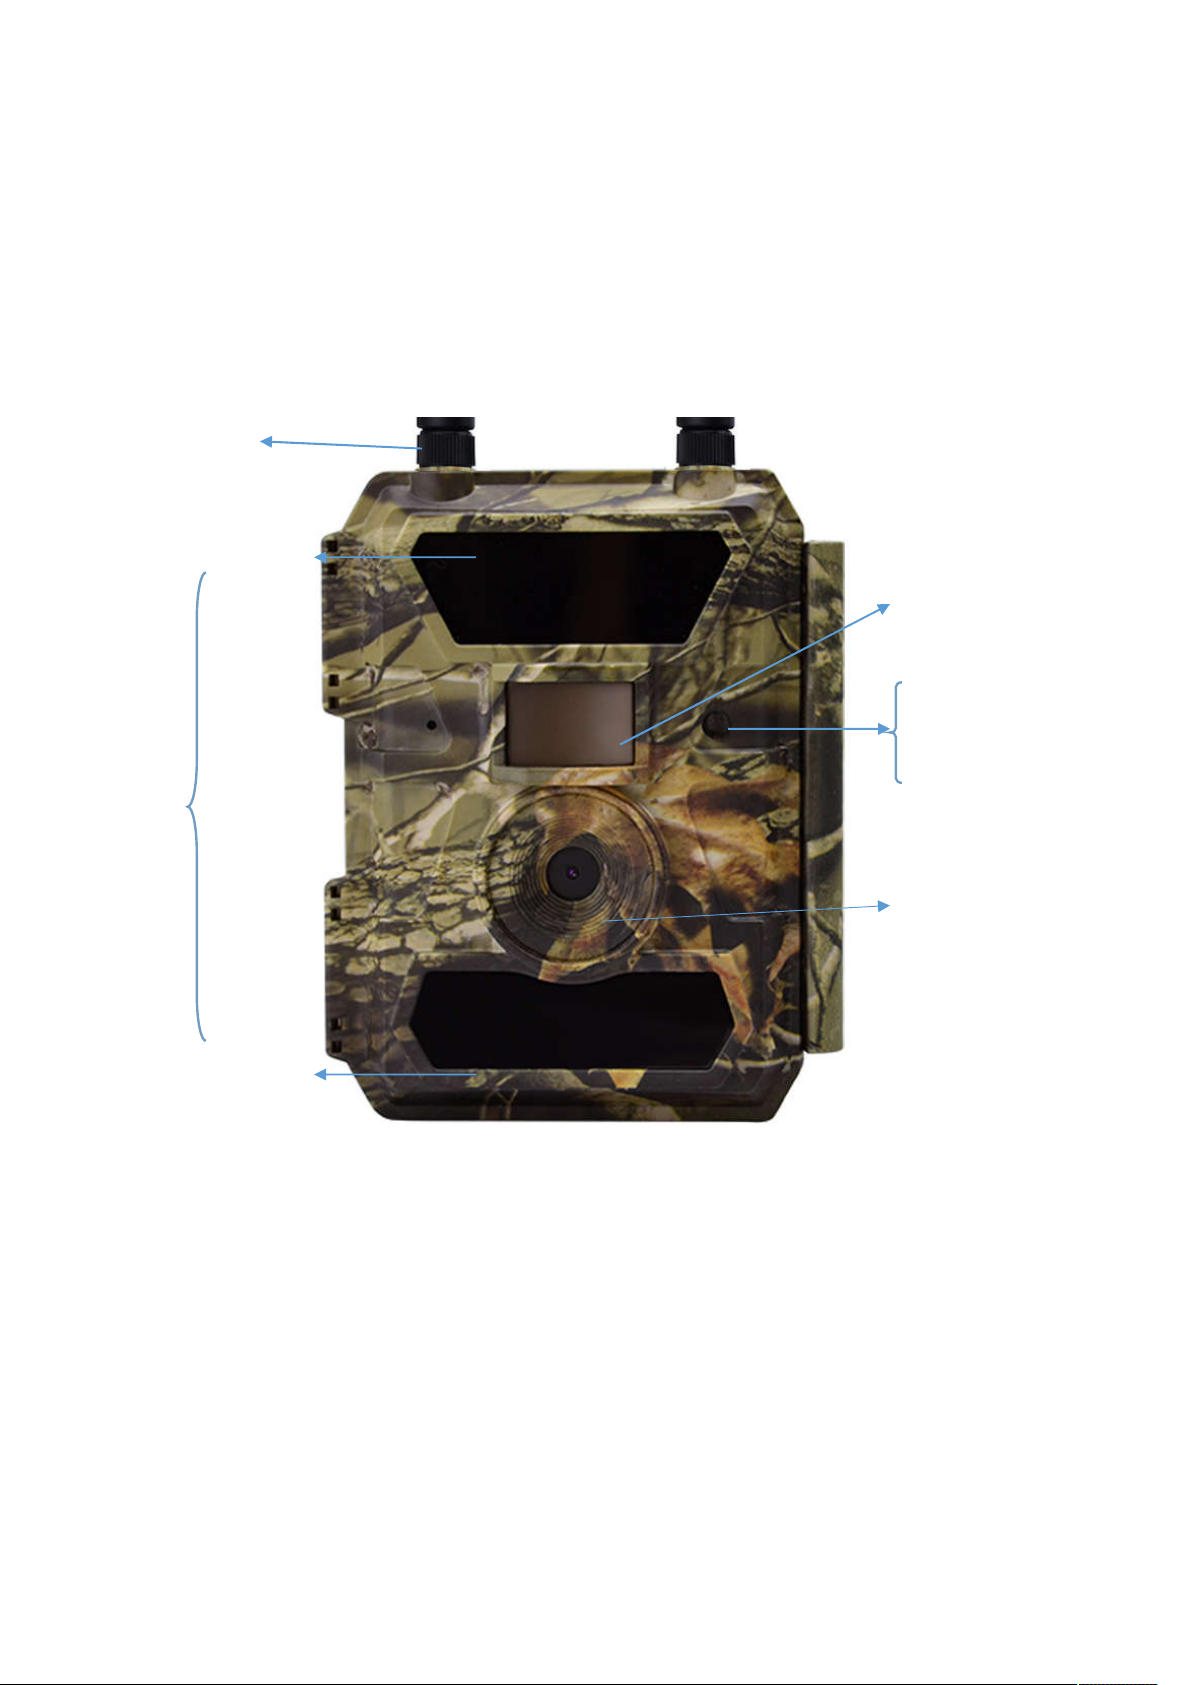
2. Whole View and Details of Camera
Light Sensor
2.1 Figure 1: Front View of Camera;
Antenna
28 IR LEDs
PIR Sensor
Indicator
Light
(day/night)
58 IR LEDs
in TotalLens
30 IR LEDs

- 5 -
2.2 Figure 2: Bottom View of Camera;
SIM CARD Golden Part Faces Front Housing Side
SD Card Slot Battery Slot
DC in USB Port
2.3 Figure 3: Internal, Side and Back View of Camera
MENU Button LCD Colorful Screen
Navigation Buttons/ OK Button
Power Switch
(ON/ OFF/ SETUP Test Mode) Battery Slot
 Loading...