

Page 1

DataWindow Designer User’s Guide
DataWindow .NET
2.0
™
Page 2

DOCUMENT ID: DC00043-01-0200-01
LAST REVISED: March 2006
Copyright © 2004-2006 by Sybase, Inc. All rights reserved.
This publication pertains to Sybase software and to any subsequent release until otherwise indicated in new editions or technical notes.
Information in this document is subject to change without notice. The software described herein is furnished under a license agreement,
and it may be used or copied only in accordance with the terms of that agreement.
To order additional documents, U.S. and Canadian customers should call Customer Fulfillment at (800) 685-8225, fax (617) 229-9845.
Customers in other countries with a U.S. license agreement ma y co ntac t Customer Fulfillment via the above fax number. All other
international customers should contact their S ybase subsidiary or local distributor. Upgrades are provided only at regularly scheduled
software release dates. No part of this publication may be reproduced, transmitted, or translated in any form or by any means, electronic,
mechanical, manual, optical, or otherwise, without the prior written permission of Sybase, Inc.
Sybase, the Sybase logo, ADA Workbench, Adaptable Windowing Environment, Adaptive Component Architecture, Adaptive Server,
Adaptive Server Anywhere, Adaptive Server Enterprise, Adaptive Server Enterprise Monitor, Adaptive Server Enterprise Replication,
Adaptive Server Everywhere, Adaptive Warehouse, Afaria, Answers Anywhere, Anywhere Studio, Application Manager, AppModeler,
APT Workbench, APT-Build, APT-Edit, APT-Execute, APT-Translator, APT-Library, AvantGo Mobile Delivery, AvantGo Mobile
Inspection, AvantGo Mobile Marketing Channel, AvantGo Mobile Pharma, AvantGo Mobile Sales, AvantGo Pylon, AvantGo Pylon
Application Server, AvantGo Pylon Conduit, AvantGo Pylon PIM Server, AvantGo Pylon Pro, Backup Server, BizTracker,
ClearConnect, Client-Library, Client Services, Convoy/DM, Copernicus, Data Pipeline, Data Workbench, DataArchitect, Database
Analyzer, DataExpress, DataServer, DataWindow, DataWindow .NET, DB-Library, dbQueue, Developers Workbench, DirectConnect,
DirectConnect Anywhere, Distribution Director, e-ADK, E-Anywhere, e-Biz Impact, e-Biz Integrator, E-Whatever, EC Gateway,
ECMAP, ECRTP, eFulfillment Accelerator, Embedded SQL, EMS, Enterprise Application Studio, Enterprise Client/Server, Enterprise
Connect, Enterprise Data Studio, Enterprise Manager, Enterprise SQL Server Manager, Enterprise Work Architecture, Enterprise Work
Designer, Enterprise Work Modeler, eProcurement Accelerator , EW A, F inancial Fusion, F inancial Fusion Server, Gateway Manager,
GlobalFIX, iAnywhere, iAnywhere Solutions, ImpactNow, Industry W arehouse Studio, InfoMaker, Information Anywhere, Information
Everywhere, InformationConnect, InternetBuilder, iScript, Jaguar CTS, jConnect for JDBC, M2M Anywhere, Mach Desktop, Mail
Anywhere Studio, Mainframe Connect, Maintenance Express, Manage Anywhere Studio, M-Business Anywhere, M-Business Channel,
M-Business Network, M-Business Suite, MDI Access Server, MDI Database Gateway, media.splash, MetaWorks, mFolio, Mirror
Activator, MySupport, Net-Gateway, Net-Library, New Era of Networks, ObjectConnect, ObjectCycle, OmniConnect, OmniSQL
Access Module, OmniSQL Toolkit, Open Biz, Open Client, Open ClientConnect, Open Client/Server, Open Client/Server Interfaces,
Open Gateway, Open Server, Open ServerConnect, Open Solutions, Optima++, PB-Gen, PC APT Execute, PC DB-Net, PC Net Library,
Pharma Anywhere, PocketBuilder, Pocket PowerBuilder, Power++, power.stop, PowerAMC, PowerBuilder, PowerBuilder Foundation
Class Library, PowerDesigner, PowerDimensions, PowerDynamo, PowerScript, PowerSite, PowerSocket, Powersoft, PowerStage,
PowerStudio, PowerTips, Powersoft Portfolio, Powersoft Professional, PowerWare Desktop, PowerWare Enterprise, ProcessAnalyst,
QAnywhere, Rapport, RemoteWare, RepConnector, Replication Agent, Replication Driver, Replication Server, Replication Server
Manager, Replication Toolkit, Report-Execute, Report Workbench, Resource Manager , RFID Anywhere, R W -DisplayLib, R W -Library ,
Sales Anywhere, SDF, Search Anywhere, Se c ure SQL Server, Secure SQL Toolset, Security Guardian, SKILS, smart.partners,
smart.parts, smart.script, SOA Anywhere, SQL Advantage, SQL Anywhere, SQL Anywhere Studio, SQL Code Checker, SQL Debug,
SQL Edit, SQL Edit/TPU, SQL Everywhere, SQL Modeler, SQL Remote, SQL Server, SQL Server Manager, SQL SMART, SQL
Toolset, SQL Server/CFT, SQL Server/DBM, SQL Server SNMP SubAgent, SQL Station, SQLJ, STEP, SupportNow, S.W.I.F.T.
Message Format Libraries, Sybase Central, Sybase Client/Server Interfaces, Sybase Financial Server, Sybase Gateways, Sybase IQ,
Sybase MPP, Sybase SQL Desktop, Sybase SQL Lifecycle, Sybase SQL Workgroup, Sybase User Workbench, SybaseW ar e, Syber
Financial, SyberAssist, SybFlex, SyBooks, System 10, System 11, System XI (logo), SystemTools, Tabular Data Stream, TradeForce,
Transact-SQL, Translation Toolkit, UltraLite, UltraLite.NET, UNIBOM, Unilib, Uninull, Unisep, Unistring, URK Runtime Kit for
UniCode, VisualWriter, VQL, WarehouseArchitect, Warehouse Control Center, Warehouse Studio, Warehouse WORKS, Watcom,
Watcom SQL, Watcom SQL Server, Web Deployment Kit, Web.PB, Web.SQL, WebSights, WebViewer, WorkGroup SQL Server, XALibrary, XA-Server, XcelleNet, and XP Server are trademarks of Sybase, Inc. 10/05
Unicode and the Unicode Logo are registered trademarks of Unicode, Inc.
All other company and product names used herein may be trademarks or registered trademarks of their respective companies.
Use, duplication, or disclosure by the government is subject to the restrictions set forth in subparagraph (c)(1)(ii) of DFARS 52.227-7013
for the DOD and as set forth in FAR 52.227-19(a)-(d) for civilian agencies.
Sybase, Inc., One Sybase Drive, Dublin, CA 94568.
Page 3

Contents
About This Book.......................................................................................................................... xv
PART 1 THE DATAWINDOW DESIGNER ENVIRONMENT
CHAPTER 1 Working with DataWindow Designer............................................. 3
About DataWindow Designer........................................................... 4
The DataWindow Designer environment.......................................... 4
About the PowerBar .................................................................. 5
Working with projects....................................................................... 6
Working with DataWindow objects................................................... 7
Creating new DataWindow objects ........................................... 8
Opening existing DataWindow objects...................................... 8
Running or previewing DataWindow objects............................. 9
Working in painters ........................................................................ 10
Using views in painters............................................................ 10
Using pop-up menus ............................................................... 15
Defining colors......................................................................... 16
Working with tools.......................................................................... 17
Using the file editor.................................................................. 17
Using the To-Do List................................................................ 18
Setting properties........................................................................... 20
Using toolbars ................................................................................ 21
Toolbar basics......................................................................... 21
Drop-down toolbars................................................................. 21
Controlling the display of toolbars ........................................... 22
Moving toolbars using the mouse............................................ 23
Customizing toolbars............................................................... 23
Creating new toolbars ............................................................. 28
Using online Help........................................................................... 29
Customizing keyboard shortcuts.................................................... 30
Changing fonts............................................................................... 31
DataWindow Desi gne r User’s Guide iii
Page 4

Contents
How your DataWindow Designer environment is managed........... 32
About the registry.................................................................... 32
About the initialization file........................................................ 33
CHAPTER 2 Working with Libraries.................................................................. 35
About libraries................................................................................ 35
About the Library painter................................................................ 36
Working with libraries..................................................................... 37
Displaying libraries and objects............................................... 37
Using the pop-up menu........................................................... 38
Controlling columns that display in the List view..................... 38
Selecting objects..................................................................... 39
Filtering the display of objects................................................. 39
Filtering the display of libraries and folders............................. 40
Opening and previewing objects............................................. 40
Copying, moving, and deleting objects.................................... 40
Setting the root........................................................................ 42
Moving back, forward, and up one level.................................. 42
Modifying comments ............................................................... 43
Deleting libraries...................................................................... 44
Optimizing libraries......................................................................... 44
Regenerating library entries........................................................... 45
Migrating libraries.................................................................... 45
Exporting and importing entries ..................................................... 46
Creating a deployment library (PBD file)........................................ 48
Including additional resources in the PBD file......................... 48
What happens at runtime........................................................ 49
Creating a library directory report................................................... 49
CHAPTER 3 Managing the Database................................................................. 51
Working with database components.............................................. 51
Managing databases...................................................................... 54
Using the Database painter............................................................ 55
Modifying database preferences............................................. 58
Logging your work................................................................... 59
Creating and deleting an Adaptive Server Anywhere database..... 60
Working with tables........................................................................ 62
Creating a new table from scratch........................................... 62
Creating a new table from an existing table............................ 63
Specifying column definitions.................................................. 64
Specifying table and column properties .................................. 64
Altering a table ........................................................................ 68
Cutting, copying, and pasting columns.................................... 70
iv
DataWindow .NET
Page 5

Contents
Closing a table......................................................................... 70
Dropping a table...................................................................... 70
Viewing pending SQL changes............................................... 71
Printing the table definition...................................................... 72
Exporting table syntax............................................................. 72
About system tables................................................................ 73
Creating and editing Sybase Adaptive Server temporary
tables................................................................................ 74
Working with keys.......................................................................... 75
Working with indexes..................................................................... 79
Working with database views......................................................... 81
Manipulating data........................................................................... 86
Retrieving data........................................................................ 86
Modifying data......................................................................... 87
Sorting rows ............................................................................ 88
Filtering rows........................................................................... 89
Viewing row information .......................................................... 90
Importing data ......................................................................... 90
Printing data............................................................................ 91
Saving data ............................................................................. 91
Creating and executing SQL statements ....................................... 92
Building and executing SQL statements ................................. 92
Customizing the editor............................................................. 95
Controlling access to the current database.................................... 96
PART 2 DATAWINDOWS
CHAPTER 4 Defining DataWindow Objects..................................................... 99
About DataWindow objects............................................................ 99
DataWindow object examples............................................... 100
Choosing a presentation style...................................................... 101
Using the Tabular style.......................................................... 102
Using the Freeform style ....................................................... 102
Using the Grid style............................................................... 103
Using the Label style............................................................. 103
Using the N-Up style ............................................................. 105
Using the Group style............................................................ 106
Using the Composite style..................................................... 107
Using the Graph and Crosstab styles.................................... 108
Using the TreeView style....................................................... 108
Building a DataWindow object ..................................................... 109
Selecting a data source................................................................ 110
DataWindow Designer User’s Guide v
Page 6

Contents
Using Quick Select....................................................................... 112
Selecting a table.................................................................... 113
Selecting columns................................................................. 114
Specifying sorting criteria...................................................... 115
Specifying selection criteria................................................... 115
Using SQL Select......................................................................... 121
Selecting tables and views.................................................... 122
Selecting columns................................................................. 124
Displaying the underlying SQL statement............................. 125
Joining tables ........................................................................ 126
Using retrieval arguments ..................................................... 129
Specifying selection, sorting, and grouping criteria............... 130
Using Query ................................................................................. 136
Using External.............................................................................. 136
Using Stored Procedure............................................................... 137
Using ADO DataSet..................................................................... 139
Choosing DataWindow object-wide options................................. 141
Generating and saving a DataWindow object.............................. 142
About the extended attribute system tables and
DataWindow objects....................................................... 143
Saving the DataWindow object ............................................. 144
Modifying an existing DataWindow object............................. 144
Defining queries........................................................................... 145
Previewing the query............................................................. 146
Saving the query ................................................................... 146
Modifying a query.................................................................. 147
What's next................................................................................... 147
CHAPTER 5 Enhancing DataWindow Objects................................................ 149
Working in the DataWindow painter............................................. 150
Understanding the DataWindow painter Design view........... 152
Using the DataWindow painter toolbars................................ 154
Using the Properties view in the DataWindow painter .......... 155
Selecting controls in the DataWindow painter....................... 156
Resizing bands in the DataWindow painter Design view...... 157
Using zoom in the DataWindow painter................................ 157
Undoing changes in the DataWindow painter....................... 158
Using the Preview view of a DataWindow object......................... 158
Retrieving data...................................................................... 159
Modifying data....................................................................... 161
Viewing row information........................................................ 162
Importing data into a DataWindow object.............................. 163
Using print preview................................................................ 163
Printing data.......................................................................... 165
vi
DataWindow .NET
Page 7

Contents
Working in a grid DataWindow object ................................... 166
Saving data in an external file...................................................... 168
Saving the data as PDF ........................................................ 168
Saving the data in HTML Table format.................................. 169
Working with PSR files.......................................................... 170
Modifying general DataWindow object properties........................ 171
Changing the DataWindow object style................................. 171
Setting colors in a DataWindow object.................................. 172
Specifying properties of a grid DataWindow object............... 173
Specifying pointers for a DataWindow object........................ 174
Defining print specifications for a DataWindow object .......... 174
Modifying text in a DataWindow object ................................. 178
Defining the tab order in a DataWindow object..................... 179
Naming controls in a DataWindow object.............................. 180
Using borders in a DataWindow object................................. 181
Specifying variable-height bands in a DataWindow object.... 182
Modifying the data source of a DataWindow object.............. 183
Storing data in a DataWindow object using the Data view........... 185
What happens at runtime...................................................... 187
Retrieving data............................................................................. 187
Prompting for retrieval criteria in a DataWindow object ........ 187
Retrieving rows as needed.................................................... 188
Saving retrieved rows to disk ................................................ 189
CHAPTER 6 Controlling Updates in DataWindow Objects........................... 191
About controlling updates............................................................. 191
What you can do ................................................................... 192
Specifying the table to update...................................................... 193
Specifying the unique key columns.............................................. 193
Specifying an identity column....................................................... 194
Specifying updatable columns ..................................................... 194
Specifying the WHERE clause for update/delete......................... 195
Specifying update when key is modified...................................... 197
Using stored procedures to update the database........................ 198
CHAPTER 7 Working with Controls in DataWindow Objects....................... 201
Adding controls to a DataWindow object ..................................... 201
Adding columns to a DataWindow object.............................. 201
Adding text to a DataWindow object ..................................... 202
Adding drawing controls to a DataWindow object................. 203
Adding a group box to a DataWindow object........................ 203
Adding pictures to a DataWindow object............................... 204
Adding computed fields to a DataWindow object.................. 205
DataWindow Designer User’s Guide vii
Page 8

Contents
Adding buttons to a DataWindow object ............................... 210
Adding graphs to a DataWindow object................................ 213
Adding InkPicture controls to a DataWindow object.............. 213
Adding reports to a DataWindow object................................ 214
Reorganizing controls in a DataWindow object............................ 214
Displaying boundaries for controls in a DataWindow object . 215
Using the grid and the ruler in a DataWindow object............ 215
Deleting controls in a DataWindow object............................. 216
Moving controls in a DataWindow object .............................. 216
Copying controls in a DataWindow object............................. 216
Resizing controls in a DataWindow object............................ 217
Aligning controls in a DataWindow object............................. 218
Equalizing the space between controls in a DataWindow
object.............................................................................. 218
Equalizing the size of controls in a DataWindow object........ 219
Sliding controls to remove blank space in a DataWindow
object.............................................................................. 219
Positioning controls in a DataWindow object............................... 221
Rotating controls in a DataWindow object ................................... 222
CHAPTER 8 Displaying and Validating Data .................................................. 225
About displaying and validating data............................................ 225
Presenting the data............................................................... 226
Validating data....................................................................... 227
About display formats................................................................... 227
Working with display formats ....................................................... 228
Working with display formats in the Database painter .......... 228
Working with display formats in the DataWindow painter ..... 230
Defining display formats............................................................... 231
Number display formats ........................................................ 233
String display formats............................................................ 235
Date display formats.............................................................. 235
Time display formats............................................................. 237
About edit styles........................................................................... 238
Working with edit styles................................................................ 240
Working with edit styles in the Database painter................... 240
Working with edit styles in the DataWindow painter.............. 242
Defining edit styles....................................................................... 242
The Edit edit style.................................................................. 242
The DropDownListBox edit style........................................... 243
The CheckBox edit style........................................................ 244
The RadioButtons edit style .................................................. 245
The EditMask edit style......................................................... 246
viii
DataWindow .NET
Page 9

Contents
The DropDownDataWindow edit style................................... 249
The InkEdit edit style............................................................. 251
Defining a code table ................................................................... 251
How code tables are implemented........................................ 252
How code tables are processed............................................ 253
Validating user input.............................................................. 254
About validation rules................................................................... 255
Understanding validation rules.............................................. 255
Working with validation rules........................................................ 256
Defining validation rules............................................................... 257
Defining a validation rule in the Database painter................. 257
Defining a validation rule in the DataWindow painter............ 260
How to maintain extended attributes............................................ 263
CHAPTER 9 Filtering, Sorting, and Grouping Rows ..................................... 265
Filtering rows................................................................................ 265
Sorting rows ................................................................................. 267
Suppressing repeating values............................................... 269
Grouping rows.............................................................................. 270
Using the Group presentation style....................................... 272
Defining groups in an existing DataWindow object............... 276
CHAPTER 10 Highlighting Information in DataWindow Objects ................... 285
Highlighting information................................................................ 285
Modifying properties when designing.................................... 285
Modifying properties at runtime............................................. 286
Modifying properties conditionally at runtime............................... 289
Example 1: creating a gray bar effect.................................... 290
Example 2: rotating controls.................................................. 291
Example 3: highlighting rows of data..................................... 292
Example 4: changing the size and location of controls ......... 294
Supplying property values............................................................ 295
Background.Color.................................................................. 297
Border.................................................................................... 298
Brush.Color ........................................................................... 299
Brush.Hatch........................................................................... 300
Color...................................................................................... 301
Font.Escapement (for rotating controls)................................ 302
Font.Height............................................................................ 303
Font.Italic............................................................................... 304
Font.Strikethrough................................................................. 305
Font.Underline....................................................................... 306
Font.Weight........................................................................... 306
DataWindow Designer User’s Guide ix
Page 10

Contents
Format................................................................................... 307
Height.................................................................................... 307
Pen.Color .............................................................................. 308
Pen.Style............................................................................... 308
Pen.Width.............................................................................. 310
Pointer................................................................................... 310
Protect................................................................................... 311
Timer_Interval ....................................................................... 311
Visible.................................................................................... 311
Width..................................................................................... 312
X............................................................................................ 312
X1, X2.................................................................................... 313
Y............................................................................................ 313
Y1, Y2.................................................................................... 314
Specifying colors.......................................................................... 314
CHAPTER 11 Using Nested Reports ................................................................. 317
About nested reports.................................................................... 317
Creating a report using the Composite presentation style........... 319
Placing a nested report in another report..................................... 321
Placing a related nested report in another report.................. 321
Placing an unrelated nested report in another report............ 324
Working with nested reports......................................................... 325
Adjusting nested report width and height.............................. 325
Changing a nested report from one report to another........... 326
Modifying the definition of a nested report ............................ 326
Adding another nested report to a composite report............. 327
Supplying retrieval arguments to relate a nested report to
its base report................................................................. 327
Specifying criteria to relate a nested report to its base
report............................................................................. 329
Using options for nested reports ........................................... 330
CHAPTER 12 Working with Crosstabs.............................................................. 333
About crosstabs ........................................................................... 333
Two types of crosstabs.......................................................... 336
Creating crosstabs....................................................................... 337
Associating data with a crosstab.................................................. 338
Specifying the information..................................................... 338
Viewing the crosstab............................................................. 341
Specifying more than one row or column.............................. 343
Previewing crosstabs ................................................................... 344
x
DataWindow .NET
Page 11

Contents
Enhancing crosstabs.................................................................... 344
Specifying basic properties ................................................... 345
Modifying the data associated with the crosstab................... 346
Changing the names used for the columns and rows........... 346
Defining summary statistics................................................... 347
Cross-tabulating ranges of values......................................... 350
Creating static crosstabs....................................................... 353
Using property conditional expressions................................. 354
CHAPTER 13 Working with TreeViews............................................................. 357
TreeView presentation style......................................................... 357
Creating a new TreeView DataWindow ....................................... 359
TreeView creation process.................................................... 359
Creating a TreeView DataWindow........................................ 359
Adding and deleting TreeView levels........................................... 363
Selecting a tree node and navigating the tree.............................. 364
Sorting rows in a TreeView DataWindow..................................... 365
TreeView DataWindow Design view............................................ 366
Setting properties for the TreeView DataWindow........................ 367
Setting general TreeView properties..................................... 368
Setting TreeView level properties.......................................... 369
Setting detail band properties................................................ 371
TreeView DataWindow samples.................................................. 371
Data Explorer sample............................................................ 372
Data Linker sample ............................................................... 375
CHAPTER 14 Exporting and Importing XML Data........................................... 379
About XML ................................................................................... 379
Valid and well-formed XML documents................................. 380
XML syntax............................................................................ 381
XML parsing.......................................................................... 382
XML support in the DataWindow painter...................................... 383
The Export/Import Template view for XML................................... 384
Creating templates................................................................ 385
Saving templates................................................................... 387
Header and Detail sections................................................... 387
Editing XML templates................................................................. 390
XML declaration .................................................................... 391
Document type declaration.................................................... 392
Root element......................................................................... 393
Controls................................................................................. 394
DataWindow expressions...................................................... 394
Attributes............................................................................... 395
DataWindow Designer User’s Guide xi
Page 12

Contents
Composite and nested reports.............................................. 395
CDATA sections.................................................................... 397
Comments............................................................................. 397
Processing instructions ......................................................... 398
Exporting to XML.......................................................................... 398
Setting properties on the Data Export page.......................... 399
Selecting templates at runtime.............................................. 408
Importing XML.............................................................................. 408
Importing with a template...................................................... 409
Default data import................................................................ 413
Tracing import ....................................................................... 416
CHAPTER 15 Working with Graphs................................................................... 419
About graphs................................................................................ 419
Parts of a graph..................................................................... 420
Types of graphs..................................................................... 421
Using graphs in DataWindow objects .......................................... 425
Placing a graph in a DataWindow object............................... 425
Using the graph's Properties view......................................... 426
Changing a graph's position and size.................................... 427
Associating data with a graph ............................................... 428
Using overlays....................................................................... 437
Using the Graph presentation style.............................................. 439
Defining a graph's properties ....................................................... 440
Using the General property page in the graph's Properties
view ............................................................................... 440
Sorting data for series and categories................................... 442
Specifying text properties for titles, labels, axes, and
legends........................................................................... 442
Specifying overlap and spacing............................................. 445
Specifying axis properties ..................................................... 446
Specifying a pointer............................................................... 448
PART 3 APPENDIXES
APPENDIX A Identifiers ................................ ....... ...... ....... ...... ...... ....... .............. 451
Rules............................................................................................ 451
Reserved words ........................................................................... 452
xii
DataWindow .NET
Page 13

Contents
APPENDIX B The Extended Attribute System Tables .................................... 453
About the extended attribute system tables................................. 453
The extended attribute system tables.......................................... 454
Edit style types for the PBCatEdt table........................................ 457
CheckBox edit style (code 85)............................................... 457
RadioButton edit style (code 86)........................................... 458
DropDownListBox edit style (code 87).................................. 459
DropDownDataWindow edit style (code 88).......................... 460
Edit edit style (code 89)......................................................... 461
Edit Mask edit style (code 90)............................................... 463
APPENDIX C St arting DataWindow Designer from the Command Line....... 465
Starting DataWindow Designer from the command line .............. 465
Index ........................................................................................................................................... 467
DataWindow Designer User’s Guide xiii
Page 14

Contents
xiv
DataWindow .NET
Page 15

About This Book
Audience
How to use this book
Related documents
Other sources of
information
This book is written for programm ers who need to design Data W indow®
objects. DataW indow objects are us ed to retrieve, present , and manipulate
data from a relational database or other source. You can use the
DataWindow objects that you build in DataWindow Designer to create
applications for the Microsoft .NET Framework using Sybase
DataWindow .NET™.
This book guides you throug h the process of using Dat aWind ow Designer
to create DataWindow objects.
For information on using DataWindow objects with the Microsoft .NET
Framework, see the DataWindow .NET Programmer's Gui de.
For a complete list of books and online documentation, see the preface in
the DataWindow .NET Programmer's Guide.
Use the Sybase Getting Started CD, the SyBooks CD, and the Sybase
Product Manuals Web site to learn more about your product:
• The Getting Started CD contains release bulletins and installation
guides in PDF format, and may also contain other documents or
updated information no t in cluded o n t he SyBooks CD. It is included
with your software. To read or print documents on the Getting Started
CD, you need Adobe Acrobat Reader, which you can do wnload at no
charge from the Adobe Web site using a link provided on the CD.
• The SyBooks CD contains product manuals and is included with your
software. The Eclipse-based SyBooks browser allows you to access
the manuals in an easy-to-use, HTML-based format.
Some documentation may be provided in PDF format, which you can
access through the PDF directory on the SyBooks CD. To read or
print the PDF files, you need Adobe Acrobat Reader.
Refer to the SyBooks Installation Guide on the Getting Started CD, or
the README.txt file on the SyBooks CD for instructions on installing
and starting SyBooks.
DataWindow Desi gne r User’s Guide xv
Page 16

• The Sybase Product Manuals W eb site is an online version of t he SyBooks
CD that you can access using a standard Web browser. In addition to
product manuals, you will find links to EBFs/Maintenance, Technical
Documents, Case Management, Solved Cases, newsgroups, and the
Sybase Developer Network.
Sybase EBFs and
software
maintenance
T o access the Sybase Pro duct Manuals Web site, go to
http://www.sybase.com/support/manuals/
❖ Finding the latest information on EBFs and software maintenance
.
Product Manuals at
1 Point your Web browser to the Sybase Support Page at
http://www.sybase.com/support
.
2 Select EBFs/Maintenance. If prompted, enter your MySybas e user name
and password.
3 Select a product.
4 Specify a time frame and click Go. A list of EBF/Maintenance releases is
displayed.
Padlock icons indicate that you do not have download authorization for
certain EBF/Maintenance releases because you are not registered as a
Technical Support Contact. If you have not registered, but have valid
information provided by your Sybase representative or through your
support contract, click Edit Roles to add the “T ec hnical Support Contact”
role to your MySybase profile.
5 Click the Info icon to display the EBF/Maintenance report, or click the
product description to download the software.
If you need help
Each Sybase installati on that has purchased a su pport contract ha s one or more
designated people who are authorized to contact Sybase Technical Support. If
you cannot resolve a problem us ing the manuals or online help, pleas e have the
designated person contact Sybase Technical Support or the Sybase subsidiary
in your area.
xvi DataWindow .NET
Page 17

PART 1 The Dat aWindow Designer
Environment
This part introduces you to DataWindow Designer and
describes how to work in and manage its environment. It
also describes how to work with databases, tables, views,
and extended attributes.
Page 18

Page 19

CHAPTER 1
Working with DataWindow
Designer
About this chapter
Contents
This chapter describes the basics of working w ith DataWindow Designer
and its painters.
Topic Page
About DataWindow Designer 4
The DataWindow Designer environment 4
Working with projects 6
Working with DataWindow objects 7
Working in painters 10
Working with tools 17
Setting properties 20
Using toolbars 21
Using online Help 29
Customizing keyboard shortcuts 30
Changing fonts 31
How your DataWindow Designer environment is managed 32
DataWindow Desi gne r User’s Guide 3
Page 20

About DataWindow Designer
About DataWindow Designer
DataWindow Designer is a tool that creates DataWindow objects for use in
applications. A DataWindow object is an object that you use to retrieve and
manipulate data from a relati onal database or other data sou rce. The following
DataWindow object retrieves and updates employee data.
DataWindow Designer provides built-in connectivity to a broad range of
desktop and server-based databases. It includes the EAS Demo DB (a Sybase
Adaptive Server® Anywhere database) to create reports and other
DataWindow Designer objects.
When you work in DataWindow Designer, you work in a graphical
environment—and working with data in this environment means you do not
need to understand SQL, the standard programming language for talking to
databases. DataWindow Des igner creates all SQL statements behind the scene s
as you build your DataWindow objects and other objects graphically.
Painters
In DataWindow Designer, you do most of your work in the DataWindow
painter, where you “paint” your DataWindow objects. DataWindow Designer
also has painters where you work with databases, libraries, and SQL
statements.
The DataWindow Designer environment
When you start
DataWindow Desi gner
the first time
4 DataWindow .NET
In DataWindow Designer, you always work within the context of a
DataWindo w pr oject. Infor mation abou t the proj ect is s tored in a tex t file with
the extension .dwp. The DataWindow objects you create are stored in binary
files called libraries. Library files have the extension .pbl.
To create a new project and a library to hold your DataWindow obje cts, click
the New button on the PowerBar and select Project from the Project tab page.
Page 21
CHAPTER 1 Working with DataWindow Designer
If you have used
DataWindow Design er
before
When DataWindow
Designer starts
You can open an existing project by selecting Open Project or Recent Projects
from the File menu, or Open Project from the pop-up menu in the System Tree.
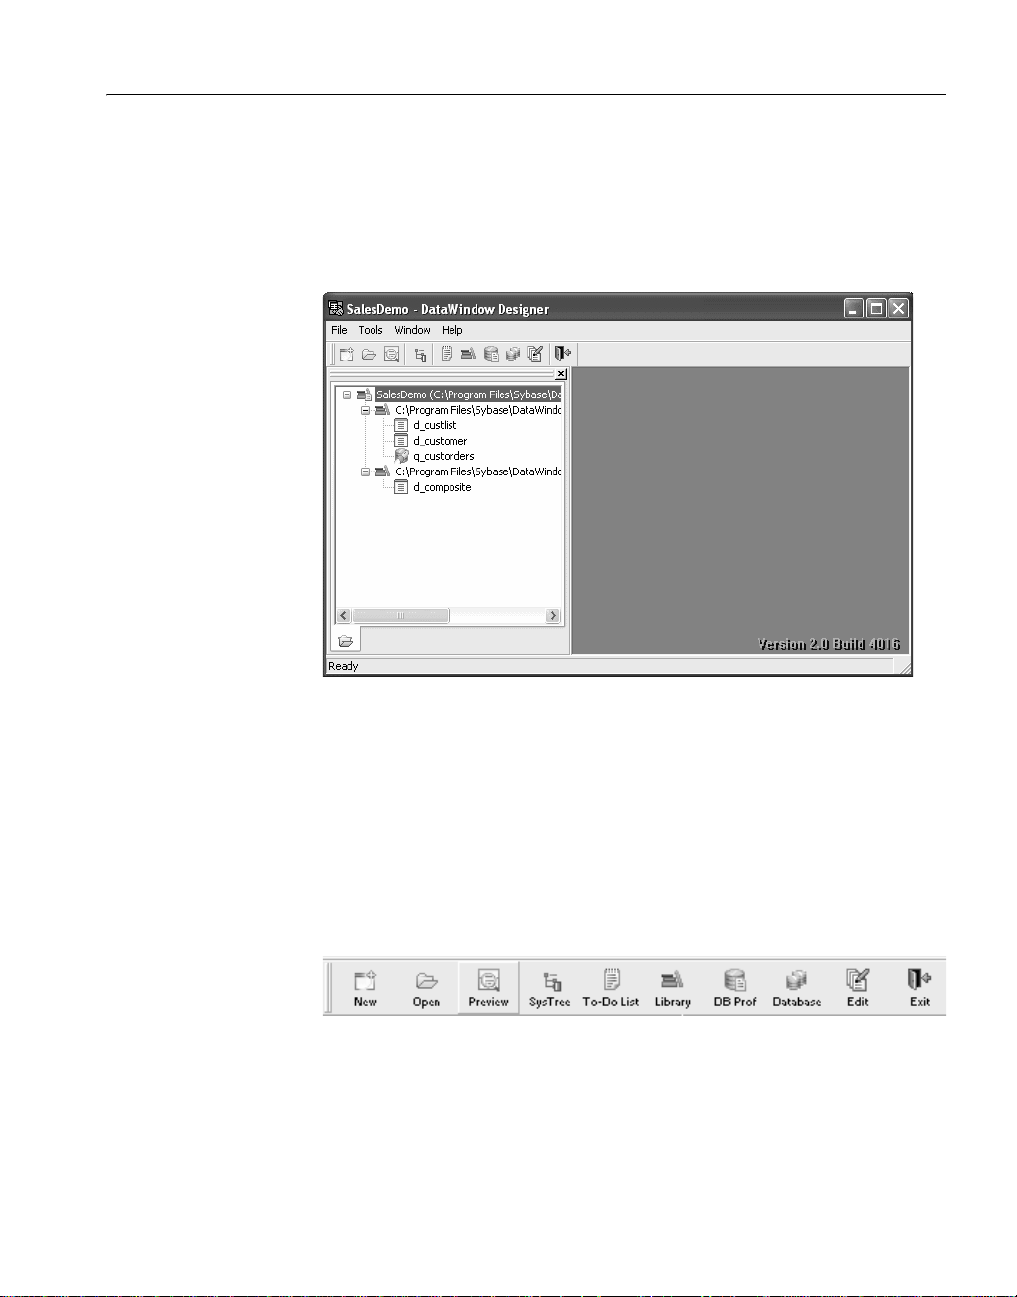
When DataWindow Designer starts, it opens in a window that contains the
System Tree on the left, a menu bar at the top, and the PowerBar below the
menu bar. The following figure shows an open project in the System Tree:
You can create new objects, open existing objects, change libraries, access the
database, and perform other tasks by usi ng pop- up men us in the Sys t em Tree,
menus on the menu bar, or buttons in the PowerBar.
About the PowerBar
What it is
DataWindow Desi gne r User’s Guide 5
From the PowerBar you can create new projects and objects and open existing
objects. You can display text on each button to help you identify them, as
shown in the following illustration:
Page 22

Working with projects
Buttons on the
PowerBar
Customizing the
PowerBar
About PowerTips
From left to right on the PowerBar, here are the buttons and what you can do
after you click a button:
This PowerBar
button Lets you do this
New Create new projects and DataWindow objects and open tools
Open Open existing objects
Preview Preview DataWindow objects
System Tr e e Show or hide the Syst em Tree
To-Do List Keep track of object creation tasks and use links to quickly get
you to the place where you co mplete the tasks
Library Manage your libraries using the Li br ary painter
DB Profile Define and use named sets of parameters to connect to a
particular database
Database Maintain databases and database tables, control user access to
databases, and manipulate data in database s using the Database
painter
File Editor Edit text files
Exit Close DataWindow Designer
You can customize the PowerBar. For example, you can move it to different
locations and add buttons for operations you perform frequently. For more
information, see “Using toolbars” on page 21.
In the PowerBar, when you leave the mouse pointer over a button for a second
or two, DataW indow Designer di splays a b rief descript ion of the b utton, calle d
a PowerTip. PowerTips display in DataWindow Designer wherever there are
toolbar buttons.
Working with projects
You can create a new project, add existing libraries to a project’s library list,
create a new library , and open a dif ferent project to work on objects in a library
in that project. The libraries in your current library list display in the System
Tree. You can open the DataWind ow objects in any library on your current list.
6 DataWindow .NET
Page 23

CHAPTER 1 Working with DataWindow Designer
❖ To create a new project:
1 Click the New button in the PowerBar, or select File>New from the menu
bar.
2 On the Project page in the New dialog box, select the project icon and click
OK.
3 Browse to the location where you want to store the project and type a name
for the project.
4 Do the same for the library, or simply click Finish to create the library in
the same folder as the project and with the same name.
❖ To add existing libraries to a project:
1 Right-click the project icon in the System Tree and select Properties.
2 Click the Browse button to navigate to the folder where the libraries
reside.
3 Select one or more libraries, click Open, then click OK in the Library List
dialog box.
❖ To create a new library:
1 Right-click the project icon in the System Tree and select New Library.
2 Browse to the location where you want to create the library, type a name
for the library, and click OK.
❖ To open a different project:
• Right-click the project icon in the System Tree and select Open Project, or
select File>Open Project from the File menu.
Working with DataWindow objects
In DataWindow Desig ner, you can:
• Create new DataWindow objects
• Open existing DataWindow objects
• Run or preview DataWindow objects
After you create or open a DataWindow object, it displays in the DataW indow
painter and you work on it there.
DataWindow Desi gne r User’s Guide 7
Page 24

Working with DataWindow objects
Creating new DataWindow objects
To create new DataWindow objects, use the New button in the PowerBar.
❖ T o cr ea te a new object :
1 Click the New button in the PowerBar, or select File>New from the menu
bar.
2 In the New dialog box, select the DataWindow tab page.
3 Select an icon and click OK.
The DataWindow wizard helps you create a new DataWindo w object. For
more information about using the wizard, see Chapter 4, “Defining
DataWindow Objects.”
Opening existing DataWindow objects
There are several ways to open existing objects. The quickest way is to
double-click its icon in the System Tree, or select it from the list of recent
objects on the File menu. The recent objects list includes the eight most
recently opened objects, but you can include up to 36 objects on the list.
❖ To modify the number of recent objects:
1 Select Tools>System Options from the menu bar.
2 In the System Optio ns di al og bo x (G en eral t ab p a ge), modify the number
for the recent objects list.
You can also use the Open button in the PowerBar to open a DataWindow
object. The DataWindow object must be in a library on your current library list.
❖ To open existing objects:
1 Click the Open button in the PowerBar, or select File>Open from the menu
bar.
8 DataWindow .NET
Page 25
CHAPTER 1 Working with DataWindow Designer
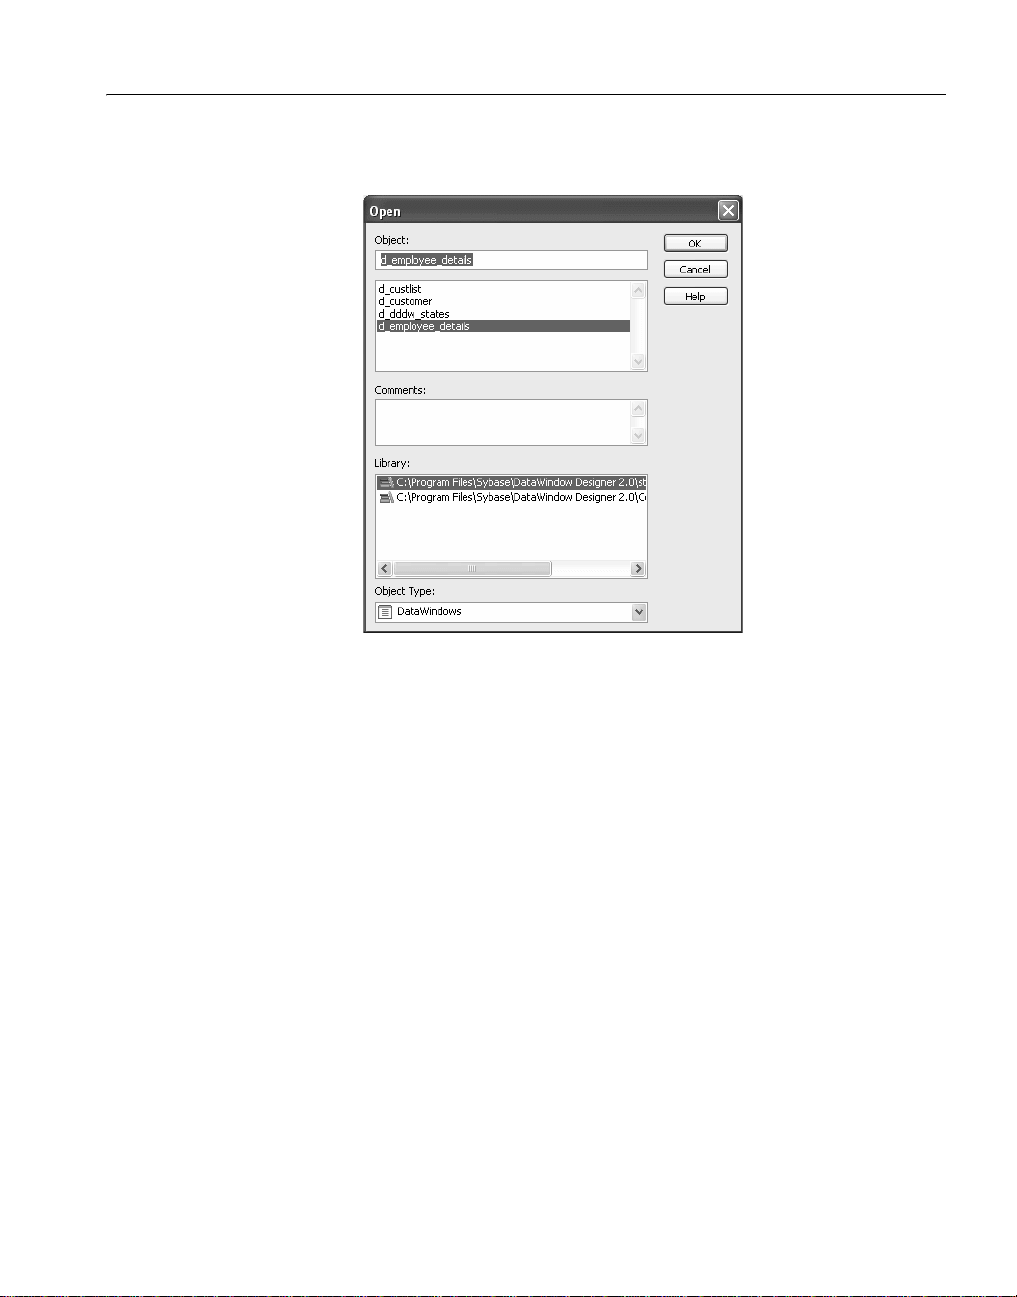
2 In the Open dialog box, select one or more libraries in the Libr ary pane and
then select the object you want to open.
3 Click OK.
The object opens in the DataWindow painter.
Running or previewing DataWindow objects
To preview a DataWindow object, use the Preview button in the PowerBar.
❖ To run or preview an object:
1 Click the Preview button in the PowerBar, or select File>Run/Preview
from the menu bar.
2 In the Run/Preview dialog box, select one or more libraries in the Library
pane and then select the DataWindow object you want to preview.
3 Click OK.
The DataWindow object displays in DataWindow Preview mode. This
mode has a Painterbar from which you can sort, filter, import, and retrieve
rows, insert and delete rows, get information on row activity, and zoom in
and out. To return to the DataWindow painter, click the X in the Painterbar .
DataWindow Desi gne r User’s Guide 9
Page 26

Working in painters
Working in painters
The DataWindow Designer painters are listed in Table 1-1.
Table 1-1: DataWindow Designer painters
Painter What you do
Database painter Maintain databases, control user access to databases, manipulate
DataWindow
painter
Library painter Manage libraries
Query painter Graphically define and save SQL
Select painter Graphically define SQL SELECT s t at ements for DataWindow
Using views in painters
Most of the DataW i ndow Des igner painter s have views. Each vi ew provides a
specific way of viewing or modifying the object you are working on or a
specific kind of information related to that object. Having all the views
available in a painter window means you can work on more than one task at a
time.
data in databases, and create tables
Build intelligent objects called DataW indow objects that pres ent
information from the database
SELECT statements for reuse
with DataWindow objects
objects
View s are displayed i n panes in the painter window . Some views are stacked in
a single pane. At the bottom of the pane there is a tab fo r each view in the stack.
Clicking the tab for a view pops that view to the top of the stack.
Each painter has a default l ayout , but you can disp lay the vi ews you choose in
as many panes as you want to and save the layouts you like to work with. For
some painters, all available views are included in the default layout; for others,
only a few views are included.
Each pane has:
• A title bar you can display temporarily or permanently
• A handle in the top-left corner you can use to drag the pane to a new
location
• Splitter bars between the pane and each adjacent pane
10 DataWindow .NET
Page 27

Displaying the title bar
For most views a title bar does not permanently display at the top of a pane
(because it is often unnecessary). But you can display a title bar for any pane
either temporarily or permanently.
❖ To display a title bar:
1 Place the pointer on the splitter bar at the top of the pane.
2 To display the title bar permanently , click the pushpin at the left of the title
After you display a title bar either temporarily or permanently, you can use the
title bar’s pop-up menu.
❖ To maximize a pane to fill the workspace:
• Select Maximize from the title bar’s pop-up menu or click the Maximize
CHAPTER 1 Working with DataWindow Designer
The title bar displays.
bar or select Pinned from its pop-up menu.
Click the pushpin ag ain or select Pinn ed again on the p op-up menu to hi de
the title bar.
button on the title bar.
❖ To restore a pane to its original size:
• Select Restore from the title bar’ s pop-up menu or click the Restore bu tton
on the title bar.
Moving and resizing panes and views
You can move a pane or a view to any location in the painter window. You
might find it takes a while to get used to moving pan es and views aroun d, bu t
if you do not like a layou t, you can alway s revert to th e default lay out and start
again. To restore the default layout, select View>Layouts>Default.
To move a pane, you select and drag the title bar of the view that is at the top
of the stack. If the pane contains stacked views, all views in the stack move
together. To move one of the views out of the stack, you drag the tab for the
view you want to move.
❖ To move a pane:
1 Place the pointer anywhere on the title bar of the view at the top of the
stack, hold down the left mouse button, and start moving the pane.
DataWindow Desi gne r User’s Guide 11
Page 28

Working in painters
A gray outline appears in the pane:
2 Drag the outline to the new location.
The outline changes size as you drag it. When the pointer is over the
middle of a pane, the outline fills the pane. As you drag the pointer toward
any border, the outline becomes a narro w rectangle adjacent to that border .
When the pointer is over a splitter bar between two panes, rows, or
columns, the outline straddles the splitter bar:
When you move the pointer to a corner
When you move the pointer to a corner, you will find that you have many
places where you can drop the outline. To see your options, move the
pointer around in all directions in the corner and see where the outline
displays as you move it.
3 Release the mouse button to drop the outline in the new location:
To move a pane here Drop the outline here
Between two panes On the splitter bar between the panes
Between a border and a pane At the side of the pane nearest the b order
Into a new row On the splitter bar between two rows or at the
top or bottom of the painter window
Into a new column On the splitter ba r be tween two c olumns or at
the left or right edge of the painte r window
Onto a stack of panes On the middle of the pan e (if th e pane was no t
already tabbed, tabs are created)
12 DataWindow .NET
Page 29

❖ To move a view in a stacked pane:
• Place the pointer anywhere on the view’s tab, hold down the left mouse
button, and start moving the view.
You can now move the view as in the previous procedure. If you want to
rearrange the views in a pane, you can drag the view to the left or right
within the same pane.
❖ To resize a pane:
• Drag the splitter bars between panes.
Floating and docking views
Panes are docked by default within a painter window, but some tasks may be
easier if you float a pane. A floating pane can be moved outside the painter’s
window or even outside the DataWindow Designer window.
When you open another painter
If you have a floating pane in a painter and then open another painter, the
floating pane temporarily disap pears . It reap pears when the o riginal painter is
selected.
CHAPTER 1 Working with DataWindow Designer
❖ To float a view in its own pane:
• Select Float from the title bar’s pop-up menu.
❖ To float a view in a stacked pane:
• Select Float from the tab’s pop-up menu.
❖ To dock a floating view:
• Select Dock from the title bar’s pop-up menu.
Adding and removing views
Y ou may want to add additional views to the painter window . If there are some
views you rarely use, you ca n move them into a stacked p ane or r emove them.
When removing a view in a stacked pane, make s ure you remove th e view and
not the pan e .
DataWindow Desi gne r User’s Guide 13
Page 30

Working in painters
❖ To add a new view to the painter window:
1 Select View from the menu bar and then select the view you want to add.
The view displays in a new pane in a new row.
2 Move the pane where you want it.
For how to move panes, see “Moving and resizing panes and views” on
page 11.
❖ To remove a view in its own pane from the painter window:
1 If the view’s title bar is not displayed, display it by placing the pointer on
the splitter bar at the top of the pane.
2 Click the Close button on the title bar.
❖ To remove a view in a stacked pane from the painter window:
• Select the tab for the view and select Close from its pop-up menu.
❖ To remove a stacked pane from the painter window:
1 If the title bar of the top view in the stack is not displayed, display it by
placing the pointer on the splitter bar at the top of the pane.
2 Click the Close button on the title bar.
Saving a layout
When you have rearranged panes in the painter window, DataWindow
Designer saves the layout in the registry. The next time you open the painter
window , your last l ayout displays. Y ou can also save customized layo uts so that
you can switch from one to another for different kinds of activities.
❖ To save customized layouts for a painter window:
1 Select View>Layouts>Manage from the menu bar.
14 DataWindow .NET
Page 31
CHAPTER 1 Working with DataWindow Designer
2 Click the New Layout button (second from the left at the top of the dialog
box).
3 Type an appropriate name in the text box and click OK.
Restoring the default layout
You can restore the default layout at any time by selecting
Views>Layout>Default.
Using pop-up menus
DataWindow Designer provides a context-sensitive pop-up menu that lists:
• Actions appropriate to the currently selected object or the current position
of the pointer
• Where appropriate, a Properties menu item for accessing the Properties
view or the Properties dialog box associated with the current ob ject or the
current position of the pointer
The pop-up menu is available almost everywhere in DataWindow Designer
when you position the pointer over an object and click the right mouse button.
Example
DataWindow Desi gne r User’s Guide 15
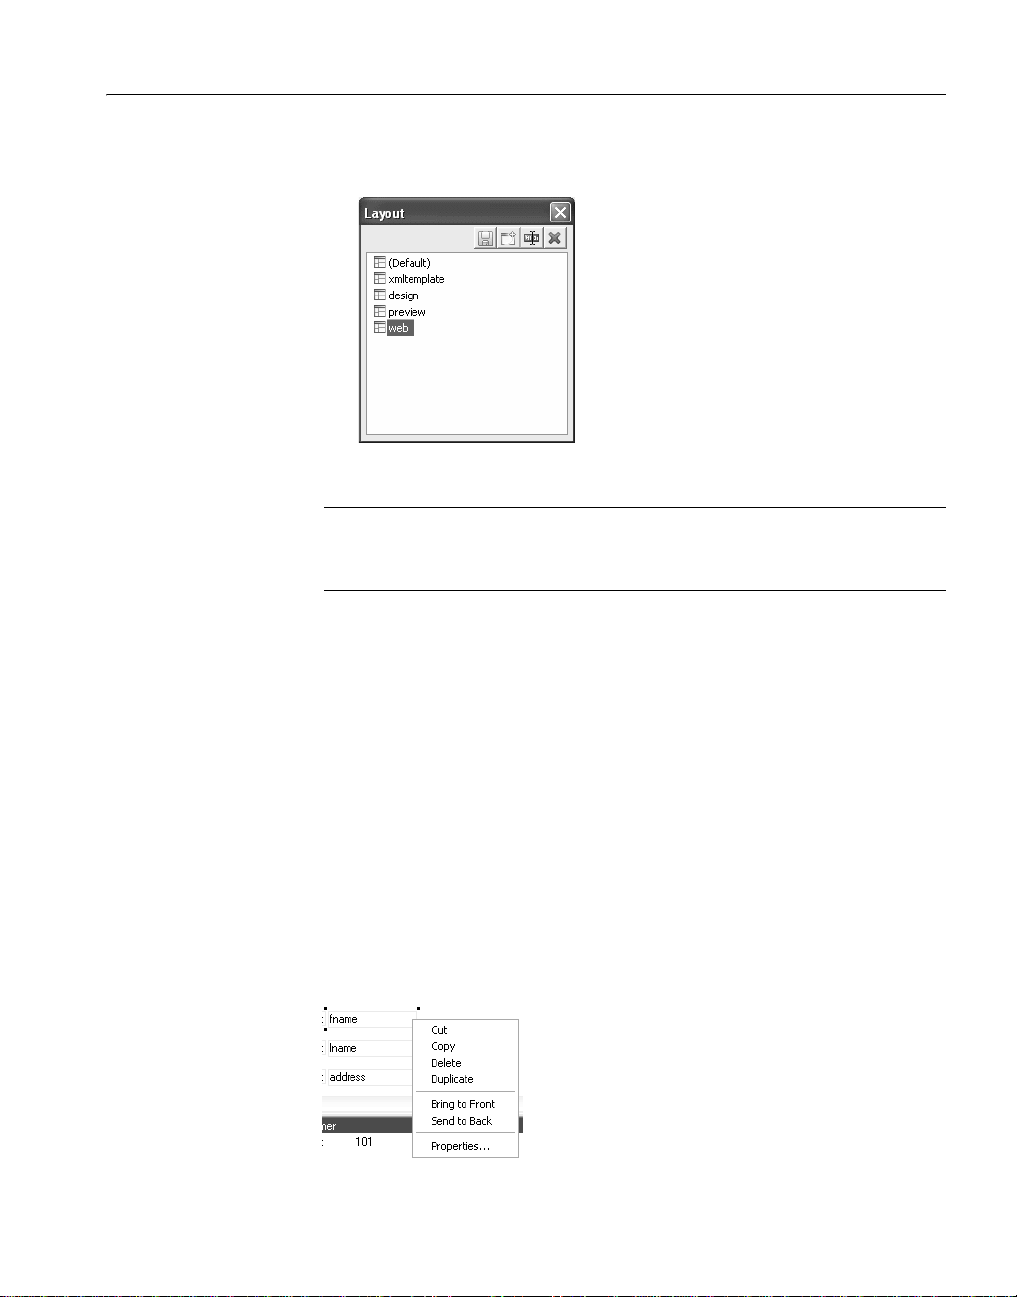
For example, the following screen shows the pop-up menu for a column in a
DataWindow:
Page 32

Working in painters
Defining colors
You can define custom colors to use in most painters and in o bjects you create.
❖ To define custom colors:
1 In a painter that uses custom colors, select Design>Custom Colors from
the menu bar.
The Color dialog box displays:
2 Define your custom colors:
Area of the
Color dialog box What you do
Basic colors Click the basic color closest to the color you want to
define to move the pointer in the color matrix and slider
on the right
Custom colors
palette
Color matrix Click in the color matrix to pick a color
Color slider Move the slider on the right t o adju st the c olor's attributes
Add to Custom
Colors button
Modify an existing color—click a custom color, then
modify the color matrix and slider. Define a new color—
click an empty box, define the color, and click Add to
Custom Colors
After you have designe d the color , click this button to add
the custom color to the Custom colors palette on the left
16 DataWindow .NET
Page 33

Working with tools
In addition to painters, DataWindow Designer provides you with some other
tools to help you with your work. You can open most tools from the Tools
menu, the PowerBar, or the Tools page in the New dialog box.
CHAPTER 1 Working with DataWindow Designer
Tool summary
Table 1-2 lists the tools.
Table 1-2: DataWindow Designer tools
T ool What you use the tool for
File editor Edit text files. For more information, see "Using the file editor"
To-Do List Keep track of object creation tasks and create links to quickly get
Database profile Define and use named sets of paramete rs to connect to a
Using the file editor
DataWindow Designer provides a text ed itor that is always available. Using the
editor, you can view and modify text files (such as initialization files and
tab-separated files with data) without leaving DataWindow Designer.
❖ To open the file editor:
1 Press Shift+F6 anywhere in DataWindow Designer.
2 Select File>Open File or click the Open icon (an open folder) on the
next.
you to the place where you need to complete the tasks. For
information, see “Using the To-Do List” on page 18.
particular database. For informat ion , see Connecting to Your
Database.
Painter bar to open the file you want to edit.
Setting file editing
properties
The file editor has font properties and an indentation property that you can
change to make files easier to read. If you do not change any properties, files
have black text on a white background and a tab stop setting of 3 for
indentation.
❖ To specify File Editor properties:
1 Select Design>Options to display the property page.
2 Choose the tab appropriate to the property you want to specify.
DataWindow Desi gne r User’s Guide 17
Page 34

Working with tools
Editing activities
The file editor provides a full set of basic editing facilities including:
• Opening, saving, and printing files
• Cutting, copying, pasting, and clearing selected text
• Finding and replacing text
• Undoing changes
• Commenting and uncommenting lines
• Importing and exporting text files
• Dragging and dropping text
The file editor has a PainterBar that provides a shortcut for performing
frequently used activities. There is also a corresponding menu item (and often
a shortcut key) for each activity.
T o see t he s hor t cut keys, s e lect Tools>Keyboard Shortcuts fr om the men u bar
and use the Keyboard Shortcuts dialog box.
T o move text, simply select it, drag it to its new location, and drop it. To copy
text, press the Ctrl key while you drag and drop the text.
Using the To-Do List
Opening the To-Do
List
The To-Do List displays a list of tasks you want to do in the current project.
❖ T o open the To-Do List:
• Click the To-Do List button in the PowerBar, or select Tools>To-Do List
from the menu bar.
To-Do List entries
You can create an entry in the To-Do List at any time to remind you about any
task you need to complete. You can create entries that are hot-linked to qu ickly
get you from the T o-Do List to the DataW indow p ainter and the specific object
you need.
18 DataWindow .NET
Page 35

CHAPTER 1 Working with DataWindow Designer
When you move the pointer over entries on the To-Do list, the pointer changes
to a hand if it is over a linked entry.
You can export or import a To-Do List by select ing Impor t or Export fro m the
pop-up menu. Doing this is useful if you want to move from one computer to
another or you need to wor k with To-Do Lists as part of some other syst em
such as a project management system.
Working with entries
on the To-Do List
Table 1-3 tells you how to work with entries on the To-Do List.
Table 1-3: The To-Do List
To do this Do this
See linked entries Move the pointer over the entries. A hand di splays when the
entry you are over is linke d .
Use a linked entry to
get to a painter or
wizard
Add an entry with no
link
Add a linked entry to
the DataWindow
painter
Change an entry’s
position on the list
Edit or delete an entry Select Edit or Delete from the pop-up menu.
Delete checked
entries or all entries
Check or uncheck an
entry
Export a To-Do List Select Export from the pop-up menu, name the To-Do List
Import a To-Do List Select Import from the pop-up menu, navigate to an
Double-click the linked entry or sel ect it and then select Go
To Link from the pop-up menu.
Select Add from the pop-up menu.
With the painter open, select Add Linked from the pop-up
menu.
Drag the entry to the position you want.
Select Delete Checked or Delete All from the pop-up menu.
Select an entry and then select Check/Uncheck from the
pop-up menu.
text file, and click Save.
exported To-Do List text file, and click Open.
DataWindow Desi gne r User’s Guide 19
Page 36

Setting properties
Setting properties
In DataW i ndo w De sig ner, you set properties on pages t hat di sp l ay i n a t abb ed
dialog box or in a view in a painter. In the DataWindow painter, you set object
properties in the Properties view. In the Database painter, you set properties in
the Object Details view.
For example, for a column in a DataWindow object, you can set several
different kinds of properties (general, pointer, HTML, position, edit style, font,
and display format) by clicking appropriate tabs in the Properties view.
How property pages
work in the Properties
view
How other property
pages work
The Properties view is dynamically updated when you select another ob ject or
control. If you select more than one object or control,
group selected
displays in the title bar, the properties common to them display, and you can set
the properties for more than one control at a time.
In the Properties view, you can use a pop-up menu to specify where the labels
for the properties display and to get Help on the properties.
The selections you make or the information you type into a box in the
Properties view is saved when you tab to another field or open a different
property page.
Properties dialog boxes that do not display in the Properties view have OK,
Cancel, Apply , and He lp buttons. The Ap ply button is enabl ed when you make
a change on one tab:
Use this button To do this
OK Apply the properti es you have set on all tabs and close the
property page
Cancel Close the window and apply no new changes
Apply Apply the properties you have set on all tabs immediately
without closing the property page
Help Get Help on setting properties for the tab that displays
Displaying properties
pages
You can display properties pages in a few ways:
• Select Vi ew>Properties fro m the men u bar in the DataWindow painter or
View>Object Details in the Database painter
• If the Properties view is op en, s elect an object or co nt rol i n the Lay out or
Control List views to dis play t he pr oper t ies of the object or control in the
Properties view
20 DataWindow .NET
Page 37

Using toolbars
Toolbar basics
CHAPTER 1 Working with DataWindow Designer
• Select Properties from the pop-up menu of an object, control, library
name, or table or column name
• Select Object>Properties or Entry>Properties from the menu bar
(dependi ng on the painter you are working in)
• Click the Properties button in the PainterBar
T oolbars provide bu ttons for the most common tasks in Da taWindo w Designer.
Y ou can move an d dock or float tool bars, customize them, and create you r own.
DataWindow Designer uses three toolbars: the PowerBar, PainterBar, and
StyleBar. You can hide a toolbar by right-clicking in the toolbar area and
clearing the check mark text to its name. If a toolbar is not hidden, it displays
as shown in T a ble 1-4.
Table 1-4: DataWindow Designer toolbars
Toolbar Purpose Availability
PowerBar Opening painters and tools Always.
PainterBar Performing tasks in the current
painter
StyleBar Changing the properties of text,
such as font and alignment
When a painter is open. Some
painters have more than one
PainterBar.
In appropriate painters.
Drop-down toolbars
T o reduce t he size o f tool bars, some toolbar button s have a down arro w on th e
right that you can click to display a drop-down toolbar containing related
buttons.
DataWindow Desi gne r User’s Guide 21
Page 38

Using toolbars
For example, the down arrow next to the Text button in the DataWindow
painter displays the Controls drop-down toolbar, which has a button for each
control you can place on a DataWindow object:
Default button replaced
The button you select f rom a drop- down too lbar replaces the default b utton on
the main toolbar. For example, if you select the Picture button from the
Controls drop-down toolbar , it replaces the Command button in the PainterBar .
Controlling the display of toolbars
You can control:
• Whether to display individual toolbars and where
• Whether to display text on the buttons
• Whether to display PowerTips
Choosing to display text and PowerTips affects all toolbars.
❖ To control a toolbar using the pop-up menu:
1 Position the pointer on a toolbar and display the pop-up menu.
2 Click the items you want.
A check mark means the item is currently selected.
❖ To control a toolbar using the Toolbars dialog box:
1 Select Tools>Toolbars from the menu bar.
The Toolbars dialog box displays.
2 Click the toolbar you want to work with (the current toolbar is highlighted)
and the options you want.
DataWindow Designer saves your toolbar preferences in the registry and the
DataWindow Designer initialization file.
22 DataWindow .NET
Page 39

Moving toolbars using the mouse
You can use the mouse to move a toolbar.
❖ To move a toolbar with the mouse:
1 Position the pointer on the grab bar at the left of the toolbar or on any
vertical line separating groups of buttons.
2 Press and hold the left mouse button.
3 Drag the toolbar and drop it where you want it.
As you move the mouse, an outlined box shows how the toolbar will
display when you drop it. You can line it up along any frame edge or float
it in the middle of the frame.
Docking toolbars
When you first start DataW in dow Desig ner, all the toolbars displa y one above
another at the top left of the workspace. When you move a toolbar, you can
dock (position) it:
• At the top or bottom of the workspace, at any point from the left edge to
the right edge
CHAPTER 1 Working with DataWindow Designer
• At the left or right of the workspace, at any point from the top edg e to the
bottom edge
• To the left or right of, or above or below, another toolbar
Customizing toolbars
You can customize toolbars with DataWindow Designer buttons and with
buttons that invoke other applications, such as a clock or text processor.
Adding, moving, and
deleting buttons
DataWindow Desi gne r User’s Guide 23
You can add, move, and delete buttons in any toolbar.
❖ To add a button to a toolbar:
1 Position the pointer on the toolbar and display the pop-up menu.
2 Select Customize.
Page 40

Using toolbars
The Customize dialog box displays.
3 Click the palette of buttons you want to use in the Select palette group.
4 Choose a button from the Selected palette box and drag it to the position
you want in the Current toolbar box.
If you choose a button from the Custom palette, another dialog box
displays so you can define the button.
For more information, see “Adding a custom button” on page 25.
Seeing what's available in the PowerBar
DataWindow Designer provides several buttons that do not display by
default in the PowerBar , b ut which y ou can ad d. To see what is available,
scroll the list of buttons and select one. DataWindow Designer lists the
description for the selected button.
❖ T o mov e a button on a toolbar:
1 Position the pointer on the toolbar, display the pop-up menu, and select
Customize.
2 In the Current toolbar box, sel ect the butto n and drag it t o its ne w position.
24 DataWindow .NET
Page 41

CHAPTER 1 Working with DataWindow Designer
❖ To delete a button from a toolbar:
1 Position the pointer on the toolbar, display the pop-up menu, and select
Customize.
2 In the Current toolbar box, select the button and dr ag it outside the Curr ent
toolbar box.
Resetting a toolbar
Clearing or deleting a
toolbar
You can restore the original setup of buttons on a toolbar at any time.
❖ To reset a toolbar:
1 Position the pointer on the toolbar, display the pop-up menu, and select
Customize.
2 Click the Reset button, then Yes to confirm, then OK.
Whenever you want, you can remove all buttons from a tool bar. If you do not
add new buttons to the empty toolbar, the toolbar is deleted. You can delete
both built-in toolbars and toolbars you have created.
To recreate a toolbar
If you delete one of DataWindow Designer’ s built-in toolbars, you can recreate
it easily. For example, to recreate the PowerBar, display the pop-up menu,
select New, and then select PowerBar1 in the New Toolbar dialog box. For
information about creating new toolbars and ab out the meaning o f PowerBar1,
see “Creating new toolbars” on page 28.
❖ To clear or delete a toolbar:
1 Position the pointer on the toolbar, display the pop-up menu, and select
Customize.
2 Click the Clear button, then Yes to confirm.
The Current toolbar box in the Customize dialog box is emptied.
3 Select new buttons for the current toolbar and click OK, or click OK to
delete the toolbar.
Adding a custom
button
You can add a custom button to a toolbar. A custom button can:
• Invoke a DataWindow Designer menu item
• Run an executable (application) outside DataWindow Designer
• Run a query or preview a DataWindow object
• Assign a display format or create a computed field in a DataWindow
object
DataWindow Desi gne r User’s Guide 25
Page 42
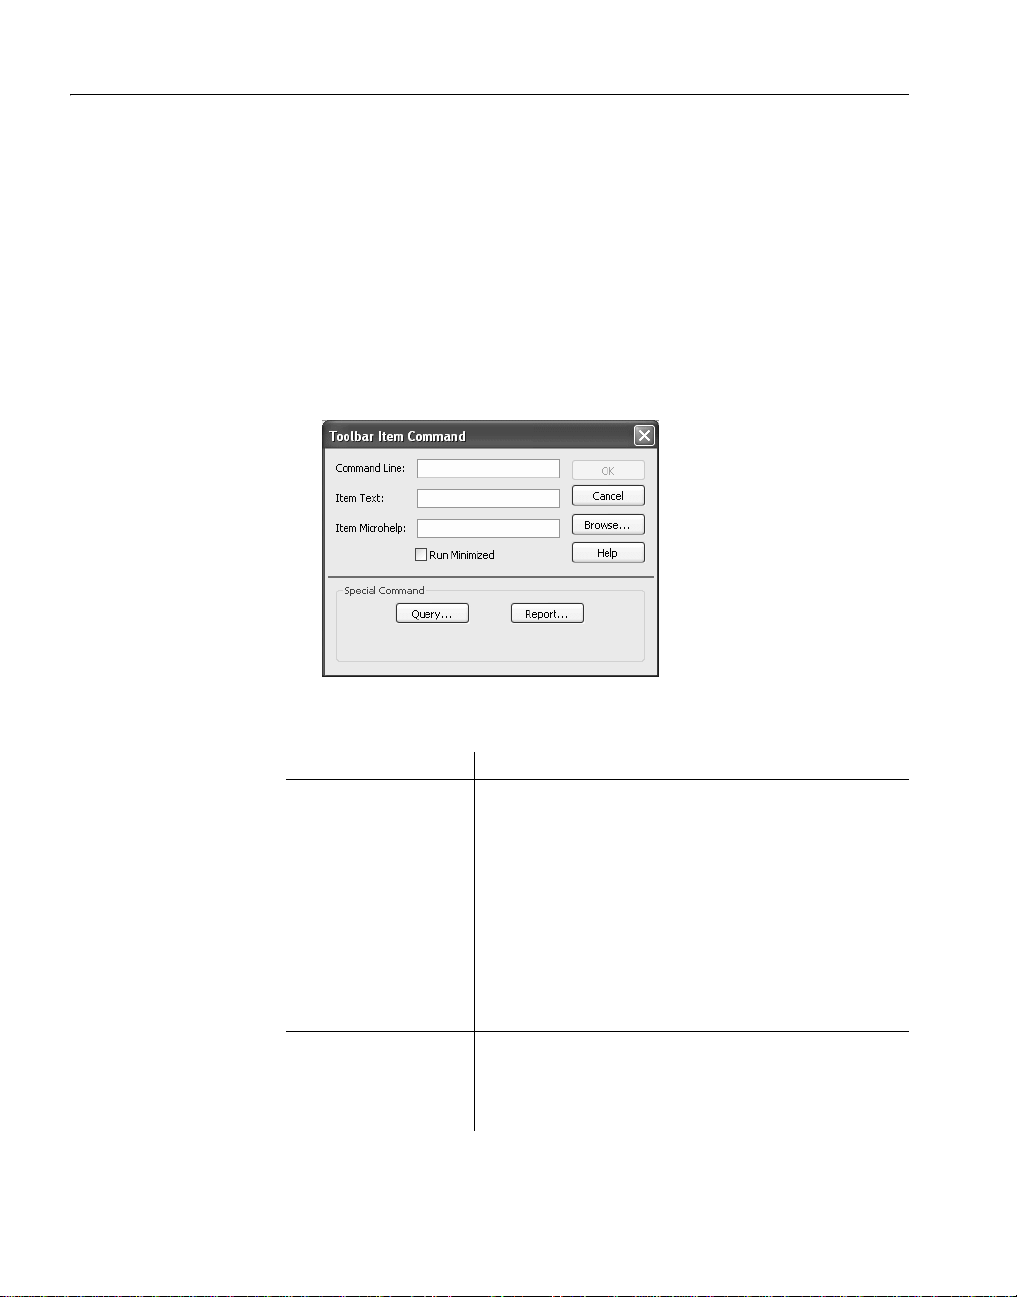
Using toolbars
❖ T o add a custom button:
1 Position the pointer on the toolbar, display the pop-up menu, and select
Customize.
2 Select Custom in the Select Palette group.
The custom buttons display in the Selected Palette box.
3 Select a custom button and drag it to where you want it in the Current
toolbar box.
The T oolbar Item C ommand dialog box displays. Dif ferent buttons disp lay
in the dialog box depending on which toolbar you are customizing:
4 Fill in the dialog box as shown in Table 1-5.
Table 1-5: Toolbar Item Command dialog box
Button purpose Action in Toolbar Item Command dialog box
Invoke a DataWindow
Designer menu item
Run an executable
outside DataWind ow
Designer
Type
@MenuBarItem.MenuItem
in the Command Line box. For example, to make the
button mimic the Open item on the File menu, type
@File.Open
You can also use a number to refer to a menu item. The
first item in a drop-down/cascading menu is 1, the second
item is 2, and so on. Separator lines in the menu count as
items. Example:
@Edit.Align.4
Type the name of the executable in the Command Line
box. Specify the full path name if the executable is not in
the current search path.
To search for the file name, click the Browse button.
26 DataWindow .NET
Page 43

CHAPTER 1 Working with DataWindow Designer
Button purpose Action in Toolbar Item Command dialog box
Run a query Click the Query butto n an d s el ec t t he quer y fro m the
displayed list.
Preview a DataWindow
object
Assign a display format
to a column in a
DataWindow object
Create a computed field
in a DataWindow
object
Click the Report button and select a DataWindow
objectfrom the displayed list. You can then specify
command-line arguments i n the Command Line box, as
described below.
(DataWindow painter only) Click the Format button to
display the Display Formats dialog box. Select a data type,
then choos e an existing display format from th e list or
define your own in the Format box.
For more about specifying display formats, see Chapter 8,
“Displaying and Validating Data.”
(DataWindow painter only) Click the Function button to
display the Function for Toolbar dialog box. Select the
function from the list.
5 In the Item Text box, specify the text associated with the button in two
parts separated by a comma—the text that displays on the button and text
for the button's PowerTip:
ButtonText, PowerTip
For example:
Save, Save File
If you specify only one piece of text, it is used for both the button text and
the PowerTip.
6 In the Item MicroHelp box, specify the text to appear as Micro Help when
the pointer is on the button.
Supplying arguments
with DataWindow
objects
DataWindow Desi gne r User’s Guide 27
If you define a custom button to run a DataWindow object, you can specify
arguments in the command line in the Toolbar Item Command dialog box.
Table 1-6: Arguments for running reports
Argument Meaning
/l LibraryName Specifies the library containing the DataWindow object
/o
DataWindowName
/r Previews the DataWi nd ow obj ect
/ro Previews the DataWi nd ow ob ject bu t does not provi de design
/a "Arguments" Specifies arguments to pass to the DataWindow object
Specifies the DataWindow object
mode for modifying the DataWindow object
Page 44

Using toolbars
The default command line is:
DataWindow /o DataWindowName /ro
Modifying a custom button
❖ To modify a custom button:
1 Position the pointer on the toolbar, display the pop-up menu, and select
Customize.
2 Double-click the button in the Current toolbar box.
3 Make your changes, as described in “Adding a custom button” on page 25.
Creating new toolbars
DataWindow Designer has built-in toolbars. When you start DataWindow
Designer, you see what is called the PowerBar . In each painter, you als o see one
or more PainterBars. But PowerBar and PainterBar are actually types of
toolbars you can create to make working in DataWindow Designer easier.
PowerBars and
PainterBars
Where you create
them
A PowerBar is a t oolbar t hat alway s displ ays in DataWindow Designer, unless
you hide it. A PainterBar is a toolbar that always displays in the specific painter
for which it was defined, unless you hide it. You can have up to four
PowerBars, named PowerBar1, PowerBar2, and so on. You can have up to
eight PainterBars in each painter, named PainterBar1, PainterBar2, and so on.
You can create a new PowerBar anywhere in DataWindow Designer, but to
create a new PainterBar, you must be in the workspace of the painter for which
you want to define the PainterBar.
❖ T o cr ea te a new toolbar:
1 Position the pointer on any toolbar, display the pop-up menu, and select
New.
About the StyleBar
In painters that do not have a StyleBar, StyleBar is on the list in the New
T o ol bar di alog b ox . You can define a toolbar wit h th e name StyleBar, but
you can add only painter-specific buttons, not style buttons, to it.
2 Select a PowerBar name or a PainterBar name and click OK.
The Customize dialog box displays with the Current toolbar box empty.
3 One at a time, drag the toolbar buttons you want from the Selected palett e
box to the Current toolbar box and then click OK.
28 DataWindow .NET
Page 45

Using online Help
DataWindow Designer has online Help that provides both reference and
task-oriented information. Context-sensitive and reference information is
provided in Windows Help format. Task-oriented information is provided in
compiled HTML Help (CHM) format.
CHAPTER 1 Working with DataWindow Designer
How to access Help
Learning to use online
Help
Using the pop-up
menu
You can get Help in any of the ways listed in Table 1-7.
Table 1-7: Accessing Help
Approach What it does
Use the Help menu on the
menu bar or press F1
Add a Help button to the
PowerBar and click it
In a wizard, click the Help
button [?] in the upper right
corner of the window
In a wizard, press F1 Context-sensitive Help for the current field displays.
In the Properties view in the
DataWindow painter, select
Help from the pop-up menu
on any tab page
Click the Help button in a
dialog box
Click the Online Books
button on the Help window
Displays the Help contents.
Displays the Help contents.
The pointer displa ys wit h a questio n mark so that yo u
can get context-sensitive Help. Point and click in a
field you need Help on.
Displays a Help topic from which you can get He lp on
the properties for the object or control whose
properties are displaying in the Properties view.
Displays information about that dialog box.
Open the compiled HTML books
To get information on using Help, press F1 anywhere within online Help.
DataWindow Designer online Help provides a pop-up menu with shortcuts to
features available on the Help menu b ar . T o display t he pop-up menu in online
Help, click the right mouse button.
Sybooks CD and Web
site
DataWindow .N ET books are also provided on the Syb ooks CD and the Sybase
Product Manuals Web site. For more information, see “Other sources of
information” on page xv.
DataWindow Desi gne r User’s Guide 29
Page 46
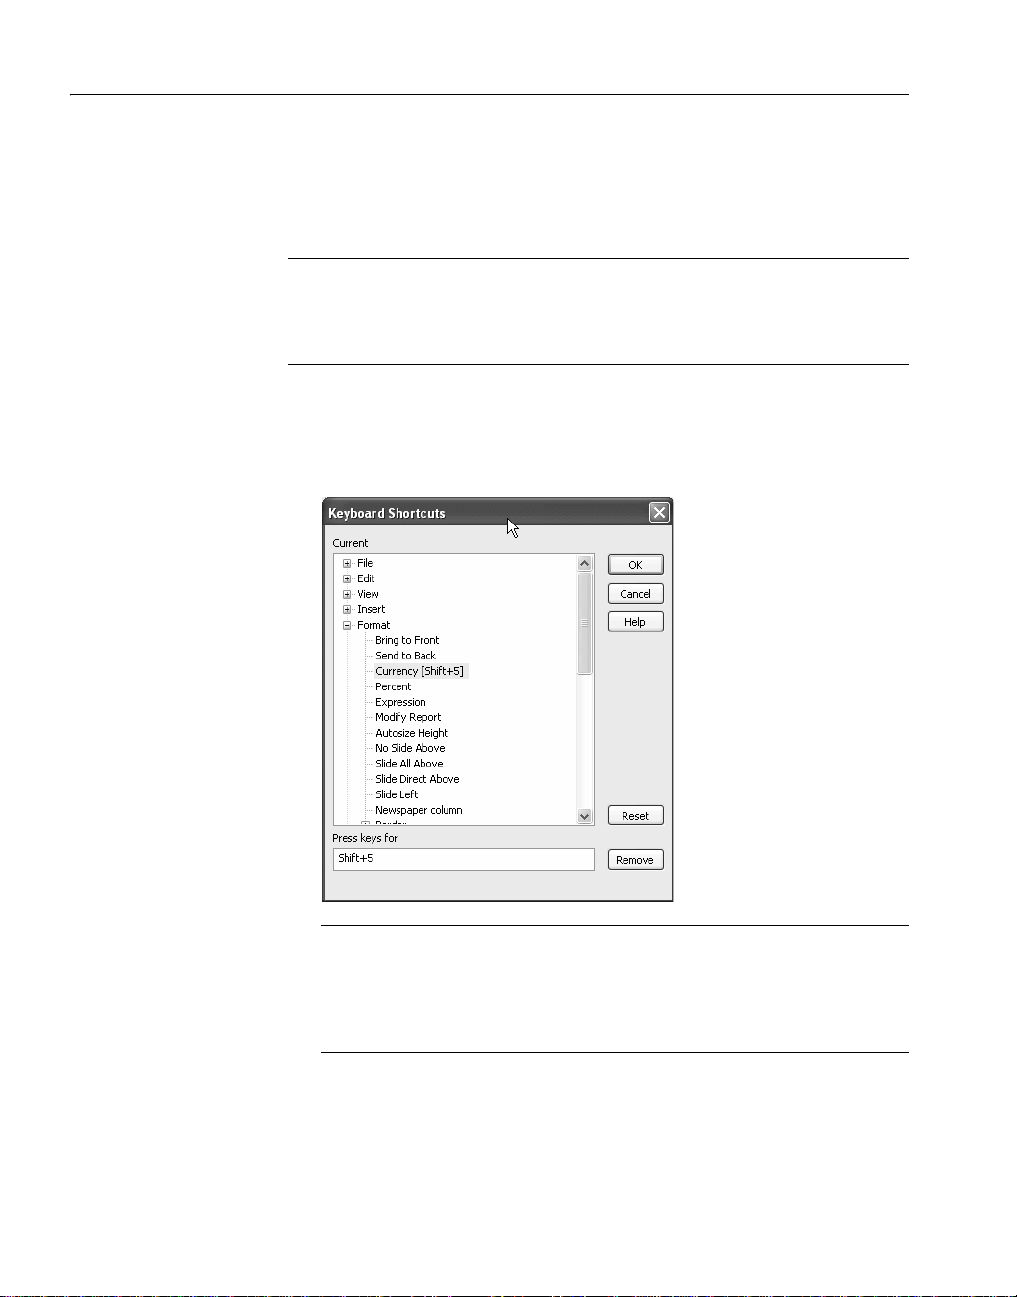
Customizing keyboard shortcuts
Customizing keyboard shortcuts
You can associate your own keyboard shortcuts with DataWindow Designer
menu items.
Tip
Creating keyboard shortcuts means you can use the keyboard instead of the
mouse in many situations, such as changing libraries, objects, or connections,
by creating shortcuts for the File>Recent menu items.
❖ To associate a keyboard shortcut with a menu item:
1 Select Tools>Keyboard Shortcuts from the menu bar.
The keyboard shortcuts for the current menu bar display.
Keyboard shortcuts in a painter or tool
In a painter , the Key board Sho rtcuts dialo g box includes both menu items
as well as additional actions that apply to the current painter or tool. These
nonmenu actions are listed under Additional Global Shortcuts and
Additional Painter Shortcuts.
2 Select a menu item with no shortcut or a menu item with a default shortcut
that you want to change and then put the cursor in the Press Keys For
Shortcut textbox.
30 DataWindow .NET
Page 47
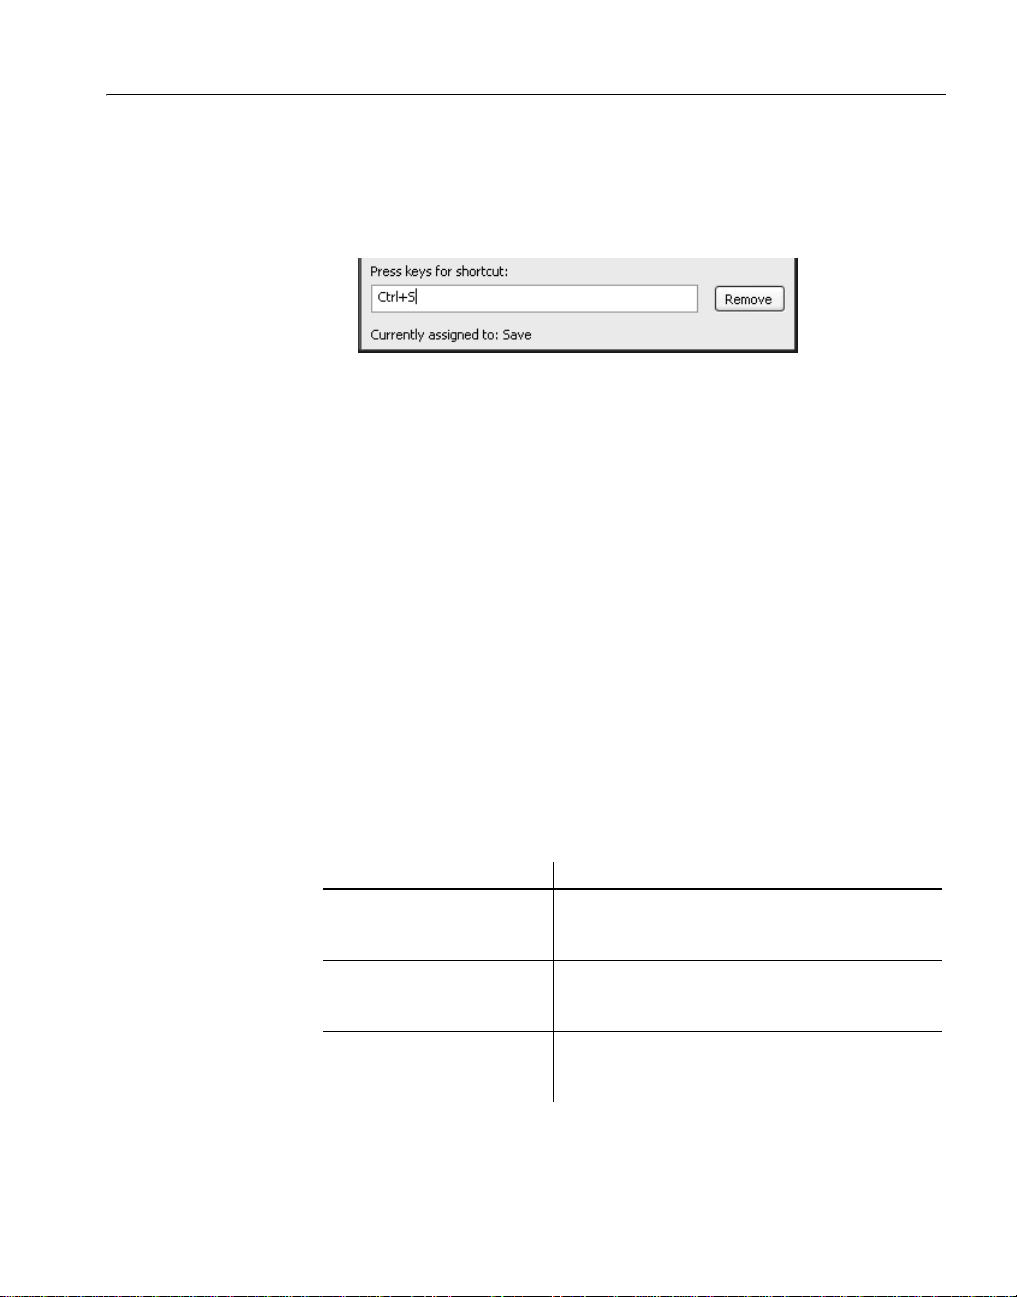
CHAPTER 1 Working with DataWindow Designer
3 Press the keys you want for the shortcut; the new shortcut displays in the
textbox.
If you type a shortcut that is alread y being used, a messag e notifies y ou so
that you can type a different shortcut or change the existing shortcut.
❖ To remove a keyboard shortcut associated with a menu item:
1 Select Tools>Keyboard Shortcuts from the menu bar.
2 Select the menu item with the shortcut you want to remove.
3 Click Remove.
You can reset keyboard shortcuts to the default shortcuts globally or only for
the current painter.
❖ To reset keyboard shortcuts to the default:
• Click the Reset button and respond to the prompt.
Changing fonts
Table 1-8 summarizes the various ways you can change the fonts used in
DataWindow Designer.
Table 1-8: Changing fonts
For this object or painter Do this
A table’s data, headings, and
labels
Objects in the DataWindow
painter
Library painter and
MicroHelp
DataWindow Desi gne r User’s Guide 31
In the Database painter, display the table’s property
page, and change the font properties on the Data,
Heading, and Label Font tabs.
Select objects and then modi fy settings in the
StyleBar, or, in the Properties view for one or more
objects, change the font properties on the Font tab.
Select Tools>System Options from the menu bar
and change the font properties on the System Font
and Printer Font tab pages.
Page 48

How your DataWindow Designer environment is managed
For this object or painter Do this
Interactive SQL view in the
Database painter and the file
editor (changes made for one
of these apply to both)
Use the Printer font tab to set fonts specifically for printing. If you need to print
multilanguage characters, make sure you use a font that is installed on your
printer. Changes you make in the Tools>System Options dia log box and from
the Design>Options menu selection are used the next time you open
DataWindow Designer.
Select Design>Options from the menu bar to
display the editor’s prope rty pa g e and cha nge the
font properti e s on the Editor Font and Printer Font
tab pages.
How your DataWindow Designer environment is
managed
Your DataWindow Designer configuration information is stored in both the
DataWindow Designer initialization file (DW.INI) file and the registry. When
you start DataWindow Designer, it looks in the registry and the DW.INI file to
set up your environment.
About the registry
Some DataWindow Designer features require the use of the DW.INI file, but
many features use the registry to get and store configuration information.
Normally, you should not need to access or modify items in the registry.
Information related to your preferences (such as the way you have arranged
your views in the painters and the shortcut keys you have defined for
DataWindow Designer menu items) is stored in
HKEY_CURRENT_USER/Software/Sybase/DataWindowDesigner/2.0.
Installation-related information is stored in
HKEY_LOCAL_MACHINE/Software/Sybase/DataWi ndowDesigner/2.0.
32 DataWindow .NET
Page 49

About the initialization file
The initialization file is a text file that contains variables that specify your
DataWindow Designer preferences. These preferences include information
such as the last database you connected to and the PBL you are using. When
you perform certain actions in D ataWindow Designer, DataWind ow Desi gner
writes your preferences to the initialization file automatically.
CHAPTER 1 Working with DataWindow Designer
Specifying
preferences
Format of INI files
Normally, you do not need to edit the initialization file. You can specify all
your preferences by taking an action, such as resizing a window or opening a
new application, or by select ing Design>Op tions from on e of the pai nters. But
sometimes a variable does not appear by default in the options sheet for the
painter. In this case, you can use a text editor to modify the variable in the
appropriate section of the initialization file.
Do not use a text editor to edit the DataWindow Designer initialization file
while DataWindow Designer is running. DataWindow Designer caches the
contents of initialization files in memory and overwrites your edited
DataWindow Designer initialization file when it exits, ignoring changes.
The DataWindow Designer initialization file uses the Windows INI file format.
It has three types of elements:
• Section names, which are enclosed in square brackets
• Keywords, which are the names of preference settings
• Values, which are numeric or text strings, assigned as the value of the
associated keyword
A variable can be listed with no value specified, in which case the default is
used.
Some sections are always present by default, but others are created only when
you specify different preferences. If you spec ify preferences for another painter
or tool, DataW indow De signer creates a new secti on for it at the end of the fil e.
Where the
initialization file is kept
DW.INI is installed in the same directory as the DataWindow Designer
executable file.
You can keep your initializatio n file in anoth er locatio n and tell DataWindow
Designer where it can find it by specifying the location in the System Options
dialog box. You might want to do this if you use more than one version of
DataWindow Designer or if you are running DataWindow Designer over a
network.
DataWindow Desi gne r User’s Guide 33
Page 50

How your DataWindow Designer environment is managed
❖ To specify a different location for DW.INI:
1 Select Tools>System Options from the menu bar.
2 On the General tab page, enter the path of your initialization file in the
Initialization Path textbox.
DataWindow Designer records the path in the Windows registry.
DataWindo w Designer looks in the W indows Regi stry for a path to the file, and
then looks for the file in the directory where DataWindow Designer is installed.
If DataWindow Designer cannot find the initialization file using the path in the
Registry, it clears the path value.
If DataWindow Designer does not find the initialization file when it starts up,
it recreates it. However, if you want to retain any preferen ces you have set, such
as database profiles, keep a backup copy of your initialization file. The
recreated file has the default preferences.
34 DataWindow .NET
Page 51

CHAPTER 2
Working with Libraries
About this chapter
Contents
About libraries
DataWindow Designer stores all the objects you create in libraries. This
chapter describes how to work with your libraries.
Topic Page
About libraries 35
About the Library painter 36
Working with libraries 37
Deleting libraries 44
Optimizing libraries 44
Regenerating library entries 45
Exporting and importing entries 46
Creating a deployment library (PBD file) 48
Creating a library directory report 49
DataWindow Designer uses libraries to hold objects. A library is a file
with the file extension PBL (pronounced pibble):
filename.pbl
In DataWindow Designer, you use the Library painter to work with the
objects and libraries you create.
What you can do in the
Library painter
The Library painter workspace displays objects in all libraries on your
computer, bu t you can set the Library painter to di splay only objects in the
current library. In the Library painter, you can:
• Open objects in the current library to edit them in the appropriate
painters
• Copy, move, and delete objects in any library
• Optimize libraries
DataWindow Desi gne r User’s Guide 35
Page 52

About the Library painter
What you canno t do in
the Library painter
You cannot create a library or rename a library in the Library painter. For
information about creating a library, see “Working with projects” on page 6.
You cannot create new DataWindow objects or queries in the Library painter.
You cannot open objects that are not in the current project.
About the Library painter
❖ T o open the Library p a inter:
• Click the Library button in the PowerBar.
Views in the Library
painter
About the Tree view
and the List view
The Library painter has two views that you use for displaying library files
(PBLs) and the objects they contain. The two views, which are available from
the View menu, are Tree and List.
By default, the Library pain ter displays one T ree view (on th e left) and one List
view (on the right). When the Library painter opens, both the T ree view and the
List view display the drives that are on your computer or mapped to it.
Tree view The Tree view displays the drives and folders on the computer and
the libraries and objects they contain.
List view The List view also displays the drives and folders on the computer
and the libraries and objects they contain, but the view has columns with
headers. For libraries, the comment column displays any comment associated
with the library . For objects, the columns display the object name, modification
date, size, and any comment associated with the object. You can resize columns
by moving the splitter bar between columns. You can sort a column’ s contents
by Clicking the column header.
Displaying i tems in the
Tree view and the List
view
Most of the time, you select a library in the Tree view and display the objects
in that library in the List view. You can set a new root or move back and
forward in the history of your actions in the List view and the Tree view so
libraries or other items display. For information about setting the root, see
“Setting the root” on page 42. For information about moving back or forward,
see “Moving back, forward, and up one l evel” on page 42.
36 DataWindow .NET
Page 53
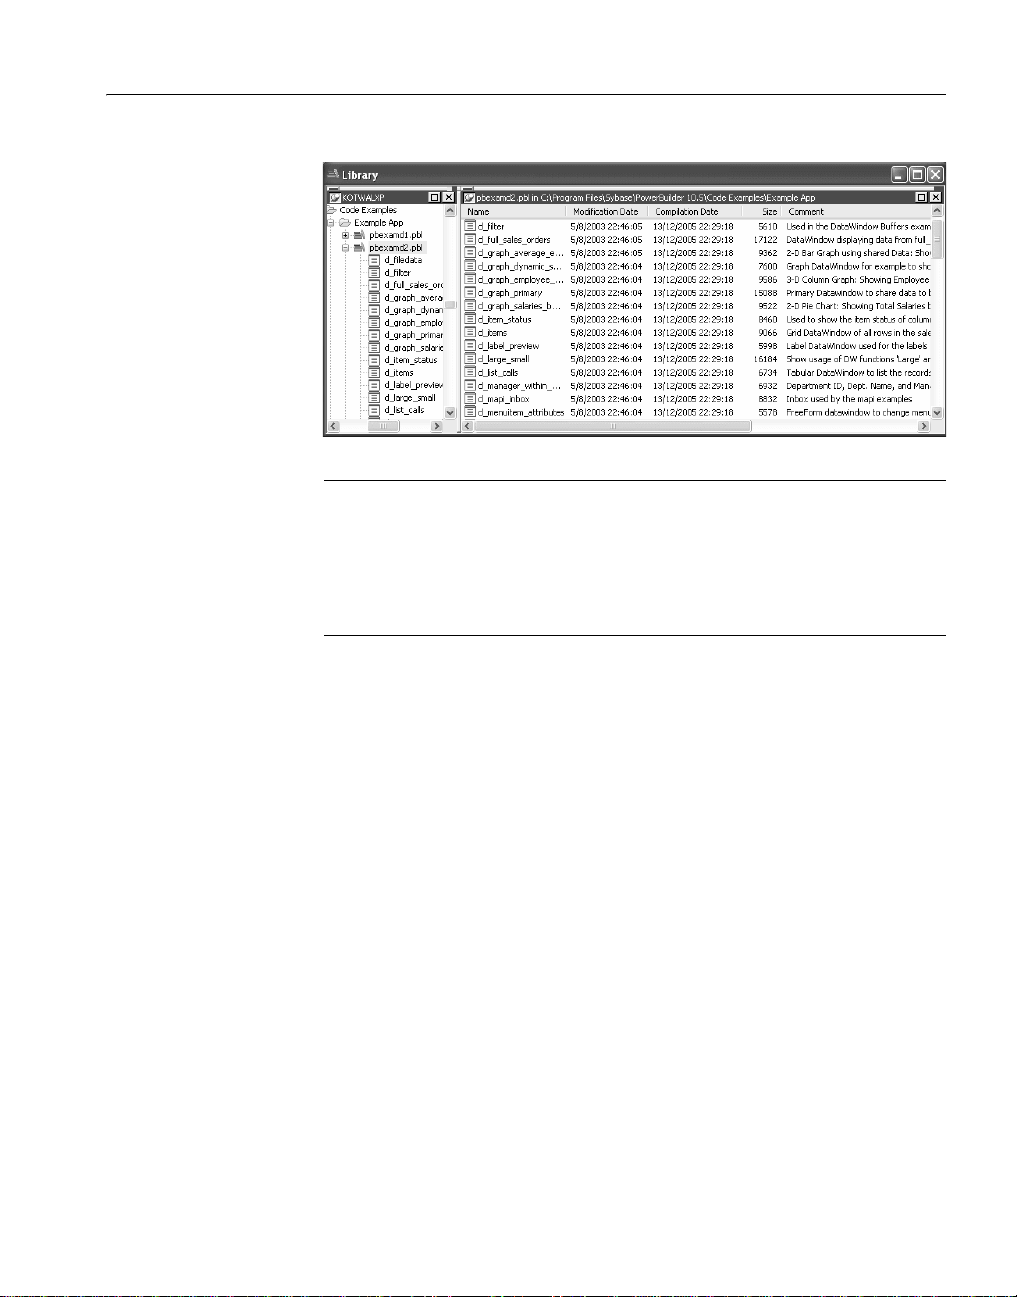
CHAPTER 2 Working with Libraries
About sorting the Name column
When you Click the Name column header repeatedly to sort, the sort happens
in four ways: by object type and then name in bo t h ascen ding and descending
order and by object name in both ascending and des cending order . Y ou may not
easily observe the four ways of sorting if all objects of the same type have
names that begin with the same character or set of characters.
Working with libraries
You work with librari es in the Library painter.
Displaying libraries and objects
What you see in the
views
DataWindow Desi gne r User’s Guide 37
In the Tree view, you can expand items and see the folders, libraries, or objects
they contain. In the List view, you do not see expansions and contractions of
contents. The List view displays only contents. You cannot see any files that
are not in libraries.
❖ To expand or collapse an item in the Tree view:
• Double-click the item.
If the item contains libraries or objects, they display in the List view.
❖ To display the contents of an item in the List view:
• Select the item in the Tree view , or double-Click the item in the List view.
Page 54

Working with libraries
Using drag and drop
to expand items
You can drag and drop items to expand them and see the contents:
If you drag an item
from a And drop it in a This happens
Tree view or List view List view The List view sets the item as the
root and displays the cont ents
Tree view or List view Tree view The Tree view expands to that item
For example, you can drag a library fr om the Tree view and drop it in the List
view to quickly display the objects the library contains in the List view. For
information about using drag and drop to copy or move items, see “Copying,
moving, and deleting objects” on page 40.
Using the pop-up menu
Like the other painters, the Librar y painter has a pop-up menu that provides
menu items that apply to the selected item in the Tree view or the List view . For
example, from a library’s pop-up menu, you can delete, search, opt imize, print
the directory , or displ ay library properties . From an object’ s pop-up menu, you
can edit (go to the painter), copy, move, or delete the object.
Controlling columns that display in the List view
Y ou can cont rol whether to display t he last modification date, co mpilation date,
size, and comments (if a comment was created when an object or library was
created) in the List view.
❖ To control the display of columns in the List view:
1 Select Design>Options from the m enu bar.
2 On the General tab page, select or clear these display items: Modification
Date, Compilation Date, Sizes, and Comments.
38 DataWindow .NET
Page 55

Selecting objects
In the List view, you can select one or more libraries or objects to act on.
❖ To select multiple entries:
• In the List view, use Ctrl+Click (for individual entries) and Shift+Click
(for a group of entries).
❖ To select all entries:
• In the List view, select an object and then Click the Select All button on
the PainterBar.
Filtering the display of objects
You can change which objects display in expanded libraries.
Settings are remembered
DataWindow Designer records your preferences in the Library section of the
DataWindow Designer initialization file so that the next time you open the
Library painter, the same objects and information are displayed.
CHAPTER 2 Working with Libraries
Specifying which
objects display in all
libraries
Initially in the Tree and List views, the Library painter displays all objects in
libraries that you expand. You can specify that the Library painter display in all
libraries only objects whose names match a specific pattern. For example, you
can limit the display to DataWindow objects that begin with
❖ To restrict which objects are displayed :
emp_.
1 Select Design>Options from the menu bar and select the Include tab.
2 In the Options dialog box, specify the display criteria:
• To limit the display to entries that contain specific text in their names,
enter the text in the Name box. You can use the wildcard characters
question mark (?) and asterisk (*) in the string: ? represents one
character, * represents any string of characters. The default is all
entries.
3 Click OK.
The Options dialog box closes.
4 In the Tree view, expand libraries or select a library to display the objects
that meet the criteria.
DataWindow Desi gne r User’s Guide 39
Page 56

Working with libraries
Overriding the ch oices
you made for a
specific view
In either the Tree view or the List view , you can overr ide your choice of o bjects
that display in all libraries by selecting a library, displaying the library’s pop-up
menu, and then clearing or selecting items on the list of objects.
Filtering the display of libraries and folders
In either the Tree view or the List view, you can control what displays when
you expand a drive or folder, An expanded drive or folder can display only
libraries, only folders, or both.
❖ To control the display of libraries and folders:
• In either view, select a drive or folder and then select or clear Libraries
and/or Folders from the pop-up menu.
Opening and previewing objects
You can open and preview objects in the current project.
❖ T o open an object:
• In either the Tree view or the List view, double-click the object, or select
Edit from the object’s pop-up menu.
DataWindow Designer takes you to the painter for that object and opens
the object. You can work on the object and save it as you work. When you
close it, you return to the Library painter.
You can preview DataWindow objects from the Library painter.
❖ To preview an object in the Library painter:
• Select Run/Preview from the object’s pop-up menu.
Copying, moving, and deleting objects
As your needs change, you may want to rearrange the objects in libraries. To
do that, you need to be able to copy and move objects between libraries or
delete objects that you no longer need.
40 DataWindow .NET
Page 57

CHAPTER 2 Working with Libraries
❖ To copy or move objects using drag and drop:
1 In the Tree view or the List view, select the objects you want to copy or
move.
2 Press Shift to move the entries.
Otherwise, the objects will be copied.
3 Drag the objects to a library in either view (or if the contents of a library
are displayed in the List view, you can drop the objects there).
If copying, DataWindow Designer replicates the objects. If moving,
DataWindow Designer moves the objects and deletes them from the
source library. If an object with the same name already exists,
DataWindow Designer prompts you and, if you allow it, replaces the
existing object with the copied or moved object.
❖ To copy or move objects using a button or menu item:
1 Select the objects you want to copy or move to another library.
2 Click the Copy button or the Move button on the Painterbar, or select
Entry>Copy or Entry>Move from the menu bar.
The Select Library dialog box displays.
3 Select the library to which you want to copy or move the objects and Click
OK.
❖ To delete objects:
1 Select the objects you want to delete.
2 Click the Delete button, or select Entry>Delete from the menu bar.
You are prompted to confirm the firs t deletion.
Being asked for confirmation
By default, DataWindow Designer asks you to confirm each deletion. If
you do not want to have to confirm deletions, select Design>Options to
open the Options dialog box for the Library pai nter and clear the Confirm
on Delete check box in the General tab page.
DataWindow Designer records this preference as the DeletePrompt
variable in the Library section of the DW.INI file.
3 Click Yes to delete the entry or Yes To All to delete all entries. Click No
to skip the current entry and go on to the next selected entry.
DataWindow Desi gne r User’s Guide 41
Page 58
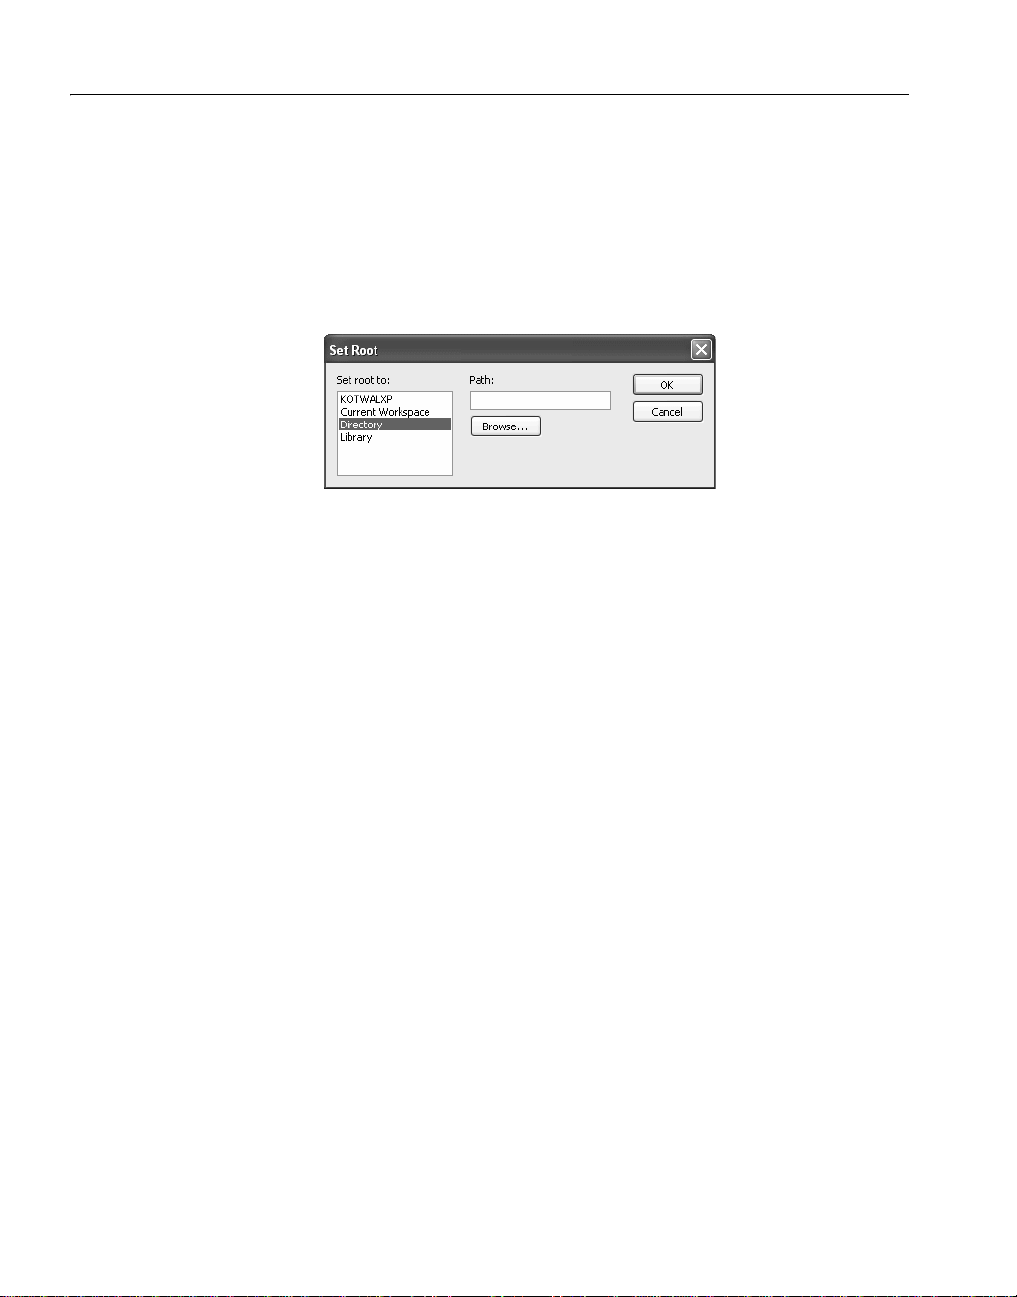
Working with libraries
Setting the root
In either the Tree view or the List view, you can set the root location of the
view.
❖ To set the root of the current view:
1 In either view, select V iew>Set Root from the menu bar , or select Set Root
from the pop-up menu.
2 If you want the root to be a directory or library, type the path or browse to
the path.
If you set the root to the Library List in both the Tree view and the List view,
only the names of the libraries in the current project display in the Tree view
and the List view.
Moving back, forward, and up one level
Y ou can also set a ne w root by moving back to where you were b efore, moving
forward to where you just were, or for the List view, moving up a level.
❖ To move back, forward, or up one level:
• Select View>Back, View>Forward, or View>Up One Level from the
menu bar, or select Back, Forward, or Up One Level from the pop-up
menu.
The name of the location yo u are moving back to or for ward to is appended
to Back and Forward.
42 DataWindow .NET
Page 59

Modifying comments
You can use comments to document your objects and libraries. You can
associate comments with an object when you first save it in a painter, and you
can use the Library painter to:
• Modify existing comments for objects
• Add comments to objects that do not currently have any comments
• Modify the comments for a single object
• Modify comments for multiple objects using a shortcut
• Modify comments for a library
❖ To modify comments for objects:
1 In the List view, select the objects you want.
2 Select Entry>Properties from the menu bar, or select Properties from the
CHAPTER 2 Working with Libraries
pop-up menu.
DataWindow Designer displays the Properties dialog box. The
information that displays is for the first object you selected. You can
change existing comments, or, if there are no comments, you can enter
new descr i ptive text.
3 Click OK when you have finished with the first object.
If you do not want to change the comments for an object, Click OK. The
next object displays.
4 Enter comments and Click OK for each object until you have finished.
If you want to stop working on comments before you finish with the
objects you selected, Click Cancel. The comments you have entered un til
the most recent OK are retained. The new commen ts display in the Library
painter workspace.
❖ To modify comments for a library:
1 Select the library you want.
2 Click the Properties button, or select Library from the pop-up menu.
3 Add or modify the comments.
DataWindow Desi gne r User’s Guide 43
Page 60

Optimizing libraries
Deleting libraries
❖ To delete a library:
1 In either the Tree view or the List view, select the library you want to
delete.
2 Select Library>Delete from the menu bar.
Restriction
You cannot delete libraries in the current library list.
The Delete Library dialog box dis pl ays , sh ow ing the libr a ry yo u select ed.
3 Click Yes to delete the library.
The library and all its entries are deleted. You cannot get them back.
Optimizing libraries
You might need to optimize your libraries occasionally. Optimizing removes
gaps in libraries and defragments the storage of objects, thus improving
performance.
Optimizing affects only layout on disk; it does not affect the contents of the
objects. Objects are not recompiled when you optimize a library.
❖ T o optim ize a library:
1 In either Tree view or List view, choose the library you want to optimize.
2 Select Library>Optimize from the menu bar, or select Optimize from the
library's pop-up menu.
DataWindow Designer reorganizes the library structure to optimize o bject
and data storage and index locations. Note that DataWindow Designer
does not change the modification date for the library entries. DataWindow
Designer saves the unoptimized version as a backup file in the same
directory.
The optimized file is created with the default permissions for the drive
where it is stored. On some systems new files are not shareable by default.
If you see “save of object failed” or “link error” messages after optimizing,
check the permissions assigned to the PBL.
44 DataWindow .NET
Page 61

If you do not want a backup file
If you do not want to save a backup copy of the library, clear the Save
Optimized Backups check box in the Libr ary painter's Design>Options tab
dialog box. If you clear this option, the new setting remains in effect until
you change it.
Regenerating library entries
When you regenerate an entry, DataWindow Designer recompiles the source
form stored in the library and replaces the existing compiled form with the
recompiled form.
❖ To regenerate library entries:
1 Select the entries you want to regenerate.
2 Click the Regen button, or select Entry>Regenerate from the menu bar.
DataWindow D es igner uses the source to rege nerate the library entry and
replaces the current compiled object with the regenerated object. The
compilation date and size are updated.
CHAPTER 2 Working with Libraries
Migrating libraries
When you upgrade to a new version of DataWindow Designer, your existing
libraries need to be migrated to the new version.
Make sure PBLs are writable
If you make copies of your libraries before you migrate to a new version of
DataWindow Designer, make sure that the libraries you will migrate are
writable.
The library that is created when you create a new project contains the default
application object, which is required for migration. If you add other libraries to
the project and delete the default application library, DataWindow Designer
cannot migrate the other libraries in the project to the current version.
DataWindow Desi gne r User’s Guide 45
Page 62

Exporting and importing entries
DataWindow Designer uses project (.dwp) files to manage libraries. The
following sample has three libraries: lib1.pbl, lib2.pbl, and lib3.pbl. If you
delete the library listed on the applib line, lib1.pbl, from the library list, you
cannot migrate the project to the current version:
A library must be in the current library list for you to migrate it.
❖ T o migra te libraries :
1 Select Migrate from the pop-up menu for the project in the System Tree.
2 Click OK.
Save Format v3.0(19990112)
appname "Default";
applib "lib1.pbl";
LibList "lib1.pbl;lib2.pbl;lib3.pbl";
type "DataWindow Designer";
The Migrate Application dialog box displays.
DataWindow Designer migrates all objects in the library to the current
version.
Exporting and importing entries
You can export DataWindow object definitions to text files. The text files
contain all the information that defines the DataWindow objects. The files are
virtually identical syntactically to the source forms that are stored in libraries
for all objects.
You may want to export object def initions in the following situations:
• You want to store the objects as text files.
• You want to move objects to another computer as text files.
Caution
The primary use of the Export feature is to export source code, not to modify
the source. Modifying source in a text file is not recommended.
Later on you can import the files back int o Dat aWindow Designer for storage
in a library.
46 DataWindow .NET
Page 63

CHAPTER 2 Working with Libraries
❖ To export entries to text files:
1 Select the Library entries you want to export.
2 Click the Export button.
or
Select Entry>Export from the menu bar.
The Export Library Entry dialog box displays showing the name of the
first entry selected for export in the File Name box and the name of the
current directory. The current directory is the last directory you selected
for saving exported entries or saving a file using the file editor.
DataWindow Designer appends the file extension .srd.
3 Specify the filename and directory for the export file. Do not change the
file extension.
4 Specify the encoding type you want the file to use.
5 Click OK.
DataWindow Designer converts the entry to the requested file format,
stores it with the specified name, then displays t he next ent ry you selected
for export.
If a file already exists with the same name, DataWindow Designer displays
a message asking whether you want to rep l ace the file . If you s ay n o, you
can change the name of the file and then export it, skip the file, or cancel
the export of the current file and any selected files that have not been
exported.
6 Repeat steps 3 and 4 until you have processed all the selected entries.
You cannot see export files in the Library painter
Since export files are text files, the Library painter does not show them; it
shows only libraries and directories.
❖ To import text files to library entries:
1 Click the Import button.
or
Select Entry>Import from the menu bar.
The Select Import Files dialog box disp lays show ing the curren t directory
and a list of files with the extension srd in that directory.
2 Select the files you want to import. Use Shift+Click or Ctrl+Click to select
multiple files.
DataWindow Desi gne r User’s Guide 47
Page 64

Creating a deployment library (PBD file)
3 Click Open.
The Import File Into Library Entry dialog box displays listing the libraries
in the library search path.
4 Select the library you want to import the text files to.
5 Click OK.
DataWindow Designer converts the specified text files to DataWindow
Designer format, regenerates (recompiles) the ob jects, stores the entries in
the specified library, and updates the entries' timestamps.
If a library entry with the same name already exists, DataWindow
Designer replaces it with the imported entry.
Caution
When you import an entry with the same name as an existing entry, the old
entry is deleted before the import takes place. If an import fails, the old
object will already be deleted.
Creating a deployment library (PBD file)
The DataWindow objects you build in DataWindow Designer can be
distributed in a deployment library (PBD). Other DataWindow Designer,
PowerBuilder, or InfoMaker users can open a PBL and copy or modify the
DataWindow objects in it. They cannot open and modify objects in a PBD.
T o create PBDs for all the PBLs in your project, select Build Dep loyment from
the pop-up menu for the project in the System T ree. PBDs have the same name
as PBLs with the extension .PBD.
Including additional resources in the PBD file
When building a runtime library (PBD file), DataWindow Designer does not
inspect the objects; it simply removes the source form of the objects from the
library (leaving only the runtime version). Therefore, if any of the objects in
the library use resources (p ictures and pointer s) and you do not want to provide
these resources separately, you must list the resources in a resource file (PBR
file). Doing so enables DataWindow Designer to include the resources in the
runtime library when it builds it.
48 DataWindow .NET
Page 65

A PBR file is an ASCII t ext file in which y ou list resource names (s uch as BMP,
CUR, RLE, and WMF files) and DataWindow objects.
❖ To create a PowerBuilder resource file (PBR file):
• Using a text editor, create a text file that lists all resource files referenced
in your DataWindow objects. List the names of each resource, one
resource on each line, then save the list as a file with the extension PBR.
Naming resources
If the resource file is in the current folder, you can simp ly list the file, such as:
FROWN.BMP
If the resource file is in a different folder, include the path to the file, such as:
C:\BITMAPS\FROWN.BMP
What happens at runtime
When a resource such as a bitmap is referenced at runtime, the DataWindow
server first looks in the PBDs that are defined for the application. Failing that,
it looks in folders in the search path for the file.
CHAPTER 2 Working with Libraries
Creating a library directory report
A library directory report lists all entries in the current library, showing the
following information for all objects in the library, ordered by object type:
• Name of object
• Modification date and time
• Size (of compiled object)
• Comments
DataWindow Desi gne r User’s Guide 49
Page 66

Creating a library directory report
❖ To create the library directory report:
1 Select the current library.
2 Select Library>Print Directory from the menu bar.
DataWindow Designer sends the library directory report to the printer
specified under File>Printer Setup in the menu bar.
50 DataWindow .NET
Page 67

CHAPTER 3
Managing the Database
About this chapter
Contents
Before you begin
This chapter describes how to manage the database from within
DataWindow Designer.
Topic Page
Working with database components 51
Managing databa ses 54
Using the Database painter 55
Creating and deleting an Adaptive Server Anywhere database 60
Working with tables 62
Working with keys 75
Working with indexes 79
Working with database views 81
Manipulating data 86
Creating and executing SQL statements 92
Controlling access to the current database 96
You work with relational databases in DataWindow Designer. If you are
not familiar with relational databases, you might want to consult an
introductory text, suc h as A Database Primer by C. J. Date.
Working with database components
A database is an electronic storage place for data. Databases are designed
to ensure that data is valid and consistent and that it can be accessed,
modified, and shared.
A database management system (DBMS) governs the activities of a
database and enforces rules that ensure data integrity. A relational DBMS
stores and organizes data in tables.
DataWindow Desi gne r User’s Guide 51
Page 68

Working with database components
How you work with
databases in
DataWindow Designer
Tables and columns
Keys
You can use DataWindow Designer to work with the following database
components:
• Tables and columns
•Keys
• Indexes
• Database views
• Extended attributes
• Addition al database components
A database usually has many tables, each of which contains rows and columns
of data. Each row in a table has the same columns, but a column’s value for a
particular row could be empty or
NULL if the column’s definition allows it.
Tables often have relationships with other tables. For example, in the EAS
Demo DB included with DataWindow Designer, the
Dept_id column, and the Employee table also has a Dept_id column that
Department table has a
identifies the department in which the employee works. When you work with
the
Department table and the Employee table, the relationship between them is
specified by a join of the two tables.
Relational databases use keys to ensure database integrity.
Primary keys A primary key is a column or set of columns that uniqu ely
identifies each row in a table. For example, two employees may have the same
first and last names, but they have uniqu e ID numbers. The
Emp_id column in
the Employee table is the primary key column.
Foreign keys A foreign key is a column or set of columns that contains
primary key values from a nother table. For example, the
primary key column in the
Department table and a foreign key in the Employee
Dept_id column is the
table.
Key icons In DataWindow Design er, columns def ined as keys ar e displayed
with key icons that use different shapes and colors for primary and foreign.
DataWindow Designer automatically joins tables that have a primary/foreign
key relationship, with the join on the key columns.
52 DataWindow .NET
Page 69

CHAPTER 3 Managing the Database
Indexes
In the following illustration there is a join on the
primary key for the
department table and a foreign key for the employee table:
dept_id column, which is a
For more information, see “Working with keys” on page 75 .
An index is a column or set of columns you identify to improve database
performance when searching for data specified by the index. You index a
column that contains information you will need frequently. Primary and
foreign keys are special examples of indexes.
You specify a column or set of columns with unique values as a unique index,
represented by an icon with a single key.
Y ou specify a column or set of colu mns that has values that are not unique as a
duplicate index, represented by an icon with two file cabinets.
For more information, see “Working with indexes” on page 79.
Database views
If you often select data from the same tables and columns, you can create a
database view of the tables. You give the database view a name, and each time
you refer to it the associated
SELECT command executes to find the data.
Database views are listed in the Objects view of the Database painter and can
be displayed in the Object Layout view , but a database view does not phys ically
exist in the database in the same way that a table does. Only its definition is
stored in the database, and the view is re-created whenever the definition is
used.
Database administrators often create database views for s ecurity purpos es. For
example, a database view of an Employee table that is available to users who
are not in Human Resources might show all columns except Salary.
For more information, see “Working with database views” on page 81.
DataWindow Desi gne r User’s Guide 53
Page 70

Managing databases
Extended attributes
Additional database
components
Extended attributes enable you to store information about a table’s columns in
special system tables. Unlike tables, keys, indexes , and database views (which
are DBMS-specific), extended attributes are DataWindow Designer-specific.
The most powerful extended attributes determine th e edit style, display format,
and validation rules for the column.
For more information about extended attributes, see “Specifying column
extended attributes” on page 66. For more information about the extended
attribute system tables, see Appendix B, “The Extended Attribute System
Tables.”
Depending on the database to which you are connected and on your user
privileges, you might be able to view or work with a variety of additional
database components through DataWindow Designer. These components
might include:
Driver information
Groups
Metadata types
Procedures and functions
Users
Logins
For example, driver information is relevant to ODBC connections. It lists all
the ODBC options associated with the ODBC driver, allowing you to
determine how the ODBC interface will behave for a given connection. Login
information is listed for Adaptive Server Enterprise (SYC) database
connections. Information about groups and users is listed for several of the
databases and allows you to add new user s and groups and maintain pas swords
for existing users.
Managing databases
DataWindow Designer supports many database management systems
(DBMSs). For the most par t, you work the sam e way in DataW indow Designer
for each DBMS, but because each DBMS provides some unique features
(which DataWindow Designer makes use of), there are some issues that are
specific to a particular DBMS. For complete information about using your
DBMS, see Connecting to Your Database.
54 DataWindow .NET
Page 71

CHAPTER 3 Managing the Database
What you can do
Setting the database
connection
Changing the
database connection
Using the Database painter, you can do the following in any DBMS to which
you have been given access by the database administrator:
• Modify local table and column properties
• Retrieve, change, and insert data
• Create new local tables or modify existing tables
When you open a painter that communicates with the database (such as the
Database painter or DataWindow painter), DataWindow Designer connects
you to the database you used last if you are not already connected. If the
connection to the default database fails, the painter still opens.
If you do not want to connect to the database you used last, you can deselect
the Connect to Default Profile option in the Database Preferences dialog box.
You can change to a different database at any time. You can have several
database connections open at a time, although only one connection can be
active. The database components for each open connection are listed in the
Objects view.
The Database painter title bar displays the number of open connections and
shows which is active. The title bar for each view displays the connection with
which it is currently associated. Y ou can change the connection associated with
a view by dragging the profile name for a different connection onto the view.
For more about changing the database you are connected to, see Connecting to
Your Database.
Creating and deleting
databases
When you are connected to Adaptive Server Anywhere, you can create a new
database or delete an existing database using the Database painter.
For all other DBMSs, creating and deleting a database is an administrative task
that you cannot do within DataWindow Designer.
Using the Database painter
To open the Database painter, click the Database button in the PowerBar.
About the painter
DataWindow Desi gne r User’s Guide 55
Like the other DataW ind ow Designe r painters , the Databas e painter co ntains a
menu bar, customizable PainterBars, and several views. All database-related
tasks that you can do in DataWindow Designer can be done in the Database
painter.
Page 72

Using the Database painter
Views in the Database
painter
Table 3-1 lists th e views available in the Database painter.
Table 3-1: Database painter views
View Description
Activity Log Displays the SQL syntax generated by the actions you
execute.
Columns Used to create and/or modify a table’s columns (formerly
done in the Table painter).
Extended Attributes Lists the display formats, edit styl es, and validation rules
defined for the selected database connection.
Interactive SQL Used to build, execute or explain SQL. (In DataWindow
Designer 6 and earlier, some of this functionality was in the
Database Administration painter.)
Object Details Displays an object’s propertie s. For some objects, properties
are read-only; for others, properties can be modified. This
view is analogous to the Properties view in other painters.
Object Layout Displays a graphical representation of tables.
Objects Lists the database interfa ces and profiles. For an active
database c o nnection, m ight also lis t all or some o f the
following objects associated with that database: grou p s,
metadata types, procedures and functions, tables, columns,
primary and foreign keys, indexes, users, views, driver
information, and utilities (the database components listed
depend on the data base and your user privileges).
Results Displays data in a grid, table, or freeform format.
56 DataWindow .NET
Page 73

CHAPTER 3 Managing the Database
Dragging and
dropping
Database painter
tasks
You can select certain database objects from the Objects view and drag them
to the Object Details, Object Layout, Columns, and/or ISQL views. Just
position the pointer on the d atabase object ’ s icon and drag it to the appropriate
view.
Table 3-2: Using drag and drop in the Database painter
Object Can be dragged to
Driver, group, metadata typ e, procedure or function,
table, column, user, primary or foreign key, index
Table or view Object Layout view
Table or column Columns view
Procedure or view ISQL view
Object Details view
Table 3-3 describes how to do some basic tasks in the Database painter. Most
of these tasks begin in the Objects view. Many can be accomplished by
dragging and dropping objects into di fferent views. If you prefer, you can use
buttons or menu selections from the main bar or from pop-up menus.
Table 3-3: Common tasks in the Database painter
To Do this
Modify a database profile Highlight a database profi le and select Properties from
the Object or pop-up menu or use th e Prop erties butto n.
Alternatively, use the Import and Export Profiles menu
selections to copy profiles.
For more information, see th e sec tion o n impo rtin g and
exporting database profiles in Connecting to Your
Database.
Connect to a database Highlight a database profile and then select Connect
from the File or pop-up menu or use the Connect button.
With File>Recent Connections, you can review and
return to earlier connections. You can also make
database connections using the Database Profile button.
Create new profiles,
tables, views, columns,
keys, indexes, or gr oups
Modify database objects Drag the object to the Object Details view.
Graphically display tables Drag the table icon from the list in the Objects view to
Manipulate data Highlight the table and select Grid, T abular , or Freeform
Highlight the database object and select New from the
Object or pop-up menu or use the Create button.
the Object Layout view , or highlight the table and select
Add To Layout from the Object or pop-up menu.
from the Object>Data menu or the pop-up menu Edit
Data item, or use the appropriate Data Manipulation
button.
DataWindow Desi gne r User’s Guide 57
Page 74

Using the Database painter
To Do this
Build, execute or explain
SQL
Define or modify
extended attributes
Specify exte nded
attributes for a column
Access database utilities Double-click a utility in the Objects view to launch it.
Log your work Select Design>Start Log from the menu bar. To see the
Modifying database preferences
To modify database preferences, select Design>Options fr om the menu bar.
Some preferences are specific to the database connection; others are s pecific to
the Database painter.
Use the ISQL view to build SQL statements. Use the
Paste SQL button to p a s te SELECT, INSERT, UPDATE,
DELETE statements or type them directly into the
and
view’s workspace. To execute or explain SQL, select
Execute SQL and Explain SQL from the Design or
pop-up menu.
Select from the Object>Insert menu the type of extended
attribute you want to define or modify, or highlight the
extended attribute from the list in the Extended
Attributes view and select New or Properties from the
pop-up menu.
Drag the column to the Object Details view and select
the Extended Attributes tab.
SQL syntax generated, display the Activity Log view.
Preferences on the
General property page
The Connect To Default Profile, Shared Database Profiles, Keep Co nnectio n
Open, Use Extended Attributes, and Read Only preferences are specific to the
database connection.
The remaining preferences are specific to the Database painter. For information
about modifying these preferences, see Connecting to Your Database.
Table 3-4: Database painter preferences
Database
preference
Columns in the
Table List
SQL Te rm inato r
Character
What DataWindow Designer does with the specified
preference
When DataWindow Designer displays tables graphically, eight
table columns display unless you change the number of
columns.
DataWindow Designer uses the semicolon as the SQL
statement terminator unless you enter a different termi nator
character in the box. Make sure that the character you choose
is not reserved for a nother use by your database vendor. For
example, using the slash character (/) causes compilation errors
with some DBMSs.
58 DataWindow .NET
Page 75

CHAPTER 3 Managing the Database
Preferences on the
Object Colors property
page
You can set colors separately for each component of the Database painter's
graphical table representation: the table header , columns, indexes, primary ke y ,
foreign keys, and joins. Set a color preference by selecting a color from a
drop-down list.
You can design custom colors that you can use when you select color
preferences. To design custom colors, select Design>Custom Colors from the
menu bar and work in the Custom Colors dialog box.
Logging your work
As you work with your database, y ou generate SQL statements. As you define
a new table, for example, DataW indow Designer builds a
statement internally. When you click the Create button, DataWindow Designer
sends the SQL statement to the DBMS to create the table. Similarly, when yo u
add an index, DataWindow Designer builds a
Database
preference
Refresh Table List When DataWindow Designer first displays a table list,
What DataWindow Designer does with the specified
preference
DataWindow Designer retrieve s the table list from the database
and displays it . T o sa ve time, DataW ind ow Desig ner saves this
list internally for reuse to avoid regeneration of very large table
lists. The table list is refreshed every 30 minutes (1800
seconds) unless you specify a different re fresh rate.
SQL CREATE T ABL E
CREATE INDEX statement.
Y ou can see all SQL generated in a Database painter session in the Activity Log
view. You can also save this information to a file. This allows you to have a
record of your work and makes it easy to duplicate the work if you need to
create the same or similar tables in another database.
❖ To start logging your work:
1 Open the Database painter.
2 Select Start Log from the Design menu or the po p-up menu in the Activity
Log view.
DataWind ow Designer begins sendi ng all generated syntax to the Acti vity
Log view.
DataWindow Desi gne r User’s Guide 59
Page 76

Creating and deleting an Adaptive Server Anywhere database
❖ T o stop the log:
• Select Stop Log from the Desi gn menu or the pop-up men u in the Activity
Log view.
DataWi ndow Des igner st ops s ending th e genera ted synt ax to the Ac tivity
Log view. Your work is no lo nger logged.
❖ To save the log to a permanent text file:
1 Select Save or Save As from the File menu.
2 Name the file and click Save. The default file extension is SQL, but you
can change that if you want to.
Submitting the log to your DBMS
You can open a saved log file and submit it to your DBMS in the ISQL view.
For more information, see “Building and executing SQL statements” on page
92.
Creating and deleting an Adaptive Server Anywhere
database
In DataWindow Designer you work within an existing database. With one
exception, creating or deleting a database is an administrative task that is not
performed directly in DataW indow Designer. The one exception is that you can
create and delete a local Adaptive Server Anywhere database from within
DataWindow Designer.
For information about creating and deleting other databases, see your DBMS
documentation.
❖ To create a local Adaptive Server Anywhere database:
1 From the Objects view, launch the Create ASA Database utility included
with the ODBC interface.
The Create Adaptive Server Anywhere Database dialog box displays.
2 In the Database Name box, specify the file name and path of the database
you are creating.
If you do not provide a file extension, the database file name is given the
extension DB.
60 DataWindow .NET
Page 77

CHAPTER 3 Managing the Database
3 Define other properties of the database as needed.
If you are using a non- English database, you can specify a co de page in the
Collation Sequence box.
For complete information about filling in the dialog box, click the Help
button in the dialog box.
4 Click OK.
When you click OK, DataWindow Designer does the following:
• Creates a database with the specified name in the specified directory
or folder. If a database with the same name exists, you are asked
whether you want to replace it.
• Adds a data source to the ODBC.INI key in the registry. The data
source has the same name as the database unless one with the same
name already exists, in which case a suffix is appended.
• Creates a database profile and adds it to the registry. The profile has
the same name as the database unless one with the same name already
exists, in which case a suffix is appended.
• Connects to the new database.
❖ To delete a local Adaptive Server Anywhere database:
1 Open the Database painter.
2 From the Objects view, launch the Delete ASA Database utility included
with the ODBC interface.
3 Select the database you want to delete and select Open.
4 Click Yes to de lete th e datab ase.
When you click Yes, DataWindow Designer deletes the specified
database.
DataWindow Desi gne r User’s Guide 61
Page 78

Working with tables
Working with tables
When you open the Database painter, the Object view lists all tables in the
current database that you have access to (inc luding tables that were not created
using DataWindow Designer). You can create a new table or alter an existing
table. You can also modify table properties and work with indexes and keys.
Creating a new table from scratch
In DataW indow Design er, you can create a new t able in any database to which
DataWindow Designer is connected.
❖ To create a table in the current database:
1 Do one of the following:
• Click the Create Table button.
• Right-click in the Columns view and select New Table from the pop-
up menu.
• Right-click T ables in the Objects view and select New T able from the
pop-up menu.
• Select Insert>Table from the Object menu.
The new table template displays in the Columns view. What you see in the
view is DBMS-dependent.Y ou use this template to specify each column in
the table. The insertion point is in the Column Name box for the first
column.
2 Enter the required information for this column.
For what to enter in each field, see “Specifying column definitions” on
page 64.
As you enter information, use the Tab key to move from place to place in
the column definition. After defining the last item in the column
definition, press the Tab key to display the work area for the next co lumn.
3 Repeat step 2 for each additional column in your table.
4 (Optional) Select Object>Pending SQL from the menu bar or select
Pending SQL from the pop-up menu to see the pending SQL syntax.
If you have not already named the table, you must provide a name in the
dialog box that displays. To hide the SQL syntax and return to the table
columns, select Object>Pending Syntax from the menu bar.
62 DataWindow .NET
Page 79

CHAPTER 3 Managing the Database
5 Click the Save button or select Save from the File or pop-up menu, then
enter a name for the table in the Create New Table dialog box.
DataWindow Designer submits the pending SQL syntax statements it
generated to the DBMS, and the table is created. The new table is
displayed in the Object Layout view.
About saving the table
If you make changes after you save the table and before you close it, you
see the pending changes when you select Pending SQL again. When you
click Save again, DataWindow Designer submits a
DROP TABLE
statement to the DBMS, recreates the table, and applies all changes that are
pending. Clicking Sav e many times can be t ime consum ing when you are
working with larg e tabl es, so y ou mi ght wan t to s ave onl y when you hav e
finished.
6 Specify extended attributes for the columns.
For what to enter in each field, see “Specifying column extended
attributes” on page 66.
Creating a new table from an existing table
You can create a new table that is similar to an existing table very quickly by
using the Save Table As menu option.
❖ To create a new table from an existing table:
1 Open the existing table in the Col umn s vi ew by d ragging and dropping it
or selecting Alter Table from the pop-up menu.
2 Right-click in the Columns view and s elect Save T able As from the po p-up
menu.
3 Enter a name for the new table and then the owner’s name, and click OK.
The new table appears in the Object Layout view and the Columns view.
4 Make whatever changes you want to the table definition.
5 Save the table.
6 Make changes to the table’s properties in the Object Details view.
For more information about modifying table properties, see “Specifying
table and column properties” on page 64.
DataWindow Desi gne r User’s Guide 63
Page 80

Working with tables
Specifying column definitions
When you create a new table, you must specify a definition for each column.
The fields that display for each column in the Columns view depend on your
DBMS. You might not see all of the following fields, and the values that you
can enter are dependent on the DBMS.
For more information, see your DBMS documentation.
Table 3-5: Defining columns in the Columns view in th e Database
painter
Field What you enter
Column Name (Required) The name by which the column will be identified.
Data Type (Required) Select a datatype from the drop-down list. All
Width For datatypes with variable widt hs, the numb er of cha racters in
Dec For numeri c datatypes, the number of decimal places to display.
Null Selec t Yes or No from the Null drop-down list to specify whethe r
Default The value that will b e p laced in a c olumn i n a ro w th at y ou in sert
datatypes supported by the current DBMS are displayed in the list.
the field.
NULLs are allowed in the column. Specifying No means the
column cannot have
is the default in a new table.
into a DataWindow ob je ct . The drop -do w n list has built-in
choices, but you can type any other value. For an explanation of
the built-in choices, see your DBMS documentation.
NULL values; users must supply a value. No
Specifying table and column properties
After you create and save a table, you can specify the properties of the table
and of any or its columns. Table properties include the fonts used for headers,
labels, and data, and a comment that you can associate with the table. Column
properties include the text used for headers and labels, display formats,
validation rules, and edit styles used for data (also known as a column’s
extended attributes), and a comment you can associate with the column.
64 DataWindow .NET
Page 81

Specifying t able properties
In addition to adding a comment to associate with the table, you can choose the
fonts that will be used to display information from the table in a DataWindow
object. You can specify the font, point size, color, and style.
❖ To specify table properties:
1 Do one of the following:
• Highlight the table in either the Objects view or the Object Layout
• Click the Properties button.
• Drag and drop the table to the Object Details view.
The properties for the table display in the Object Details view.
2 Select a tab and specify properties:
Select this tab To modify this property
General Comments associated with the table
Data Font Font for data retrieved from the datab ase and displayed in
Heading Font Font for column identifiers u sed in grid, tabu lar, a nd n-up
Label Font Font for column identifiers used in freeform
CHAPTER 3 Managing the Database
view and select Properties from the Object or pop-up menu.
the Results view by clicking a Data Manipula tion but ton
DataWindow objects displayed in the Results view by
clicking a Data Manipulation button
DataWindow objects displayed in the Results view by
clicking a Data Manipulation button
3 Right-click on the Object Details view and select Save Chan ges from the
pop-up menu.
Any changes you made in the Object Details view are imm ediately s aved
to the table definition.
DataWindow Desi gne r User’s Guide 65
Page 82

Working with tables
Specifying column extended attributes
In addition to adding a comment to associate with a column, you can specify
extended attributes for each column. An extended attribute is information
specific to DataWindow Designer that enhances the definition of the column.
❖ T o spe cify exte nde d attri butes :
1 Do one of the following:
• Highlight the column in either the Objects view or the Object Layout
view and select Properties from the Object or pop-up menu.
• Click the Properties button.
• Drag and drop the column to the Object Details view.
2 Select a tab and specify extended attribute values:
Select this tab To modify these extended attributes
General Column comments.
Headers Label text used in free-form DataWindow objects
Display How the data is formatted in a DataWindow ob ject as well
Validation Criteria that a value must pass to be accepted in a
Edit Style How the column i s presented in a DataW in dow object. For
Header text used in tabular, grid, or n-up DataWindow
objects
as display height, wi dth, and position. For example, you
can associate a display format with a Revenue column so
that its data displays with a leading dollar sign and n egative
numbers display in parentheses.
DataWindow object. For example, you can associ at e a
validation rule with a Salary column so that you can enter
a value only within a particular range.
The initial value for the column. You can select a value
from the drop-down list. The initial value must be the same
datatype as the column, must pass validation, and can be
NULL only if NULL is allowed for the column.
example, yo u can disp lay column valu es as radio buttons or
in a drop-down list.
3 Right-click on the Column property sheet and select Save Changes from
the pop-up menu.
Any changes you made in the propert y sheet are immediatel y saved to the
table definition.
66 DataWindow .NET
Page 83

CHAPTER 3 Managing the Database
Overriding definitions
In the DataWindow painter, you can override the extended attributes specified
in the Database painter for a particular DataWindow object.
How the information is
stored
Extended attributes are stored in the DataWindow Designer system tables in
the database. DataWindow Designer uses the information to display, present,
and validate data in the Database painter and in DataWindow objects. When
you create a view in the Database painter, the extend e d attributes of the table
columns used in the view are used by default.
About display formats ,
edit styles, and
validation rules
In the Database painter, you create display formats, edit styles, and validation
rules. Whatever you create is then available for use with columns in tables in
the database. You can see all the display formats, edit styles, and validation
rules defined for the database in the Extended Attributes view.
For more information about defining, maintaining, and using these extended
attributes, see Chapter 8, “Displaying and Val ida ti ng Data.”
About headings and
labels
By default, DataWindow Designer uses the column names as labels and
headings, replacing any underscore characters with spaces and capitalizing
each word in the name. For example, the default heading for the column
Dept_name is Dept Name. To define multiple-line headings, press Ctrl+Enter
to begin a new line.
Specifying additional properties for character columns
Y ou can also set two additional properties for character columns on the Display
property page: Case and Picture.
Specifying the
displayed case
Y ou can specify whether DataW indow Designer converts the case of characters
for a column in a DataWindow object.
❖ To specify how character data should be displayed:
• On the Display property page, select a value in the Case drop-down list:
Value Meaning
Any Characters are displayed as they are entered
UPPER Characters are converted to uppercase
lower Characters are converted to lowercase
DataWindow Desi gne r User’s Guide 67
Page 84

Working with tables
Specifying a column
as a picture
Altering a table
You can specify that a character column can contain names of picture files.
❖ To specify that column values are names of picture files:
1 On the Display property page, select the Picture check box.
When the Picture check box is selected, DataWindow Designer expects to
find picture file names in the column and displays the contents of the
picture file—not the name of the file—in reports and DataWindow
objects.
Because DataWindow Designer cannot determine the size of the image
until runtime, it sets both display height and display width to 0 when you
select the Picture check box.
2 Enter the size and the justification for the picture (optional).
After a table is created, how you can alter the table depends on your DBMS.
You can always:
• Add or modify DataWindow Designer-specific extended attributes for
columns
• Delete an index and create a new index
You can never:
• Insert a column between two existing columns
• Prohibit null values for an appended column
• Alter an existing index
Some DBMSs let you do the following, but others do not:
• Append columns that allow null values
• Increase or decrease the number of characters allowed for data in an
existing column
• Allow null values
• Prohibit null values in a column that allowed null values
68 DataWindow .NET
Page 85

CHAPTER 3 Managing the Database
Database painter is DBMS aware
The Database painter grays out or not ifi es you about actions that your DBMS
prohibits.
For complete information about what you can and cannot do when you mod ify
a table in your DBMS, see your DBMS documentation.
❖ To alter a table:
1 Highlight the table and select Alter Table from the pop-up menu.
Opening multiple instances of tables
You can open another instance of a table by selecting Columns from the
View menu. Doing this is helpful when you want to use the Database
painter's cut, copy, and paste features to cut or copy and paste between
tables.
The table definition displays in the Columns view (this screen shows the
Employee table).
2 Make the changes you want in the Columns view or in the Object Details
view.
3 Select Save Table or Save Changes.
DataWindow Designer submits the pending SQL syntax statements it
generated to the DBMS, and the table is modified.
DataWindow Desi gne r User’s Guide 69
Page 86

Working with tables
Cutting, copying, and pasting columns
In the Database painter, you can use the Cut, Copy, and Paste buttons in the
PainterBar (or Cut, Copy, and Paste from the Edit or pop-up menu) to cut, copy ,
and paste one column at a time within a table or between tables.
❖ To cut or copy a column within a table:
1 Put the insertion point anywhere in the column you want to cut or copy.
2 Click the Cut or Copy button in the PainterBar.
❖ To paste a column within a table:
1 Put the insertion point in the column you want to paste to.
If you are changing an existing table, put the insertion point in the last
column of the table. If you try to insert a column between two columns,
you get an error message. To an existing table, you can only append a
column. If you are definin g a new table, you can paste a column anywhere.
2 Click the Paste button in the PainterBar.
❖ To paste a column to a different table:
1 Open another instance of the Columns view and use Alte r T able to display
an existing table or click New to create a new table.
2 Put the insertion point in the column you want to paste to.
3 Click the Paste button in the PainterBar.
Closing a table
You can remove a table from a view by selecting Close or Reset View from its
pop-up menu. This action only removes the table from the Database painter
view. It does not drop (remove) the table from the database.
Dropping a table
Dropping removes the table from the database.
❖ To drop a table:
1 Select Drop Table from the table's pop-up menu or select Object>Delete
from the menu bar.
2 Click Ye s.
70 DataWindow .NET
Page 87
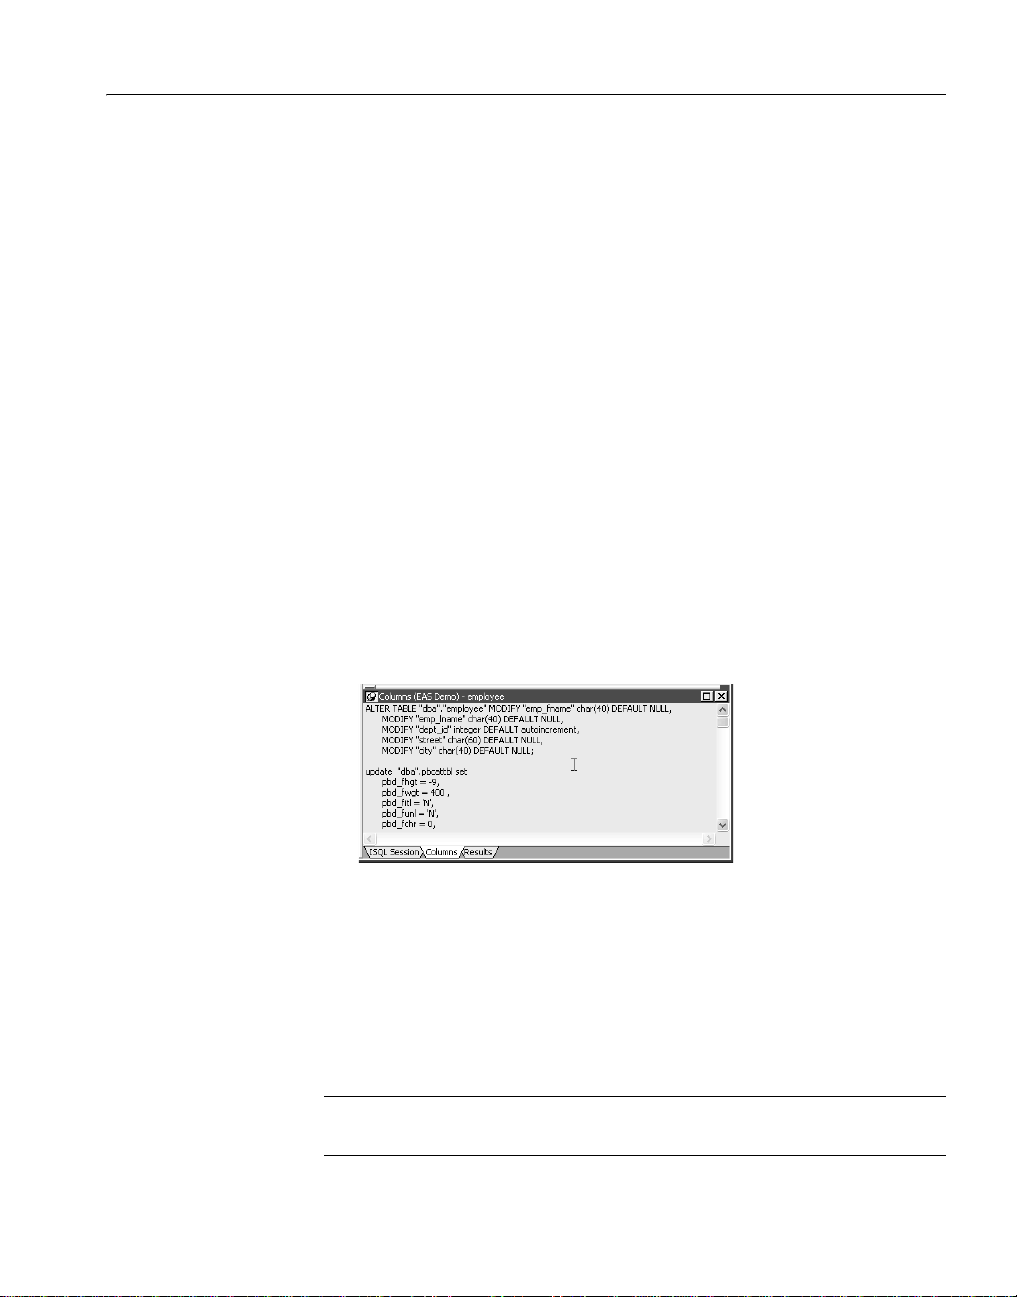
CHAPTER 3 Managing the Database
Deleting orphaned
table information
If you drop a table outside DataWindow Designer, information remains in the
system tables about the table, including extended attributes for the columns.
❖ T o dele te orpha ned table information from the extended attribute system
tables:
• Select Design>Synch Extended Attributes from the menu bar and click
Yes.
If you try to delete orphaned table information and there is none, a
message tells you that synchronization is not necessary.
Viewing pending SQL changes
As you create or alter a table definition, you can view the pending S QL syntax
changes that will be made when you save the table definition.
❖ To view pending SQL syntax changes:
• Right-click the table definition in the Columns view and select Pending
Syntax from the pop-up menu.
DataWindow D esigner displays the pending changes t o the table definition
in SQL syntax:
The SQL statements execute only when you save the table definition or
reset the view and then tell DataWindow Designer to save changes.
Copying, saving, and
printing pending SQL
changes
When you are viewing pending SQL changes, you can:
• Copy pending changes to the clipboard
• Save pending changes to a file
• Print pending changes
To copy, save, or print only part of the SQL syntax
Select the part of the SQL syntax you want before you copy, save, or print.
DataWindow Desi gne r User’s Guide 71
Page 88

Working with tables
❖ To copy the SQL syntax to the clipboard:
• In the Pending Syn tax view , cl ick the Copy button or s elect Copy from the
pop-up menu.
❖ To save SQL syntax for execution at a later time:
1 In the Pending Syntax view, Select File>Save As.
The Save Syntax to File dialog box displays.
2 Navigate to the folder where you want to save SQL, name the file, and then
click the Save button.
At a later time, you can import the SQL file into the Database painter and
execute it.
❖ To print pending table changes:
• While viewing the pending SQL syntax, click the Print button or select
Print from the File menu.
❖ To display columns in the Columns view:
• Select Object>Pending Syntax from the menu bar.
Printing the table definition
You can print a report of the table's definition at any time, whether or not the
table has been saved. The Table Definition Report contains information about
the table and each column in the table, including the extended attributes for
each column.
❖ To print the table definition:
• Select Prin t or Print Definition from the File or pop-up menu or click the
Print button.
Exporting table syntax
Y ou can export the s yntax for a table to th e log. This feature is useful when you
want to create a backup definition of the table before you alter it or when you
want to create the same table in another DBMS.
To export to another DBMS, you must have the DataWindow Designer
interface for that DBMS.
72 DataWindow .NET
Page 89

❖ To export the syntax of an existing table to a log:
1 Select the table in the painter workspace.
2 Select Export Syntax from the Object menu or the pop-up menu.
3 Select the DBMS to which you want to export the syntax.
4 If you selected ODBC, specify a data source in the Data Sources dialog
5 Supply any informati on you are prompted for.
About system tables
CHAPTER 3 Managing the Database
If you selected a table and have more than one DBMS interface installed,
the DBMS dialog box displays. If you selected a view, DataWindow
Designer immediately exports the syntax to the log.
box.
DataWindow Designer exports the syntax to the log. Extended attribute
information (such as validation rules used) for the selected table is also
exported. The syntax is in the format required by the DBMS you s elected.
For more information about the log, see “Logging your work” on page 59.
Two kinds of system tables exist in the database:
• System tables provided by your DBMS (for more information, see your
DBMS documentation)
• DataWindow Designer extended attribute system tables
About DataWindow
Designer system
tables
DataWindow Designer stores extended attribut e information you provide when
you create or modify a table (such as the text to use fo r labels and headi ngs for
the columns, validation rules, display formats, and edit styles) in system tables.
These system tables contain information about database tables and columns.
Extended attribute information extends database definitions.
In the
Employee table, for example, one column name is Emp_lname. A label
and a heading for the column are defined for DataWindow Designer to use in
DataWindow objects. The column label is defined as
column heading is defined as
the
PBCatCol table in the extended attribute system tables.
Last Name. The label and heading are stor ed in
Last Name:. The
The extended attribute system tables are maintained by DataW indow Designer,
and only DataWindow Designer users can enter information into them. Table
3-6 lists the extended attribute system tables. For more information, see
Appendix B, “The Extended Attribute Syste m Tables.”
DataWindow Desi gne r User’s Guide 73
Page 90

Working with tables
Table 3-6: Extended attribute system tables
This system table Stores this extended attribute information
PBCatCol Column data such as na me, he ader an d label for re ports and
DataWindow objects, and header and label positions
PBCatEdt Edit style names and definitions
PBCatFmt Display format names and definitions
PBCatTbl Table data such as name, fonts, and comments
PBCatVld Validation rule names and definitions
Opening and
displaying syste m
tables
You can open system tables like other tables, in the Database painter.
By default, DataWindow Designer shows only user-created tables in the
Objects view. If you highlight T abl es and select Show System Tables from the
pop-up menu, DataWindow Designer also displays system tables.
Creating and editing Sybase Adaptive Server temporary tables
You can create and edit temporary tables in the Database painter, SQL painter,
or DataWindow painter when you use the PowerBuilder SYC native driver to
connect to an ASE database. Temporary tables persist for the duration of a
database connection, residing in a special database called “
You add a temporary table to the
tempdb databas e by assignin g a name that
starts with the # character when you create a new table in a PowerBuilder
painter. (Temporary tables must start with the # character.)
After you create a temporary table, you can create indexes and a primary key
for the table. If you define a unique index or primary key, you can execute
INSERT, UPDATE, and DELETE statements for a temporary table. Selecting
Edit Data from the pop-up menu of a temporary table retrieves data that you
store in that table.
Standard catalog query limitations
When you click Refresh from the pop-up menu for the Tables node in the
Database painter or the Objects view of the DataWindow painter, the list of
tables displays temporary tables even though they exist only in the
database. However, once you refresh table definitions from the database, the
Objects view can no longer list the index or primary key information of the
temporary tables, and the Layout view can no longer display that information
graphically.
tempdb”.
tempdb
74 DataWindow .NET
Page 91

Working with keys
If your DBMS supports primary and foreig n keys, you can work with the key s
in DataWindow Designer.
CHAPTER 3 Managing the Database
Why you should use
keys
What you can do in
the Database painter
If your DBMS supports them, you should use primary and foreign keys to
enforce the referential integrity of your databas e. That way you can rely on the
DBMS to make sure that only valid values are entered for certain columns
instead of having to write code to enforce valid values.
For example, say you have two tables called
Department table contains the column Dept_Head_ID, which holds the ID of the
Department and Employee. The
department's manager . You want to make sure that only valid employee I Ds are
entered in this column. The only valid values for
Department table are values for Emp_ID in the Employee table.
T o enforce this ki nd of relationshi p, you define a fo reign key for
that points to the
any value for
Employee table. With this key in place, the DBMS disallows
Dept_Head_ID that does not match an Emp_ID in the Employee
Dept_Head_ID in the
Dept_Head_ID
table.
For more about primary and foreign keys, consult a book about relational
database design or your DBMS documentation.
You can work with keys in the follo wing way s:
• Look at existing primary and foreign keys
• Open all tables that depend on a particular primary key
• Open the table containin g the primary k ey used by a particul ar foreign k ey
• Create, alter, and drop keys
For the most part, you work with keys the same way for each DBMS that
supports keys, but there are some DBMS-specific issues. For complete
information about using keys with your DBMS, see your DBMS
documentation.
Viewing keys
Keys can be viewed in several ways:
• In the expanded tree view of a table in the Objects view
• As icons connected by lines to a table in the Object Layout view
DataWindow Desi gne r User’s Guide 75
Page 92
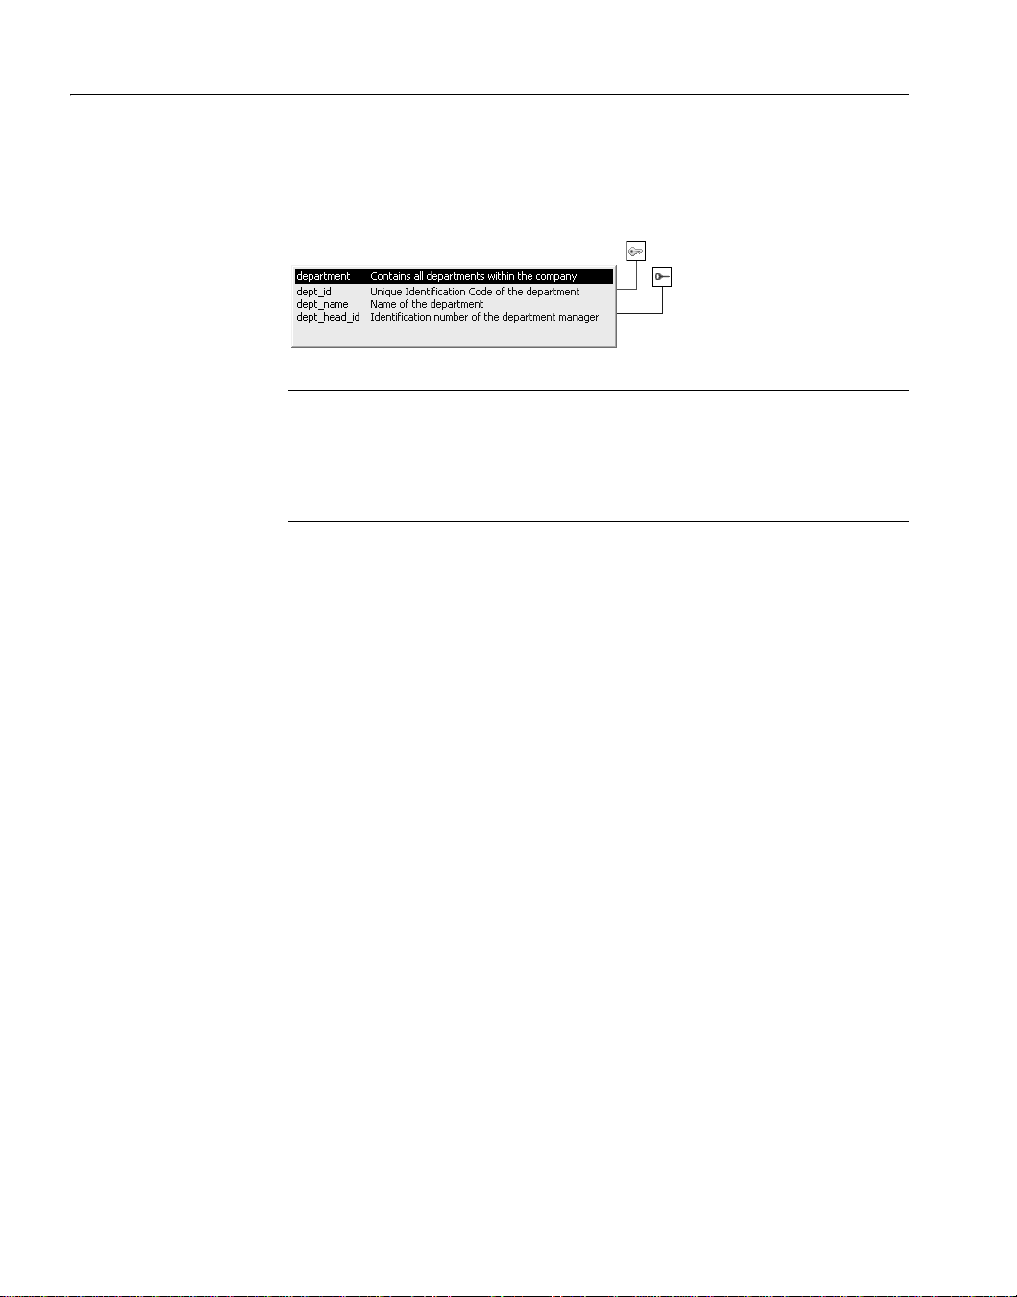
Working with keys
In the following picture, the Department table has two keys:
Opening related
tables
• A primary key (on
• A foreign key (on
If you cannot see the lines
dept_id)
dept_head_id)
If the color of your window background makes it hard to see the lines for the
keys and indexes, you can set the colors for each component of the Database
painter's graphical table representation, including keys and indexes. For
information, see “Modifying database preferences” on page 58.
When working with tables containin g keys, you can eas ily o pen related ta bles.
❖ To open the table that a particular foreign key references:
1 Display the foreign key pop-up menu.
2 Select Open Referenced Table.
❖ To open all tables referencing a particular primary key:
1 Display the primary key pop-up menu.
2 Select Open Dependent Table(s).
DataWindow Designer opens and expands all tables in the database
containing foreign keys that reference the selected primary key.
Defining primary keys
If your DBMS supports primary keys, you can define them in DataWindow
Designer.
❖ T o cr ea te a primar y key:
1 Do one of the following:
• Highlight the table for which you want to create a primary key and
click the Create Primary Key drop-down toolbar button in
PainterBar1.
• Select Object>Insert>Primary Key from the main menu or
New>Primary Key from the pop-up menu.
76 DataWindow .NET
Page 93

CHAPTER 3 Managing the Database
• Expand the table’ s tree view , rig ht-click Primary Key , an d select New
Primary Key from the pop-up menu.
The Primary Key properties display in the Object Details view.
2 Select one or more columns for the primary key.
Columns that are allowed in a primary key
Only a column that does not allow null values can be included as a column
in a primary key definition. If you choose a column that allows null values,
you get a DBMS error when you save the table. In DBMSs that allow
rollback for Data Definition Language (DDL), the table definition is rolled
back. In DBMSs that do not allow rollback for DDL, the painter is
refreshed with the current definition of the table.
3 Specify any information required by your DBMS.
Naming a primary key
Some DBMSs allow you to name a primary key and specify whether it is
clustered or not clustered. For these DBMSs, the Primary Key property
page has a way to specify these properties.
For DBMS-specific information, see your DBMS documentation.
4 Right-click on the Object Details view and select Save Chan ges from the
pop-up menu.
Any changes you made in the view are immediately saved to the table
definition.
Completing the primary key
Some DBMSs automatically create a unique index when y ou define a primary
key so that you can immediately begin to add data to the tabl e. Othe rs req uire
you to create a unique index separately to support the primary key before
populating the table with data.
To find out what your DBMS does, see your DBMS documentation.
DataWindow Desi gne r User’s Guide 77
Page 94

Working with keys
Defining foreign keys
If your DBMS supports foreign keys, you can define them in DataWindow
Designer.
❖ T o cr ea te a foreign key:
1 Do one of the following:
• Highlight the table and click the Create Foreign Key drop-down
toolbar button in PainterBar1.
• Select Object>Insert>Foreign Key from the main menu or
New>Foreign Key from the pop-up menu.
• Expand the table’s tree view and right-click on Foreign Keys and
select New Foreign Key from the pop-up menu.
The Foreign Key properties display in the Object Details view. Some of
the information is DBMS-specific.
2 Name the foreign key in the Foreign Key Name box.
3 Select the columns for the foreign key.
4 On the Prima ry Key tab page, se lect the table and column containing the
Primary key referenced by the foreign key you are defining.
Key definitions must match exactly
The definition of the foreign key columns must match the primary key
columns, including datatype, precision (width), and scale (decimal
specification).
5 On the Rules tab page, specify any information required by your DBMS.
For example, you might need to specify a delete rule by selecting one of
the rules listed for On Delete of Primary Table Row.
For DBMS-specific information, see your DBMS documentation.
6 Right-click on the Object Details view and select Save Changes from the
pop-up menu.
Any changes you make in the view are immediately saved to the table
definition.
78 DataWindow .NET
Page 95

CHAPTER 3 Managing the Database
Modifying keys
Dropping a key
You can modify a primary key in DataWindow Designer.
❖ To modify a primary key:
1 Do one of the following:
• Highlight the primary key listed in the table’s expanded tree view and
click the Properties button.
• Select Properties from the Object or pop-up menu.
• Drag the primary key icon and drop it in the Object Details view.
2 Select one or more columns for the primary key.
3 Right-click on the Object Details view and select Save Chan ges from the
pop-up menu.
Any changes you make in the view are immediately saved to the table
definition.
Y ou can d rop keys (remov e them from the databas e) from within DataW indow
Designer.
❖ To drop a key:
1 Highlight the key in the expanded tree view for the table in the Objects
view or right-click the key icon for the table in the Object Layout view.
2 Select Drop Primary Key or Drop Foreign Key from the key’s pop-up
menu.
3 Click Yes .
Working with indexes
You can create as many single- or multi-valued indexes for a database table as
you need, and you can drop indexes that are no longer needed.
Update limitation
Y ou can update a tab le in a DataW in dow object only if it has a un ique index or
primary key.
DataWindow Desi gne r User’s Guide 79
Page 96

Working with indexes
Creating an index
In Adaptive Server Anywhere databases
In Adaptive Server Anywhere databases, you should not define an index on a
column that is defined as a foreign key, because foreign keys are already
optimized for quick reference.
❖ To create an index:
1 Do one of the following:
• Highlight the table for which you want to create an index and click the
Create Index drop-down toolbar button in PainterBar1.
• Select Object>Insert>Index from t he main menu or New>Index from
the pop-up menu.
• Expand the table’s tree view, right-click on Indexes, and select New
Index from the pop-up menu.
The Index’s properties display in the Object Details view.
2 Enter a name for the index in the Index box.
3 Select whether or not to allow duplicate values for the index.
4 Specify any other information required for your database
For example, in Adaptive Server Enterprise, specify whether the index is
clustered, and in Adaptive Server Anywhere, specify the order of the
index.
5 Click the names of the columns that make up the index.
6 Select Save Changes from the pop-up menu.
7 Right-click on the Object Details view and select Save Changes from the
pop-up menu.
Any changes you made in the view are immediately saved to the table
definition.
Modifying an index
You can modify an index.
❖ To modify an index:
1 Do one of the following:
• Highlight the index listed in the table’s expanded tree view and click
the Properties button.
• Select Properties from the Object or pop-up menu.
• Drag the index icon and drop it in the Object Details view.
80 DataWindow .NET
Page 97

CHAPTER 3 Managing the Database
2 In the Object Details view, select or deselect columns as needed.
3 Right-click on the Object Details view and select Save Chan ges from the
pop-up menu.
Any changes you made in the view are immediately saved to the table
definition.
Dropping an index
Dropping an index removes it from the database.
❖ To drop an index from a table:
1 In the Database painter workspace, display the pop-up menu for the index
you want to drop.
2 Select Drop Index and click Yes.
Working with database views
A database view gives a dif ferent (and u sually limited) perspective of the data
in one or more tables. Although you see existing database views listed in the
Objects view, a database view does not physically exist in the database as a
table does. Each time you select a database view and use the view’s data,
DataWindow Designer executes a SQL
and creates the database view.
For more information about using database views, see your DBMS
documentation.
Using database vi ews
in DataWindow
Designer
You can define and manipulate database views in DataWindow Designer.
Typically you use database views for the following reasons:
• To give names to frequently executed
SELECT statement to retrieve the data
SELECT statements.
• To limit access to data in a table. For example, you can create a database
view of all the columns in the
Employee table except Salary. Users of the
database view can see and update all information except the employee's
salary.
• To combine information from multiple tables for easy access.
In DataWindow Designer, you can create single- or multiple-table database
views. You can also use a database view when you define data to create a new
database view.
DataWindow Desi gne r User’s Guide 81
Page 98

Working with database views
You define, open, and manipulate database views in the View painter, which is
similar to the Select painter. For more information about the Select painter, see
“Selecting a data source” on page 110.
Updating database views
Some database views are logically updat able and others are not. Some DBMSs
do not allow any updating of views . For the rules your DBMS follows, s ee your
DBMS documentation.
❖ To open a database view:
1 In the Objects view, expand the list of Views for your database.
2 Highlight the view you want to open and select Add To Layout from the
❖ T o cr ea te a dat a bas e view :
1 Click the Create View button, or select View or New View from the
pop-up menu, or drag the view’s icon to the Object Layout view.
Object>Insert or pop-up menu.
The Select T ables dialog box displays, listing all tables and views that you
can access in the database.
2 Select the tables and views from which you will create the view by doing
one of the following:
• Click the name of each table or view you want to open in the list
displayed in the Sel ect Tables dialog box, then click the Open button
to open them. The Select Tables dialog box closes.
• Double-click the name of each table or view you want to open. Each
object is opened immediately. Then click the Cancel button to close
the Select Tables dialog box.
Representations of the selected tables and views display in the View
painter workspace:
3 Select the columns to include in the view and include computed columns
as needed.
4 Join the tables if there is more than one table in the view.
For information, see “Joining tables” on page 84.
5 Specify criteria to limit rows retrieved (Where tab), group retrieved rows
(Group tab), and limit the retrieved groups (Having tab), if appropriate.
82 DataWindow .NET
Page 99

CHAPTER 3 Managing the Database
For information, see the section on using the SQL Select painter in
“Selecting a data source” on page 110. The View painter and the SQL
Select painter are similar.
6 When you have completed the view, click the Return button.
7 Name the view.
Include view or some other identifier in the view’s name so that you will
be able to distinguish it from a table in the Select Tables dialog box.
8 Click the Create button.
Displaying a data base
view’s SQL statement
DataWind ow D esi gn er gen erat e s a
CREATE VIEW statement and submits
it to the DBMS. The view definition is created in the database. You return
to the Database painter workspace with the new view displayed in the
workspace.
You can display the SQL statement that defines a database view. How you do
it depends on whether you are creating a new view in the V iew painter or want
to look at the definition of an existing view.
❖ To display the SQL statement from the View painter:
• Select the Syntax tab in the View painter.
DataWindow Designer displays the SQL it is generating. The display is
updated each time you change the view.
❖ To display the SQL statement from the Database painter:
• Highlight the name of the database view in the Objects view and select
Properties from the pop-up menu, or drag the view’s icon to the Object
Details view.
DataWindow Desi gne r User’s Guide 83
Page 100

Working with database views
The completed SELECT statement used to create the database view
displays in the Definit ion field on the General page:
View dialog box is read-only
You cannot alter the view definition in the Object Details view. To alter a
view, drop it and create another view.
Joining tables
If the database view contains more than one table, you should join the tables on
their common columns. When the View painter is first opened for a database
view containing more than one table, DataWindow Designer makes its best
guess as to the join columns, as follows:
• If there is a primary/foreign key relationship between the tables,
DataWindow Designer automatically joins them.
• If there are no keys, DataWindow Designer tries to join tables based on
common column names and types.
❖ T o join tables:
1 Click the Join button.
2 Click the columns on which you want to join the tables.
In the following screen, the Employee and Dep artment tables are joined on
the dept_id column:
84 DataWindow .NET
 Loading...