

Syba SD-UEN-525 User Manual

Installation Manual
Introduction
This 5.25” enclosure is designed to provide a solution to con nect existing storage
devices such as 3.5” IDE hard drive, MO drives, CD devices or DVD devices to
IEEE1394a or USB2.0. This 5.25” enclosure can provide peak data transfer rate up
to 480Mbps for USB 2.0 interf ace and 400Mbps for IEEE 1394a interface.
Features
General
y Support plug-n-play. Hot- Swap and W ake-UP.
y Accommodate all existing storage devices such as 3.5” IDE h ard drive, MO
drives, CD devices or DVD devices
y Support Self power mode.
y Support Windows98, 98SE, ME, 2000, XP and MAC OS* (*Depending on
chipset).
USB 2.0 (For USB 2.0 & Combo Version)
y Compliant with Universal Serial Bus Specification Revision 2.0
y Fully backward compatible to USB 1.1
y Compliant with ATA/ATAPI-6 Specification
y Support LBA 48, PIO Mode 0-4, DMA Mode 0-2, UDMA Mode 0-5
y Compliant with USB Mass Storage Bulk only Specification 1.0
y Support High-Speed (480Mbps) and Full-Speed (12Mbps) mode
IEEE 1394a (For IEEE 1394a & Combo version)
y Compliant with I EEE 1394-1995 and 1394a standard for high performance
serial bus.
y Sustained IDE rate at 25Mbytes/sec (200Mbps), Peak transfer rate at
50Mbytes/sec (400Mbps).
y Compliant with ATA/ATAPI-6 Specification.
y Support PIO Mode 0-4, DMA mode 0-2 and UDMA mode 0-5.
What is in your package?
Please check whether the package contains following items:
y One 5.25’’ Enclosure
y Installation Manual
y USB 2.0 (Type ‘A’ to Type ‘B’) cable (USB 2.0 & Combo version only)
y 1394a (6pin to 6pin) cable (1394a & Combo version only)
y AC-DC Power Supply 12VDC
y Screws for securing the enclosure and 3.5” hard drive or CD/DVD devices
y Driver CD
y
If any item is missing or damaged, please contact the retailer as soon as possible.
1
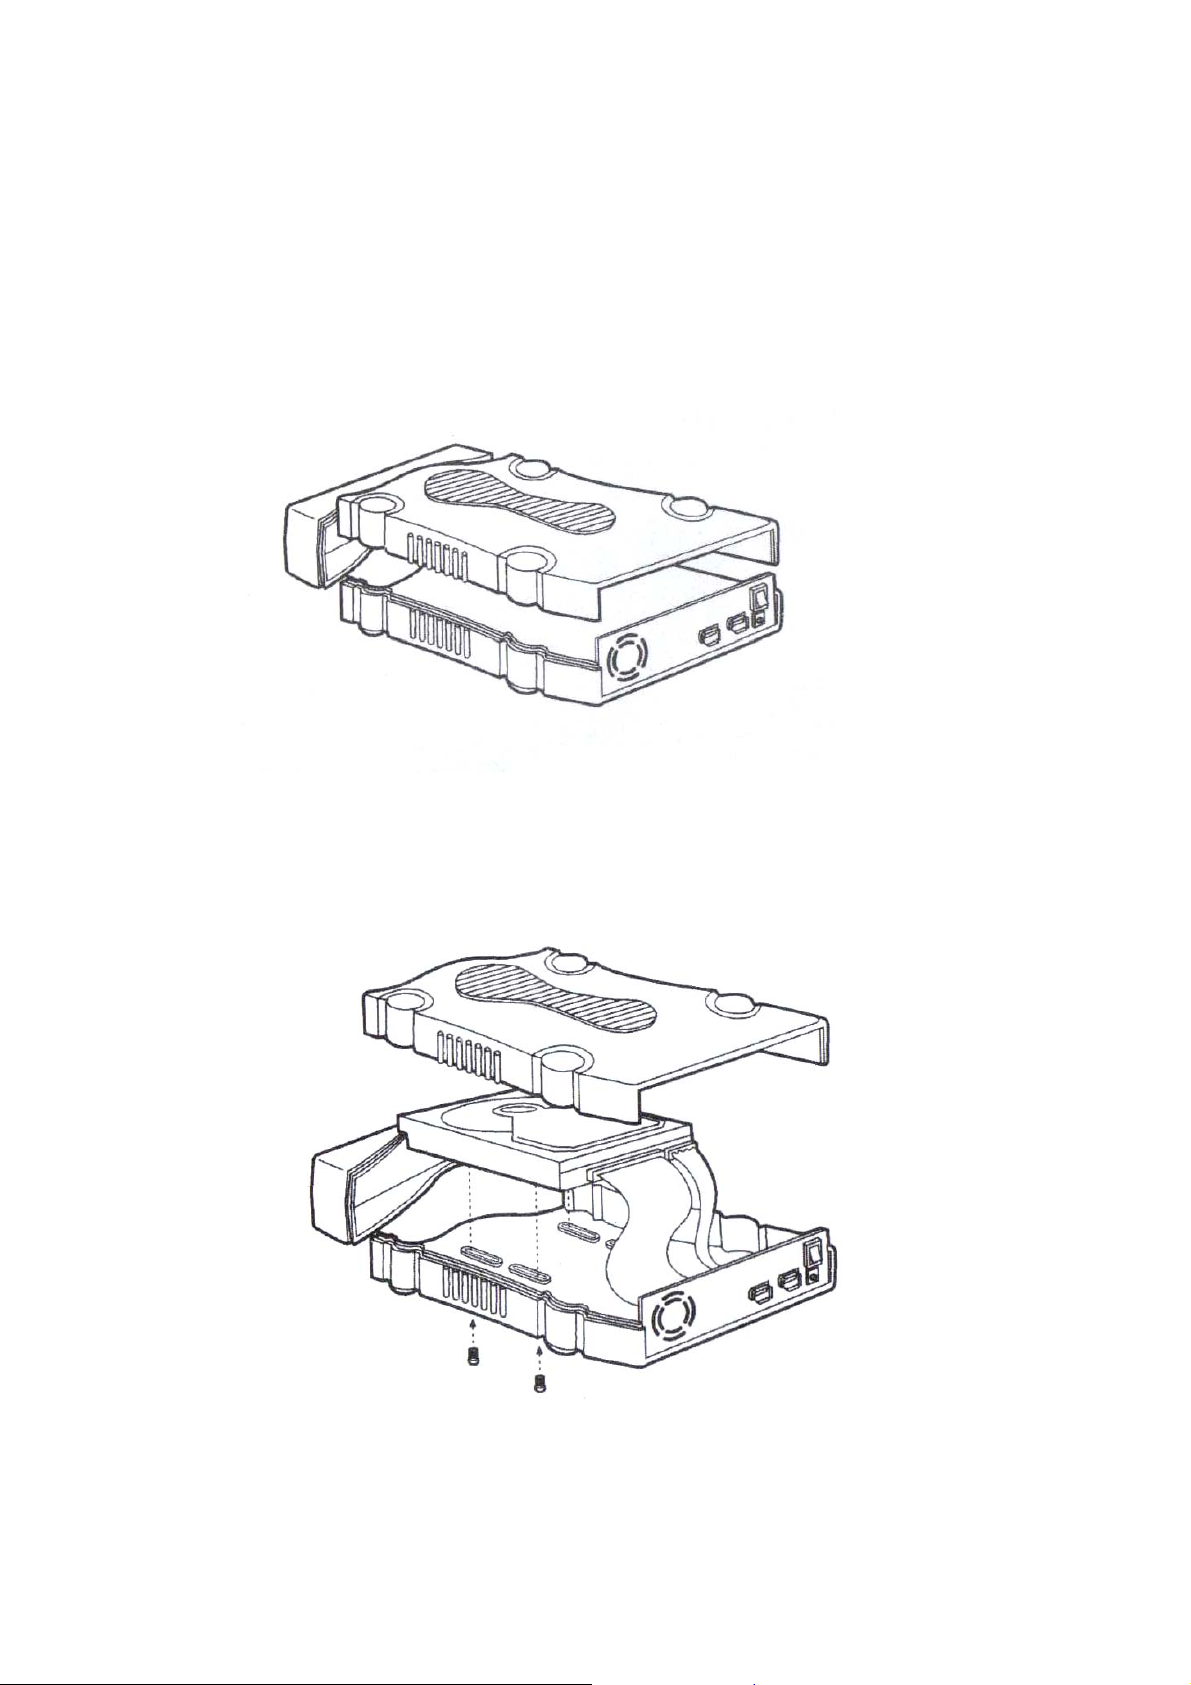
HARDWARE INSTALLATION
Installing a 3.5’’ hard drive in to the 5.25’’ enclosure
Step 1: Take off the top cover of the 5.25” enclosure as shown in diagram.
Step 2: Connect the IDE cable and power cable to t he 3.5” hard drive and secure
the 3.5” hard drive with the screws provided as shown in diagram.
2
 Loading...