

Page 1
Classic S117
User manual
Page 2
Quick reference guide
Handset
Activate/deactivate the
handset
Activate/deactivate the keypad
protection
hold down
hold down
a
ª
Activate/deactivate tones hold down
Make an external call
Redial a number If applicable, select an entry
Save phone number in the
directory
Dial with the directory
Set the handset volume
Make an internal call e. g.
Call all handsets
Transfer call to another
handset
Internal enquiry calls e. g.
Set the date
c
o
z
MENU
h
h
o
MENU AUDIO SET OK H/SET VOL OK
OK
INT INT
«
INT INT CALL ALL
e. g.
INT
INT MENU GO BACK OK
MENU
DATE SET OK
«
Z
Z
COPY TO DIR OK
[Name] and/or
or
^
or
c
Z
c
YZ
c
Ÿ a
; End:
Ÿ
BASE SET OK
Z
DATE/TIME OK
Z
c
Z
Y
Set the time
Set the alarm clock
MENU
Z
MENU
OK
BASE SET OK
Z
CLOCK SET OK
Enter the alarm call
ALARM CLOCK OK
Z
DATE/TIME OK
Z
II
Page 3
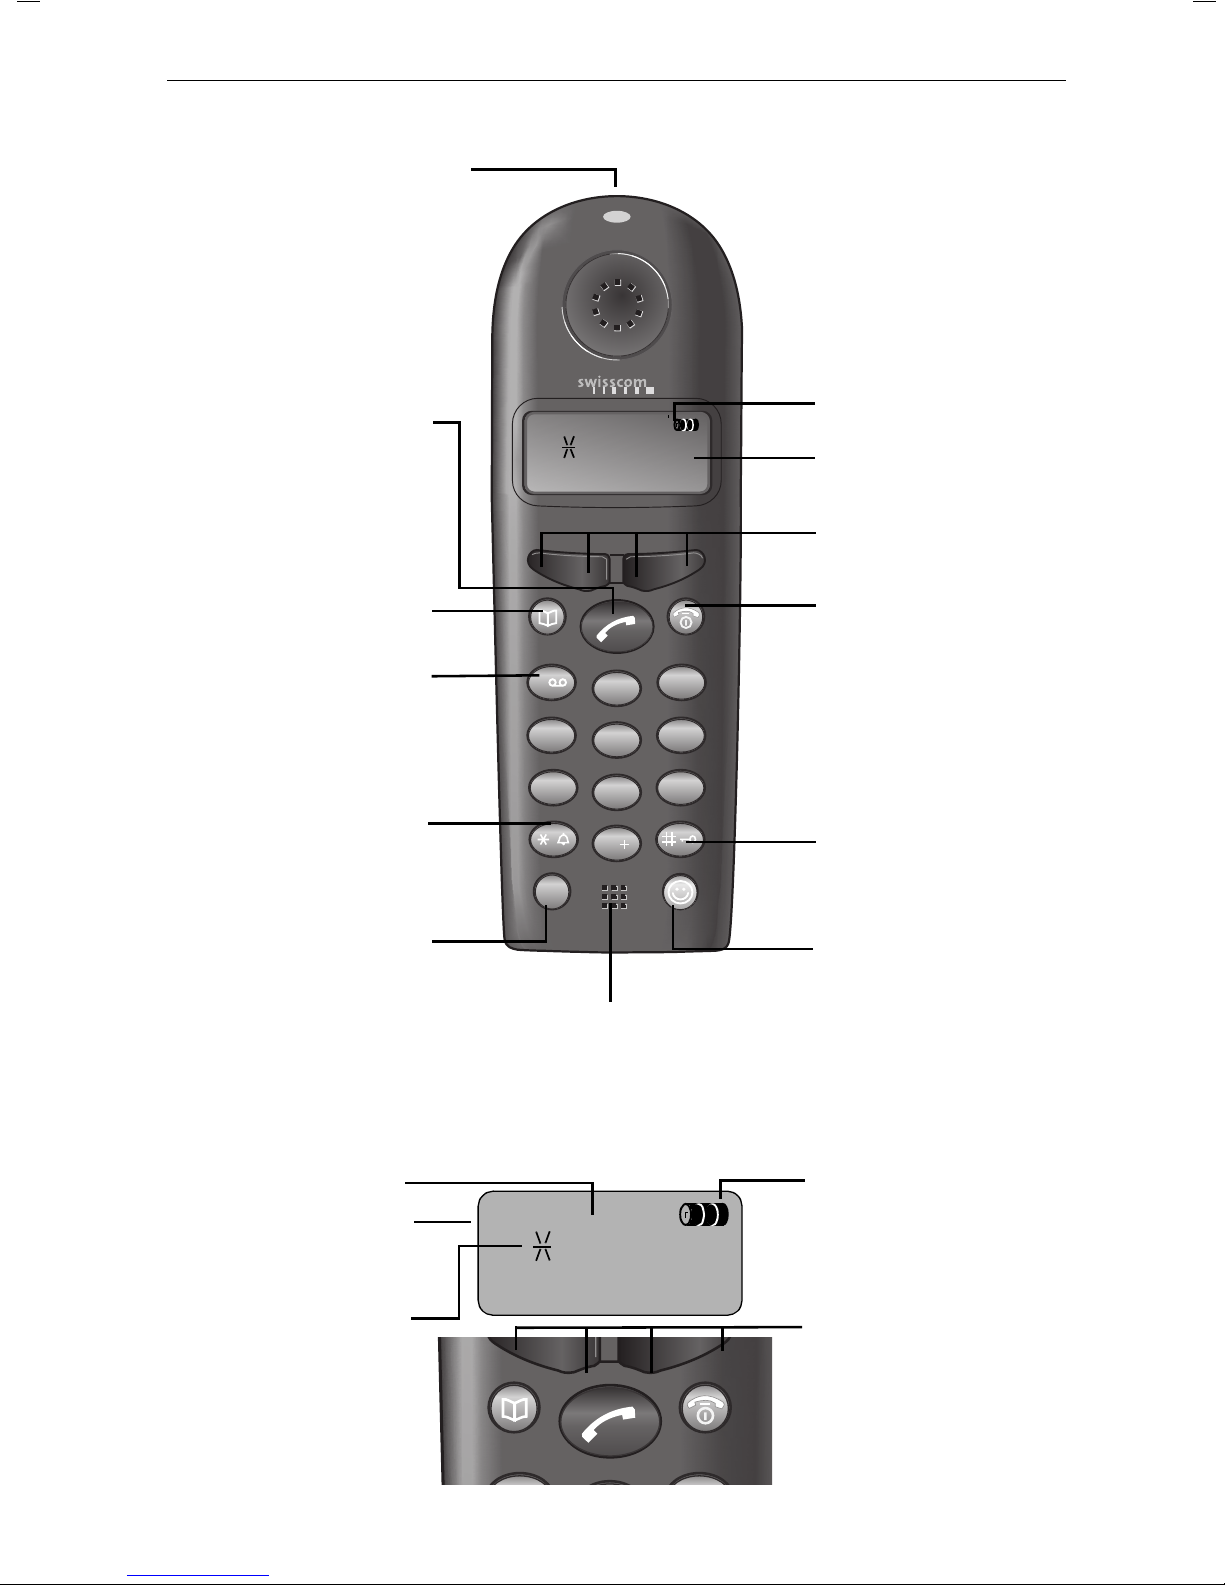
Brief overview of the handset
Status LED (li.-em. diode)
lights up during a call;
flashes for:
- incoming call
- alarm call
Ta l k k e y
- answer a call
- dial a phone number
Directory key
Open the directory
Key 1
Hold down to select
the mailbox number
Asterisk key
Hold down to
activate/deactivate
the ringer
Recall key
- Pause
(hold key down!)
- R key function (flash)
1
2 2
z
Classic S117
1
4
7
2
GHI
5
PQRS
8
0
R
Microphone
- 3
ABC
JKL
TUV
Charging status
3
6
9
3
WXYZ
DEF
MNO
Display (display field)
Current display and
display keys
see below!
End call key and
On/Off key
- end the call
- cancel function
- one menu level back
(press briefly)
- Return to idle state
(hold down)
- when the telephone is
idle on/off (hold down!)
# key
Hold down to activate/deactivate keypad protection
Callback key
(special phone numbers
can be programmed. Callback key becomes
inactive.)
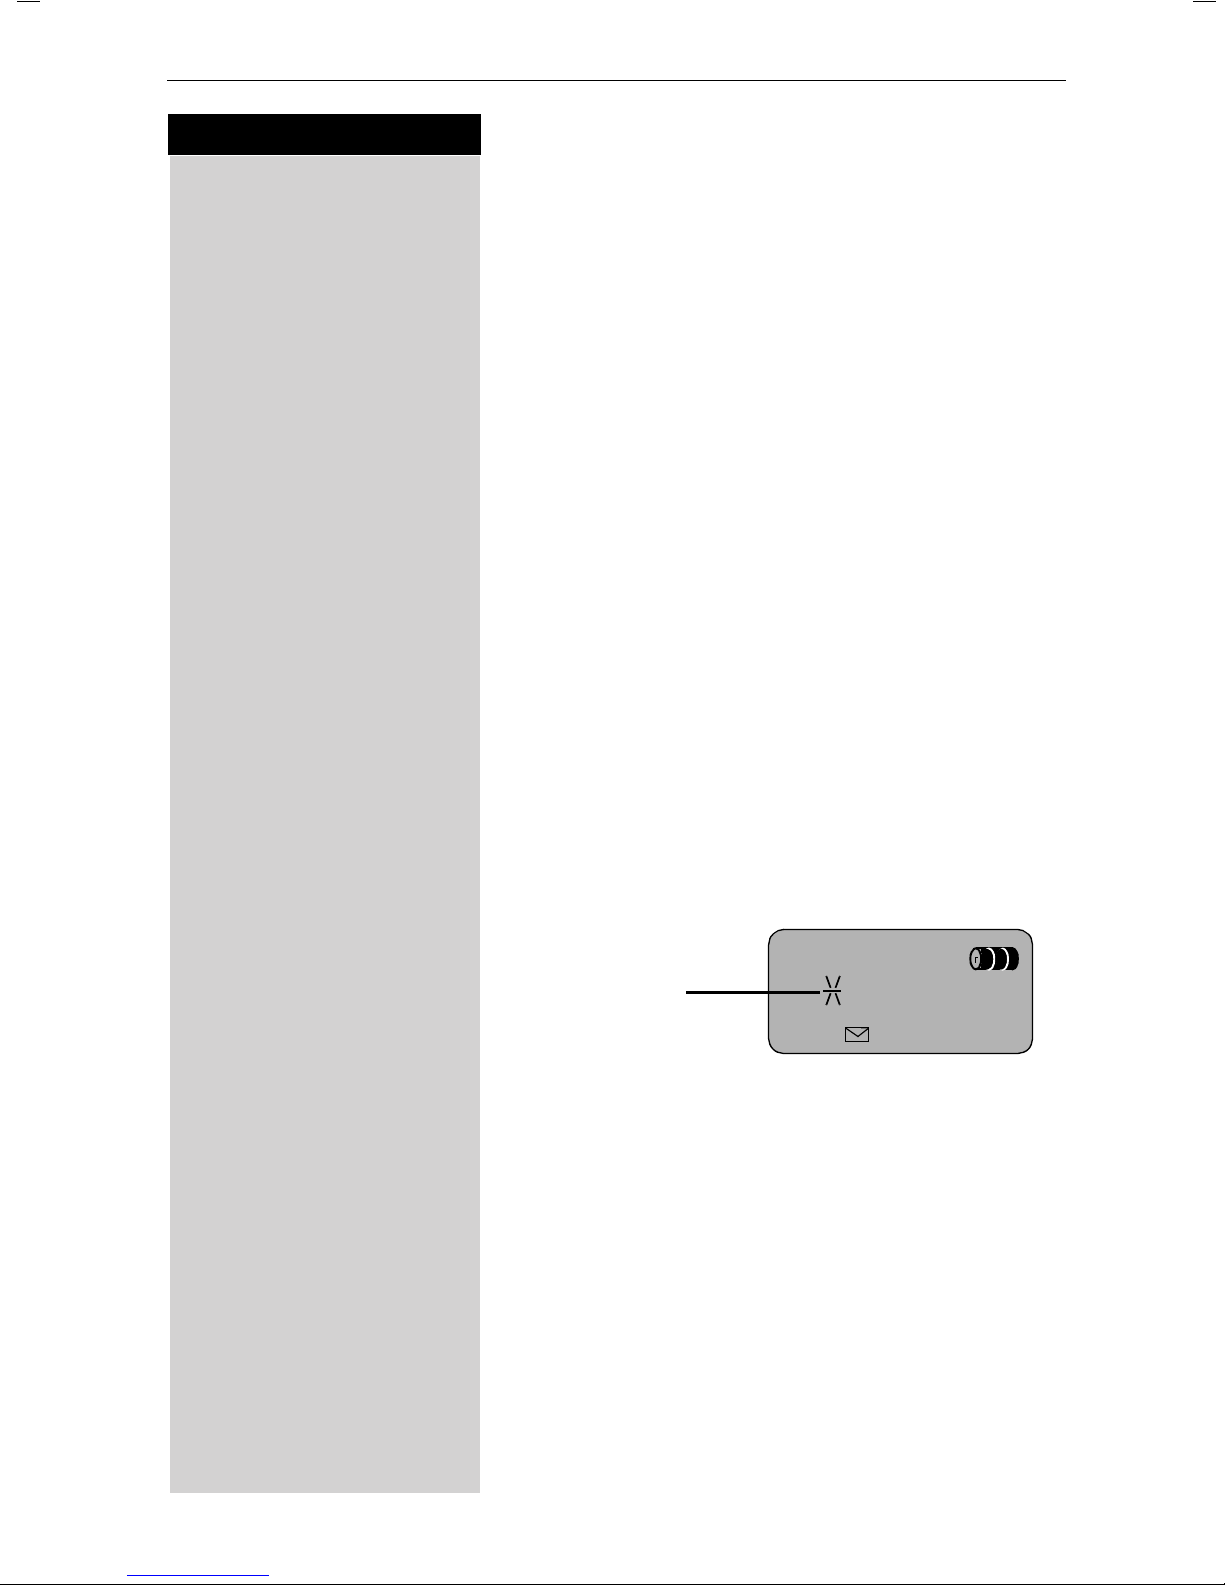
Display and display keys
Time
Internal handset
phone number
of the handset
Asterisk
The asterisk indicates
that the alarm clock
is set
.
1
z
2 2 - 3
INT MENU
3
MENU
MENUMENU
Charging status
battery empty
Ý
battery fully charged
Ú
flashes: warning
Display keys:
Press the corresponding
keys to initiate the
function shown in the
display
III
Page 4
General
General
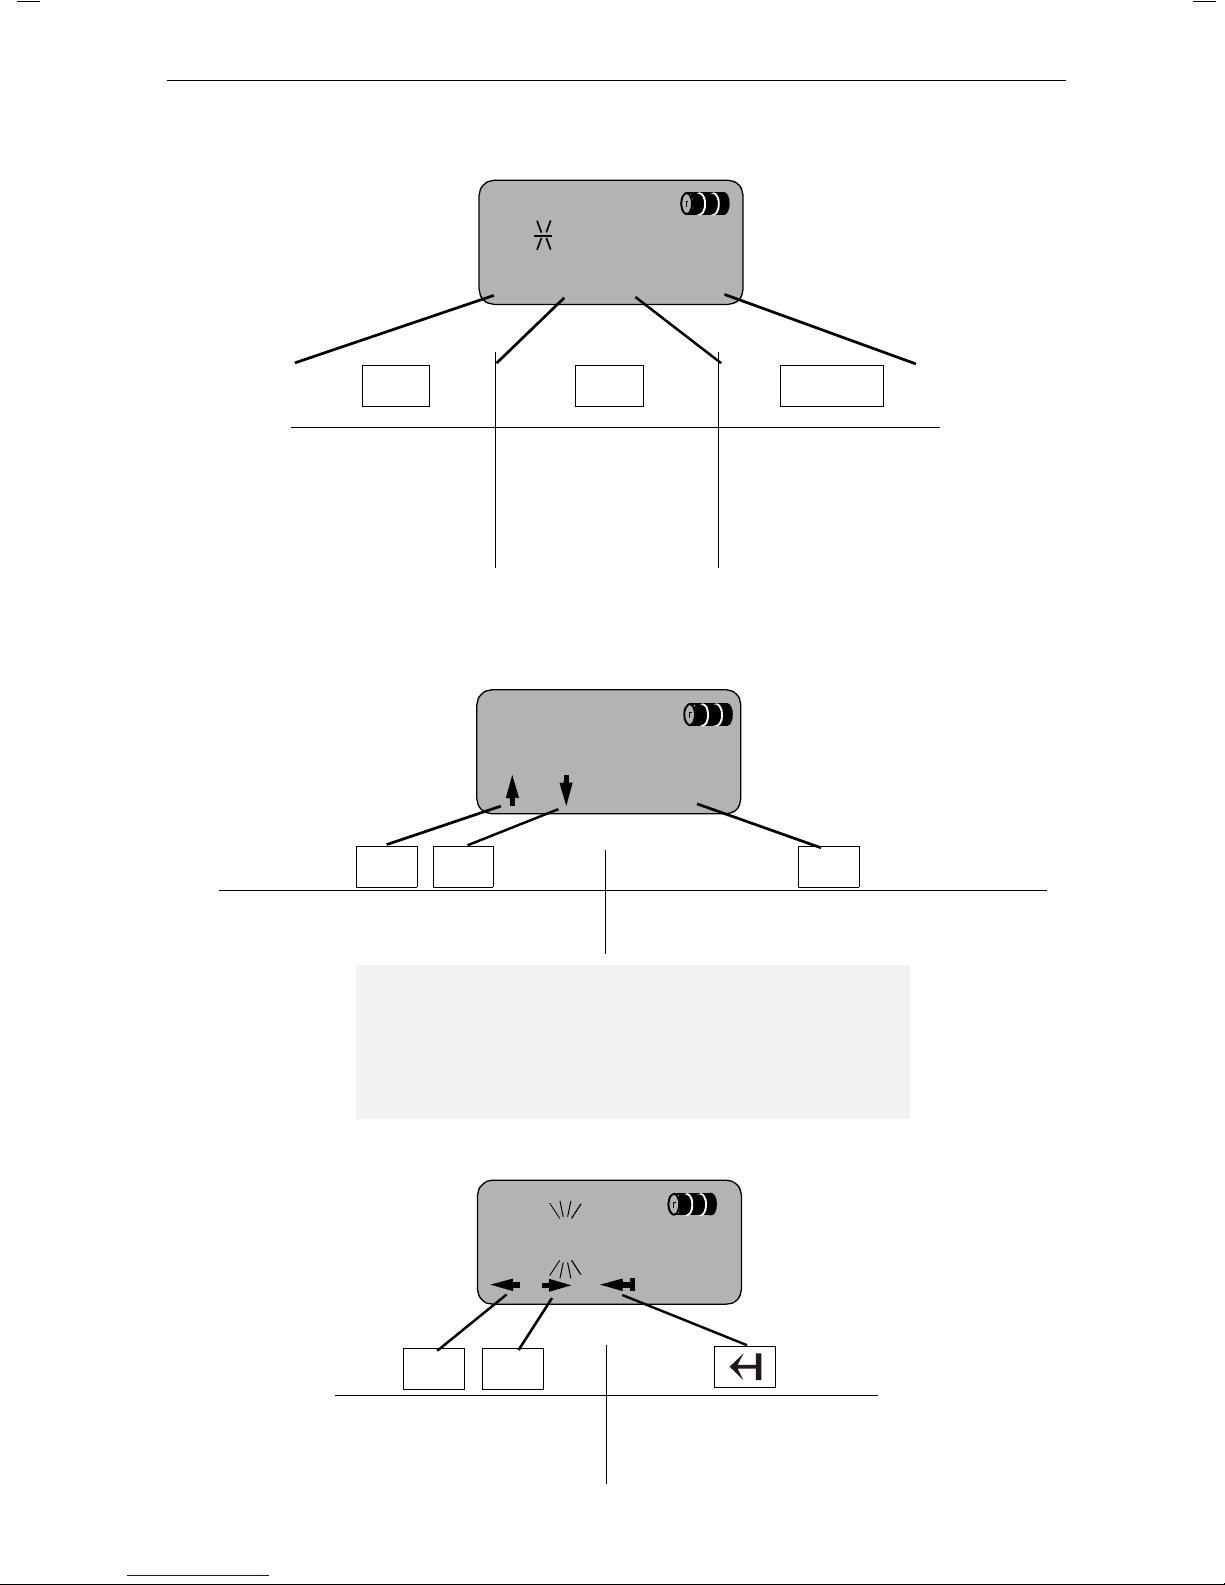
Display symbols
1
z
2 2 - 3
INT
3
MENU
MENU
MENUMENU
z
Automatic redial
key:
Opens the list with
the five phone numbers dialled last.
INT key:
Call other registered
handsets.
INT
MENU
Menu key:
To initiate functions
(when the telephone
is idle/during a call).
2
ALARM CLOCK
OK
OK
OKOK
Y Z
Scroll through the menu. Confirm the function selected.
End and save the setting.
OK
Then:
Press
hold
No input: Automatically to the
< >
Scroll to the left and right
when entering numbers or
messages.
IV
briefly: 1 menu level up
a
down
: Return to the idle state
a
idle state
1
09-45
MENU
MENU
MENUMENU
Delete key (Backspace):
Delete input from right to
left.
Page 5

Contents
Quick reference guide . . . . . . . . . . . . . . . . . . . . . . . . . . . . . . . . . . . . . . . . . . . . . . .II
Brief overview of the handset . . . . . . . . . . . . . . . . . . . . . . . . . . . . . . . . . . . . . . . III
Display and display keys . . . . . . . . . . . . . . . . . . . . . . . . . . . . . . . . . . . . . . . . . . . . III
Display symbols . . . . . . . . . . . . . . . . . . . . . . . . . . . . . . . . . . . . . . . . . . . . . . . . . . IV
Safety precautions . . . . . . . . . . . . . . . . . . . . . . . . . . . . . . . . . . . . . 4
Preparing the telephone . . . . . . . . . . . . . . . . . . . . . . . . . . . . . . . . . 5
Installing the base station . . . . . . . . . . . . . . . . . . . . . . . . . . . . . . . . . . . . . . . . . . . .5
Attaching the belt clip . . . . . . . . . . . . . . . . . . . . . . . . . . . . . . . . . . . . . . . . . . . . . . .8
Activating/deactivating handset. . . . . . . . . . . . . . . . . . . . . . . . . . . . . . . . . . . . . . . .8
Activating/deactivating keypad protection . . . . . . . . . . . . . . . . . . . . . . . . . . . . . . . .8
Date and time. . . . . . . . . . . . . . . . . . . . . . . . . . . . . . . . . . . . . . . . . . . 9
Setting the date and the time . . . . . . . . . . . . . . . . . . . . . . . . . . . . . . . . . . . . . . . . .9
Setting the alarm clock . . . . . . . . . . . . . . . . . . . . . . . . . . . . . . . . . . . . . . . . . . . . .10
Making calls. . . . . . . . . . . . . . . . . . . . . . . . . . . . . . . . . . . . . . . . . . . 11
Making an external call . . . . . . . . . . . . . . . . . . . . . . . . . . . . . . . . . . . . . . . . . . . . .11
Making internal calls . . . . . . . . . . . . . . . . . . . . . . . . . . . . . . . . . . . . . . . . . . . . . . .11
Answering a call . . . . . . . . . . . . . . . . . . . . . . . . . . . . . . . . . . . . . . . . . . . . . . . . . .12
Muting the microphone. . . . . . . . . . . . . . . . . . . . . . . . . . . . . . . . . . . . . . . . . . . . .12
Mailbox . . . . . . . . . . . . . . . . . . . . . . . . . . . . . . . . . . . . . . . . . . . . . . . . . . . . . . . . .13
Enhanced telephone features. . . . . . . . . . . . . . . . . . . . . . . . . . . . 14
Automatic redial. . . . . . . . . . . . . . . . . . . . . . . . . . . . . . . . . . . . . . . . . . . . . . . . . . .14
Directory . . . . . . . . . . . . . . . . . . . . . . . . . . . . . . . . . . . . . . . . . . . . . . . . . . . . . . .15
Character map . . . . . . . . . . . . . . . . . . . . . . . . . . . . . . . . . . . . . . . . . . . . . . . . . . . .16
Network services . . . . . . . . . . . . . . . . . . . . . . . . . . . . . . . . . . . . . . 19
Functions before a call . . . . . . . . . . . . . . . . . . . . . . . . . . . . . . . . . . . . . . . . . . . . .19
Functions during a call . . . . . . . . . . . . . . . . . . . . . . . . . . . . . . . . . . . . . . . . . . . . .21
Callback when busy. . . . . . . . . . . . . . . . . . . . . . . . . . . . . . . . . . . . . . . . . . . . . . . .23
For further information please refer to the index ➔page 51!
1
Page 6

Registering and de-registering handsets . . . . . . . . . . . . . . . . . . 26
Automatic registration . . . . . . . . . . . . . . . . . . . . . . . . . . . . . . . . . . . . . . . . . . . . . .26
Manual registration . . . . . . . . . . . . . . . . . . . . . . . . . . . . . . . . . . . . . . . . . . . . . . . .27
De-registering handsets . . . . . . . . . . . . . . . . . . . . . . . . . . . . . . . . . . . . . . . . . . . .28
Operating several handsets . . . . . . . . . . . . . . . . . . . . . . . . . . . . . 29
Changing the name of a handset. . . . . . . . . . . . . . . . . . . . . . . . . . . . . . . . . . . . . .29
Changing a handset's internal number . . . . . . . . . . . . . . . . . . . . . . . . . . . . . . . . .30
Making internal calls . . . . . . . . . . . . . . . . . . . . . . . . . . . . . . . . . . . . . . . . . . . . . . .30
Connecting a call . . . . . . . . . . . . . . . . . . . . . . . . . . . . . . . . . . . . . . . . . . . . . . . . . .31
Internal enquiry calls . . . . . . . . . . . . . . . . . . . . . . . . . . . . . . . . . . . . . . . . . . . . . . .31
Accepting or rejecting a waiting call . . . . . . . . . . . . . . . . . . . . . . . . . . . . . . . . . . .32
Joining in a call ("barging in") . . . . . . . . . . . . . . . . . . . . . . . . . . . . . . . . . . . . . . . . .32
Deactivating the ringer . . . . . . . . . . . . . . . . . . . . . . . . . . . . . . . . . . . . . . . . . . . . .33
Individual handset settings . . . . . . . . . . . . . . . . . . . . . . . . . . . . . . 34
Changing a handset's display language. . . . . . . . . . . . . . . . . . . . . . . . . . . . . . . . .34
Modifying volume and melody . . . . . . . . . . . . . . . . . . . . . . . . . . . . . . . . . . . . . . .35
Activating/deactivating Auto talk . . . . . . . . . . . . . . . . . . . . . . . . . . . . . . . . . . . . . .36
Resetting a handset to the factory setting . . . . . . . . . . . . . . . . . . . . . . . . . . . . . .36
Base station settings . . . . . . . . . . . . . . . . . . . . . . . . . . . . . . . . . . . 37
Changing the system PIN . . . . . . . . . . . . . . . . . . . . . . . . . . . . . . . . . . . . . . . . . . .37
Modifying volume and melody . . . . . . . . . . . . . . . . . . . . . . . . . . . . . . . . . . . . . . .38
Repeater support . . . . . . . . . . . . . . . . . . . . . . . . . . . . . . . . . . . . . . . . . . . . . . . . .39
Resetting the base station to the factory setting . . . . . . . . . . . . . . . . . . . . . . . . .39
Connecting the base station to a PABX . . . . . . . . . . . . . . . . . . . 40
Setting the flash time . . . . . . . . . . . . . . . . . . . . . . . . . . . . . . . . . . . . . . . . . . . . . .40
Setting pauses. . . . . . . . . . . . . . . . . . . . . . . . . . . . . . . . . . . . . . . . . . . . . . . . . . . .41
Appendix. . . . . . . . . . . . . . . . . . . . . . . . . . . . . . . . . . . . . . . . . . . . . . 42
Maintenance . . . . . . . . . . . . . . . . . . . . . . . . . . . . . . . . . . . . . . . . . . . . . . . . . . . . .42
Questions and answers. . . . . . . . . . . . . . . . . . . . . . . . . . . . . . . . . . . . . . . . . . . . .42
Guarantee/maintenance/repair/approval . . . . . . . . . . . . . . . . . . . . . . . . . . . . . . . .43
Technical data . . . . . . . . . . . . . . . . . . . . . . . . . . . . . . . . . . . . . . . . . . . . . . . . . . . .45
2
Page 7

Menu table . . . . . . . . . . . . . . . . . . . . . . . . . . . . . . . . . . . . . . . . . . . . 47
Accessories . . . . . . . . . . . . . . . . . . . . . . . . . . . . . . . . . . . . . . . . . . . 49
Index . . . . . . . . . . . . . . . . . . . . . . . . . . . . . . . . . . . . . . . . . . . . . . . . . 51
3
Page 8
Safety precautions
Congratulations
on purchasing your
SiemensClassic S117!
The following pages describe how your telephone works, so that you will be able to
use it easily.
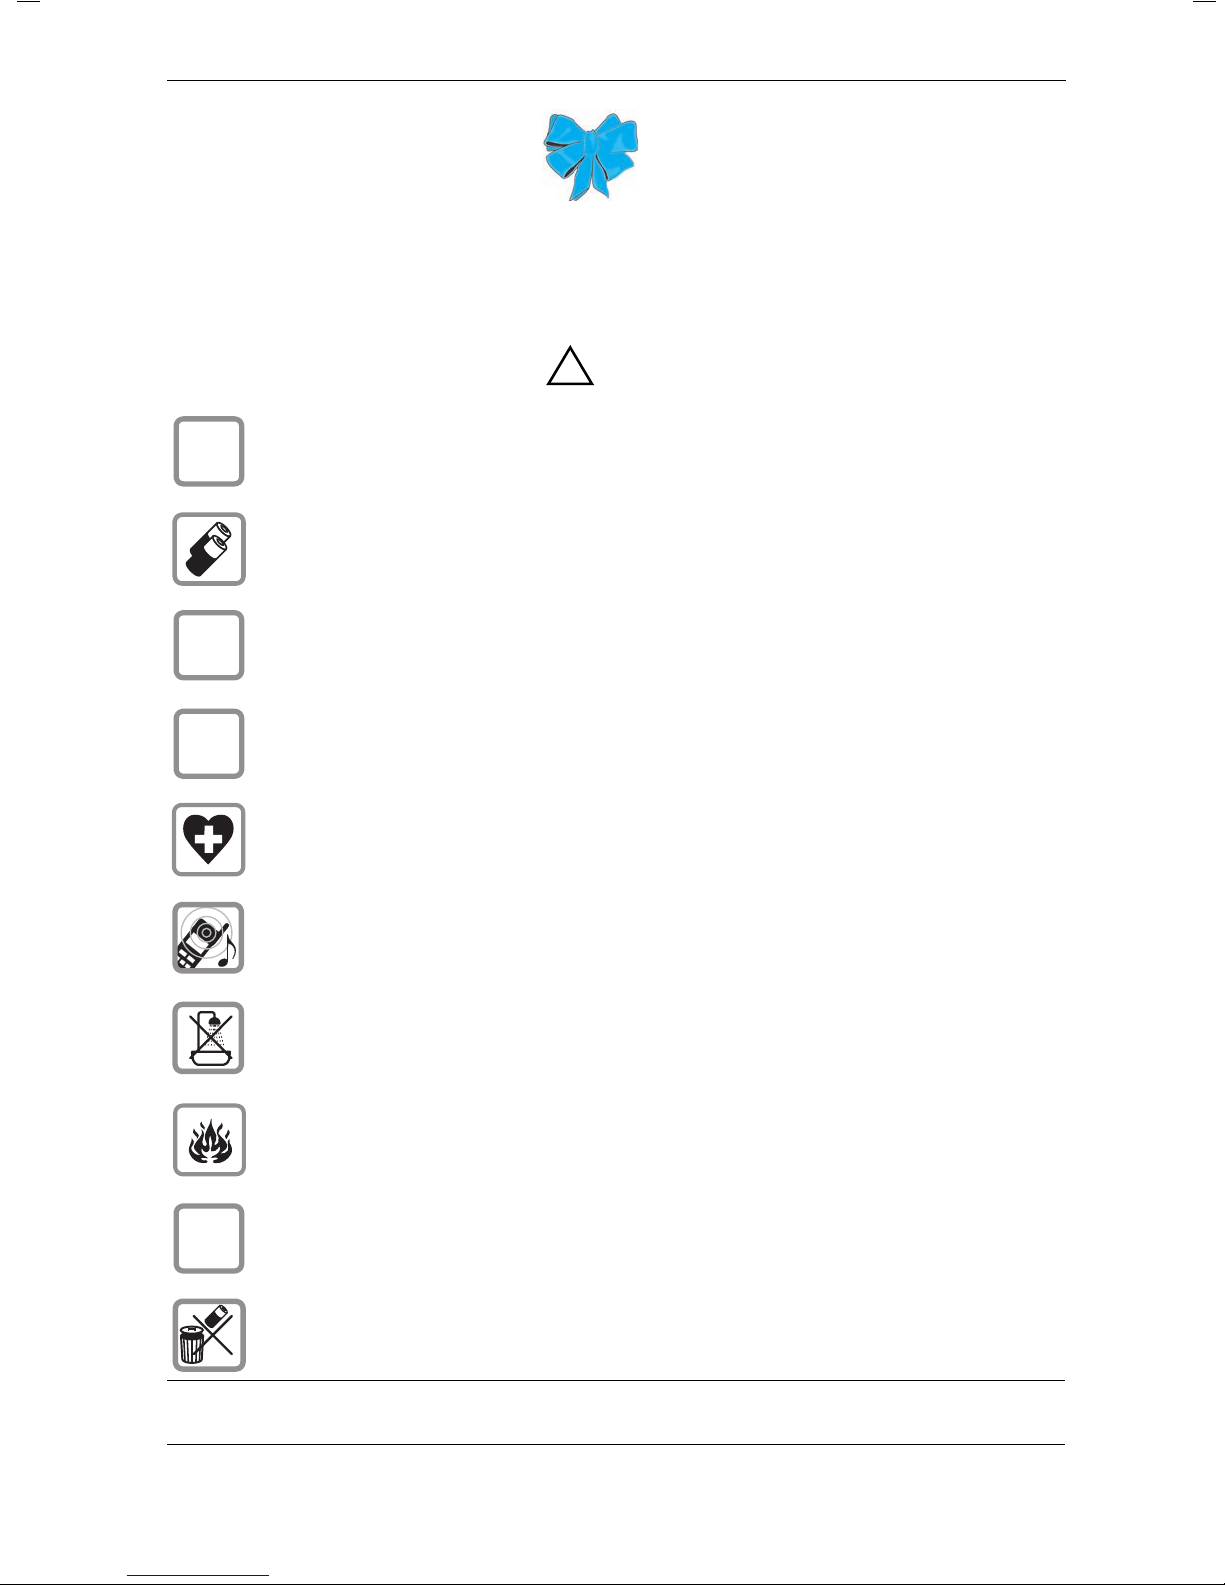
Safety precautions
Only use the power supply unit supplied as indicated on the underside
$
‹
Œ
of the device.
Only use approved rechargeable batteries of the same type.
Never use ordinary (non-rechargeable) batteries as they may pose a health
hazard or cause injury.
Make sure the rechargeable batteries are inserted the right way round (as
indicated in the handset battery compartments).
Use the batteries specified in these operating instructions
(as indicated in the handset battery compartments).
Medical equipment can be affected by the use of the telephone. Observe
the conditions in your environment (e.g. doctor's practice).
The handset can cause an unpleasant humming sound in hearing aids.
!
Do not install the base station in bathrooms or showers. The handset is not
splashproof (see also page 42).
Do not operate the telephone in environments where there is risk of
explosion (e.g. paint shops).
If you give your telephone to someone else you should also give them the
ƒ
½
4
operating instructions.
Dispose of the batteries and telephone carefully. Do not pollute the
environment.
Not all functions described in these operating instructions are available in all
telephone networks.
Page 9
Preparing the telephone
The package contains the following:
one base station,
●
one Classic S117 handset,
●
one power supply unit,
●
one telephone cord,
●
one belt clip for the handset,
●
two batteries,
●
one set of operating instructions.
●
Preparing the telephone
Installing the base station
Notes on the installation
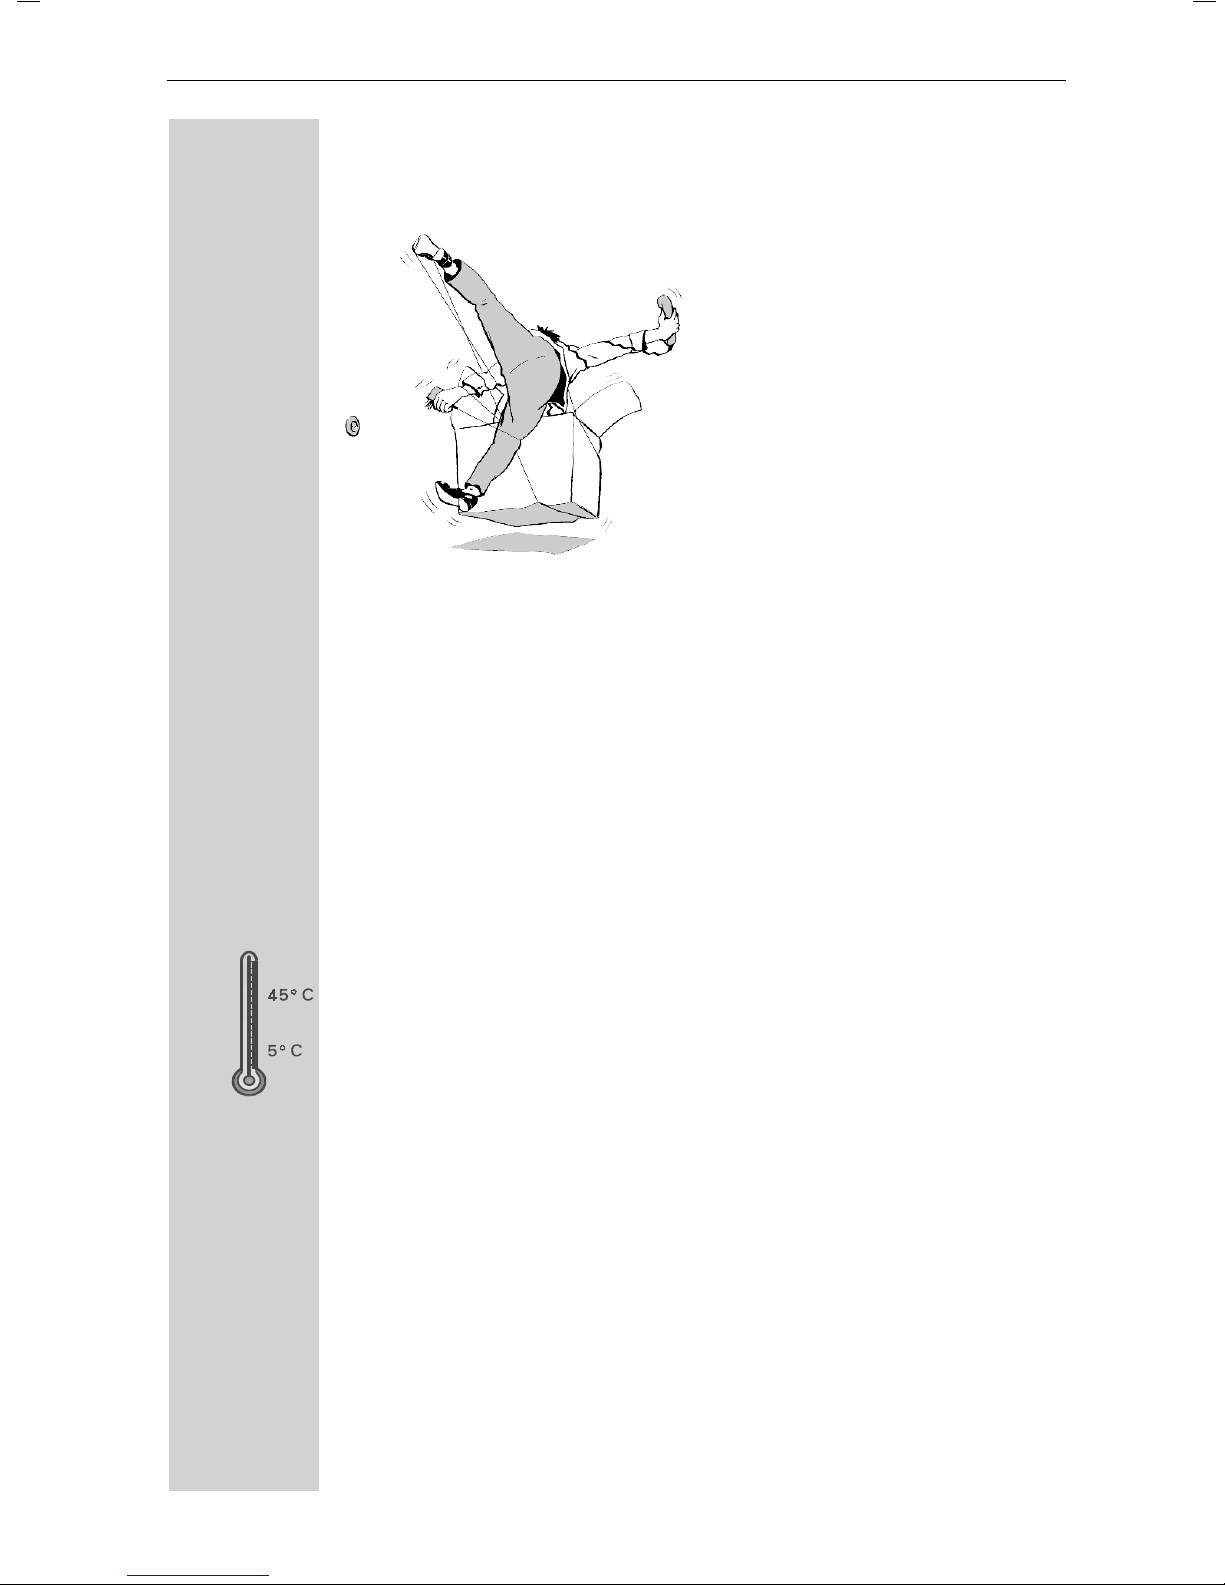
The base station is designed for operation in protected rooms with a
temperature range from +5 °C to +45 °C. Install the base station in a
central location in the flat/house, e.g. in the hall.
Range
The base station range is approx. 250 m outdoors and up to 40 m
indoors.
5
Page 10
Preparing the telephone
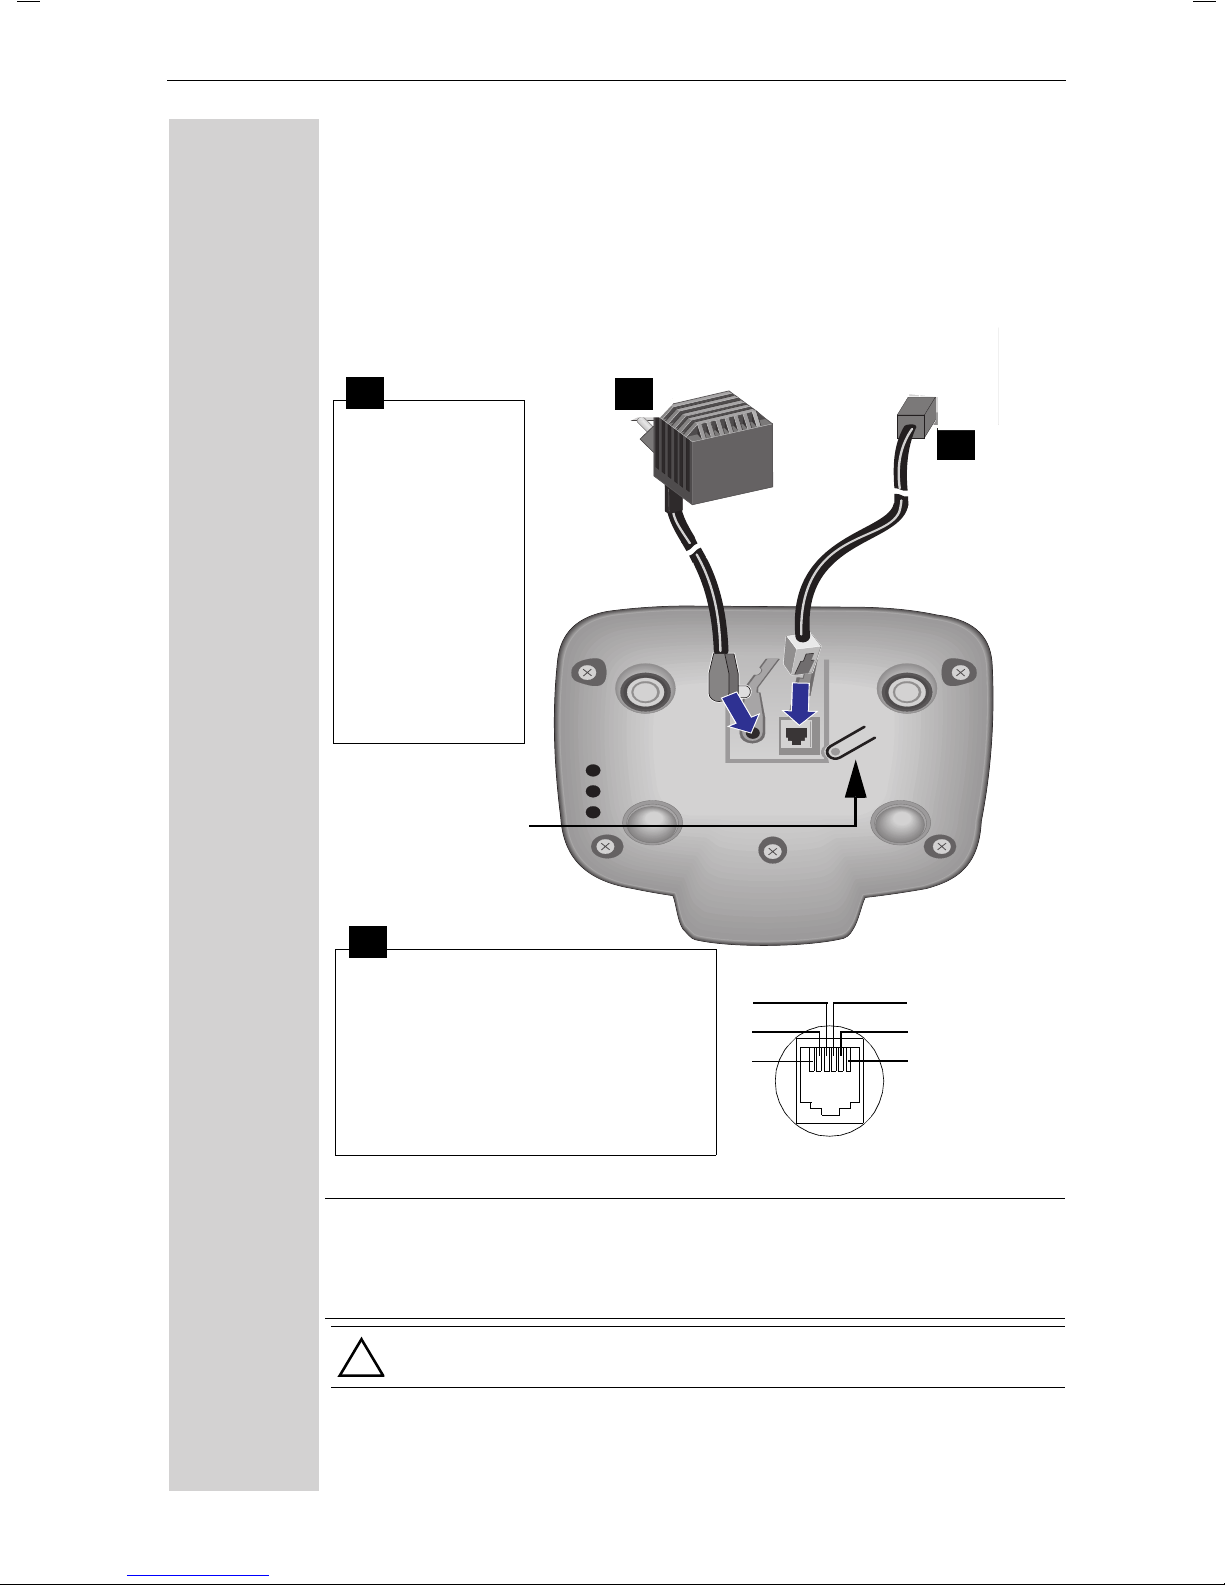
Connecting the base station
for the analogue network:
Power supply unit
(220/230 V) with
mains cable
1
Insert the
●
small plug
on the mains
cable,
place cord in
●
cable duct,
insert power
●
supply unit
into mains
socket.
Key to register
additional handsets
Telephone plug with telephone cord
1
2
2
Insert small black plug on the
●
telephone cord into jack
(clicks into place),
place cord in cable duct,
●
insert telephone jack into
●
telephone socket.
●
½
Only use the power supply unit supplied (as indicated on
the underside of the device).
If you buy another cord, ensure that it has the correct termi-
●
nal assignment (telephone wires/EURO CTR37*).
Exercise caution when using a new telephone cord.
!
Only use the cord provided.
* 3-4 assignment for preparation of the handset
3
2
1
4
5
6
free
1
free
2
a
3
b
4
free
5
free
6
6
Page 11
Preparing the telephone
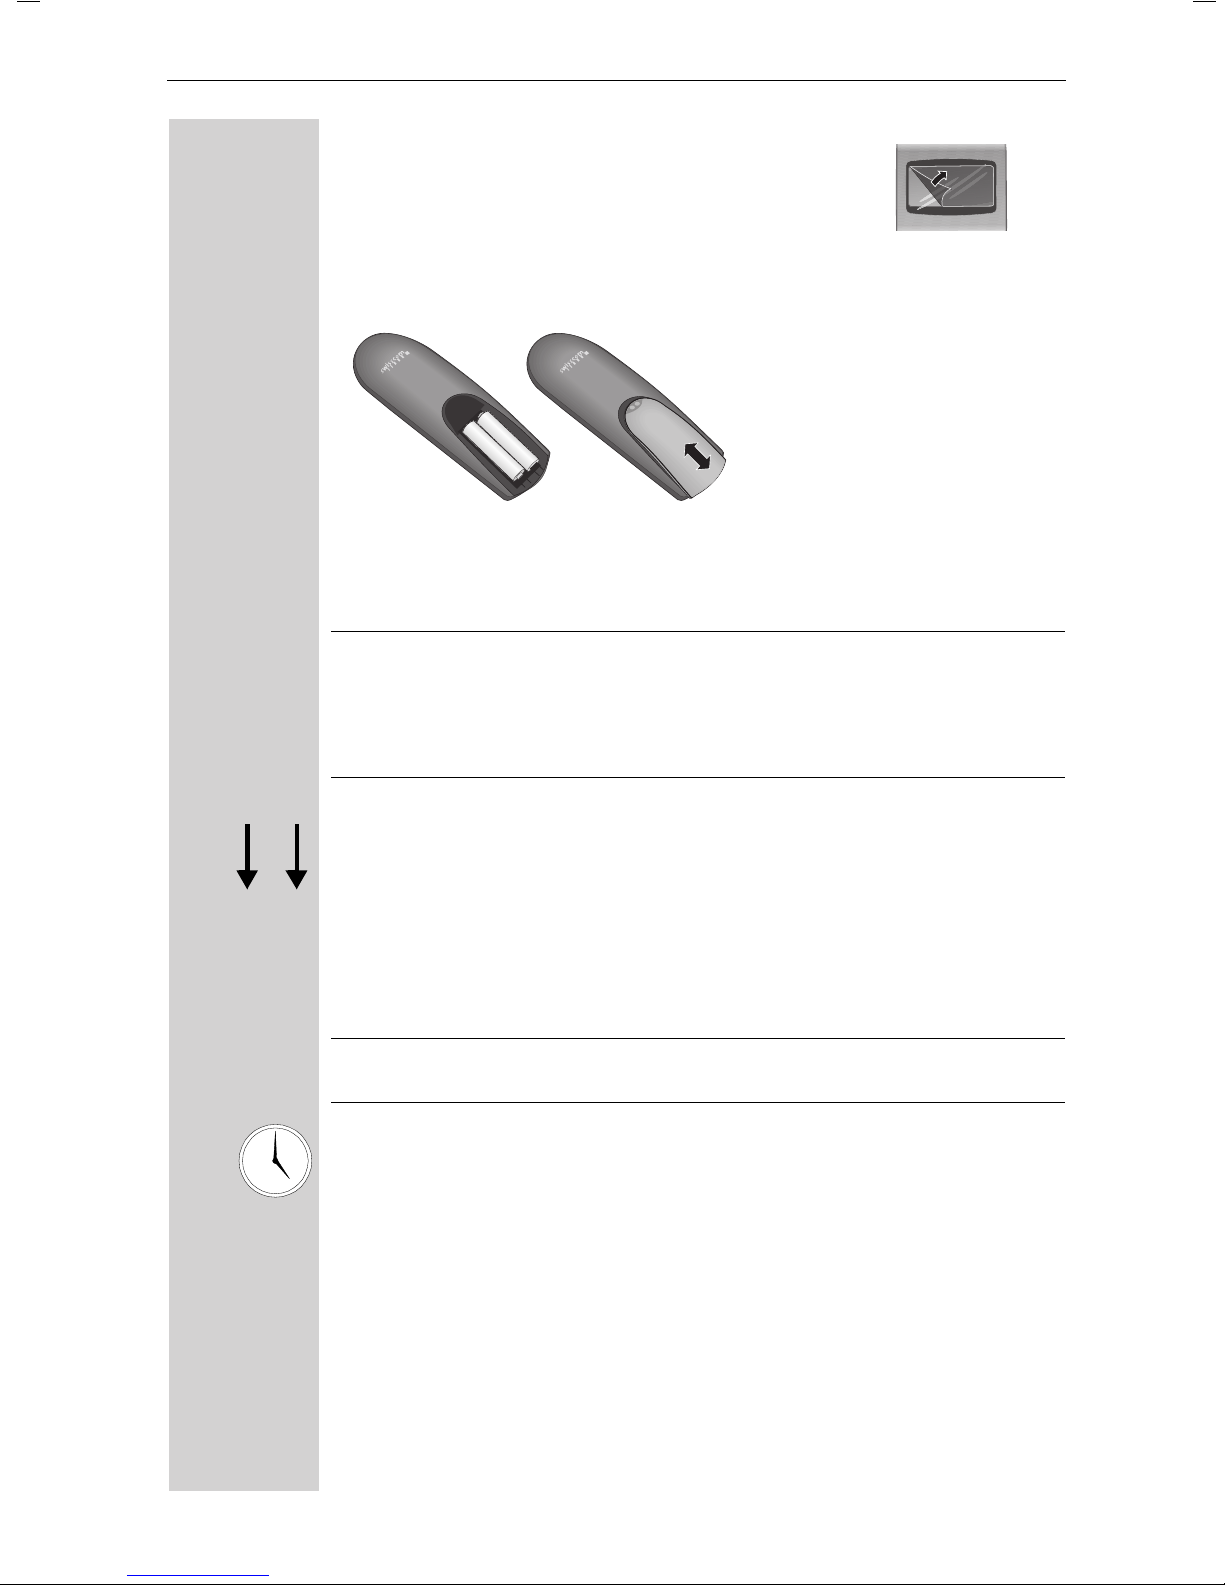
The display is protected by a plastic film.
Remove the protective plastic film!
Inserting the batteries
+
–
–
+
Insert the batteries ensuring correct polarity – see figure on left.
●
Replace cover and push gently upward until it clicks into place.
●
●
To open, press the grooved area on the cover and slide down.
k
Ö
5 h
½
page 45). Never use ordinary (non-rechargeable) batteries as
they may pose a health hazard or cause injury.
Never use non-Siemens charging units as these can damage
●
the batteries.
Only insert the recommended rechargeable batteries (see
●
Placing the handset into the base station and charging the
batteries
Before activating your handset, place it in the base station with the
display facing upward. After approx. one minute, the handset's in-
ternal number is shown in the top left-hand corner of the display (e.g.
"1").
½
Leave the handset for approx. five hours in the base station to charge
the batteries. The charging status icon flashes on the handset indicating that the batteries are being charged:
Ý
Ü
For information on how to register further handsets (bought
additionally), see page 26.
Batt. empty (symbol flashes)
Batteries 1/3 charged
Û
Ú
Batt. 2/3 charged
Batt. fully charged
Note:
Your device is now ready for operation. Please set the date and the
time (see page 9), so that the time of incoming calls can be noted
correctly.
7
Page 12
Preparing the telephone
●
½
●
●
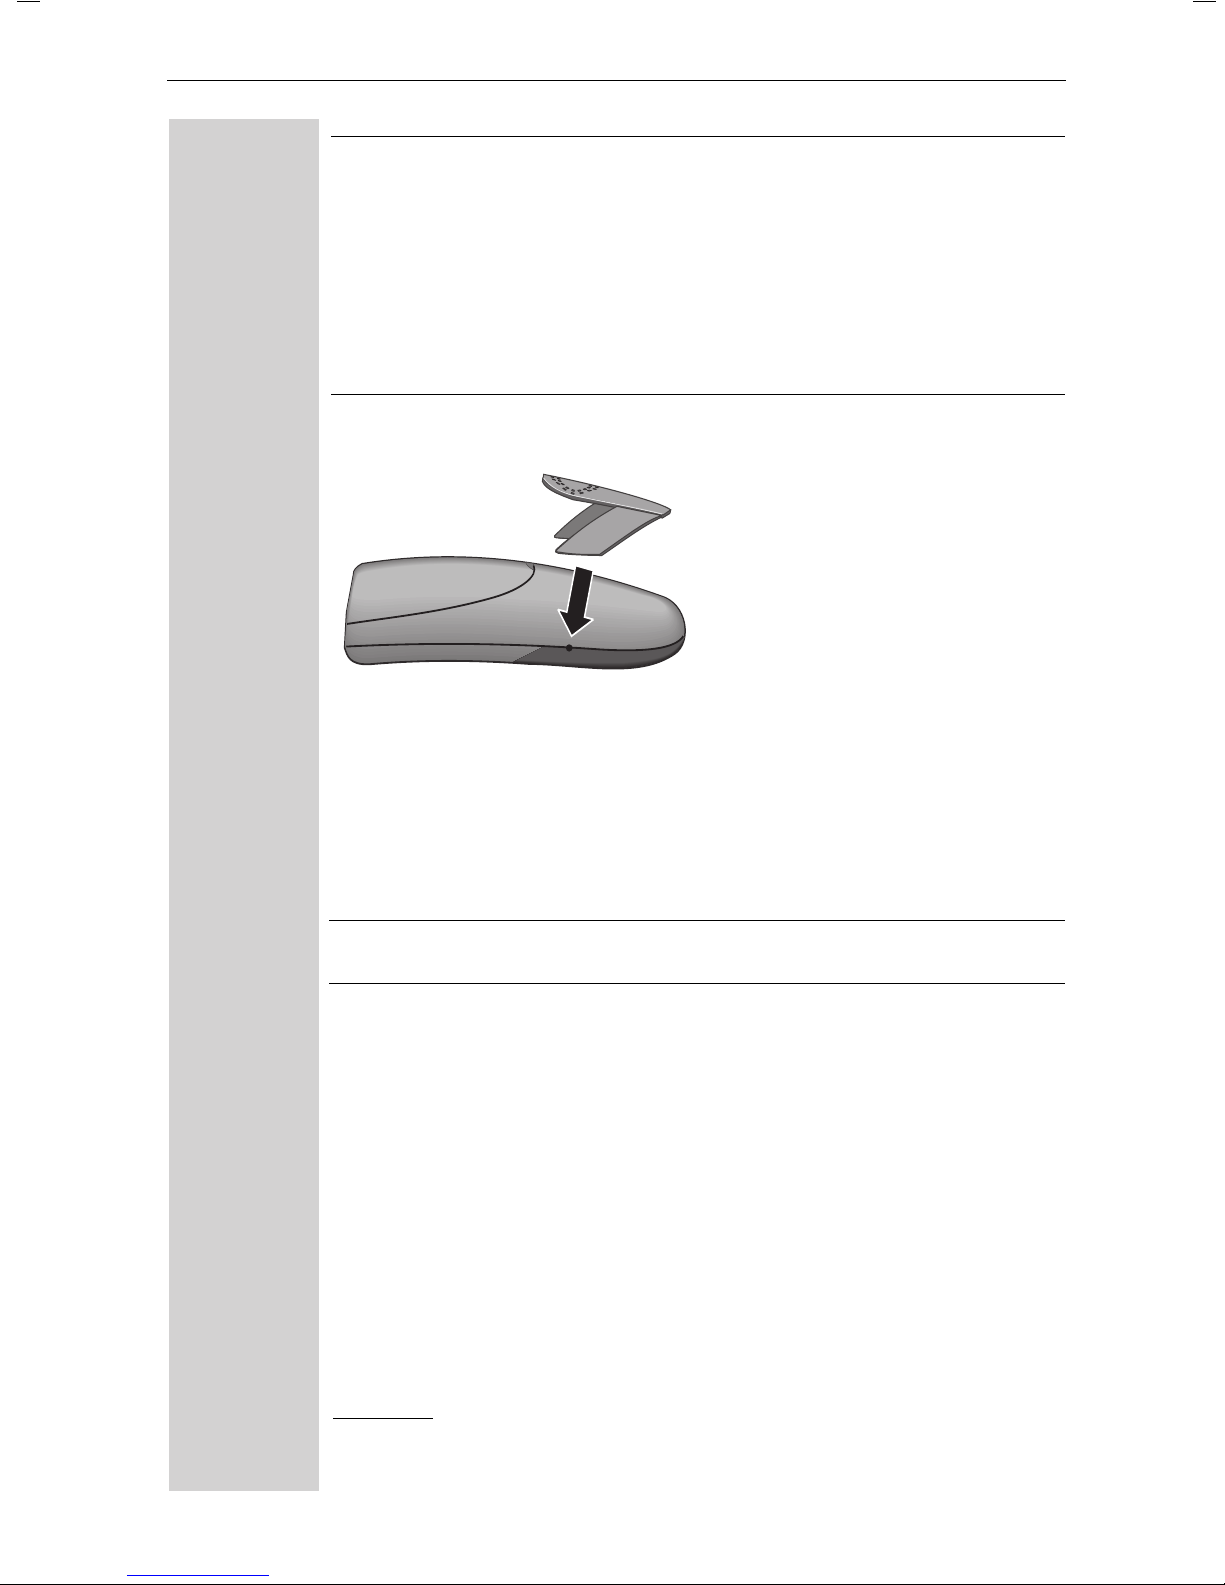
Attaching the belt clip
Once the initial charging operation is completed you can
replace your handset into the base station after each call.
Charging is controlled electronically. This ensures optimum
charging and prolongs battery life.
The batteries heat up during charging. This is normal and not
dangerous.
The battery charging status is correctly displayed only after
uninterrupted charging/discharging. You should therefore
avoid opening the battery compartment unnecessarily.
a
ª
Push the belt clip onto the back of the handset until the lugs at the side
click into place.
Activating/deactivating handset
To activate/deactivate, hold down the end call key – You will hear the
confirmation beep
The handset is activated as soon as you insert the batteries and
½
place the handset in the base station.
*.
Activating/deactivating keypad protection
You can disable the handset keys when carrying the unit in your pocket
or bag. This protects the keypad against inadvertent activation.
If there is an incoming call, the key lock is automatically deactivated
and re-activated after the call has ended.
Accepting a call: Press the talk key
To activate/deactivate, hold down key – you will hear the confirma-
*
tion beep
.
c
.
* Confirmation beep = rising tone sequence,
Error beep = falling tone sequence.
8
Page 13

Press keys:
Date and time
Date and time
Your Classic S117 has an alarm clock function to help
you keep track of your schedule.
Setting the date and the time
You can also set the clock mode, i.e. 12 h mode
AM PM
( and ) or 24 h mode.
Date
ееееееееееее
MENU
Z
BASE SET
еееееее ееееееееееееееееееееееееееееееее еееееее
Z
CLOCK SET
еееееее ееееееееееееееееееееееееееееееее еееееее
Z
DATE SET
еееееее ееееееееееееееееееееееееееееееее еееееее
ŸÞÞ¢Þ]
e.g.
Z
BASE SET
еееееее ееееееееееееееееееееееееееееееее еееееее
Z
CLOCK SET
еееееее ееееееееееееееееееееееееееееееее еееееее
Z
DATE/TIME
еееееее ееееееееееееееееееееееееееееееее еееееее
] ¬ Þ ¢
e.g.
[
[
[
<>
еееееее еееееее
еееееее
[
MENU
ееееееееееее
[
[
[
Open the menu.
Select and confirm.
Select and confirm.
Select and confirm.
The current setting is displayed in the
format DD-MM-YY.
Enter the day/month/year (e.g. 20.05.2001 as shown).
If necessary, jump to another digit, e.g. to correct it.
Save the setting and terminate the function.
Time
Open the menu.
Select and confirm.
Select and confirm.
Select and confirm.
The current setting is displayed as HH:MM.
Enter the hours/minutes( e.g. 19.05 h as shown).
<>
еееееее еееееее
AM
еееееее еееееее
Z
or
PM
еееееее еееееее еееееее
еееееее
[
[
[
еееееее
[
If necessary, jump to another digit, e.g. to correct it.
Save the setting and terminate the function.
If 12 h mode is set as :
Confirm first half of the day.
Select second half of the day and confirm.
Save the setting and terminate the function.
CLOCK MODE
9
Page 14
Date and time
Press keys:
Display mode (12 or 24 hours)
ееееееееееее
MENU
Z
BASE SET
еееееее ееееееееееееееееееееееееееееееее еееееее
Z DATE/TIME [
еееееее ееееееееееееееееееееееееееееееее еееееее
Z
CLOCK MODE
еееееее ееееееееееееееееееееееееееееееее еееееее
24 H
ееееееееееееееееееееееееееееееее еееееее
Z
12 H
еееееее ееееееееееееееееееееееееееееееее еееееее
Z
ALARM CLOCK
еееееее ееееееееееееееееееееееееееееееее еееееее
[
[
[
or
[
ееееееееееее
MENU
[
Open the menu.
Select and confirm.
Select and confirm.
Select and confirm.
Confirm 24 h mode.
Select 12 h mode and confirm.
Setting the alarm clock
You can use your handset like an alarm clock. Before
you can do so, the date and time must already be set.
Activating the alarm clock
The active alarm clock rings every day at the set time.
Open the menu.
Select and confirm (marked with ✓).
Þ¤ ]¢
e.g.
<>
еееееее еееееее
еееееее
[
ееееееееееее
MENU
Z
ALARM CLOCK
еееееее ееееееееееееееееееееееееееееееее еееееее
[
Enter the time for the alarm call (hours/minutes)
e.g. 7.15 h as shown.
If necessary, jump to another digit, e.g. to correct it.
Save the setting and terminate the function.
The asterisk
indicates that the
alarm clock is set.
1
z
2 2 - 3
INT
3
MENU
MENU
MENUMENU
Deactivating the alarm clock
The alarm clock is set, but you do not want the alarm
to sound every day.
Open the menu.
Select and confirm.
The alarm call is deactivated. The asterisk before the
time display is no longer shown.
Turning off the alarm call
10
The alarm clock rings and the status LED flashes
(approx. 30 s). Press any key to turn off the alarm call.
Page 15

Press keys:
Making calls
Making calls
Making an external call
External calls are calls into the public telephone
network.
Dial the phone number, if necessary use the display
o
key to correct single digits.
I
еееееее
e.g.
c
a
Ÿ
or
Press the talk key.
To end the call, press the end call key.
½
You can also press the talk key
●
then enter the phone number – each digit is
dialled immediately.
You can cancel the dialling operation with
●
.
the end call key
You can insert a pause with the recall key
●
R
(hold key down), e.g. for international
calls.
a
c
first
and
Making internal calls
Internal calls are calls to other registered handsets.
Internal calls are free of charge (e.g. to call within your
home from the kitchen to the living room).
Enter the handset's internal phone number.
Y Zc
еееееее еееееее
I
ееееееееvvv
еееееее
I
«
a
Press.
Select the desired user and press the talk key.
Call all handsets:
All handsets are called.
Ending a call:
Press the end call key to end the call.
11
Page 16

Making calls
Press keys:
Answering a call
Your telephone rings (ringer) and the status LED
flashes.
or
ÖÄk
c
Press the talk key.
Simply remove the handset from the base station
(factory setting: Auto talk, see page 36).
If the ringer is disturbing you: Open the
½
●
menu via and select .
As long as the call is displayed, you can
●
accept it by pressing the talk key
example.
Setting the handset volume (while you are
●
talking, see page 35).
MENU SILENT
c
, for
Muting the microphone
You can deactivate your microphone during external
calls in order to talk confidentially to another person in
the room, for example. The external caller cannot hear
your conversation during this time. You do not hear
your caller either.
еееееее
I
MENU
ееееееееееее
GO BACK
ееееееееееееееееееееееееееееееее еееееее
[
Mute the microphone – the call is placed on hold and
the external caller will hear music.
Re-activating the microphone:
Open the menu.
Confirm.
You return to the external caller.
12
Page 17

Press keys:
Making calls
Mailbox
Storing the mailbox for fast access
You can use the mailbox for fast access.
MENU
ееееееееееее
Z
VOICE MAIL
еееееее ееееееееееееееееееееееееееееееее еееееее
Z
SET KEY 1
еееееее ееееееееееееееееееееееееееееееее еееееее
MAILBOX
ееееееееееееееееееееееееееееееее еееееее
[
[
[
Open the menu.
Select and confirm.
Select and confirm.
Enter the phone number of the mailbox and confirm.
Once you have selected the mailbox, simply hold
½
down the
ly connected to the mailbox (fast access).
] key on the handset. You are direct-
13
Page 18
Enhanced telephone features
Press keys:
Enhanced telephone features
In addition to standard telephoning, your Classic S117
offers a number of other fast, convenient features.
еееееее
z
еееееее
Z
c
еееееее
z
MENU
ееееееееееее
£
DELETE?
ееееееееееееееееееееееееееееееее еееееее
Z
еееееее ееееееееееее
Z
COPY TO DIR
еееееее ееееееееееееееееееееееееееееееее еееееее
[
еееееее
z
MENU
[
Automatic redial
Your handset automatically saves the five phone numbers dialled last or names (see page 15).
Display the phone number/name.
Select the required phone number/name.
Press the talk key – the phone number is dialled.
Delete the redialling list
Open the redialling list.
Open the menu.
Press digit 6 and confirm the prompt.
Copying the phone number to the directory
Display the phone number.
Select a phone number and open the menu.
Select and confirm.
o
14
[
еееееее
o
еееееее
[
If necessary, change the phone number and confirm.
If necessary enter the name.
Input of letters and characters (see page 16).
Confirm input.
Page 19

Press keys:
Enhanced telephone features
Directory
h
MENU
ееееееееееее
Z
NEW ENTRY
еееееее ееееееееееееееееееееееееееееееее еееееее
[
o
еееееее
[
o
еееееее
[
With the directory
numbers and then dial them at the push of a button.
h
you can save up to 20 phone
Saving an entry
Open the directory.
Open the menu.
Select and confirm.
Enter the phone number.
Confirm input.
Enter the name.
For information on entering letters and characters
(max. 12) refer to the character map (see page 16).
Confirm input.
Max. number of numbers to be input:
½
Directory 22 digits
15
Page 20

Enhanced telephone features
Press keys:
]
Character map
1 x2 x3 x4 x5 x6 x
Blank 1
Ÿ
^
¡
¢
£
¤
¥
¬
Þ
«
ª
ABC2
DEF 3
GH I 4
JKL5
MN O 6
PQRS7
TUV8
WXYZ9
+0 – |?_
*
j
Press the relevant key repeatedly or hold it down:
½
/(),
< >
Controlling the cursor with
character with . Characters are always
inserted to the left of the cursor.
. Deleting a
The entries are sorted in the
following sequence:
1. Blank
2.Digits (0 to 9)
3. Letters (alphabetical)
4. Remaining characters
To avoid the alphabetical sequence of the entries in the
directory, enter a blank before the name. This entry
then goes to the first position (example: entering
" Karla").
16
Page 21

Press keys:
Enhanced telephone features
Dialling a number from the directory
e.g.
h
^^
c
þ
c
a
Open the directory.
Enter the first letter of the name (e.g. for the name
Emma - first letter "E"): Press the
scroll with the key. The names are listed in alphabetical order.
Press the talk key. The phone number is dialled.
After selecting the number, you can also open
½
the menu, select , extend/change
the number and dial with the talk key
Z
EDIT ENTRY
^
key twice and
c
.
Automatic callback with the Swisscom key
You have dialled a number and can hear the busy tone.
Press the Swisscom key.
CALL BACK appears on the display.
Press the talk key and wait until you hear the message
"Service is activated".
Press the end call key.
h
^^
e.g.
MENU
ееееееееееее
Z
SHOW ENTRY
еееееее ееееееееееееееееееееееееееееееее еееееее
[
o
еееееее
[
o
As soon as the person you are calling is free, automatic
callback will take place. The person you are calling will
not be called until you have accepted this callback.
½
Instead of using "automatic callback", you can
store phone numbers. In this case, the callback
function is inactive.
Displaying and changing a directory entry
Open the directory.
Enter the first letter of the name.
Open the menu.
Select and confirm. The entry is displayed.
If necessary, change phone number.
For information on entering letters and characters, see
page 16.
Confirm input.
Overwrite the name.
еееееее
[
Confirm input.
17
Page 22

Enhanced telephone features
Press keys:
Deleting a single entry from the directory
h
e.g. ^^
MENU
ееееееееееее
Z
DELETE
еееееее ееееееееееееееееееееееееееееееее еееееее
£
DELETE?
ееееееееееееееееееееееееееееееее еееееее
h
ееееееееееее
[
þ
/
MENU
[
Open the directory.
Enter the first letter of the name.
Open the menu.
Select and confirm.
Deleting all numbers in the directory
Open the directory.
Open the menu.
Press digit 6 and confirm the prompt.
18
Page 23

Press keys:
Network services
Network services
Your handset helps you use the network services.
Functions are activated via the menu before a call
(when the telephone is idle) and during a call.
If you have any questions relating to the availability of
network services on your subscriber line, please telephone Swisscom customer service on 0800 800 135.
Functions before a call
You can set these functions before the call, for example:
Activate/deactivate call waiting
●
Set call divert.
●
MENU
ееееееееееее
Z
SEL SERVICES
еееееее ееееееееееееееееееееееееееееееее еееееее
Z
CALL WAITING
еееееее ееееееееееееееееееееееееееееееее еееееее
ON
ееееееееееееееееееееееееееееееее еееееее
Z
OFF
еееееее ееееееееееееееееееееееееееееееее еееееее
[
[
[
or
[
a
Activating/deactivating call waiting
Open the menu.
Select and confirm.
Select and confirm.
Confirm.
Select and confirm.
Press after confirmation from the telephone network.
19
Page 24

Network services
Press keys:
Call divert
Incoming calls are diverted to another phone number.
You can define the following conditions:
Immediately
●
When the call is not answered
●
When the number is busy.
●
You want to divert all calls to another number
permanently.
MENU
ееееееееееее
Z
SEL SERVICES
еееееее ееееееееееееееееееееееееееееееее еееееее
Z
CALL DIVERT
еееееее ееееееееееееееееееееееееееееееее еееееее
AUTOMATIC
ееееееееееееееееееееееееееееееее еееееее
Z
NO ANSWER
еееееее ееееееееееееееееееееееееееееееее еееееее
Z
IF BUSY
еееееее ееееееееееееееееееееееееееееееее еееееее
ON
ееееееееееееееееееееееееееееееее еееееее
Z
OFF
еееееее ееееееееееееееееееееееееееееееее еееееее
o
[
[
[
[
[
[
еееееее
[
[
or
or
or
Open the menu.
Select and confirm.
Select and confirm.
Set to automatically divert all incoming calls immediately. Calls are no longer signalled.
Set to divert incoming calls if nobody answers after
several ring cycles.
Set to divert incoming calls when your line is busy.
Then activate or deactivate:
Activate call divert.
Enter the phone number to which incoming calls
should be diverted and confirm with OK.
Deactivate call divert.
20
After confirmation from the telephone network, press
the end call key
½
You can activate several of these call diversions at the same time, but you must also deactivate each one separately when no longer
required.
a
.
Page 25

Press keys:
Network services
Functions during a call
You can set the following functions during a call:
Enquiry call, toggling, initiating/ending a conference,
●
Accepting/rejecting a waiting call.
●
Enquiry calls, toggling
Enquiry call: You are conducting an external call and
want to call a second external user. The first user waits
in the meantime.
MENU
ееееееееееее
EXTN CALL
ееееееееееееееееееееееееееееееее еееееее
Z
END CALL
еееееее ееееееееееееееееееееееееееееееее еееееее
ееееееееееееееееееееееееееееееее еееееее
CONFERENCE
END CONF
ееееееееееееееееееееееееееееееее еееееее
[
o
Y
еееееее еееееее
Z
MENU
ееееееееееее
[
or
[
MENU
ееееееееееее
[
Open the menu.
Confirm.
Enter the second user's phone number. The phone
number is dialled.
½
Toggling: switching between two callers.
Open the menu.
End the second call. You are re-connected to the waiting caller.
Conference: You and two external users can listen and
talk simultaneously.
Open the menu.
End the conference:
You return to the "toggling" status and are re-connected
to only one caller.
For dialling the second user, you can also use
the directory (
h
key).
еееееее еееееее
Z
MENU
ееееееееееее
END CALL
ееееееееееееееееееееееееееееееее еееееее
Y
[
a
If necessary, change to the user whose call is to be disconnected.
Open the menu.
You carry on the call with the other user.
Press. The call is ended and all users are disconnected.
21
Page 26

Network services
Press keys:
Call waiting during a call
You are conducting an external call and hear a call waiting tone that signals an additional external call.
MENU
ееееееееееее
ACCEPT
ееееееееееееееееееееееееееееееее еееееее
Z
REJECT
еееееее ееееееееееееееееееееееееееееееее еееееее
[
or
[
Open the menu.
Accept the waiting call.
Reject the waiting call.
22
Page 27

Press keys:
MENU
Network services
Callback when busy
Activate callback
When the line of the called user is busy, you can initiate
a callback. When the called user is available, a callback
is made automatically (this is shown in the display). The
user is called only after you have accepted the callback.
þ
c
or
MENU
ееееееееееее
Z
RINGBACK
еееееее ееееееееееееееееееееееееееееееее еееееее
[
MENU
ееееееееееее
Press the Swisscom key.
Press the talk key.
Open the menu.
Select and confirm.
After confirmation from the telephone network, press
the end call key
½
Please note that for the selection
first be shown in the display (it appears after
2-3 sec) .
a
.
the call duration must
RINGBACK
Deactivating callback
You have decided not to receive a callback.
Open the menu.
Z
SEL SERVICES
еееееее ееееееееееееееееееееееееееееееее еееееее
Z
RINGBACK OFF
еееееее ееееееееееееееееееееееееееееееее еееееее
[
[
Select and confirm.
Select and confirm.
After confirmation from the telephone network press
the end call key a.
23
Page 28

Press keys:
Setting call charges
5
5
If the call charge pulses are not transmitted, the handset automatically displays the current call duration.
Setting call charges per unit and currency
If you want the call charges to be displayed as a sum of
money, you must set the call charges per unit with the
relevant currency. A rate of 0.10 is set a the factory setting.
MENU
ееееееееееее
Z
CALL CHARGES
еееееее ееееееееееееееееееееееееееееееее еееееее
Z
SETTINGS
еееееее ееееееееееееееееееееееееееееееее еееееее
ÞÞÞ£
e.g.
[
[
еееееее
[
o
еееееее
[
Open the menu.
Select and confirm.
Select and confirm.
"RATE ,"
Enter call charges per unit (for example: 2 pence).
Confirm input.
CURRENCY
Enter the letters for the currency abbreviation, e.g.
GBP (for information on entering letters and characters,
see page 16).
Confirm input.
½
If you set the charges per unit to zero, the
units are displayed instead of the call charges.
is displayed:
is displayed:
24
Page 29

Press keys:
Displaying/deleting call charges
You can have the following call charges displayed:
The charges of the last call,
●
The total call charges of all handsets.
●
MENU
ееееееееееее
Z
CALL CHARGES
еееееее ееееееееееееееееееееееееееееееее еееееее
LAST CALL
ееееееееееееееееееееееееееееееее еееееее
Z
ALL CALLS
еееееее ееееееееееееееееееееееееееееееее еееееее
[
[
or
[
Open the menu.
Select and confirm.
Confirm.
The charges of the last call are displayed.
Select and confirm.
The call charges of all handsets are displayed.
Provided this has been set beforehand, the call
●
½
charges are displayed. If this is not the case,
the units are displayed.
If you now press , the call charges or units
●
are deleted.
25
Page 30

Registering and de-registering handsets
Press keys:
Registering and de-registering
k
1
k
2
. . .
Ö
k
k
handsets
6
To be able to make calls with your handset, you must
"introduce" it to its base station (registering). This is
very simple and occurs automatically.
Classic E104 and Top E304 handsets and non-Siemens
handsets must be registered manually.
Automatic registration
Classic S117 handsets at the
Classic S117 base station
Automatic registration ("introducing") is only possible
for the supplied handset and any other handsets
bought additionally. Before activating your handset,
place it in the base station with the display facing
upward. After approx. 1 minute, the handset's internal
number is shown in the top left-hand corner of the display (e.g. "1").
The next unassigned internal number (1–6) is automatically assigned to the handset.
If all numbers are assigned, the internal number 6 is
re-assigned. The handset which was registered under
number 6 is then deregistered.
It is possible to assign a different internal number or a
different internal name (see page 29) to a handset later.
26
Page 31

Press keys:
Registering and de-registering handsets
Manual registration
Classic S117 handsets at the Classic
S117 base station
If a handset has already been registered at a different
base station, you must now register it at your base
station. The Classic S117 handset cannot be registered
at more than one Classic S117 base station at one time.
Step 1:
MENU
ееееееееееее
Z
REGISTER HS
еееееее ееееееееееееееееееееееееееееееее еееееее
Underside of base
station
o
[
[
еееееее
Ù
Open the menu.
Select and confirm, is displayed.
Enter the 4-digit system PIN (factory setting: 0000) and
confirm.
After entering the system PIN, flashes
in the display.
Step 2:
Press the key on the underside of the base station
briefly.
A signal tone is generated at the base station. The next
unassigned internal number (1–6) is automatically assigned to the handset.
If all numbers are assigned, the internal number 6 is
re-assigned. The handset which was registered under
number 6 is then deregistered.
PIN ****
REGISTER HS
After about a minute the internal number of the handset is shown in the top left-hand corner of the display
(e.g. "2").
27
Page 32

Registering and de-registering handsets
Press keys:
Registering Classic E104, Top E304
handsets and non-Siemens handsets at
the Classic S117 base station
Prerequisite:
The non-Siemens handsets must support the GAP
standard for the basic functions.
Underside of base
station
Ù
GAP
Step 1:
Register your handset according to the operating
instructions of the relevant handset.
After registration, your Siemens base station assigns
the first unassigned internal number to the handset.
Step 2:
Press the key on the underside of the base station
briefly.
A signal tone is generated at the base station.
Generic Access Profile =
Standard for the interaction of handsets and base stations from different
manufacturers
еееееее еееееее
Z
MENU
ееееееееееее
Z
DE-REG H/SET
еееееее ееееееееееееееееееееееееееееееее еееееее
o
DE-REGISTER?
ееееееееееееееееееееееееееееееее еееееее
28
еееееее
I
Y
[
[
еееееее
[
De-registering handsets
Prerequisite:
You can only de-register handsets from a Classic S117.
Press the display key.
Select the handset to be de-registered.
Open the menu.
Select and confirm. is displayed.
Enter the 4-digit system PIN (factory setting: 0000) and
confirm.
Confirm the prompt.
PIN ****
Page 33

Press keys:
Operating several handsets
Operating several handsets
k
1
k
2
. . .
k
6
еееееее
I
Turn your Classic S117 into a small PABX.
You can register and operate up to six handsets at your
base station.
Changing the name of a handset
The names 1, 2 etc. are assigned automatically. However, you can change these names, e.g. to "ANNE",
"OFFICE" etc. (10 characters maximum).
Press the display key.
Y
еееееее еееееее
Z
MENU
ееееееееееее
Z
EDIT NAME
еееееее ееееееееееееееееееееееееееееееее еееееее
[
o
[
еееееее
Select the required handset.
Open the menu.
Select and confirm.
Enter name (see character map on page 16).
Confirm input.
29
Page 34

Operating several handsets
Press keys:
Changing a handset's internal number
You can change the internal number of a handset.
еееееее
I
MENU
ееееееееееее
Ÿ
or
[
Z
еееееее
[
еееееее
Ÿ
еееееее
I
RE-ASSIGN NO
ееееееееееееееееееееееееееееееее еееееее
e.g.
I e.g.
еееееее
Y Zc
еееееее еееееее
Press the display key.
Open the menu.
Confirm. The first registered handset is displayed.
Select the handset.
Select a free internal number and confirm.
If the selected internal phone number has
½
already been assigned to a different handset,
you will hear an error beep (descending tone
sequence).
Making internal calls
Internal calls are calls to other registered handsets;
they are free of charge.
Enter the handset's internal number.
Press.
Select the desired user and press talk key.
I c
ееееееееvv
a
Calling all handsets:
All handsets are called ("collective call").
Ending a call:
Press.
30
Page 35

Press keys:
Operating several handsets
Connecting a call
You can transfer an external call to another handset.
еееееее
I
e.g. Ÿ
a
еееееее
I
e.g. Ÿ
Press the display key – the external user hears music
on hold.
Enter the internal number.
When the internal user answers, announce the external call. Then:
Press the end call key. The call is connected.
Internal enquiry calls
You are conducting a call with an external user. You can
call another internal user and conduct an enquiry call
without clearing down the initial connection. You are
automatically reconnected to the external user when
you end the enquiry call.
Press the display key – the external user hears music
on hold.
Enter the internal number of the handset. You are now
talking to the second internal user.
Ending the enquiry call:
MENU
ееееееееееее
GO BACK
ееееееееееееееееееееееееееееееее еееееее
[
or
a
Open the menu.
Confirm.
You are reconnected to the external user.
The external call is transferred to the second internal
user.
31
Page 36

Operating several handsets
Press keys:
Accepting or rejecting a waiting call
You hear the call waiting tone (short beep) if you
receive an external call while conducting an internal
call.
MENU
ееееееееееее
ACCEPT
ееееееееееееееееееееееееееееееее еееееее
Z
REJECT
еееееее ееееееееееееееееееееееееееееееее еееееее
Z
BASE SET
еееееее ееееееееееееееееееееееееееееееее еееееее
Z
ADD FEATURES
еееееее ееееееееееееееееееееееееееееееее еееееее
Z
BARGE IN
еееееее ееееееееееееееееееееееееееееееее еееееее
[
or
[
MENU
ееееееееееее
[
[
[
Open the menu.
Confirm. The internal call is ended. You are connected
to the external caller.
Select and confirm.
You are still connected to the internal user.
Joining in a call ("barging in")
An internal user conducts an external call. A second
internal user can barge in on this call and speak to the
other users. This is indicated by a signal tone.
Activating/deactivating this function
Open the menu.
Select and confirm.
Select and confirm.
Select and confirm.
To deactivate, confirm the function marked with
once more with .
OK
c
a
Barging in
You see in the display and want to barge
in.
Press talk key. The conference call is signalled by a
beep in the active call.
During the call, you see the display
LISTENING IN
Replace the handset to leave the call.
LINE IN USE
.
32
Page 37

Press keys:
Operating several handsets
Deactivating the ringer
All handsets ring when there is an incoming call. You
can deactivate the ringer.
«
or
MENU
ееееееееееее
SILENT
еееееееееееееее
Ù
Ù
Hold down the * key until the handset does not ring
any more.
The ringer is permanently deactivated.
«
To re-activate the ringer, press
Open the menu.
Press.
The ringer is deactivated for the current call.
.
Paging
Press the base station key very briefly – all handsets
ring at the same time ("Paging").
End paging:
Press the base station key again briefly or press the
talk key
c
on a handset.
33
Page 38

Individual handset settings
Press keys:
k
Individual handset settings
You can set your handset according to your wishes to
distinguish it from the standard settings and to obtain
optimum convenience.
¬Ÿ
Þ]
ÞŸ
or
Þ^
or
Þ¡
or
Þ¢
or
Þ£
or
Þ¤
or
Þ¥
or
Þ¬
or
]Þ
or
]]
or
]Ÿ
or
]^
or
MENU
ееееееееееее
Changing a handset's display language
Open the menu.
First press 9, then 2 and then:
for German,
for English (factory setting),
for French,
for Italian,
for Spanish,
for Portuguese,
for Dutch,
for Danish,
for Norwegian,
for Swedish,
for Finnish,
for Czech,
for Polish,
]¡
or
34
for Turkish.
Page 39

Press keys:
Individual handset settings
Modifying volume and melody
Handset volume
You can choose from three levels of volume for the
handsets – even during a call.
MENU
ееееееееееее
Z
AUDIO SET
еееееее ееееееееееееееееееееееееееееееее еееееее
H/SET VOL
ееееееееееееееееееееееееееееееее еееееее
Z
AUDIO SET
еееееее ееееееееееееееееееееееееееееееее еееееее
Z
RINGER
еееееее ееееееееееееееееееееееееееееееее еееееее
[
[
Z[
еееееее еееееее
MENU
ееееееееееее
[
[
Z[
еееееее еееееее
Open the menu.
Select and confirm.
Confirm.
You hear the current volume and the corresponding
number is displayed. Select the required level and confirm.
Ringer volume ("ring tone")
You can choose from seven options:
Five ringer volumes (1–5),
●
"crescendo" ring (increasing volume: 6),
●
No ringer (ringer off: 0).
●
Open the menu.
Select and confirm.
Select and confirm.
You hear the current volume and the corresponding level is displayed. Select the required level and confirm.
MENU
ееееееееееее
Z
AUDIO SET
еееееее ееееееееееееееееееееееееееееееее еееееее
Z
MELODY
еееееее ееееееееееееееееееееееееееееееее еееееее
[
[
Z[
еееееее еееееее
Ringer melody
You can choose from ten ringer melodies (1–10).
Open the menu.
Select and confirm.
Select and confirm.
You hear the current melody and the corresponding
melody number is displayed. Set the required melody
and confirm.
35
Page 40

Individual handset settings
Press keys:
Activating/deactivating battery low beep
When this function is activated, you are acoustically
informed that the battery is almost empty (factory
setting).
MENU
ееееееееееее
¬¡]
or
¬¡Þ
MENU
ееееееееееее
¬ ]]
or
¬ ]Þ
k
Open the menu.
Activate the function.
Deactivate the function.
Activating/deactivating Auto talk
When this function is activated, you can remove the
handset from the charging unit without pressing the
to accept a call ( factory setting).
handset key
Open the menu.
Activate the function.
Deactivate the function.
c
Resetting a handset to the factory setting
The directory is not deleted when you reset the handset. Registration at the base station is not affected.
MENU
ееееееееееее
¬^
RESET ?
ееееееееееееееееееееееееееееееее еееееее
[
Open the menu.
First press 9 and then 3 to activate the procedure.
Confirm prompt.
Function Factory
setting
Handset volume (see page 35) 1
Ringer volume
("ring tone", see page 35)
Ringer melody (see page 35) 1
Auto talk (see page 36) on
Battery low beep (see page 36) on
Alarm clock (see page 9) off
5
36
Page 41

Press keys:
Base station settings
Base station settings
Ö
All base station settings are conveniently made via the
handset!
Changing the system PIN
To prevent unauthorised registration of a handset, you
should change the preset system PIN (factory setting:
0000) to a PIN that only you know.
MENU
ееееееееееее
Z
BASE SET
еееееее ееееееееееееееееееееееееееееееее еееееее
Z
SYSTEM PIN
еееееее ееееееееееееееееееееееееееееееее еееееее
[
[
o
[
еееееее
o
[
еееееее
o
[
еееееее
Open the menu.
Select and confirm.
Select and confirm.
Enter the currently valid system PIN (4 digits; factory
setting: 0000).
For security reasons only four asterisks (****) are
displayed.
Confirm. is displayed:
Enter the new system PIN (4 digits).
Confirm. is displayed:
Repeat the new system PIN.
Confirm.
½
<NEW PIN>
<REP PIN>
Be sure to memorise your PIN!
If you forget it, it will have to be reset by Swisscom against an additional charge.
37
Page 42

Base station settings
Press keys:
MENU
ееееееееееее
Modifying volume and melody
Ringer volume ("ring tone")
You can choose from seven options:
Five ringer volumes (1–5),
●
"crescendo" ring (increasing volume: 6),
●
No ringer (ringer off: 0).
●
Open the menu.
Z
BASE SET
еееееее ееееееееееееееееееееееееееееееее еееееее
AUDIO SET UP
ееееееееееееееееееееееееееееееее еееееее
Z
RINGER VOL
еееееее ееееееееееееееееееееееееееееееее еееееее
Z
BASE SET
еееееее ееееееееееееееееееееееееееееееее еееееее
AUDIO SET UP
ееееееееееееееееееееееееееееееее еееееее
Z
MELODY
еееееее ееееееееееееееееееееееееееееееее еееееее
[
[
[
Z[
еееееее еееееее
MENU
ееееееееееее
[
[
[
Z[
еееееее еееееее
Select and confirm.
Select and confirm.
Confirm.
Your hear the current volume and its level is displayed.
Select the required level and confirm.
OFF
CRESCENDO
Incoming calls are not signalled
at the base station but only on
the handset.
Increasing volume.
Ringer melody
You can choose from ten ringer melodies (1–10).
Open the menu.
Select and confirm.
Select and confirm.
Confirm.
You hear the current melody and the corresponding level is displayed. Select the required melody and confirm.
38
Page 43

Press keys:
Base station settings
Repeater support
With the repeater you can extend the range from your
base station to the handset and open up areas in which
reception was not previously possible.
If you want to use a repeater, you must activate this
function.
MENU
ееееееееееее
Z
BASE SET
еееееее ееееееееееееееееееееееееееееееее еееееее
Z
ADD FEATURES
еееееее ееееееееееееееееееееееееееееееее еееееее
Z
REPEATER
еееееее ееееееееееееееееееееееееееееееее еееееее
SURE?
ееееееееееееееееееееееееееееееее еееееее
[
[
[
[
Ö
MENU
ееееееееееее
Z
BASE SET
еееееее ееееееееееееееееееееееееееееееее еееееее
Z
BASE RESET
еееееее ееееееееееееееееееееееееееееееее еееееее
RESET ?
ееееееееееееееееееееееееееееееее еееееее
o
[
[
[
еееееее
[
Open the menu.
Select and confirm.
Select and confirm.
Select and confirm.
Confirm prompt.
Resetting the base station to the factory
setting
Resetting the base station does not affect the system
PIN or handset registration.
Open the menu.
Select and confirm.
Select and confirm.
Enter the system PIN (factory setting: 0000) and
confirm.
Confirm prompt.
Function Factory setting
Ringer volume (see page 38) 5
Ringer melody (see page 38) 2
Call charges per unit (see page 24) 00.10
Joining a call (barging in)
(see page 32)
The handset's name (see page 29) INT 1 to INT 6
Repeater (see page 39) off
Pause after R (see page 41) 800 ms
Pause after line seizure
(see page 41)
Flash time
(at PABXs, see page 40)
off
3 s
SWZ 120 ms
39
Page 44

Connecting the base station to a PABX
Press keys:
Connecting the base station to
a PABX
Setting the flash time
Prerequisite:
Your PABX requires a flash time different to the preset
flash time (to set up a connection to the phone network). Please refer to the operating instructions of
your PABX.
MENU
ееееееееееее
Z
BASE SET
еееееее ееееееееееееееееееееееееееееееее еееееее
Z
ADD FEATURES
еееееее ееееееееееееееееееееееееееееееее еееееее
Z
TBR
еееееее ееееееееееееееееееееееееееееееее еееееее
[
[
[
Z[
еееееее еееееее
Open the menu.
Select and confirm.
Select and confirm.
Select and confirm.
Select the flash time and confirm.
80 ms, 100 ms, 120 ms, 180 ms, 250 ms, 300 ms,
600 ms.
½
The current setting is marked with ✓.
40
Page 45

Press keys:
Connecting the base station to a PABX
Setting pauses
Pause after line seizure
With this function you can set the length of the pause
inserted automatically after pressing the talk key
before transmitting the phone number.
c
MENU
ееееееееееее
¥ ¬]£
e.g.
]
ееееееееееее
[
еееееее
MENU
¥ ¬]Ÿ
e.g.
]
[
еееееее
Open the menu.
Initiate the setting.
Enter the pause length and confirm.
1 second = 1; 3 seconds = 2; 7 seconds = 3;
2.5 seconds = 4.
The setting is saved.
Pause after recall key
With this function, you can set the length of the pause
- key.
that is inserted after holding down the
Open the menu.
Initiate the setting.
Enter the pause length and confirm.
none = 1; 800 ms = 2; 1600 ms = 3;
3200 ms = 4.
The setting is saved.
R
41
Page 46

Appendix
Appendix
Maintenance
Simply wipe the base station and handset with a damp cloth or an
antistatic wipe. Never use a dry cloth as this can cause static
discharge!
Contact with liquid
If the handset should come into contact with liquid,
on no account switch the device on.
Remove all batteries immediately.
Allow the liquid to drip out of the device, and then dab all parts of the
device dry.
Keep the handset with the batteries removed in a warm, dry place for
at least 72 hours. In many cases, you will then be able to use it again.
!
Questions and answers
If you experience problems while using your telephone, please try to
solve the problem by referring to the following list.
Question Possible cause Possible solution
No
display.
Handset not
activated
Batteries empty Charge or replace the
Hold down the end call
for 1 second
key
a
batteries (see page 7).
No reaction to keystroke.
No radio connection to the base
station – all
displays flashing.
Handset that is in
the base station is
not charging.
Keypad protection
activated
Handset outside the
base station range.
Handset not
registered
Base station not
activated
Line seized by a
second handset for a
long period.
ª
Hold down the
for 1 second
Move closer to the base
station.
Register the handset
(see page 26).
Check the connector at
the base station (see
page 6).
Maximum charging power is only possible while
nobody is making calls.
key
42
Page 47

Appendix
Question Possible cause Possible solution
Handset/base
station does not
ring.
Call charges are
not displayed
Your caller cannot
hear you.
The ringer/dialling
tone cannot be
heard.
Error beep is
generated
(descending tone
sequence)
Ringer off Activate the ringer
(see page 35/page 38).
Price per unit =
00.00
INT GO BACK OK
The key was
pressed – the microphone is "muted".
You have changed
the telephone cord
on your Gigaset.
Set the price per unit
(see page 24)
Press
re-activate the microphone.
Ensure, when purchasing
a new cord, that it has
the correct pin assignment (see page 6).
Wrong input Repeat the procedure;
note the display and, if
necessary, refer to the
operating instructions.
to
Guarantee/maintenance/repair/approval
Guarantee
The guarantee period is two years from the date of purchase.
For repairs to be carried out under the guarantee, the defective item must be
accompanied by a completed guarantee card that has been stamped by the
dealer at the time and place of purchase.
The guarantee does not cover any defects or damage caused by improper use
or wear and tear or third-party intervention. The guarantee does not cover consumables or defects which only have a minor effect on the value or operability
of the phone.
If a defect occurs please contact your dealer.
43
Page 48

Appendix
Repair/maintenance
Leased phones
If your phone is not functioning correctly please contact the Repair Service
Team (Tel. 175).
*
The actual repair
Purchased phones
Within the guarantee period, repairs to the phone will be carried out free of
charge in accordance with the provisions of the guarantee
phone must be returned to the original place of purchase for repair.
Where the Repair Service Team is called out (including during the guarantee period), the repair process will be chargeable (travel costs and time spent). Beyond the guarantee period the repair costs incurred will also be chargeable.
Battery
A battery is a consumable good and is therefore not covered by the guarantee.
There will be a charge for replacing defective batteries. This applies to both
leased and purchased phones.
) and repair process are free of charge.
*
. The defective
Assistance
If you have any general enquiries about our products or services please contact
the Swisscom information helpline (Freephone 0800 800 135).
Approval and conformity
This handset can be used throughout the analogue Swiss network.
Country-specific requirements have been taken into consideration. Should you
have any queries relating to differences between the public telephone networks please contact your service provider or specialist dealer.
Excerpt from the original declaration:
"We, Siemens AG, declare, that the above mentioned product is manufactured according to our Full Quality Assurance System certified by
CETECOM ICT Services GmbH with the registration number
"Q810820M" in compliance with ANNEX V of the R&TTE-Directive 99/
05/EC. The presumption of conformity with the essential requirements regarding Council Directive 99/05/EC is ensured."
Senior Approvals Manager
The Declaration of Conformity (DoC) has been signed. For an original
copy of the signed Declaration of Conformity (DoC) please contact the
Siemens hotline.
* excluding damage to spare parts such as cables, marking labels and batteries
and damage through improper use caused by dropping the phone
or ingress of moisture
.
44
Page 49

Appendix
Tech n ical dat a
Recommended batteries
Nickel-cadmium (NiCd) Nickel-metal-hydride (NiMH)
Sanyo N-3U
(700 mAh)
Mobile Power 700
(700 mAh)
Panasonic 600 DT
(600 mAh)
Emmerich 700
(700 mAh)
Saft RH 6 NiMH 1300
(1300 mAh)
Panasonic HHR-110 AA
(1100 mAh)
Panasonic Pro+ 1500
(1500 mAh)
Sanyo HR-3U
(1600 mAh)
GP GP130 AAHC
(1300 mAh)
Varta Phone Power
(1300 mAh)
Emmerich 1300
(1300 mAh)
The handset's operating times/charging time
Capacity
(mAh)
Standby time
(hours)
Ta l kt i m e
(hours)
Charging
time
(hours)
700 up to 200 (8 days) more than 10 approx. 5.5
1200 up to 320 (13 days) more than 17 approx. 9
1600 up to 550 (23 days) more than 24 approx. 12
We recommend initially charging the batteries as detailed in the
½
table without interruption – irrespective of the charging status
icon!
The battery charge capacity decreases after a few years for
technical reasons.
Power consumption
– On standby (not during charging): approx. 1.9 watts.
– On standby (during charging): approx. 4.6 watts.
– During a call (not during charging): approx. 2.1 watts.
45
Page 50

Feature Value
DECT-Standard is supported
GAP standard is supported
No. of channels 60 duplex channels
Appendix
Radio frequency
1880 – 1900 MHz
range
Duplex method Time multiplex, 10 ms frame length
Channel grid 1728 kHz
Bit rate 1152 kbit/s
Modulation GFSK
Language code 32 kbit/s
Transmission power 10 mW, average power per channel
Range up to 250 m outdoors,
up to 40 m indoors
Power supply Base station 220/230 V ~/ 50 Hz
(power supply unit SNG X-a)
Environmental conditions for operation
+5 °C to +45 °C
20 % to 75 % relative humidity
Dialling mode DTMF (tone dialling)
Flash time Flash: 120 ms
Dimensions
136.6 x 149 x 64.2 mm (L x W x H)
Base station
Dimensions
155.5 x 53.6 x 36.2 mm (L × W × H)
Handset
Weight Base station 175 g
Handset with batteries < 160 g
Length of the cords Telephone connecting cord approx. 3 m.
Mains cable approx. 3 m
46
Page 51

Menu table
Menu table
It is faster to select a menu function by pressing
combinations than by scrolling, e.g.
¢ Ÿ Ÿ
MENU
= 5-2-2 to set the time.
Main menu
MENU
1 SEL SERVICES 1-1 WITHHOL D NO
2 ALARM CLOCK Enter alarm time
3 AUDIO SET 3-1 H/SET VOL set
4 CALL CHARGES 4-1 LAST CALL display
5 BASE SET 5-1 AUDIO SET UP 5-1-1 SPEAKER VOL
when the telephone
CALL WAITING
1-2
1-3 RINGBACK OFF
1-4 CALL DIVERT select
3-2 RINGER set
3-3 MELODY set
4-2 ALL CA LL S display
4-3 SETTINGS Enter cost per unit
is idle
, press:
5-1-2 RINGER set
5-1-3 MELODY set
and then selecting the digit
set (G4015 only)
5-2 CLOCK SET 5-2-1 DATE SET
5-2-2 DA TE/TIME
5-2-3
5-3 SYSTEM PIN enter
BASE RESET factory setting
5-4
5-5 ADD FEATURES 5-5-1 DIAL MO DE 5-5-1-1 TONE
5-5-2 TBR 5-5-2-1
5-5-3 REPEATER on/off
6 VOICE MAIL 6-1 SET KEY 1 6-1-1 MAILBOX
7 REGISTER HS
CLOCK MODE
5-2-3-1
5-2-3-2
5-5-1-2 PULSE
5-5-1-3 FLASH
Until
5-5-2-7
24 H
12 H
80 MS
600 MS
47
Page 52

Menu table
Directory
Press
The following functions are now available:
h to
1 EDIT ENTRY Add to number
NEW ENTRY Save new phone number
2
SHOW ENTRY Display/change phone number
3
4 DELETE Delete entry
open the corresponding list.
MENU
48
Page 53

k
1
k
2
!"§==Sinus XX=
1
GHI
4
PQRS
7
R
Accessories
Accessories
Upgrade your Classic S117 to a cordless PABX:
. . .
k
6
DEF
3
ABC
2
MNO
6
JKL
5
WXYZ
9
TUV
8
0
!"§
Everyone has their own handset
●
Toll-free internal communication
●
Transferring external calls to the right person etc.
●
Classic S117
The Classic S117 handset offers you the following
features:
12-digit display to show the time, phone numbers
●
etc.
Directory with 20 entries
●
Alarm clock
●
Automatic redialling of the last 5 numbers
●
The package includes: Handset with charging unit
Repeater
With the repeater you can extend the range of your
Classic S117 and open up areas in which reception
was not previously possible.
All functions of the handset can be used in the normal
way in the extended transmission area (not available
in all countries).
49
Page 54

Accessories
1
GHI
4
PQRS
7
Top S 317
Mobile-phone style Comfort handset:
Small and convenient,
●
Easy operation via illuminated keypad and 4-line il-
●
luminated graphic display,
Directory for up to 100 phone numbers/names,
●
Full ISDN functionality in connection with an ISDN
INT
M
DEF
3
ABC
2
MNO
6
JKL
5
WXYZ
9
TUV
8
0
●
base station,
Adjustable handset volume,
●
Automatic redialling of the last 5 numbers,
●
Headset jack.
●
The package includes: handset with charging unit
50
Page 55

Index
Index
A
Accessories 49
Activating
handset 8
keypad protection 8
Alarm call 10
Alarm clock 10
activating 10
deactivating 10
approval 44
Auto talk
activating/deactivating 36
Automatic redial 14
B
Barging in (joining a call) 32
Base station
connecting 6
connecting to a PABX 40
installing 5
resetting to the factory setting 39
setting pauses 41
setting the ringer volume 38
Batteries
inserting 6, 7
loading 7
recommended 45
Battery low beep 36
Belt clip 8
Brief overview III
C
Call
connecting 31
ending 11
Call charges
displaying/deleting 25
Call charges per unit 24
Call divert 20
Call duration 24
Call waiting 32
Callback when busy 23
Changing the display language 34
Changing the system PIN 37
Character map 16
Charging status icon 7
charging time of the handset 45
CLIP
displaying numbers 12
Collective call (making internal calls) 30
Confirmation beep 8
Connecting a call 31
D
Date setting 9
Deactivating
battery low beep 36
handset 8
keypad protection 8
ringer 33
Delivery package 5
De-registering handsets 28
Dialling modes 27, 28
Directory 15
deleting a single entry 18
deleting all entries 18
dialling a number 17
storing an entry 15
Display keys III
Displaying phone numbers (CLIP) 12
Displaying/deleting call charges 25
Diversion see call divert 20
E
Enquiry call (internal) 31
Error beep 8
F
Factory setting
base station 39
handset 36
G
GAP standard 28
guarantee 43
51
Page 56

Index
H
Handset
activating/deactivating 8
all handsets ring ("Paging") 33
automatic registration 26
de-registering 28
name of a handset 29
operating 7
operating times/charging time 45
power consumption 45
preparing 6
registration 26
resetting to the factory setting 36
Handset volume 35
I
Internal dialling 11
Internal enquiry calls 31
Internal number 30
K
Keypad protection 8
Keys III
M
Mailbox 13
Maintenance 42
maintenance 43, 44
Making an external call 11
Making calls
answering a call 12
external call 11
internal dialling 11, 30
Medical equipment 4
Muting the microphone 12
N
Name of a handset 29
Network access list (call-by-call)
displaying and changing an entry 17
entering a name 17
storing an entry 15
Network services 19
O
Operating times of the handset 45
operating times of the handset 45
Operation see preparing the telephone 5
P
PABX 40
Paging 33
Pause 11
Phone number 15
redialling list 14
Power consumption 45
Preparing the telephone 5
Protective plastic film 7
Q
Questions and answers 42
R
Range 5
Redialling list 14
Registering handsets 26
repair 44
Repeater 39
Ring tone
base station setting 38
handset setting 35
Ringback 23
Ringer melody (base station) 38
Ringer melody (handset) 35
Ringer volume (base station) 38
Ringer volume (handset) 35
S
Safety precautions 4
Setting the language
display 34
Settings 34
display language 34
Symbols IV
T
Technical Data 45
Time setting 9
Toggling 21
52
Page 57

 Loading...