

Page 1
Handset Aton CL103
User guide
1
Page 2

2
Page 3

The handset at a glance
The handset at a glance
U
09:19
§§Menu §
12
11
10
9
1
13
2
3
4
5
6
7
1 Direct dialling keys (I to III)
2 Display in idle status (example)
3 Battery charge level
e V U (1/3 charged to
fully charged)
= flashes: battery almost flat
e V U flashes: battery charging
4 Display keys (page 8)
5 Control key (page 7)
6 End call key, On/off key
End call, cancel function, go back one menu
level (press briefly), back to idle status
(press and hold), activate/deactivate handset (press and hold in idle status)
7 hash key
Keypad lock on/off (press and hold in idle
status, page 7)
Insert a pause (press and hold for dialling)
Switch between uppercase/lowercase letters and digits for text entry (page 17)
8 Microphone
9 Recall key
Enter flash (press and hold)
10 Connection socket for headset
11 Talk key
Answer a call, start dialling
12 handsfree key
Toggle between earpiece and handsfree
mode
Lights up: handsfree activated
Flashing: incoming call
13 Voice portal key
8
1
Page 4

Contents
Contents
The handset at a glance . . . . . . . . 1
Safety precautions . . . . . . . . . . . . 3
Aton CL103 –
more than just a telephone . . . . . 4
First steps . . . . . . . . . . . . . . . . . . . . 4
Pack contents . . . . . . . . . . . . . . . . . . . . 4
Setting up the handset for use . . . . . . . 4
Making calls . . . . . . . . . . . . . . . . . . 7
Making an external call/ending a call . . 7
Answering a call . . . . . . . . . . . . . . . . . . 7
Handsfree operation . . . . . . . . . . . . . . 7
Operating the handset . . . . . . . . . 7
Switching the handset on/off . . . . . . . . 7
Activating/deactivating the keypad lock 7
Control key on the handset . . . . . . . . . 7
Display keys . . . . . . . . . . . . . . . . . . . . . 8
Returning to idle status . . . . . . . . . . . . 8
Menu guidance . . . . . . . . . . . . . . . . . . 8
"Swisscom Voice Portal" key . . . . . . . . . 9
Correcting incorrect entries . . . . . . . . . 9
Appendix . . . . . . . . . . . . . . . . . . 14
Symbols and typographical
conventions used . . . . . . . . . . . . . . . . 14
Care . . . . . . . . . . . . . . . . . . . . . . . . . . . 14
Contact with liquid . . . . . . . . . . . . . . . 14
Questions and answers . . . . . . . . . . . . 14
Faults and Self-help with
Troubleshooting . . . . . . . . . . . . . . . . . 14
Warranty/Maintenance/Repair/
Authorisation . . . . . . . . . . . . . . . . . . . 15
Repair/Maintenance . . . . . . . . . . . . . . 15
Technical data . . . . . . . . . . . . . . . . . . . 16
Writing and editing a text message . . 17
Index . . . . . . . . . . . . . . . . . . . . . . 18
Accessories . . . . . . . . . . . . . . . . . 20
Assembling the charging cradle 20
Using the directory, direct dialling
keys and lists . . . . . . . . . . . . . . . . . 9
Directory . . . . . . . . . . . . . . . . . . . . . . . . 9
Direct dialling keys . . . . . . . . . . . . . . . 10
Last number redial list . . . . . . . . . . . . 11
Opening the message list with the display
key . . . . . . . . . . . . . . . . . . . . . . . . . . . 11
Handset settings . . . . . . . . . . . . . 12
Changing the display language . . . . . 12
Screensaver . . . . . . . . . . . . . . . . . . . . 12
Auto answer . . . . . . . . . . . . . . . . . . . . 12
Adjusting the loudspeaker volume . . 12
Changing ringtones . . . . . . . . . . . . . . 12
Advisory tones . . . . . . . . . . . . . . . . . . 13
Using the handset as an alarm clock . 13
Restoring the handset default settings 13
2
Page 5
Safety precautions
Safety precautions
Caution:
Read the safety precautions and the user guide before use.
Explain their contents to your children as well as the potential hazards associated with using the tel-
ephone.
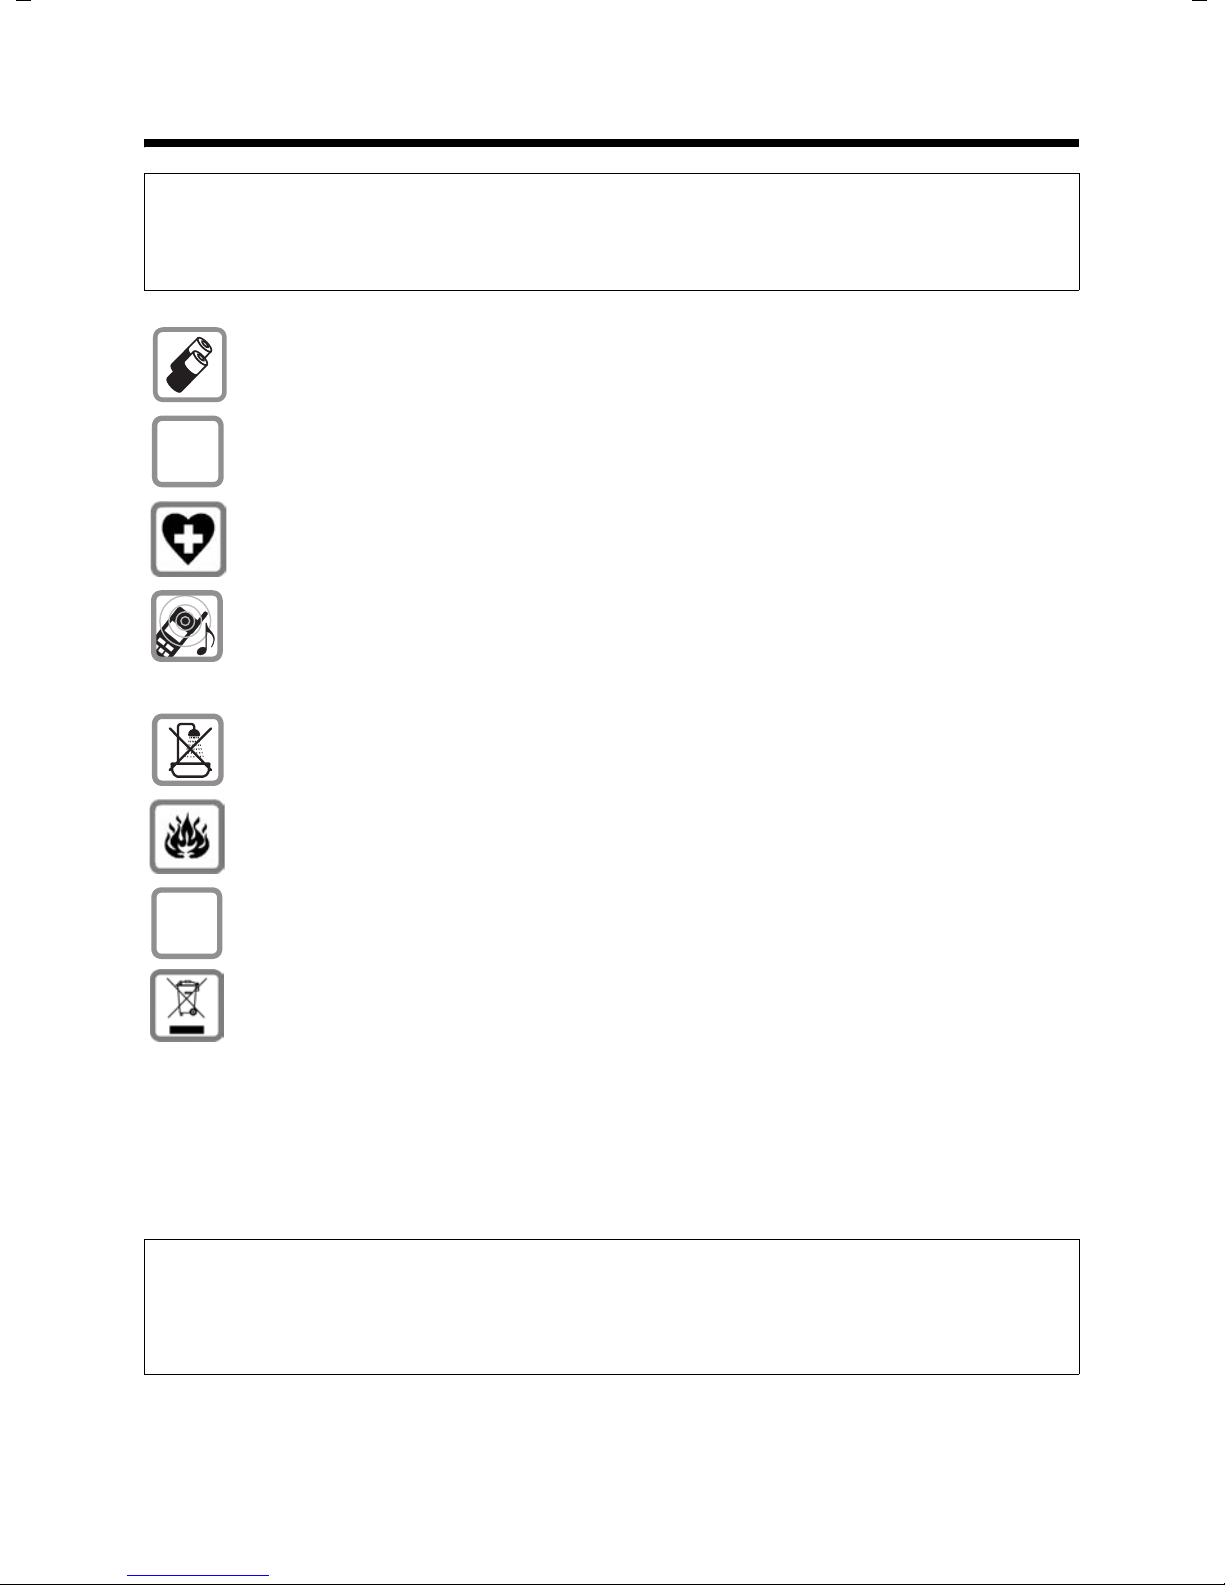
Only fit the recommended rechargeable batteries of the same type (page 16)
! In other words, do not use any other battery type or non-rechargeable batteries
as this could result in significant health risks and personal injury.
‹
Œ
Fit rechargeable batteries with the correct polarity and use them according to
this user guide (polarity symbols can be seen in the handset's battery compartment, page 4).
The operation of medical appliances may be affected. Be aware of the technical
conditions in your particular environment, for example doctor's surgery.
Do not hold the reverse side of the handset to your ear if the handset is ringing
or if the handsfree function is switched on. Otherwise, you risk developing serious, permanent hearing damage.
The handset may cause an unpleasant humming noise in hearing aids.
Do not install the charging cradle in bathrooms or shower rooms. The handset
is not splash proof (page 14).
Do not use the phone in environments with a potential explosion hazard, for
example auto paint shops.
If you give your Aton CL103 to someone else, make sure you also give them the
ƒ
user guide.
Information about disposal
At the end of its service life this product must not be disposed of among the
normal household refuse. Instead, it must be handed in at a sales outlet or at a
collection point for recycling electrical and electronic devices in accordance with
regulations governing the return, taking back and disposal of electrical and electronic devices (ORDEA).
The materials can be recycled as indicated. By recycling materials and reusing or
utilising old appliances in any other way you are making an important contribution to the protection of the environment.
Note:
u Not all of the functions described in this user guide are available in all countries.
u CLIP (Calling Line Identification Presentation), SMS (Short Message Services) and
"Swisscom Voice Portal": these functions depend on the network provider.
3
Page 6
Aton CL103 – more than just a telephone
Aton CL103 –
more than just a telephone
Your phone not only enables you to store
up to 100 telephone numbers (page 9) – it
can do a whole lot more:
u You can programme the direct dialling
keys of your phone with important
phone numbers. The number is then
dialled by simply pressing a key
(page 10).
u Use the handsfree function (page 7) to
keep your hands free when making a
call.
u Use your handset as an alarm clock
(page 13).
A special SOS procedure is available to you
when your handset is registered on an
Aton CL103 base station; for details see
the user guide for your CL103 base station.
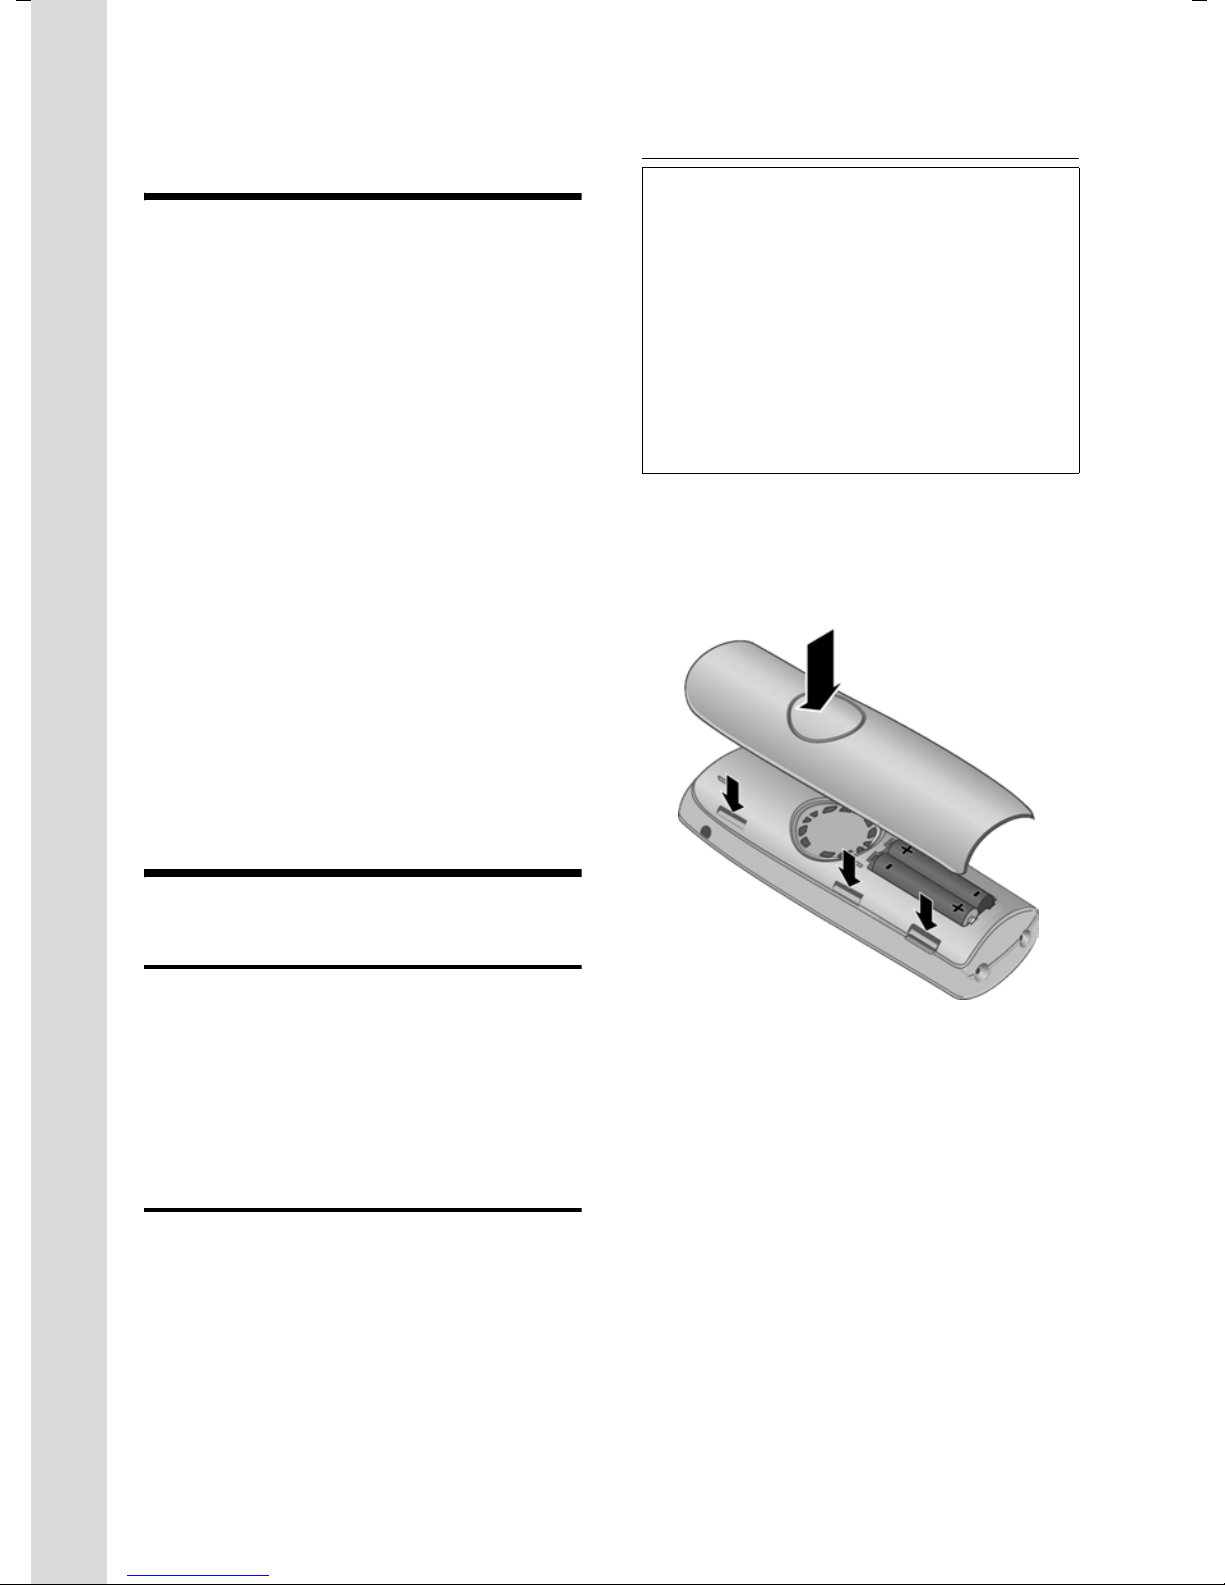
Fitting the batteries and closing
the cover
Caution:
Use only the rechargeable batteries recommended on page 16. In other words, never use
a conventional (non-rechargeable) battery or
other battery types as this could result in significant health risks and personal injury. For
example, the outer casing of the batteries or
accumulators could be destroyed or the batteries could explode. The phone could also malfunction or be damaged as a result of using
batteries that are not of the recommended
type.
¤ Fit the batteries with the correct polar-
ity (see diagram).
The polarity is indicated in the battery
compartment.
Have fun using your new telephone!
First steps
Pack contents
The packaging contains an Aton CL103
handset, two batteries, a battery cover, a
belt clip, a user guide and a headset.
The Aton CL103 charging station is a separate product.
Setting up the handset for use
Please refer to the end of this user guide
for information on connecting and, if
appropriate, wall-mounting the charging
cradle.
¤ First align the notches on the side of
the battery cover with the protrusions
on the inside of the casing.
¤ Then press down the cover so that it
clicks into place.
Attaching the belt clip
There are notches for attaching the belt
clip on the side of the handset at the same
height as the display.
¤ Press the belt clip onto the back of the
handset so that the protrusions on the
belt clip engage with the notches.
4
Page 7

First steps
You can also attach a cord for carrying the
handset in your hand or wearing it around
your neck.
Opening the battery cover
¤ If fitted, remove the belt clip.
¤ Reach into the housing cavity and pull
the battery cover upwards.
Registering
Automatic registration can take up to
5 minutes. While registration is in
progress the screen displays Registering.
The handset is assigned the lowest unassigned internal number (1–4). If several
handsets are registered on the base, the
internal number is shown in the display
after registration, for example 2. This
means that the handset has been
assigned the internal number 2.
Notes:
– Automatic registration is only possible if
the base station on which you wish to register the handset is not being used to make
a call.
– A key press cancels automatic registration.
– If four handsets are already registered on a
base station there are two options:
– The handset with the internal number 4
is in idle status: the handset you wish to
register is assigned the number 4. The
handset that was previously number 4 is
de-registered.
– The handset with the internal number 4
is being used: the handset you wish to
register cannot be registered.
– If automatic registration does not work, the
handset will have to be registered manu-
ally.
You have to register your Aton CL103 on a
base station before you can use it. It can
be registered on up to four base stations.
The registration process depends on the
particular base station.
Automatically registering the handset on
the Aton CL103 base station
Requirement: the handset must not
already be registered on any base station.
Registering the handset on the Aton
CL103 base station occurs automatically.
¤ Place the handset in the charging cra-
dle of the base station with its display
facing forward.
You will hear a confirmation tone.
Manually registering the handset on
the Aton CL103 base station
You must activate manual registration of
the handset on both the handset and the
base station.
After it has registered, the handset returns
to idle status. If several handsets are registered on the base, the internal number is
shown in the display after registration, for
example 2.
The registration process is cancelled after
60 seconds. If the handset has not registered within this time, repeat the process.
5
Page 8

First steps
On the handset
Menu§ ¢ Settings ¢ §OK§ ¢ Handset ¢ §OK§
¢ Register Handset ¢ §OK§ ¢ Enter
system PIN of base station
(default status: 0000)
¢ §OK§
On the base station
Press and hold the registration/paging key on the base
station (min. 1 sec.).
Registering the handset Aton CL103
on other GAP-enabled base stations
On the handset: §Menu§ ¢ Settings ¢ §OK§
¢ Handset ¢ §OK§ ¢ Register Handset
¢ §OK§ ¢ Enter system PIN of base
station (default status: 0000)
On the base station: Start to register the
handset on the base station as described
in its user guide.
Charging the batteries
¢ §OK§.
¤ Once the batteries are fully charged,
remove the handset from the charging
cradle and do not put it back again until
the batteries are fully discharged.
Note:
After the first battery charge and discharge
you may replace your handset in the charging
cradle after every call.
Please ensure the following:
u Always repeat the charging and dis-
charging procedure if you remove the
batteries from the handset and reinsert them.
u The batteries may warm up as they are
charging. This is not dangerous.
u After a time the charge capacity of the
batteries will decrease for technical
reasons.
Note:
You will find explanations for the symbols and
typographical conventions used in this user
guide in the appendix, page 14.
¤ Plug the mains adapter of the charging
cradle into the power socket.
¤ Place the handset in the charging cra-
dle with its display facing forward.
To charge the batteries, leave the handset
in the charging cradle. Battery charging is
indicated in the top right of the display by
a flashing battery icon e if the handset
is switched on. During handset operation,
the battery icon indicates the charge status of the batteries (page 1).
Initial charging and discharging of
batteries
The correct charge status can only be displayed when the batteries are first fully
charged and discharged through use.
¤ To do this, leave the handset in the
charging cradle without interruption
until the battery icon stops flashing in
the display (approx. 6 hours).
Setting the date and time
§Menu§ ¢ Settings ¢ §OK§ ¢ Date/Time
¢ §OK§
~ Enter the day, month and year
with 6 digits and press
Use q to move between the
fields.
~ Enter hours and minutes with
4 digits (e.g. 0 7 1 5 for
07.15 hrs) and press
q to move between the
fields.
Once the phone is registered and the
time set, the idle display looks as shown
on page 1.
Your phone is now ready for use.
§OK§.
§OK§. Use
6
Page 9

Making calls
Making calls
Making an external call/ending
a call
External calls are calls using the public telephone network.
~ (Enter phone number)
The number is dialled. (You can also first
press the c key [ringtone] and then enter
the number.) The earpiece volume can be
adjusted during the call with the t key.
End a call/cancel dialling:
Press the end call key a.
Answering a call
The handset indicates an incoming call in
three ways: by ringing, by a display on the
screen and by the flashing handsfree
key d.
You can answer the call by:
¤ Pressing the talk key c.
¤ Pressing the handsfree key d.
¤ Pressing the display key §Accept§.
If the handset is in the charging cradle and
the Auto Answer function is activated
(page 12), the handset will answer a call
automatically when you lift it out of the
charging cradle.
¢ c.
Handsfree operation
You can make calls immediately in handsfree mode (the d key lights up permanently) after entering the phone number
by pressing the handsfree key d.
Toggle between earpiece and handsfree
mode during a call by pressing the
d key. The volume can be adjusted
during handsfree operation with the
t key.
Operating the handset
Switching the handset on/off
a Press and hold the end
call key.
You will hear the confirmation tone.
Activating/deactivating the
keypad lock
# Press and hold the hash key.
You will hear the confirmation tone. The
icon Ø appears in the display when the
keypad lock is activated.
Control key on the handset
If the ringtone is intrusive, press
The ringtone is switched off for this call.
You can answer the call so long as it is displayed on the screen.
§Silence§.
1
1 Control key
The side of the control key you have to
press in the given operating situation is
shown in black (top, bottom) in this user
guide. Example: t for "press the top of
the control key".
The control key has a number of different
functions:
7
Page 10

Operating the handset
When the handset is in idle status
s Open the directory.
t Adjust the ringer melody vol-
ume of the handset (page 12).
In lists and menus
t / s Scroll up/down line by line.
In an input field
t / s Move the cursor left or right.
During an external call
s Open the directory.
t
Adjust loudspeaker volume for
earpiece and handsfree mode.
Display keys
The current display functions are shown in
the bottom display line in reverse video.
The functions of the display keys change
depending on the particular operating
situation.
Example:
§Redial§ §Menu §
1
Returning to idle status
You want to return to idle status from anywhere in the menu: Press and hold the
end call key a.
If you do not press any key, the display will
automatically revert to idle status after 2
minutes.
Changes that you have not confirmed/
stored by pressing
For an example of the display in idle status: page 1.
§OK§ will be rejected.
Menu guidance
Your telephone's functions are accessed
using a menu that has a number of levels.
Main menu (first menu level)
¤ To open the main menu, press §Menu§
with the handset in idle status.
Accessing a function
¤ Scroll to the function with the control
key q and press
The corresponding submenu (the next
menu level) is opened.
§OK§.
2
1 Current display key functions
2 Display keys
The most important display symbols are:
§Back§ Go back one menu level or
cancel operation.
§Menu§ Open the main menu or a con-
text-dependent menu.
§OK§ Confirm highlighted selection.
§Delete§ Delete key: backspace delete
one character at a time.
§Redial§ Open the last number redial
list (base station dependent).
Submenus
The functions in the submenus are displayed as lists.
To access a function:
¤ Scroll to the function with the control
key q and press
Briefly pressing the end call key a
returns you to the previous menu level /
cancels the operation.
§OK§.
8
Page 11

Using the directory, direct dialling keys and lists
"Swisscom Voice Portal" key
> Press the direct dialling key.
You will be directly connected to the
Swisscom Voice Portal.
The access number can be repro-
grammed.
Note:
This key allows you to connect to the Swisscom
Voice Portal, where you can activate additional
services such as call diversion (Service 21, 61
or 67), call waiting (Service 43) or three-party
conference with a simple voice command. You
can also use voice command to access current
sport, news and weather information.
Correcting incorrect entries
u Navigate to the wrong input with the
control key if û is displayed.
u Press §Delete§ to delete the character to
the left of the cursor.
u Insert new character to the left of the
cursor.
u When entering the time and date etc.,
edit the flashing character.
You will find explanations for the symbols
and typographical conventions used in
this user guide in the appendix, page 14.
Directory
You can store numbers and the associated
names in the directory. With the handset
in idle status, open the directory by pressing the s key.
Length of an entry
Number: max. 22 digits
Name: max. 16 characters
Storing the first number in the
directory
s ¢ Dir empty New entry? ¢ §OK§
¢ ~(Enter number) ¢ §OK§
¢ ~(Enter name) ¢ §OK§
Storing a number in the directory
s ¢ §Menu§ ¢ New Entry ¢ §OK§
¢ ~(Enter number) ¢ §OK§
¢ ~(Enter name) ¢ §OK§
Selecting a directory entry
s Open the directory.
You have the following options:
u Use q to scroll to the entry until the
required name is selected.
u Enter the first character of the name, or
scroll to the entry with q.
Using the directory, direct
dialling keys and lists
A directory, last number redial list and
calls list are available.
You can save up to 100 entries in the
directory.
You can create a personalised directory for
your own individual handset. However,
you can send the list or individual entries
to other handsets (page 10).
Dialling with the directory
s ¢ q (Select entry; page 9) ¢ c
Managing directory entries
You have selected an entry (page 9).
Editing entries
§Menu§ ¢ Edit Entry ¢ §OK§
¢ ~(Change number if required)
¢ §OK§ ¢ ~(Change name if required)
¢ §OK§
9
Page 12

Using the directory, direct dialling keys and lists
Using other functions
The following functions can be selected
§Menu§ ¢ q:
with
Use Number
Edit or add to a stored number. Then
dial or use other functions with
Show Number
Show number.
Delete Entry
Delete selected entry.
Send Entry
Send a single entry to another handset
(page 10).
Delete List
Delete all directory entries.
Send List
Send the complete list to another
handset (page 10).
§Menu§.
Sending the directory to another
handset
Requirements:
u The sending and receiving handsets
must both be registered on the same
base station.
u The other handset and base station can
send and receive directory entries.
¢ q (Select entry; page 9) ¢ §Menu§
s
¢ Send Entry / Send List ¢ §OK§ ¢ ~
(Enter the internal number of the
receiving handset) ¢§OK§
A successful transfer is confirmed by a
message and confirmation tone on the
receiving handset.
Adding a displayed number to
the directory
You can copy any numbers to the directory that appear in a list, for example the
calls list or the last number redial list.
If you have arranged CNIP with your network provider, the first 16 characters of
the transferred name are also copied to
the Name line.
A number is displayed.
§Menu§ ¢ Copy to Directory ¢ §OK§
¤ Complete the entry (page 9).
Direct dialling keys
You can store particularly important
phone numbers, for example emergency
numbers, under the 3 free direct dialling
keys.
You dial the stored direct dialling number
by pressing the corresponding direct dialling key and the talk key c.
Refer to the font table (page 17) for information on how to enter the text correctly.
Storing/changing direct dialling keys
You can assign external phone numbers
and the internal call function to the direct
dialling keys.
A special SOS procedure is available to you
when your handset is registered on an
Aton CL103 base station; for details see
the user guide for your CL103 base station.
§Menu§ ¢ Settings ¢ §OK§ ¢ Direct Diall.
¢ §OK§ ¢ I: <no entry> ¢ q Select
Keys
direct dialling key (I to III)
10
Entering/changing an entry
You have selected a direct dialling key.
§Menu§ ¢ Edit Entry ¢ §OK§
~ Enter or edit the number if
required and press
~ Enter or edit the name if
required and press
§OK§.
§OK§.
Page 13

Using the directory, direct dialling keys and lists
Using other functions
The following functions can be selected
§Menu§ ¢ q:
with
Delete Entry
Delete selected entry.
Call. Home Internal
Pressing this key results in all registered
handsets being called.
Use Number
Edit or add to a stored number. Then
dial or use other functions with
§Menu§.
Note:
When a phone number is displayed on the
screen during pre-dialling, from the last
number redial list or from the directory, you
can programme this number onto an unassigned direct dialling key by pressing and hold-
ing the relevant direct dialling key.
Last number redial list
Managing entries in the last number
redial list
§Redial Press the display key.
q Select an entry.
§Menu§ Press the display key.
The following functions can be selected
with q:
Use Number (as in the directory, page 10)
Copy to Directory (as in the directory,
page 10)
Delete Entry (as in the directory, page 10)
Delete List (as in the directory, page 10)
Opening the message list with
the display key
Open the message list (base station
dependent) using the display key
‘.
The last number redial list contains the ten
numbers last dialled with the handset
(max. 22 digits). If one of the numbers is
in the directory, then the corresponding
name will be displayed.
Dialling from the last number redial list
Redial Press the display key.
q Select an entry.
c Press the talk key. The number
is dialled.
An advisory tone sounds as soon as a new
entry appears in a list. A message appears
in the display. If you press the display
‘, you will see all the lists that
key
contain new messages. If only one list
contains new messages, this list will be
opened automatically. Press any key and
the message advising of new messages is
no longer shown on the display.
The calls list can be opened from the
menu.
11
Page 14

Handset settings
Handset settings
Your handset comes with default settings.
You can change the individual settings.
Changing the display language
You can view the display texts in different
languages.
§Menu§ ¢ Settings ¢ §OK§ ¢ Language
¢ §OK§ ¢ q (Choose language) ¢ §OK§
The current language is indicated by ‰ .
If you accidentally choose a language you
do not understand:
§Menu§ ¢ LI ¢ q (Choose
language)
Screensaver
When this function is activated, the time is
shown in digital in idle status, filling the
entire display.
§Menu§ ¢ Settings ¢ §OK§ ¢ Handset ¢ §OK§
¢ Screen Saver ¢ §OK§ (‰ =on)
Auto answer
When this function is activated, simply lift
the handset from the charging cradle to
answer a call without having to press the
talk key c.
§Menu§ ¢ Settings ¢ §OK§ ¢ Handset ¢ §OK§
¢ Auto Answer ¢ §OK§ (‰ =on)
¢ §OK§
Adjusting the loudspeaker
volume
You can set the loudspeaker volume for
handsfree talking and the earpiece volume to five different levels (1–5; e.g.
volume 2 = ˆ).
§Menu§ ¢ Audio Settings ¢ §OK§ ¢ Handset
Volume / Handsfree Volume
q Adjust the volume and
§OK§.
press
Adjust the volume during a call:
t Press the control key.
q Adjust the volume and
§OK§.
press
¢ §OK§
Changing ringtones
u Volume:
Five volume levels (1–5;
e.g. volume 2 = ˆ) and "off"
(volume 0 =Ú‰).
u Melody:
List of pre-loaded ringer melodies. The
first three melodies are the "classical"
ring tones.
You can also set different melodies for the
following functions:
u External Calls: For external calls
u Internal Calls: For internal calls
u Alarm Clock: For the alarm clock
Setting ringer volume
12
The ringer volume is the same for all types
of signalling.
§Menu§ ¢ Audio Settings ¢ §OK§ ¢ Ringer
Volume
¢ §OK§ ¢ q (Adjust volume)
¢ §OK§
Or in idle status:
t Press briefly ¢ q (Adjust volume)
¢ §OK§
Page 15

Handset settings
Setting ringer melody
Set different ringer melodies for external
calls, internal calls and the alarm clock.
§Menu§ ¢ Audio Settings ¢ §OK§ ¢ Ringer
Melody
Calls / Alarm Clock
melody)
¢ §OK§ ¢ External Calls / Internal
¢ §OK§ ¢ q (Select
¢ §OK§ (‰ =on)
Advisory tones
Your handset uses 'advisory tones' to tell
you about different activities and statuses.
The following tones can be activated and
deactivated independently of each other:
u Advisory tones:
– Key click: Each key press is acknowl-
edged.
– Confirmation tone (rising tone
sequence): at the end of an entry/
setting, when the handset is placed
in the charging cradle and on arrival
of a new entry in the calls list.
– Error tone (descending tone
sequence): when you make an
incorrect entry.
– Menu end tone: when scrolling at
the end of a menu.
u Battery warning tone: The battery
requires charging.
You cannot deactivate the confirmation
tone for placing the handset in the
charging cradle.
Using the handset as an
alarm clock
Activating/deactivating the alarm clock
Requirement:
The time is set (see page 6).
§Menu§ ¢ Alarm Clock ¢ §OK§ ¢ Activation
¢ §OK§ (‰ =on)
After you activate the alarm clock, the
menu for setting the wake up time opens
automatically.
If the alarm clock is set, the wake up time
appears with the l icon in the display.
Setting the wake up time
§Menu§ ¢ Alarm Clock ¢ §OK§ ¢ Wakeup
¢ §OK§ ¢ Enter wake up time ¢ §OK§
time
When the alarm clock rings…
Press the display key §Off§ or any key to
deactivate the alarm clock for 24 hours.
If you do not press any key, the alarm
clock switches off after one minute.
Restoring the handset default
settings
You can reset any individual settings and
changes that you have made. This will not
affect entries in the directory and calls list
or the handset's registration on the base
station.
Activating/deactivating advisory tones
§Menu§ ¢ Audio Settings ¢ §OK§ ¢ Advisory
Tones
¢ §OK§ (‰ =on)
Setting the battery warning tone
§Menu§ ¢ Audio Settings ¢ §OK§ ¢ Battery
¢ §OK§ ¢ On / Off / During Call
Low
¢ §OK§ (‰ =on)
The battery warning tone is activated or
deactivated or sounds during a call.
§Menu§ ¢ Settings ¢ §OK§ ¢ Handset ¢ §OK§
¢ Reset Handset ¢ §OK§
Cancel the reset with a.
13
Page 16

Appendix
Appendix
Symbols and typographical
conventions used
This section explains the meaning of certain symbols and typographical conventions that are used in this user guide.
~ Enter digits or letters.
§Menu§ The display functions cur-
rently in the bottom display
line are shown in reverse
video. Press the relevant display key to launch the function.
q Press the top or bottom of the
control key, for example when
scrolling.
Contact with liquid
If the handset has come into contact with
liquid:
!
¤ Switch the handset off and remove
the batteries immediately.
¤ Allow the liquid to drain from the
handset.
¤ Pat all parts dry, then place the handset
with the battery compartment open
and the keypad facing down in a dry,
warm place for at least 72 hours
(not in a microwave, oven, etc.).
¤ Do not switch on the handset again
until it is completely dry.
When it has fully dried out, you will generally be able to use it again.
Questions and answers
c / Q / P etc.
Press the illustrated key on the
handset.
External Calls / Internal Calls (example)
Select one of the menu functions (External Calls or Internal
Calls) from the list and
§OK§.
press
§Menu§ ¢ Audio Settings ¢ §OK§ ¢ Ringer
Melody (example)
Press
tings using q and press
Select Ringer Melody using q
and press
¢ §OK§
§Menu§. Select Audio Set-
§OK§.
§OK§.
Care
¤ Wipe the base station and handset with
a damp cloth (do not use solvent) or an
antistatic cloth.
Never use a dry cloth. This can cause
static.
Faults and Self-help with
Troubleshooting
Not every fault is due to a defective
phone. In certain circumstances, it can
come from a brief interruption in the
power supply to the base station (unplug/
plug in power supply) or if the batteries of
the handset are removed and inserted
again. The following instructions should
be of help for specific faults.
Important: problems or faults can only be
remedied if you bring the complete unit
(base station, handset, as well as connecting cable) to the place of purchase.
The display is blank.
1. The handset is not switched on.
¥ Press andhold the end call key a.
2. The battery is flat.
¥ Charge the battery or replace it
(page 4).
14
Page 17

Appendix
The handset does not respond to a key
press.
The keypad lock is activated.
¥ Press and hold the hash key
Base is flashing in the display.
1. The handset is outside the range of the
base station.
(page 7).
#
¥ Move the handset closer to the base.
2. The base station is not switched on.
¥ Check the base station mains adapter.
Handset does not ring.
The ringtone is switched off.
¥ Activate the ringtone (page 12).
You hear an error tone when keying an
input
(a descending sequence of tones).
Action has failed/invalid input.
¥ Repeat the operation.
Watch the display and refer to the operating instructions if necessary.
Warranty/Maintenance/Repair/
Authorisation
Repair/Maintenance
Rental devices
If your phone does not operate properly,
notify Technical Assistance (phone
number 175).
*
The repair
charge.
Purchased devices
Repair services are performed free of
charge within the warranty period in
accordance with the regulation of the
warranty certificate). If a repair is necessary, the device must be returned to the
place of purchase.
If Technical Assistance is made available
(during the warranty period as well
the fault action is charged (route lump
sum price as well as time expenses). The
repair costs are additional outside the
warranty period.
Batteries
and the fault action are free of
**
),
Warranty
The warranty period is 2 years as of the
date of purchase.
For warranty repair, the warranty card,
filled out and stamped by the place of purchase must be included with the defective
device.
Excluded from the warranty are damages
due to improper use, wear and tear, or
tampering by others. The warranty does
not include consumed materials and deficiencies which only affect the value or
capability for use inconsiderably.
In case of an error, please contact your
place of purchase.
Battery cells are considered consumed
material, which is not covered by the warranty service. Defective batteries are not
replaced free of charge. This applies to
rental and purchased devices.
Help
If you have any general questions about
products, services, etc., please contact
your Swisscom Information Centre (tollfree number 0800 800 800).
* except for damage to wearing parts (cables,
labels, batteries etc.) and damage arising
from incorrect handling such as dropping it
or allowing fluid to penetrate into handset
etc.
**
15
Page 18

Appendix
Authorisation
This device is intended to be operated on
the analogue Swiss network.
Country-specific conditions have been
taken into account.
If you have any questions about the
differences between the public phone
networks, please contact your specialist
dealer or network provider.
Swisscom hereby declare that this device
meets the essential requirements and
other relevant regulations laid down in
Directive 1999/5/EC.
The Declaration of Conformity can be found on
the following web site:
www.swisscom.com under the rubric
Online Shop, Phone, Declaration of Conformity
or can be ordered from the following postal
address:
Technical data
Recommended batteries
(Valid at the time of going to press)
Nickel-metal-hydride (NiMH):
u Sanyo Twicell 650
u Sanyo Twicell 700
u Sanyo NiMH 800
u Panasonic 700 mAh "for DECT"
u GP 700mAh
u GP 850mAh
u Yuasa Technology AAA Phone 700
u Yuasa Technology AAA 800
u VARTA Phone Power AAA 700mAh
The handset is supplied with two recommended batteries.
Handset operating times/charging
times
The following information relates to batteries with a capacity of 650mAh.
Swisscom Fixnet AG
RES-Voice
Customer Premises Equipments (CPE)
3050 Bern
Standby time approx 160 hours (7days)
Calling time approx. 18 hours
Charging time approx. 6 hours
The operating and charging times apply
only when using the recommended batteries.
General specifications
DECT standard is supported
GAP standard is supported
Range up to 250 m outdoors,
up to 40 m indoors
Base station
power supply
Environmental
conditions for
operation
230 V ~/50 Hz
+5 °C to +45 °C;
20 % to 75 % relative
humidity
16
Page 19

Appendix
Writing and editing a text
message
The following rules apply when writing a
text message:
u The cursor is controlled with t s.
u Characters are added to the left of the
cursor.
u Press the hash key
from "Abc" mode to "123", from "123"
to "abc" and from "abc" to "Abc" (uppercase: 1.st letter uppercase, all others
lowercase). Press the hash key #
before entering the letter.
u Press the hash key
Shows the selection line of the characters assigned to the hash key.
u The first letter of the name of directory
entries is automatically capitalised, followed by lowercase letters.
Editing text
When you press a key and hold it, the
characters of that key appear in the bottom display line and are highlighted one
after the other. When you release the key,
the highlighted character is inserted into
the input field. For how to enter special
characters, see page 17.
The display briefly shows whether uppercase or lowercase letters or digits are
selected when you switch from one mode
to the next: The bottom text line displays
"abc -> Abc", "Abc -> 123" or "123 -> abc".
briefly to switch
#
three times:
#
Order of directory entries
The directory entries are usually sorted in
alphabetical order. Spaces and digits take
first priority. The sort order is as follows:
1. Space (shown here as s)
2. Digits (0–9)
3. Letters (alphabetical)
4. Other characters
To get round the alphabetical order of the
entries, insert a space or a digit in front of
the name. These entries will then move to
the beginning of the directory. Names
that you have preceded with an asterisk
will move to the end of the directory.
Entering special characters
Standard characters
1 Q P #
*) **)
1x
Space Space
.*
2x 1 Â ,/
3x £ 1 ? ( #
4x $
â
!)@
5x ¥ £ 0 < \
6x ¤ $ + = &
7x ¥ - > §
8x ¤ : %
9x ¿
10x ¡
11x “
12x ‘
13x ;
14x _
Abc-->
123
123 -->
abc
*) Directory and other lists
**) When writing an SMS
17
Page 20

Index
Index
A
Accessories . . . . . . . . . . . . . . . . . . . . 20
Advisory tones
Alarm clock
Auto answer
B
Battery
charging
display
fitting
icon
recommended batteries
segment display
warning tone
. . . . . . . . . . . . . . . . . . . . . . . . 4
. . . . . . . . . . . . . . . . . . . . . . . . . 6
C
Call
answering
Calls list
Cancelling (operation)
Care of the telephone
Characters
deleting
Charge status (battery)
Charge status display
Confirmation tone
Connection socket for headset
Control key
Correcting incorrect input
Customer Care
. . . . . . . . . . . . . . . . . . . . . . . 11
D
Dialling
directory
Directory
order of entries
sending entry/list to handset
Display
changing display language
in idle status
setting
Display keys
. . . . . . . . . . . . . . . . . . 13
. . . . . . . . . . . . . . . . . . . . 13
. . . . . . . . . . . . . . . . . 7, 12
. . . . . . . . . . . . . . . . . . . . . . 6
. . . . . . . . . . . . . . . . . . . . . . . 6
. . . . . . . . . 16
. . . . . . . . . . . . . . . . 1
. . . . . . . . . . . . . . . . . 13
. . . . . . . . . . . . . . . . . . . . 7
. . . . . . . . . . . . . 8
. . . . . . . . . . . . 14
. . . . . . . . . . . . . . . . . . . . . . 9
. . . . . . . . . . 1, 6
. . . . . . . . . . . . . . 6
. . . . . . . . . . . . . . . 13
. . . . . . . 1
. . . . . . . . . . . . . . . . . . . 1, 7
. . . . . . . . . . . 9
. . . . . . . . . . . . . . . . . . 15
. . . . . . . . . . . . . . . . . . . . . 9
. . . . . . . . . . . . . . . . 17
. . . . . . 10
. . . . . . . 12
. . . . . . . . . . . . . . . . . . . 1
. . . . . . . . . . . . . . . . . . . . . . 12
. . . . . . . . . . . . . . . . . . . 1, 8
E
Earpiece volume . . . . . . . . . . . . . . . . 12
End call key
Entering flash
Error tone
. . . . . . . . . . . . . . . . . . . 1, 7
. . . . . . . . . . . . . . . . . . . 1
. . . . . . . . . . . . . . . . . . . . . 13
F
FAQs . . . . . . . . . . . . . . . . . . . . . . . . 14
H
Handset
activating/deactivating
advisory tones
contact with liquid
display language
idle status
loudspeaker volume
operating and charging times
restoring default settings
setting (individual)
starting up
Handset charging times
Handset operating time
Handsfree operation
. . . . . . . . . . . . . . . . . . . . . . . . . 1
key
Hash key
Headset
Hearing aids
. . . . . . . . . . . . . . . . . . . . . 1, 7
. . . . . . . . . . . . . . . . . . . . . . . 1
. . . . . . . . . . . . . . . . 13
. . . . . . . . . . . . . . 12
. . . . . . . . . . . . . . . . . . . . 8
. . . . . . . . . . . . . . . . . . . 4
. . . . . . . . . . . . . . . . . . . . 3
. . . . . . . . . . . 7
. . . . . . . . . . . . . 14
. . . . . . . . . . . . 12
. . . . . 16
. . . . . . . . 13
. . . . . . . . . . . . . 12
. . . . . . . . . . . 16
. . . . . . . . . . . 16
. . . . . . . . . . . . . . 7
I
Idle status (display) . . . . . . . . . . . . . 1, 8
Incorrect input (correction)
. . . . . . . . . 9
K
Key click . . . . . . . . . . . . . . . . . . . . . . 13
Keypad lock
Keys
control key
display keys
end call key
handsfree key
hash key
keypad lock
message key
on/off key
recall key
talk key
. . . . . . . . . . . . . . . . . . . . 7
. . . . . . . . . . . . . . . . . 1, 7
. . . . . . . . . . . . . . . . . 1, 8
. . . . . . . . . . . . . . . . . 1, 8
. . . . . . . . . . . . . . . . . 1
. . . . . . . . . . . . . . . . . . . 1, 7
. . . . . . . . . . . . . . . . . . . 7
. . . . . . . . . . . . . . . . . 11
. . . . . . . . . . . . . . . . . . . . 1
. . . . . . . . . . . . . . . . . . . . . 1
. . . . . . . . . . . . . . . . . . . . . . 1
18
Page 21

Index
L
Last number redial . . . . . . . . . . . . . . . 11
Liquid
List
Lock (keypad)
Loudspeaker volume
. . . . . . . . . . . . . . . . . . . . . . . . 14
calls list
last number redial list
. . . . . . . . . . . . . . . . . . . . . 11
. . . . . . . . . . . 11
. . . . . . . . . . . . . . . . . . . 7
. . . . . . . . . . . . . 12
M
Making calls
answering a call
external
Medical appliances
Menu
back one menu level
end tone
menu guidance
Message key
opening lists
. . . . . . . . . . . . . . . . . . . . . . 7
. . . . . . . . . . . . . . . . . . . . 13
. . . . . . . . . . . . . . . . 7
. . . . . . . . . . . . . . . . 3
. . . . . . . . . . . . . 8
. . . . . . . . . . . . . . . . 8
. . . . . . . . . . . . . . . . . . 11
N
Number
storing in directory
. . . . . . . . . . . 9, 10
O
On/off key . . . . . . . . . . . . . . . . . . . . . .1
Operation (preparing to use the phone) 4
Order of entries in directory
. . . . . . . . 17
P
Pack contents . . . . . . . . . . . . . . . . . . . 4
Phonebook
opening
selecting entry
storing entry
storing the first number
. . . . . . . . . . . . . . . . . . . . . 9
. . . . . . . . . . . . . . . . . . . . . . 8
. . . . . . . . . . . . . . . . . 9
. . . . . . . . . . . . . . . . . . 9
. . . . . . . . . . 9
Q
Questions and answers . . . . . . . . . . . 14
R
Recall key . . . . . . . . . . . . . . . . . . . . . . 1
Registering (handset)
Restoring default settings
handset
Ringtone
changing
setting melody
setting the volume
. . . . . . . . . . . . . . . . . . . . . 13
. . . . . . . . . . . . . . . . . . . . 12
. . . . . . . . . . . . . . 5
. . . . . . . . . . . . . . . . 13
. . . . . . . . . . . 8, 12
S
Safety precautions . . . . . . . . . . . . . . . 3
Searching
in directory
Sending
directory entry to handset
Setting date
Setting melody (ringtone)
Setting the volume
earpiece
handset loudspeaker
loudspeaker
ringtone
Setting time
Setting wake up time
SMS
writing text
Special characters
Speed dialling list
Switching off
advisory tones
auto answer
keypad lock
Switching on
advisory tones
auto answer
keypad lock
. . . . . . . . . . . . . . . . . . . 9
. . . . . . . 10
. . . . . . . . . . . . . . . . . . . . 6
. . . . . . . . . 13
. . . . . . . . . . . . . . . . . . . . 12
. . . . . . . . . . . 12
. . . . . . . . . . . . . . . . . . 12
. . . . . . . . . . . . . . . . . . . . 12
. . . . . . . . . . . . . . . . . . . . 6
. . . . . . . . . . . . 13
. . . . . . . . . . . . . . . . . . 17
. . . . . . . . . . . . . . . 17
. . . . . . . . . . . . . . . 10
. . . . . . . . . . . . . . . . 13
. . . . . . . . . . . . . . . . . 12
. . . . . . . . . . . . . . . . . . . 7
. . . . . . . . . . . . . . . . 13
. . . . . . . . . . . . . . . . . 12
. . . . . . . . . . . . . . . . . . . 7
T
Talk key . . . . . . . . . . . . . . . . . . . . . . . 1
Technical data
Troubleshooting
. . . . . . . . . . . . . . . . . . 16
. . . . . . . . . . . . . . . . 14
V
Volume
ringtone
. . . . . . . . . . . . . . . . . . . . 12
W
Warning tone (battery) . . . . . . . . . . . 13
Writing, editing text
. . . . . . . . . . . . . 17
19
Page 22

Accessories
Accessories
Aton CL103 charging station
(including mains adapter)
All accessories and batteries are available from your mobile phone retailer or from the
Swisscom shop.
Only use original accessories. This will avoid possible health risks and damage to property
and also ensure that all the relevant regulations are complied with.
Assembling the charging cradle
20
Page 23

This user guide is made with 100% recycled paper.
en 25/06 FX-RES-V-CPE English for Internet
 Loading...