

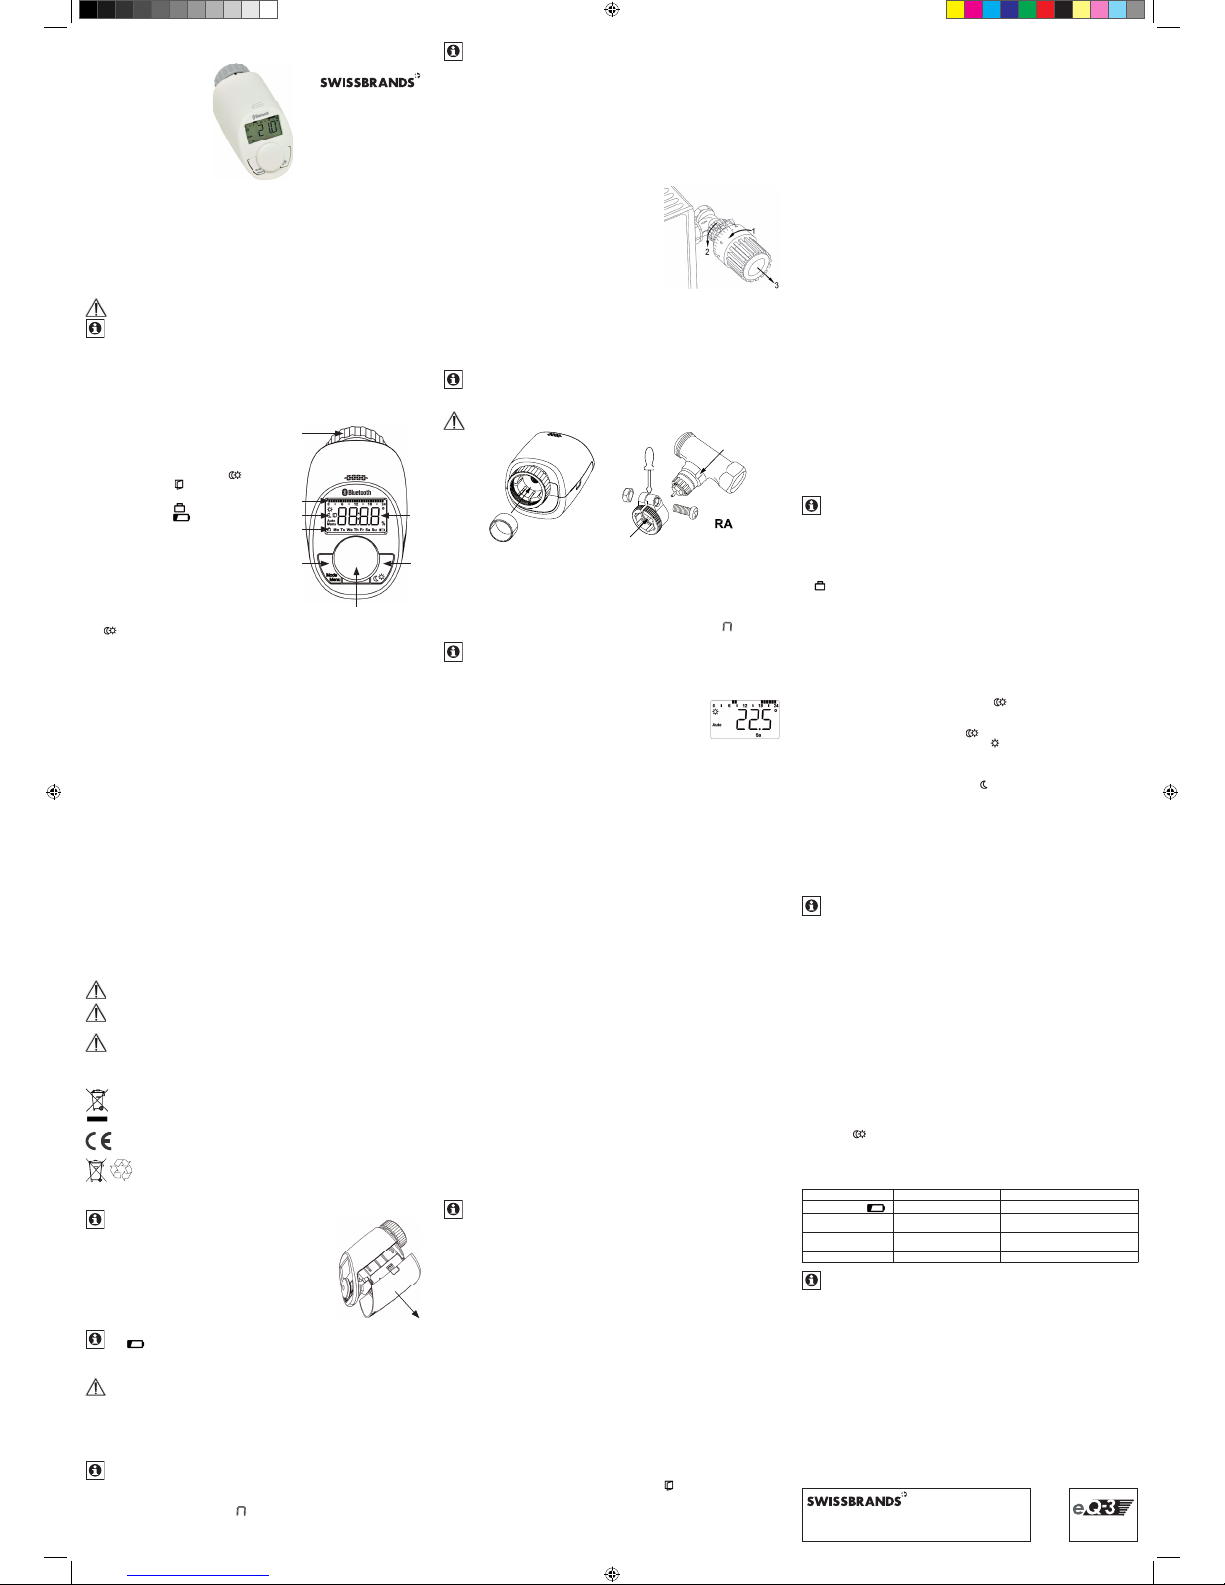
Swissbrands eQ-3 Operating Manual
Bedienungsanleitung
eQ-3 BLUETOOTH® Smart Heizkörperthermostat
1. Ausgabe Deuts ch 04/2015 / Dokument ation © 2015 eQ-3 AG, D eutschland.
Alle Rechte vor behalten. / CC- RT-BLE-SB, V1.1, Art-N r. 142279
Swissbrand s GmbH / Romain-R olland-Str. 14-24 / 13 089 Berlin / Germ any / www.swissbr ands.com
1. Hinweise zu dieser Anleitung
Lesen Sie dies e Anleitung vollstän dig und sorgfältig, b evor Sie das Gerät in Betri eb
nehmen. Sie enthält zahlreiche Hinweise zum bestimmungsgemäßen Einsatz des
Gerätes. Beachten Sie insbesondere die Sicherheitshinweise. Bewahren Sie die
Anleitung zum späteren Nachschlagen auf. Wenn Sie das Gerät anderen Personen
zur Nutzung überlassen, übergeben Sie bitte auch diese Anleitung.
Benutzte Symbole:
Achtung! Hier wird auf eine Gefahr hingewiesen.
Hinweis. Dieser Abschnitt enthält zusätzliche wichtige Informationen.
2. Lieferumfang
1x Heizkörper thermostat, 1x Adapter Da nfoss RA, 1x Stützri ng, 1x Mutter M4,
1x Zylinderkopfs chraube M4 x 12 mm, 2x 1,5 V Mignon /LR6/AA, 3x Bedi enungsanleitung in Deutsch/Englisch, Französisch/Niederländisch, Polnisch/Italienisch
3. Geräteübersicht
A
C
D
B
E
F
G
H
A Überwur fmutter zur Montage am
Heizungsventil
B Eingestellte Schaltzeiträume im Wochen-
programm
C
Absenk-/Komfort-Temperatur (
), Fens-
ter-auf-Funktion ( ), Manuelle r Betrieb
(Manu), Automatikbetrieb (Auto)
D
Urlaubsfunktion (
), Wochentag, B atte-
rie-leer-Symbol ( )
E Mode-/Menu-Taste: Wechsel zw ischen
Automatikbetrieb, manuellen Betrieb und
Urlaubsfu nktion (Taste kurz drücken);
Öffnen de s Konfi gurationsme nüs (Taste
mind. 3 Sekunden drücken)
F Stell rad: Einstellungen vorneh men, z. B.
Temperatur (durch Dre hen des Stellrads),
Aktivierung der Boost-Funktion und Bestätigen bzw. Speichern von Einstellungen
im Menü (kurz es Drücken des Stellrads)
G
-Taste: Umschalten zwischen Absenk-/
Komfort-Temperatur
H
Temperaturanzeige, Zeit-/Datumsanzeige,
Menüpunkte
, Funkt ionen
4. Allgemeine Funktion
Der elektr ische BLUE TOOTH® Smart Heizkörperthermostat ermöglicht eine zeitgesteuerte Regulierung der Raumtemperatur über eine intuitiv bedienbare App.
Die kostenlos e App „calor BT“ is t für iOS- und Andr oid-Smar tphones verfüg bar. Der
Heizkörperthermostat dient zur Regulierung einzelner Heizkörper bzw. der Raumtemperatur.
Durch vorprogrammierte oder individuelle Heiz- und Absenkphasen kann die gewünschte Temperatur komfortabel eingestellt werden.
Der Heizkörperthermostat passt auf alle gängigen Heizkörperventile und ist einfach
zu montieren - ohne Ablassen von Heizungswasser oder einen Eingriff in das Heizungssystem. Die Boost-Funktion ermöglicht ein schnelles, kurzzeitiges Aufheizen
des Heizkörp ers durch vollständige Ö ffnung des Ventils. Durch ei ne automatische
„Fenster-auf-Erkennung“ wird zusätzlich Energie während des Lüftens gespart.
5. Bestimmungsgemäßer Einsatz
Der Heizkörperthermostat dient zum Regulieren eines gängigen Heizkörperventils.
Betreiben Sie das Ger ät nur in Inn enräumen und ve rmeiden Sie den Einfl uss von
Feuchtigkeit , Staub sowie Sonnen- od er Wärmebestrahlung. J eder andere Einsatz
als der in dieser Bedienungsanleitung beschriebene ist nicht bestimmungsgemäß
und führt zu G arantie- un d Haftungs ausschluss. D ies gilt auch f ür Umbauten und
Veränderungen. Das Gerät ist ausschließlich für den privaten Gebrauch gedacht.
Hiermit er klärt die eQ -3 AG, dass si ch dieses Ger ät in Übereinst immung mit den
grundlegenden Anforderungen und den anderen relevanten Vorschriften der Richt-
linie 1999/5/EG befi ndet. Die vollständige Konformitätserklä rung fi nden Sie unter
www.eQ-3.de.
6. Sicherheitshinweise
Das Gerät ist kei n Spielzeug; erlauben Sie K indern nicht damit zu spi elen.
Lassen Sie Ver packungsmaterial ni cht achtlos liegen. D ies kann für Kinder zu
einem gefährlichen Spielzeug werden.
Öffnen S ie das Gerät nic ht, es enthält kein e durch den Anwender zu wart enden Teile. Im Fehlerfall lassen Sie das Gerät von einer Fachkraft prüfen.
7. Entsorgungshinweise
Gerät nic ht im Hausmüll entso rgen!
Elektronische Geräte sind entsprechend der Richtlinie über Elektro- und
Elektronik-Altgeräte über die örtlichen Sammelstellen für Elektronik-Altgeräte zu entsorge n!
Das CE-Zeichen ist ein Freiverkehrszeichen, das sich ausschließlich an die
Behörden wendet und keine Zusicherung von Eigenschaften beinhaltet.
Verbrauchte Bat terien gehören nicht in d en Hausmüll! Ents orgen Sie
diese in Ihrer örtlichen Batteriesammelstelle!
8. Batterien einlegen (wechseln)
Im Auslieferungszustand sind die Batterien bereits eingelegt. Entfernen Sie
einfach den Isolierstreifen.
Um die Batter ien zu wechseln, gehen Si e wie folgt vor:
• Drücken Sie den Bat teriefac hdeckel an den Ein kerbungen
auf beiden Seiten mit den Fingern ein und ziehen Sie ihn
nach unten ab.
• Legen Sie 2 neue Bat terien vom Typ LR6/Mignon /AA
(1,5 V) polungsric htig in das Batteriefac h ein.
• Setzen Sie den Bat teriefachdeckel wi eder auf und rasten
Sie ihn ein.
Die Lebensda uer neuer Alkaline Ba tterien beträgt c a. 2 Jahre. Ein Batteri esymbol (
) im Display weist d arauf hin, dass die Batteri en auszutauschen sind.
Nach Entnahme d er leeren Batterien sol lte bis zum Einlegen der neuen Ba tterien ca. 1 Min ute gewartet werden. Ein Bet rieb mit Akkus ist nicht m öglich.
Normale Batterien dürfen niemals aufgeladen werden. Es besteht Explosionsgefahr. Batte rien nicht ins Feuer wer fen! Batterien nicht ku rzschließen!
9. Datum und Uhrzeit einstellen
Wenn Batteri en eingelegt wur den, werden nach kur zer Anzeige der Fi rmware-Versionsnummer un d kurzem Motorla uf („InS“) autom atisch Datum und Uh rzeit abgefra gt.
• Stellen Sie Jahr, Mona t, Tag, Stunde und Minute d urch Drehen des Stellrads e in
und bestäti gen Sie durch kurzes Dr ücken des Stellrads (F).
Datum und Uhr zeit können Sie auch später im M enü unter „dAt“ einste llen.
Während der Eing abe von Datum und Uh rzeit fähr t der Motor den S teuerstif t bereits zurück.
• Die Anzeige „InS“ mit drehendem „
“ weist darauf hi n, dass der Motor n och zurückfäh rt. Sobald der H eizkörpert hermostat am Ventil m ontiert werde n kann, steht
nur „InS“ im D isplay.
Das Wochenpr ogramm und andere Ein stellungen können vo r der Montage angepasst werd en. Drücken Sie dazu die M ode/Menu-Taste, während in d er An-
zeige „InS“ ste ht. Mehr Details fi nden Sie ab Absch nitt „13. Ste uerung und
Konfi guration“.
• Nach abgeschl ossener Prog rammierung s teht erneut „I nS“ im Display u nd die
Montage kann erfolgen.
10. Montage am Heizkörper
Die Montag e des Heizkörperthe rmostaten ist einfach u nd kann ohne Ablassen von
Heizungswasser oder Eingriff in das Heizungssystem erfolgen. Spezialwerkzeug
oder ein Abschalten der Heizung sind nicht erforderlich. Die am Heizkörperthermostat angebrachte Überwurfmutter ist universell einsetzbar und ohne Zubehör passend für alle gä ngigen Ventile mit dem Gewin demaß M30 x 1,5 mm.
• Drehen Sie den Thermostatkopf auf den Maximal-
wert (gegen den Uhrzeigersinn). Der Thermostatkopf drückt j etzt nicht me hr auf die Ventilspi ndel
und kann so leichter demontiert werden.
• Entfernen Sie den alten Thermostatkopf. Setzen
Sie bei Bedarf den beiliegenden Stützring oder
Adapter auf.
• Montieren Sie den Heizkörperthermostat auf das
Ventil.
10.1 Stützr ing und Adapter für Danfo ss
Bei Bedarf legen Sie den beiliegenden Stützring (I) vor der Montag e in den Flansch
des Gerätes ei n, um einen festeren Sitz a m Ventil zu ermög lichen.
Zur Montage auf Danfoss RA-Ventile kann der beiliegende Adapter verwendet werden. Die Ventilkörper von Danfoss weisen umlaufend längliche Einkerbungen (K)
auf, die auch einen besseren Sitz des Adapters nach dem Aufrasten gewährleisten.
Achten Sie bei d er Montage darauf, dass di e Zapfen im Inneren des Ada pters
(J) eine deckungsgleiche Position zu den Einkerbungen (K) am Ventil haben.
Rasten Sie den Adapter vollständig auf.
Achten Sie bei d er Montage darauf, sich ni cht die Finger zwisch en den Adapterhälften einzuklemmen!
I
11. Adaptierfahrt
Nach dem Einle gen der Batter ien und der Mon tage am Ventil wird z ur Anpassung
an das Ventil eine Adaptierfahrt („AdA“) durchgeführt.
• Sobald der Heizkör pertherm ostat auf dem Ventil mont iert wurde, drü cken Sie kurz
auf das Stellra d, wenn im Display „InS“ ste ht.
Während der Adap tierfahrt werden „ AdA“ und das Aktivitä tssymbol (
) im Display
angezeigt. In der Zwischenzeit ist keine Bedienung möglich.
Wurde die Adapti erfahrt vor de r Montage eingele itet, drücken Sie kur z auf das
Stellrad und de r Motor fährt zur ück zur Position „ InS“. Wird eine Fehler meldung
(F1, F2, F3) angezeigt, fähr t der Motor ebenfalls zur ück zur Position „InS “.
12. Display-Inhalt im Normalbetrieb
Im Normalbetrieb werden Schaltzeiträume, Betriebsmodus,
Soll-Temperatur und Wochentag angezeigt.
Die Balken für Schaltzeiträume des Wochenprogramms werden
für jedes zweite Zeitintervall angezeigt.
13. Steuerung und Konfi guration
Nachdem Sie den Heizkörperthermostat montiert und in Betrieb genommen haben,
kann das Gerät individuell gesteuert und konfi guriert werden. Die Steuerung und
Konfi guration kann entweder per BLUETOOTH
®
über die App „c alor BT“ ode r di-
rekt am Gerät e rfolgen.
13.1 Steueru ng und Konfi gura tion über A pp
Um das Gerät per A pp zu steuern, gehen Sie w ie folgt vor:
• Laden Sie die App „ calor BT“ aus d em App Store fü r iOS oder Andr oid herunter
und installieren Sie diese auf Ihrem Smartphone.
• Folgen Sie den Anwei sungen in der App.
Sie können den Heizkörperthermostat anschließend über die App steuern und kon-
fi gurieren.
13.2 Steuerun g und Konfi gurat ion direkt am Gerät
Um die Steuerung und Konfi guratione n direkt am Gerät vorzun ehmen, gehen S ie
wie in den nachfolgend beschriebenen Abschnitten vor.
13. 2.1 Wochenprogramm (Pro)
Im Wochenpro gramm lassen s ich für jeden Woc hentag separ at bis zu 3 Heizpha sen (7 Schalt zeitpunkte) einstelle n. Die Programmierun g erfolgt für die ausg ewählten Tage, wobei für eine n Zeitraum von 0 0:00 bis 23:59 Uh r Temperaturen hinterlegt werden können.
• Drücken Sie die Mo de-/Menu -Taste mindestens 3 Sekunden. I m Display erschei nt
„Pro“. Bestät igen Sie durch kurzes D rücken des Stellrads.
• Im Display ersche int „dAy“. Mit dem Stel lrad sind einzelne Wo chentage, alle Wer k-
tage, das Woche nende oder die gesamte Woc he auswählbar.
• Bestätigen Sie d urch kurzes Drücken de s Stellrads.
• Der erste Schaltzeitpunkt wird angezeigt (0:00). Dieser kann nicht verändert wer-
den. Die Heizzeiten werden als Balken angezeigt.
• Bestätigen Sie d urch kurzes Drücken de s Stellrads.
• Stellen Sie die Temperat ur ein, die ab 0:00 Uhr gewünsc ht ist.
• Bestätigen Sie d urch kurzes Drücken de s Stellrads.
• Der nächste Schaltzeitpunkt wird angezeigt. Diesen können Sie individuell anpassen.
• Stellen Sie ansch ließend die Tempera tur ein, die ab der ge wünschten Uhr zeit
vorherrschen soll.
• Diesen Vorgang können Sie wiederholen, bis die weiteren gewünschten Tempe -
raturen für de n Zeitraum von 0:00 bis 23:59 U hr hinterlegt sind.
• Sind alle 7 Schalt zeitpunkte belegt, wir d 23:59 Uhr als Endzeitpunkt zum B estä-
tigen angezeigt.
Im Auto-M odus kann die Temperatur jederz eit auch über das S tellrad verän dert werde n. Die geänderte Temperatu r bleibt dann bis zum nächsten S chaltzeitpunkt erhalten.
13.2.2 Datum und Uhrzeit einstellen (dAt)
Über das Menü kön nen jederzeit das Datum u nd die Uhrzeit angepass t werden.
• Drücken Sie die Mo de-/Menu-Taste mindesten s 3 Sekunden.
• Wählen Sie mit dem Ste llrad den Menüpunkt „d AT “ aus.
• Stellen Sie Jahr, Mona t, Tag, Stunde und Minute d urch Drehen des Stellrads e in
und bestäti gen Sie durch kurzes Dr ücken des Stellrads.
13.2 .3 Umschalten Sommer-/Winter zeit (dSt)
Für den Heizkörperthermostat kann eine automatische Umschaltung zwischen Sommer- und Winterzeit aktiviert bzw. deaktiviert werden. Werkseitig ist die automatische Umschaltung aktiviert.
• Drücken Sie die Mo de-/Menu-Taste mindesten s 3 Sekunden.
• Wählen Sie mit dem Ste llrad den Menüpunkt „dS t“ aus.
• Bestätigen Sie d ie Auswahl durch kurzes D rücken des Stellrads.
• Im Display ersche int „OFF“, wenn die Funktion dea ktiviert werden so ll oder „On“,
wenn die Funkti on aktiviert werde n soll.
• Bestätigen Sie I hre Auswahl durch kurzes D rücken des Stellrads.
13.2 .4 Fenster- auf-Funktion (AEr)
Der Heizkörperthermostat erkennt bei einer stark absinkenden Temp eratur automatisch, dass e in Raum gelüftet wird. U m Heizkosten zu sparen, w ird dann die Temperatur für einen bestimmten Zeitraum herunter geregelt (wer kseitig 15 Minuten). Währenddessen wird im Display das Fenster-auf-Symbol (
) angezeigt.
• Drücken Sie die Mo de-/Menu-Taste mindesten s 3 Sekunden.
• Wählen Sie mit dem Ste llrad den Menüpunkt „ AEr“ und bestätig en Sie durch kur-
zes Drücken de s Stellrads.
• Die Temperatur und die Zei t lassen sich mit dem Stellra d einstellen. Mit der Zeit-
auswahl „0“ l ässt sich die Funktion dea ktivieren.
13.2 .5 Offset-Temperatur einstellen (tOF)
Da die Temperatur am He izkörper gemessen wi rd, kann es an einer anderen S telle
im Raum kälter oder wärmer sein. Um dies anzugleichen, kann ein Temperatur-Offset von bis zu ±3.5 ° C eingestellt we rden. Werden z. B. 18 °C ans tatt einges tellter
20 °C im Raum erre icht, ist ein Offset vo n -2.0 °C einzustellen.
• Drücken Sie die Mo de-/Menu-Taste mindesten s 3 Sekunden.
• Wählen Sie mit dem Ste llrad den Menüpunkt „tO F“ aus und bestätigen Si e durch
kurzes Drücken des Stellrads.
• Drehen Sie das Stel lrad so lange, bis die gewüns chte Temperatur erscheint.
• Bestätigen Sie d urch kurzes Drücken de s Stellrads.
13.2 .6 BLU ETOOTH
®
aktivieren/deaktivieren (bLE)
Die BLUETOOTH
®
Funktion des Heizkörperthermostaten kann manuell aktiviert
bzw. deaktiviert werden.
• Drücken Sie die Mo de-/Menu-Taste mindesten s 3 Sekunden.
• Wählen Sie mit dem Ste llrad den Menüpunkt „b LE“ aus und bestätigen Si e durch
kurzes Drücken des Stellrads.
• Im Display ersche int „OFF“, wenn die Funktion dea ktiviert werden so ll oder „On“,
wenn die Funkti on aktiviert werde n soll.
• Bestätigen Sie d urch kurzes Drücken de s Stellrads.
13.2 .7 Werkseinstellungen wieder herstellen (rES)
Die Werkseinstellungen des Heizkörperthermostaten können manuell wieder hergestellt werden. Dabei gehen alle vorgenommenen Einstellungen verloren.
• Drücken Sie die Mo de-/Menu-Taste mindesten s 3 Sekunden.
• Wählen Sie mit dem Ste llrad den Menüpunkt „r ES“ aus und bestätigen Si e durch
kurzes Drücken des Stellrads.
• Anschließend erscheint „COnF“ im Display.
• Bestätigen Sie d urch kurzes Drücken de s Stellrads.
13.2 .8 Boost-Funktion
Kommen Sie z. B. f rüher nach Hause und möc hten es schnell warm haben , hilft Ihnen die Boost -Funktion. Bei A ktivierung d er Boost-Funkt ion wird das Heizu ngsventil
sofort für 5 M inuten auf 80 % geöffnet . Die Erwärmung eines R aumes dauert zwar
länger als 5 Min uten, die vom Heizkörper a bgegebene Wärme kann d ennoch sofort
wahrgenommen werden.
• Drücken Sie kur z das Stellrad zum Aktivi eren der Boost-Funkt ion.
• Die verbleibende Funktionsdauer wird im Sekundentakt heruntergezählt („b300“
bis „b000“).
• Nach Ablauf dieser 5 Minuten wechselt der Heizkörperthermostat in den vorher
aktiven Modus (Auto/Manu) mit der vorher eingestellten Temperatur.
• Die Funktion läss t sich jeder zeit vor zeitig durc h Betätige n des Stellra ds deakti vieren.
Die Boost- Funktion hat keinen unm ittelbaren Effek t, wenn der Heizkörpe r verdeckt ist (z. B. du rch ein Sofa). Die Fenster- auf-Funktion i st während der Boost Funktion deaktiviert.
13.2 .9 Urlaubsfunkt ion einstellen
Die Urlaubs funktion kann ge nutzt werden, wen n für einen bestimmt en Zeitraum eine
feste Temperatur gehalten werden soll (z. B. während eines Urlaubs oder einer Party).
• Drücken Sie die Mo de-/Menu-Taste so oft kurz , bis im Display das Ko ffersymbol
(
) erscheint.
• Stellen Sie über da s Stellrad die Uh rzeit ein, bis zu d er die Temperatur geha lten
werden soll un d bestätigen Sie durch ku rzes Drücken des Stell rads.
• Stellen Sie das Datu m ein und bestätige n Sie durch kurzes D rücken des Stellr ads.
• Stellen Sie die Temperatur ein und bestätigen Sie durch kurzes D rücken des
Stellrads.
Die eingestellte Temperatur bleibt bis zum vorgegebenen Zeitpunkt bestehen. Danach wechselt der Heizkörperthermostat in den Auto-Modus.
13. 2.10 Komfort- und Absenk-Temperatur
Über die Taste Komfort-/Absenk-Temperatur (
) kann zwischen diesen beiden
Temperaturen gewechselt werden. Werkseitig liegen diese bei 21.0 °C (KomfortTemperatur) und 17.0 °C (Absenk-Temperatur).
• Halten Sie die Komfo rt-/Absenktas te (
) für mindestens 3 Sekund en gedrückt.
• Im Display ersche inen das Sonne nsymbol (
) und die aktuel l hinterlegte Ko m-
fort-Temperatur.
• Verändern Sie die Tempera tur mit dem Stellr ad und bestätigen Sie durc h kurzes
Drücken des Stellrads.
• Im Display ersche inen das Mondsymbol (
) und die Absenk-Temperatur.
• Verändern Sie die Tempera tur mit dem Stellr ad und bestätigen Sie durc h kurzes
Drücken des Stellrads.
Auch im Auto- Modus kann die Temperatur über die Taste jed erzeit geänd ert werden. Diese bleibt dann bis zum nächsten Schaltzeitpunkt des Programms erhalten.
13. 2.11 Heizpause aktivieren (Batterieschonung)
Ist die Heizung i m Sommer abge schaltet, könne n die Batteri en geschont we rden.
Dazu wird das Venti l ganz geöffnet . Der Verkalkungssc hutz wird weiter d urchgeführt .
Um Batterie n zu schonen, kann zud em die BLUETOOTH® Funktion deaktiviert
werden (siehe Abschnitt „13. 2.6 Bluetooth® aktivieren/deaktivieren (bLE)“ auf
Sei te 1).
Zum Aktivieren der Heizpause gehen Sie wie folgt vor:
• Drehen Sie das Stel lrad im manuell en Betrieb (Manu) so lan ge nach rechts , bis
im Display „On“ erscheint.
• Zum Beenden verlassen Sie den manuellen Betrieb (Manu) oder drehen Sie da s
Stellrad nach links.
13. 2.12 Frostschutzbetr ieb einstellen
Wenn ein Raum nicht geheizt werden soll, kann das Ventil geschlossen werden.
Nur bei Frostgef ahr wird das Ventil ge öffnet. De r Verkalkungssc hutz wird wei ter
durchgeführt.
• Drehen Sie das Stel lrad im manuellen Betri eb (Manu) so lange nach links, bis im
Display „OFF“ erscheint.
• Zum Beenden verlassen Sie den manuellen Betrieb (Manu) oder drehen Sie da s
Stellrad nach rechts.
13.2 .13 Kindersicherung / Bediensperre
Die Bedienu ng des Gerätes kann gesper rt werden.
• Zur Aktivierung/Deaktivierung der Bediensperre, drücken Sie die Tasten Mode-/
Menu und
kurz gleichzeitig.
• Nach erfolgreicher Aktivierung erscheint „LOC“ im Display.
• Zur Deaktivierung der Bediensperre, drücken Sie erneut beide Tasten.
14. Fehlerbehebung und Wartung
Fehlercode im Display Problem Behebung
Batteriesymbol (
)
Batterieleistung zu gering Batterien austauschen
F1 Ventilantrieb schwergängig
Installation prüfen,
Heizungsventil überprüfen
F2 Stellbereich zu groß
Befestigung des Heizkörper-
thermostaten überprüfen
F3 Stellbereich zu klein Heizungsventil überprüfen
Zum Schutz vor Ventilverkalkung führt der Heizkörperthermostat einmal wöchentlich a m Samstag um 12:00 Uh r eine Entkalkung sfahrt durc h. Dabei erscheint „CAL“ im Display.
15. Technische Eigenschaften
Geräte-Kurzbezeichnung: CC-RT-BLE-SB
Versorgungs spannung: 2x 1,5 V LR6/Mi gnon/AA
Stromaufn ahme: 100 m A max.
Batterielebensdauer: 2 Jahre (typ.)
Schutzart: I P20
Verschmutzungsgrad: 2
Umgebungstemperatur: 5 bis 35 °C
Oberfl ächentemperatur: 9 0 °C (am Heizkörper)
Display: LC-Display
Anschluss: M30 x 1,5 mm
Wirkungsweise: Typ 1
Linearer Hub: 4,3 mm
Abmessung en (B x H x T): 55 x 60 x 102 mm
Gewicht: 162 g (inkl. Batte rien)
Funkfrequen z: 2,402 GHz - 2,4 80 GHz
Freifeldreic hweite: 10 m (typ.)
K
J
Bevollmächtigter des Herstellers:
Manufacturer’s authorised representative:
eQ-3 AG
Maiburger Straße 29
26789 Leer / GERMANY
www.eQ-3.de
Technische Änderungen si nd vorbehalten.
The BLUETOOTH® word
mark and logos are registered trademarks owned
by Bluetooth SIG, Inc. and
any use of such marks by
eQ-3 AG is under license.
Other trademarks and
trade names are those of
their respective owners.
www.swissbrands.com
SWISSBRANDS GmbH
Romain-Rolland-Str. 14-24
13089 Berlin / Germany
Technische Änderungen vorbehalten.
Abbildungen ähnlich.
Serviceadresse:
Swiss CC-RT-BLE_UM_GE_eQ-3_220515.indd 1 29.05.2015 10:55:23

Operating manual
eQ-3 BLUETOOTH® Smart Radiator Thermostat
1st English edition 04/2015 / Documentat ion © 2015 eQ-3 AG, Ger many / All rights res erved.
Translation from t he original versi on in German. / CC- RT-BLE-SB, V1.1, 142279
Swissbrand s GmbH / Romain-R olland-Str. 14-24 / 13 089 Berlin / Germ any / www.swissbr ands.com
1. Information about this manual
Please read th is manual completely and c arefully before star ting to use the device.
The manual co ntains impor tant infor mation about t he intended use of t he device.
Especially o bserve the safety notes. Ke ep the manual for l ater consult ation. If you
hand over the devi ce to other persons fo r use, please hand over thi s manual as well.
Symbols used:
Attention! T his indicates a hazard.
Note. This section contains important additional information.
2. Package contents
1x radiator ther mostat, 1x adapter Danfoss R A, 1x support ring, 1x nut M4,
1x cylinder head sc rew M4 x 12 mm, 2x 1.5 V mignon/LR 6/AA, 3x operat ing manual in
German/English, French/Dutch and Polish/Italian
3. Device overvi ew
A
C
D
B
E
F
G
H
A Union nut for fi tting on the he ating valve
B Defi ned swit ching time periods in th e
week program
C
Eco/comfort temperature (
), open-win-
dow functio n ( ), manual mode (Manu),
automatic mo de (Auto)
D
Holiday function (
), weekday, empty
battery symbol ( )
E Mode/M enu button: Switch bet ween auto
mode, manu mod e and holiday function
(press butt on shortly); confi guration menu
(press butt on for at least 3 seconds)
F Control wheel: Change settings, e.g. tem-
perature (tur n the control wheel), acti vate
the boost fun ction and confi rm /save set-
tings in the men u (press control whee l
shor tly)
G
button: Switc h between eco and com -
fort temperature
H
Temperature display, time/date display,
menu items
, functions
4. Function
The electr ic BLUETOOT H® Smart Radi ator Thermos tat offers i ndividual co ntrol of
the room temp erature from a user-frie ndly and intuitive app.
The app “calo r BT” is available for fr ee for iOS and Andro id smartphone s. The radiator thermos tat enables the regulat ion of single radiators or t he room temperature.
Thanks to pre -programmed or indiv idually tailored heat ing and cooling phases, t he
desired temperature can be comfortably adjusted.
The ra diator thermo stat fi ts to all c ommon radiator valves and is easy to mount -
without havin g to drain any water or interve ne in the heating system. Wi th the boost
function, c ool rooms can be heated wi thin short by o pening the heat ing valve fully.
Thanks to the auto matic “open wi ndow detectio n”, additional ene rgy can be saved
during ventilation.
5. Intended use
The radiator thermostat is used to control a conventional radiator valve. Only operate
the device in ins ide rooms and avoid the infl uence of moist ure, dust and sunlight or
external hea t radiation. Using the devi ce for any purpose other tha n that described
in this operating manual does not fall within the scope of intended use and shall in-
validate any warrant y or liability. This also applies to any conversio n or modifi c ation
work. The devi ce is intended for private u se only.
eQ-3 AG her eby declares that this devi ce complies with th e essential requireme nts
and oth er relevant regulatio ns of Direct ive 1999/5 /EC. You can fi nd the fu ll declar a-
tion of confo rmity at www.eQ- 3.de.
6. Safety instructions
The device is n ot a toy; do not allow children to pl ay with it.
Do not leave packa ging material lyi ng around. It can be da ngerous in the hands
of a child.
Do not open the d evice: it does not c ontain any com ponents that n eed to be
servic ed by the user. In the event of an error, pleas e have the device checked
by an expert.
7. Disposal instructions
Do not dispo se of the device wit h regular domest ic waste!
Electroni c equipment must be dispo sed of at local collec tion points for waste
electronic equipment in compliance with the Waste Electrical and Electronic
Equipment Dire ctive.
The CE sign is a fr ee trading sign addre ssed exclusively to the a uthorities and
does not incl ude any warranty of any prope rties.
Used batter ies should not be dispo sed of with regular dom estic waste!
Instead, take th em to your local batter y disposal point.
8. Inserting (replacing) batteries
In the initial s tate, the batteries are al ready inserted. Simpl y remove the insulation stri p.
To replace the batte ries, please procee d as follows:
• Press the batter y compar tment cover on bo th sides with
your fi ng ers and re move the c over by push ing it dow nwards.
• Insert 2 new LR6/m ignon/AA (1.5 V) batteri es in the battery
compart ment, making sure they are t he right way round.
• Reattach the bat tery compartm ent cover and latch it into
place.
The servi ce life of new alkaline bat teries is approximate ly
2 years. A batte ry symbol (
) on the display in dicates that the bat teries need
to be replace d. After removing th e empty batterie s, wait approx. 1 minute bef ore
insertin g the new ones. Operatio n with rechargeable bat teries is not possibl e.
Never recharg e standard batterie s. Doing so will present a ri sk of explosion.
Do not throw the b atteries into a fi re. D o not short-circui t batteries.
9. Set date and time
After inse rting batt eries, the date a nd time is automa tically requ ested after a b rief
display of the fi rmware version number and s hort motor run (“InS ”).
• Set the year, mont h, day, hour and minute with the contr ol wheel and con fi rm by
pressing th e control wheel shor tly (F).
You can adjust the tim e and date in the menu under “dAt ”.
The motor moves t he control pin backwar ds during the setting of d ate and time.
• If “InS” and the ro tating activity sy mbol “
” are displayed, t he motor still reverses.
When only “I nS” is shown in th e display, the radiato r thermosta t can be install ed
on the valve.
The week prog ram and other sett ings can be adjuste d before installat ion. Press
the Mode/Men u button for this, while “InS” is shown in the display. You will fi nd
further i nformation in chapter “13. O peration and confi guration”.
• After the progr amming has bee n completed, “ InS” is shown ag ain in the displ ay
and installation can take place.
10. Installation on the radiator
The radiator t hermostat is easy to instal l and can be done without drai ning heating
water or inter vening in the heating system. No s pecial tools are require d, nor does
the heating have t o be switched off. The union n ut attached to the radiato r thermostat can be use d universally and witho ut accessories fo r valves of the most popular
manufactur ers with a thread size of M30 x 1.5 m m.
• Rotate the therm ostat dial to the m aximum value
(anti-clockwise). The thermostat dial then no longer
presses against the valve spindle, making it easier to remove.
• Remove the mechanic al thermos tat head. If re -
quired, plac e the supplied su pport rin g or adapt-
er fi rst.
• Attach the radi ator thermostat to the val ve.
10.1 Suppor t ring and ada pter for Danfoss
If required, pl ace the provid ed support r ing (I) int o the fl ange before mounting the
radiator the rmostat to improve on the st ability.
The provided a dapter is required fo r installation on D anfoss RA valves. T he Danfoss
valve bodies have e longated notches ( K) around their circumference, which also ensure that the ada pter is properly seated w hen it snaps on.
During inst allation, please ensu re that the pins inside th e adapter (J) are lined
up with the notc hes (K) on the valve. Ensu re that the adapter is p roperly clipp ed
on.
Take care during installat ion that you do not trap your fi ngers betwe en the two
halves of the adapter!
I
11. Adaption run
After inse rting batt eries and moun ting on the valve an a dapting run (“Ad A”) is performed to ada pt to the valve.
• As soon as the radia tor thermostat has be en mounted to the valve, pres s the con-
trol wheel wh en “InS” is displayed.
“AdA” and the activi ty symbol (
) are displayed. N o operations c an be performed
in the meantime.
If the adaptin g run has been initiated pr ior to mounting, please pr ess the control wheel sh ortly and the motor r eserves to the “In S” position. If an err or message (F1, F2, F3) is displayed, th e motor similarly travel s back to the “InS” po sition.
12. Display content in normal mode
Switching t ime periods, operati ng mode, setpoint temperature
and weekday are dis played in normal mode.
The bars for sw itching time pe riods of the we ek program are
displayed for ever y second time inter val.
13. Operation and confi guration
After the ra diator therm ostat has been m ounted and set up, the d evice can be in -
dividually operated and confi gured. Operation and confi guration can be performed
either via BLUETOOTH
®
with the app “c alor BT” or directly on th e device.
13.1 Operati on and confi g uration via a pp
To control the device via app, please proceed as follows:
• Download the app “c alor BT” from the iOS o r Android store and insta ll the app on
your smartphone.
• Follow the instru ctions in the app.
Afterw ards, you can control and c onfi gure the radiat or thermostat via the ap p.
13.2 Operati on and confi gu ration on th e device
Operation and co nfi guration can be performed directly on the d evice. Therefo re,
please proc eed as described in the f ollowing sections.
13. 2.1 Week program (Pro)
In the week prog ram, for each weekday up to 3 heati ng phases (7 change sett ings)
can be set separ ately. The programmin g is carried out f or the selected days , whereby
temperature s ettings have to be set for th e entire period bet ween 00:00 and 23:59 h.
• Press the Mode/ Menu button for at least 3 sec onds. The display will show “ Pro”.
Confi rm by p ressing the control w heel shortly.
• “dAy” appears on t he display. You can use the control w heel to select a single d ay
of the week, all we ekdays, the weekend, or the entir e week.
• Confi rm by pres sing the control whee l shortly.
• The fi rst switching time point is disp layed (00:00). Thi s cannot be c hanged. The
heating time s are displayed as bars.
• Confi rm by pres sing the control whee l shortly.
• Set the temperatur e which is desired from 0:0 0.
• Confi rm by pres sing the control whee l shortly.
• The next switching time point is displayed. You can adjust this individually.
• Finally set the tempe rature which should preva il from the selected tim e.
• You can repeat this proc edure until all the other d esired temperature s for the time
period fro m 0:00 to 23:59 have been stored.
• If all 7 s witching time p oints have been allocated, 23:59 is displayed as the fi nal
switching po int to be confi rmed.
In auto mode, the t emperature c an be changed at any t ime using the c ontrol
wheel. The modifi ed temperature will then remain the same until the next point
at which the pr ogram changes.
13.2.2 Settin g date and time (dAt)
Date and time ca n be adjusted via the menu at any ti me.
• Press the Mode/ Menu button for at least 3 se conds.
• Select the menu it em “dAT” with the control whe el.
• Set the year, mont h, day, hour and minute with the contr ol wheel and con fi rm by
pressing th e control wheel shor tly.
13.2 .3 Swi tching between s ummer and winter t ime (dSt)
An automatic s witching between summe r and winter time can be acti vated and deactivated. Th e automatic switching is ac tivated in the factory s ettings.
• Press the Mode/ Menu button for at least 3 se conds.
• Select the menu it em “dSt” with the contr ol wheel.
• Confi rm by pres sing the control whee l shortly.
• The display will sho w “OFF” to deac tivate the fu nction or “ On” to activate t he functi on.
• Confi rm by pres sing the control whee l shortly.
13.2 .4 Open-window function (AEr)
With a rapidl y reducing temp erature, the ra diator therm ostat automati cally detect s
that a room is be ing ventilated. In o rder to save heati ng costs, the te mperature is
then reduce d for a certain peri od of time (15 minutes, set at the factor y). Whilst this
function is a ctive, the “window ope n” symbol (
) appears on th e display.
• Press the Mode/ Menu button for at least 3 se conds.
• Select t he menu it em “AEr” w ith the c ontrol wheel and con fi rm by p ressing the
control wheel shortly.
• The temperature an d time can be set with the co ntrol wheel. The functi on can be
deactivated by s electing “0” for the t ime.
13.2 .5 Setting offset temperature (tOF)
As the temper ature is measured on t he radiator, the temper ature distributi on can vary
throughout a r oom. To adjust this, a temperature of fset of up to ±3.5 °C can be set .
If a nominal tem perature of e.g. 20 °C is set but the ro om presents with only 18 °C,
an offset of -2 .0 °C needs to be set.
• Press the Mode/ Menu button for at least 3 se conds.
• Select t he menu ite m “tOF” with the control whe el and co nfi rm by pressing the
control wh eel shortly.
• Turn the control wheel f or as long as ne cessar y until the d esired temp erature app ears.
• Confi rm by pres sing the control whee l shortly.
13.2 .6 Activate/deactivate BLUETOOTH
®
(bLE)
The BLU ETOOTH
®
function of t he radiator the rmostat ca n be activated or d eacti-
vated manually.
• Press the Mode/ Menu button for at least 3 se conds.
• Select t he menu item “bLE” wit h the con trol wheel and confi r m by pressin g the
control wh eel shortly.
• The display will sho w “OFF” to deac tivate the fu nction or “ On” to activate t he functi on.
• Confi rm by pres sing the control whee l shortly.
13.2 .7 Restore factory settings (rES)
The factor y settings of the radiator th ermostat c an be restored ma nually. If you do
this, you will l ose all your settings.
• Press the Mode/ Menu button for at least 3 se conds.
• Select t he menu it em “rES” with the control whee l and con fi rm by p ressing the
control wheel shortly.
• “COnF” then app ears in the display.
• Confi rm by pres sing the control whee l shortly.
13.2 .8 Boost function
If, for example, you a rrive home ea rlier than usu al, the boost fun ction will help you
to heat the room u p quickly. When activatin g the boost functio n, the heating valve is
immediately o pened to 80 % for 5 minutes. T he heating of a room takes lo nger than
5 minutes, but th e heat given off by the radiato r can be felt immediately.
• Press the contro l wheel shortly to act ivate the boost button.
• The remaining tim e for the fun ction wil l be counted d own in sec onds (“b3 00” to “ b000 ”).
• After these 5 min utes have elapsed, the actu ator changes to the mode w hich was
previously active (auto/manu) with the previously set temperature.
• The function c an be deactivate d prematurely a t any time by pressin g the control
wheel again.
The boost fun ction will not have an immedi ate effect if the radiator i s covered
or conceal ed (e.g. by a sofa). The open-window fun ction is deactivated whi le
the boost fun ction is active.
13.2 .9 Set ting the holiday f unction
If yo u want to mai ntain a fi xe d temp eratu re for a c erta in per iod, e. g. duri ng your holi-
days or a part y, the holiday fun ction can be used.
• Brie fl y pre ss the Mo de/M enu but ton repe atedl y, until t he suitc ase sym bol (
) ap-
pears in the display.
• Change the time unt il which the tem perature shal l remain with the c ontrol wheel
and confi rm by pressing t he control wheel shor tly.
• Then set the date and c onfi rm by pressing th e control wheel shor tly.
• Set the temperatur e and confi rm by pressi ng the control wheel sh ortly.
The set temperature will remain until the set end time. Afterwards, the radiator thermostat will sw itch back to auto mode.
13. 2.10 Comfort and reduction temperature
Via the comf ort and redu ction temper ature button (
) you can chang e between
these two tem peratures. The factor y setting for the comfor t temperature is 21.0 °C
and the reduc tion temperature 17.0 °C.
• Press and hold the comfort/reduction temperature button (
) for at least 3 sec onds.
• The sun symbol (
) and the curre ntly stored co mfort temp erature appea r in the
display.
• Change the temperature with the contr ol wheel and confi rm by pressing the con -
trol wheel shortly.
• The moon symbol (
) and the curre ntly stored red uction tempe rature appea r in
the display.
• Change the temperature with the contr ol wheel and confi rm by pressing the con -
trol wheel shortly.
Even in auto mode, th e temperature can be cha nged at any time using the bu tton. It
will then rema in the same until the next po int at which the program ch anges.
13. 2.11 Activate heating pause (batter y saving)
Battery l ife can be prolong ed by switching the he ating off in summer. To achieve thi s,
the valve is open ed fully. The calcifi c ation protection con tinues to run.
In order to save on ba ttery life, y ou can also deac tivate the BLU ETOOTH®
function (see s ec. “13.2.6 Activate/deac tivate Bluetooth® (bLE) ”).
To activate the heatin g pause, proceed as follow s:
• Turn the control whee l in manu mode (manu) to the right un til “On” appea rs in
the display.
• To end it, exit the manu mode (manu) or turn th e selector dial to the lef t.
13. 2.12 Set f rost protection m ode
If a room is not to be h eated, the valve c an be closed. Th e valve is only open ed if
there is a risk o f frost. The calcifi cation protection co ntinues to run.
• Turn the control whee l in manu mode (manu) to the left unt il “OFF” appe ars in
the display.
• To end it, exit the manu mode (manu) or turn th e control wheel to the rig ht.
13.2 .13 Child safeguard/operating lock
The operati on of the device can be locke d.
• To activate/deactivate th e operating lo ck, press the M ode/Menu a nd
button
at the same time .
• After it has been su ccessfully activat ed, “LOC” appears in the d isplay.
• To deactivate the operat ing lock, press both but tons again.
14. Troubleshooting and maintenance
Error cod e on the
display
Problem Solution
Battery sy mbol (
)
Battery o utput too low Replace batter ies
F1 Valve drive sluggish
Check installation,
check the heating valve
F2 Actuating range too wide
Please check
mounting of the radiator thermostat
F3 Adjustment range too small Check the heating valve
The radiator t hermostat perf orms a routine desc aling run once a week on S at-
urday at 12:0 0 to protect agai nst calcifi ca tion of the valve. During this, “ CAL”
appears in the display.
15. Technical data
Device shor t description: CC- RT-BLE-SB
Supply volta ge: 2x 1.5 V L R6/mignon/AA
Current con sumption: 100 mA max.
Battery l ife: 2 years (ty p.)
Degree of prot ection: IP20
Degree of pol lution: 2
Ambient temp erature: 5 to 35 °C
Surface t emperature: 90 °C (at the radiator)
Display: LCD
Connecti on: M30 x 1.5 mm
Method of operation: Type 1
Linear travel: 4.3 mm
Dimension s (W x H x D): 55 x 60 x 102 m m
Weight: 162 g (incl. batte ries)
Radio freque ncy: 2.402 GHz - 2.48 0 GHz
Open area RF ra nge: 10 m (typ.)
Subject to technical changes.
The BLUETOOTH® word mark an d logos are regi stered tradem arks owned by Blu etooth SIG, Inc .
and any use of suc h marks by eQ-3 AG is un der license. Othe r trademarks and t rade names are
those of their respective owners.
K
J
Bevollmächtigter des Herstellers:
Manufacturer’s authorised representative:
eQ-3 AG
Maiburger Straße 29
26789 Leer / GERMANY
www.eQ-3.de
www.swissbrands.com
SWISSBRANDS GmbH
Romain-Rolland-Str. 14-24
13089 Berlin / Germany
Technische Änderungen vorbehalten.
Abbildungen ähnlich.
Serviceadresse:
Swiss CC-RT-BLE_UM_GE_eQ-3_220515.indd 2 29.05.2015 10:55:27
 Loading...