

Swimline 51050 User Manual Page 1
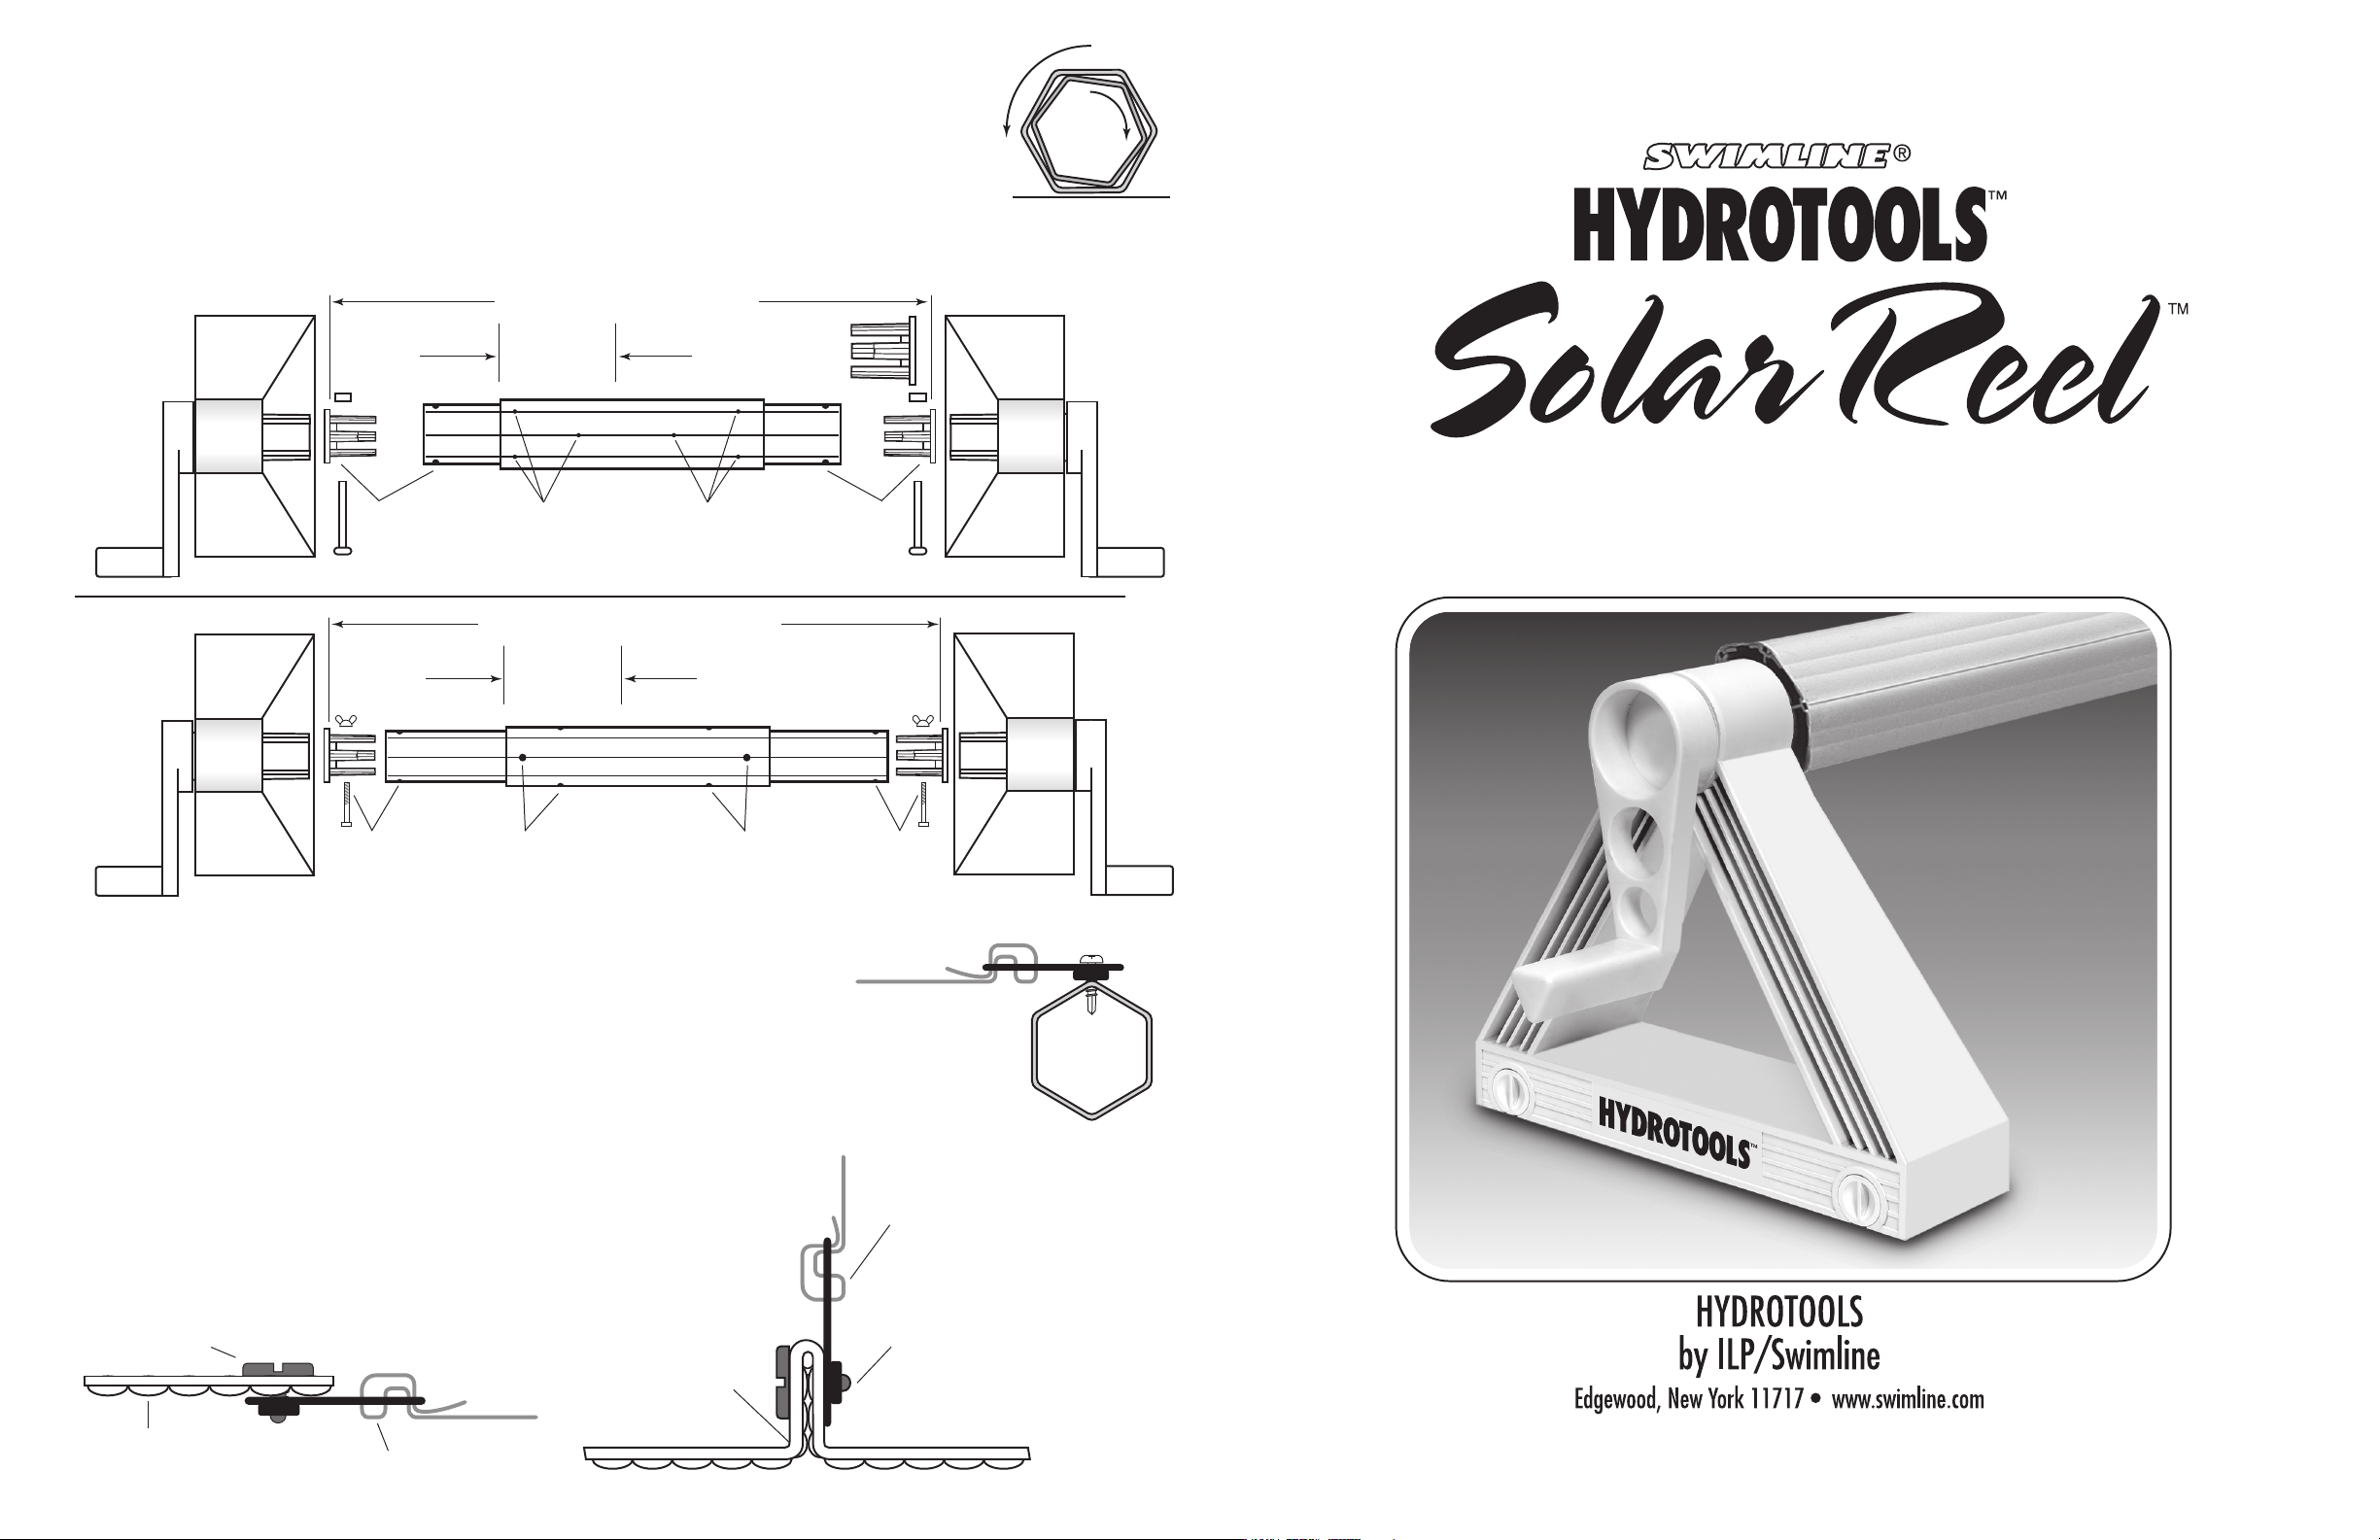
3 INCH RANGE TUBE KIT ASSEMBLY:
(Cont.)
• Loosely assemble extruded tubes together. Slide excess width into adjoining tubes, dividing it up as equally as possible.
Note: You must have a minimum of 9” of overlap in each tube!
• Measure the width across the pool from plug surface to plug surface & adjust length of the tube assembly to fit the span.
• With tubes on flat surface, lock the tubes together by rotating each adjoining tube in the opposite direction. (See Figure C)
• Secure each tube with just 1 self drilling screw in each adjoining tube.
• Attach the tube assembly into the Crank and Tubing Plugs and check for fit. Assemble Tube assembly together with
Crank Handles and Tube Plugs by lining up hole in the end of each tube fitted into Crank Handle and secure with
metal Axle Bolt and nut provided.
• When all is OK, drill and screw the remaining screws at each end of the overlapped poles. You should have 6 screws on
each tube end where there is a connection.
3 INCH RANGE
TUBE KIT
ASSEMBLY:
Fasten
With
Axle
Bolt
Measure Plug Surface To Plug Surface
Minimum
9"
Overlap
Fasten with
6 screws at each join
in pre-drilled holes
Fasten with
6 screws at each join
in pre-drilled holes
Use Large Plug
For Pole Kit 5116
Only!
Fasten
With
Axle
Bolt
Item #51050 Instructions
Fig. C
IMPORTANT!
With Tubes On Flat Surface
Twist Tubing To
Remove Excess Play Prior
To Screwing Together.
Resin Reel System
For In Ground Solar Pool Covers
4 INCH RANGE
Measure Plug Surface To Plug Surface
TUBE KIT
ASSEMBLY:
Fasten
With
SS Axel
Bolt
2 Bolts at each join
(pre-drilled in outer tube)
Minimum
Overlap
Fasten with
9"
Fasten with
2 Bolts at each join
(pre-drilled in outer tube)
Fasten
With
SS Axel
Bolt
4&5 INCH RANGE TUBE KIT ASSEMBLY:
• Follow instructions as above, then
With tubes on flat surface,
lock the tubes together by rotating
each adjoining tube in the opposite direction. (See Figure C)
• When all is OK, drill through holes in large outer tubes using pre-drilled holes as a template.
Drill from each side with Drill Bit supplied.
• Fasten with 2 Bolts & Nuts at each join. Bolts are at right angles to each other
9. Attach Straps to Tubes:
Come in 6 inches from each tube end and attach a strap plate to the aluminum tube assembly. Use the self drilling screws
on the drill line to attach the plate. Look at the holes that were pre-drilled at the factory and use the same drill line. There
are 6 lines on each tube. Take the remaining strap plates and connect them evenly along the length
of the tube assembly. Attach Straps to strap plate. (See Figure D Above)
10. Attach Solar Blanket to Straps:
If Reel is to be placed at the end of the pool, attach cover to strap plate with plastic screw
Strap & Bracket
as shown in Figure E Below Left. If Reel is to be placed in offset position, then attach cover
to strap plate forming a fold to act like a hinge and the plastic screw will go through two layers
of the solar blanket as shown in Figure F Below Right.
Bubbles should face down.
Plastic Screw
Plastic Screw
Fig. D
Thread
Strap
as Shown
Solar Blanket
Solar Blanket Folded
Strap & Bracket
Fig. E Fig. F
 Loading...