

Page 1
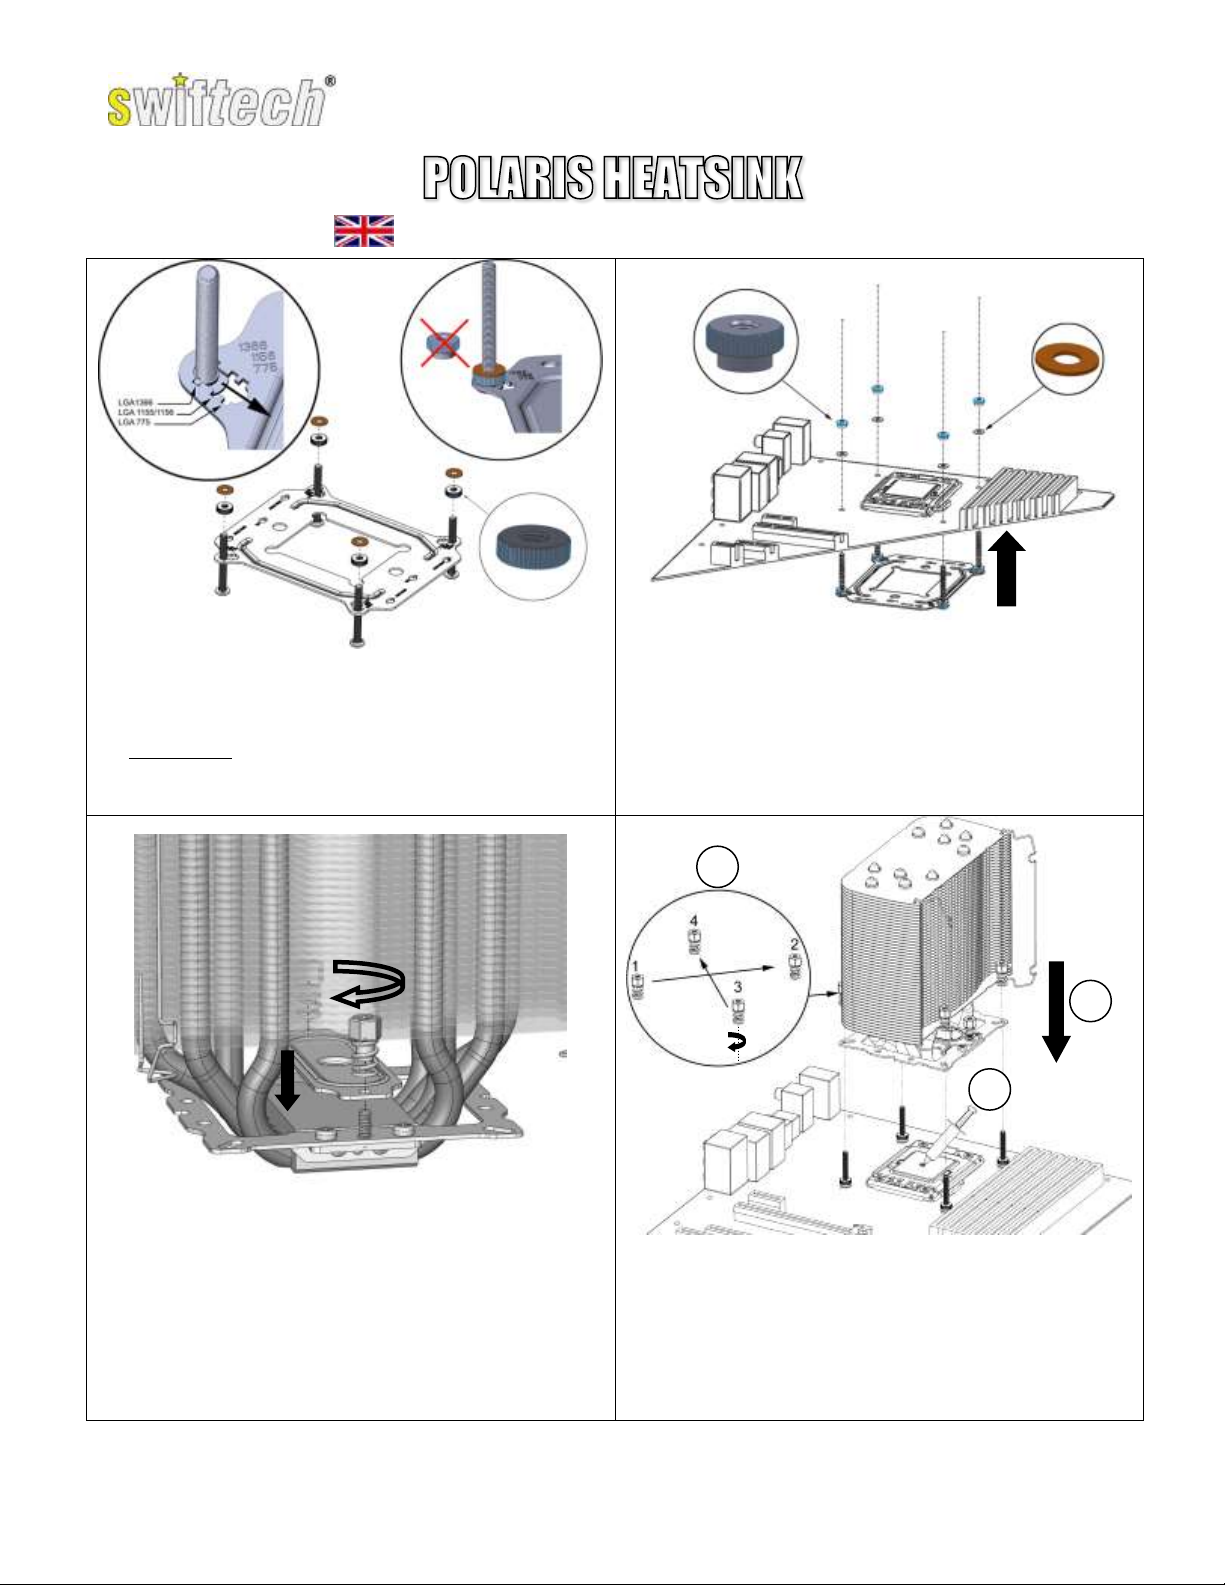
1. Back-plate assembly
Insert the four threaded posts in the slotted holes marked
1366/1156/775, and align them at the location corresponding to your
motherboard socket. Fasten the posts to the back-plate using the
provided knurled-nuts, and then place an insulating washer over each
nut. Important note: be careful not to use the provided thumb-nuts, as
they are thicker and would offset the black-plate too far from the
motherboard.
2. Back-plate installation to the motherboard
Mate the back-plate to the back of the motherboard, insert the
insulating washers onto each post, and then fasten the back-plate
using the provided thumb-nuts.
3. Heatsink assembly
Fasten the cross-bar to the heatsink with its center niple facing down
by using two of the provided spring loaded screws.
4. Heatsink installation to the motherboard
a. Clean the CPU with a degreaser (preferably formulated for
electronics) then apply a small amount of the supplied
grease to the center of the CPU.
b. Orient the heatsink so that the hot air generated by the fan
will blow in the direction of a chassis exhaust fan and then,
mate the heatsink to the CPU.
c. Progressively and alternatively (in a cross pattern) fasten
four spring loaded screws until they bottom out.
INSTALLATION GUIDE FOR INTEL® PROCESSORS
Copyright Swiftech 2010 – All rights reserved – Last revision date: 11-29-10 - Rouchon Industries, Inc., dba Swiftech® –151 West Victoria Street, Long Beach, CA
90805 – Tel. 310-763-0336 - Toll free (US) 888-857-9438 – Fax 310-763-7095 - E Mail: help@swiftech.com – URL: http://www.swiftech.com - Information subject
to change without notice
Page 2
Rated voltage
12V
Rated Speed
750 ~ 2500 RPM +/- 250 RPM
Rated current
0.03 ~ 0.32 +/- 0.02A
Airflow
26.56 ~ 83.32 CFM
Start-up Voltage
7V
Static Pressure
1.74 ~ 4.85 mm-H20
Rated Power
0.36 ~ 3.84W
Noise Level
≤13.2 ~ 41.5dBA
Operating Voltage Range
10.2 ~ 13.8V
Bearing system
Hydraumatic
Dimensions
120x120x25mm
Function
PWM speed control
Weight
130.8 g
Connector
4-pin
While all efforts have been made to provide the most comprehensive tutorial possible, Swiftech® assumes no liability expressed or implied for
any damage(s) occurring to your components as a result of using Swiftech® cooling products, either due to mistake or omission on our part in
the above instructions, or due to failure or defect in the Swiftech® cooling products. In addition, Swiftech™ assumes no liability, expressed or
implied, for the use of this product, and more specifically for any, and all damages caused by the use of this product to any other device in a
personal computer, whether due to product failure, leak, and electrical short, and or electro-magnetic emissions.
Our products are guaranteed for 12 months from the date of delivery to the final user against defects in materials or workmanship. During this
period, they will be repaired or have parts replaced provided that: (I) the product is returned to the agent from which it was purchased; (II) the
product has been purchased by the end user and not used for hire purposes; (III) the product has not been misused, handled carelessly, or
other than in accordance with any instructions provided with respect to its use. This guarantee does not confer rights other than those
expressly set out above and does not cover any claims for consequential loss or damage. This guarantee is offered as an extra benefit and
does not affect your statutory rights as a consumer.
5. Fan installation to the heatsink
Attach the fan to the heatsink using the provided clips, making sure that
the fan blows towards the heatsink: the fan label should be facing
against the heatsink fins, and will no longer be visible once the fan is
installed.
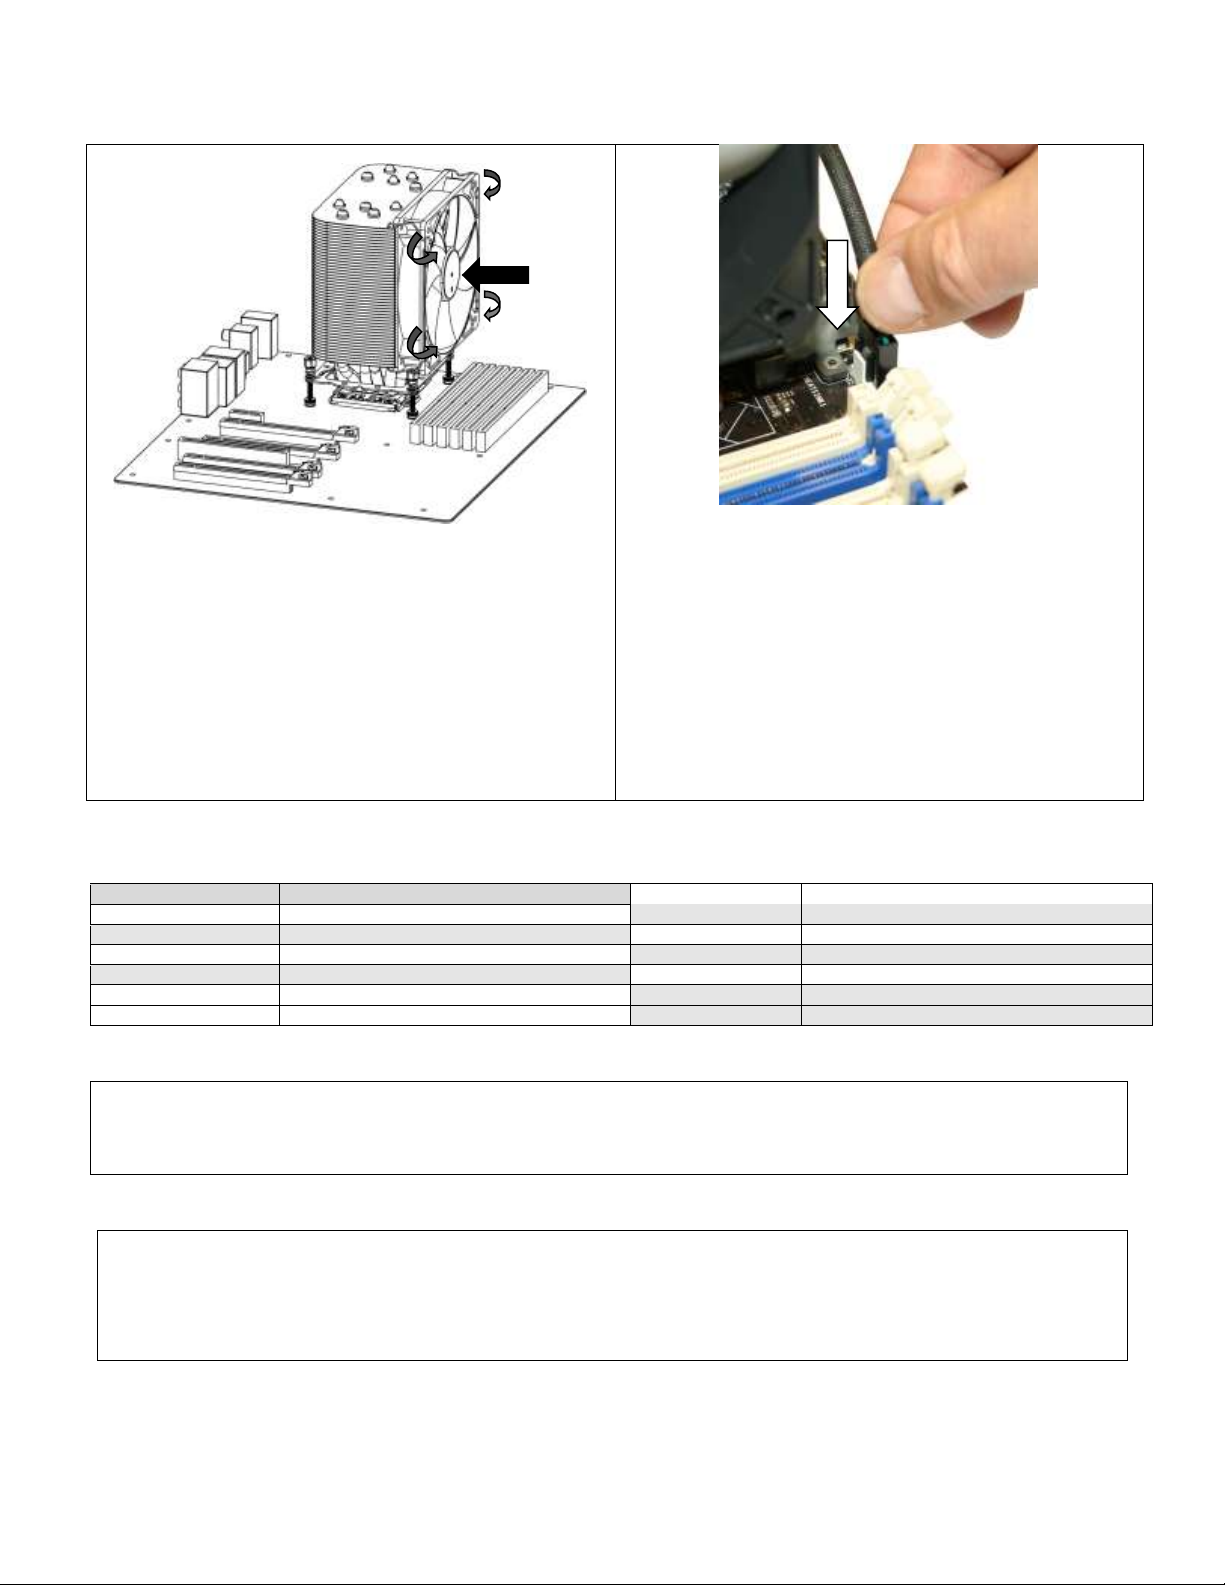
6. Electrical connection
In order for the fan speed to be controlled by the motherboard PWM
controller and to reach its full speed adjustment range which is 750 to
2500 RPM +/- 250 RPM, the fan’s 4-pin connector must be plugged
into the CPU fan 4-pin header of the motherboard. The header is
typically marked “CPU_Fan“, and is always located at close proximity
of the CPU socket.
If the fan’s 4-pin connector is plugged into a motherboard 3-pin header,
the fan will operate at full speed and lose its variable speed
functionality. The fan can also be connected to a fan controller;
however its speed adjustment range will be limited from 7 to 12v, i.e.
1500 RPM to 2500 RPM +/- 250 RPM. The fan cannot start below 7
volts.
“CPU_Fan”
Fan specifications
DISCLAIMER
WARRANTY
 Loading...