

Page 1
Parts list
Parts QTY PARTS QTY
MCW6000 or 6002-P™ stepped waterblock
This product is intended for expert users. Please consult with a qualified technician for installation. Improper installation may
result in damage to your components. Swiftech assumes no liability whatsoever, expressed or implied, for the use of these
products, nor their installation. The following instructions are subject to change without notice. Please visit our web site at
www.swiftnets.com
Worm-drive clamps 2 Céramique™ Thermal compound 1
for updates.
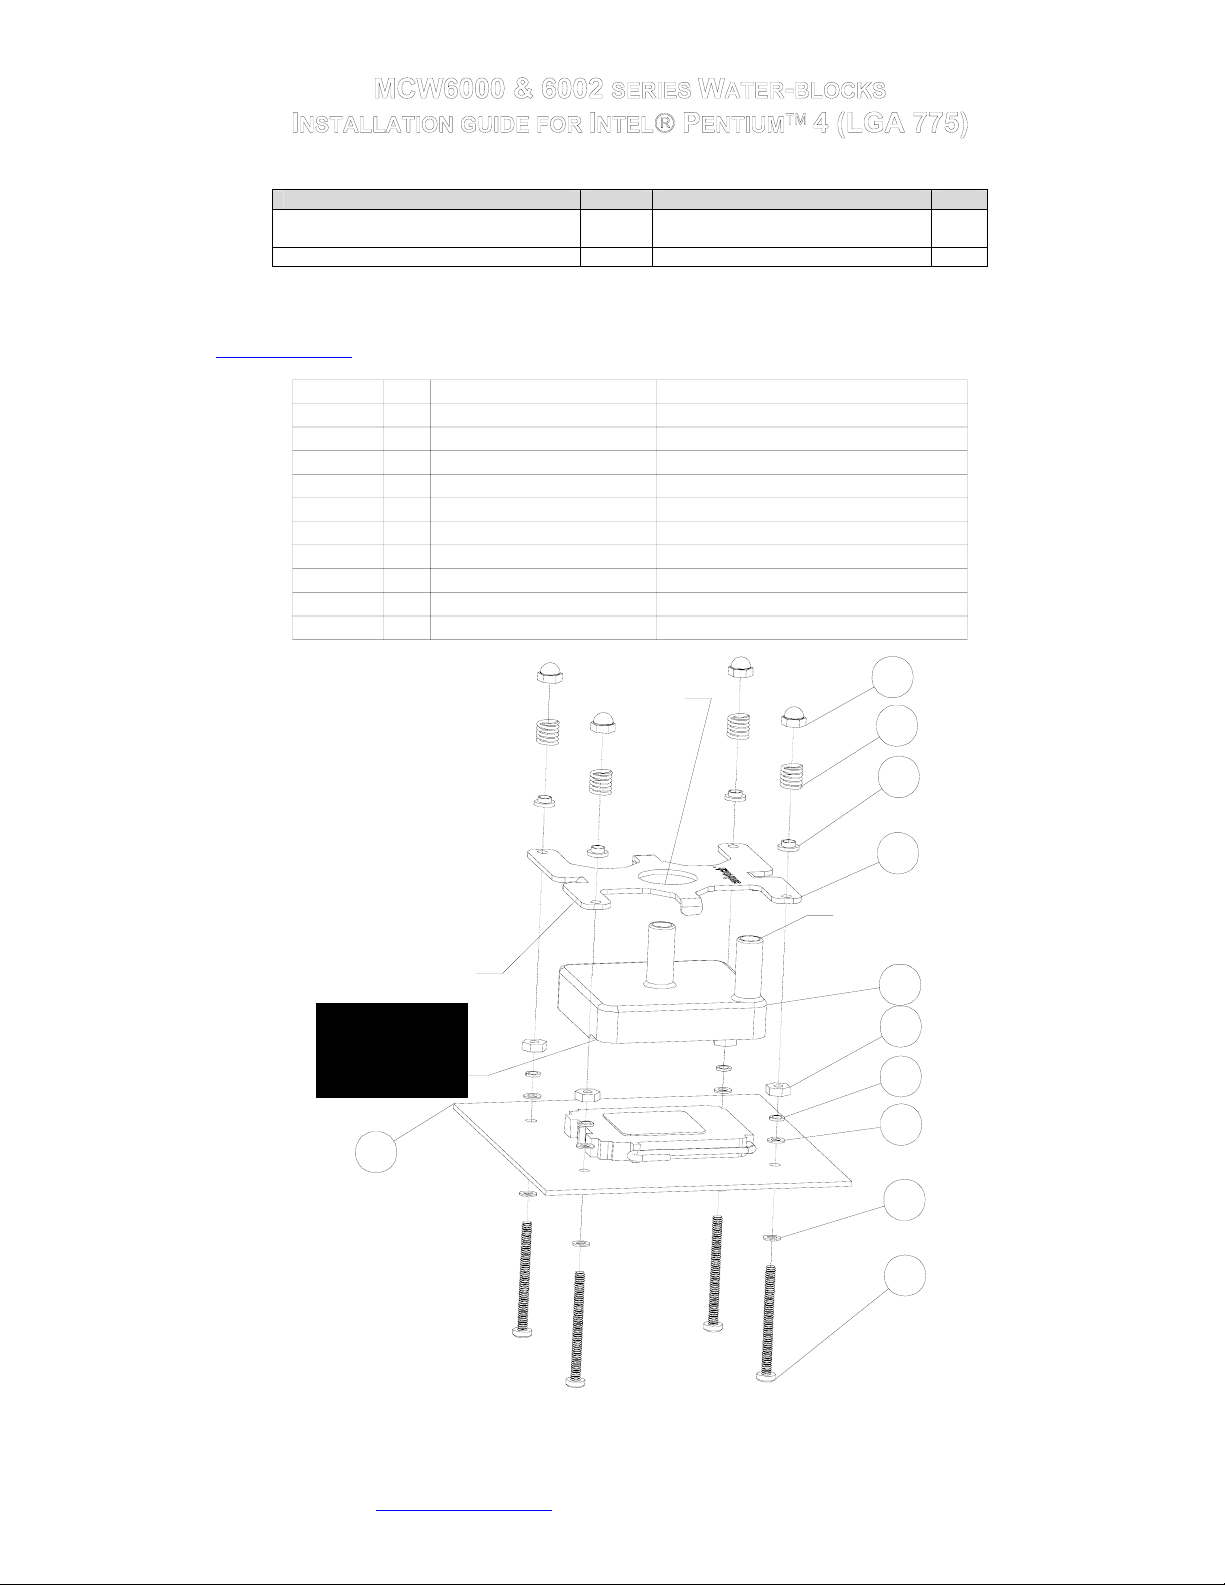
ITEM NO.
QTY.
PART N O.
1 1 socket 775
2 8 FW140X250X0215FB
1 S775 hold-down plate & hardware 1
DESCRIPTION
LGA 775 motherboard
Black fiber washer
3 1 S775-bracket6
4 4 6-32-Acorn-nut
5 1 MCW6000-A MCW6000 "Stepped base"
6 4 6-32X1.5-8 6-32 x 1 5/8" philips screw
7 4 SPRING6 70927compressed-to-0337
8 4 6-32-nut 6-32 nut
9 4 12SWS0444 Nylon should washer
10 4 Lock-washer #6
Hold-down plate
"Short arm" side
over socket lever
CRITICAL:
Water-block
"step side" over
socket lever
1
INLET
SPIGOT
4
7
9
3
DISCHARGE
SPIGOT
5
8
10
2
2
Figure 1
Copyright Swiftech 2004 – All rights reserved – Last revision date: 10-29-04
Rouchon Industries, Inc., dba Swiftech – 1703 E. 28
Swiftech@swiftnets.com – URL: http://www.swiftnets.com - Information subject to change without notice
th
Street, Signal Hill, CA 90755 – Tel. 562-595-8009 – Fax 562-595-8769 - E Mail:
6
Page 2
1. Preparing your Motherboard
Installation of the retention posts requires removal of the motherboard from the chassis.
Remove the existing heat sink
Carefully clean the CPU.
2. Retention Posts installation
Install all the washers in the precise sequence shown in figure 1. The sequence is: Philips screw,
black fiber-washer, motherboard, black fiber-washer, lock-washer, and hex-nut. Using fiberwashers on either side of the motherboard is critical to prevent shorting of the motherboard. Once
the posts are securely fastened to the motherboard, you can re-install it inside the chassis.
Completed installation is also shown in figure 2.
3. Purging the water-block
The geometry and keep-out areas surrounding socket LGA 775 require that the MCW6000 & 6002
water-blocks be installed with the discharge spigot facing downwards. In a vertical orientation, this
prevents the water-block from purging appropriately. There are two possible strategies to purge
the water-block: :
a. You can fill-up the circuit and purge the water-block of any air trapped inside BEFORE
fastening it to the motherboard, as shown in figure 3.
TIP! If you are using a 12 volts pump feeding from the computer power-supply, do not start-
up the computer while the cooler is not installed on the CPU. Disconnect the power
supply from the motherboard, and use a power supply tester to start it up independently. This
will allow you to run the pump by itself, and fill-up the circuit.
b. If you do not have a power-supply tester, you can install the water-block onto the
motherboard, but you will need to fill-up the circuit with the computer laying flat on a table, as
the water-block purges correctly when lying horizontally.
4. Connecting the water-block(s) to the cooling circuit:
Carefully identify the direction of the flow in your circuit. For the MCW6000 to operate
properly, the spigot located at the center of the water-block MUST BE USED AS THE INLET
(see figure 1 “INLET” spigot).
Attaching the tubes: the MCW6000™ and 6002 series ship with worm-drive type hose
clamps. Secure the tubes as shown in the picture to the right, and tighten the clamps firmly
Type of Coolant: being entirely made of copper, the MCW6000™ series may be used with
pure water, and do not necessitate the use of anti-corrosion agents. The use of an algaecide
is nonetheless recommended in any liquid cooling system, and our HydrX™ additive also
performs such function.
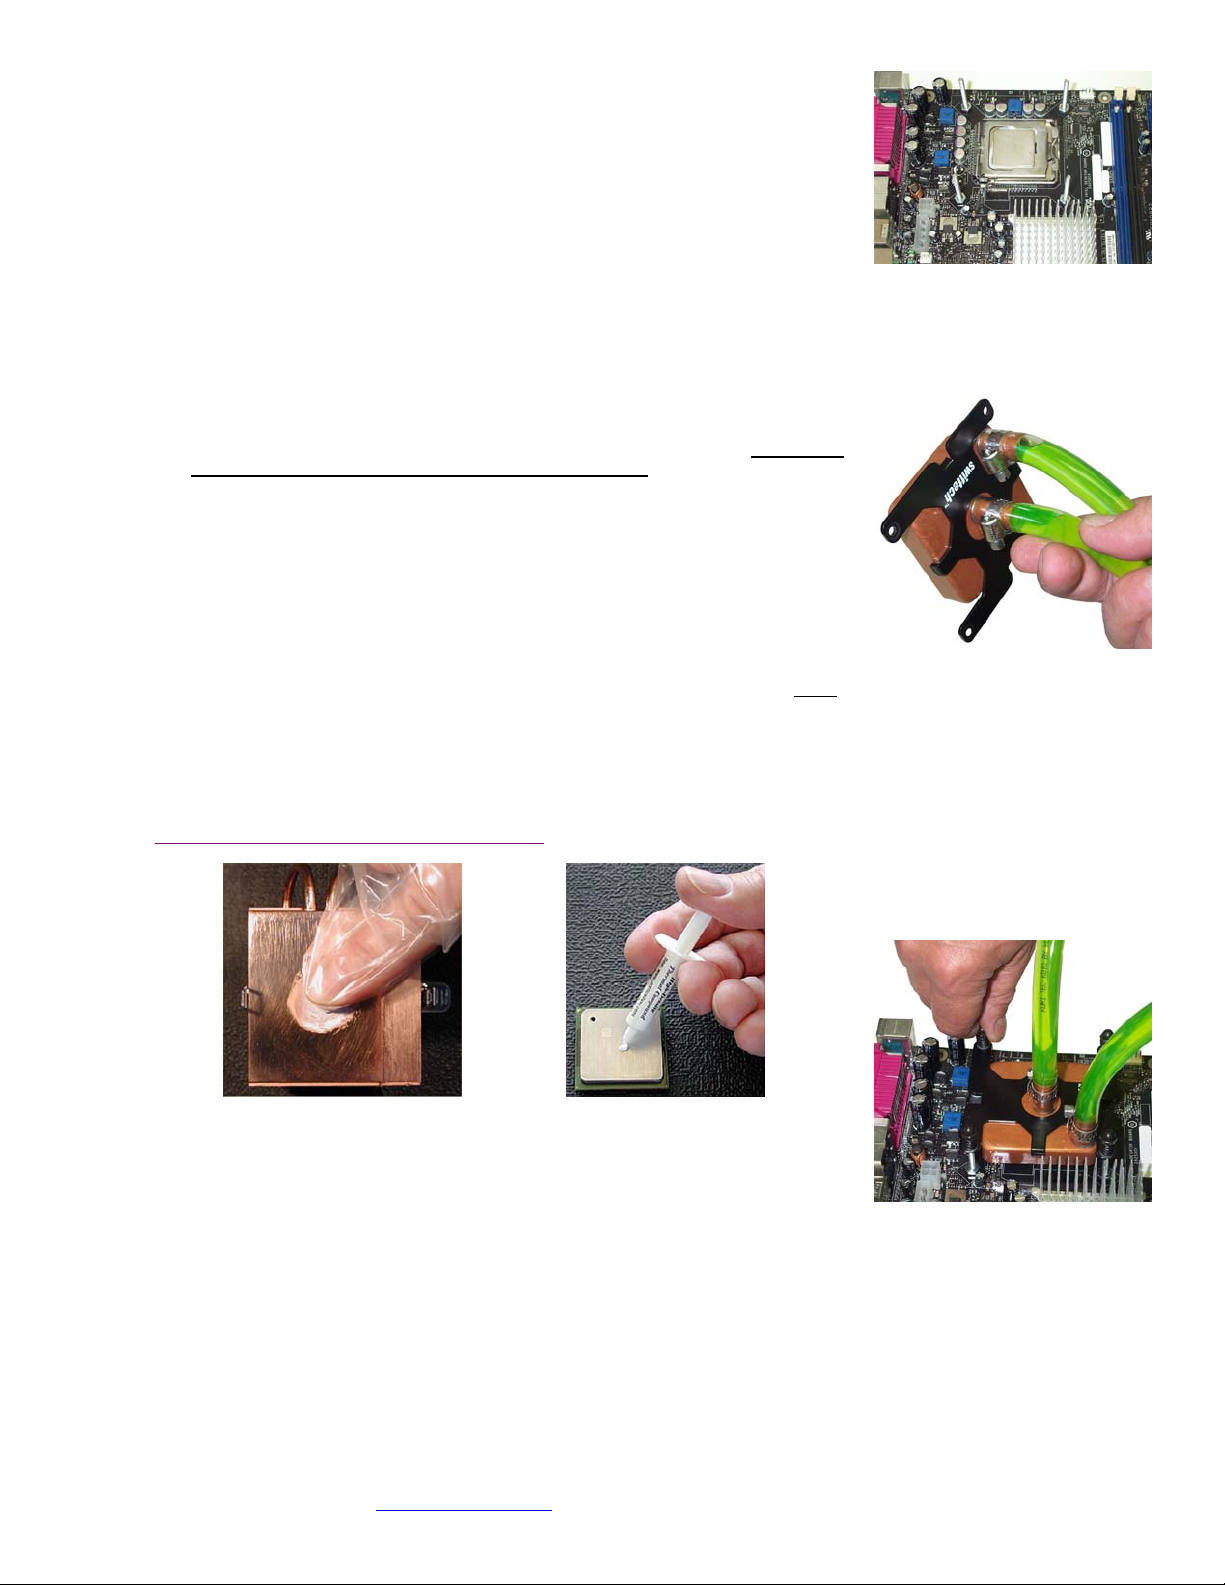
5. Applying thermal compound to the CPU
Lightly coat the CPU with the provided Céramique™ thermal compound. Follow this link
http://www.arcticsilver.com/ceramique_instructions.htm
for detailed instructions.
Figure 2
Install retention posts
Figure 3
Purge the air from the water-block,
.
by pointing the discharge spigot
upwards
Rub some compound in base of water-block
first, and then clean off with lint-free cloth.
Apply small amount of compound on
the CPU heat spreader
6. Fasten water-block to motherboard
Place the water-block on the CPU with the step side above the socket lever. The hold-down plate
is asymmetric in order to locate the water-block precisely inside of the “keep out” areas. This
guarantees full compatibility of the water-block with all LGA 775 motherboards. Insert nylon
shoulder washer and spring on each post, and fasten the acorn nuts in a cross pattern.
Installation is complete!
IMPORTANT DISCLOSURES
While all efforts have been made to provide the most comprehensive tutorial possible, Swiftech assumes no liability expressed or implied for any damage(s) occurring to your components as a result of
using Swiftech cooling products, either due to mistake or omission on our part in the above instructions, or due to failure or defect in the Swiftech cooling products.
WARRANTY
Our products are guaranteed for 12 months from the date of delivery to the final user against defects in materials or workmanship. During this period, they will be repaired or have parts replaced
provided that: (I) the product is returned to the agent from which it was purchased; (II) the product has been purchased by the end user and not used for hire purposes; (III) the product has not been
misused, handled carelessly, or other than in accordance with any instructions provided with respect to its use. This guarantee does not confer rights other than those expressly set out above and does
not cover any claims for consequential loss or damage. This guarantee is offered as an extra benefit and does not affect your statutory rights as a consumer.
Install water-block, hold-down plate,
and fasten the spring-nut assemblies’
in a cross pattern (finger tight).
Figure 4
Copyright Swiftech 2004 – All rights reserved – Last revision date: 10-29-04
Rouchon Industries, Inc., dba Swiftech – 1703 E. 28
th
Street, Signal Hill, CA 90755 – Tel. 562-595-8009 – Fax 562-595-8769 - E Mail:
Swiftech@swiftnets.com – URL: http://www.swiftnets.com - Information subject to change without notice
 Loading...