

Page 1
SLI/CrossFire Bridge series
INSTALLATION GUIDE
Thread Size and class
Thread length
O-ring style
Fitting Style
¼” BSPP, G1/4”
Up to 5mm
Built-in (“Eurostyle”)
All barb fittings, All Compression up to ½” tube OD
For ½” ID (5/8” or 3/4” OD) tubing
For 3/8” ID (1/2” OD) tubing
1/4" BSPP x 1/2" barb Eurostyle Long chrome pltd
brass fitting (pair)
Use with
Worm-drive
clamp
(set of 4)
1/4" BSPP x 3/8" barb Eurostyle short
chrome pltd brass SLI fittings (pair)
Use with clamp for 3/8" tubing
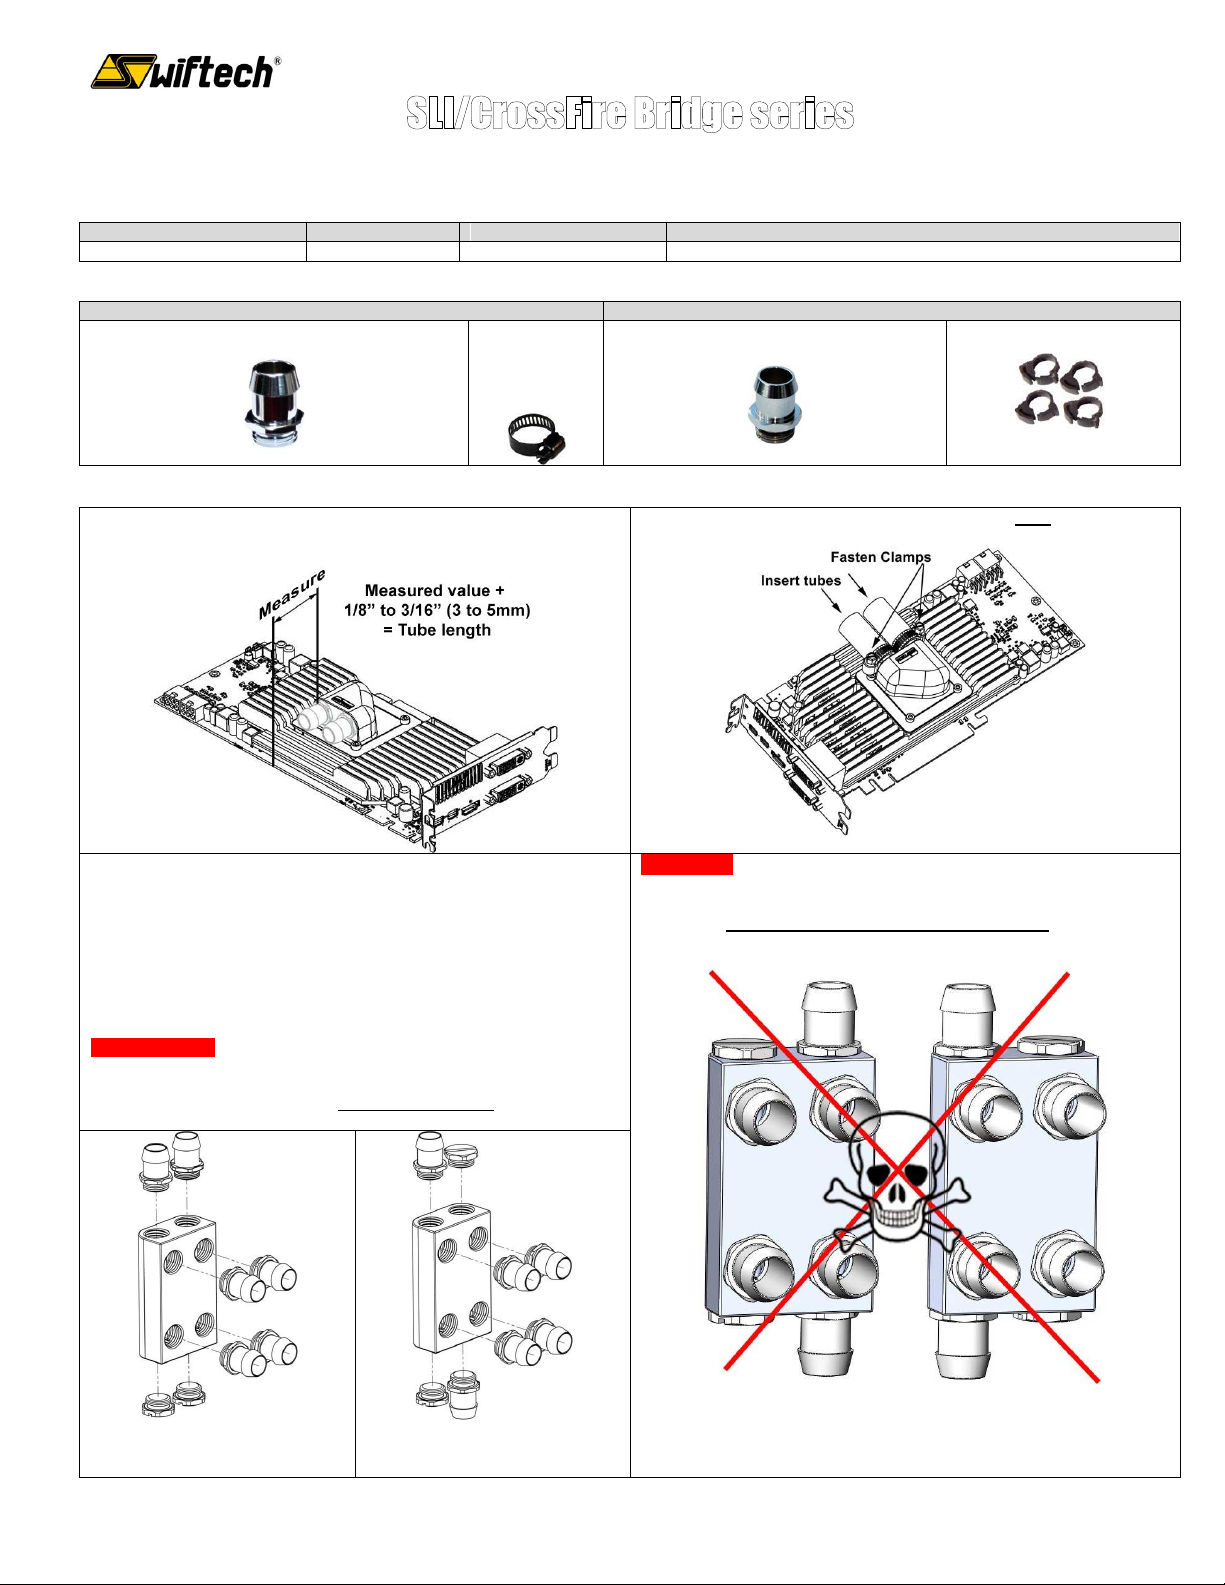
Step 1: Cut the tubing to length – Make sure all tubes are of equal
length!
Step 2: Insert the tubes and fasten the clamps to each waterblock
Step 3: Install the fittings to the bridge
Installation of the upper and lower fittings will depend on how your loop is
routed. Two typical examples are shown below.
Fasten the fittings until they completely mate with the bridge: the metal
flange of the fitting must sit flat against the surface of the bridge, thus
compressing the O-ring, and then tighten them using a 5/8” (15mm)
wrench or socket as described below.
CRITICAL READ: The tightening force (torque) must be firm but not
excessive: not enough torque and the fitting will get loose and leak
over time, and too much torque will permanently damage the plastic
thread. Ideally, you want to add one quarter of a turn after the fitting
has reached its mating surface.
WARNING:
NEVER install the upper and lower barb fittings in the same vertical
alignment, or there will be no flow to the water-blocks!
Example 1: both inlet and outlet go
ports go upwards
Example 2: one port goes upwards,
and one port goes downwards.
Compatible fittings general specifications
Compatible Swiftech fittings & clamps
Copyright Swiftech 2011 – All rights reserved – Last revision date: 9-9-11 – Rouchon Industries, Inc., dba Swiftech® –151 West Victoria St., Long Beach, CA 90805 – Tel.
(310) 763-0336 - Toll free (US) 888-857-9438 – Fax (310) 763-7095 - E Mail: help@swiftech.com – URL: www.swiftech.com - Information subject to change without notice
Page 2
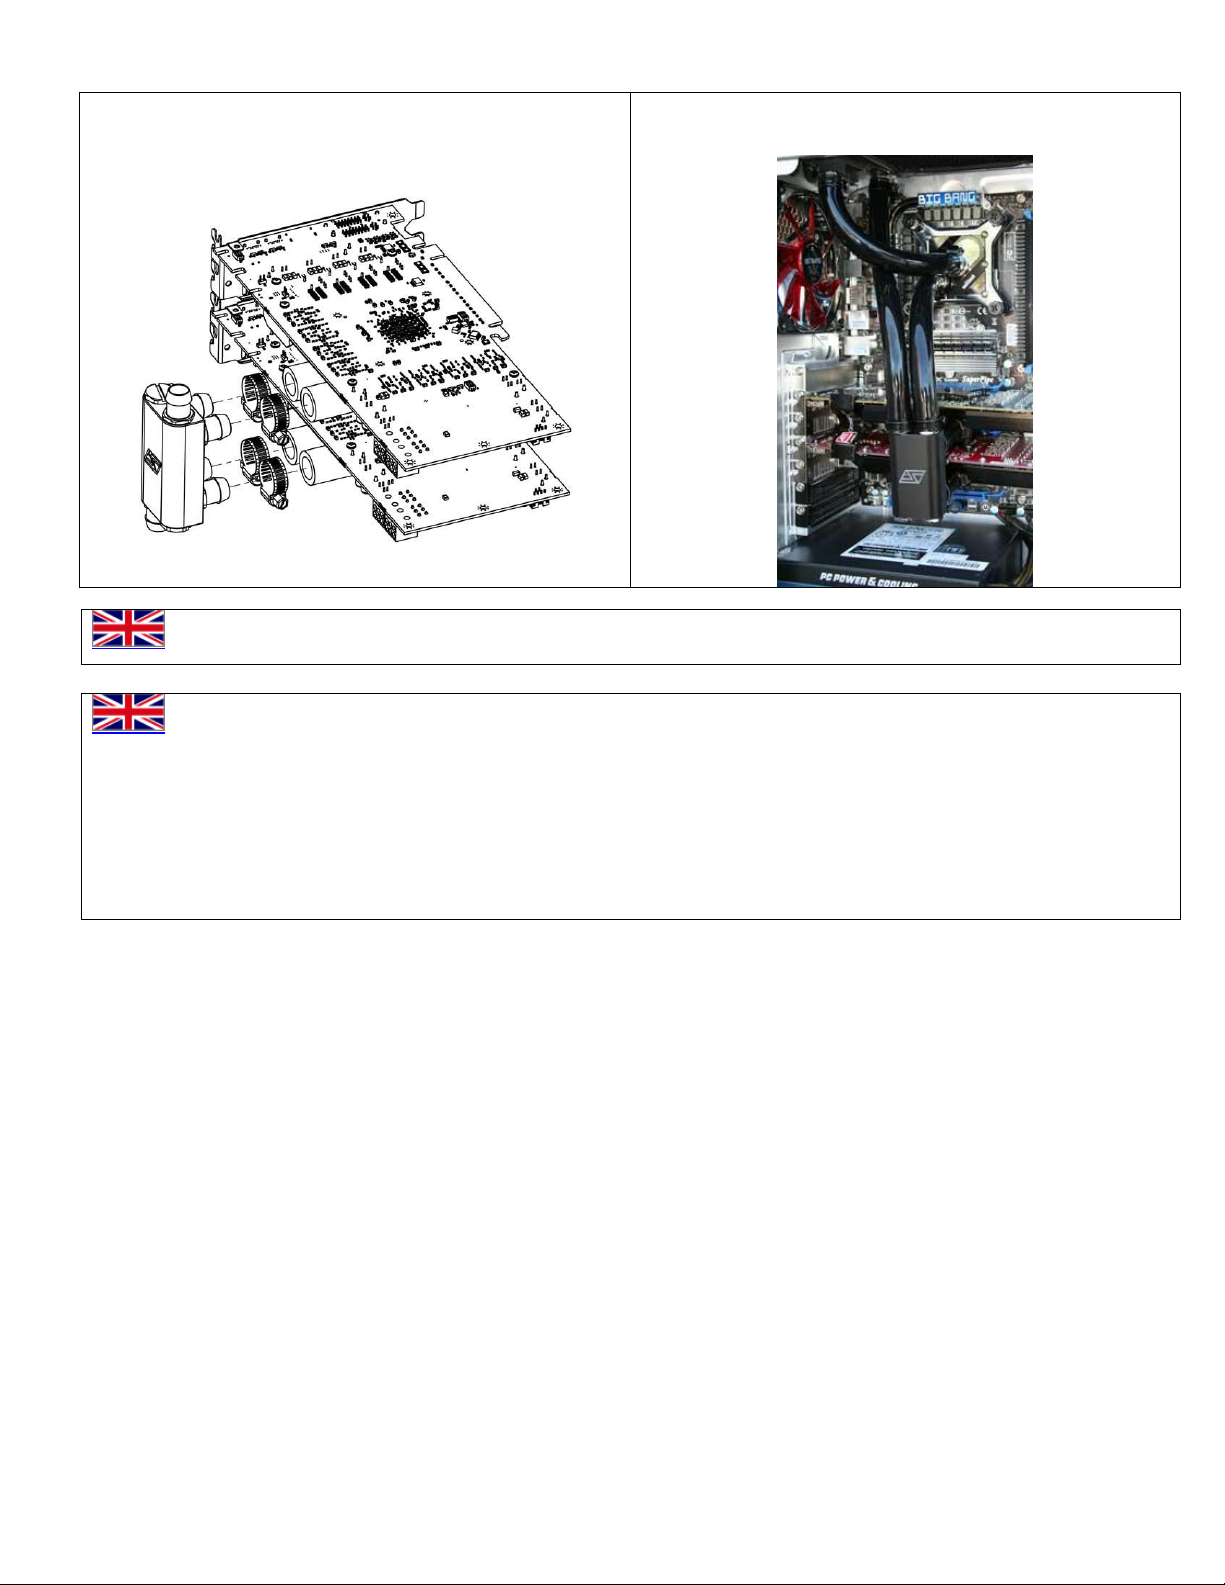
Step 4: Attach the bridge to each graphics card
Slip the loose clamps over the tubes, and then push each
graphics card into the bridge fittings. Finally, fasten the clamps.
Step 5: Install the cards back into your motherboard, and
complete the connections to the rest of your loop.
ALWAYS TEST YOUR BLOCKS FOR LEAKS PRIOR TO POWERING UP YOUR SYSTEM!
DISCLAIMER: While all efforts have been made to provide the most comprehensive tutorial possible, Swiftech® assumes no liability
expressed or implied for any damage(s) occurring to your components as a result of using Swiftech® cooling products, either due to mistake or
omission on our part in the above instructions, or due to failure or defect in the Swiftech® cooling products. In addition, Swiftech™ assumes no liability,
expressed or implied, for the use of this product, and more specifically for any, and all damages caused by the use of this product to any other device in
a personal computer, whether due to product failure, leak, and electrical short, and or electro-magnetic emissions. WARRANTY: Our products are
guaranteed for 12 months from the date of delivery to the final user against defects in materials or workmanship. During this period, they will be repaired
or have parts replaced provided that: (I) the product is returned to the agent from which it was purchased; (II) the product has been purchased by the
end user and not used for hire purposes; (III) the product has not been misused, handled carelessly, or other than in accordance with any instructions
provided with respect to its use. This guarantee does not confer rights other than those expressly set out above and does not cover any claims for
consequential loss or damage. This guarantee is offered as an extra benefit and does not affect your statutory rights as a consumer.
 Loading...