

Page 1
English version
4
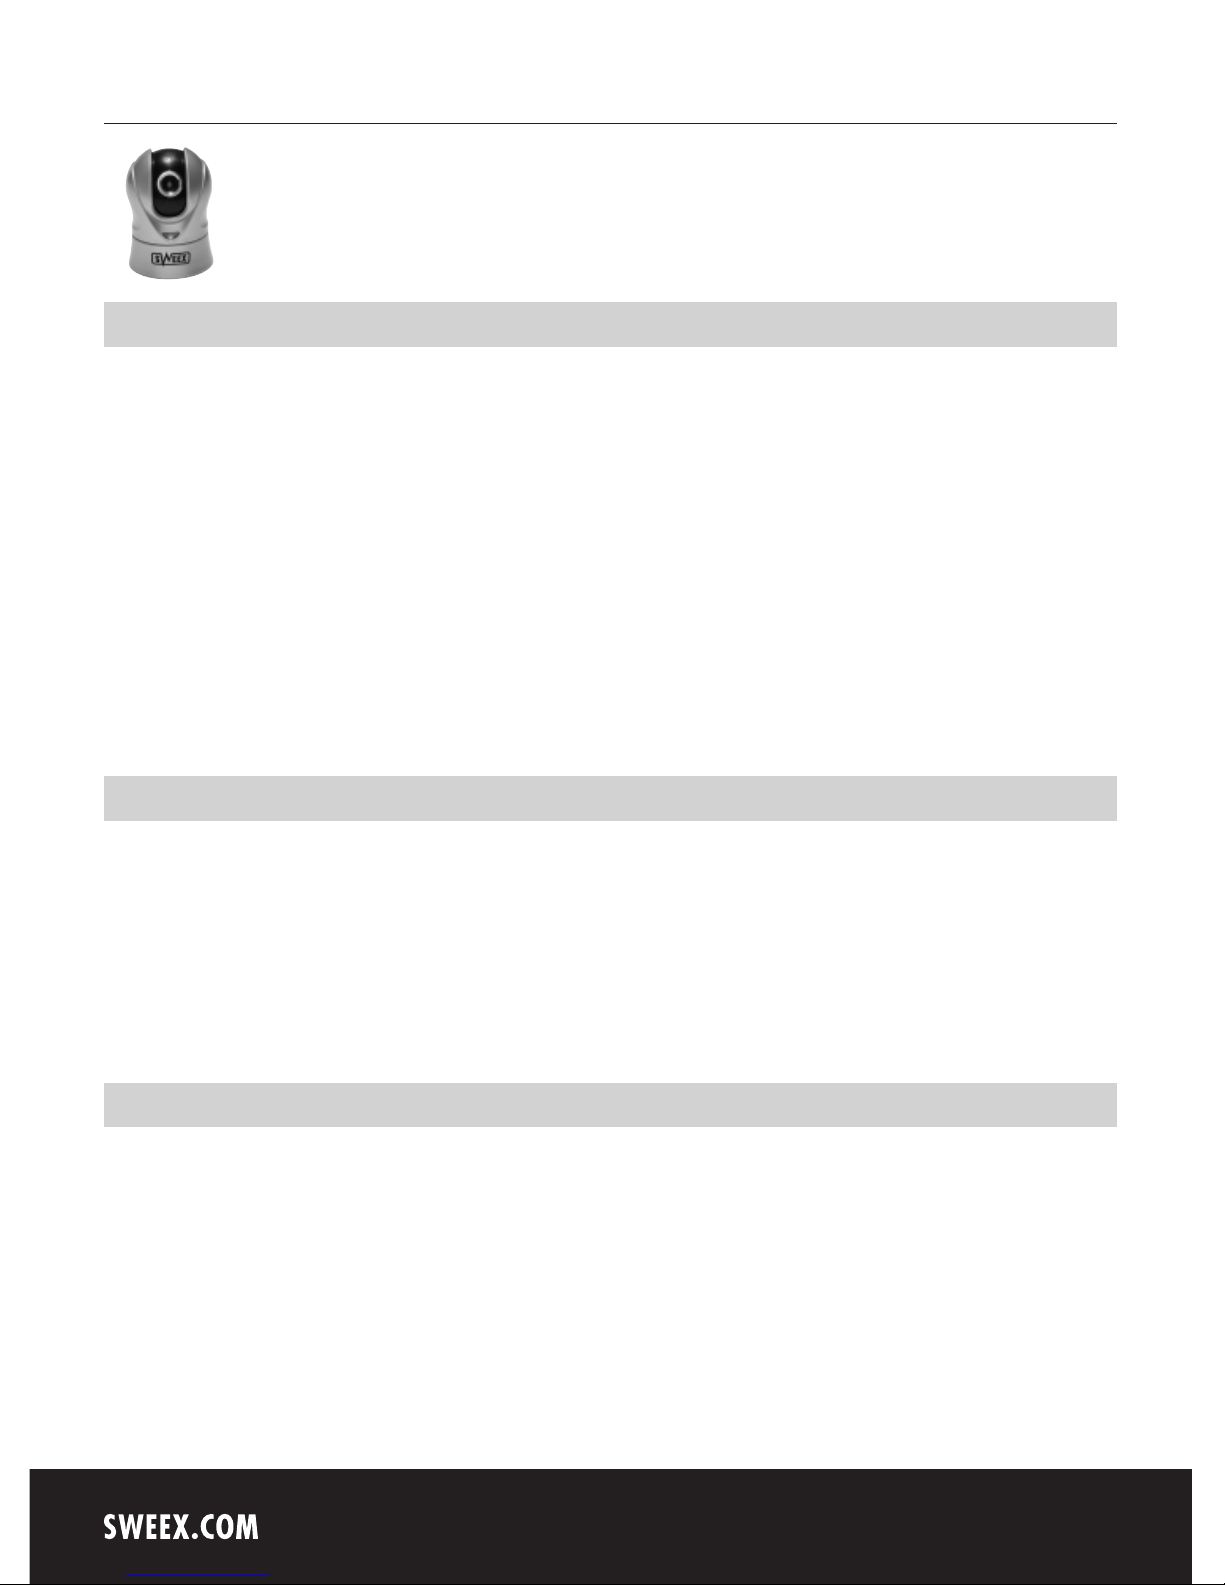
WC040 Sweex Motion Tracking Webcam 1.3 Megapixel
Introduction
First of all, many thanks for purchasing the Sweex Motion Tracking Webcam 1.3 Megapixel. This webcam enables you to easily video and audio-chat
with all your friends across the world. The webcam can also be set to automatically follow all your movements.
To ensure this product operates correctly, we advise you to carefully read this manual first. If despite this manual you still experience problems during
installation or operation of this product, go to www.sweex.com and look under the heading service & support.
In order to fully enjoy the Sweex Motion Tracking Webcam 1.3 Megapixel, it is important to observe a number of things:
• Do not expose the Sweex Motion Tracking Webcam 1.3 Megapixel to extreme temperatures. Do not place the device in direct sunlight or in the
direct vicinity of heating elements.
• Do not use the Sweex Motion Tracking Webcam 1.3 Megapixel in extremely dusty or moist surroundings.
• Protect the device against powerful shocks or jolts – they may damage the internal electronics.
• Never attempt to open the device yourself – it will cause the warranty to lapse.
Contents of the box
Prior to using the Sweex Motion Tracking Webcam 1.3 Megapixel, check if all required parts are present. The following parts must be present in the
box:
• Motion tracking webcam 1.3 mega pixel
• CD-ROM with manual and driver
If one of the above parts is missing, please contact the retail outlet.
Important!
Install the driver prior to connecting the Sweex Motion Tracking Webcam 1.3 Megapixel!
Page 2
English version
5
Specifications
• Interface: USB 2.0
• Sensor: 300K CMOS
• Built-in microphone
• Frame frequency: 30 frames per second
• Focus: 30 mm to infinite
• Lens format: 1/4”
• Colour filter: RGB24 and I420
• Video and picture resolutions: 160 x 120, 176 x 144, 320 x 240, 352 x 288, 640 x 480, 800 x 600, 1024 x 768 and 1280 x 960
(interpolated from 800 x 600)
• Motion tracking: horizontal 180 degrees, vertical 60 degrees
• Automatic tracking or manual operation
• Automatic white balance, focus and lighting
• Zoom: 4x digital
• Software-based snapshot function
• Motor type: 2-step motor
• Supports: Windows 2000 and XP
Software installation under Windows 2000 and XP
We advise you to ensure the operating system is up-to-date before starting the installation. This is easy to check by starting up Internet Explorer and
selecting the option “Windows Update” in the “Extra” menu.
Insert the Sweex CD-ROM in the CD-ROM player. The autorun menu will start automatically.
In this menu, select “Drivers Windows 2000 and XP”.
In the event that the autorun menu does not appear, the driver installation process can also be started manually. In order to do this, open “My
computer” and go to X:\driver\ (X being the letter of your CD-ROM drive). Here you will find the ‘SweexWC040_WebCamDriver.exe’ file, doubleclick this file and follow the instructions.
Page 3
English version
6
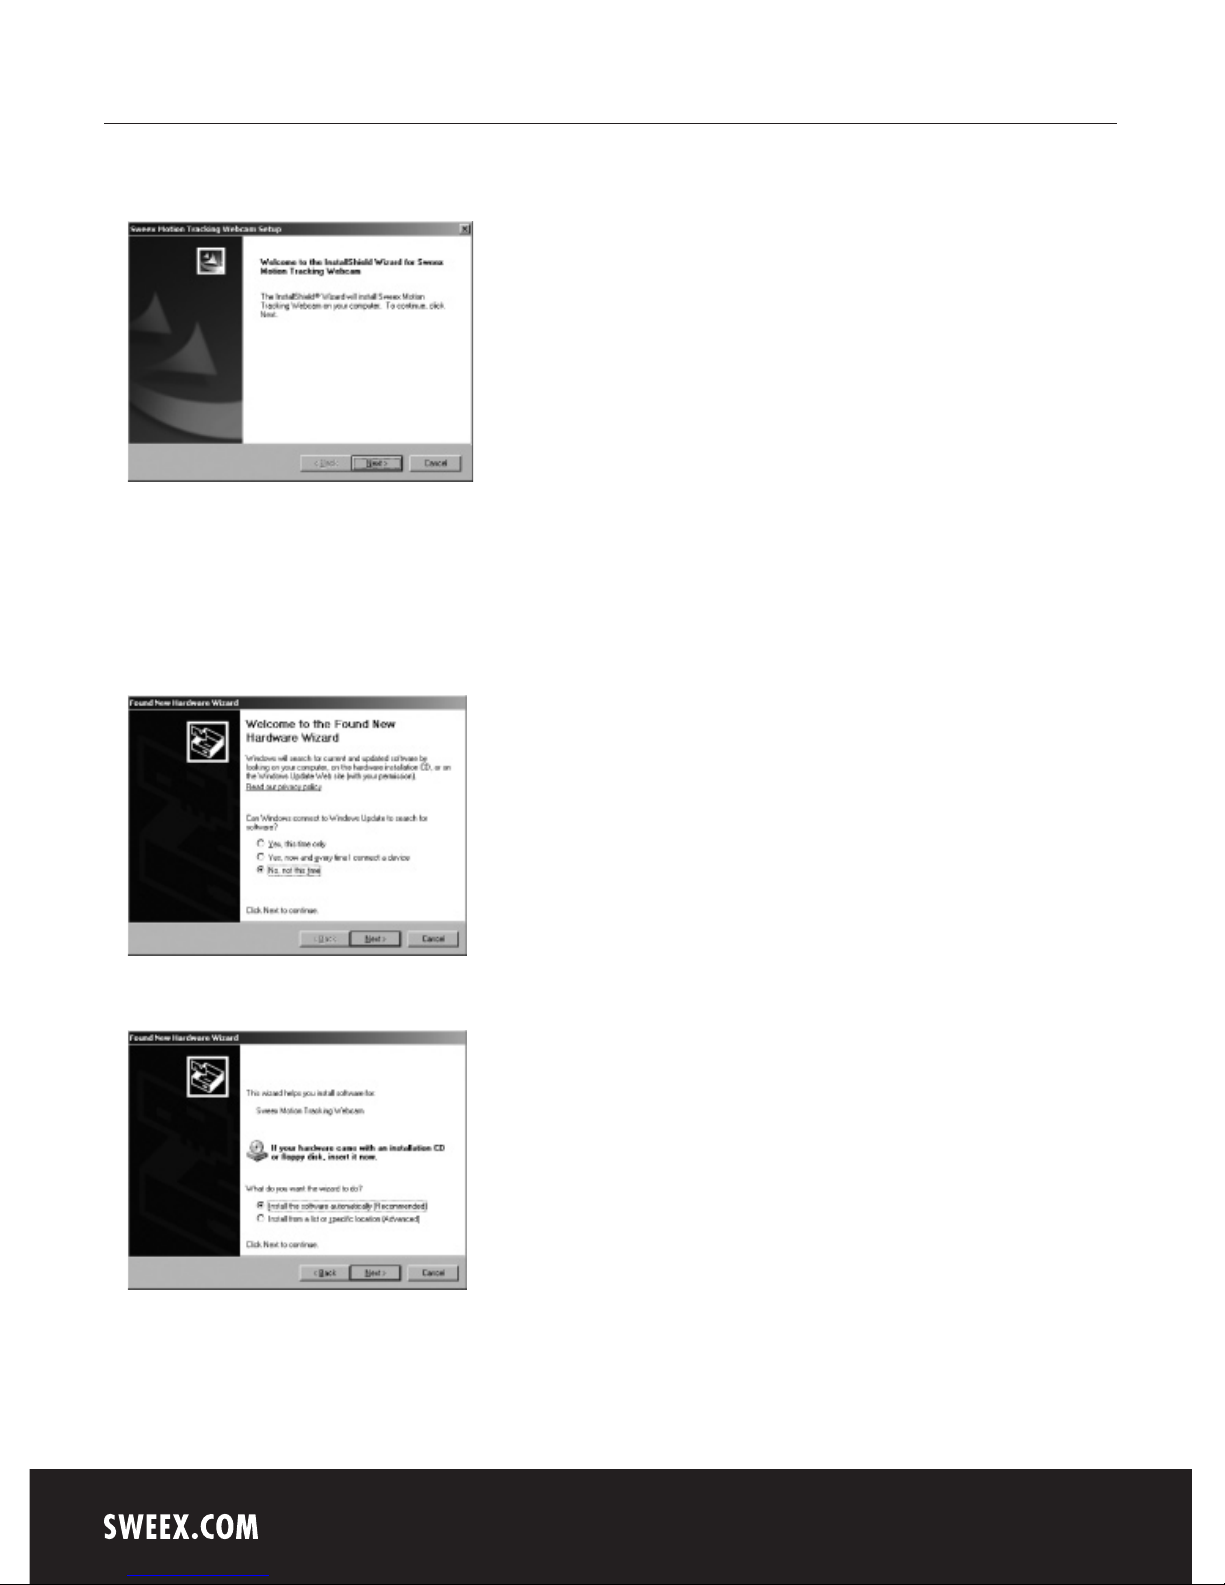
The following screen appears:
Click “Next”.
Windows will install the driver automatically. To complete the installation process, restart the PC or laptop. Following the restart, connect the Sweex
Motion Tracking Webcam 1.3 Megapixel to the PC or laptop.
The following screen appears:
Here, select the option “No, not this time” and click “Next”.
Here, select the option “Install the software automatically” and click “Next”.
Page 4
English version
7
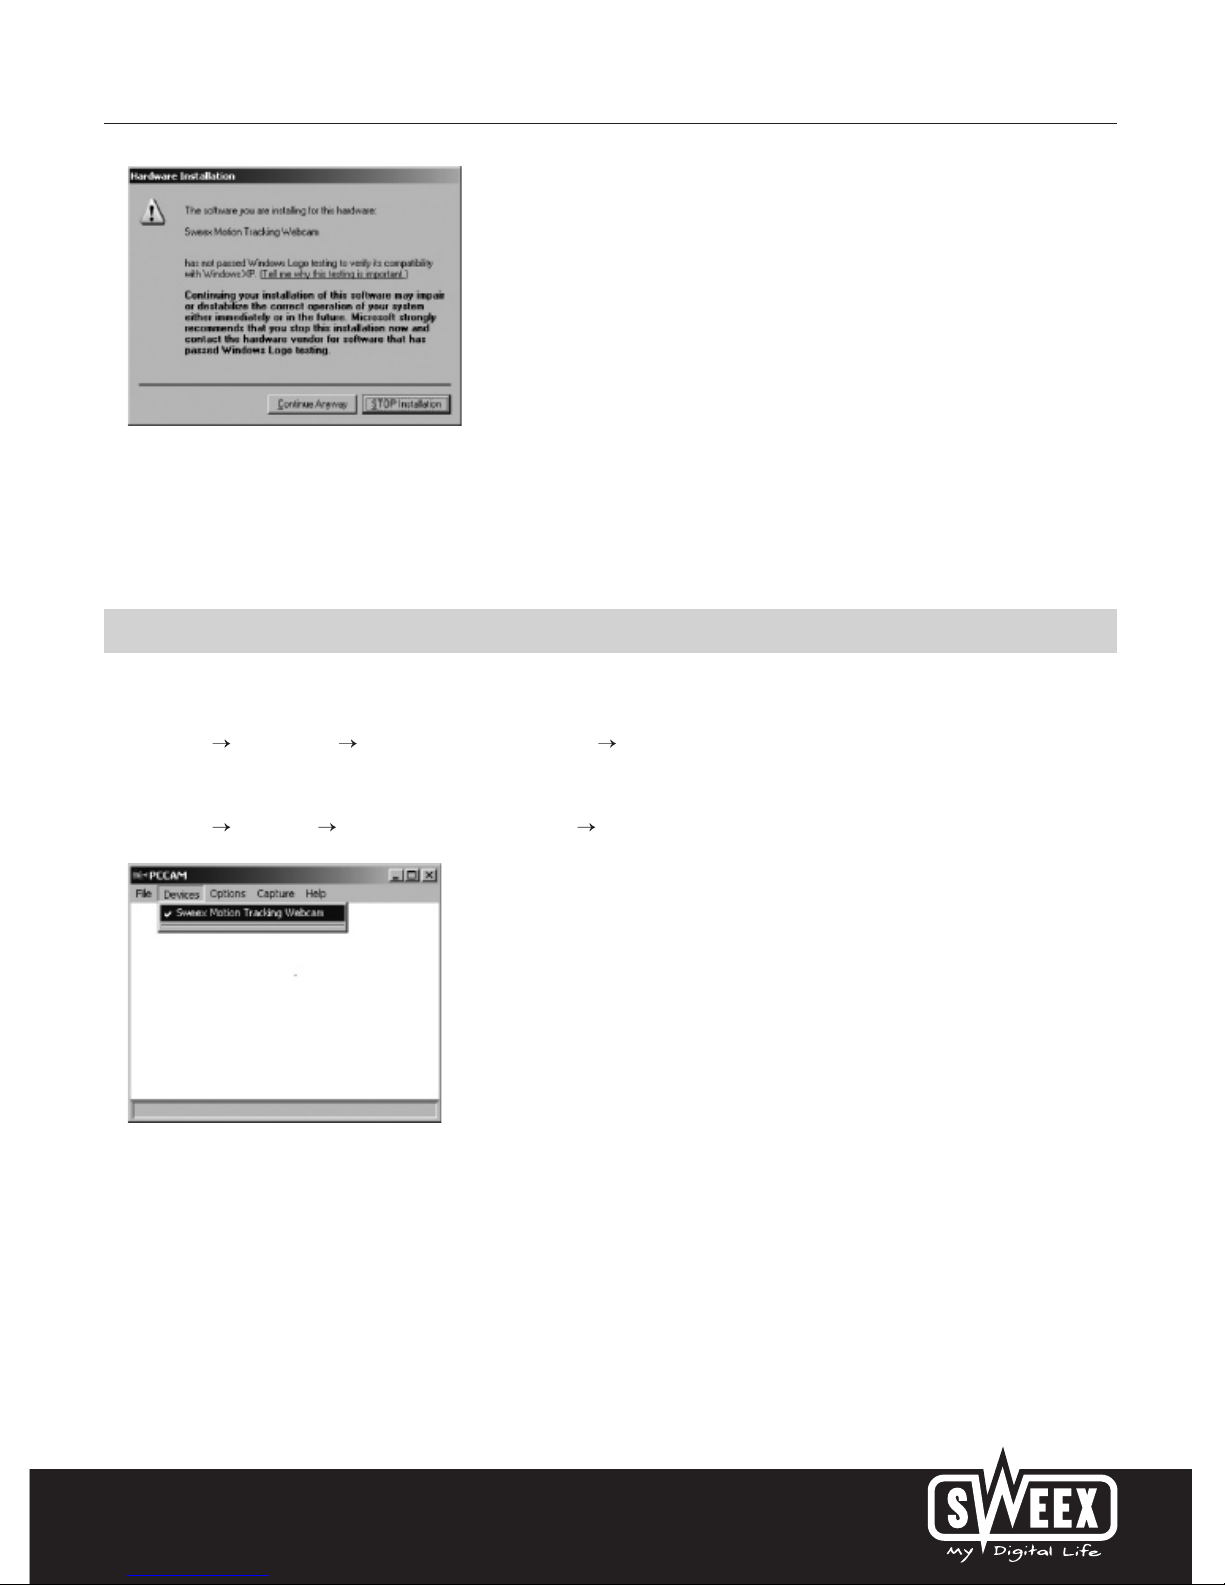
Windows will note that the driver is not certified. This will not affect the correct functioning of the Sweex Motion Tracking Webcam 1.3 Megapixel.
All Sweex products and corresponding drivers are tested extensively. Here select the option “Continue Anyway”.
Finally, click “Finish” to finalise the installation.
Testing the functioning of the webcam
The functioning of the Sweex Motion Tracking Webcam 1.3 Megapixel can be viewed and tested as follows:
Go to START “All Programs” “Sweex Motion Tracking Webcam” “AMcap”.
Or, if the Windows classic style is used:
Go to START “Programs” “Sweex Motion Tracking Webcam” “AMcap”.
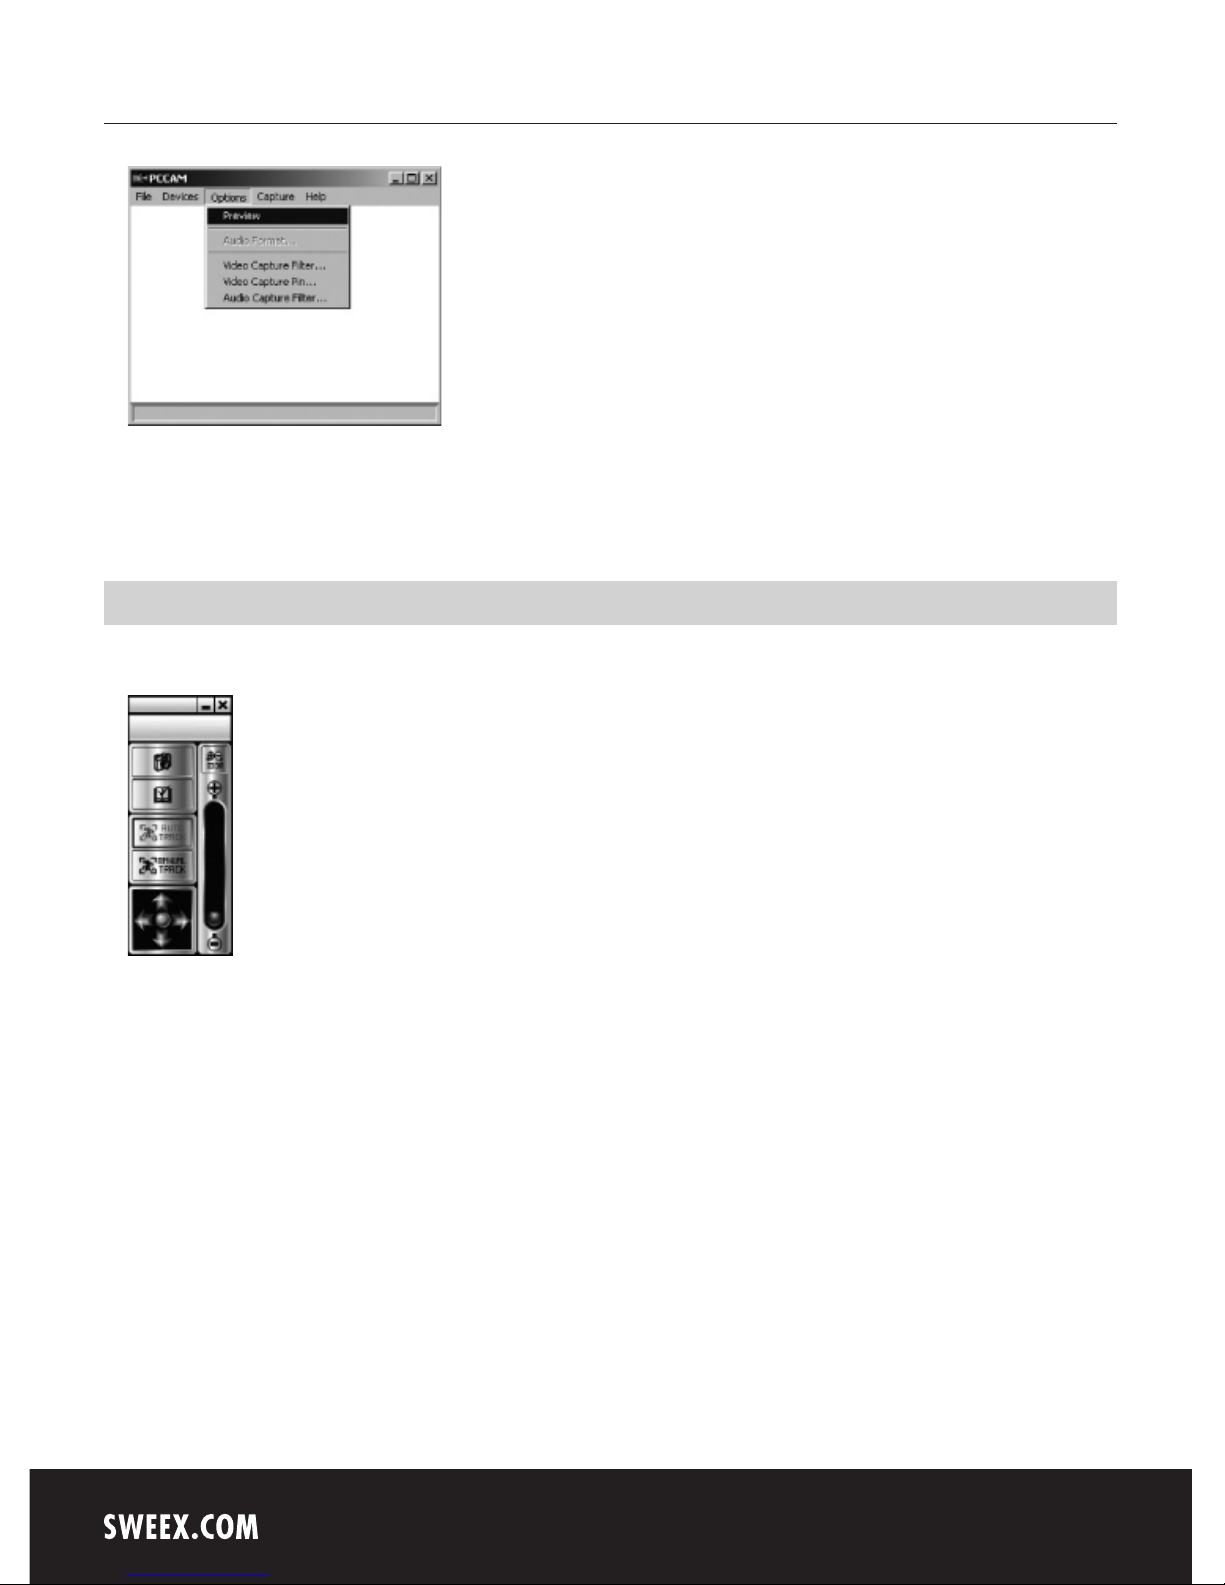
Open the “Devices” menu. Make sure to select the correct webcam: ‘Sweex Motion Tracking Webcam’.
Page 5
English version
8
Open the “Options” menu. Select the “Preview” option. This option enables you to view the picture.
In the same menu, the “Video Capture Filter...” and “Video Capture Pin...” options enable you to change the settings of the webcam.
Motion tracking tool
If the Sweex Motion Tracking Webcam 1.3 Megapixel is used, the following tool is shown on the right-hand side of the screen:
This tool can be used to operate the webcam. It has the following features, top to bottom:
Capture
Use this to take a picture of the current image.
Setting Menu
This opens the configuration menu. In this menu, various settings and options of the webcam can be changed.
Auto tracking
By clicking on this option, the motion-tracking mode is enabled. The webcam now tracks ‘the largest amount of movement’ it detects.
Manual tracking
This option activates manual operation. If this option is selected, the auto-tracking mode of the webcam no longer functions. The arrows underneath
this button and the zoom bar now become active.
Page 6
English version
9
Up/Down/Left/Right
These buttons only work if manual operation has been selected. They make the webcam either rotate or tilt. Up/Down ensures that the lens slides
up/down, Left/Right makes the webcam rotate to the left or right.
Home
The green ball between the arrows works at any time. It enables the webcam to find its original starting position. If the webcam is initialised, it will
also do this automatically.
Zoom
The zoom bar can be found on the right-hand side of the tool. It will only work if manual operation has been selected. By moving the green ball
up/down, the webcam will zoom in (max. 4 x).
Motion-tracking
The motion-tracking feature of the Sweex Motion Tracking Webcam 1.3 Megapixel can be activated in various ways. The tool provided, as described
above, is the simplest way of activating motion-tracking (“Auto Tracking” button).
If the tool does not appear automatically, or if it is not active, the motion-tracking feature can also be activated by means of the options.
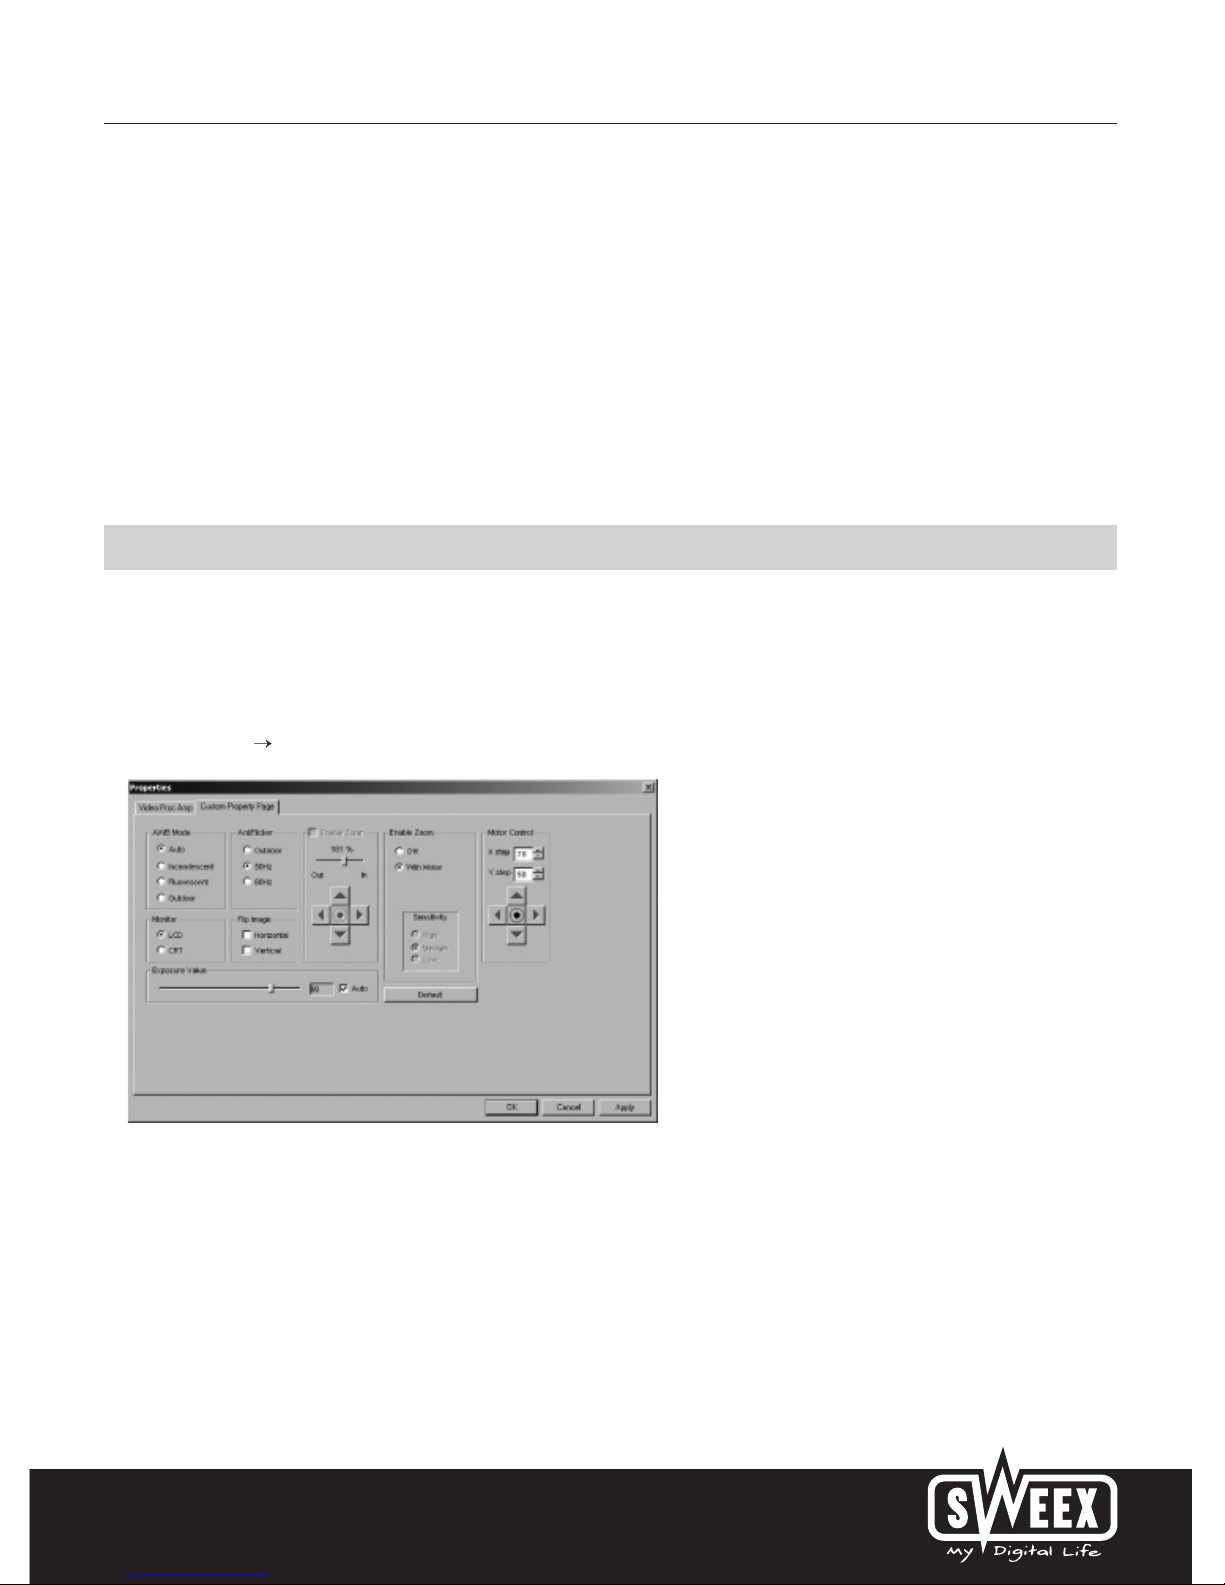
AMcap (“Options” “Video Capture Filter...”) for instance enables you to open the screen of webcam properties:
Motion-tracking can be enabled in the fourth column under “Enable Zoom”. By clicking on this option (“With Motor”), the motion-tracking mode is
activated.
Note! In order to be able to select “With Motor”, “Enable Zoom” in the third column must be unticked. Manual operation is enabled by selecting
the first option (“Off”).
Page 7
English version
10
Microphone
The Sweex Motion Tracking Webcam 1.3 Megapixel has a separate microphone connection. This must be inserted in the sound card (“mic in”).
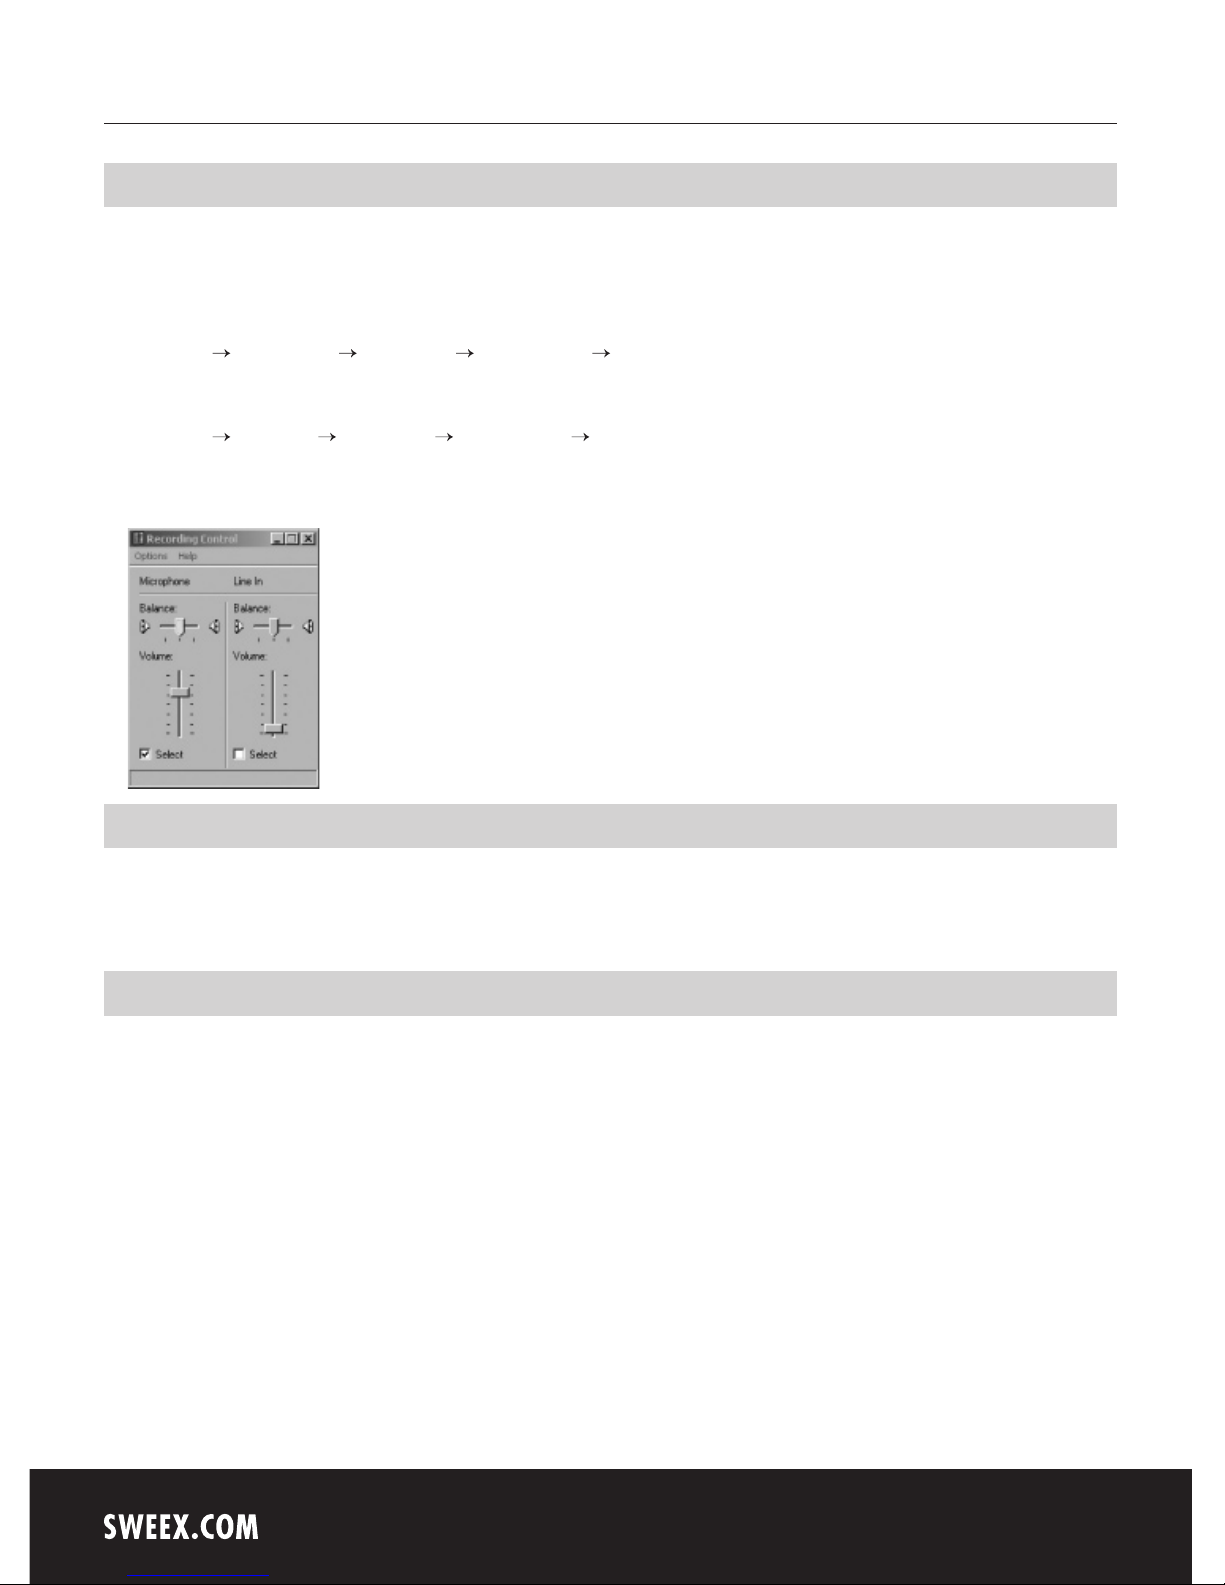
Note! Windows must have selected the microphone input as an active recording source. You can check this as follows:
Go to START “All Programs” “Accessories” “Entertainment” “Volume Control”.
Or, if the Windows classic style is used:
Go to START “Programs” “Accessories” “Entertainment” “Volume Control”.
Then go to "Properties" via “Options”. Here, select “Recording”. Check whether the “Microphone” has been selected as an active recording source.
LED indicator
The Sweex Motion Tracking Webcam 1.3 Megapixel has 1 blue LED. This is continuously lit, which means that the webcam is in use and that it has
been connected and is functioning properly.
Warranty
All products under the Sweex brand are warranted for a period of three years. We do not grant support or warranties for any software and/or
(rechargeable) batteries included. Settlement of guarantee only takes place via the dealer where you have purchased the product in question.
The rightful owner has and retains title to all brand names and related rights mentioned in this manual.
 Loading...