

English version
MM002 Sweex USB DVB-T Dongle
Introduction
• Do not expose the Sweex USB DVB-T Dongle to extreme temperatures. Do not place the device in direct sunlight or in the direct vicinity of
heating elements.
• Do not use the Sweex USB DVB-T Dongle in extremely dusty or moist surroundings.
• Protect the device against powerful shocks or jolts – they may damage the internal electronics.
• Never attempt to open the device yourself – it will cause the warranty to lapse.
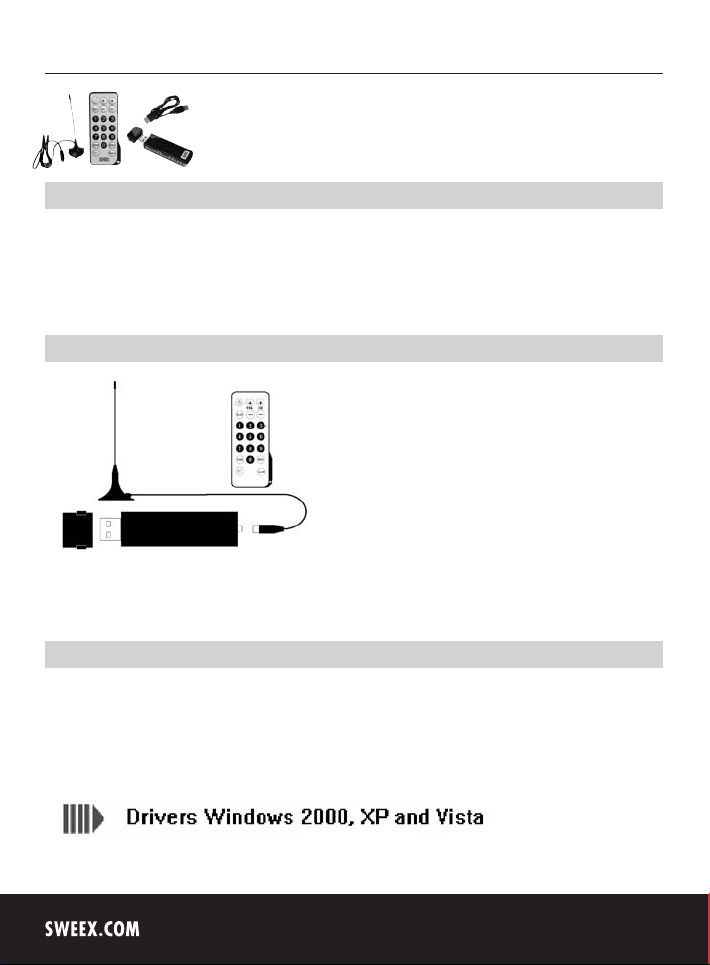
Explanation of the device
Important!
Install the driver prior to connecting the Sweex USB DVB-T Dongle.
Installation under Windows 2000, XP and Vista
We advise you to ensure that the operating system you use is up-to-date before you start the installation. This update is easy to carry out by starting
up Internet Explorer and selecting the option Windows Update in the Extra menu.
Insert the Sweex CD-ROM in the CD-ROM player. The autorun menu will start automatically.
In this menu, select “Drivers Windows 2000, XP and Vista”.
4

English version
In the event that the autorun menu does not appear, the driver installation process can also be started manually. In order to do this, open “My
computer” and go to X:\driver\ (X being the letter of your CD-ROM drive). Here you can find the ‘setup.exe’ file. Double-click this file and follow the
instructions.
Having selected the desired installation language, the following screen appears:
Click “Next”.
The following screen appears:
Click “Next”.
The following screen appears:
5

English version
1. Remove the protective cover of the Sweex USB DVB-T Dongle by pressing the buttons on either side, and pull.
2. Connect the antenna.
3. Connect the Sweex USB DVB-T Dongle to a free USB port on the computer and click ”Yes”.
The following screen appears:
Select ”No, not this time” and click ”Next”.
During this installation, Windows may display a message that the software has not been certified. This will not affect the correct functioning of the
Sweex USB DVB-T Dongle. All Sweex products and corresponding drivers are tested extensively. Here, select the option “Continue Anyway”.
The following screen appears:
6

English version
Here, select the option ”Install the software automatically (Recommended)” and click ”Next”.
Click “Finish”.
Installation of the DVB-T Player
Insert the Sweex CD-ROM in the CD-ROM player. The autorun menu will start automatically.
In this menu, select “DVBT Player software”.
In the event that the autorun menu does not appear, the driver installation process can also be started manually. In order to do this, open “My
computer” and go to X:\driver\ (X being the letter of your CD-ROM drive). Here you can find the ‘setup.exe’ file. Double-click this file and follow the
instructions.
Having selected the desired installation language, the following screen appears:
Click “Next”.
7

English version
The following screen appears:
Click “Next”.
The following screen appears:
Click “Finish”.
DVB-T Player
Go to start – all programmes – Sweex – DVBT – DVBT Player
The following screen appears:
8

Click “Stop” to discontinue scanning process.
A. Select your nation/area setting
B. Click ”Auto Scan” to search for the channels
After the search, a list of channels is displayed
Click ”Save As” to store the list with generated channels.
This can be loaded later on via ”Load".
After having stored the list, click “OK".
English version
9

English version
The settings can be changed by pressing the button.
Press the button for further information and functions of the software.
Time shifting
The Sweex USB DVB-T Dongle includes a time shifting feature. Time shifting is a technique that enables you to simply pause a TV broadcast and
resume it with the press of a button, without having to miss a single second.
Warranty
All Sweex products are warranted for three years. We do not grant support or warranties for any software and/or (rechargeable) batteries included.
Settlement of guarantee only takes place via the dealer where you have purchased the product in question.
The rightful owner has and retains title to all brand names and related rights mentioned in this manual.
10
 Loading...