

English version
LW310 Sweex Wireless Broadband Router 300 Mbps
Important! The Setup Wizard is located on the Sweex CD-ROM. This installation
procedure will show you step by step how to setup the router.
• Do not expose the Sweex Wireless Broadband Router 300 Mbps to extreme temperatures.
Do not place the device in direct sun light or close to heating elements.
• Do not use the Sweex Wireless Broadband Router 300 Mbps in extremely dusty or moist environments.
• Prevent hard shocks or impacts of the device, as this can cause damage to the internal electronics.
• Never try to open the device yourself, this voids the warranty.
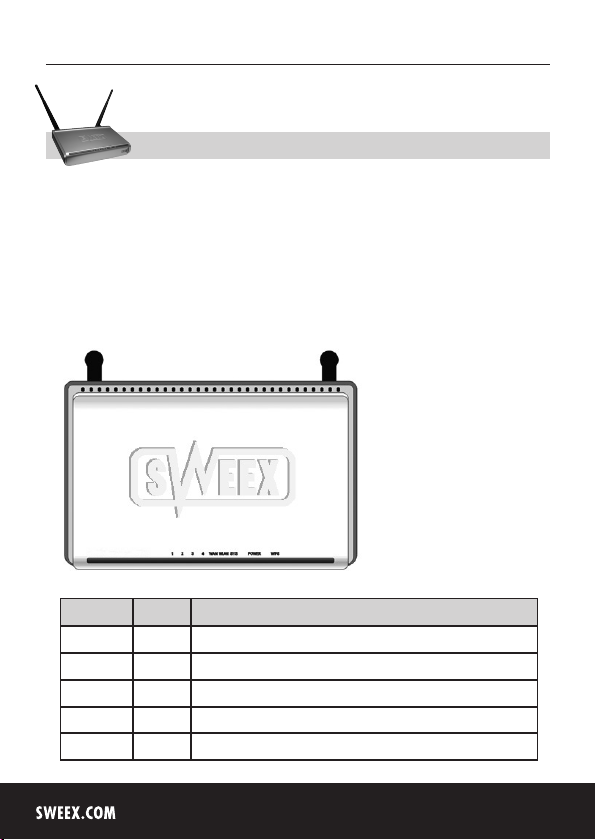
View from above or front of the router
LED Indicators Status Indication
1-4 On Indicates that a computer is connected to the corresponding port
1-4 Blinking Indicates that there is activity between the corresponding computer and the router
WAN On There is a good connection with the internet modem
WAN Blinking Indicates that there is activity between the router and the modem
WLAN On Indicates that the wireless connection of the router is activated
2
English version
3
WLAN Blinking Indicates that there is activity between the designated wireless computer(s) and
SYS Blinking Indicates that the router is working properly. When turning on the router it can
Power On Indicates that the modem is on
WPS Blinking A WPS is being made
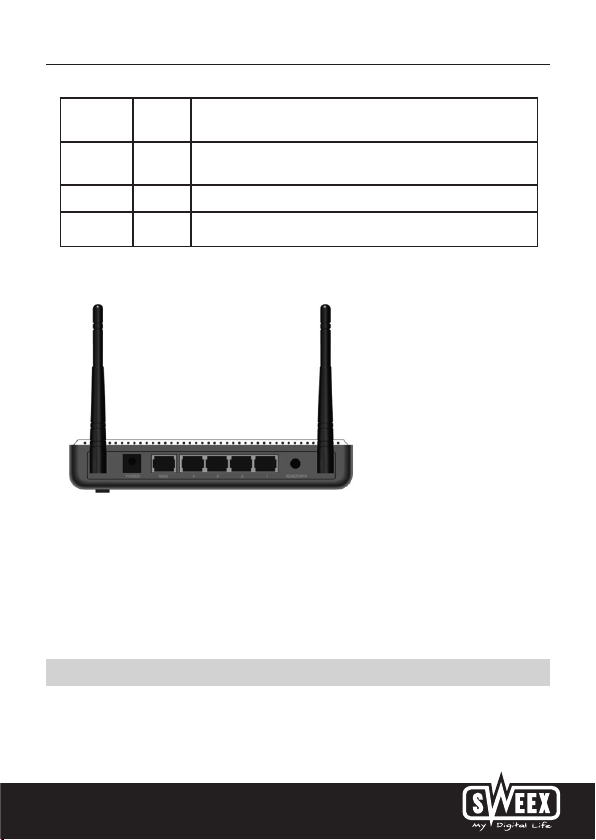
Rear view of the router
From left to right on the rear side of the router there are the following connections:
• Antenna1
• Power port to connect the power adapter.
• WAN-port to connect a modem with an RJ-45 UTP ethernet networking cable
• UTP Ethernet ports 1, 2, 3 and 4 to connect computers with an ethernet networking cable RJ45.
• Reset / WPS button to restore default settings (press and hold 10 sec) or connection of WPS (press shortly 1x)
• Antenna2
the router
take 15 seconds before the light starts blinking.
Connecting the Sweex Broadband Router
1. Connect the supplied power adapter to the rear side of the router. Plug the power adapter in a plug socket. The light
next to “Power” has to be lit. When it does not, check the power adapter off the router and check the plug socket.
English version
2. Turn on the computer and connect a networking cable (RJ-45 UTP) to the computer on the rear side of the router.
Do this in port 1, 2, 3 or 4. The corresponding light on the front side will light up. When it does not, check if the
networking cable is correctly connected to the computer and the router.
3. Turn on the modem*. Pay attention: We do not mean the Sweex router. With a networking cable (RJ-45 UTP),
connect the modem to the rear side of the router. Do this in the WAN-port. The WAN light on the front side of the
router will light up. When it does not, check if the networking cable is correctly connected to the modem and the router.
*To be able to use the Sweex Broadband Router you need a working internet connection, which is made by a modem.
In most cases this modem is provided by the internet provider.
Configuration computer to connect to the router
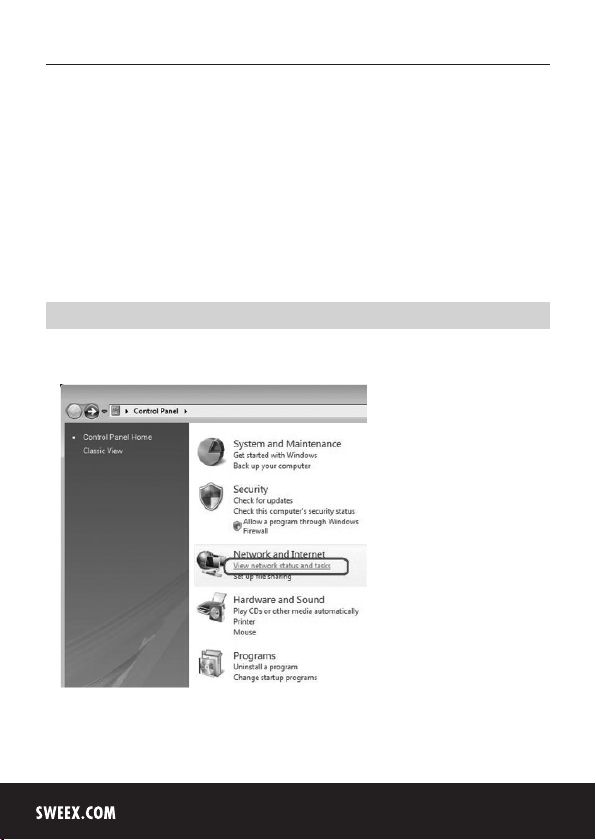
Windows Vista
At the bottom left of the screen go to “Start”‡ . “Control Panel”
Select “View network status and tasks”.
4

English version
5
In the left column select “Manage network connections”.
English version
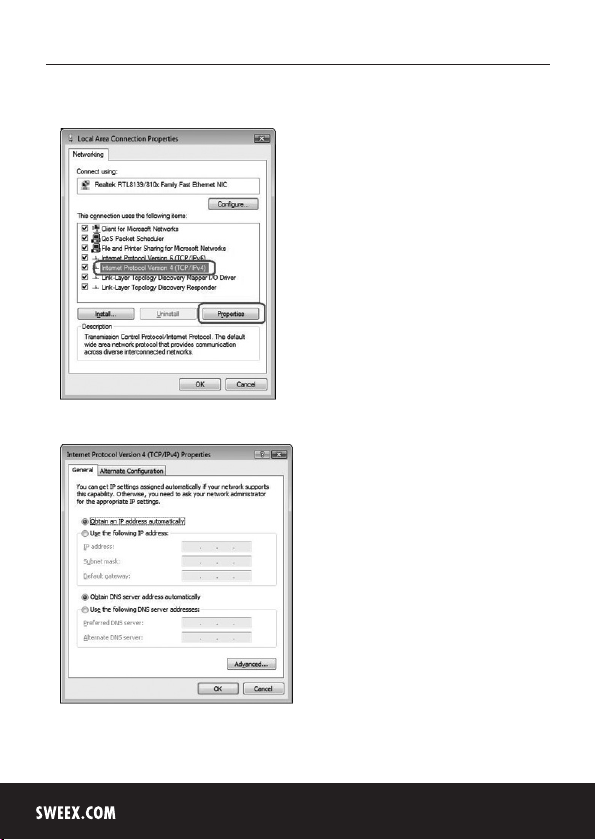
Right-click “LAN Connection” or “Wireless Network connection” and choose “Properties”. The following screen appears:
Select “Internet Protocol Version 4 (TCP/IPv4)” and select “Properties”.
Select the option “Obtain an IP address automatically” and “Obtain DNS server address automatically”.
Confirm the settings by clicking “OK”. The network settings for Vista are now configured correctly. Further on in this
manual you will find the correct settings for your internet browser.
6
English version
7
Windows XP
At the bottom left of the screen go to “Start”‡ . “Control Panel”
Then go to “Network and Internet Connections”. Open “Network Connections” or when the classic view is being used;
“Start”‡ Settings‡ “Network Connections”.
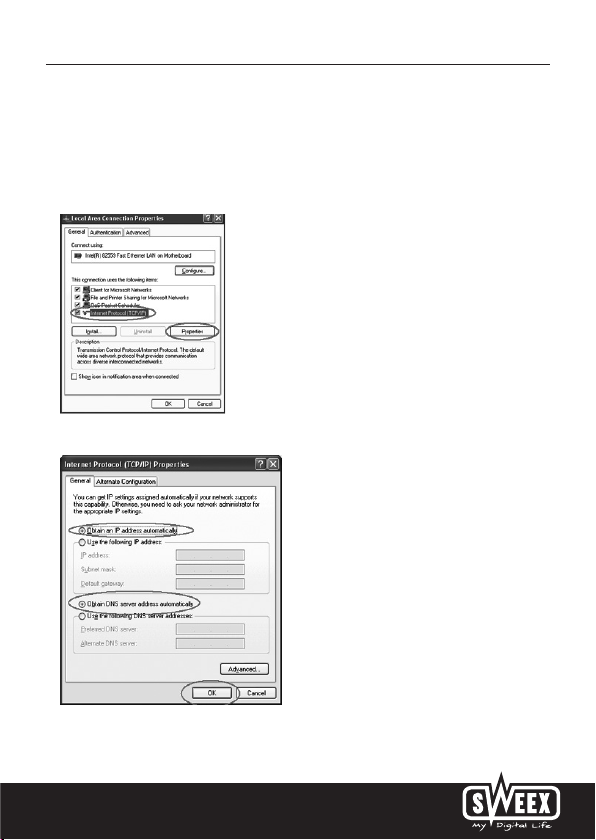
Right-click “LAN Connection” or “Wireless Network connection” and choose “Properties”. The following screen appears:
Under the “General” tab select “Internet Protocol (TCP/IP)” and select “Properties”.
Select the option “Obtain an IP address automatically” and “Obtain DNS server address automatically”.
Confirm the settings by clicking “OK”. The network settings for Windows XP are now configured correctly. Further on in
this manual you will find the correct settings for your internet browser.

English version
Windows 2000
At the bottom left of the screen go to “Start”‡ . “Control Panel”
Then go to “Network and Internet Connections”. Open “Network Connections”
or when the classic view is being used;
“Start”‡ Settings‡ “Network Connections”.
Right-click “LAN Connection” or “Wireless Network connection” and choose “Properties”. The following screen appears:
Select “Internet Protocol (TCP/IP)” and select “Properties”.
Select the option “Obtain an IP address automatically” and “Obtain DNS server address automatically”. Press “OK” twice.
The network settings for Windows 2000 are now configured correctly. Further on in this manual you will find the correct
settings for your internet browser.
8

English version
9
Internet browser settings for Windows 2000, XP and Vista
1. To be able to connect to the router the browser settings have to be setup correctly. This can be checked easily by
selecting “Extra” - “Tools” and then the option “Internet Options…” in Internet Explorer.
2. In this screen go to the tab “Connections” and select “Never dial a connection” or in the white space above remove
all connections.
3. Then click “LAN Settings…” at the bottom, remove all check marks and click “OK”.
4. Restart the browser to activate the new settings.
Setting up the wireless network
How does it work?
To create a wireless network you need a wireless router, wireless modem or access point. The wireless router, modem
or access point distributes the wireless network. The name of this network, also called the SSID, is dependant on your
wireless router, modem or access point and is different per type or brand. You can often change the name, so you can
easily identify your own wireless network.
Security
A wireless network is comparable with radio signals. However, a wireless network at home does not have such a long
range. The range of a home network often has a range of 20 to 30 meters. This means that neighbours and passers-by
can also use your network. This way they can surf on your internet connection and possibly access your shared folders
and files on your network unpunished. That is why it is necessary to secure your wireless network. This security is
configured on the device that transmits the network. In most cases this is the wireless router, modem or access point.
By means of a WEP or WPA security code you can secure the network. This code is also called the network key. Enter
this code on every computer that wants to connect to the secured network. Only with this key you can be part of the
network. If you did not enter the network key yourself in the router or modem, ask the installer, manufacturer, supplier
or provider for this code.
Connecting the computer to the wireless network
At the bottom left of the screen go to “Start”‡ . “Control Panel”
Then go to “Network and Internet Connections”. Open “Network Connections”
or when the classic view is being used;
“Start”‡ Settings‡ “Network Connections”.
Right click “LAN Connection” or “Wireless Network connection” and choose “View Available Wireless Networks”.
 Loading...