

SWEEX LW300, LW300UK User Manual
English version
4
LW300/LW300UK Sweex Wireless Broadband Router 300 Mbps
Introduction
• Do not expose the Sweex Wireless Broadband Router 300 Mbps to extreme temperatures. Do not place the device in direct sunlight or in the
direct vicinity of heating elements.
• Do not use the Sweex Wireless Broadband Router 300 Mbps in extremely dusty or moist surroundings.
• Protect the device against powerful shocks or jolts - they may damage the internal electronics.
• Never attempt to open the device yourself - it will cause the warranty to lapse.
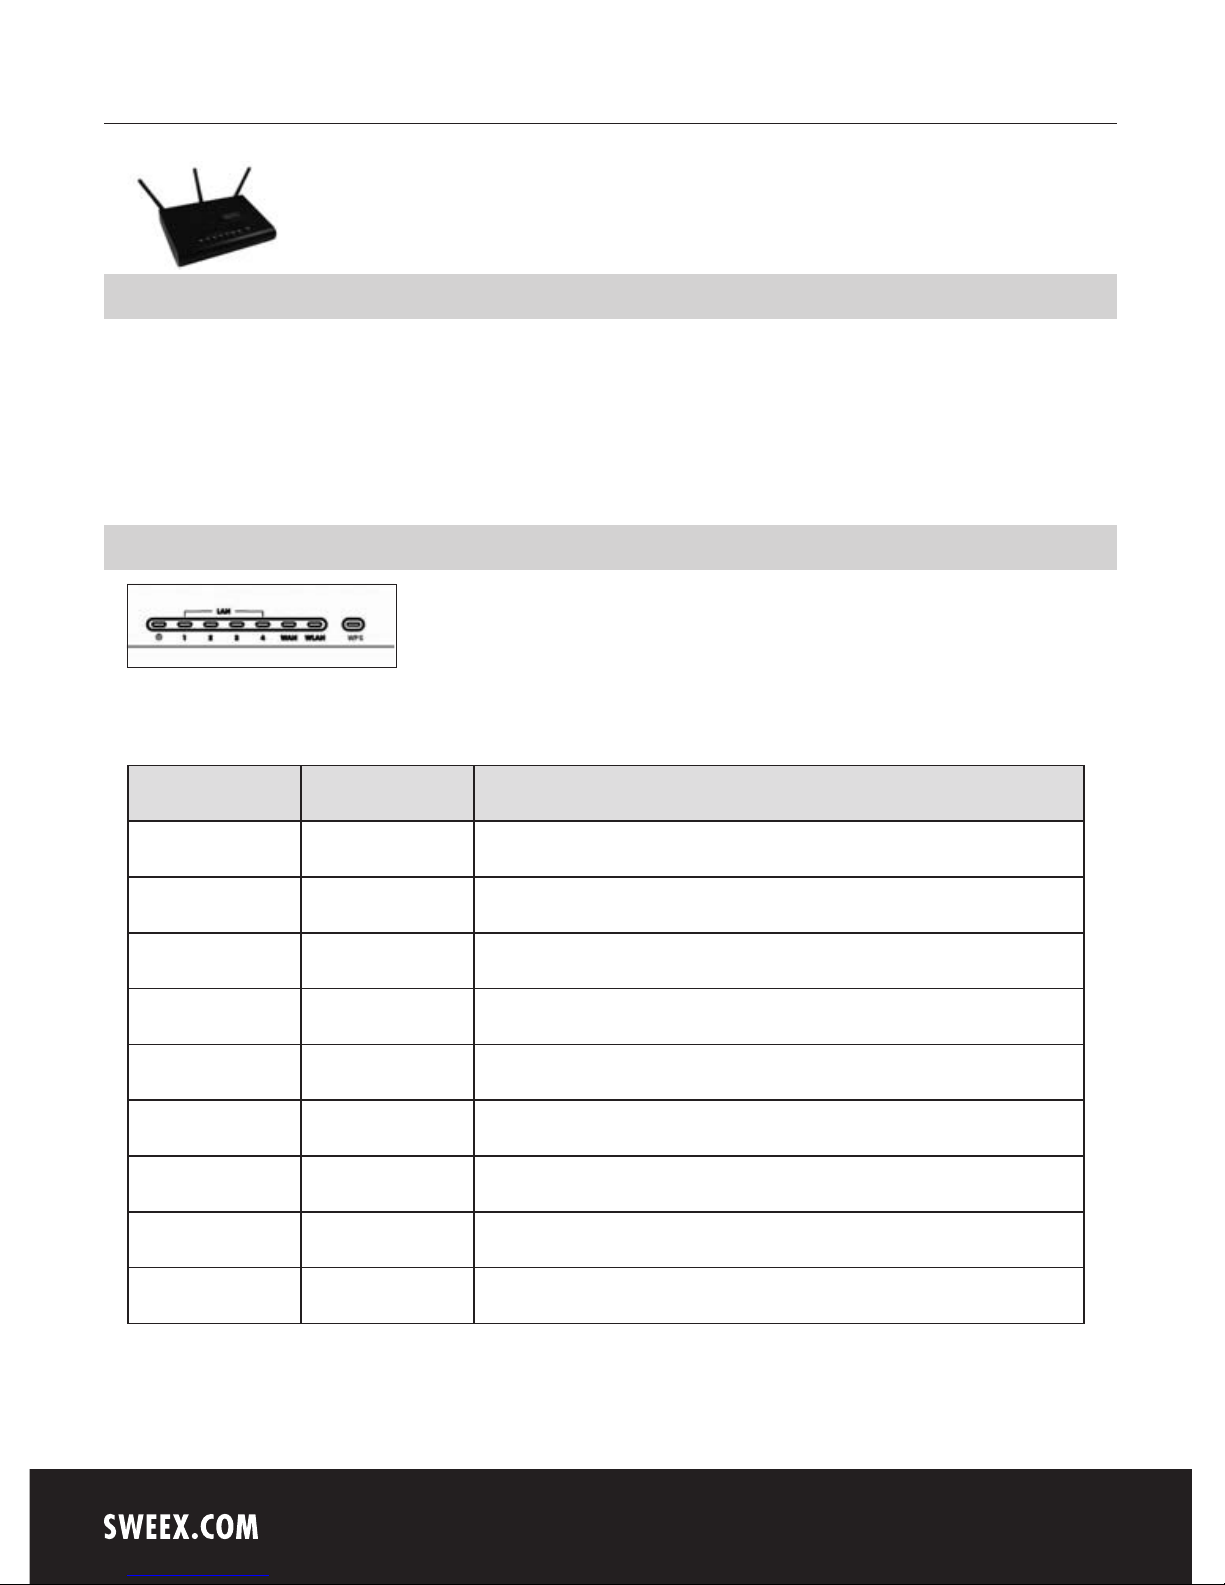
Front or top view of the modem
LED indicators Status Meaning
Power On Indicates that the modem is switched on.
1 - 4 On Indicates that a computer is connected to the relevant port.
1 - 4 Blinking Indicates activity between the relevant computer and the router
WAN On The connection with the Internet modem is ok.
WAN Blinking Indicates activity between the router and the modem.
WLAN On Indicates activity between the router and the modem.
WLAN Blinking Indicates activity between the wireless computer(s) and the router.
WPS On There is a connection with a wireless adapter with WPS (WiFi Protected Setup).
WPS Blinking A WPS connection is being established.
English version
5
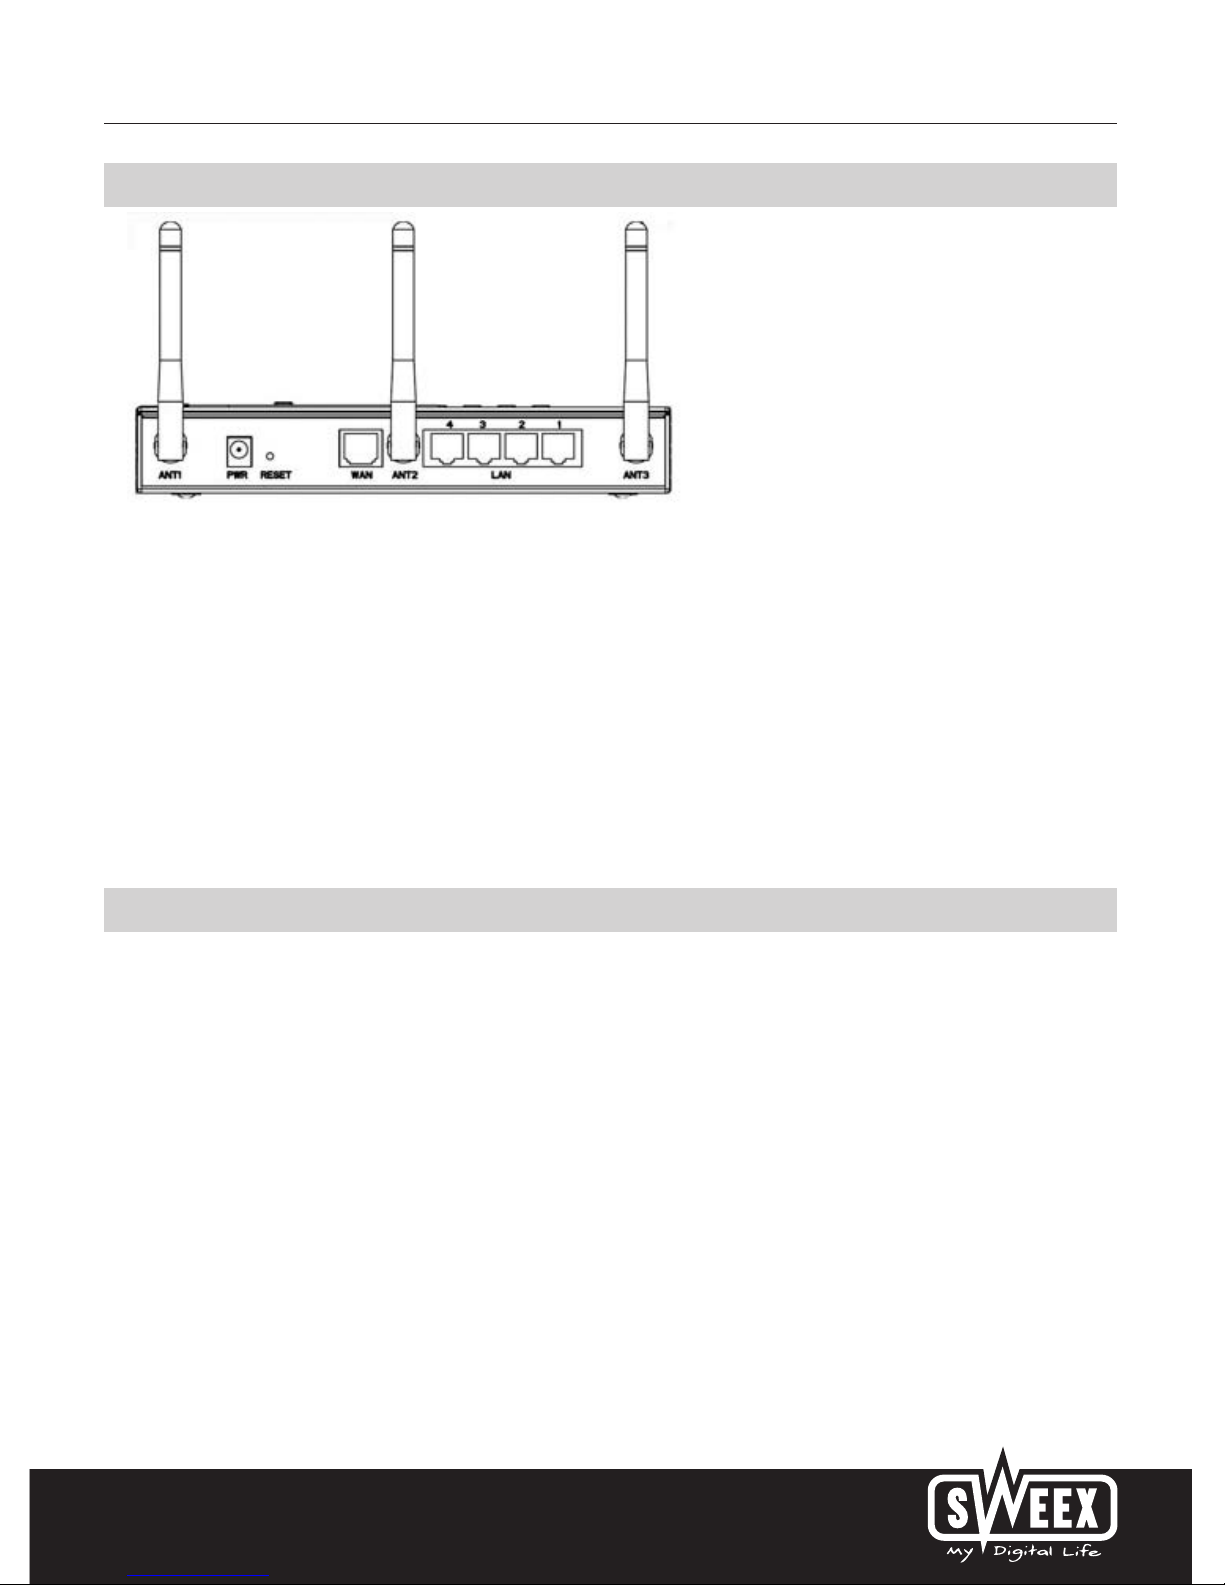
Rear view of the router
Starting on the left, the following connections can be found at the rear of the router:
• Antenna 1 (Fixed)
• Power port for connecting the power adaptor
• Reset button to return to the factory settings
• WAN port for connecting a modem by means of a RJ-45 UTP Ethernet network cable
• Antenna 2 (Fixed)
• UTP Ethernet ports 1, 2, 3 and 4 for connecting computers with an Ethernet network cable RJ45
• Antenna 3 (Fixed)
Connecting the Sweex Broadband Router
1. Connect the power adaptor (included) to the rear of the router and the mains socket. The light next to “Power” is lit. In the event the LED is not
lit, check the connections of the power adaptor to the router and the mains socket.
2. Switch on the computer and connect it to the rear of the modem using a network cable (RJ-45 UTP). You can select any of the ports 1, 2, 3
and 4. The corresponding light at the front will be lit. In the event the light fails to light up, check whether the network cable is properly
connected to the computer and the router.
3. Switch on the modem* again. Note: Here we do not refer to the Sweex router. Connect the modem to the rear of the router using a network
cable (RJ-45 UTP). Do this via the WAN port The WAN light at the front of the router will light up. In the event the light fails to light up, check
whether the network cable is properly connected to the router and the modem.
* In order to use the Sweex Broadband Router you need an active Internet connection, which is established through a modem. This modem is
usually supplied by the provider.
English version
6
Configuring the computer to connect to the router
Windows Vista
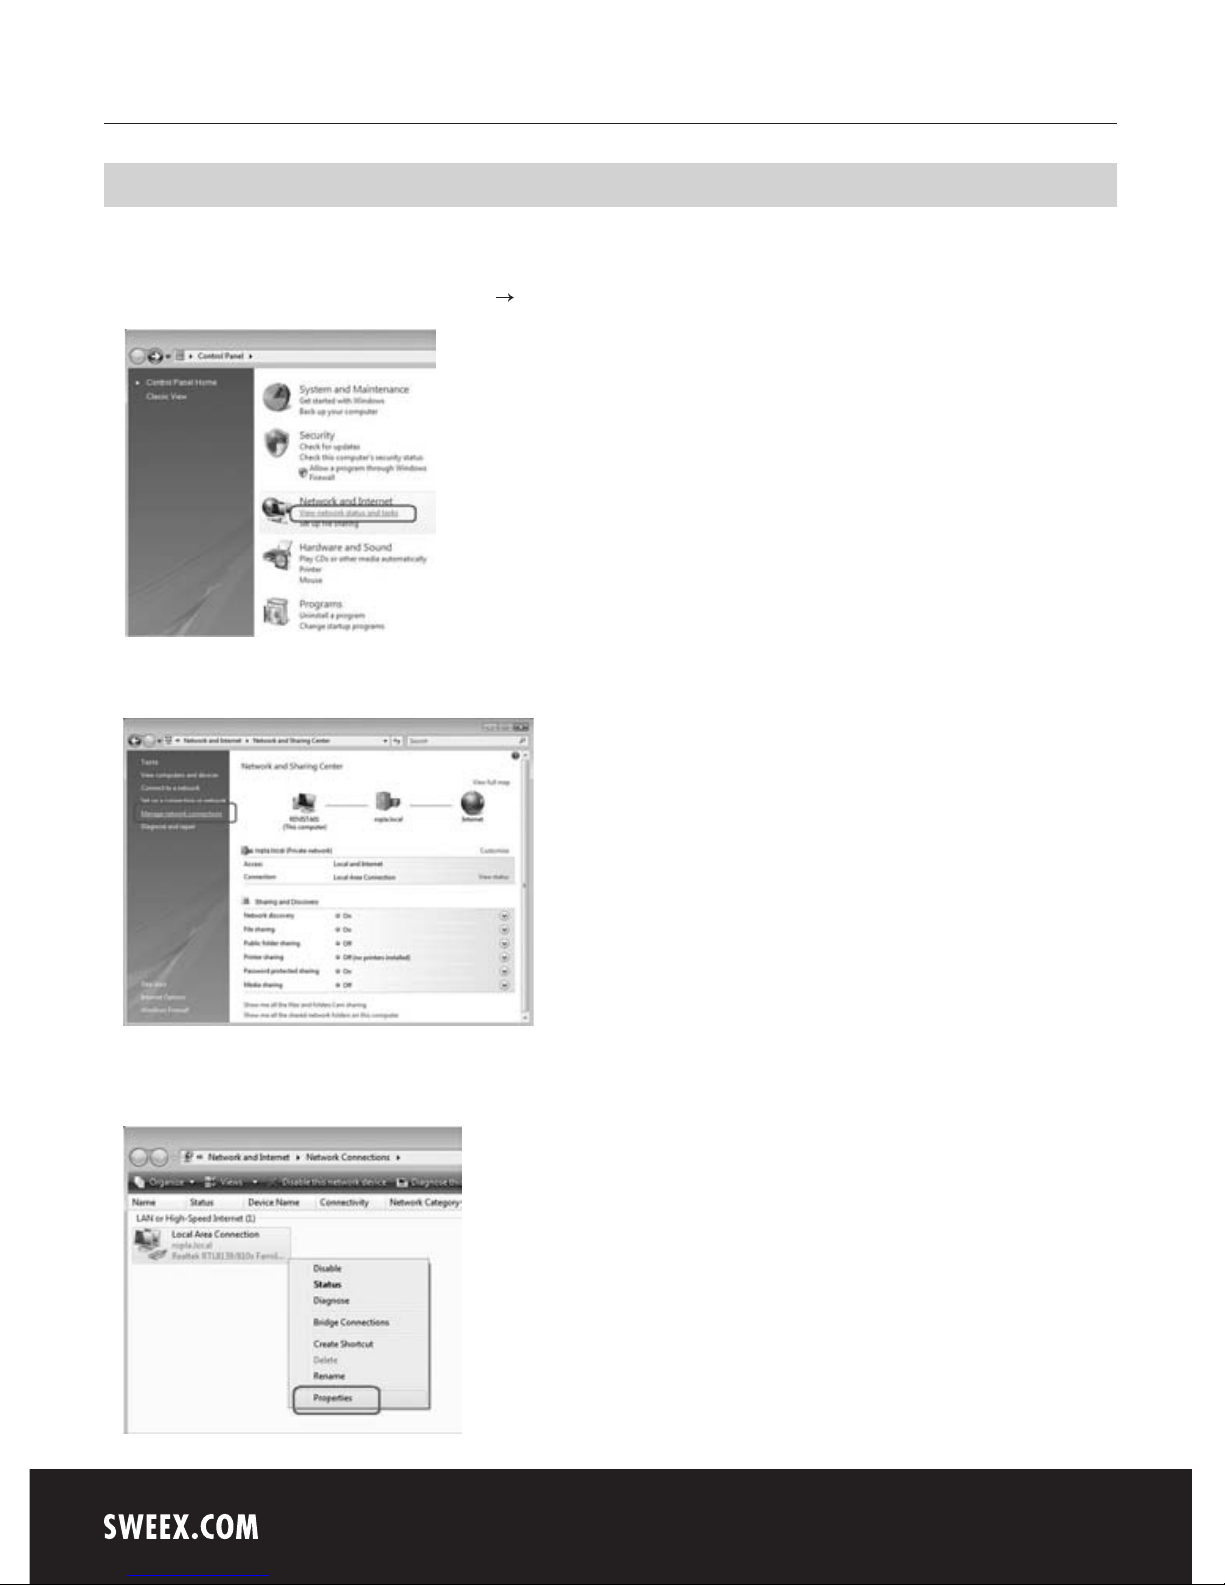
In the bottom left of your screen, go to “Start” (Start) “Control Panel” (Control Panel).
Click on “View network status and tasks” (View network status and tasks).
Left in the column, click on “Manage network connections” (Manage network connections).
English version
7
Right-click “LAN Connection” (LAN Connection) or “Wireless Network connection” (Wireless Network connection) and select “Properties”
(Properties). The following screen appears:
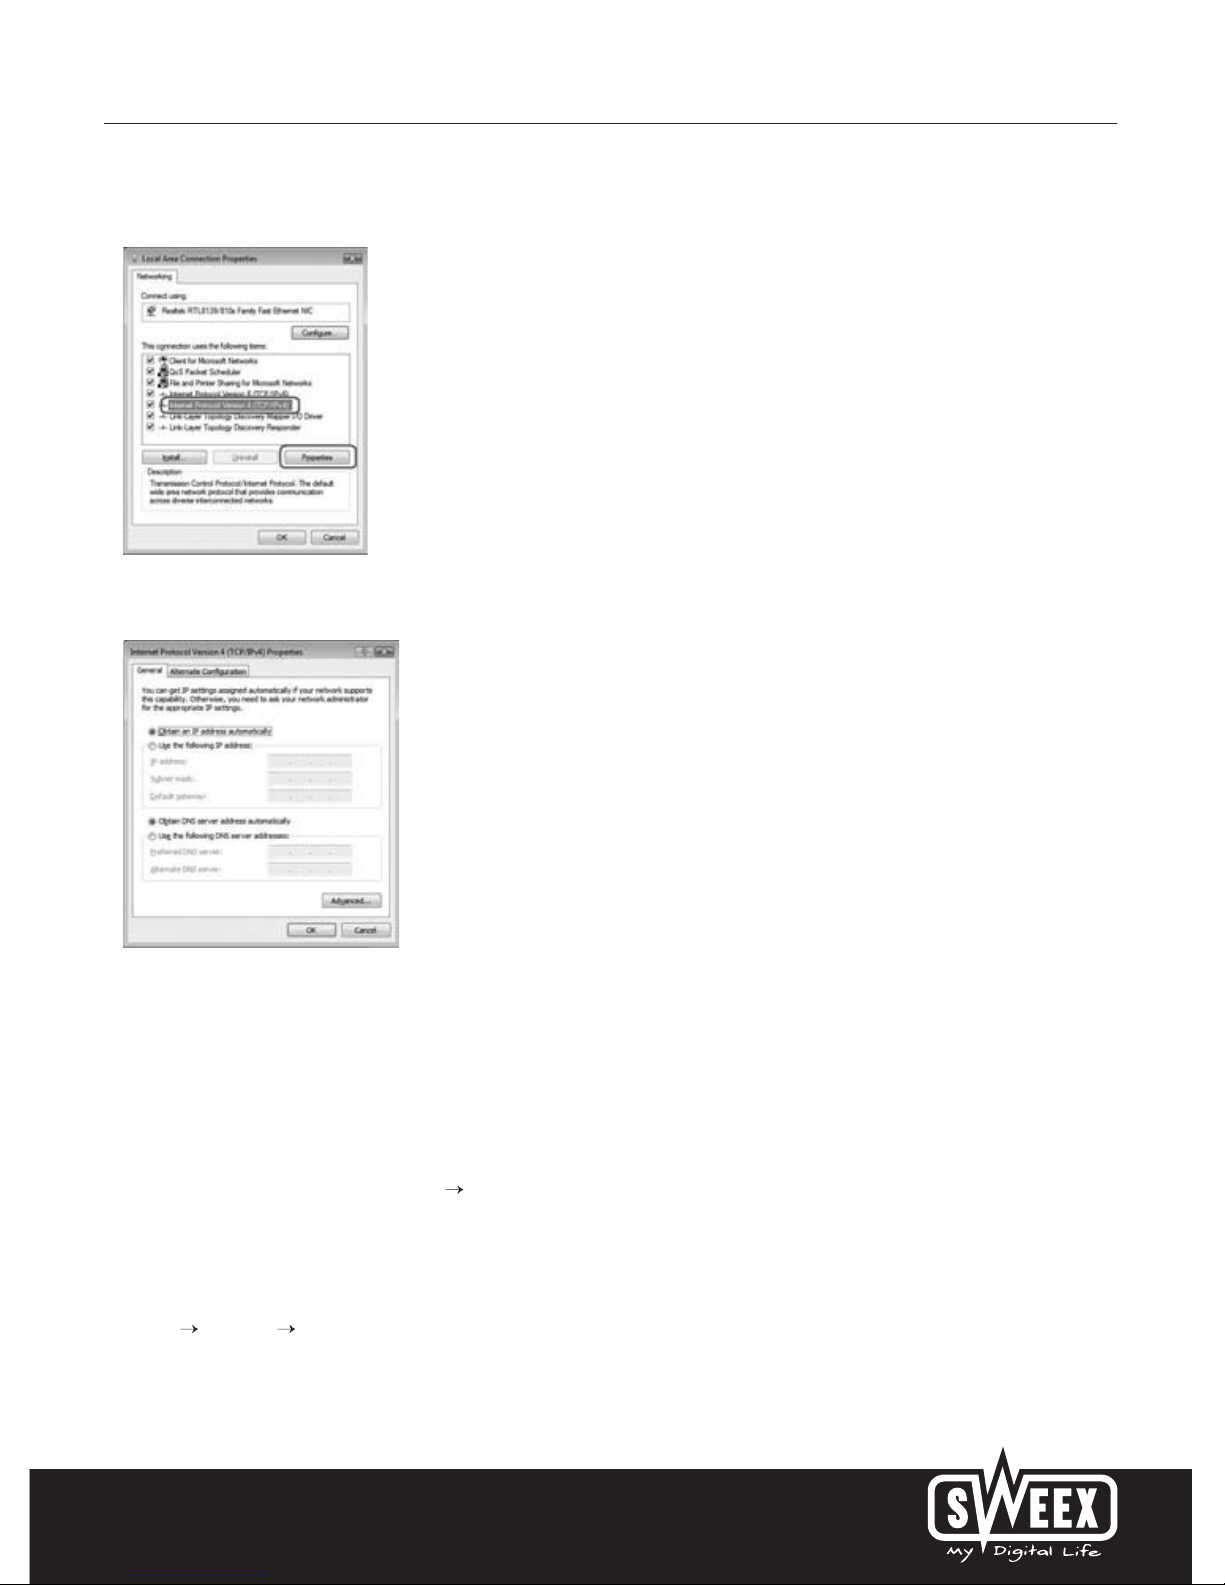
Now select “Internet Protocol Version 4 (TCP/IPv4)” and click “Properties” (Properties).
Select the options “Obtain an IP address automatically” (Obtain an IP address automatically) and “Obtain DNS server address automatically”
(Obtain DNS server address automatically).
Confirm the settings by clicking “OK”. The network settings have now been configured correctly for Vista. The correct settings for the Internet
browser will be discussed later in this manual.
Windows XP
In the bottom left of your screen, go to “Start” “Control Panel”
Then go to “Network and Internet Connections”.
Open “Network Connections”.
Or, if the Windows classic style is used:
“Start” “Settings” “Network Connections”.
Right-click “LAN Connection” or “Wireless Network Connection” and select “Properties”. The following screen appears:
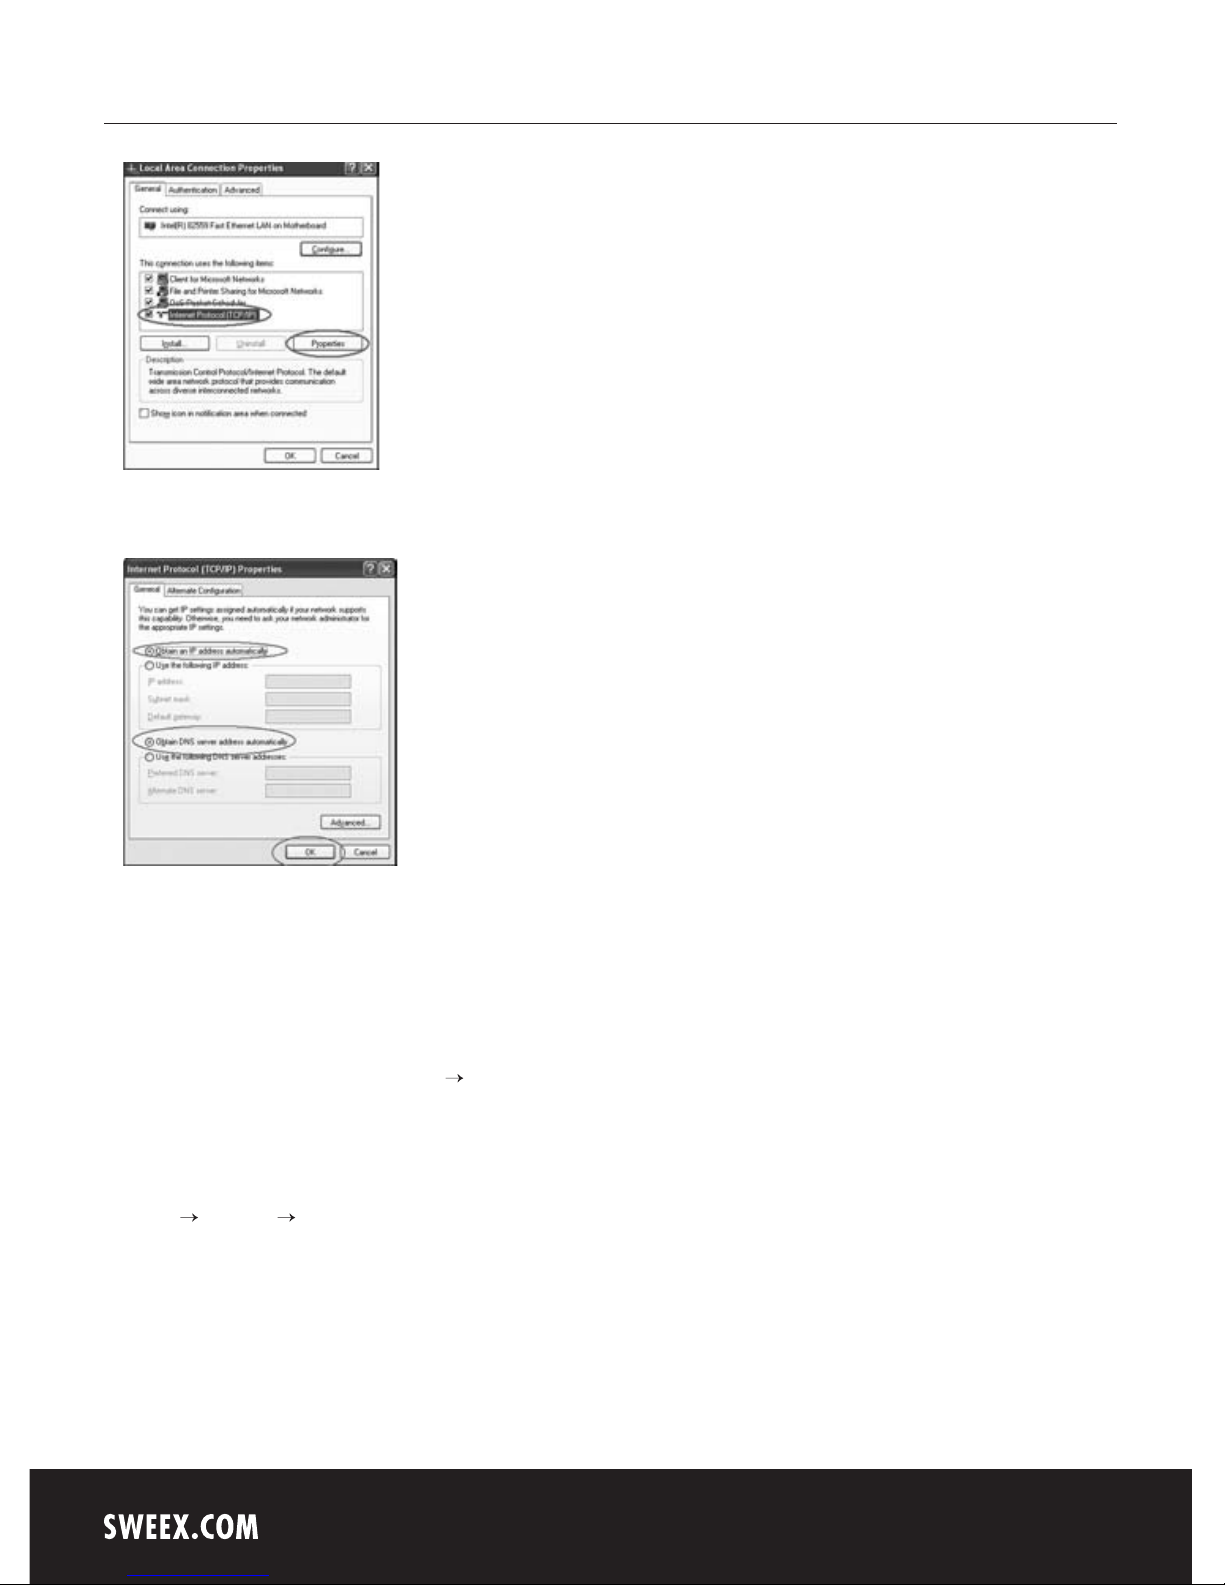
English version
8
Under the tab “General” select TCP/IP and click “Properties”
Select the options “Obtain an IP address automatically” and “Obtain DNS server address automatically”.
Confirm the settings by clicking “OK”. The network settings for Windows XP have now been configured correctly. The correct settings for the Internet
browser will be discussed later in this manual.
Windows 2000
In the bottom left of your screen, go to “Start” “Control Panel”.
Then go to “Network and Internet Connections”.
Open “Network Connections”.
Or, if the Windows classic style is used:
“Start” “Settings” “Network Connections”.
Right-click “LAN Connection” or “Wireless Network Connection” and select “Properties”. The following screen appears:
 Loading...