

SWEEX LW050v2UK, LW050/LW050UK User Manual
English version
4
LW050v2/LW050v2UK Sweex Wireless Broadband Router 54 Mbps
Introduction
First of all, many thanks for purchasing this Sweex Wireless Broadband Router 54 Mbps. The Sweex Wireless Broadband Router 54 Mbps enables
you to share a broadband Internet connection and to set up your own wireless network.
To ensure this product operates correctly, we advise you to carefully read this manual first. If despite this manual you still experience problems during
installation or operation of this product, go to www.sweex.com and look under the heading service & support.
In order to fully enjoy the Sweex Wireless Broadband Router 54 Mbps, it is important to observe a number of things:
• Do not expose the Sweex Wireless Broadband Router 54 Mbps to extreme temperatures.
Do not place the device in direct sunlight or in the direct vicinity of heating elements.
• Do not use the Sweex Wireless Broadband Router 54 Mbps in extremely dusty or moist surroundings.
• Protect the device against powerful shocks or jolts - they may damage the internal electronics.
• Never attempt to open the device yourself - it will cause the warranty to lapse.
Contents of the box
Prior to using the Sweex Wireless Broadband Router 54 Mbps, check if all required parts are present. The following parts must be present in the box:
• Wireless broadband router 54 Mbps
• Antenna
• Power supply adaptor
• RJ-45 UTP Ethernet network cable
• CD-ROM with manual and Panda Anti-virus trial software
If one of the above parts is missing, please contact the shop or supplier.
English version
5
Specifications
• Supports: IEEE 803.3 and IEEE 803.3u
• Supports: IEEE 802.11b, IEEE 802.11g
• Maximum wireless data transfer speed: 54Mbps
• Supports: DHCP (dynamic IP), PPTP, Static IP, PPPoE, L2TP
• 1 x WAN, 4 x LAN RJ-45 UTP ports
• Supports: WEP/WPA./WPA2/802.1X data encryption
• Built-in Firewall and Port Forwarding
• Removable reverse SMA Antenna 5 dBi
• 2 to 3 x Extended Range
• Supports: VPN pass through
• Web-based configuration
• Not operating system dependent
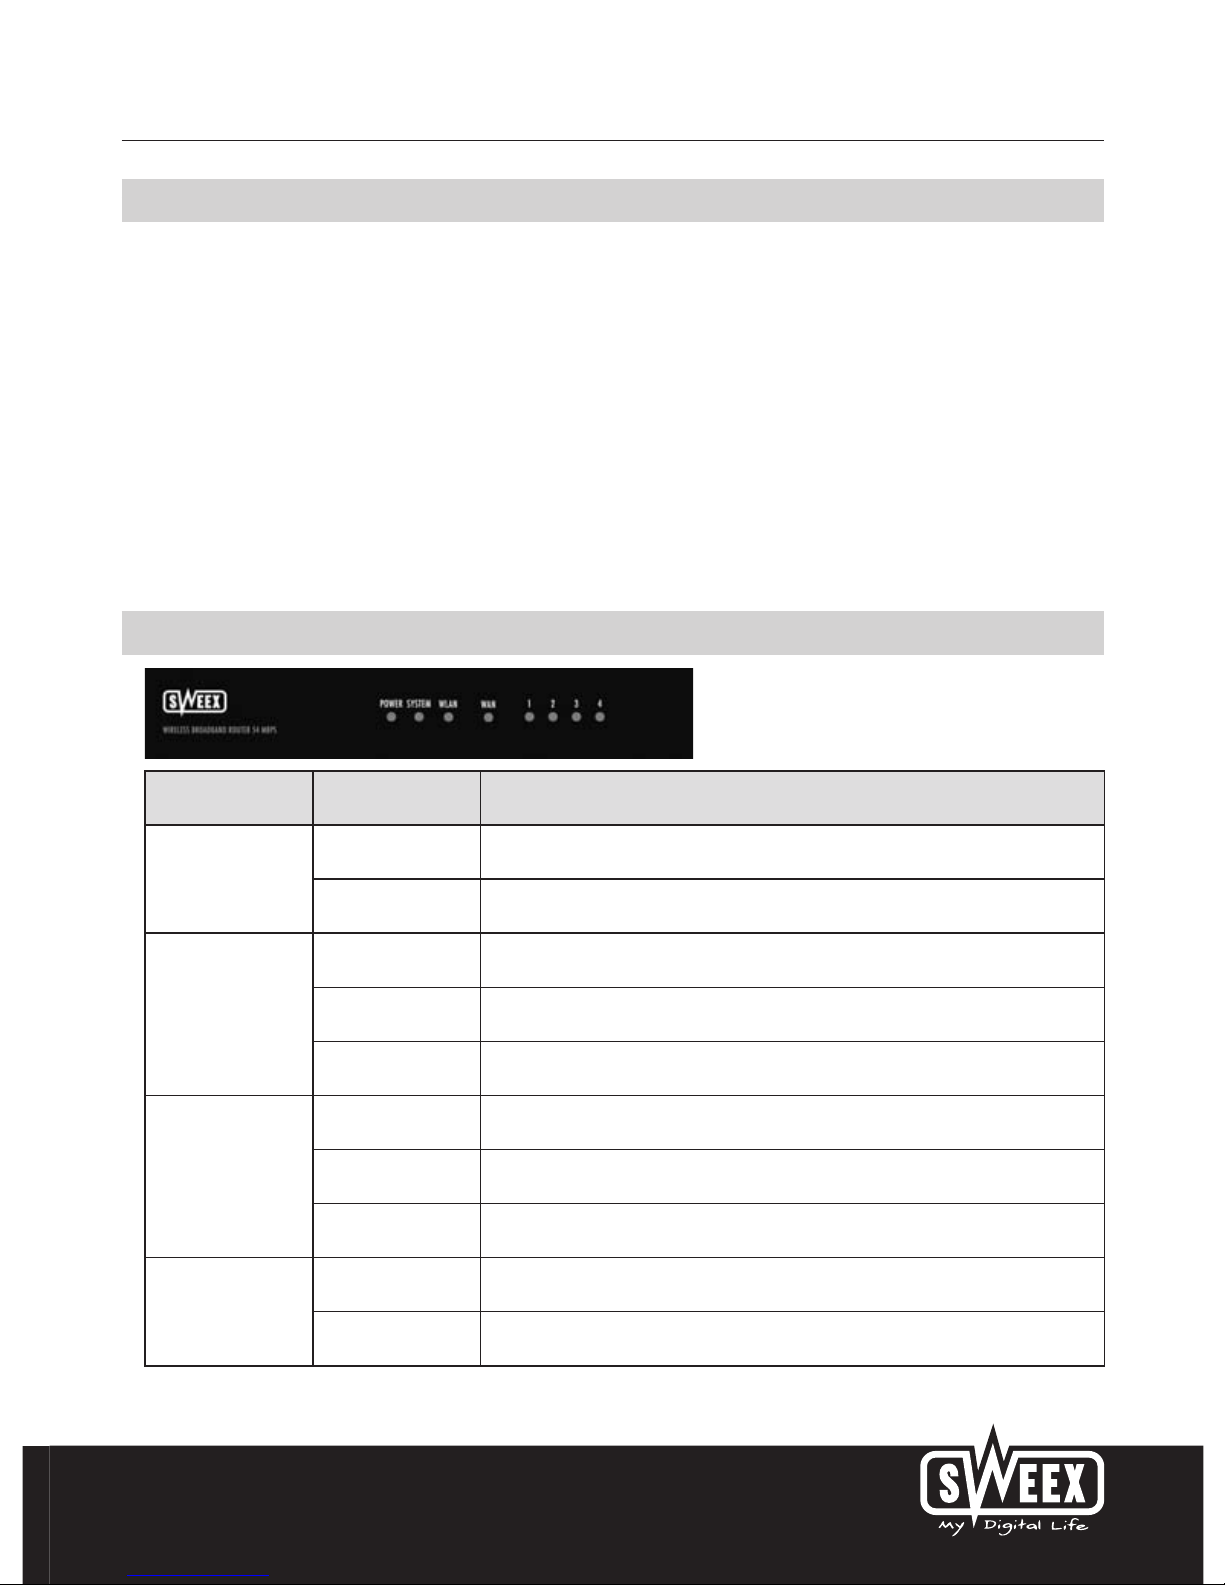
Front view
Status Status Meaning
Power
Off The router is switched off
Lit The router is switched on
System
Lit The router is starting up
Blinking The router is operating correctly
Off The router has a hardware error
Link/Act WAN
and 1 to 4
Off No device is connected to this port
Lit A computer or other network device is connected to this port
Blinking There is data traffic between the router and the connected device
WLAN
Off The wireless part is switched off
Blinking The wireless part is active
English version
6
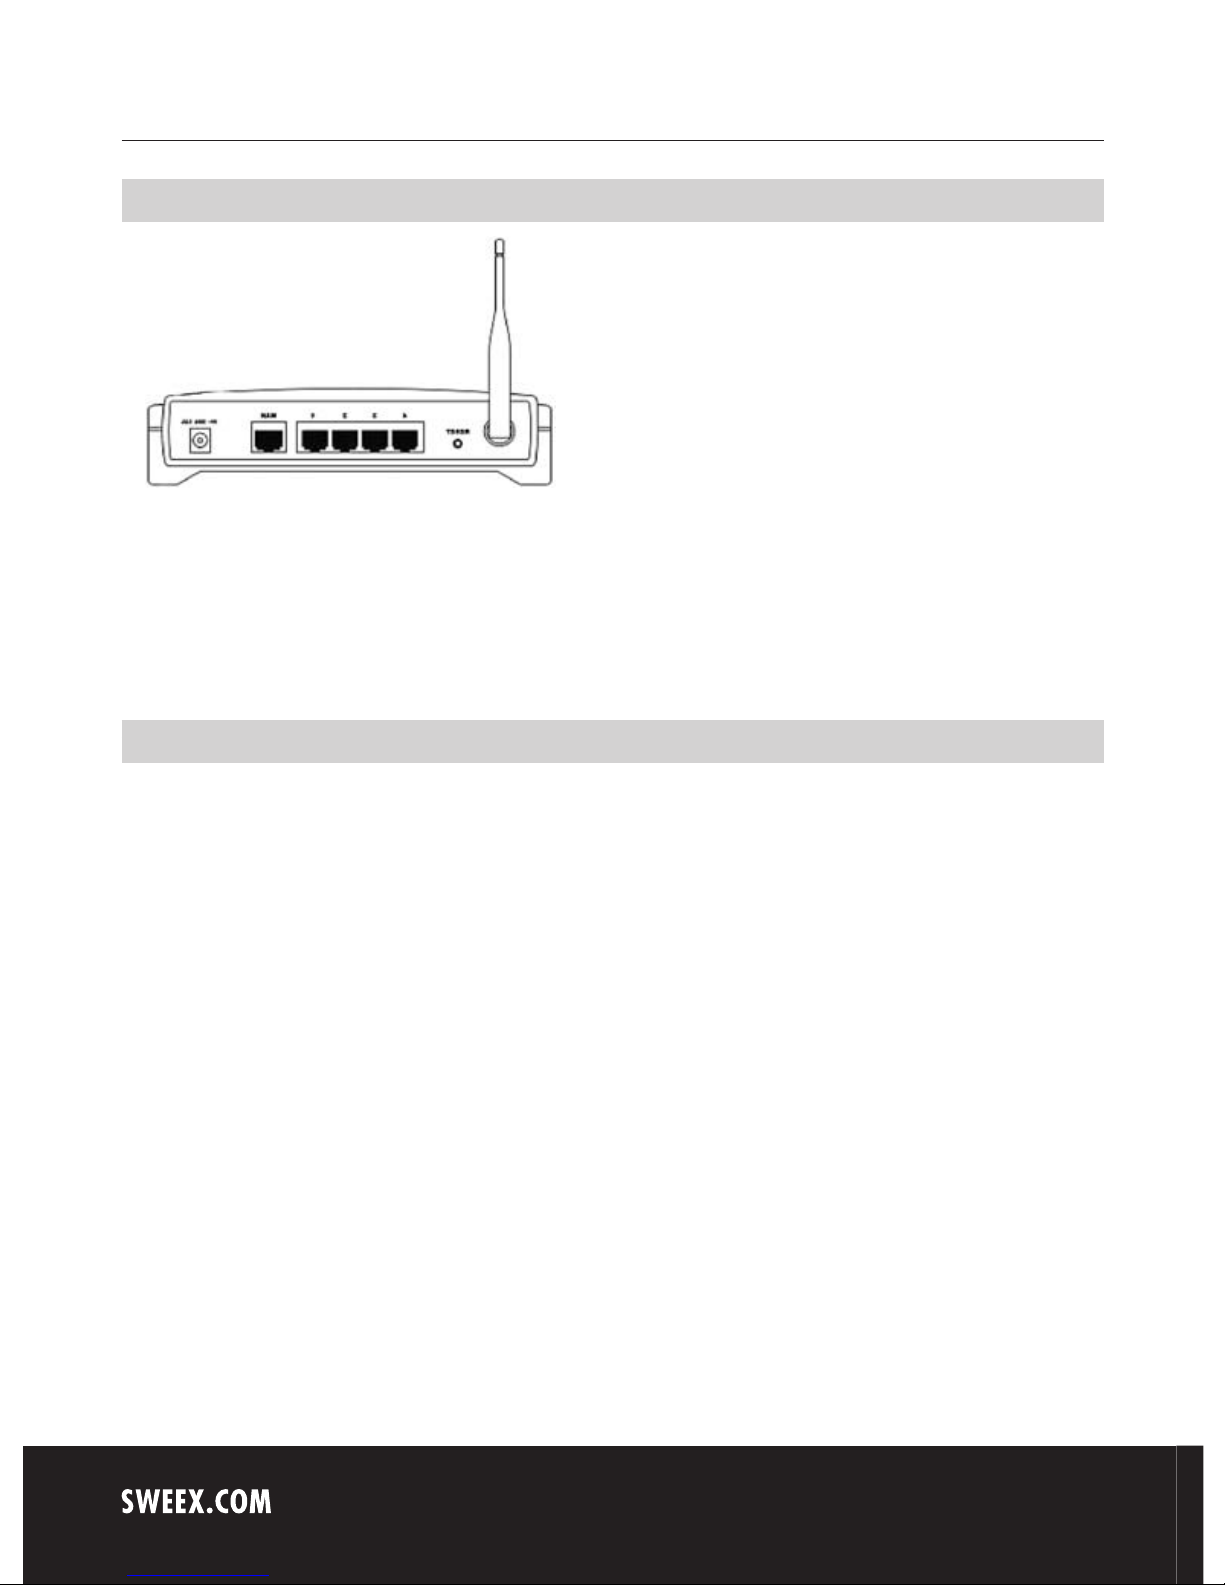
Rear view
• Antenna with reverse SMA connector.
• Reset button to return to the factory settings
• WAN port for connecting a modem by means of a RJ-45 UTP Ethernet network cable.
• LAN ports 1, 2, 3 and 4 for connecting computers by means of an RJ-45 UTP Ethernet network cable.
• Power connector for connecting the power adaptor.
Connecting the Sweex Wireless Broadband Router 54 Mbps
1. Connect the power adaptor (included) to the rear of the router and the mains socket. The light next to “Power” is lit. In the event the LED is not
lit, check the connections of the power adaptor to the router and the mains socket.
2. Switch on the computer and connect it to the rear of the modem using a network cable (RJ-45 UTP). You can select any of the ports 1, 2, 3 and 4.
The corresponding light at the front will be lit. In the event the light fails to light up, check whether the network cable is properly connected to
the computer and the router.
3. Switch on the modem* again. Note: Here we do not refer to the Sweex router. Connect the modem to the rear of the router using a network
cable (RJ-45 UTP). Do this via the WAN port The WAN light at the front of the router will light up. In the event the light fails to light up, check
whether the network cable is properly connected to the router and the modem.
*In order to use the Sweex Wireless Broadband Router 54 Mbps you need an active Internet connection, which is established through a modem.
This modem is usually supplied by the provider.
English version
7
Configuring the computer to connect to the router
Windows XP
In the bottom left of your screen, go to “Start” “Control Panel”
Then go to “Network and Internet Connections”.
Open “Network Connections”.
Or, if the Windows classic style is used:
“Start” “Settings” “Network Connections”.
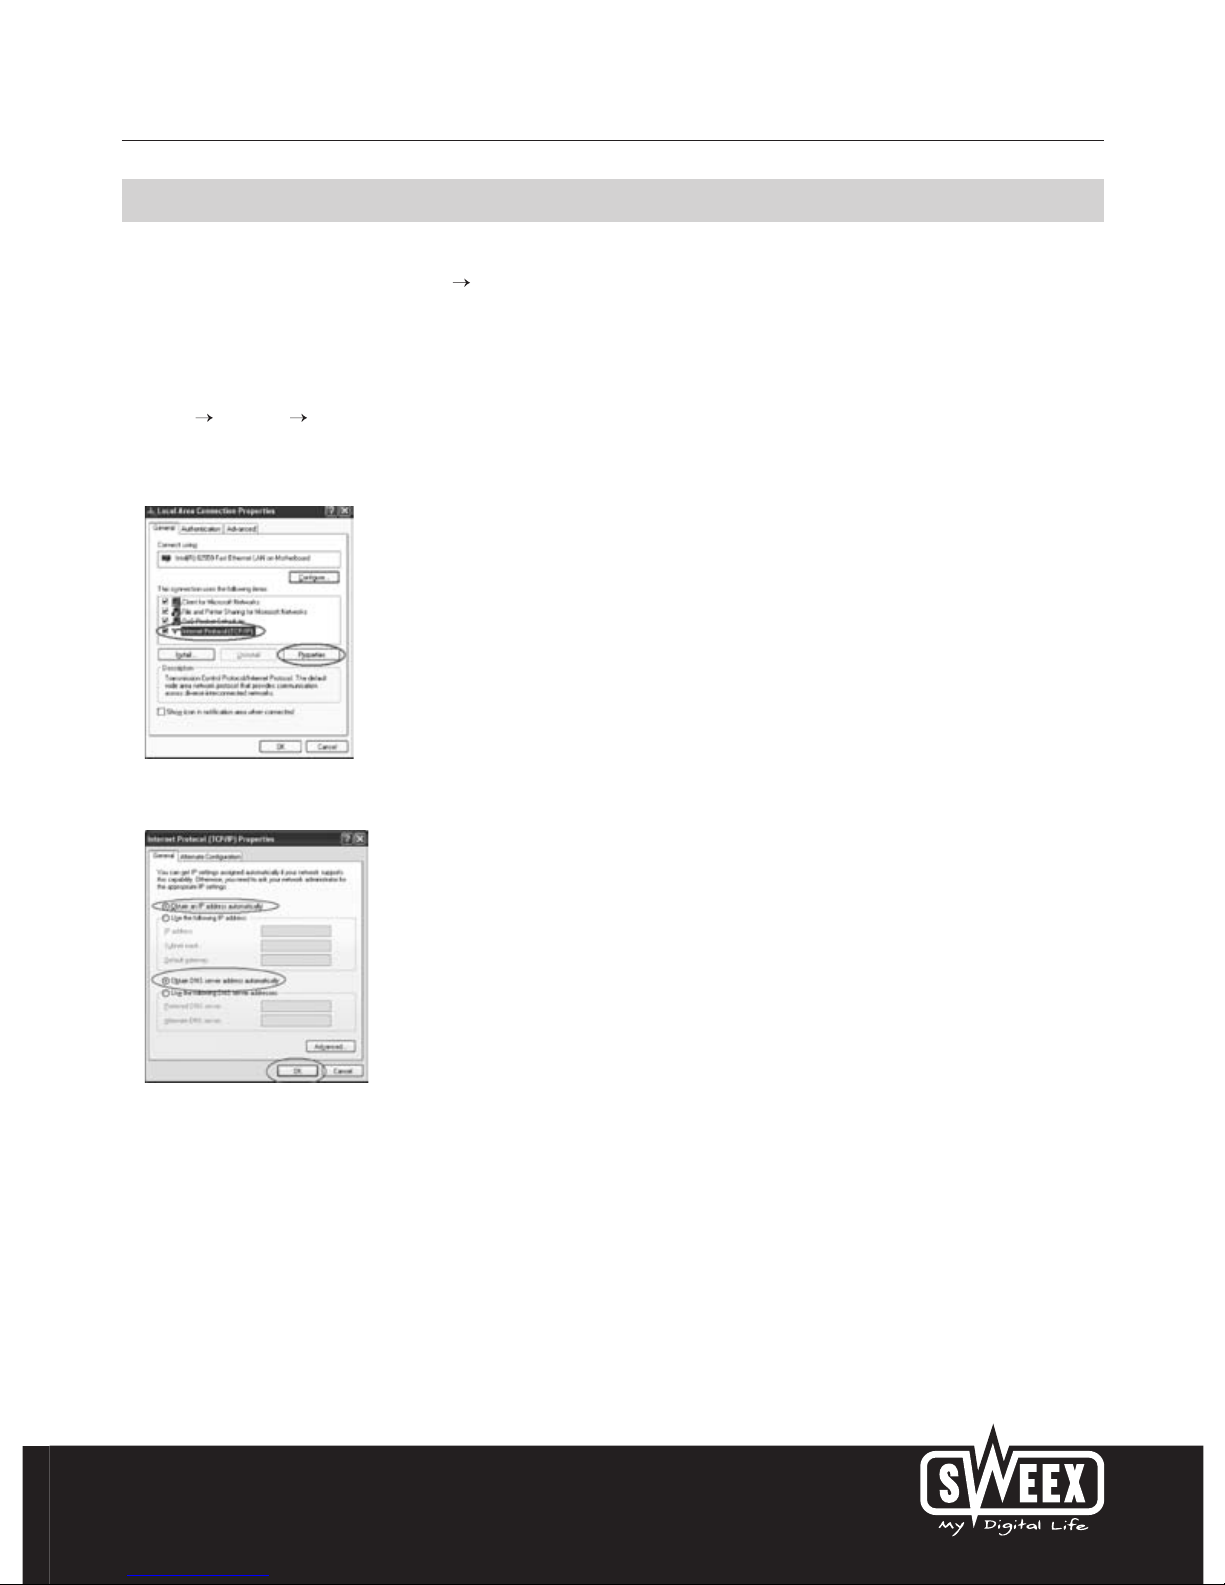
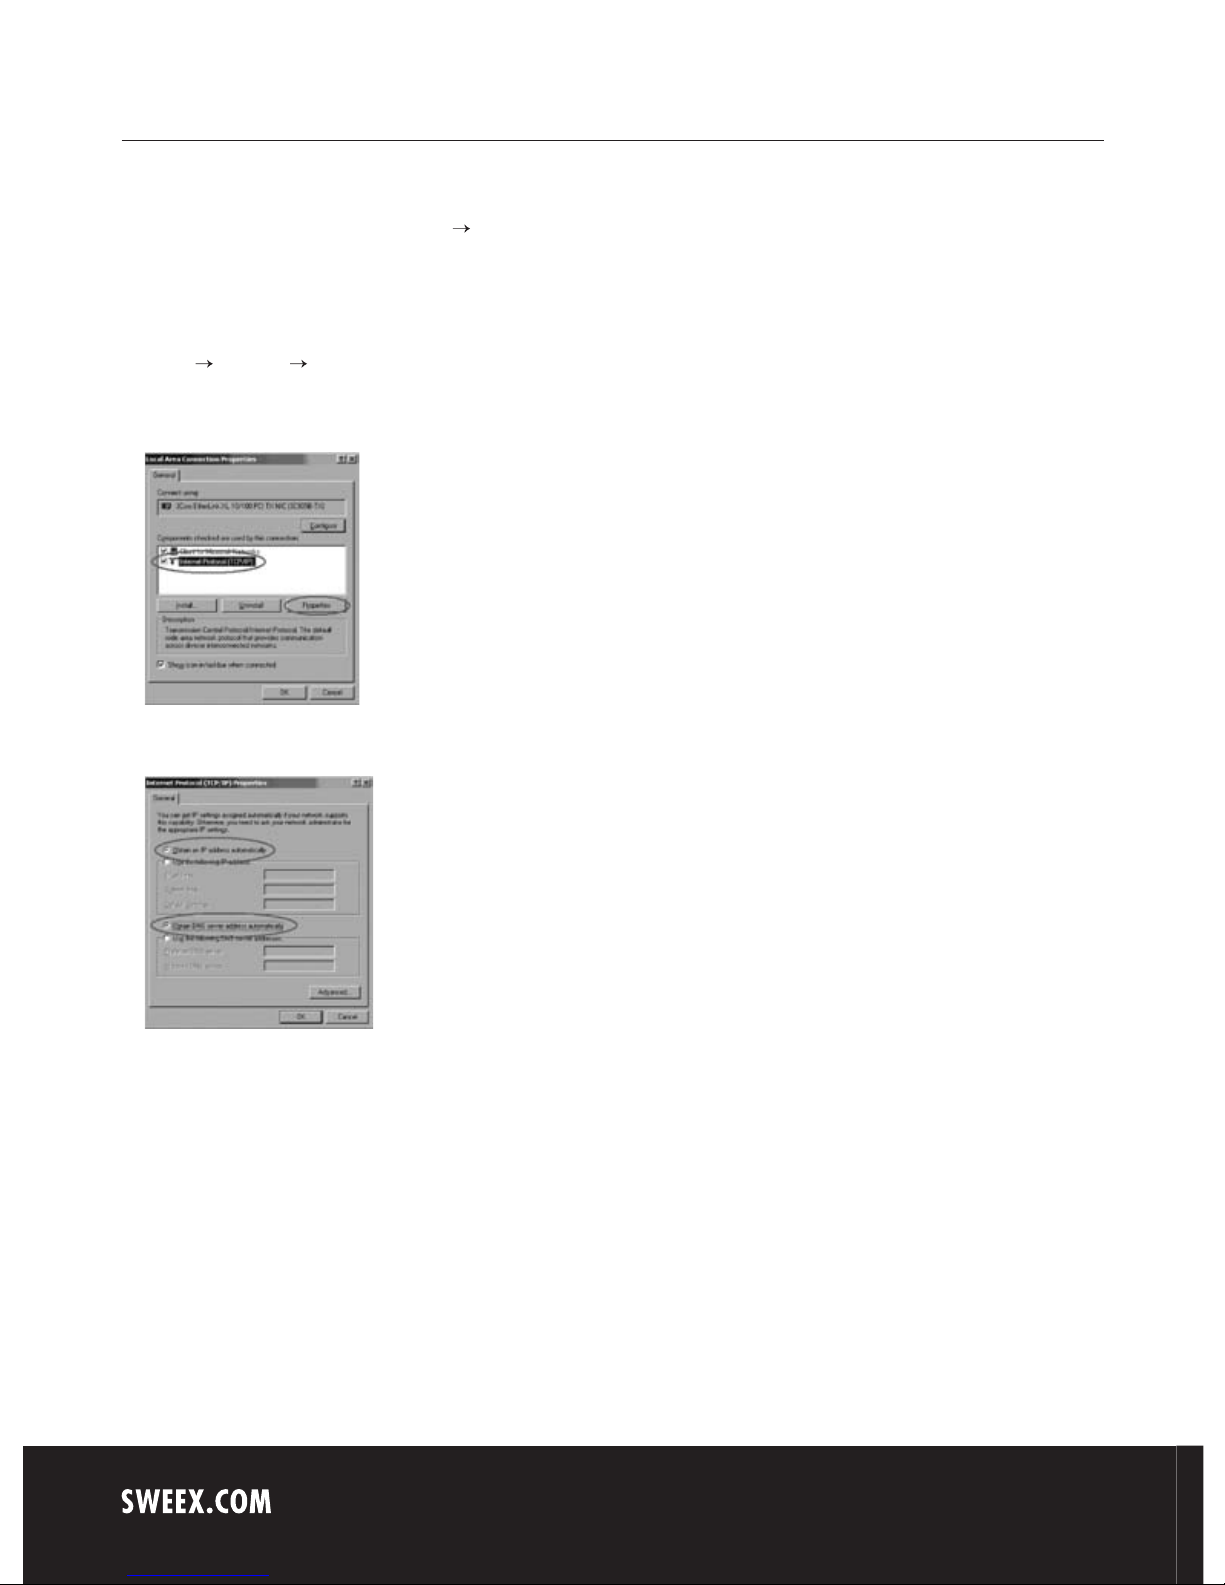
Right-click “LAN Connection” or “Wireless Network Connection” and select “Properties”. The following screen appears:
Under the tab “General” select TCP/IP and click “Properties”.
Select the options “Obtain an IP address automatically” and “Obtain DNS server address automatically”.
Confirm the settings by clicking “OK”. The network settings for Windows XP have now been configured correctly. The correct settings for the Internet
browser will be discussed later in this manual.
English version
8
Windows 2000
In the bottom left of your screen, go to “Start” “Control Panel”.
Then go to “Network and Internet Connections”.
Open “Network Connections”.
Or, if the Windows classic style is used:
“Start” “Settings” “Network Connections”.
Right-click “LAN Connection” or “Wireless Network Connection” and select “Properties”. The following screen appears:
Now select “Internet Protocol (TCP/IP)” and click “Properties”.
Select the options “Obtain an IP address automatically” and “Obtain DNS server address automatically”. Click “OK” twice.
The network settings for Windows 2000 have now been configured correctly. The correct settings for the Internet browser will be discussed later in
this manual.
English version
9
Windows 98SE
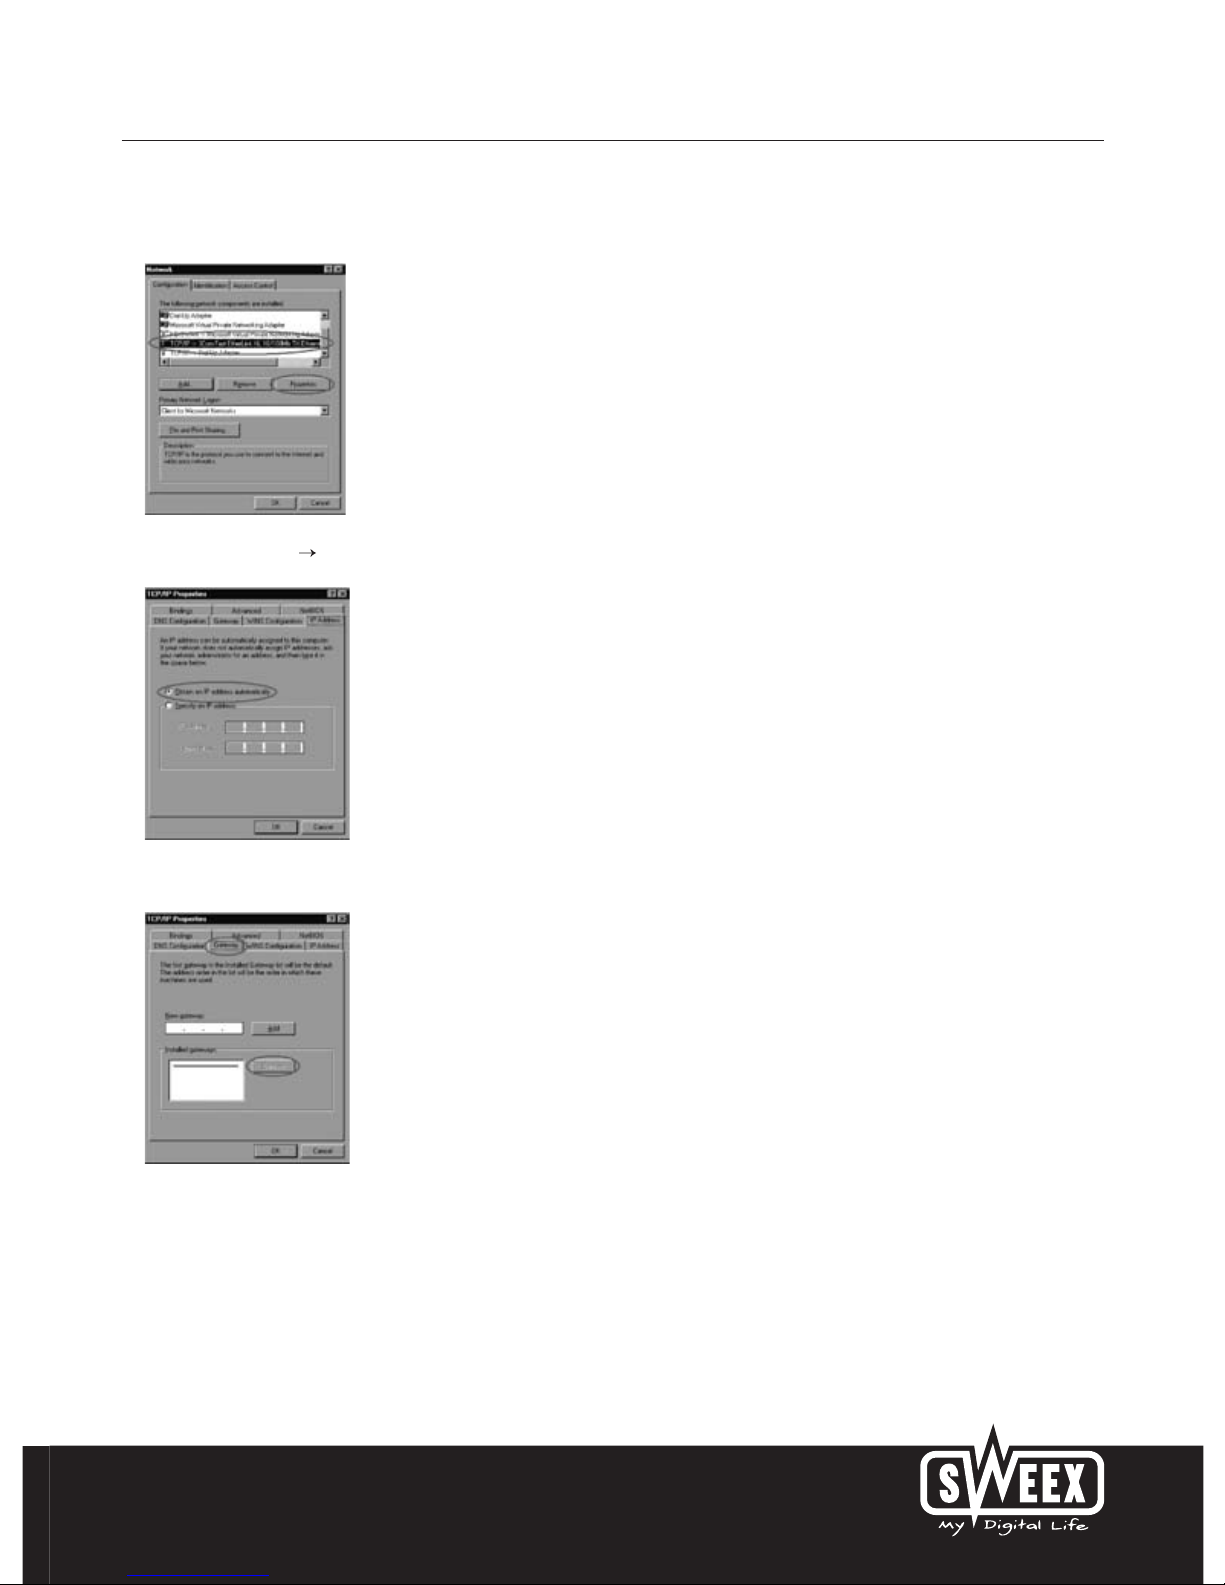
Go to “Start”, “Settings”, “Control Panel” and click “Network”.
Select the line “TCP/IP ” which corresponds to your (wireless) network card and click “Properties”.
Under the tab “IP Address”, select the option “Obtain an IP address automatically”.
Under the tab “Gateway”, the list of “Installed gateways” must be empty. If so required, select each gateway and click “Remove”.
English version
10
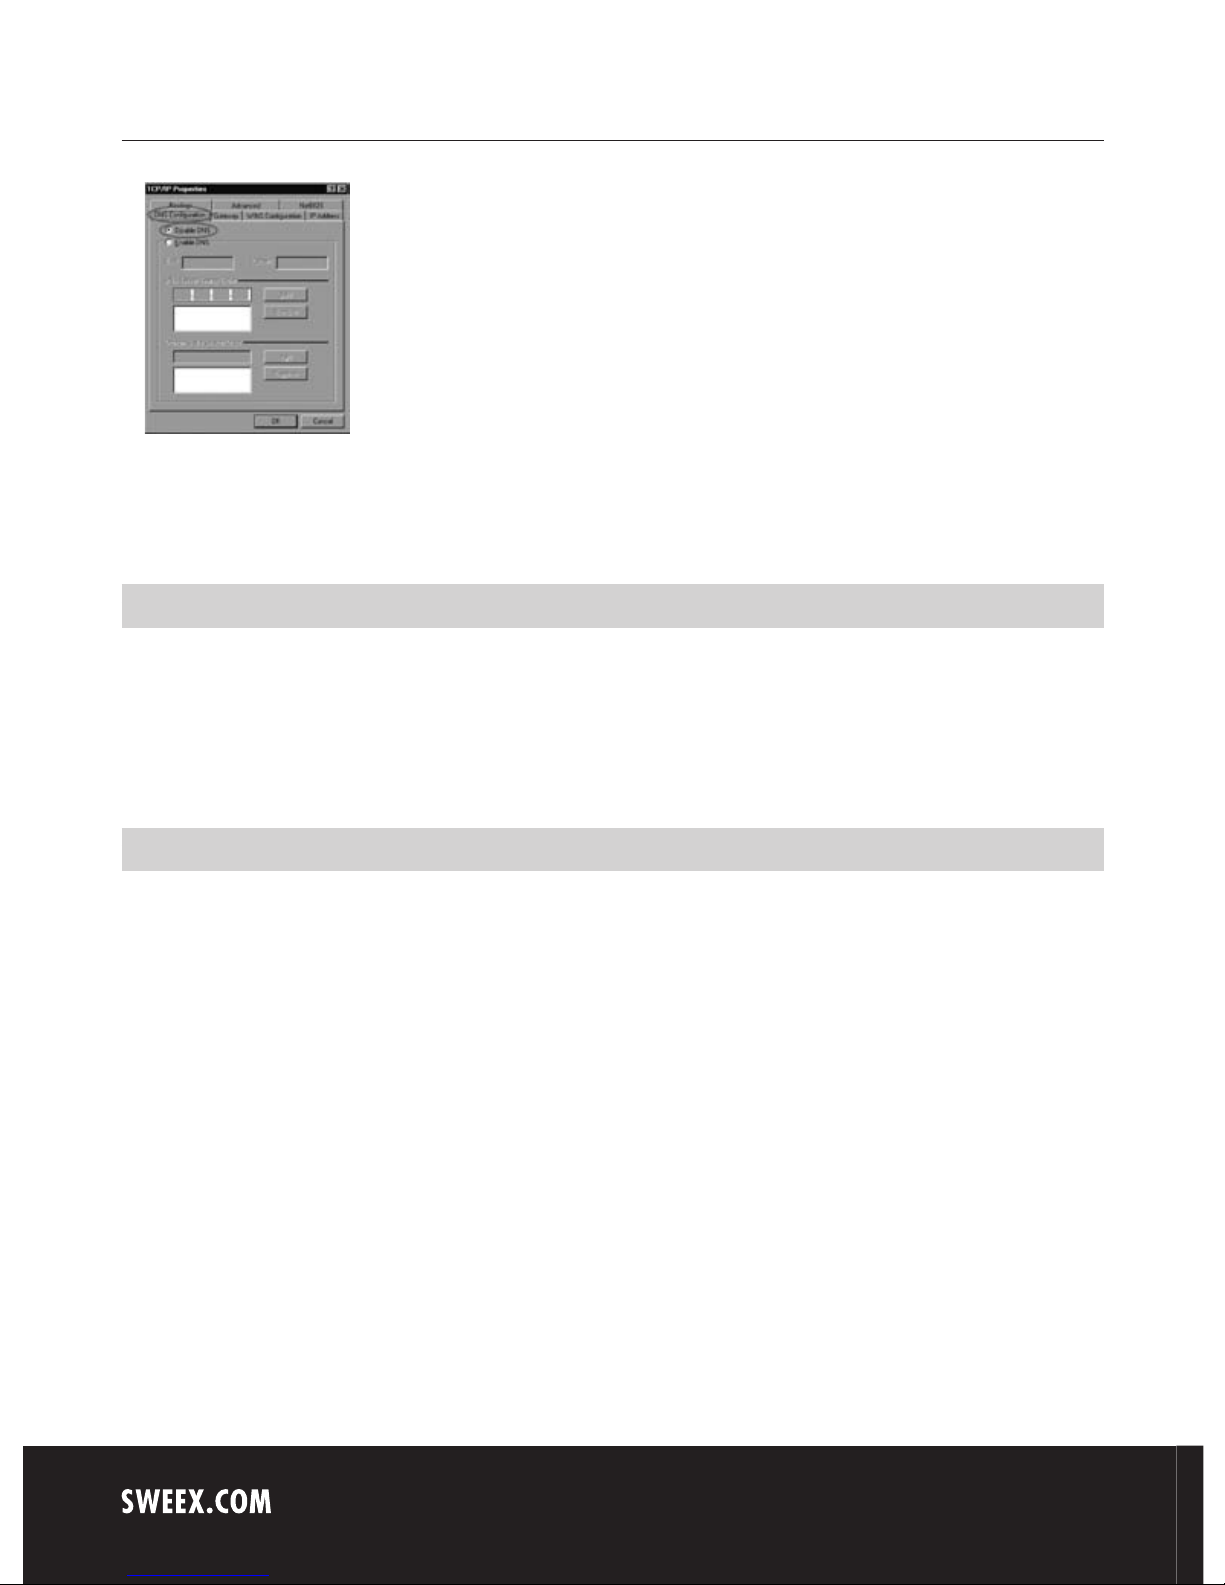
Under the tab “DNS Configuration”, select the option “Disable DNS”. Click “OK” twice.
The network settings for Windows 98SE have now been configured correctly. Now continue with the correct settings for the Internet browser below.
Internet browser settings for Windows 98SE, 2000 and XP
1. In order to access the router, the browser settings must be correct. This is easy to check by starting up Internet Explorer and selecting “Tools”
from the menu bar and then selecting the option “Internet Options”.
2. In this window, go to “Connections” and select “Never dial a connection” or remove all connections listed in the field above.
3. At the bottom, click “LAN Settings”, remove all ticks and click “OK”.
4. Restart the browser to activate the settings.
Setting the wireless network
How does it work?
In order to create a wireless network, you need a wireless router, wireless modem or access point. The wireless router, modem or access point
transmits the wireless network. The name of this network, also referred to as SSID, depends on your wireless router, modem or access point and
often differs per model or brand. You can often determine the name yourself and thus recognise your own wireless network.
Protection
You could compare a wireless network to radio signals. However, the range of a wireless network at home is not as big. Your home wireless network
often has a range of 20 to 30 metres. This means that neighbours and passers-by too can make use of your network. As a result they can get away
with surfing on your Internet connection, and they may gain access to your shared folders and files on your network. That is why it is recommended
to secure your wireless network. This protection is set up on the device transmitting the network. In most cases that is the wireless router, modem or
access point. By adding a WEP or WPA protection code, you secure the network. This code is also referred to as the network key. Enter this code on
each computer that wants to connect to that secured network. You can only be part of that network if you enter this code. If you did not enter the
network key into the router or modem yourself, ask the installer, manufacturer, supplier or provider for this code.
 Loading...