

English version
WWW.SWEEX.COM
2
LC000070 Sweex Wireless Broadband Router 11g
Introduction
First of all, we would like to thank you for buying the Sweex Wireless Router 11g. With this router, you can quickly and efficiently set up a
wireless network. The built-in router also enables you to share your internet connection easily.
The Sweex Wireless Router 11g is an advanced device consisting of a Wireless Access Point and a 4 ports switch. This means that four computers
can be connected with UTP cables to the built-in switch. In addition, several computers can have wireless communication with the router.
The router satisfies both the IEEE 802.11b as well as the 802.11g standard. This means that computers can communicate wirelessly with the
router at a speed of 11 Mbps (802.11b) or 54 Mbps (802.11g). The router is equipped with the WEP security protocol. This means that
information is encrypted.
The router also has possibilities such as DHCP Server, NAT technology and supports VPN connections. In addition, the router has a built-in Firewall
for blocking undesirable access to your network via the Internet.
We advise you to first read this manual carefully to ensure correct operation of the router adapter. If after reading the manual you still encounter
problems with the installation or operation of the router, you can find more information on our website at http://www.sweex.com.
Contents of the packaging
Before starting the installation first check that all necessary parts are present. The box should contain the following parts:
• Wireless Router 11g
• Adapter
• CD-ROM with comprehensive English language manual
• This manual
Contact the supplier if any of the above items is missing.

English version
3
Specifications
• Compatible with the 802.11g standard
• Backwards compatible with 802.11b
• Data speed: maximum 54 Mbps
• Standard IEEE 802.3. 10Base-T, 100Base-TX
• Plug and Play
• 4 UTP ports, 10/100 Mbps
• 1 WAN port
• 32 bits MIPS processor
• 64 and 128 bits WEP encryption
• Internal LAN to WAN connection of more than 50 Mbps
• Automatic MDI/MDIX function for LAN and WAN ports
• 10/100 Mbps automatic detection on both LAN as well as WAN port(s)
• Option of cloning the MAC address for specific Internet providers
• 2.4 GHz frequency range
• Supports: Windows 98SE, ME, NT, 2000, XP and Mac
WAN Port
• Virtual server
• Multi-DMZ to enable multimedia applications and internet servers on the local network.
Monitoring
• DHCP Client Log, tracking of amplified IP-addresses
• Security Log
• Device/connection Status
Management
• Web-Based Management

English version
WWW.SWEEX.COM
4
Front view
The front of the router contains the control LED’s that indicate the device status. From left to right:
PWR LED (Power LED)
Lights up in green as soon as the device is switched on.
WLAN LED (Wireless LAN LED)
This lamp starts flashing when data is being transmitted or received via the wireless network. If the LED remains continuously lit in green, this
indicates that the wireless network is available.
M1
This LED flashes when the router is active.
LAN LED 1 through 4:
These green LED’s indicate the status of the connection at each of the 4 LAN ports. In addition, these LED’s flash when data transfer is taking
place.
SPEED
Data traffic on a 10/100 Mbps connection at the connected LAN port.
WAN LED
This green LED indicates whether a WAN connection is active. The LED flashes when data transmission is taking place.
Rear view
The rear of the Wireless Router contains the various network connections, a reset button and the antennae. From right to left:
ANTENNAE
This is the antenna that is used for the wireless network. The antenna can be turned to obtain optimum reception.
WAN:
The ADSL or cable modem for the Internet connection is connected here.
LAN 1 through 4:
Computers can be directly connected to this with a UTP cable. The connection is suitable for both 10 as well as 100 Mbps connections.
RESET
This button has two different functions. The router can be reset by pressing the button with a pen or paper clip for example. This has the same
effect as temporarily pulling out the plug. If there are serious problems with the functioning of the router, the router may be reset to the factory
settings by keeping the reset button pressed with a pen or paper clip for 10 seconds. This will delete all settings.
DC IN
The external voltage supply is connected here (5Volt DC voltage).

English version
5
System requirements
A 10/100 Mbps network card.
Installation
Before proceeding with the installation we strongly advise you to ensure that the operating system is up-to-date. This can be easily checked by
opening “Internet Explorer” and selecting the “Tools” menu and then selecting the “Windows Update” option.
The wireless router may be configured in two ways. Using a computer directly connected to a UTP cable or with a computer that is wirelessly
connected to the router.
Important!
Before starting to connect the router, we recommend that you first check whether the internet connection works properly when connected directly
to the computer.
Connecting a computer with a UTP cable
Follow the steps below to set the router with a computer connected to one of the four LAN ports. Ensure that the computer(s) connected are
switched off. Then switch on the power supply to the router. Connect the computer with a UTP cable to one of the four LAN ports on the back of
the router.
Connect the ADSL or cable modem to the WAN port on the back of the router with a UTP cable. Switch the computer(s) on. After starting, the
LAN lamps on the front of the router should light up to indicate that a connection is present. The WAN lamp should light up to indicate that there
is a connection between the router and the ADSL or cable modem. If one of the lamps does not light up, check whether the UTP cables have
been connected properly.
Connecting a computer with a wireless adapter
You may proceed as follows to create a wireless connection with the router. Ensure that the computer(s) are switched off. Then switch on the
power supply to the router. Connect the ADSL or cable modem to the WAN port on the back of the router with a UTP cable.
Switch on the computer(s) that have a network adapter.
After starting the computer, check whether the settings for the wireless network have been made correctly. The name of the wireless network
(SSID) should be set at WLAN and the WEP encryption should be switched off.

English version
WWW.SWEEX.COM
6
Windows 98SE
Click “Start” and then select the options “Settings” and “Configuration screen”. Double-click on the Network icon. Select the “Configuration” tab,
and then select the TCP/IP protocol of the network adapter. Finally, click on “Properties”. Select the option “Obtain an IP address automatically”.
Click the tab “Gateway” and check that all the fields are empty. Remove existing IP numbers if any. Finally, click “OK”. Again click “OK”.
Windows may ask you for the original Windows CD-ROM in order to copy a number of files to the hard disk of the computer. Instead of using the
original CD-ROM, you may also have Windows search for these files at the following locations:
c:\windows\options\cabs. Otherwise, place the original Windows CD-ROM in the CD-ROM drive and follow the instructions.
After copying the files, Windows will indicate that the computer has to be restarted in order to activate the settings. If Windows does not ask for
this, manually restart the computer to ensure that all the new settings have been taken over correctly.
Windows 2000
Click “Start” and then select the options “Settings” and “Configuration screen”. Double-click on the Network icon and dial-up connections. Select
the desired LAN connection by clicking on it once with the mouse. Then right-click the mouse and select “Properties” in the menu that appears.
Select the option “Internet Protocol” and click on “Properties”. Activate the following options: “Obtain an IP-address automatically” and “Obtain
a DNS-address automatically”. Click ‘OK’ to close the window. Click ‘OK’ once again to close the Network screen. Restart your computer.
Windows XP
The Configuration screen in Windows XP may be displayed in two different ways, in the new Windows XP view or in the classic Windows view.
To go to the Network settings via the classic view, follow the instructions applicable to Windows 2000. For the Windows XP view of the
Configuration screen, you may proceed as follows: Click “Start” and then select the options “Settings” and “Configuration screen”. Select the
category “Network and Internet connections”. Finally, select the option “Network connections”.
Select the desired LAN connection by clicking on it once with the mouse. Now right-click with the mouse and select the option “Properties”.
Check whether the Internet Protocol (TCP/IP) is tick-marked and select this line. Click on “Properties”.
Activate the following options: “Automatically assign an IP address” and “Automatically assign a DNS server address”. Click ”OK” to exit the
TCP/IP screen and once again click “OK” to exit the Network Settings screen.
Setting the Sweex Wireless Router 11g
The settings for using the Internet depend largely on the provider and the manner in which the connection is made. Keep information about the
provider easily available. The settings of the router have to be made only once, and remain stored in the router memory.
English version
7
The Setup Wizard
Start the Internet browser, and type the following in the address bar: http://192.168.123.254. For security reasons, the router has password
protection.This password is: “admin”. Then click on “OK”. The password can be changed.
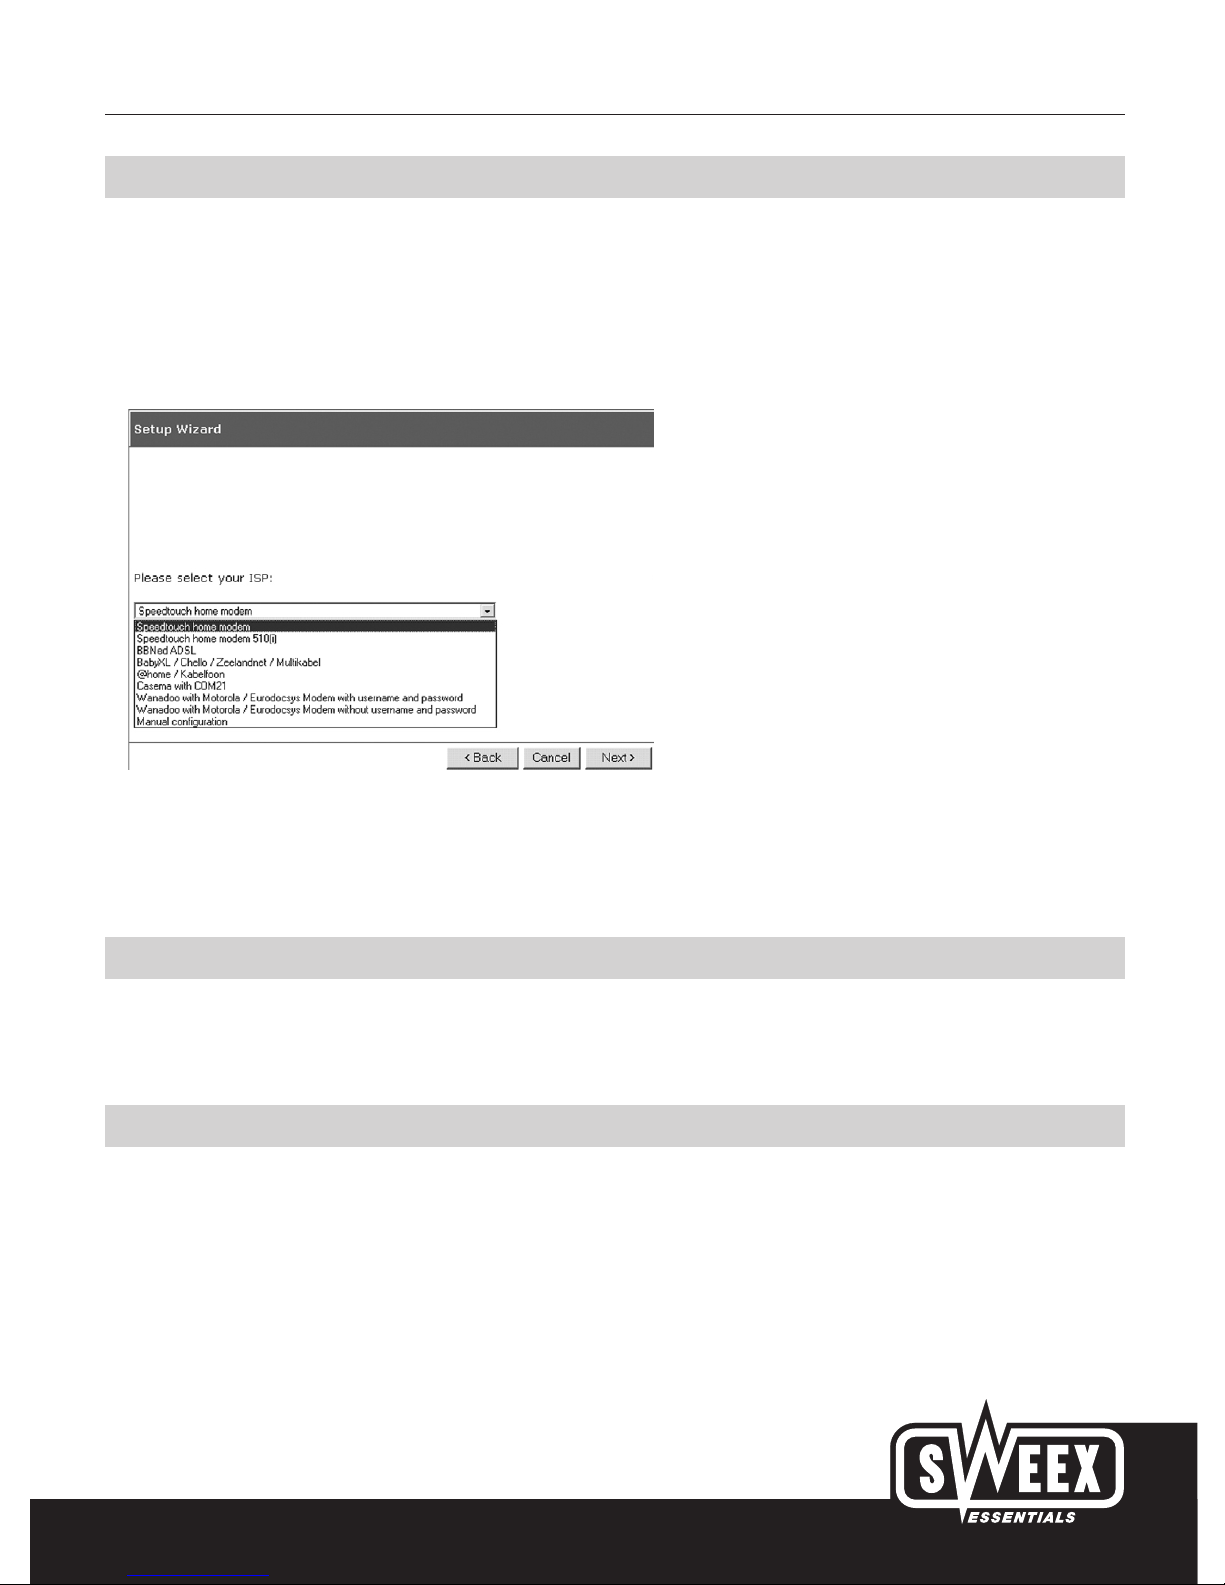
The status screen shall first appear. The option “wizard” can be selected on the left side in the menu. Now click on “Next”. The following screen
shall appear. Sweex has set a number of presets. Select an option out of these presets or select “Manual Configuration” to configure the modem
manually.
For certain providers, a so-called MAC address has to be specified during the configuration of the Sweex Wireless Router. A MAC address is the
unique number of the network card. This address can be quickly entered in the router using the “Clone MAC Address” button. This number can be
recovered in the following manner and can then be entered manually.
MAC address for Windows 98SE
Go to “Start”, select “Run” and type in the following: WINIPCFG. Then press “Enter”. An IP configuration window will now appear. Here, select
the network card (Attention! This is not a NDIS adapter or PPP adapter!). Now accurately enter the adapter address.
MAC address for Windows 2000 and XP
Go to “Start”, select “Run” and type in the following: CMD. Press Enter and a Command window will appear. Type in the command: IPCONFIG
/ALL and press Enter. A list showing technical details will appear; from these note down the Physical Address of the LAN connection.
In some cases, you will have to perform the following actions if an Internet connection is not made. Close Internet Explorer. Shut down the
computer, wait for 10 seconds and then switch off the modem as well. Leave the router switched on at all times! Again wait for 10 seconds and
then switch on the modem. Wait for 10 seconds and switch on the computer. Internet can be used after Windows starts up.

English version
WWW.SWEEX.COM
8
Advanced settings
Apart from the Setup Wizard, you can also select Advanced options in the main menu of the Sweex Wireless Router. (Extra and Tools). More
information about this may be found in the comprehensive English language manual on the CD-ROM.
Known problems and solutions
Pinging between the computers connected to the router cannot be done
There may be two reasons why pinging between computers cannot take place. If necessary, deactivate the Firewall such as Norton or ZoneAlarm,
if any active. In Windows XP, check the network card settings. Switch off the Firewall option. Go to: “Configuration screen” and select “Network
connections”. Now right-click with the mouse on the network card used and select the “Properties” option. Go to the “Advanced” tab and
remove the tick mark placed against the Firewall option.
Since the installation of the Wireless Router, Internet Explorer does not run properly
Check whether the correct type of connection has been set in “Internet Explorer”. Go to the menu “Extra” and select the menu item “Internet
Options”. Select the “Connections” tab and check whether the option “Never dial a connection” has been selected. Now click “LAN settings”.
Check whether all the options have been deactivated. Close the window by clicking “OK” and once again click “OK” to close the Internet Options
window . Finally close “Internet Explorer” and restart the computer.
Warranty
All articles that are carried under the name Sweex Essentials have a 3-year term of guarantee. Only the Sweex digital photo and video cameras
have a 2-year term of guarantee. We offer a warranty of six months on rechargeable batteries.
Settlement of guarantee takes place only via the dealer where you have purchased the product in question.
 Loading...