

Page 1
English version
English version
WWW.SWEEX.COM
Management
• Web-Based Management
• Remote Management
Possible applications
Create a network for several users, and share the internet in a flash without the need to install an extra piece of software for this purpose. No difficult
settings. A standard Firewall is built in, offering protection against external users trying to search your PC. Attention: A software Firewall should be
installed.
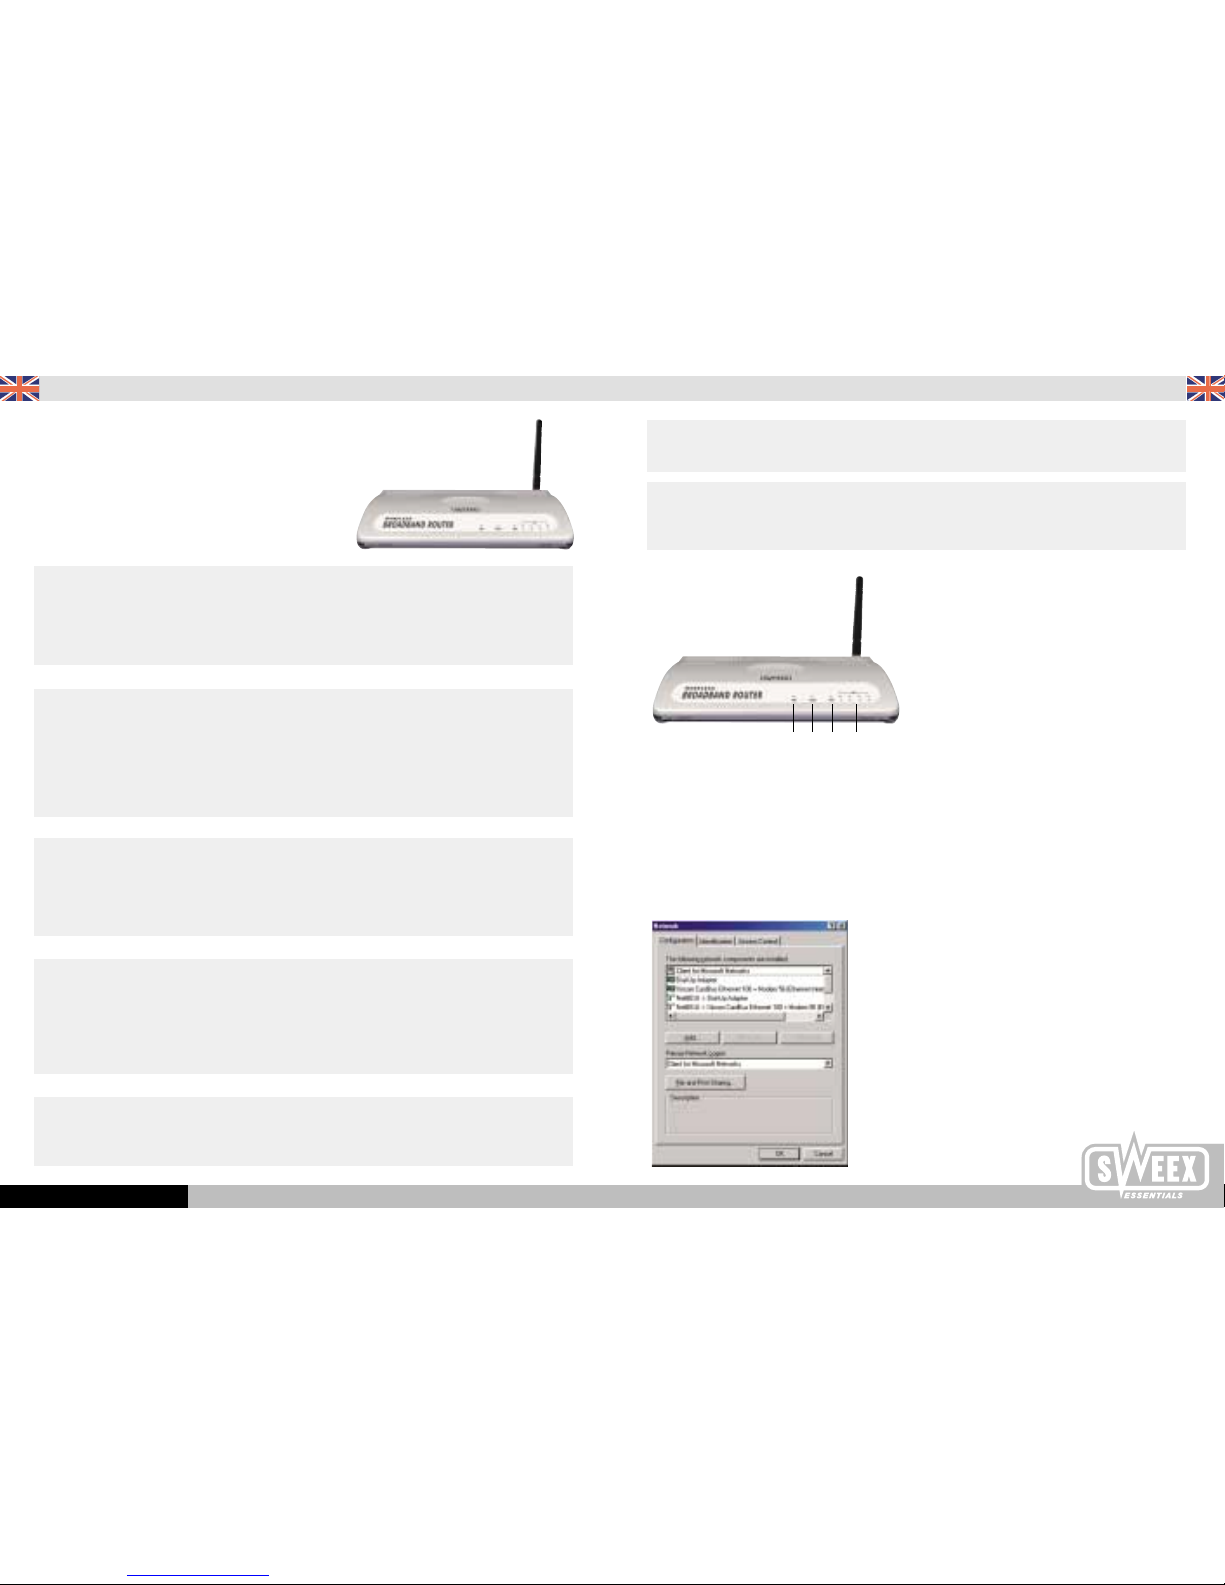
Explanation of the router LEDs
1. PWR: Shows a green light as soon as the router is connected; the router is ready for use.
2. WLAN: Shows a green light whenever a wireless client is active; flashes during data exchange.
3. WAN: Shows a green light when the xDSL is correctly connected to the WAN port.
4. LAN 1 through 4: Lights up when there is a connection to the local PC; flashes during data exchange.
Quick Configuration installation for Windows 95, 98 and ME
In conjunction with router configuration, the PC first requires a few basic settings; in this context proceed as follows.
Using your right-hand mouse button, click on the network environment and select ‘properties’. The ‘network configuration window’ appears.
If your computer is equipped with a modem, this window will also show a calling adapter, a TCP/IP for the calling adapter and a NetBEUI.
Sweex Wireless BroadBand Router
+ 4 port switch
Advantages
Internet Sharing - A broadband internet connection makes it possible for several PCs to use the internet simultaneously.
Wireless - Working on the internet without needing a cable, using the 802.11 B protocol
Supports DHCP Server/Client - Ideal for quick installation, user-friendly configuration (supports the DHCP server/client support).
4 port 10/100 switch - Create a network and share certain files and / or the printer with several other users.
Firewall to protect the intranet - The Firewall offers protection against external attacks.
Primary properties
• Standard IEEE 802.3. 10Base-T, 100Base-TX
• 4 UTP ports, 10/100 Mbps
• Wireless Access Point in accordance with the 802.11B protocol
• Firewall to protect the intranet
• WEB Based Management GUI - Provides quick access so as to change the router configuration
• Supports Static & Dynamic IP, PPPoE and PPTP clients for xDSL connections
• Support of IPRouting and NAT
Technical Specifications
• WAN Port
• DMZ couples the WAN port of local IP addresses to LAN Prive IP addresses
• Address Mapping
• Virtual Servers
• Bridge Mode
Access control and security
• NAT Firewall - There is no internet access to the private IP addresses
• IP Packet Access Control
• Hacker Attack protection (DoS)
• PAP/CHAP/MS-CHAP verification
• VPN PPTP Client
• VPN /PPTP/IPSec pass through
Monitoring
• DHCP Client Log
• Security Log
• Device/Connection Status
123 4
Page 2
English version
English version
WWW.SWEEX.COM
And the router will assign the IP adress.
This completes the basic settings for Windows 95, 98 and ME. In order to create the internet connection, open the chapter on ‘router configuration’
further down in this manual. The included CD ROM contains further information on router applications.
Quick Configuration installation for Windows 2000 and XP
In conjunction with router configuration, the PC first requires a few basic settings; in this context proceed as follows.
Using your right-hand mouse button, click on the network environment and select ‘properties’. The ‘network configuration window’ appears. Select the
option ‘internet protocol’ (TCP/IP) and confirm with ‘OK’.
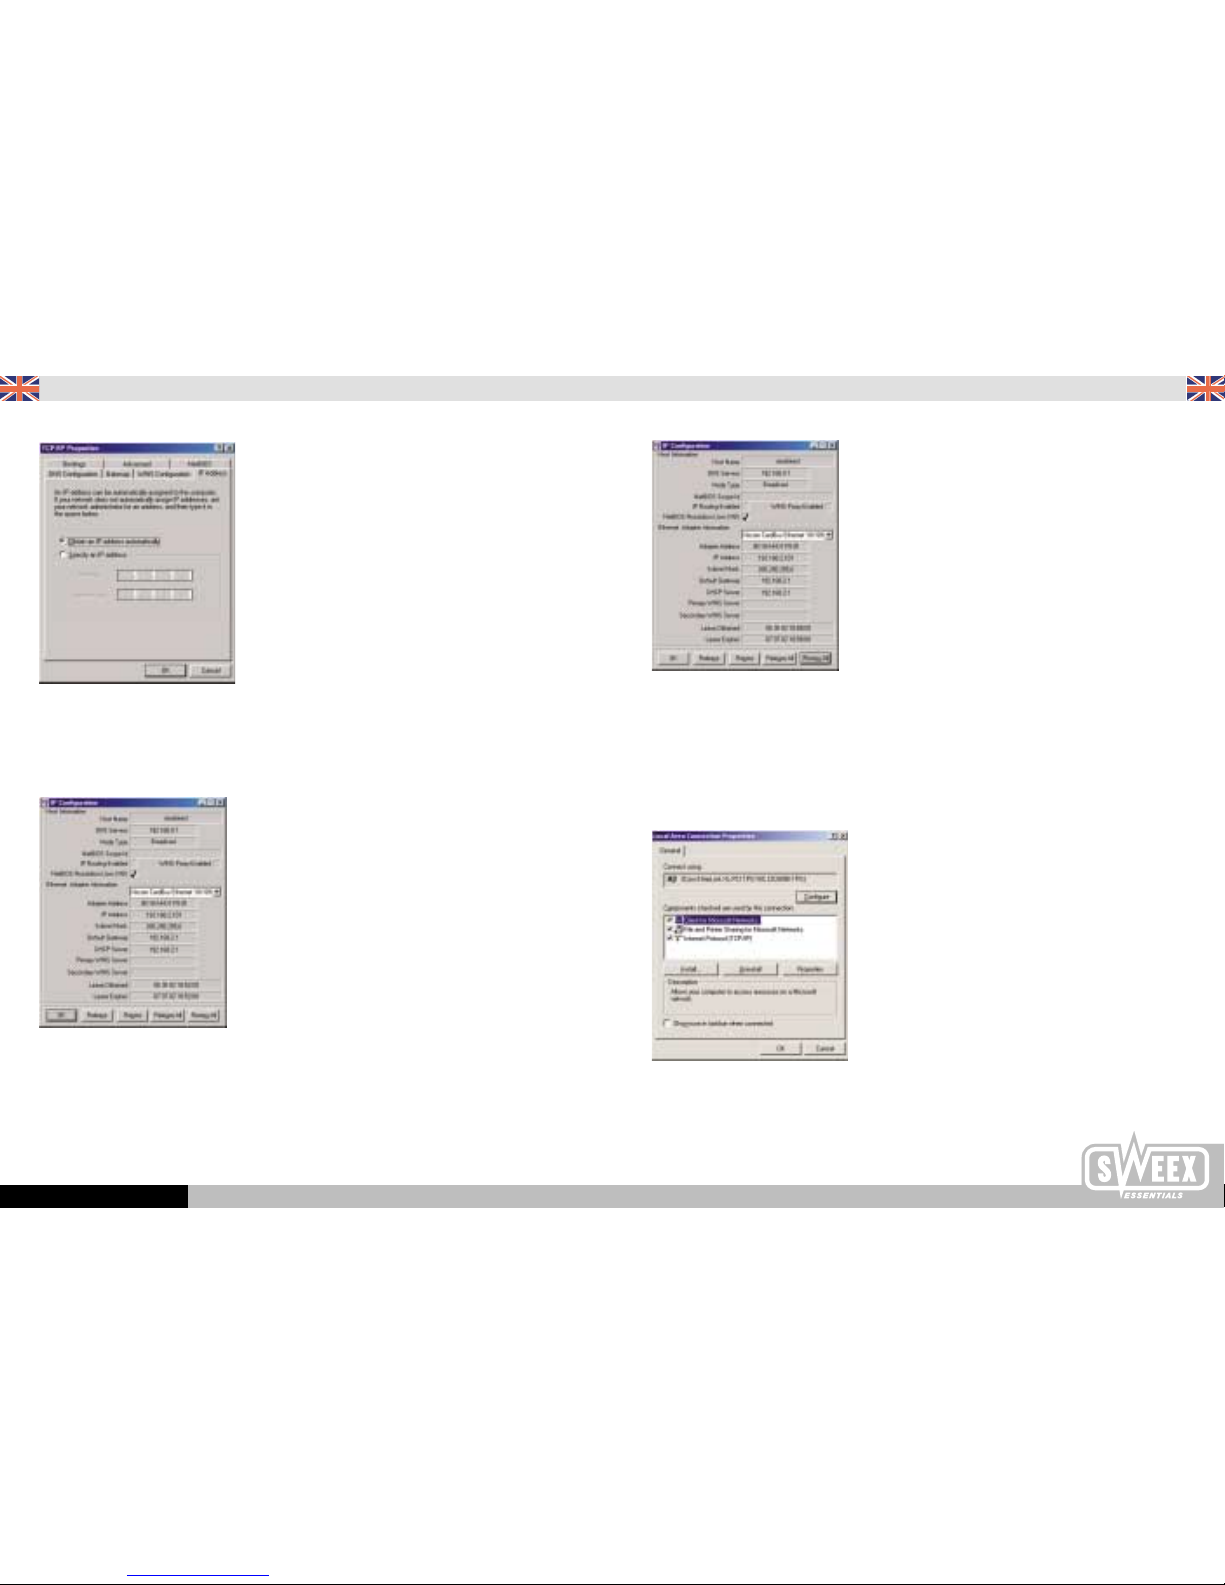
Then click on TCP/IP of your network card; if you gave an IP address, click on ‘automatic assignment of an IP address’.
Now connect your Broadband router to the computer; connect it to the network card via a straight cable.
Open the main menu and select ‘perform’, give the “winipcfg” command (without quotation marks), and select your network card as adapter
information.
The IP configuration address is found on xxx.xxx.xxx.xxx. Click on ‘release all’ and the IP configuration address will be changed to 0.0.0.0
Then click on “revise all”.
Page 3

English version
English version
WWW.SWEEX.COM
The router will now assign a new IP address.
Resetting the router to the factory settings
Attention: The following procedure will erase all data entered into the router. This means that your inlog name, your password, MAC address and IP
addresses will have to be entered once more.
For a complete router reset press the reset button with a pen and keep it pressed for four seconds. The LAN LEDs 1 through 4 will all light up to show
that the reset procedure is completed. The router settings will return to ‘factory default’.
Pressing the reset button once will effect a regular router reset. In this case the data entered will remain effective.
Router Configuration
As soon as you have completed the network configuration of your computer, you may create the internet connection.
Start up your browser and enter the following address http://192.168.2.1 in the URL bar.
Confirm with ‘Enter’.
Click on ‘Login’ without entering anything in this panel.
Select the option ‘automatic assignment of an IP address’ and confirm with ‘OK’.
Attention: The mentioned commands in quotation marks should not be used when performing the tasks.
Now open the start menu, select ‘perform’ and enter “CMD”. Confirm with ‘Enter’. Give the ‘Ipconfig’ command and confirm with ‘Enter’.
Now give the ‘Ipconfig/release’ command and confirm with ‘Enter’.
The IP address is being renewed. You will find that in this case, too, the IP address is now 0.0.0.0. Now give the ‘Ipconfig/renew’ command and
confirm with ‘Enter’.
Page 4

English version
English version
WWW.SWEEX.COM
• Cable modem Your ISP automatically provides an IP address
• Fixed-IP xDSL You have received a fixed IP address from your ISP
• PPPoE Your ISP works via a point-to-point protocol using an ethernet (PPPoE) connection.
• PPTP Your ISP works via point-to-point tunneling Protocol (PPTP) connection.
Select the type of connection. To exemplify this procedure we will create a PPPoE connection.
Select PPPoE xDSL; you will be automatically referred to the correct panel.
Enter you user name and password. Enter the MTU value under 1492 and confirm with ‘OK’ to save the data.
In the status screen under ‘internet connection’ you can see whether the internet connection is functional.
Then you can click on ‘LogOut’ in the upper right-hand corner to return to the login screen. Now click on ‘Cancel’. After a restart, the computer is ready
to access the internet via the router.
Click on ‘Quick Setup’
Enter the time zone; if you like you may enter the summer time and winter time data.
Click on ‘Next’ to continue the procedure.
Page 5

English version
WWW.SWEEX.COM
In the wireless LAN screen you can record the most important data such as the ESSID and the channel. N.B. make sure that the SSID matches that of the
wireless client. Click on ‘Apply’ to go to the next screen.
In the ‘Encryption’ screen you can secure the wireless LAN against undesirable users. You can choose between a 64 or 128 bit key. This can be created
very simply by specifying a standard sentence. For example. My router is secure. Click on ‘Generate’ and the hexadecimal code is created for you.
You then transfer this key into your ‘Wireless Client Adapter‘ If you have used this key, click on ‘Apply’
Then you can click on ‘LogOut’ in the upper right-hand corner to return to the login screen. Now click on ‘Cancel’. After a restart, the computer is ready to
access the internet via the router.
 Loading...