

Page 1
English version
WWW.SWEEX.COM
English version
External Modem Ambient
Advantages
Live video & conference ready - Offers the opportunity to watch television or chat through your webcam with your family, friends and acquaintances all
over the world.
Multifunctional - The computer can be used as a videotelephone, both for receiving and sending video images. The computer can also be used in
combination with the modem an as answering machine, which means that you have the possibility to phone hands free.
Speed - Receive and send faxes up to a maximum speed of 14.400bps, receive data up to a maximum speed of 56kbps in V.90 or 56kflex modus.
Fallback to V.34 / 33.6kbps- If it should happen that a telephone line is bad, the system switches automatically to a different protocol.
If the other side of the modem does not support the V.90 mode, the system also switches back automatically.
Main features
• Intel Ambient chipset
• Hayes compatible
• Modem 56,000bps / V.90
• Modem 33,600 / 28,800bps ITU V.34
• Fax group III class 1 9,600 / 14,400 bps
• Modem is suitable for Internet, telebanking and sending and receiving faxes, you can also use the computer together with the modem and a full
duplex sound card as an answering machine
• Suitable for computer systems with IBM PC 586 and above
• Fully compatible with Windows 95 / 98 / ME / 2000 / NT / XP
Brand names
All company names, brand names and product names are trademarks or registered trademarks owned by the companies in question.
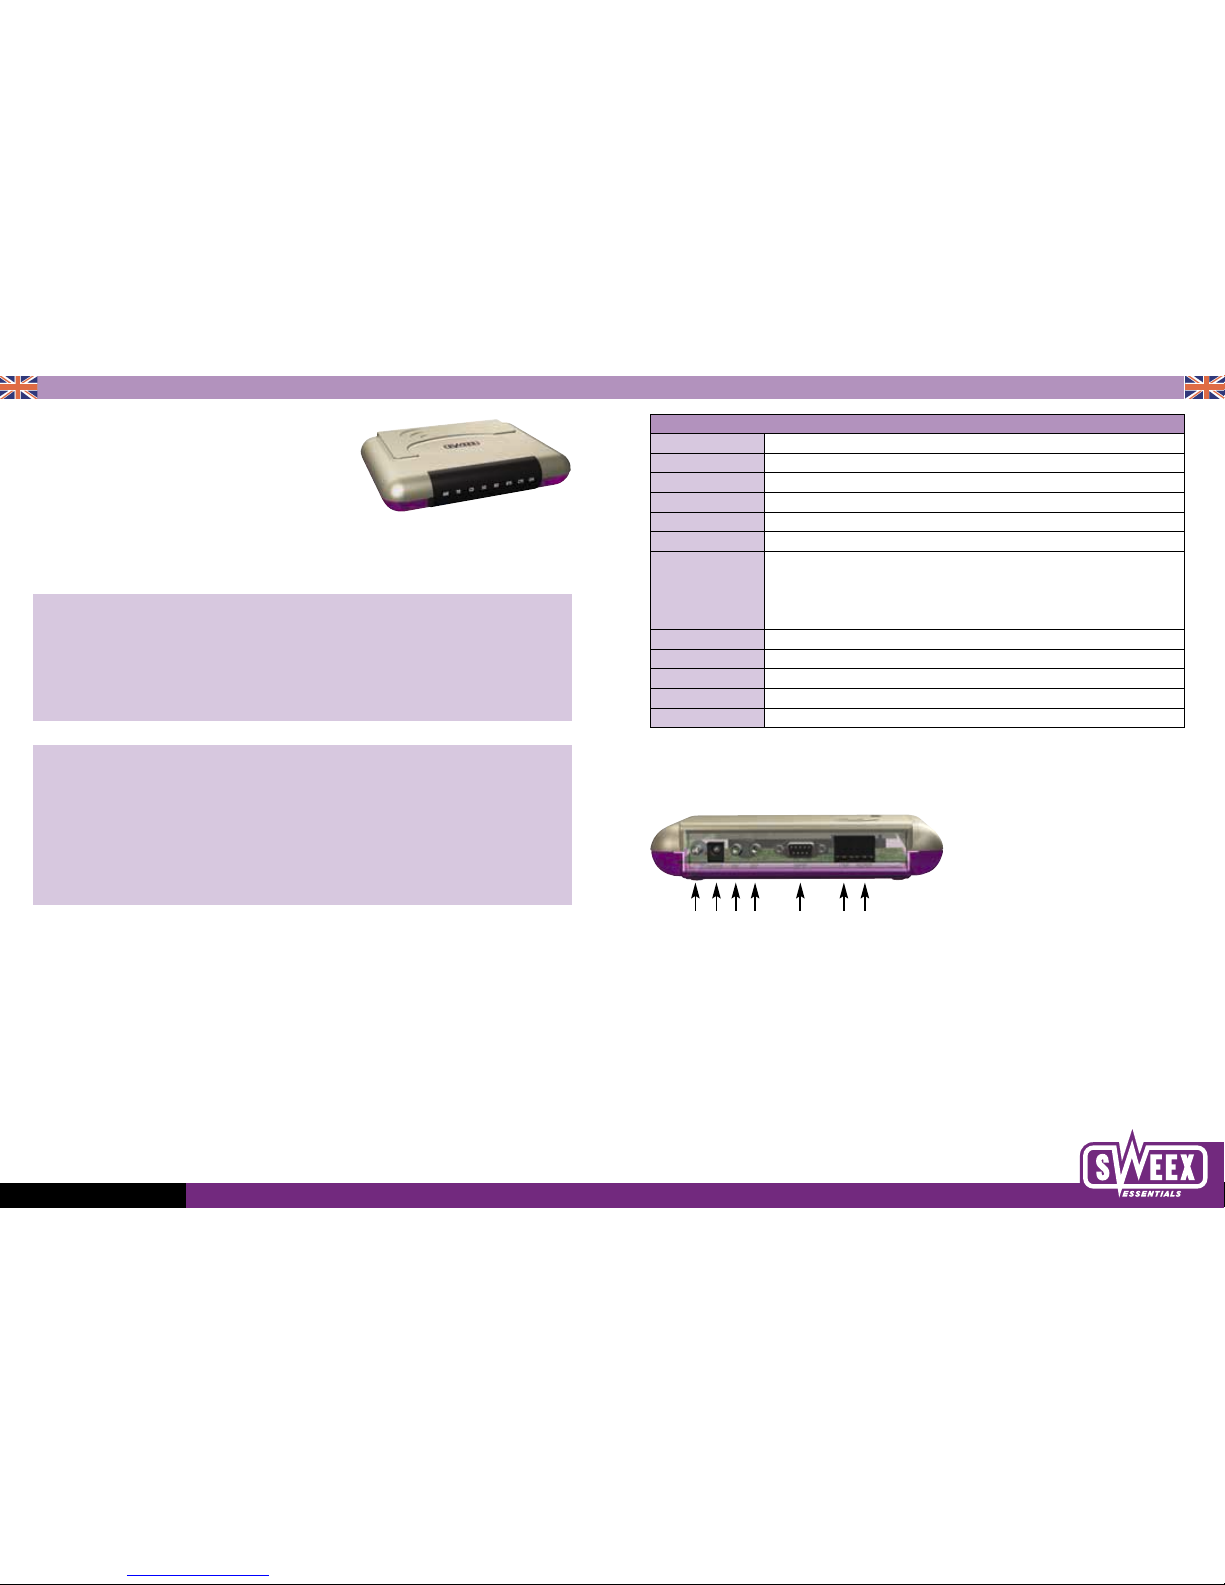
Rear view of external Ambient modem
1. on/off switch
2. power adapter (only use the adapter supplied)
3. loudspeaker connection
4. microphone connection
5. serial connection, this is connected to your computer with the supplied cable
6. ‘Line in’, you connect the PTT line to this
7. ‘Phone out’, you connect the telephone to this
The combination of C and D creates the hands-free option
Chipset: Ambient ( Cirrus )
Data Modulation Rates V.90/K56flex, V.34bis, V.34+, ITU-T V.34, V.32bis, V.32, V.22bis, V.22 and Bell 212A, ITU-T V.23, V.21 and Bell 103
Transmission 56000, 33600, 31200, 28800, 24000 14400, 12000, 9600, 7200, 4800, 1200bps, 1200/75bps & 300bps
Voice Mode Allows a DTE to be accepted and played
Computer interface: EIA RS-232 serial port
Data compression ITU-T V.42bis and MNP 5
Error correction ITU-T V.42 and MNP 2, 3 and 4
Fax specifications -ITU-T group 3 compatible fax machines/modems
-ITU-T V.17 V.29 V.27bis V.21 channel 2, 300bps
-14400, 9600, 7200, 4800, 2400bps
-Class 1 fax interface
Operation Full duplex
Commands Hayes compatible, extended AT command set
Test Modes Analogue, digital and remote digital loopback with self test
Compatibility IBM PC, XT, AT, 386, 486, 586 or compatible
Auto-dialing Touch-tone and pulse dialling, auto-dial and auto-nswer
1234 5 67
Page 2
English version
WWW.SWEEX.COM
English version
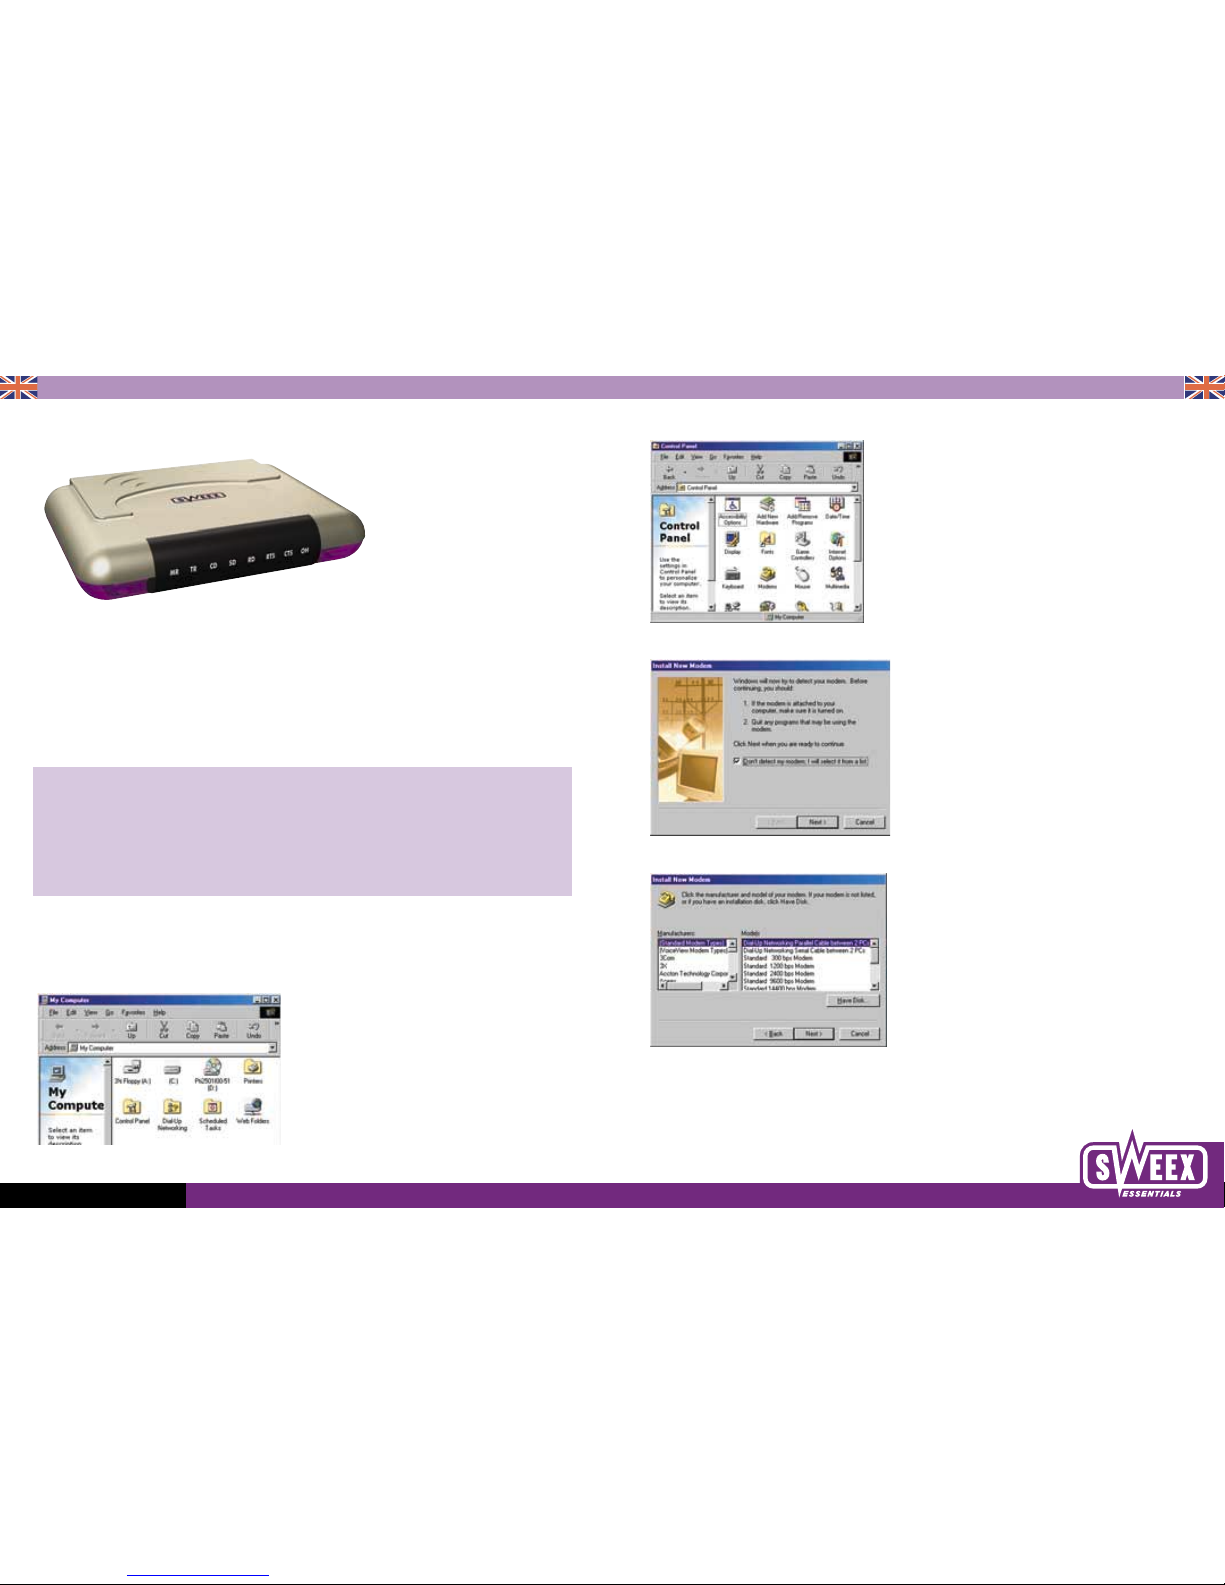
Meaning of the LEDs on the external Ambient modem
MR = ‘Modem Ready’, this is illuminated when the adapter is connected
TR = ‘Terminal Ready’, this is illuminated when communication with a remote computer is set up
CD = ‘Carrier Detect’, this is illuminated when a data signal is received from the remote computer
SD = ‘Send Detect’, this is illuminated when data is sent from the computer to the modem
RD = ‘Receive Detect’, this is illuminated when data is received by the modem
RTS = ‘Ready to send’, this is illuminated when the modem is ready to send data
CTS = ‘Ready to Receive’, this is illuminated when the modem is ready to receive data
OH = ‘Off Hook’, this is illuminated when the line is busy
Installation procedure for the external Ambient modem
• Take care that the PC is turned off when there is no mains voltage.
• Then remove the supplied cable from the package and connect it to the modem.
• At the rear of the computer there are in general two serial connectors. The left connector is ‘COM 1’ and the right connector is ‘COM 2’.
These connectors look the same as those on the modem. However, the connector on the PC consists of nine pins instead of nine holes.
Now plug the end of the cable into an available Com port, this may be COM 1 or COM 2.
Check that you mention the correct Com-port during the installation, when asked.
• After this, switch the computer on, Windows will detect the new hardware.
Software installation procedure for the external Ambient modem
When you switch your PC on, Windows will detect the modem. Click on ‘Cancel’ because we are going to add the modem manually.
If you double click on ‘My computer’, you will see the following screen.
Then click on ‘Control Panel’ and in the control panel click on the ‘Modems’ icon.
Check the ‘Do not detect modem. I will select a modem myself’ option. Go to the next screen and click on ‘Next’.
The following screen appears. Click on ‘Diskette’ and then ‘Next’.
Page 3

English version
WWW.SWEEX.COM
English version
When the next screen appears, click ‘Browse’.
Then insert the supplied CD ROM in the CD drive. Select the CD drive containing the CD. Now select the ‘Drivers’ folder and the operating system you
are using and click ‘
To confirm, click ‘OK’ again when the following screen appears.
Then select ‘Ambient 56k bps Modem External (CL-MD5650) Modem’ and click ‘Next’.
Select the com port to which the modem is connected. This is generally ‘Com1’. ‘Com 2’ may appear in the list in the above screen. If your modem is
connected to your computer’s 2nd com port, select ‘Com 2’.
When you click on ‘Finish’, you return to the ‘Modems’ screen.
Click on ‘OK’. Windows will now install the ‘Ambient Wave Device’. Click on ‘Next’.
The ‘Ambient Wave Device’ is installed from the CD ROM. Then click on ‘Finish’.
If you want to check that the modem has been installed properly, you can right click on ‘My computer’. Select ‘Device manager’ and under
‘Sound controllers’ you will see that the Wave Device for the modem has been installed. Under ‘Modem’ you will see ‘Ambient 56k external’.
Finally click on ‘Close’ and restart your computer. The modem will then be ready to use.
 Loading...