

Page 1
English version
5
I Precautions
Storage
1. Keep this product away from extremely hot or cold places. The
storage temperature ranges from -40 to 60 and the working
temperature from -5 to 40 .
2. Do not use this product at damp environment like bathtubs, wash
basins, kitchens, washtubs, as well as basements, swimming pools
or similar places.
3. Do not expose your TV set to high humidity, dust or oil smoke.
4. Do not throw or drop this product.
5. Do not subject this device to the inside of a case or strong
vibrations, avoiding strong collision.
6. Do not push on or scrub this product with sharp objects.
Maintenance
1. Disconnect all cables of this device at first before cleaning.
2. Wipe the enclosure, screen and keys using soft cloth with a little
soft detergent on.
3. Do not use polishing cloth, abstergent, and all types of propellants
or chemical detergents like alcohol and benzene to clean your device.
Warning
1. Do not watch television programs or turn your TV set on for your
own and others' safety.
2. It is very dangerous to watch television programs or operate the
TV set while driving.
Bright spots or dark spots may appear on the screen. This is a
normal phenomenon associated with the active matrix display
technology and is not a sign of malfunction. Do not attempt to
maintain. For any failures, please turn off your TV set immediately
and contact us or your dealer. This device integrates a great deal of
fine electronic components. Disassembly or alternation may result in
damages or breaks.
Special Note
Page 2
English version
6
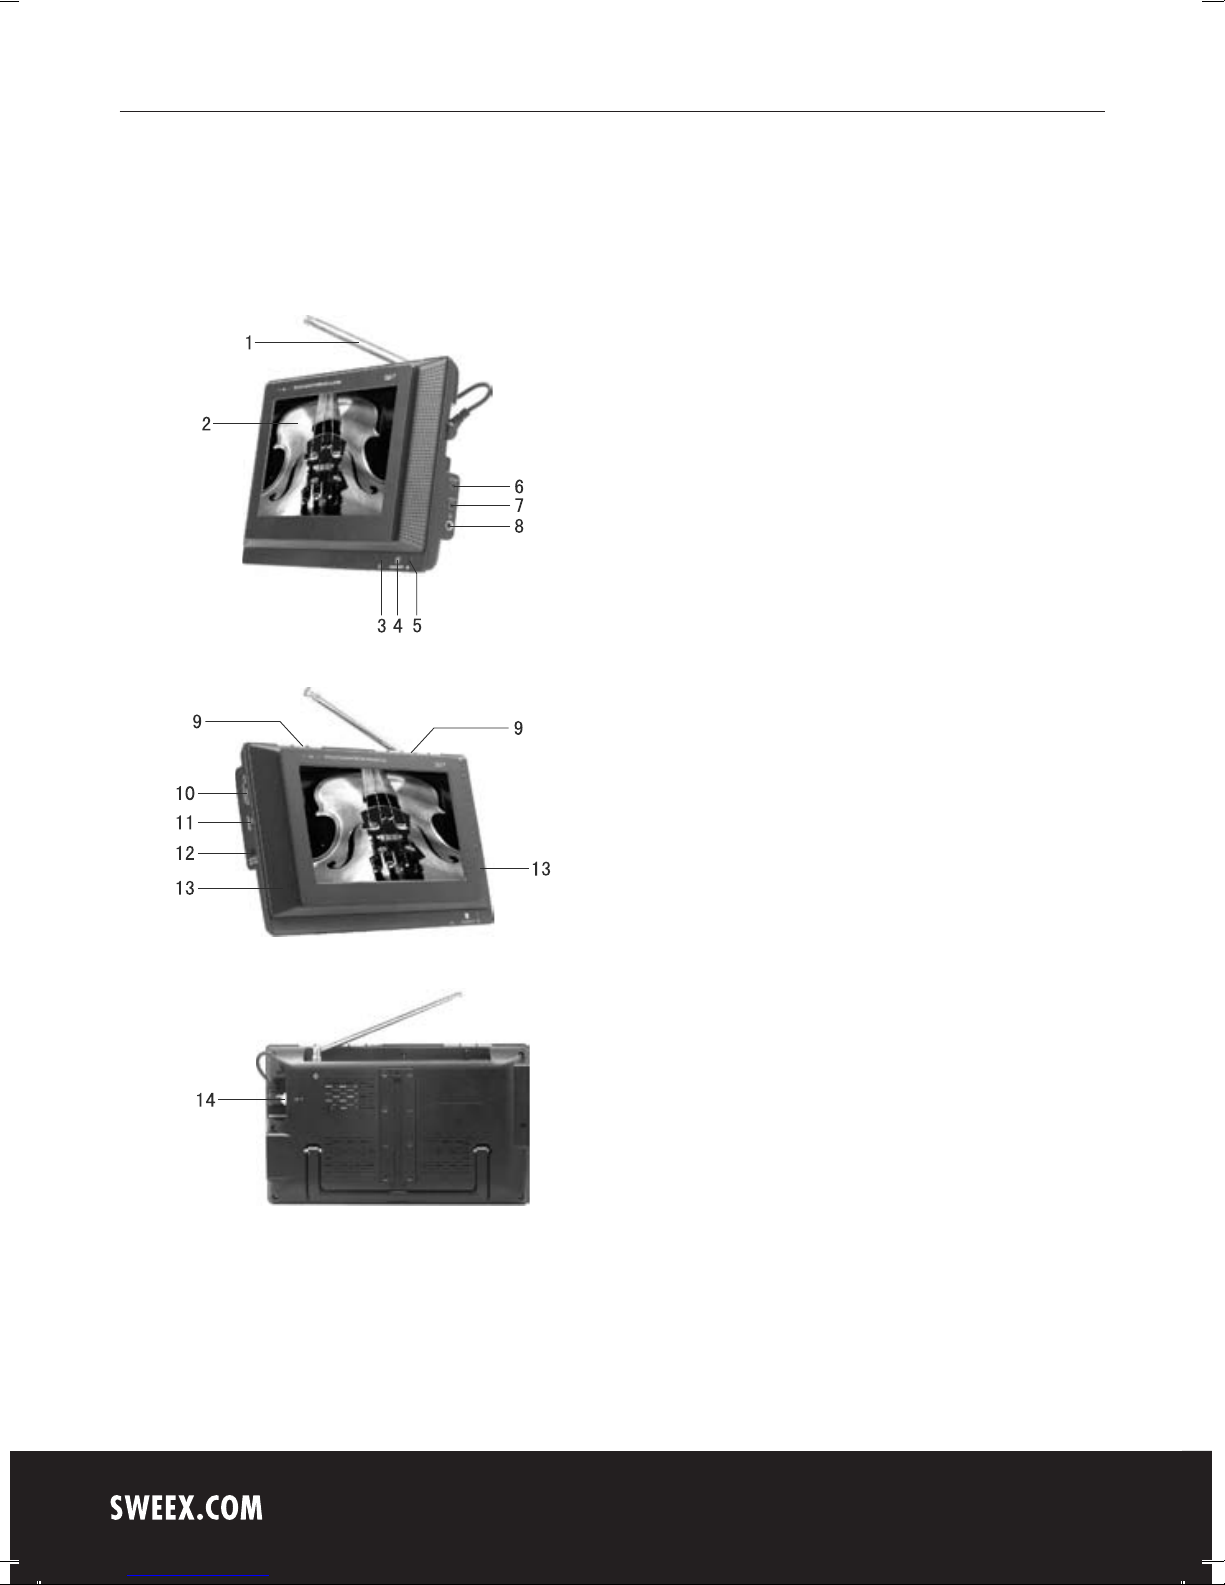
III Appearance
1. Telescopic antenna
2. TFT-LCD
(Liquid Crystal Display)
3. Power indicator:
Red: Standby
Blue: Power ON
4. POWER/MODE:
Standby/Mode shift
5. Remote-control receive
window
6. AV Output
7. AV Input
8. Headphone jack
9. Panel buttons
10. SD/MMC/MS type
CARD input port
11. USB connect jack
12. 12V DC Input
13. Speaker
14. Input of external
antenna
Page 3
English version
7
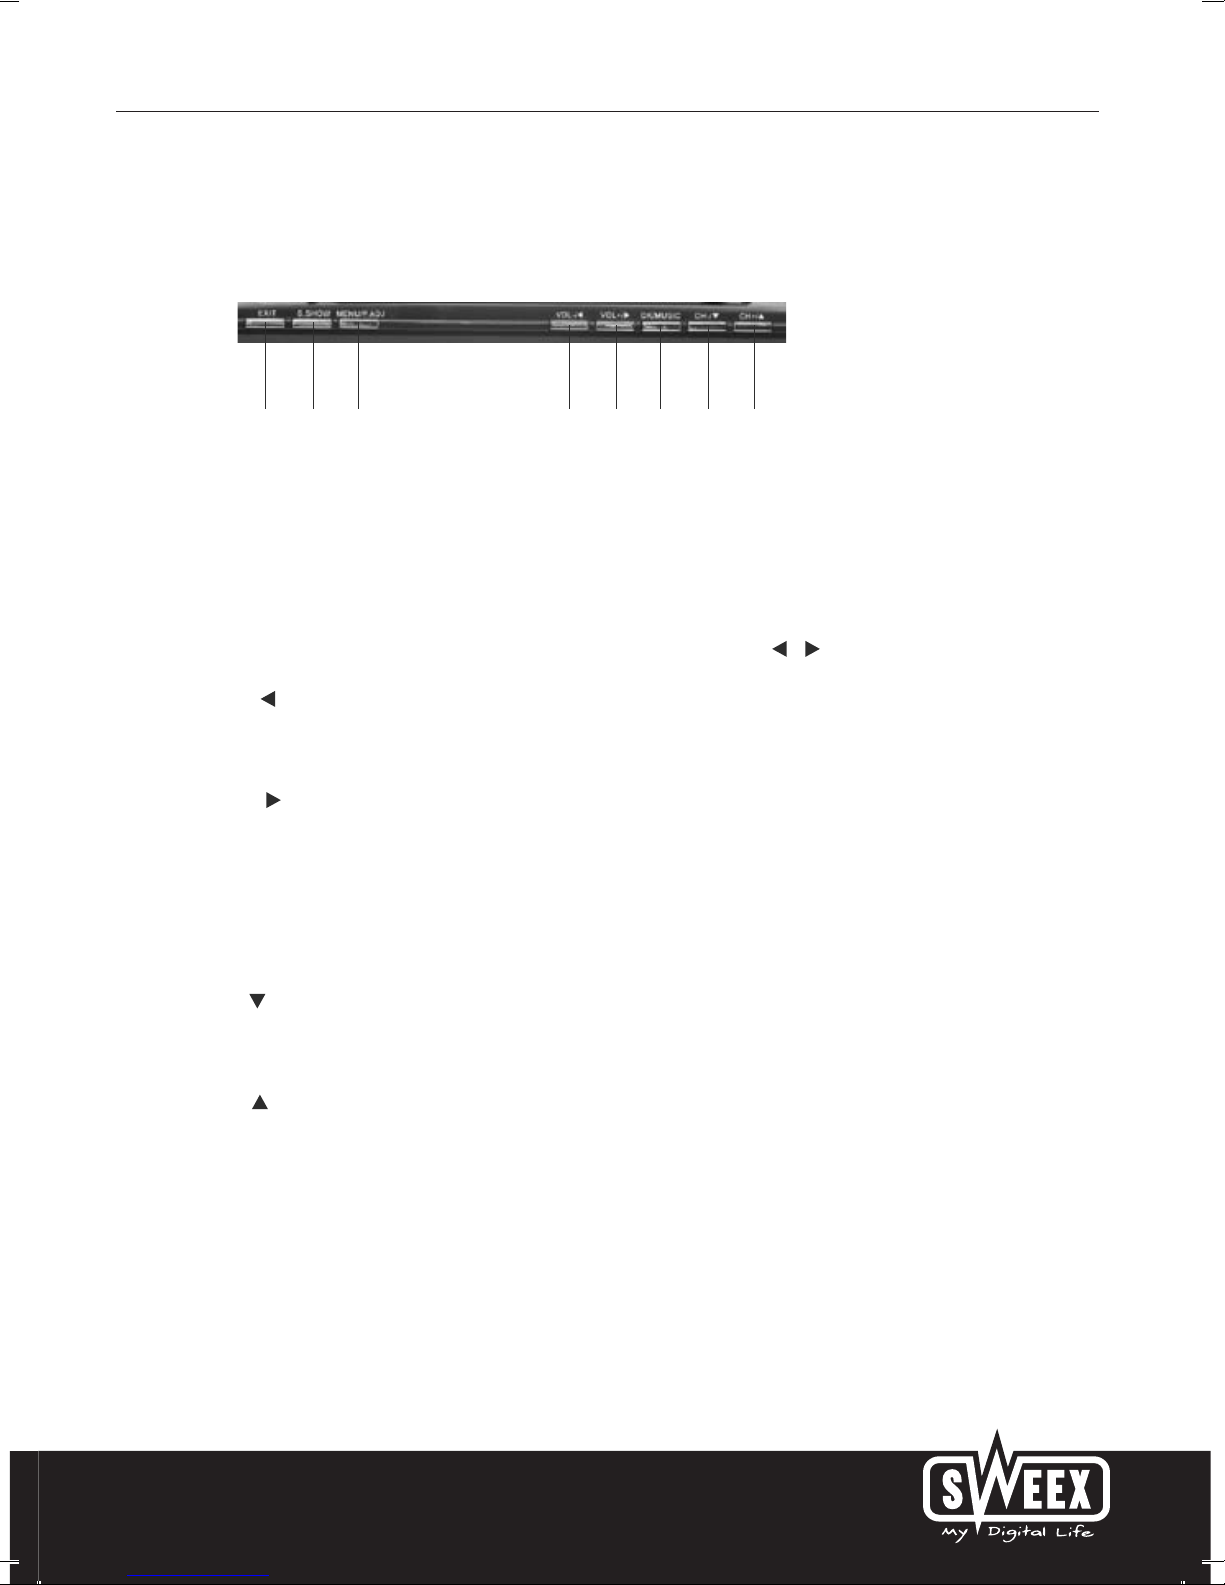
IV Description of Panel Buttons
1. EXIT: Press to exit from the current menu.
2. S.SHOW (Scan Button): While viewing pictures, press it to change the
display mode under CARD mode.
3. MENU/P.ADJ: A short press on it pops up the menu and a long press
for three seconds pops up the LCD image adjust interface. In the menu
interface, press Up/Down button to adjust the direction and the Left/
Right button to configure. In image adjust interface, press the button to
adjust the BRIGHTNESS, CONTRAST and COLOUR with the /
button.
4. VOL-/ : For DTV mode, while in DTV menu interface, it is used as the
direction button; if not, it is used as VOLUME- button. For ATV mode,
press to decrease the volume. For CARD mode, press one second for
leftward selection and three seconds to decrease the volume.
5. VOL+/ : For DTV mode, while in DTV menu interface, it is used as the
direction button; if not, it is used as VOLUME+ button. For ATV mode,
press to increase the volume. For CARD mode, press one second for
rightward selection and three seconds to increase the volume.
6. OK/MUSIC (Confirm Button/Music Background Button): After you have
selected an entry, press this button to confirm under the DTV/CARD
mode. In CARD mode, press and hold the button to activate or
deactivate the background music playing function while viewing pictures.
7. CH-/ : For DTV mode, while in DTV menu interface, it is used as the
direction button; if not, it is used as Channel- button. For ATV mode,
press to view channels backward. For CARD mode, press it for
downward selection.
8. CH+/ : For DTV mode, while in DTV menu interface, it is used as the
direction button; if not, it is used as Channel+ button. For ATV mode,
press to view channels forward. For CARD mode, press it for forward
selection.
1 2 3
4
5
6 8
7
Page 4
English version
8
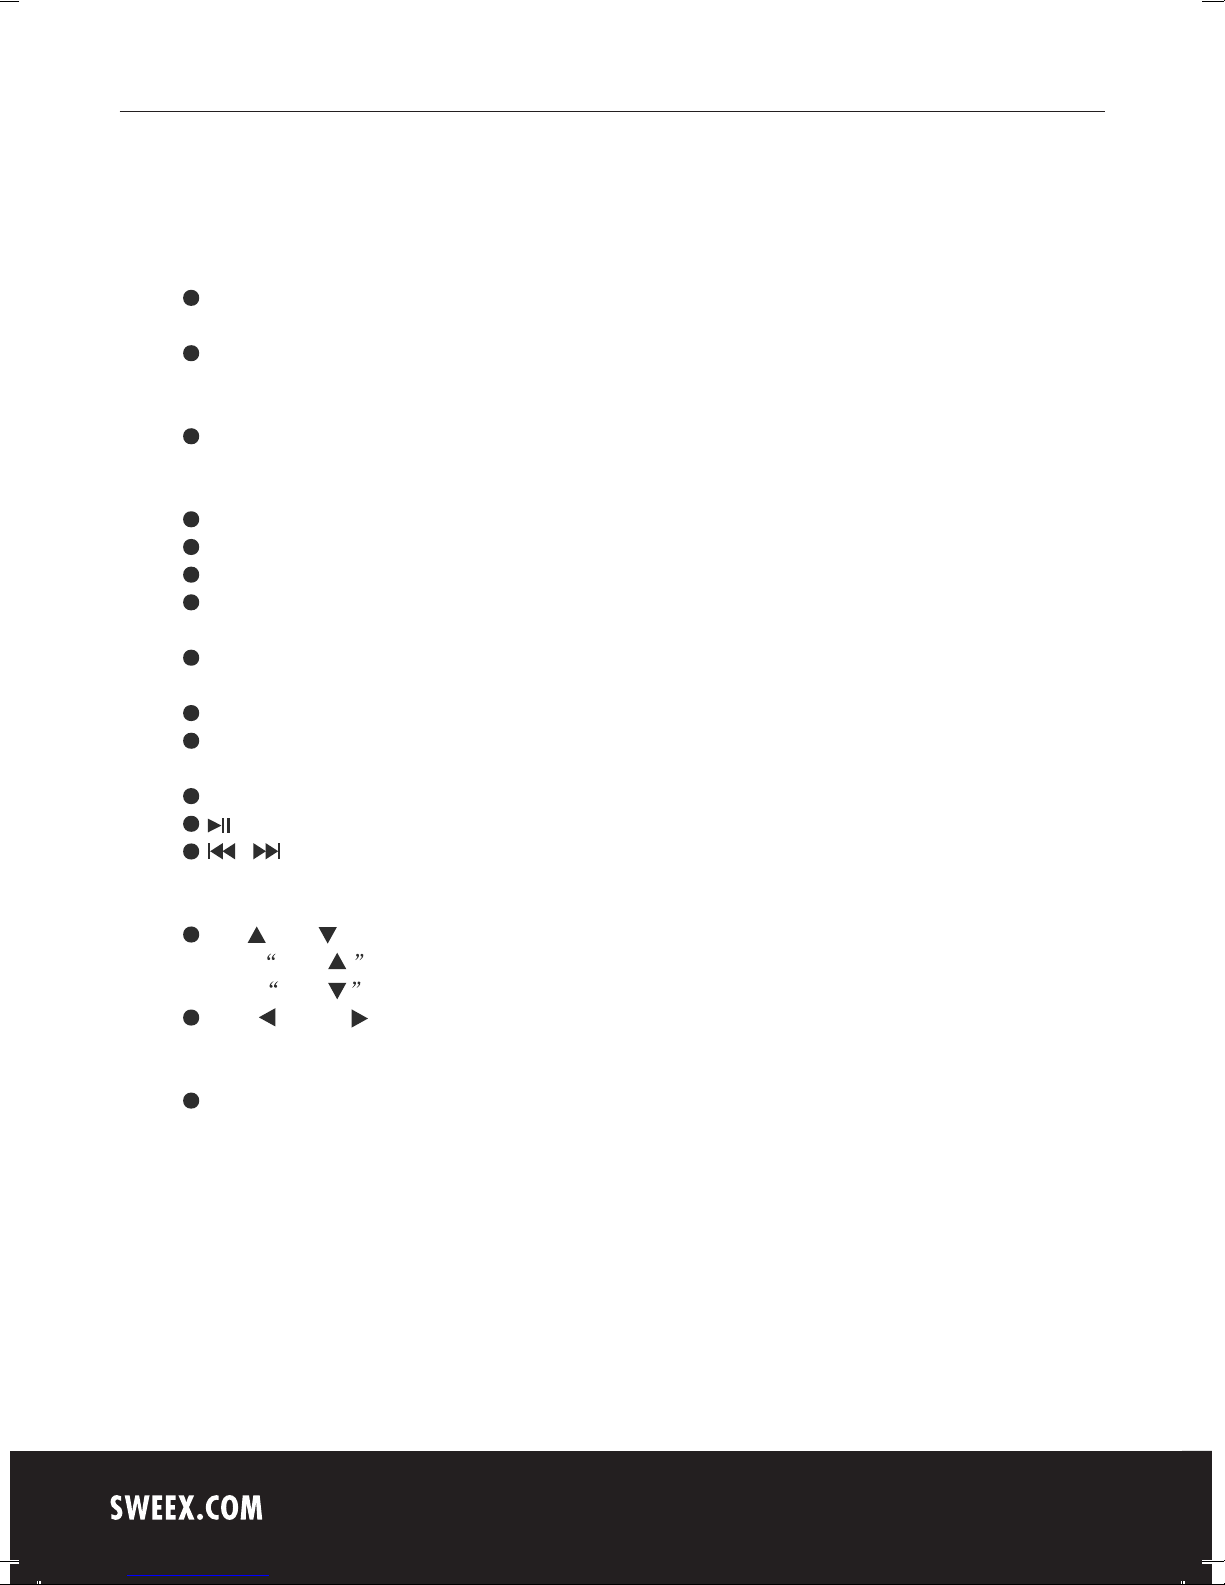
V IDescription of Buttons on Remote Control
POWER (Power On / Off):
Press this button to turn off the TV, press it again to turn on the TV.
MUTE (Mute):
Press this button, sound disappears, press it again or VOL+ to
resume normal sound.
SEARCH (Auto search key): press for Auto search under DTV
mode, keep press for Auto search under ATV mode, press to select
title/chapter/time to paly (only available under CARD mode).
AUDIO: Press to switch track under DTV/CARD mode.
FAVOR: My Favourite Channel option on/off (DTV mode only).
TITLE: Caption display switch (only available under DTV mode).
TEXT: Turn on the teletext option to watch teletext information
(DTV mode only).
GUIDE (Nine Picture Guide):
Enter nine picture guide function (DTV mode only).
LIST: Enter the Program Edit List function (DTV mode only).
EPG: Press this button to display Electronic Program Guide
(DTV mode only).
INFO: Press this button to display the information of current program.
: Press it to pause the picture or sound (DVB/CARD mode).
/ :
Keep press: previous song/next song; press: fast backward/fast
forward (only available under CARD mode).
CH+ /CH- (Program selection and up/down)
Press CH+ key, TV channel changed (forward).
Press CH- key, TV channel changed (backward).
VOL- /VOL+ (left, right key and volume up, down key):
For selecting progam, left, right under MENU, keep press for volume
up/down under CARD mode.
OK/MUSIC:
confirm OK (DTV/CARD mode only); While playing a JPEG photo,
(and MP3 music in card or USB memory), press this button to turn
on/off the background music (CARD mode only).
Page 5
English version
9
MENU: Press for main menu(under AV mode, press MENU key to
select simulation level); press to enter system menu setting, press
again or press key to exit setting (only available under
CARD mode).
(Stop/Exit key): Press to stop playing, return to main menu (only
available under CARD mode); under DTV mode, press to return to
backward menu step by step.
0 9 (Digit key), -/-- (channel direct selet key):
Press to select channel under TV mode; under CARD mode, press
to selet song or programme paly.
(Retunr key):
Under DTV/ATV mode, press to return to the previous channel,
under CARD mode, press to return to backward menu step to step.
P.ADJ (Picture adjust key): Enable to select brightness, contrast,
color and TINT, press / key to adjust
PICT (Picture mode key):
Enable to select standard, softness, sharp, bright memory.
TV/RADIO: Press to switch between TV and RADIO (only available
under DTV mode).
MODE: Press to switch DTV/ATV/CARD/AV mdoe.
ZOOM: Press to zoom in picture by 2, 3, 4times; zoom out
picture by 1/2, 1/3, 1/4 (only available under CARD mode).
Press key to move zoom positons.
S.SHOW:
When viewing pictures, enable to select picture viewing mode.
REP: Press perform single song/chapter repeat or cancel
(onlyavailable under CARD mode).
Page 6
English version
10
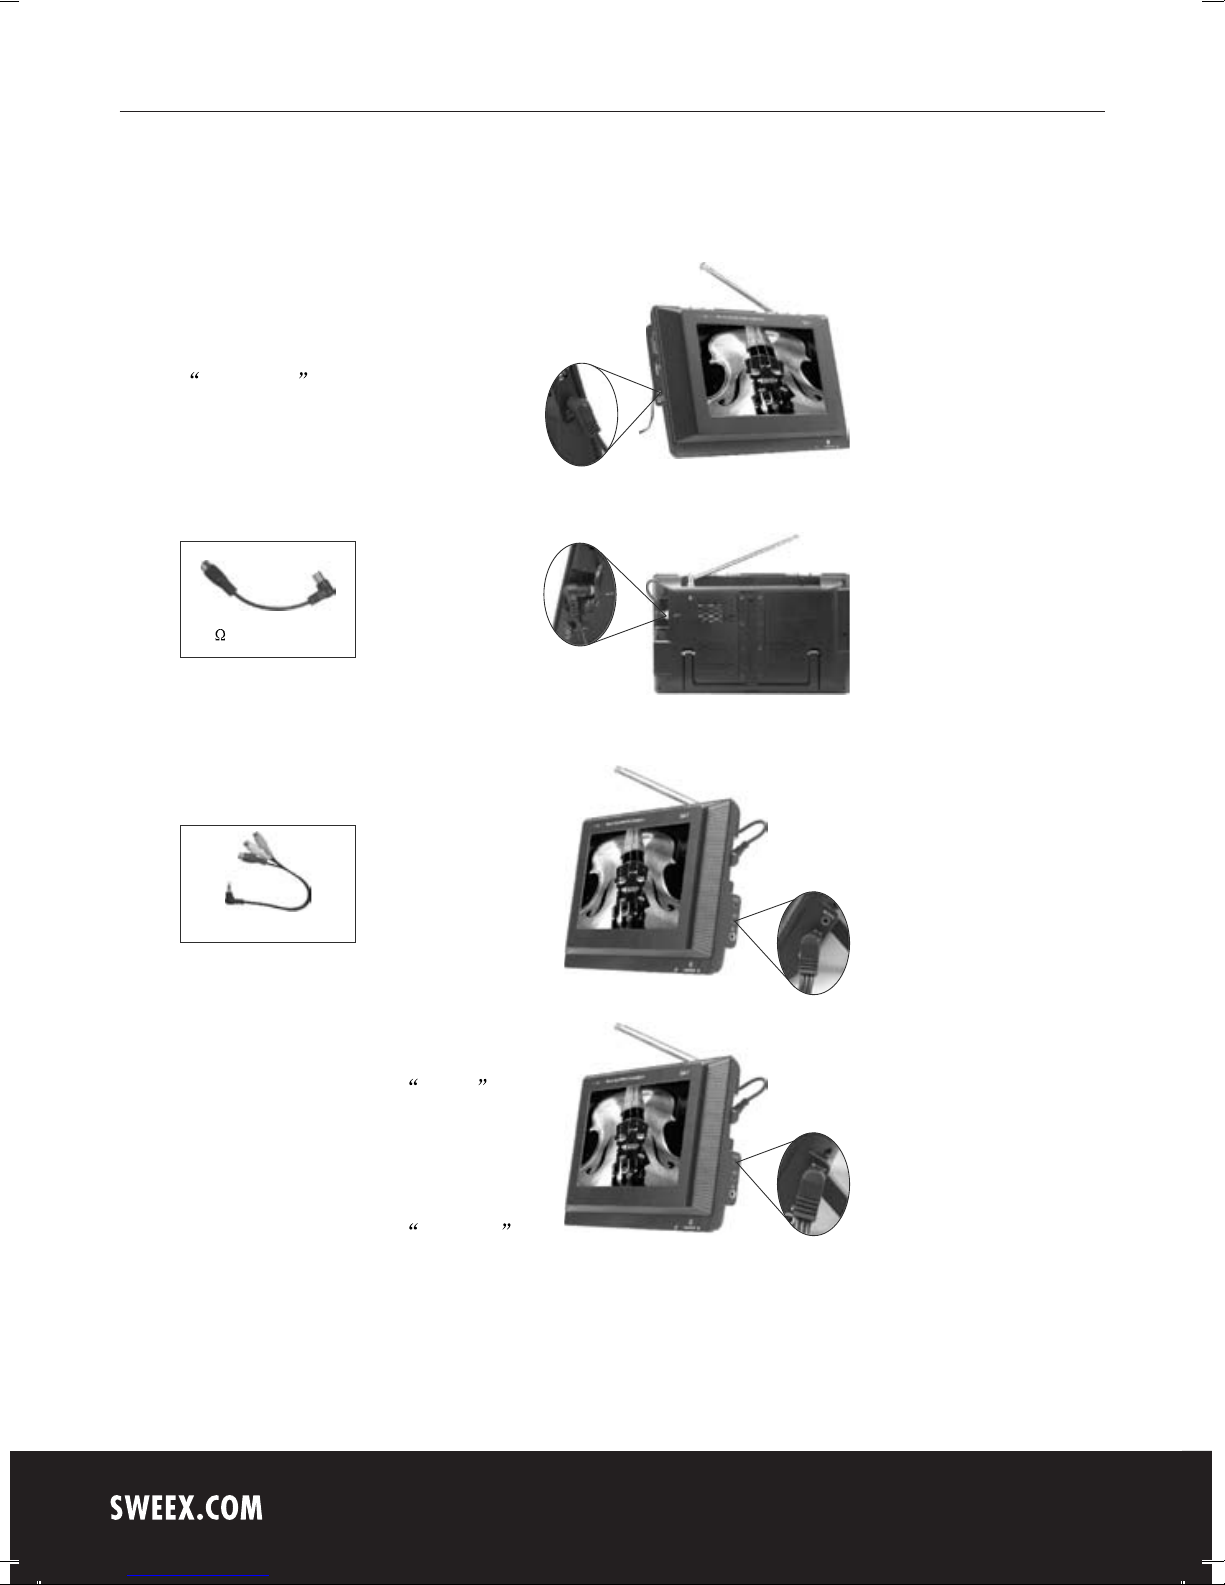
(1) AV input: Insert the external video
cable into the yellow end of AV cable.
Insert the audio left channel cable into
the white end and the audio right
channel cable into the red end. Then,
insert the AV cable into AV/IN jack.
(2) AV output: Insert the external video
cable into the yellow end of AV cable.
Insert the audio left channel cable into
the white end and the audio right
channel cable into the red end. Then,
insert the AV cable into AV/OUT jack.
Note: AV/OUT is only available in DTV and CARD mode.
VI Connection of Main Interfaces
1. Power connection
Match the DC output connector of the
AC adapter with the jack marking with
DC + 12V on the enclosure.
2. Connection of external antenna cable
Insert one end of the cable provided
with the device into the antenna input
jack. Then, connect the other end to
the antenna output connector.
75 antenna cable
3. Connection of AV cable
AV cable
Page 7
English version
11
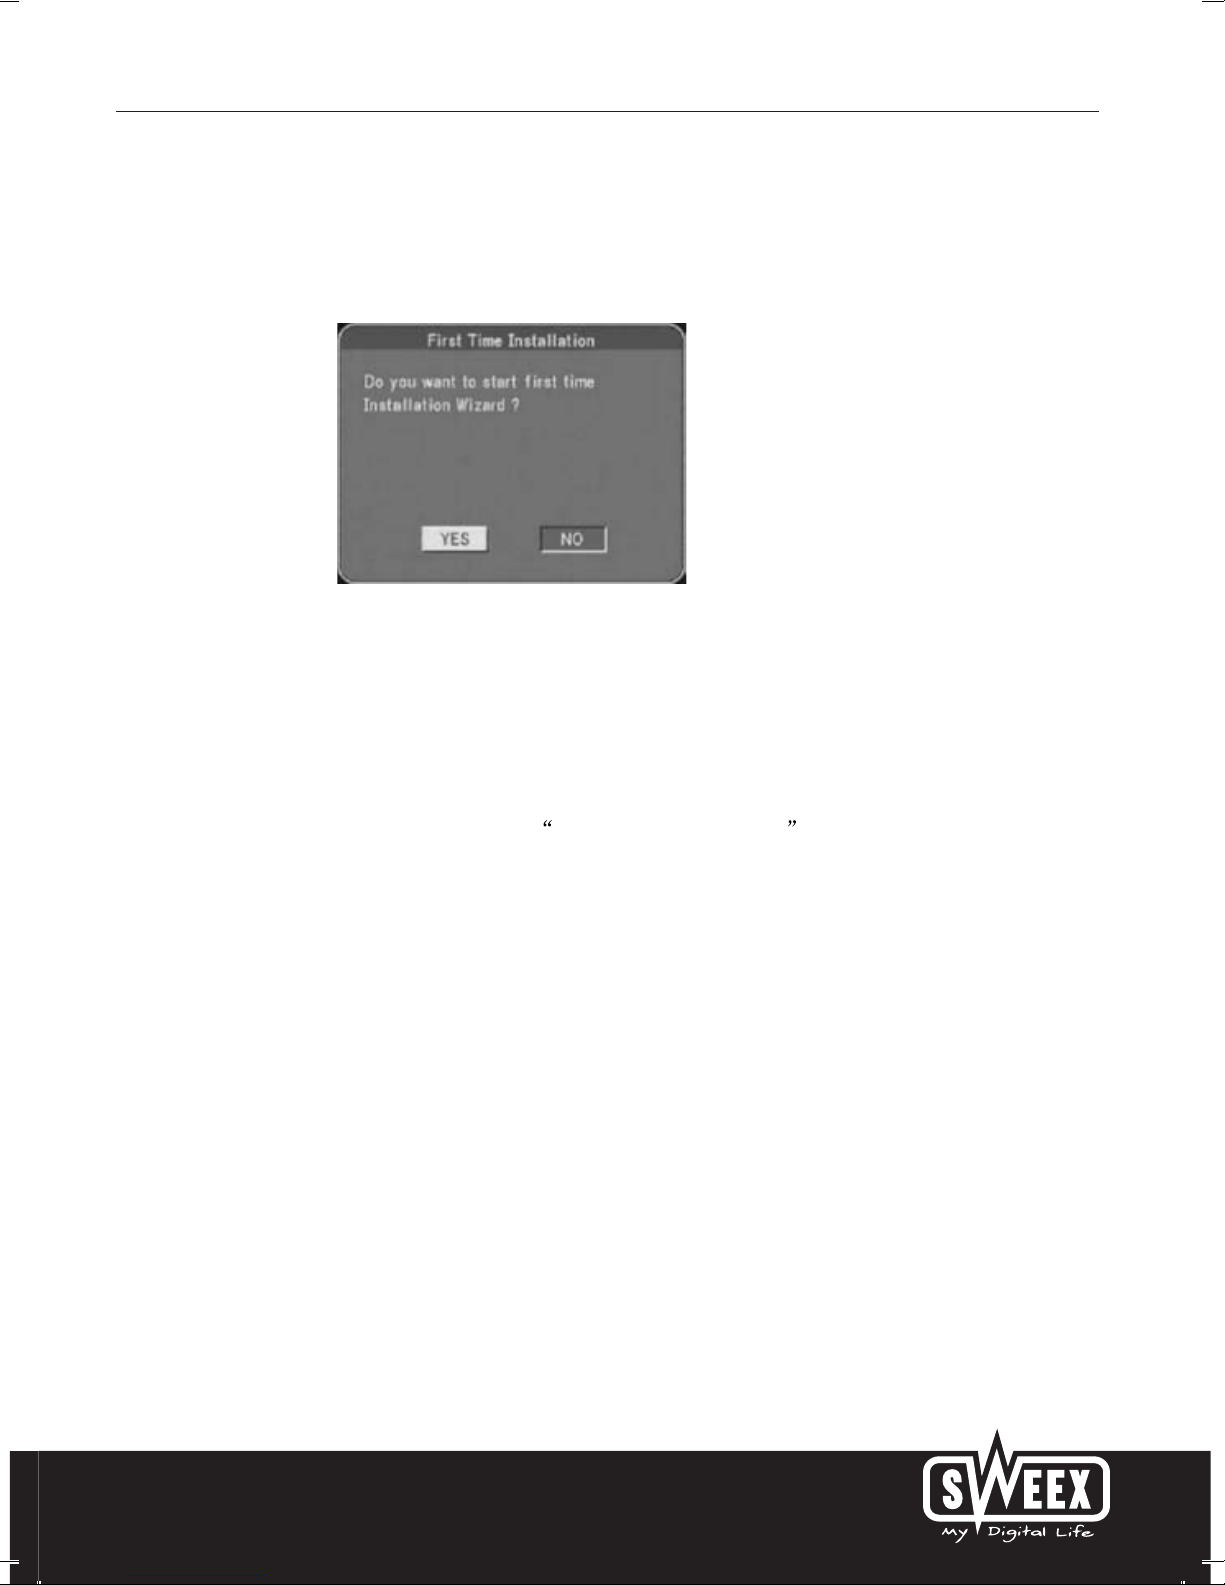
After you device is connected to power supply, the system will
implement an installation guide for your first installation.
7.1 Press VOL+ or VOL- to select YES then press OK to confirm.
Then, the following three options will appear:
Country (Set according to you location. Improper configure may lead
to signal receive failure.)
Language
Time Zone
After settings, select NEXT to pop up First Time Installation(2)
dialog box. Select YES to activate automatic search function.
Subsequently, you can watch programs.
7.2 First time installation guide function may not be activated due to
the following conditions.
(1) You have completed the first time installation.
(2) You program list is not empty.
If you need to carry out the first time installation function again, please
try the methods below:
(1) Delete all current TV and radio programs in Program List. Refer to
Part 8.1.
(2) Activate the Default Setting function in Accessory. Refer to Part 8.6.
Note:
When the Channel Lock under Parental Control is activated, a
password is needed for you to delete all programs and enter SEARCH
and FIRST TIME INSTALLATION mode. If it is deactivated, no
password is required. After default setting, the Channel Lock defaults
to be deactivated!
Installing for first time without program list
VII Auto Installation Guide
Page 8

English version
12
VIII DVB-T Menu Operation
Press the MENU button on your remote control or this device to pop up
the menu, as shown in the figure. This DVB-T system offers seven
options. Press CH+/CH- to select and VOL+/OK to access the submenu.
8.1 Program List
This Program List provides three submenu functions like TV channel list,
music channel list and custom channel sorting methods. For the edit
function, the TV channel list and music channel list can be set in the
same way. Take the TV channel list as an example,
Favor: My favorite channels. Press CH+/CH- to select the number of
channel. Press OK to set it as my favorite. To cancel, press OK.
Move: To move the channel number, press VOL+/VOL- to select MOVE
at first; then, press CH+/CH- to select the number and OK to confirm.
Use CH+/CH- to move upward/downward, Then press OK to confirm.
Del: To delete a channel, press the VOL+/VOL- button on your remote
control in Program List edit menu to move the yellow cursor to Del; press
the CH+/CH- button on your remote control to move the cursor to place
the channel you want to delete at your required location. Press OK to
confirm. To cancel, press OK. Multiple selections are supported.
After configuration, press the MENU button on your remote control to
return to the display interface and the system will save it automatically.
Once a channel is deleted, it can not be restored. You can activate the
automatic search function again.
Page 9

English version
13
Note:
When the Parental Control lock set to be ON, a password is needed
for you to delete all channels and enter SEARCH and FIRST TIME
INSTALLATION mode. If it is set to be OFF, no password is required.
After default setting, the Channel Lock defaults to be OFF!
8.2 Program Search
Enter Program Search and tow options are available:
8.2.1 Automatic search
Select Automatic Search, and the dialog box above pops up:
YES: Select it to delete the previous channel list and activate
automatic search function.
NO: Save the channel list and activate automatic search function.
Select YES to cancel previous list, then search channels automatically.
8.2.2 Manual Search
Manual search setting:
Activated Channel No item and press VOL+/VOL- to change it to your
required channel number or enter the number directly using your
digit number keys on the remote control.
In Manual Search mode, press CH+/CH- on your remote control to
move the yellow cursor to OK item.
Press OK on the control to start search.
Page 10

English version
14
Enter Parental Setting and press CH+/CH- to select your required
channel. Multiple selections are possible.
Press the OK button on your remote control to confirm. You can press
this button again to cancel your selection.
Keep pressing the MENU button on your remote control for the system
to save your settings and return to the playing interface.
* The channel lock function has to be activated. In this way, the locked
channels can be protected. To view the locked channels, input your
password.
8.4 System Setting
8.4.1 TV Standard (Video output system): Three options like PAL,
NTSC and AUTO are available.
8.4.2 Display Type (Video output ratio): Three options like 4 : 3PS ,
4 : 3LB and 16 : 9 .
8.4.3 Video output: CVBS
8.4.4 Regional Setting: Setting upon your Regional Signal.
8.4.5 Language (Language setting): Four submenus are available:
OSD Language
1st Audio Language (Configure according to the language supported
by the signal)
2nd Audio Language (Configure according to the language supported
by the signal)
Subtitle Language (Configure according to the subtitle language
supported by the signal)
8.4.6 Time Setting
8.3 Parental Control
To enter this menu, input 4-digit password and press OK to confirm
after you select it.
The default password is 8888 .
Channel Lock: This item is set to be OFF as default. To start setting,
set it as ON.
Parental Setting: Press to set.
Change PIN: Press to change your password.
Page 11

English version
15
8.5 Game
Press CH+/CH- on your control to move the yellow cursor to select a
game.
Press OK to confirm.
Mine
Tetris
Gomoku
Calendar
Press EXIT on your control to return to the game menu.
Keep pressing EXIT on your control for the system to save your settings
and return to the playing interface.
8.6 Accessory
System Information: Press to view the software version.
Factory Default: Press to reset all the settings of your system as
default.
System update: Press to update your software. This is only available
for engineer personnel.
8.7 Personal Style
Four options as follows are supported:
Menu Colour
Transparency Level
Border Pattern
Entry Animation
Page 12

English version
16
When the lock of the Parental Control menu is set to be ON, a password
is needed for you to delete all channels and enter SEARCH and FIRST
TIME INSTALLATION mode. If it is set to be OFF, no password is
required. After default setting, the Channel Lock defaults to be OFF!
Warning
8.8.4 Channel Protection Lock
8.8 Prompt of Error Message
8.8.1 Pin Code Error
A correct password is required for you to configure certain entries.
The appearance of the message above indicates that you entered
a wrong password. Please check your password and input it again.
The preset password for the system is 8888 .
8.8.2 No Signal
The occurrence of this window indicates that your TV fails to receive
signals. Please confirm that your antenna is connected properly and
adjust the angle and the direction of your receiving antenna to improve
the receiving ability.
8.8.3 No Favorite List
If you do not have a favorite list, the system will pop up this window
when you press the Favorite PR button on your control to activate
your Favorite List function.
Page 13

English version
17
BR IG HT NE SS
50
CO NT RA ST
50
CO LO UR
50
TI NT
50
UP DOWN
MIRROR
16:9
This window indicates that the channel is locked for protection.
8.8.5 Mosaic Images
This kind of image indicates poor signal quality. In this way, your TV can
not resolve the images and thus shows mosaic images. If this condition
occurs frequently, please check whether your receiving antenna is well
connected. You can also adjust the angle and the direction of the antenna
to improve the signal quality.
8.9 Analog Settings in DVB Mode
Press the P.ADJ button on your control to access the analog setting
interface. Press or to adjust the analog and P.ADJ to switch between
the following entries:
8.10 Proper Receiving
8.10.1 Generally speaking, you can watch programs via the first time
installation.
8.10.2 If no First Time Installation interface occurs on connecting to
power for the first time, refer to the instructions in Part 8.4/8.2.
8.10.3 To ensure a perfect receiving effect, please adjust the length
and direction of your antenna.
If the signal quality is very poor, mosaic phenomenon will occur to the
image and the sound will stop. This is not your TV's failure. Try an
open antenna or a cable TV if the telescopic antenna does not work.
Page 14

English version
18
Press CH- or CH+ to select BRIGHT and press VOL- or VOL+ to
adjust its analog. Press CH- or CH+ to select CONTRAST or
COLOUR in turn and adjust the analog in the same way. Press CHor CH+ to select RESET. Then, press VOL- or VOL+ to have the
analog you have set return to 50 .
PICTURE
BRIGHT 50
CONTRAST 50
COLOUR 50
RESET
IX ATV Menu
Press the MENU button to pop up the following menu:
MAIN MENU
PICTURE
SYSTEM
PRESET
Press CH- or CH+ to select one of the three entries above.
Press VOL- or VOL+ to open the submenu.
9.1 PICTURE
9.2 SYSTEM
Page 15

English version
19
PRESET
POSITION 1
REMEMBER ON
AUTO-SEARCH
SWAP 1
FINE 0
SEARCH 551MHZ
SOUND-SYS DK
COLOR-SYS PAL
SYSTEM
ENGLISH
CLOCK OFF
16:9
1
BLUE BACK ON
: Allows you to select the language you want.
CLOCK: Allows you to set the time for auto shutdown.
: (Display screen mode) Allows you to switch the mode between
16:9/4:3.
: Allows you to revolve the image.
BLUE BACK: Allows you to activate or deactivate this function when
there are no signals.
9.3 PRESET
POSITION : Allows you to select a certain channel and activate
SWAP, FINE, SEARCH, SOUND-SYS and COLOR-SYS.
REMEMBER: Press VOL-/VOL+ to select OFF. Thus, this
channel does not display when you change channels. If it is set to
be ON, this channel would display on changing channels.
AUTO-SEARCH: Press VOL-/VOL+ to start AUTO-SEARCH
function. After AUTO-SEARCH, the system will save the channels
automatically.After selections of channels, the system will return to
the channel number 0 .
Page 16

English version
20
Note:
Before you start the AUTO-SEARCH, please set the SOUND/COLOR
as the corresponding local systems. Or, the channel program may
have no audio or have cacophony while the image may have no colour.
SWAP: Press CH- or CH+ to select this entry. Press VOL+/VOL- to
change it to your required channel. To confirm, press CH- or CH+.
FINE: Use this entry to adjust the channel for perfect signal quality
when the signal quality is poor.
SEARCH: This entry is used to control the current channel. When
you SEARCH a signal in this way the receiving indication frequency
will stop. This indicates that a perfect position for you to save a
channel. If the channel features a poor signal quality, the system
will identify it as no signal.
SOUND-SYS: Press VOL-/VOL+ to switch among I , DK and
BG in turn.
1. SOUND-SYS description: I refers to 6.0 M, DK 6.5 M and
BG 5.5 M. Please set the system to the local SOUND-SYS.
2. COLOR-SYS description:
A. For your selection of I mode, the COLOR-SYS refers to PAL-I;
B. For DK , the system refers to PAL-DK or SECAM-DK;
C. For BG , it refers to PAL-BG or SECAM-BG;
D. For L , it refers to SECAM-L.
3. For images without audio or with noise, check whether the audio
system is set properly.
Note
COLOR-SYS: Press the VOL-/VOL+ button to switch among PAL,
NTSC and SECAM in turn.
If the signal intensity is very poor or too weak, ill images would still
occur with strong noise, swing and bad audio effect no matter how
you adjust the antenna. This is not the failure of your TV. Try an open
antenna or a cable TV if the telescopic antenna does not work.
Note
Page 17

English version
21
9.4 Proper Receiving
9.4.1 Access the setting entries of the Language in the System to
choose your required OSD language.
9.4.2 Access the setting entries of the AUTO-SEARCH and
SEARCH and make sure whether the systems are set according
to the responding transmitting requirements. Refer to Part 9.3 for
specific instructions.
9.4.3 Access the setting entries of the SOUND-SYS and
COLOR-SYS and start searching channels according to specific
instructions in Part 9.3.
9.4.4 To achieve the best effect for receiving channels, please adjust
the direction and angle of your antenna.
Page 18

English version
22
X Operations in CARD Mode
1. Operating Instructions of Memories (USB memory and CARD)
This product supports a variety of USB memories, as well as three types
of cards, like Multi Media Card (MMC), SD, and Memory Stick (MS) of
many brands sold in this market. The capacity of the USB memory and
cards require 2 GB below.
The USB memory and cards can play multimedia files in JPEG/MP3,
WMA/VCD and AVI like playing disks. Your device does not support
DIVX 3.11-format files.
Note: The stream of 1000 KBP/s below allows for fluent display. It the
stream is 1000 over KBP/s, image persistence may occur.
2. Playing Multimedia Files
Press the MODE button to switch to the CARD mode. Connect your USB
memory or card (The media contains the multimedia files in formats of
JPEG/MP3, WMA/VCD and AVI supported by this device.), a window is
shown as follows:
Use to select the media type among PHOTO/MUSIC/VIDEO you
want to play. Press OK to confirm. Then, press to enter the menu
that you want to play. For MP3/WMA music files, press OK and the system
will play the first track in this menu automatically. For JPEG files, you need
to use the direction button to choose the required file. The file will be
highlighted with your selection; then, press OK to access the selected file
for play.
Currently played name of WAM/MP3/JPEG file
Name of currently
played folder
Menu area:
displays all menus
and their names in
your disk.
Scroll down with the
play of tracks
File area: displays all
MP3 files or JPEG files
in the current folder.
Page 19

English version
23
TV SYSTEM NTSC
PAL
DEFAULT RESTORE
TIME 5 Secretary
10 Secretary
15 Secretary
DOWNMIX LT/RT
STEREO
SYSTEM SETUP LANGUAGE SETUP
VIDEO SETUP
SPEAKER SETUP
Note:
Press to highlight the menu area or the file area.
For JPEG/MP3, WMA/VCD, and AVI files, while playing viewing files,
press (Return step by step)/ on your remote control or the EXIT
button on the panel (Return step by step) to return to the menu interface.
You can press the number buttons to select a file in the menu directly.
For example, to start from the 15th track, press --/- once and press the
number button 5 .
While viewing JPEG, press the S.SHOW (View) button to select the
display mode of pictures.
During the play or pause time, you can press to switch the display
angle of pictures.
: Press to rotate for 90 degrees negatively
: Press to rotate for 90 degrees positively
Background music play
While viewing JPEG files, press the MUSIC button on your control
or the OK/MUSIC button on the panel to play MP3 music files if there
are such files in the CARD or USB. In this way, you can view pictures
while listening to music. To adjust the volume, press and hold the
VOL+/VOL- button for three seconds. To select the music file, press
the button. To deactivate the music, press the MUSIC button on
your control or the OK/MUSIC button on the panel again.
3. Operating Instructions of System Menu
Press the MENU button to pop up the menu as follows. The underlined
part is default setting.
OSD LANGUAGE ENGLISH
GERMAN, etc.
The OSD language can be customed.
Press the CH+/CH- button for upward/downward selection and the VOL+/
VOL- button for leftward/rightward selection. Press OK to confirm.
3.1 TV SYSTEM: (Image system) When the image signals are output to
the external display, the image system of your device should conform to
that of the display.
3.2 DEFAULT: Allows you to reset all parameters of OSD LANGUAGE/
TIME/DOWNMIX.
3.3 OSD LANGUAGE: Allows you to choose your required OSD language.
3.4 TIME: Allows you to set the paging time for viewing pictures with the
second as the unit.
3.5 DOWNMIX: Allows you to set the output parameters of your speaker.
You can choose between the Left and Right channel.
Page 20

English version
24
XI Troubleshooting
The following phenomenon does not indicate failures. Before you
contact us for repair, please check your device according to the
approaches below.
Problems
No picture or sound
No signal
No sound
Mosaic images
Signal search failure
Too-dark images
Mosaic images or
slack images/sound
occur when the car
is moving.
Causes
The AC adapter does not connect to the
vehicle adapter properly;
Non-permissible power is applied;
The power is off.
Check whether the antenna is located
well; Check the parameter of image or
region is set correctly; if not, please set
or search again.
Check whether the volume is minimized;
Check whether the headset is connected;
The signal quality is poor; The sound
attenuation function is activated;
Check whether the audio system in ATV
mode is set correctly.
Check whether the antenna is adjusted
properly;
The signal strength is too weak.
Check whether the country and region
is set right;
Maybe the signal intensity is too poor.
Check whether the brightness and
contrast of your display is adjusted well;
if not, readjust it.
May the signal intensity in this region is
too weak. Please try a vehicle digital TV
antenna.
Page 21

English version
25
XII Specifications
DTV system:
Input frequency: VHF 177.5 MHz - 226.5 MHz
UHF 474 MHz - 858 MHz
Modulate: QPSK/16-QAM/64-QAM
Decode standard: MPEG 2 ISO/IEC 13818 MPEG2 MP@ML
Audio decode standard: MPEG1 LAYER 1, II MUSICAL
General characteristic
Display: Colour TFT-LCD
Screen size: 7 inches
Resolution: 1440 (H) 234 (V)
Speaker: two 40mm square loudspeaker
Power supply: DC 12 V, 10 W
Connector: Input jack for external antenna; stereo headset jack;
audio/video (AV) input jack; DVB-T/CARD(AV) output
jack and input jack for external source
Supported power: Two options:
1. Alternating current power supply - AC adapter
2. Vehicle battery (12 V) - vehicle adapter
Dimension: 232 143 35 (mm)
Weight: about 610 g
Working temperature: -5 -40
Storage temperature: -40 -60
ATV system
Analog receive frequency: DK/I 49.75 MHz - 847.25 MHz
BG 48.25 MHz - 847.25 MHz
Analog color system: PAL/SECAM
Analog audio system: DK I BG L
Page 22

English version
26
For some descriptions with , the mark indicates the
corresponding feature is available.
This manual is for your reference only. The information in the Manual
is subject to change without prior notice. The company reserves the
right to explain for any unknowns, errors or omissions.
Warning
Warning
No elements are recoverable inside your device. Do not attempt to
open it to improve your TV set. The high-tension supply inside may
cause dangers. The maintenance and adjustment of your TV set
must be operated by professionals.
 Loading...